Stance Healthcare Victory User manual
Victory Over Bed Table -
Assembly, Maintenance and Parts Manual
45 Goodrich Drive, Kitchener, Ontario, Canada N2C 0B8 tel 1.877.395.2623 fax 1.877.395.6270 www.stancehealthcare.com
Your table may vary from this illustration
Thank you for your recent purchase of our Over Bed Table.
Although this product is engineered to provide years of reliable performance, a little common sense
maintenance and operational checks will help to keep it in top condition. Should any questions arise
regarding the performance and maintenance of the table please call our toll-free line (877) 395-2623
for assistance.
Unpacking
The package contains the following:
1) Table Top
2) Column
3) Base
4) Casters
5) Fasteners
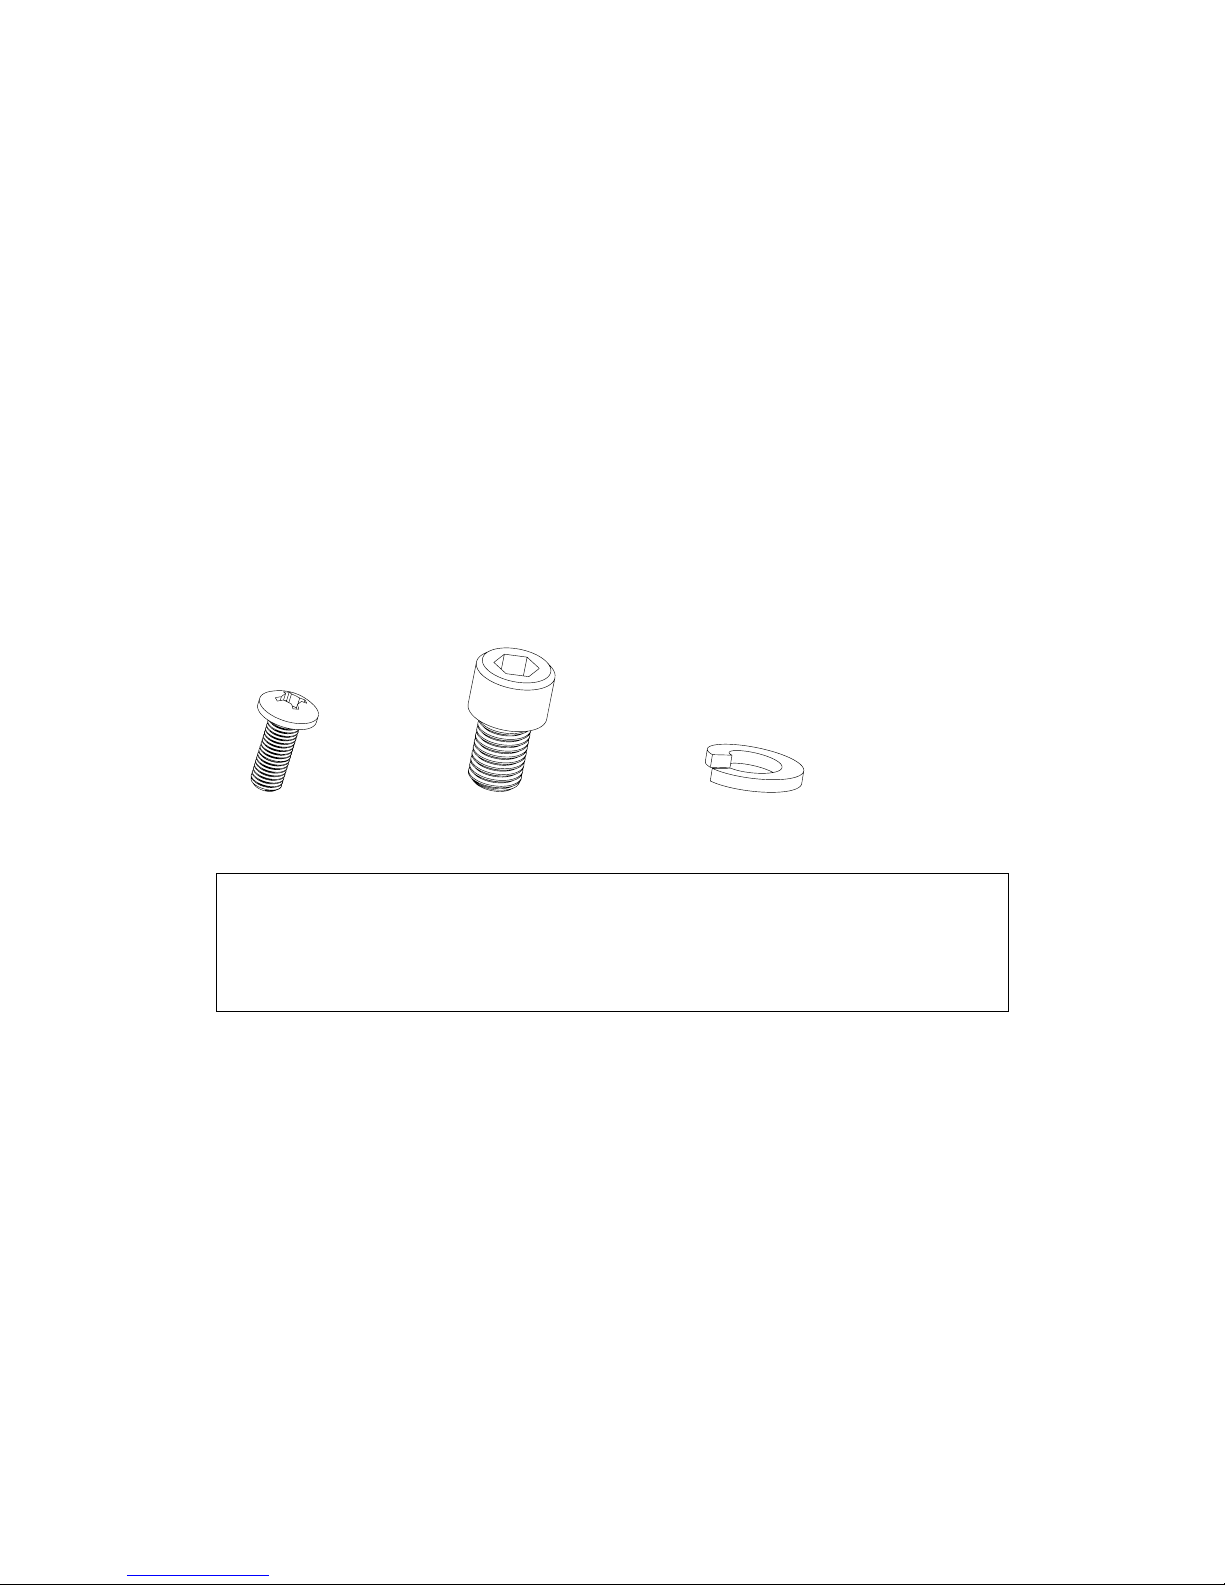
Fasteners
Caution!
The column contains the pressurized gas spring. If the column is retracted under force
without the table top attached it may extend suddenly under pressure.
Assembling the Over Bed Table
Tools Required:
1) 6mm Allen Key
2) #2 Phillips Screwdriver
3) Soft rubber Mallet
- Page 2 -
6 - # 10 X 5/8” L
machine screws
4 - M8 X 20mm bolts 4 - 5/16 lock washers
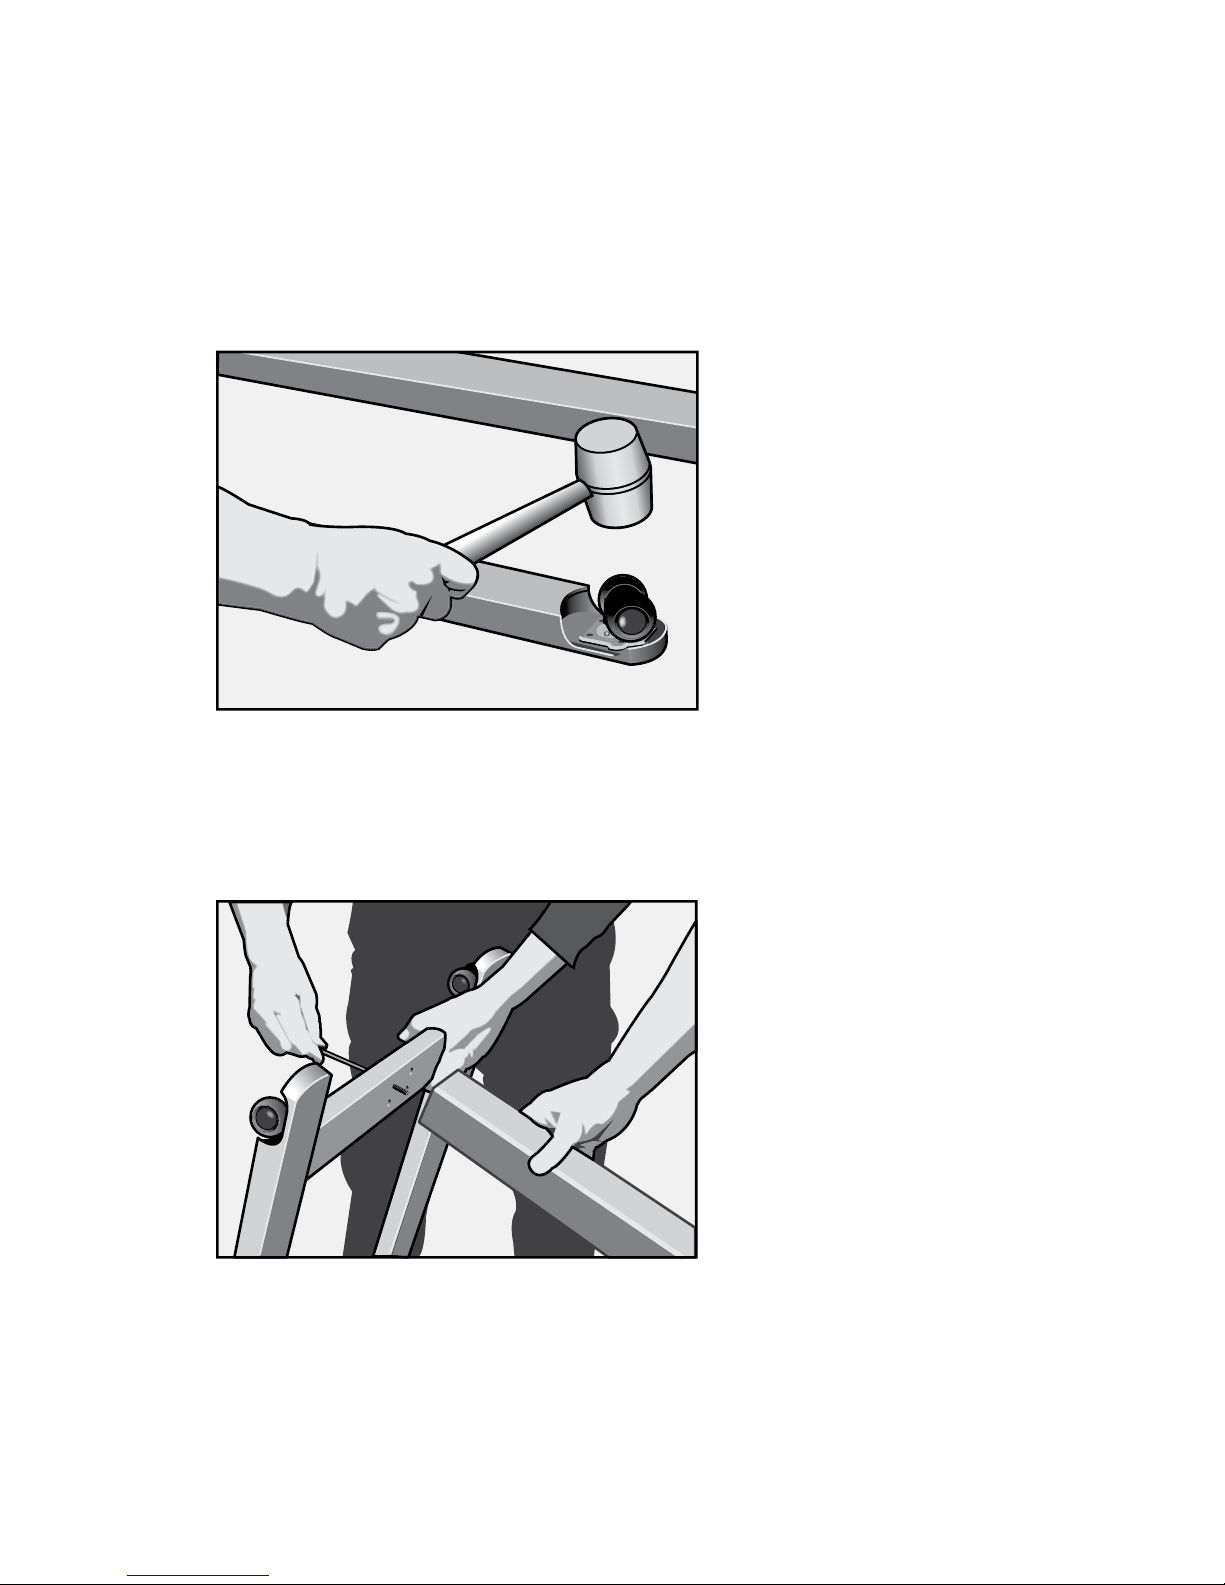
A) Attaching the Casters to the Base
1) Lay the base upside down on a table surface. A clean sheet of cardboard or a blanket should be
placed on the table to prevent scratching the nish.
2) Using a hammer and punch (or a strong hand) force each caster onto the grip ring stem until a
snap is heard, and the axle housing rotates freely. Force should be directed to the axle housing
directly over the hole into which the grip ring is inserted.
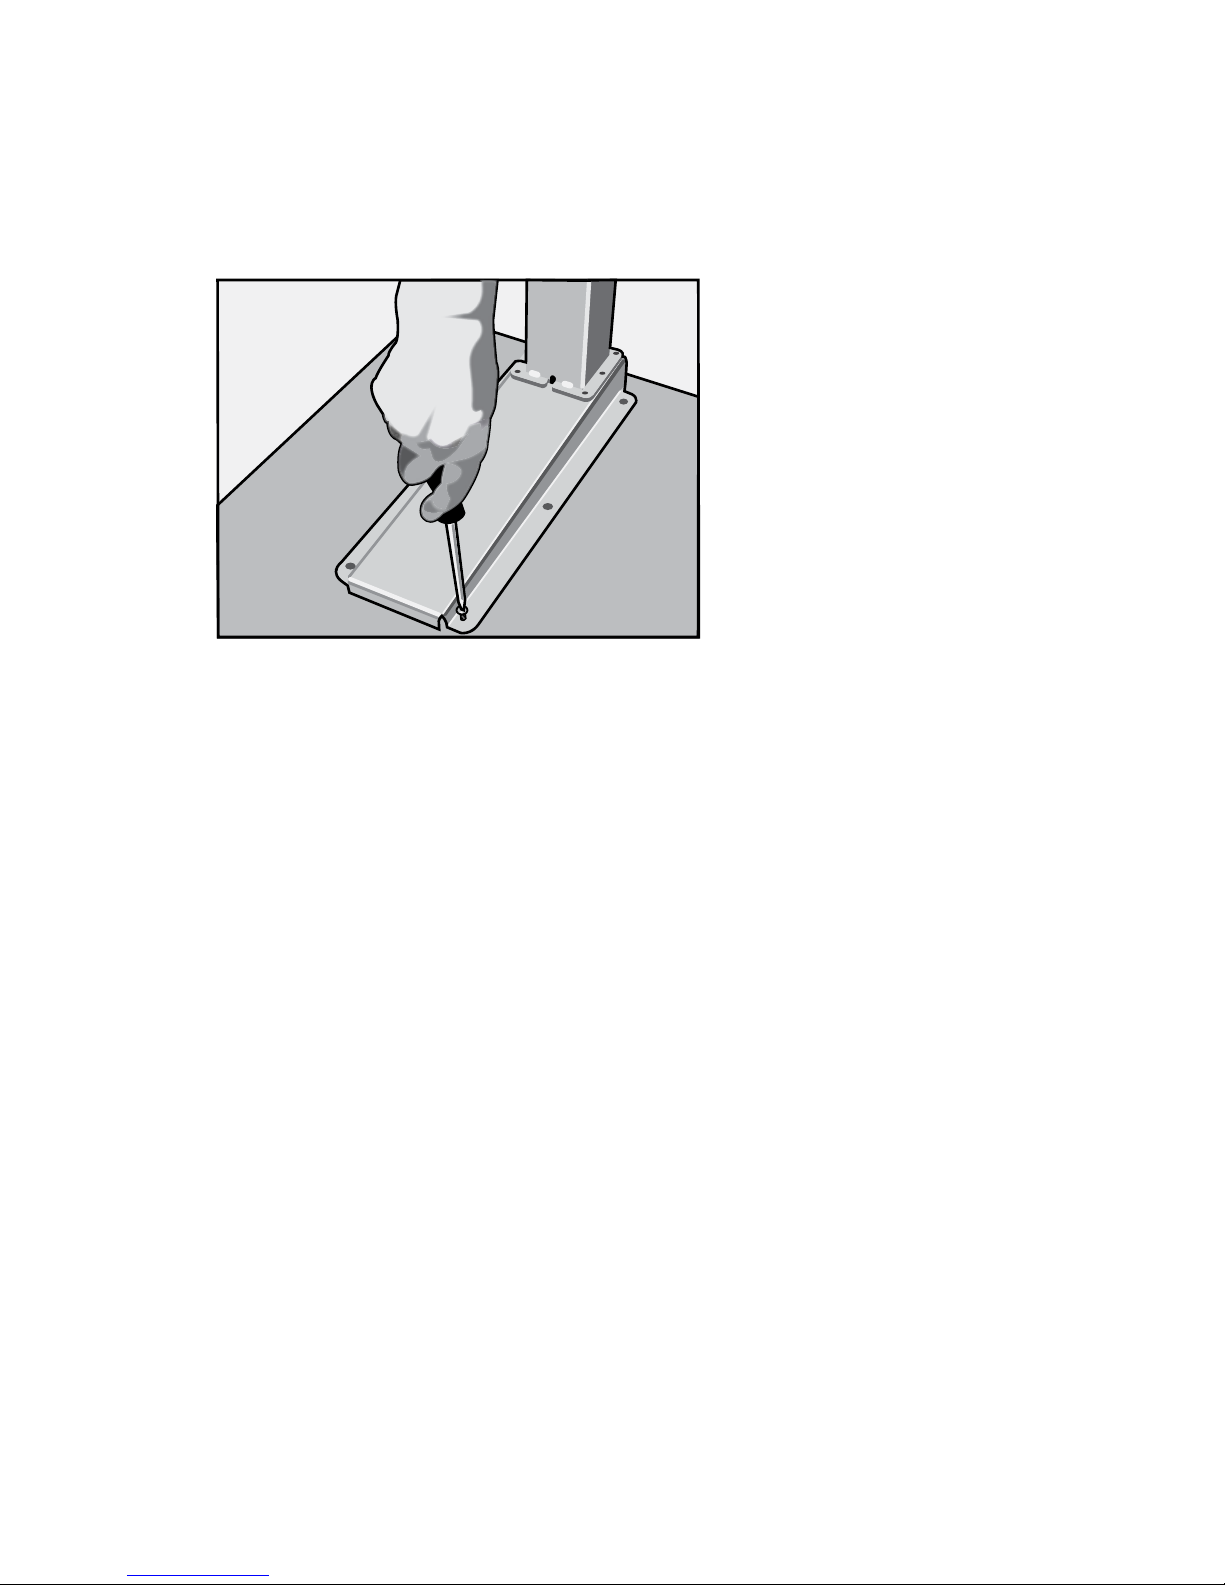
B) Attaching the Base to the Column
Have an assistant place the column on the oor do that it is resting on the front edge of the table
support plate (be sure to use cardboard or a blanket to protect the paint). Next, stand the base on
oor, and with the 6 mm Allen key, securely attached the base to the bottom of the column.
- Page 3 -
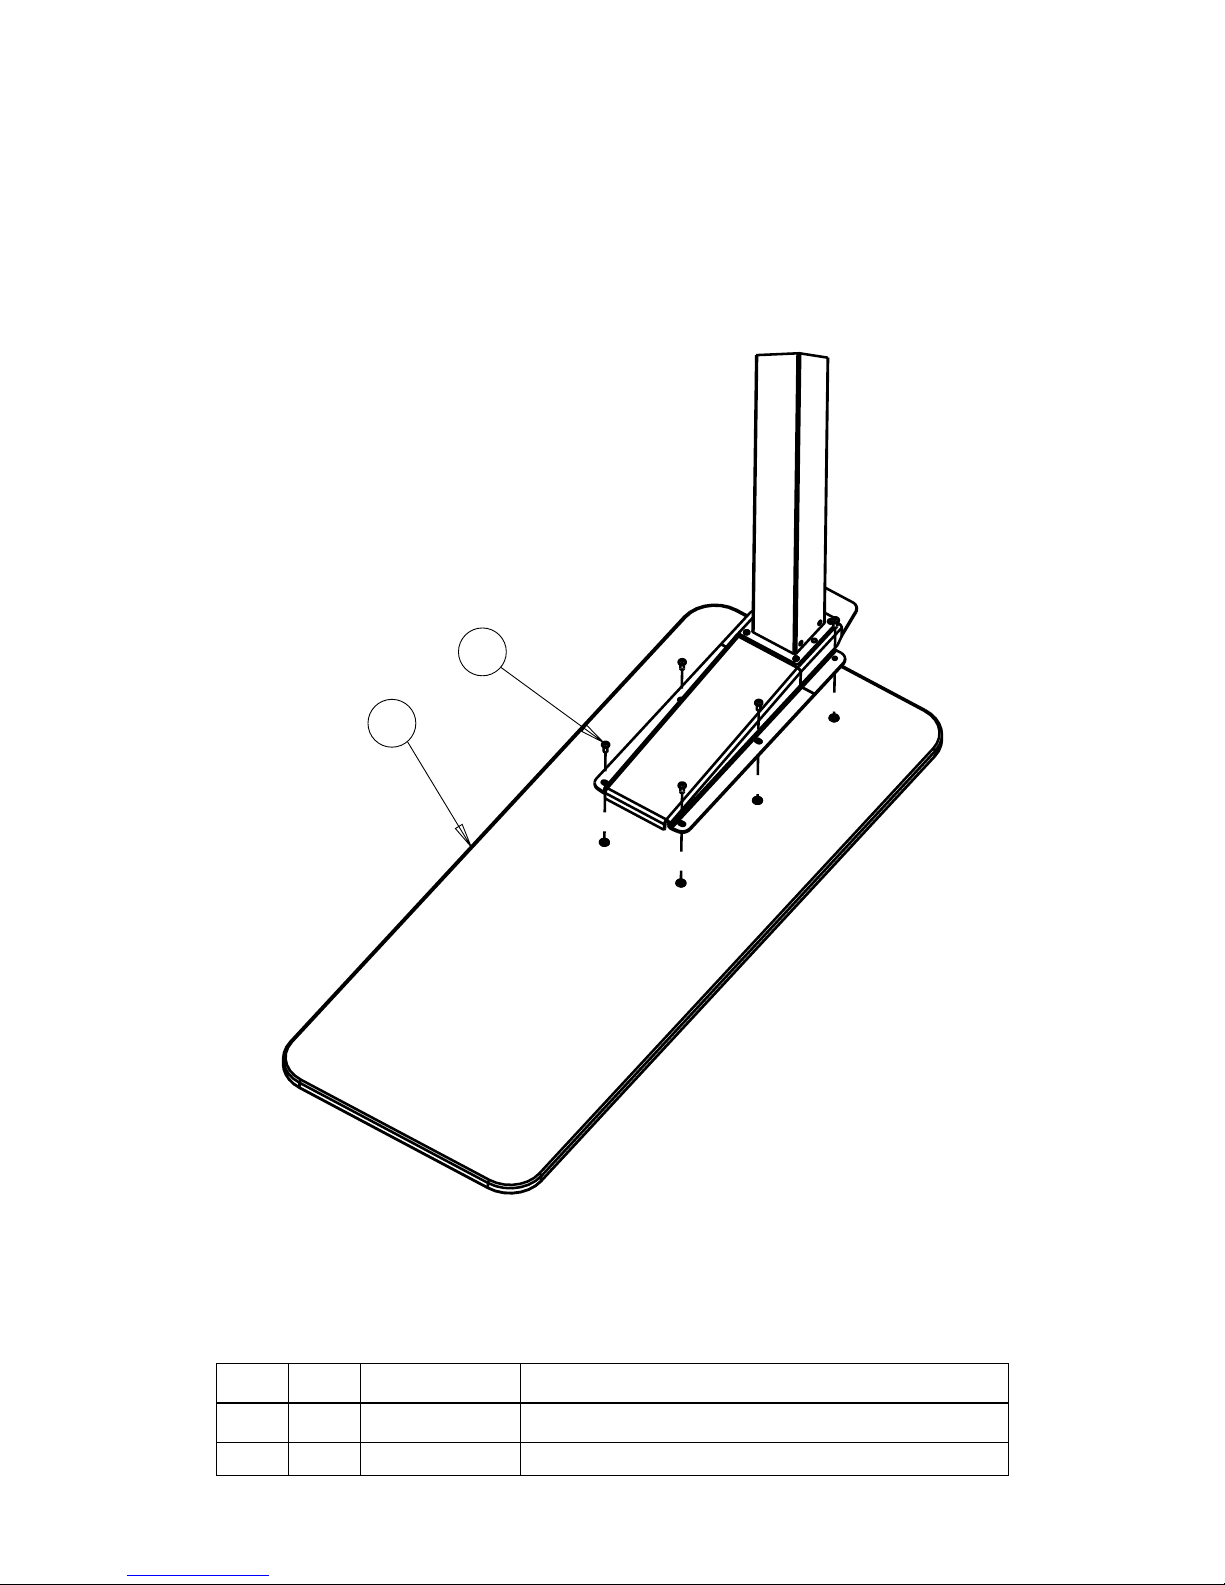
C) Attaching the Top to the Column
Place the table top face down on the oor or table (again, be sure to use cardboard or a blanket to
protect the top), and with the aid of an assistant carefully align the table support plate with the pilot
holes in the table top. Using the #2 Philips screwdriver, secure the top with the 6 pan head screw.
Discard the packaging material and you have now completed the assembly of your new Over Bed
Table.
Care and Cleaning of your Over Bed Table
All of the components will withstand cleaning using a solution of 0.5 Hydrogen Peroxide (such as
Virox®) or a 70% Isopropyl alcohol solution following the recommended cleaning frequency of a
patient room environment as set out in such guidelines as Best Practices for Environmental
Cleaning by PIDAC.
To p
The top is made with a MDF substrate covered with a PVC thermoform material.The top should
not be cleaned with harsh cleaners containing abrasive additives. In addition, cleaning products such
as bleach or those containing solvents such as lacquer thinner must be avoided.
Column and Base
The column and base have a durable powder coat nish. Abrasive cleaners should be avoided to
prevent scratching of the nish.
Casters
Casters should be regularly inspected and cleaned of debris that will impede their ability to roll
and swivel.
Frequency of Cleaning
Cleaning frequency of the Transcend Overbed Table should follow the recommended cleaning
procedures by such organizations as PIDAC.Typically in the case of patient room equipment,
cleaning of the table top should be done after each use and daily of the entire table.
- Page 4 -

Maintenance of your Over Bed Table
A) Scheduled Service and Inspections
Depending on frequency of use, the Over Bed table should receive scheduled service and
inspections.
1) Casters should be cleared of debris to ensure that they swivel and roll smoothly. No lubrication
is required.
2) The entire table should be check for structural integrity and damaged components. Looseness
between the top and the column and the column and the base should be noted and corrected
immediately.
B) Column
1) There are no adjustments or service requirements required to the column.
Replacing the Gas Spring
If the column begins to drift down, rst check to ensure the Release Paddle is not stuck or bound in
the actuated position. If the Release Paddle is function properly and the table is drifting down, the gas
spring must be replaced.
1) Turn the table upside down on a table or the oor (be sure to use cardboard or a blanket to
protect the top) and remove the 6 pan head screws securing the table top to the support plate.
Caution!
The column contains the pressurized gas spring. If the column is retracted under force
without the table top attached it may extend suddenly under pressure.
2) Using a 3/32” Allen key, remove the two button head screws holding the Release Paddle and
spring in place.
- Page 5 -
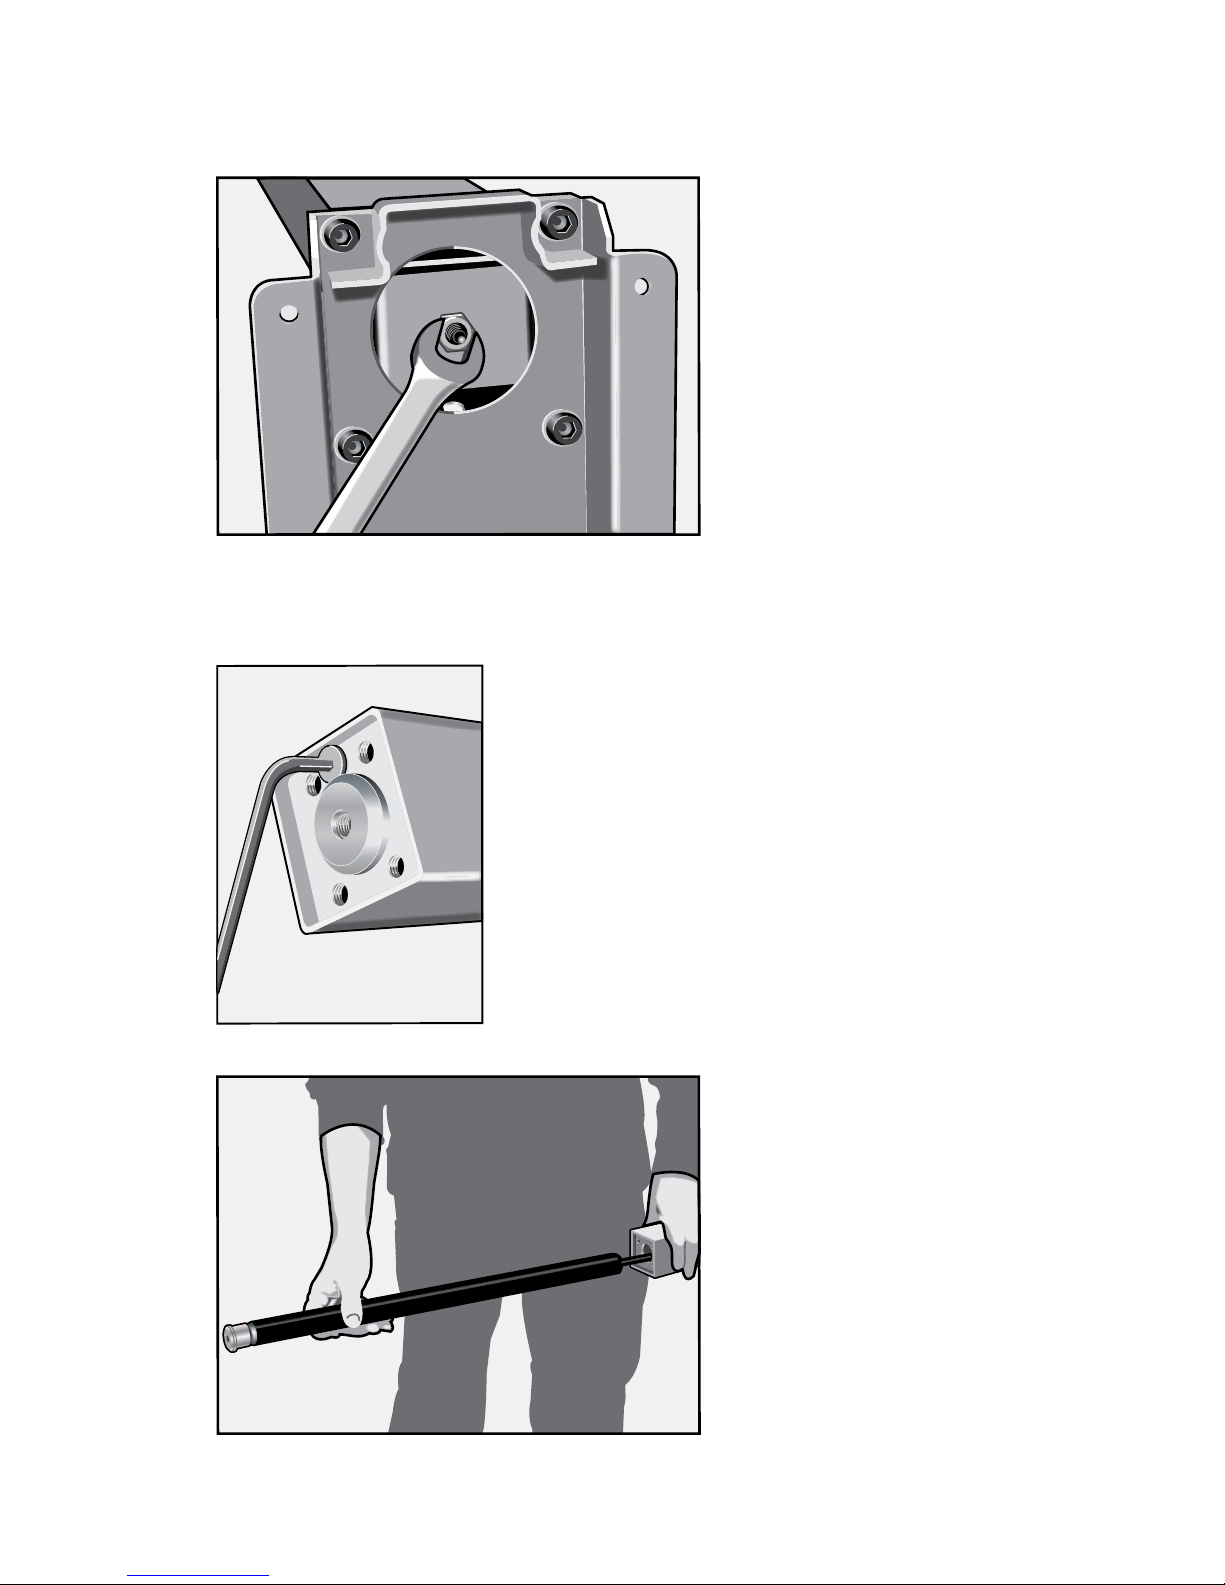
3) Using a 13mm wrench, remove the M8 nut securing the gas spring.
4) With the aid of an assistant and a 6mm Allen key, detach the base from the column.
5) Lay the column on a table, and using a 4mm Allen key, now remove the locking screw securing the
gas spring to the bottom end of the column.
6) Slide the gas spring out of the end of the column.
- Page 6 -
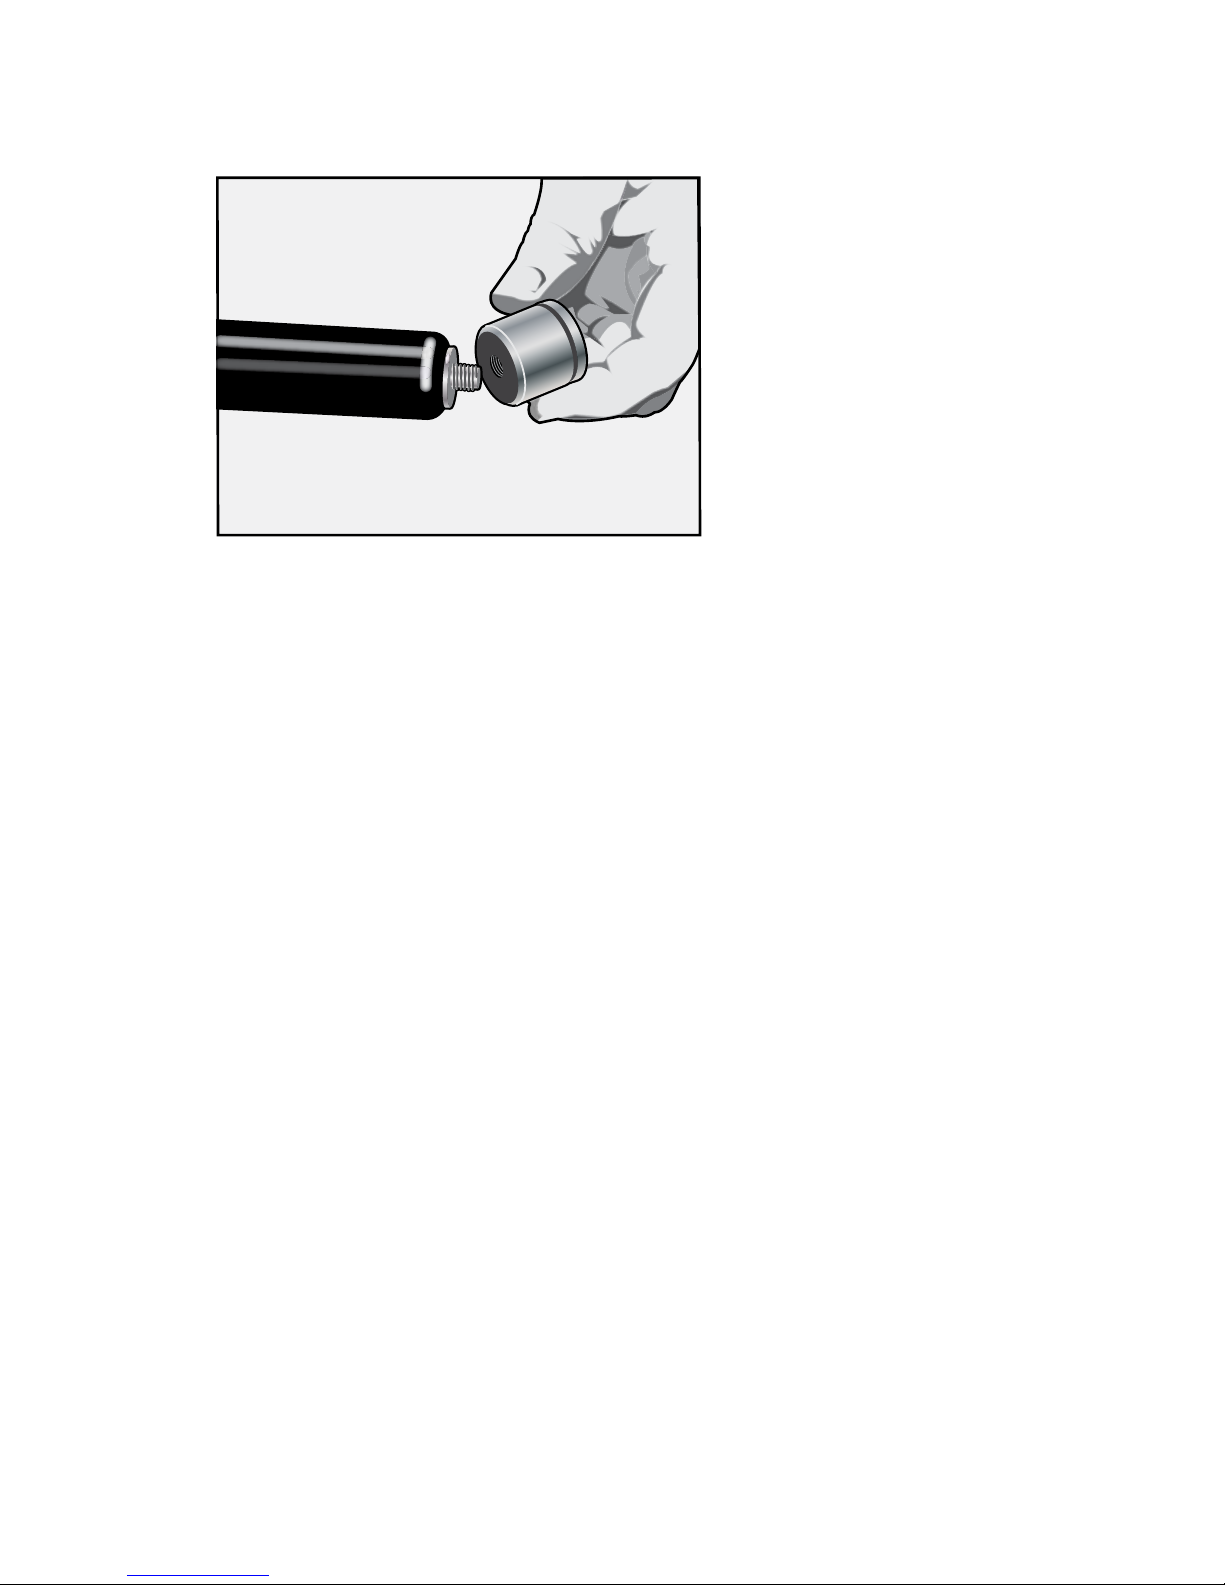
7) Unthread the mounting bushing from the gas spring.
8) Installation of the new gas spring is done in the reverse order of removing the gas spring.
- Page 7 -
- Page 8 -
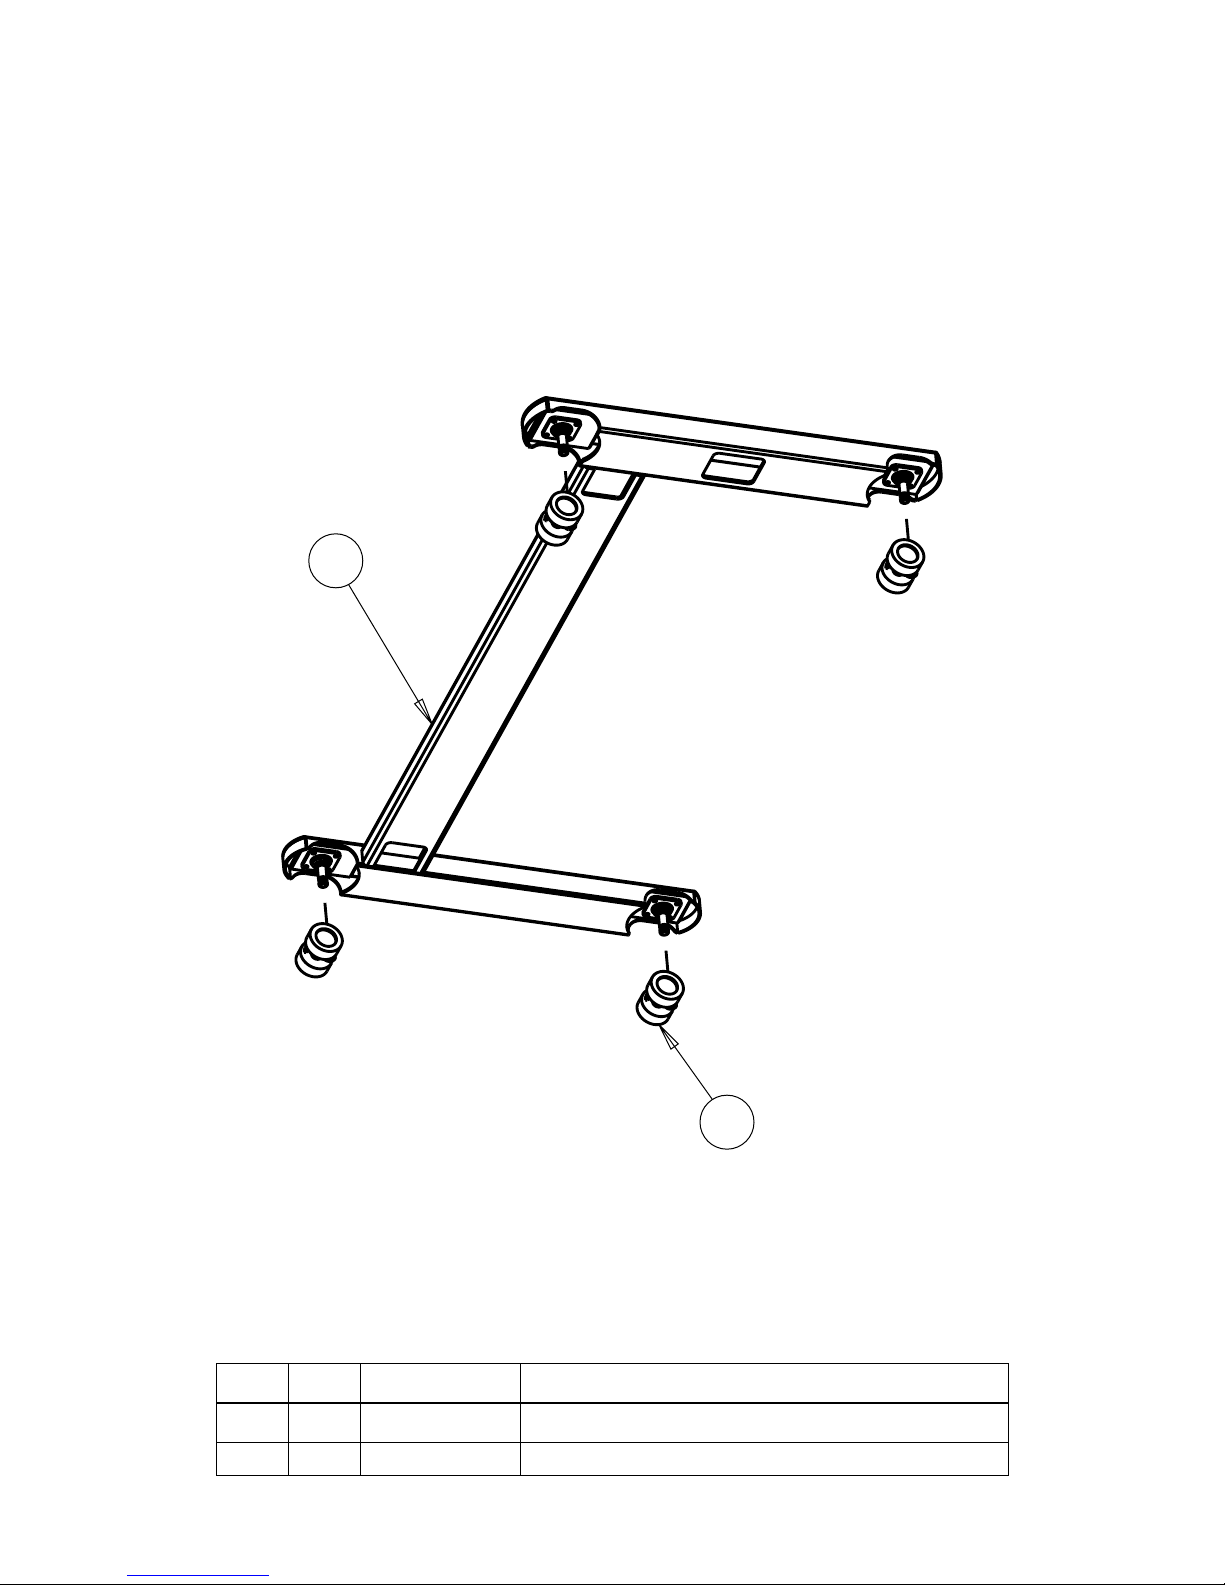
Parts Diagrams
ITEM QTY. PART NUMBER DESCRIPTION
1 1 00111ST190C ST190C OVER THE BED TABLE BASE
2 4 001310231 TENTE 5920 PJ1 040 L51-10 LOW PROFILE CASTER
2
1
- Page 9 -
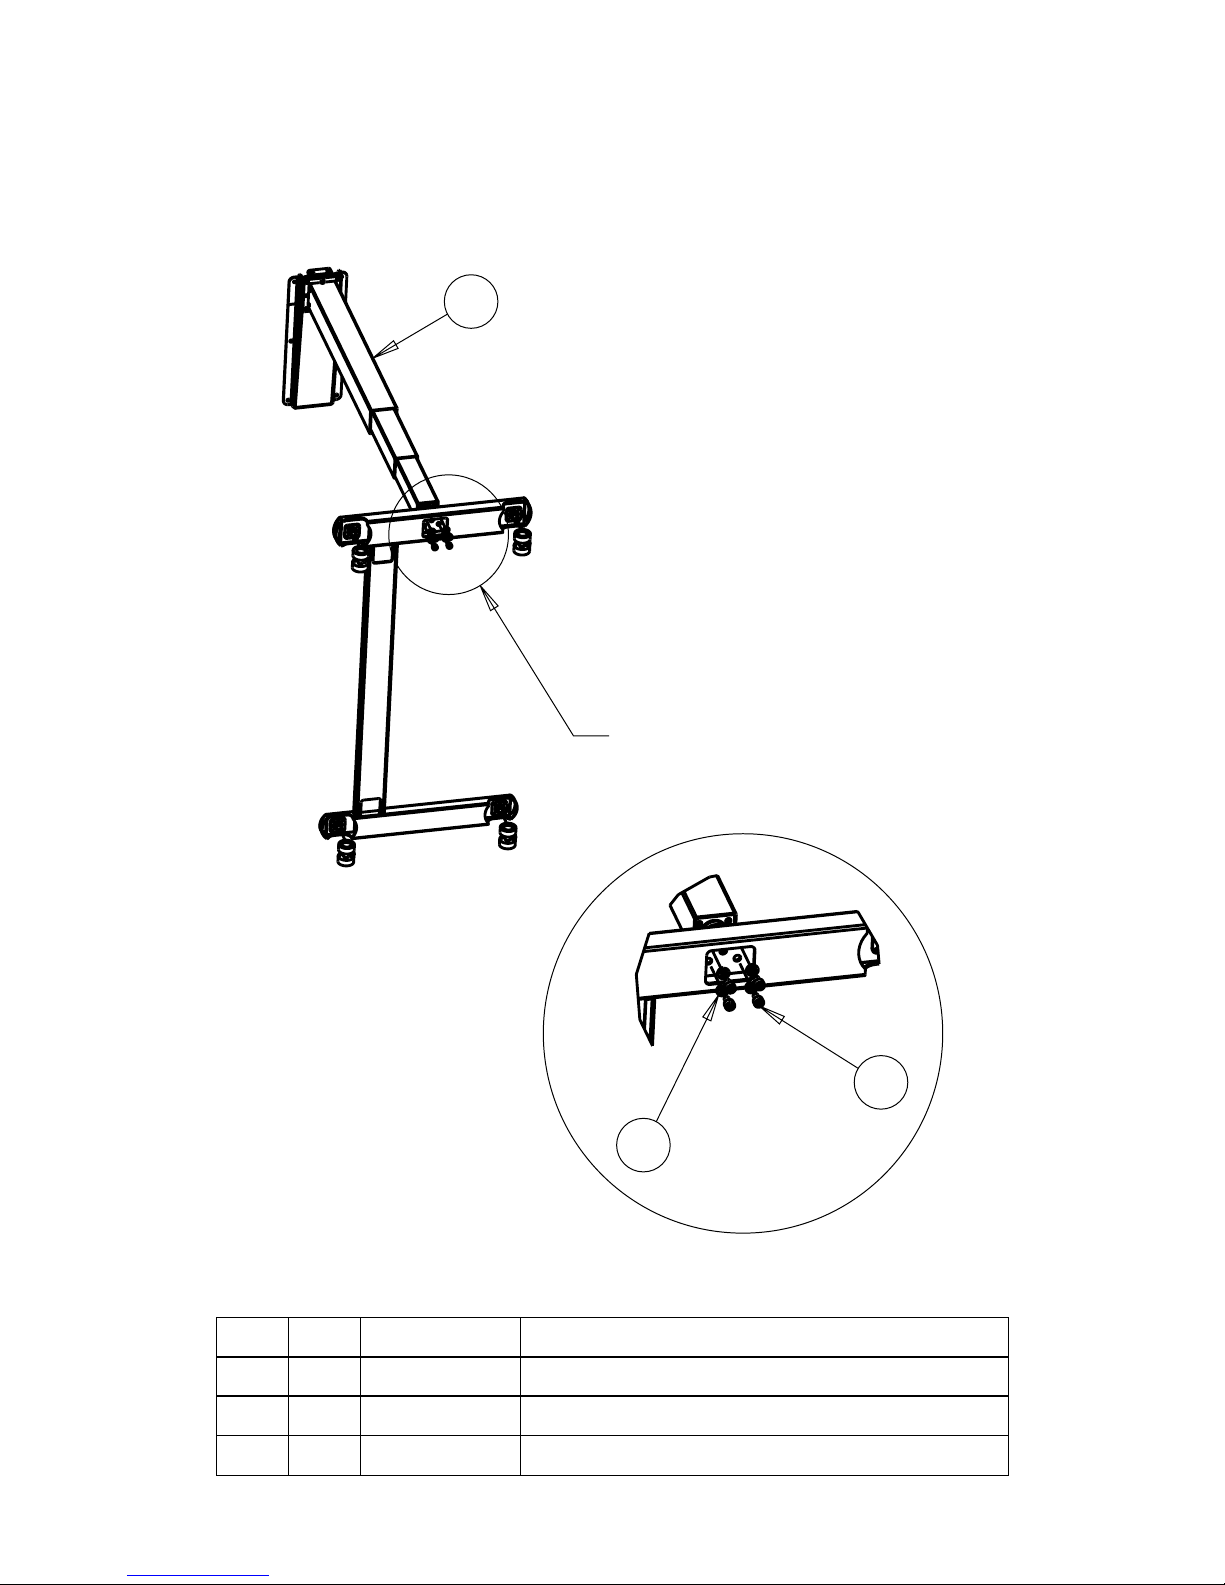
Parts Diagrams
ITEM QTY. PART NUMBER DESCRIPTION
1 1 01112ST190 ST190 BASE COLUMN W/TOP PLATE
2 4 M8X12mm HEX SOCKET CAP SCREW
3 4 5/16” SPLIT LOCK WASHER
2
1
SEE DETAIL A
DETAIL A
3

- Page 10 -
Parts Diagrams
ITEM QTY. PART NUMBER DESCRIPTION
1 1 00116ST190 ST190 RELEASE PADDLE ASSEMBLY
2 1 00116ST190LS ST190 LATCH SPRING
3 1 00116ST190PR ST190 PADDLE RETAINER
4 2 #8-32X1/4” BUTTON HEAD SOCKET SCREW
2
4
1
DETAIL A
3
SEE DETAIL A
- Page 11 -
Parts Diagrams
2
1
ITEM QTY. PART NUMBER DESCRIPTION
1 1 01213ST190 ST190 TABLE TOP W/INSERT NUTS
2 6 #10-24X1/2” PAN HEAD MACHINE SCREW

- Page 12 -
Stance Healthcare Inc.
45 Goodrich Drive, Kitchener, Ontario, Canada N2C 0B8
t: 1.877.395.2623 f: 1.877.395.6270 w: stancehealthcare.com
Specications:
Size of Top: 18 x 32”
Weight capacity of table top: 75 lbs centered on the table top (25lbs safe working capacity)
Overall Height with column extended: 45”
Overall Height with column lowered: 29”
Total Travel: 16”
Base Dimensions: (H Base) 19-5/8” x 29-1/2” (V Base) 21-1/8” x 32-1/4”
Minimum Base Height: 2”
Warranty:
Stance Healthcare Inc. is pleased to warrant products it manufactures against defects in materials
and workmanship for a period of two (2) years to the original purchaser beginning from the date
the product was shipped to said purchaser.This warranty shall not apply to products that have been
subjected to misuse, abuse, negligence, accidental damage, damage in transportation or improper
maintenance. In addition, this warranty shall not apply to any product whose original construction has
been altered by someone other than Stance Healthcare Inc.
Stance Healthcare Inc. hereby disclaims all implied warranties including the implied warranty of
merchantability or tness for any particular purpose. At its discretion, Stance Healthcare Inc. will
repair or replace defective parts that meet the terms and conditions of this warranty at no charge to
the original purchaser: Return freight charges incurred under warranty claims will be paid by Stance
Healthcare Inc. provided that the customer received written authorization and shipping instructions
from Stance Healthcare Inc. to proceed with the return.
Stance Healthcare OMST190 Owners Manual, ST190 Victory OBT, REV 1, Date: 11/15
Table of contents
Other Stance Healthcare Indoor Furnishing manuals


Popular Indoor Furnishing manuals by other brands


Carena
Carena HARÖ CHANGING TABLE 1553407 manual

Frontgate
Frontgate MANCHESTER PET TOY BOX W/PLAQUE 42359 Assembly instruction

Coaster
Coaster 224403 Assembly instructions

Hooker Furniture
Hooker Furniture 5751-10458-95 Assembly instruction

Furniture of America
Furniture of America CM7187C Assembly instructions

Hay
Hay AAT 10 instruction manual