StarFive VisionFive SBC User manual

www.starfivetech.com NO.: VisionFive-QSGEN-001-V1.1
VisionFive SBC
Quick Start Guide
Version: V1.1
Date: 2022-03-01

i
PROPRIETARY NOTICE
Copyright © Shanghai StarFive Technology Co., Ltd., 2018-2022. All rights reserved.
Information in this document is provided "as is," with all faults. Contents may be periodically up-
dated or revised due to the product development. Shanghai StarFive Technology Co., Ltd. (herein-
after “StarFive”) reserves the right to make changes without further notice to any products herein.
StarFive expressly disclaims all warranties, representations, and conditions of any kind, whether
express or implied, including, but not limited to, the implied warranties or conditions of merchant-
ability, fitness for a particular purpose and non-infringement.
StarFive does not assume any liability rising out of the application or use of any product or circuit,
and specifically disclaims any and all liability, including without limitation indirect, incidental, spe-
cial, exemplary, or consequential damages.
All material appearing in this document is protected by copyright and is the property of StarFive.
You may not reproduce the information contained herein, in whole or in part, without the written
permission of StarFive.
Shanghai StarFive Technology Co., Ltd.
Address: Room 502, Building 2, No. 61 Shengxia Rd., China (Shanghai) Pilot Free Trade
Zone, Shanghai, 201203, China
Website: www.starfivetech.com
Email: sales@starfivetech.com (sales)
support@starfivetech.com (support)
StarFive

ii
About This Manual
Introduction
This document mainly provides the users with the necessary information about the StarFive Vi-
sionFive development board, including features, specifications, board appearance and pinout, as
well as the guidelines to get started with the Fedora operation system.
Revision History
Version Released Revision
V1 2021-12-08 The first official release.
V1.1 2022-03-01
⚫Added new steps to use Ethernet to prepare software under
Windows and Mac/Linux environment in the Software Setup
section.
⚫Updated the Fedora image file name as Fedora-riscv64-
jh7100-developer-xfce-Rawhide-20211226-
214100.n.0-sda.raw.zst.
⚫Added steps to recover bootloader for Mac/Linux.
⚫Updated the description in the Software Setup section.
StarFive

iii
Table of Contents
About This Manual ...................................................................................................................ii
1Features and Specifications .................................................................................................4
1.1 Features....................................................................................................................................................... 4
1.2 Specifications............................................................................................................................................... 4
2Hardware Overview ............................................................................................................6
2.1 Board Appearance ....................................................................................................................................... 6
2.2 Pinout Diagram............................................................................................................................................ 7
3Getting Started....................................................................................................................9
3.1 Required Hardware...................................................................................................................................... 9
3.2 Connecting a Fan ......................................................................................................................................... 9
3.3 Flashing Fedora OS to Micro-SD Card..........................................................................................................9
3.3.1 For Windows....................................................................................................................................... 10
3.3.2 For Mac/Linux..................................................................................................................................... 11
3.4 Logging in to Fedora ..................................................................................................................................12
3.4.1 Using Xfce Desktop over HDMI........................................................................................................... 12
3.4.2 Using SSH over Ethernet..................................................................................................................... 12
3.4.3 Using a USB to Serial Converter..........................................................................................................14
4Appendix A: VisionFive Boot Flow .....................................................................................19
5Appendix B: Updating Firmware and u-boot ......................................................................20
5.1 Using Pre-Built Binary Packages ................................................................................................................ 20
5.1.1 Hardware Connection.........................................................................................................................20
5.1.2 Software Setup ................................................................................................................................... 21
6Appendix C: Recovering the Bootloader.............................................................................33
6.1 Hardware Setup.........................................................................................................................................33
6.2 Software Setup .......................................................................................................................................... 33
6.2.1 For Windows....................................................................................................................................... 33
6.2.2 For Mac/Linux.....................................................................................................................................35
7Appendix D: GitHub Repository.........................................................................................38
StarFive

www.starfivetech.com Page 4 V1.1 (2022-03-01)
1 Features and Specifications
VisionFive is the first generation of affordable RISC-V computers designed to run Linux. It is
fully open-source with open-source software, open hardware design and RISC-V open archi-
tecture.
It is powered by RISC-V SiFive U74 Dual-Core 64-bit RV64GC ISA SoC with 8GB LPDDR4 RAM
and has rich I/O peripherals such as USB 3.0 ports, 40-pin GPIO header, Gigabit Ethernet
Connector, Micro-SD card slot and much more.
VisionFive also has rich AI features with Neural Network Engine and NVDLA Engine. It has
onboard audio and video processing capabilities and has MIPI-CSI and MIPI-DSI connectors
for video hardware. It has wireless capabilities with Wi-Fi and Bluetooth (BLE) and has a wide
software compatibility including support for Fedora.
1.1 Features
⚫Truly open-source hardware, software and RISC-V open architecture
⚫Powerful and rich AI features with Neural Network Engine and NVDLA Engine
⚫Abundant I/O peripherals
⚫Wireless connectivity with Wi-Fi and BLE
⚫Onboard video and audio processing
⚫Wide software compatibility including support for Fedora
1.2 Specifications
Table 1-1 Specifications
Specification Details
Processor
⚫RISC-V SiFive U74 Dual-Core 64-bit RV64GC ISA SoC with 2MB L2
cache @ 1.0GHz
⚫Vision DSP Tensilica-VP6 for computing vision @ 600MHz
⚫NVDLA Engine (configuration 2048 MACs @ 800MHz)
⚫Neural Network Engine (1024MACs @ 500MHz)
Memory 8GB LPDDR4
Wireless Connec-
tivity
⚫2.4 GHz Wi-Fi (IEEE 802.11b/g/n)
⚫Bluetooth 4.2 (BLE)
StarFive

Quick Start Guide 1 Features and Specifications
www.starfivetech.com Page 5 V1.1 (2022-03-01)
Specification Details
Video Processing
⚫2 x MIPI-CSI (up to 4K@30fps), 1 x MIPI-DSI (up to 4K@30fps)
⚫1 x HDMI 1.4 (up to 1080p@60fps display)
⚫Video Decoder (H264/H265) up to 4K@60fps; Support Dual stream
decoding for 2K@30fps each
⚫Dual channels of ISP, each channel support up to 4K@30FPS
⚫Support MIPI-CSI TX for video output after ISP and AI processing
⚫JPEG encoder/decoder
Dedicated Audio
Processing DSP
and Sub-system
⚫Ultra-low power Voice Activity Detector for audio bit-stream as a
Voice Trigger
⚫On-chip Audio DAC
⚫Support DMIC and AMIC, up to 4 channels
Peripherals
⚫4 x USB 3.0 ports
⚫40 Pin GPIO Header (28 x GPIO, I2C, I2S, SPI, UART)
⚫Gigabit Ethernet Connector
⚫3.5 mm Audio jack (4-pole stereo audio output)
⚫Micro-SD card slot for system boot and data storage
⚫Support TRNG and OTP
⚫Support DMAC, QSPI and other peripheral
⚫Reset button and Power Button
Power Supply ⚫Minimum: 5 V / 1.5 A
⚫Recommended: 5 V / 3 A
Power Connector ⚫USB Type-C port or 40-pin GPIO header
Dimensions ⚫100 mm x 72 mm
StarFive

www.starfivetech.com Page 6 V1.1 (2022-03-01)
2 Hardware Overview
2.1 Board Appearance
Figure 2-1 Top View of VisionFive
Figure 2-2 Bottom View of VisionFive
StarFive

Quick Start Guide 2 Hardware Overview
www.starfivetech.com Page 7 V1.1 (2022-03-01)
Table 2-1 Interface Description
No. Description No. Description
1RISC-V SiFive U74 Dual-Core 64-bit
RV64GC ISA SoC 9HDMI 2.0 Connector
24GB LPDDR4 RAM 10 2 x MIPI-CSI Connector
32.4 GHz Wi-Fi and Bluetooth 4.2 (BLE) 11 Gigabit Ethernet (RJ45 Connector)
440 Pin GPIO Header 12 2 x USB 3.0 Host Type-A
5MIPI-DSI Connector 13 2 x USB 3.0 Host Type-A
6PMIC 14 3.5 mm Audio Jack (4-pole stereo audio
output)
7USB Type-C Connector 15 Micro-SD SDXC Card Slot
8LCD to HDMI IC 16 Fan Header for a 2-pin 5 V Fan
Notes:
The recommended current for this board is 3 A. The reason is as the following:
The onboard components need about 1 A, the 4 USB ports can draw a total of 1 A combined,
one USB port alone can also draw 1 A and the remaining current is for expansion header and
others.
2.2 Pinout Diagram
The following is the pinout diagram:
Figure 2-3 Pinout Diagram
StarFive

Quick Start Guide 2 Hardware Overview
www.starfivetech.com Page 8 V1.1 (2022-03-01)
Notes:
Each GPIO pin can safely draw a maximum current of 39 mA, whereas the maximum current
draw when all GPIOs are combined should be less than 100 mA. Please take this into account
or otherwise you will end up destroying the GPIO pins.
All GPIOs can be configured to support different functions including but not limited to SDIO,
Audio, SPI, I2C, UART and PWM.
For the instructions, refer to StarFive_40-Pin_GPIO_Header_User_Guide.
StarFive

www.starfivetech.com Page 9 V1.1 (2022-03-01)
3 Getting Started
3.1 Required Hardware
You need to prepare the following hardware before getting started with VisionFive:
⚫VisionFive
⚫16GB (or more) micro-SD card
⚫micro-SD card reader
⚫Computer (PC/Mac/Linux)
⚫USB to serial converter (3.3 V I/O)
⚫Ethernet cable
⚫Power adapter (5 V / 3 A)
⚫USB Type-C Cable
3.2 Connecting a Fan
It's recommended to use a fan with VisionFive. You can connect a 2-pin 5 V fan to the board
as follows:
Figure 3-1 Connecting a Fan
3.3 Flashing Fedora OS to Micro-SD Card
Now we need to burn Fedora (which a Linux distribution) to a micro-SD card, so that it can
run on the VisionFive. Follow the steps below according to your operating system.
Start by downloading the Fedora image from here.
StarFive

Quick Start Guide 3 Getting Started
www.starfivetech.com Page 10 V1.1 (2022-03-01)
3.3.1 For Windows
Steps:
Step 1 Insert a micro-SD card to the computer through a micro-SD card reader, or by a built-
in card reader on a laptop.
Step 2 Download Zstandard-CLI software by visiting the links below:
⚫Zstandard-CLI for windows 32-bit
⚫Zstandard-CLI for windows 64-bit
Step 3 Click here to visit the GitHub repo.
Step 4 Extract the .zip file.
Step 5 Copy the latest file (e.g.: Fedora-riscv64-jh7100-developer-xfce-Raw-
hide-20211226-214100.n.0-sda.raw.zst) and paste it into the zstd direc-
tory that you just extracted.
Step 6 Open Windows Powershell and navigate to the zstd directory.
Example:
cd D:\Downloads\zstd
Step 7 Type the following command to unzip the Fedora image:
./zstd.exe -d Fedora-riscv64-jh7100-developer-xfce-Rawhide-
20211226-214100.n.0-sda.raw.zst -o Fedora-riscv64-jh7100-de-
veloper-xfce-Rawhide-20211226-214100.n.0-sda.raw
Result:
Now your image file is named as Fedora-riscv64-jh7100-developer-xfce-
Rawhide-20211226-214100.n.0-sda.raw.
Step 8 Visit this link to download BalenaEtcher. We will use BalenaEtcher software to flash
the Fedora image to a micro-SD card.
Step 9 Install BalenaEtcher and open it.
Figure 3-2 Install BalenaEtcher
Step 10 Click on Flash from file and select the location of the image that we just unzipped:
StarFive

Quick Start Guide 3 Getting Started
www.starfivetech.com Page 11 V1.1 (2022-03-01)
Fedora-riscv64-jh7100-developer-xfce-Rawhide-20211226-
214100.n.0-sda.raw
Step 11 Click Select target and select the connected micro-SD card.
Step 12 Click Flash!
3.3.2 For Mac/Linux
Steps:
Step 1 Insert a micro-SD card to the computer through a micro-SD card reader, or by a built-
in card reader on a laptop.
Step 2 Open a terminal window on Mac/Linux.
Step 3 Type the following to update the packages list.
sudo apt-get update
Information:
If you are a Mac user, type brew update.
Step 4 Type the following to install zstd package which we will use to unzip our Fedora image
file:
sudo apt-get install zstd
Information:
If you are a Mac user, type brew install zstd.
Step 5 Navigate to the location of the downloaded Fedora image directory before.
Example Command:
cd Downloads/
Step 6 Run the following command to unzip the Fedora image.
zstd -d Fedora-riscv64-jh7100-developer-xfce-Rawhide-
20211226-214100.n.0-sda.raw.zst
Step 7 Burn the Fedora image to the micro-SD card by running the following command.
sudo dd if=Fedora-riscv64-jh7100-developer-xfce-Rawhide-
20211226-214100.n.0-sda.raw of=/dev/sdX bs=8M status=progress
&& sync
Information:
If you are a Mac user, burn the Fedora image to the micro-SD card by running:
sudo dd if=Fedora-riscv64-jh7100-developer-xfce-Rawhide-
20211226-214100.n.0-sda.raw of=/dev/sdX bs=8m && sync
of=/dev/sdX corresponds to the location of the connected micro-SD card. You
can find this by running lsblk command.
The whole burning process will take about 20 minutes.
StarFive

Quick Start Guide 3 Getting Started
www.starfivetech.com Page 12 V1.1 (2022-03-01)
3.4 Logging in to Fedora
3.4.1 Using Xfce Desktop over HDMI
After installing Fedora, you can log in to Fedora OS on VisionFive using Xfce Desktop over
HDMI.
Steps:
Step 1 After the HDMI of the display screen is connected, insert the micro-SD card with the
Fedora image into the VisionFive and power on.
Step 2 After the desktop login system is displayed, you can use the keyboard and mouse on
VisionFive.
Step 3 Enter the credentials as follows:
⚫Username: riscv (default)
⚫Password: starfive
Result:
You will see the following interface:
Figure 3-3 UI Example
3.4.2 Using SSH over Ethernet
After installing Fedora, you can log in to Fedora OS on VisionFive through an SSH connection
over the local network.
Steps:
Step 1 Insert the micro-SD card with the Fedora image into the VisionFive and power on.
Step 2 Connect one end of an Ethernet cable to the RJ45 connector on the VisionFive and
the other end of the cable to a router.
Step 3 After successful Ethernet connection, your router will assign an IP address to the Vi-
sionFive and it will be connected to the Internet.
StarFive
Quick Start Guide 3 Getting Started
www.starfivetech.com Page 13 V1.1 (2022-03-01)
For Windows
Steps:
Step 1 Log in to your router (usually you need to enter 192.168.1.1 on the web browser to
enter the router).
Step 2 Go to DHCP configuration and find the IP address of the VisionFive.
Information:
You can easily find the IP address of the VisionFive by referring to its host name, fe-
dora-starfive.
Step 3 Download and install Putty by visiting this link.
Information:
Putty is an SSH and telnet client through which you can connect to the Carrier Board.
You can skip this step if you already have Putty installed.
Step 4 Open Putty to log in to Fedora.
Step 5 Select SSH under the Connection Type.
Step 6 Configure the settings as follows:
⚫Host Name: IP address of your VisionFive
⚫Port: 22
Step 7 Click Open.
Step 8 Enter the credentials as follows:
⚫ Username: riscv
⚫ Password: starfive
Result:
Now you have connected with the VisionFive via SSH using windows!
Figure 3-4 Example Output
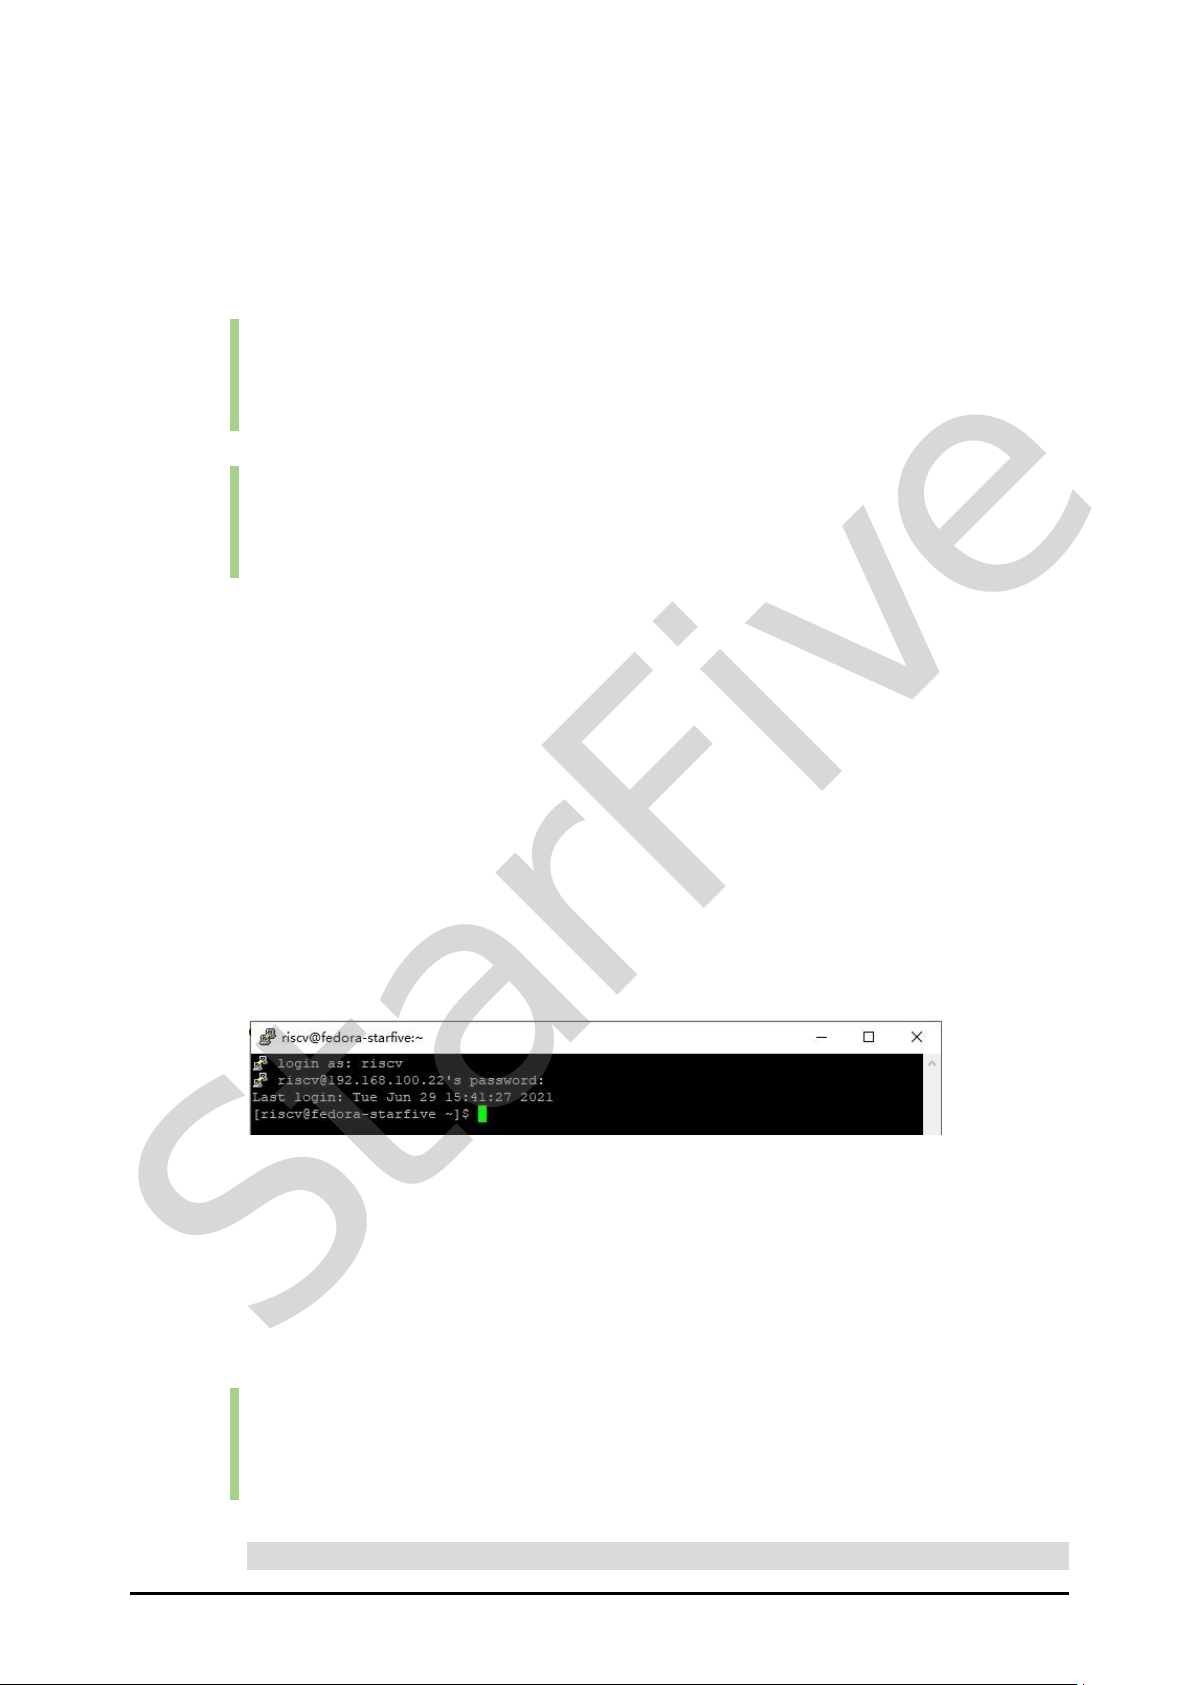
For Mac/Linux
Steps:
Step 1 Log in to your router (usually you need to enter 192.168.1.1 on the web browser to
enter the router).
Step 2 Go to DHCP configuration and find the IP address of the VisionFive.
Information:
You can easily find the IP address of the VisionFive by referring to its host name, fe-
dora-starfive.
Step 3 Open a terminal window and type the following:
StarFive

Quick Start Guide 3 Getting Started
www.starfivetech.com Page 14 V1.1 (2022-03-01)
Information:
192.168.1.xxx is the IP address of VisionFive.
Step 4 Type the password as starfive in the prompt.
Result:
Now you have connected with the VisionFive via SSH using Mac/Linux!
Information:
192.168.1.xxx is the IP address of VisionFive.
Figure 3-5 Example Output
3.4.3 Using a USB to Serial Converter
You can log in to Fedora OS on VisionFive using a USB-to-Serial converter. Please follow the
following steps:
For Windows
Steps:
Step 1 Insert the micro-SD card with the Fedora image burnt into VisionFive.
Step 2 Connect one end of the USB Type-C cable to the USB Type-C port on the VisionFive,
and connect the other end of the cable to the power adapter.
Step 3 Connect the jumper wires from the USB to Serial Converter to the 40-Pin GPIO
header of the VisionFive as follows.
Figure 3-6 Connecting Jumper Wire
Step 4 Connect the USB-to-Serial converter to the PC.
Step 5 Open Device Manager by typing Device Manager in the windows search box.
StarFive

Quick Start Guide 3 Getting Started
www.starfivetech.com Page 15 V1.1 (2022-03-01)
Step 6 Click the drop-down arrow from Ports (COM & LPT) and find the name of the con-
nected serial port (e.g.: COM4).
Figure 3-7 Example
Step 7 Download and install Putty by visiting this link.
Information:
Putty is an SSH and telnet client through which you can connect to the Carrier Board
via SSH. You can skip this step if you already have Putty installed.
Step 8 Open Putty to connect the PC to the Carrier Board.
Step 9 Select Serial under the Connection Type.
Step 10 Configure the settings as follows:
⚫Serial line: COM4 (choose your COM port)
⚫Speed: 115200
StarFive

Quick Start Guide 3 Getting Started
www.starfivetech.com Page 16 V1.1 (2022-03-01)
Figure 3-8 Example Configuration
Step 11 Click Open.
Step 12 Power on the VisionFive.
Step 13 Type username and password in the prompt as follows:
⚫Username: riscv
⚫Password: starfive
Result:
Now you have connected with the VisionFive via serial communication using win-
dows!
Figure 3-9 Example Output
StarFive

Quick Start Guide 3 Getting Started
www.starfivetech.com Page 17 V1.1 (2022-03-01)
For Mac/Linux
Steps:
Step 1 Insert the micro-SD card with the Fedora image burnt into VisionFive.
Step 2 Connect one end of the USB Type-C cable to the USB Type-C port on the VisionFive,
and connect the other end of the cable to the power adapter.
Step 3 Connect the jumper wires between the USB-to-Serial converter and the 40-Pin GPIO
header of the VisionFive as follows.
Figure 3-10 Connecting Jumper Wires
Step 4 Connect the USB-to-Serial converter to the PC.
Step 5 Open a terminal window on Mac/Linux.
Step 6 Update the packages list by typing the following command.
sudo apt-get update
Step 7 Install minicom by typing the following command.
sudo apt-get install minicom
Step 8 View the connected serial devices.
dmesg | grep tty
Figure 3-11 Example Output
Step 9 Connect to the serial device by typing the following command.
sudo minicom -D /dev/ttyUSB0 -b 115200
Information:
The baud rate is set to 115200.
StarFive

Quick Start Guide 3 Getting Started
www.starfivetech.com Page 18 V1.1 (2022-03-01)
Figure 3-12 Example Output
Step 10 Power on the VisionFive
Step 11 Type username and password in the prompt as follows:
⚫Username: riscv
⚫Password: starfive
Result:
Now you have connected with the VisionFive via serial communication using
Mac/Linux!
Figure 3-13 Example Output
StarFive

www.starfivetech.com Page 19 V1.1 (2022-03-01)
4 Appendix A: VisionFive Boot Flow
Figure 4-1 VisionFive Boot Flow
StarFive
Table of contents


