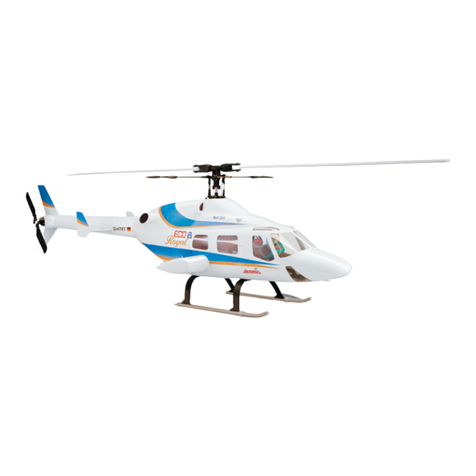
STARKID 68023 Hawk II User manual

GB
Instruction manual 68023 Hawk II
Parents: please read through
these instructions together with
your child before operating the
helicopter.
Congratulations!
We hope you will enjoy flying this high performance helicopter.
Please be careful when you play with it as it can cause a lot of damage if used carelessly. Please take
time to read these instructions through together with a grown-up, and what is more important – keep to
the instructions!
Don't complain if a grown-up won't let you play on your own. They will want to keep you out of harm's
way and protect their furniture from damage. Very important: Do not try to touch the rotating rotor
blades, they can injure you! Only use the helicopter indoors and never outside. You will soon find out
why.
Keep these instructions in a safe place so that you can read them again later and always give them to
other children who want to play with your helicopter.
Age recommendation: age 15 upwards under the supervision of an experienced adult.
Contents of package and description of parts
IR Helicopter 68023 Hawk II
IR remote control
1 instruction manual
Safety information, technical details, maintenance and care, special information on battery,
installation of battery, recharging battery.
Safety first:
•Keep your fingers off if you are under 15! Only children over 15 are allowed to play with this
helicopter!
•Flying your helicopter needs a lot of skill and you should only practise when a grown-up is there to
help you.
•Keep these instructions somewhere safe so that you can always read them again.
•Keep your hands, hair and loose clothes away from the propeller (rotor).
•Do not make any alterations or change the helicopter in any way.
•To get good flight results you must have a room with enough space. Remove all objects that could
get in the way, such as lamps and things that can fall over.
•Don't use the helicopter outside because you won't be able to control it due to wind and the short
transmission range.
•Warning! Never fly the helicopter when people or animals are near the flight range. Never fly it
near open water or power lines.
•Warning! Do not try to touch the rotating propeller.
•Do not hold or throw any objects into the rotating rotor.
•Caution: the helicopter could injure your eyes! Keep a safety distance of at least 1 meter.
•Please ask a grown-up to help you assemble the parts correctly.
(Replacement of batteries or spare parts, trimming etc.).

GB
Helicopter
Your model is an IR = infrared remote controlled helicopter with a rechargeable lithium-polymer
battery.
The lithium-polymer battery with a nominal cell voltage of 3,7 V and a capacity of 180 mAh is
already built-in to the helicopter. This is a high quality voltage storage unit but it can be dangerous if
handled wrongly.
To play safe, please keep to the following instructions:
•For recharging you can use either the remote control or a computer which you can connect to the
helicopter with the USB charger lead. Lithium-polymer batteries can start burning if they are
overcharged!
•Lithium-polymer batteries are sensitive to electricity and heat: These batteries can be damaged by
dampness, overcharging, emptying the battery too much, high current, or working at temperatures
that are too high (over 60 °C) or too low (under 0 °C).
•Don't fly the helicopter when it is very cold because it can't fly so well.
•Do not let the battery get too empty: The cell can be damaged or destroyed if put away when it is
empty.
•Recharge your battery every 6 months at the latest.
•If you want to put the model away for a long time, discharge it a bit and put it in a cool, dry place.
How to recharge the lithium-polymer battery in the helicopter
Switch off your helicopter OFF with the slide switch on the left side of the body, under the rotor axle.
Take the remote control and open the compartment containing the charger lead which you will find on
the side at the rear. Take out the charger lead and connect the charge plug of the remote control to
the charge socket of the helicopter.
Switch on the remote control. Now charging can start. The LED on the remote control lights up during
charging.
Charging takes about 30 to 50 minutes. It can alter according to how much energy is still in the battery.
The LED on the remote control goes out when charging is finished.
Now pull the charger lead out of the remote control to avoid discharging.
A USB charger lead is provided with your helicopter. You can connect this lead to the USB socket on a
computer and charge the helicopter battery this way. It takes just as long to charge with the computer
as it does with the remote control. But you can save a lot of pocket money by using the computer as it
prolongs the battery's life.
R/C Remote control:
3 Transmission frequencies marked A, B, C.
Operates with 6 batteries, each with 1,5 V LR6 / AA alkaline-manganese (not included).

GB
Drawing of remote control and explanation of settings:
Safety instructions for remote control batteries:
•Replacing remote control batteries: Open the lid of the battery compartment on the remote
control.
•Insert new alkaline-manganese batteries with the correct polarity (+ and -). Replace the lid of
the battery compartment.
•Never charge non-rechargeable batteries!
•Only let grown-ups recharge the remote control's removable, rechargeable batteries or do it
yourself when they help you.
•Remove rechargeable batteries from the remote control before recharging.
•Never use different types of batteries or new and used batteries together.
•Remove empty batteries from the remote control to stop them leaking, especially during longer
resting periods.
•Never short circuit connectors.
•Use only the recommended types of battery or equivalent types.
•Never put wires with mini plugs into sockets, in case of electric shocks!
•Please bring used batteries to your local collection point.

GB
Flight preparation – batteries and frequency switch
Insert new alkaline-manganese batteries into the remote control: do this by unscrewing the safety
screw on the lid of the battery compartment and take the lid off. Place new 1,5 V batteries LR6 / AA in
the battery compartment as shown there. Check the correct position of the batteries (polarity), + on the
battery must match + in the battery compartment. Close the lid of the compartment and screw it down
.
You have already charged the helicopter battery and it is full.
Switch the helicopter on with the slide switch. You will see one or more LEDs light up as a sign that it
is ready to start.
Switch the remote control ON.
The operation display LED now lights up. If the LED flashes, push the big left-hand speed control
slowly up and then slowly down again.
The LED now lights up all the time.
If you move the speed control slowly upwards, the rotor blades will start rotating.
If this doesn't work, you must adjust the frequency of the transmitter to match the frequency of the
helicopter. Do this by adjusting the A, B, C switches of the remote control until the helicopter reacts
properly.
If you want to save energy, you can switch the helicopter lights off with one of the two light switches on
the remote control and then switch them back on again later.
Ready for lift up: Flying the helicopter, flight surroundings, start, trimming, control and ending
flight
Flying the helicopter, flight surroundings:
The helicopter should only fly inside a house or a hall.
•The helicopter is so light that the slightest breeze can carry it away so that it is beyond the range
of the remote control and can get lost.
•The other reason for flying inside is the IR = infrared transmitter of your helicopter. It transmits light
in a non-visible range which is also a part of daylight. When it is very light and sunny outside, the
helicopter cannot tell the difference between daylight and the transmission commands and cannot
react properly. This means: the darker, the better.

GB
•The remote control must be pointed directly at the helicopter. Take care not to cover over the light
beam between the IR control and helicopter with your body, hand, stickers or other things that
cause shadows.
•Take care that no person, animal or object is disturbed by the flight of the helicopter.
•Reckon with the fact that if the helicopter suddenly drops out of its flight path, it could hit people or
objects. You are responsible for checking that all endangered people, animals and objects are far
enough away from the flight area.
•Warn them before you start.
•Make sure that you yourself are at least 1 meter away from the helicopter when it is flying.
Start: You can decide how quickly the rotor blades rotate by using the speed control (left). The higher
the speed, the quicker the helicopter lifts off and climbs. When you move the control back, the
helicopter sinks. Move the controls very slowly and gently, otherwise the helicopter whizzes off and is
out of control.
Always stand up while flying the helicopter. You can jump aside quickly if it flies in your direction. No
one else should be sitting or lying in the same room. If you break off playing, you must at least switch
off the helicopter to stop it from flying off accidentally.
Keep the helicopter away from smaller children as it could injure them.
Check that the rotor blades are not damaged – they can cause injuries. If necessary, replace them
with new blades.
Trimming: If the helicopter spins on its own axis although the right-hand direction control is in neutral,
correct this by trimming with the control dial on the remote control.
If the control is in the middle and the helicopter turns left, correct this by turning the trimmer to the
right.
If the helicopter turns right, correct this by turning the trimmer to the left.
Control: Now move the right control and watch how the helicopter reacts in its flight path. The same
happens for going forwards and backwards. Practise these basic settings until you can control the
flight of the helicopter safely.
When the battery is fully charged, the flight time lasts for 5 to 6 minutes.
When the flight is over: If you want to stop playing, switch the helicopter off. The helicopter battery
takes about 10 minutes to cool down. After this you can recharge it again. Never charge a heated
battery because this shortens its life.
Switch off the remote control.
Check the rotor blades for damage. Replace damaged rotor blades with new ones to avoid injuries.
Ask a grown-up to help you.
Longer breaks:
Remove the batteries from the remote control. The helicopter battery stays where it is but don't forget
to charge the battery again about every 6 months. This way the battery will not get too empty.
Why doesn't it work properly? Possible mistakes and their cause:
Problem: Cause and remedy:
Low transmission range Remote control: weak batteries. Insert new batteries
Helicopter sinks unintentionally Helicopter battery is empty
Helicopter does not react Adjust the transmitter to the helicopter using A, B, and C

GB
to remote control Remote control: batteries are empty, insert new ones.
Helicopter battery is empty. Charge the battery.
Remote control does not Batteries are empty or inserted wrongly.
work Too much light can disturb reception. Shade the room.
Helicopter reacts differently to There is another remote control nearby working on the same
commands frequency. Go somewhere else or talk to the other pilot.
WEEE Directive
After use: remove all batteries and dispose of them separately. Bring used electrical
appliances to the WEEE collection points. Dispose of remaining parts in the household
waste. Thank you for helping the environment!
Table of contents
Popular Toy manuals by other brands
marklin
marklin 7286 user guide

Hasbro
Hasbro Quasy Bake Cookerator 65774 How to use
Park Flite
Park Flite Mirage 2000 instruction manual
Phoenix Model
Phoenix Model Cap 232 instruction manual

Fisher-Price
Fisher-Price Laugh&Learn LEARNING BIRDBATH C6513 instructions

Fisher-Price
Fisher-Price 72723 instructions


