starlight Pro CAB-4024BL User manual

INSTRUCTION
MANUAL

1
Instructions of Steam Oven
Please refer to the real object
Tips: Please read the Instructions of this product carefully before using this product
and properly store it for future reference!
• rs
r.,,;
·
ass
· •
• • -.-.~~ ' • '
I I
' I

2
Contents
Product Structural Diagram............……………………………..................….……3
Notices for Use........................…………………………….................….….…...…5
Control Panel......……………………………………………….................…..….….6
DISPLAY PCB……....……………………………....…………..................…..…….7
Operating Instructions………………………………………..................…..….……8
Menu…..………………………………….…….………………......……..............…14
Other Functions……………..……………………………………..................….....16
Cleaning and maintenance………………………………………...................…...18
Accessories…………………………………..…………………….....................….18
Specification…………………….……………………………………................…..19
Guideline for Troubleshooting……………………………....................................19

3
Product Structural Diagram
1. Control Panel
2. Fork Assembly
3. Fork Handle
4. Grill
5. Bakeware
6. Water tank
7. Handle
8. Door
9. Water tray
10. Body
11. Door switch
12. Glove
Warning
1. Do not rinse the shell of the product in water because there are electric
components in the shell;
2. Do not allow water or other liquids to enter the product to avoid electric
shock;
A

4
3. This appliance can be used by children aged from 8 years and above and
Persons with reduced physical, sensory or mental capabilities or lack of
experience and knowledge if they have been given supervision or
instruction concerning use of the appliance in a safe way and understand
the hazards involved; Children shall not play with appliance. Cleaning and
user maintenance shall not be made by children without supervision.
4. Please check whether the voltage of the product matches the voltage of
local power supply before the product is connected to the power supply;
5. Do not use this product if the plug, power cord or the product is damaged;
6. If the power cord is damaged, it must be replaced by the manufacturer or
its professional service technicians in order to avoid the danger;
7. Please take care of the children to make sure they do not play this product;
8. Do not use wet hands to insert the plug or operation console of this product;
9. Do not place this product on or near the tablecloths, curtains and other
flammable materials;
10. A free space of at least 10cm shall be reserved on the back and two sides
and over the product when the product is placed. Do not place any item on
the product;
11. The product in use must be watched;
12. A high temperature steam or high temperature airflow will be released
when you open its door during or after the cooling operation of the product.
A safe distance shall be maintained when the door of the product is opened
to avoid the scalding yourself;
13. Do not stuff any foreign matter into door lock switch of the oven door;
14. The recommended temperature probe to this oven must be used;
15. Appliances will heat during the use. Please pay attention to the heating unit
in the oven.
16. During use the appliance becomes hot. Care should be taken to avoid
touching heating elements inside the oven.
17. The appliance and its accessible parts become hot during use. Care should
be taken to avoid touching heating elements. Children less than 8 years of
age shall be kept away unless continuously supervised.
18. Do not use harsh abrasive cleaners or sharp metal scrapers to clean the
oven door, since they can scratch the surface, which may result in
shattering of the glass.
19. Steam cleaner is not to be used.
20. WARNING: Ensure that the appliance is switched off before replacing the
lamp to avoid the possibility of electric shock.
21. The appliance must not be installed behind a decorative door in order to
avoid overheating.

5
Notices for Use
1. Please read the Instructions carefully before the use. This product is
designed specially for the home heating and cooling of food and it is not
suitable for other public and commercial purposes;
2. Do not touch at random the steam oven in use because it may have a very
high surface temperature; If it is needed to touch or move the oven, please
power off the product firstly and then use the insulated gloves;
3. The oven cannot be cleaned unless the power plug has been unplugged
and the oven is cooled down;
4. The steam oven shall be kept in a dry and flat place with plenty of space
around it and a distance of at least 10cm shall be kept away from the
surrounding objects when it is used;
5. An overloaded circuit may cause the steam oven to work abnormally when
the product used, and therefore, the steam oven shall use a single circuit;
6. Do not put the steam oven near any flammable object. It shall be kept far
away from window curtains, door curtains, wallpapers and similar items to
prevent a fire. It is not allowed to put any object on the steam oven when it
works;
7. Please clean the door glass of the oven with a soft and wet cloth rather
than any sharp cleaning tools to prevent the damage to the door glass;
8. The appliance cannot be operated under the circumstances that it connects
the external timer or the independent remote control system;
9. Please do not share an outlet with other high-power electrical devices to
avoid the fire caused by the overload of the circuit;
10. Please check whether all cooking utensils are suitable for this product
before it is used. It is recommended to hold the food with high-temperature
glass or ceramic containers; the capacity of holding the liquid food may not
exceed two-thirds of the container;
11. It is required to unplug the power plug from the outlet when the oven will
not be used for a long time to avoid any electric leakage or fire caused by
aging of insulated rubber lines;
12. The power plug shall be unplugged when changing the lights or cleaning
the cavity to avoid possible electric shock;
13. The water tank shall not be overfilled with water. Please use it correctly
since there is a marked maximum water level scale;
14. The food is not allowed to rely on the horizontal plane of door glass to
prevent the product from scalding yourself due to its inclination after the
end of cooking operation;
15. Please take out the water tank and allow the residual water of the product
to flow out automatically from the product and drain or pour away the water
from the bottom water holder after each use of the oven for cooking
operation;

6
16. It is forbidden to heat the food in a sealed container because the sealed
container is possible to explode, such as, sealed bottles, boxed milk, etc. It
is necessary to tear the package and drop the food into other vessels for
heating.;
17. Please put the oven on counter over 850 millimeter height.
Control Panel
Icon
Function Description
01
Oven lamp/child lock key:
1. Touch it once, oven lamp is ON; touch it
again, oven lamp is OFF;
2. Oven lamp will be ON for three minutes after
the work is over;
3. Oven lamp will be ON for three minutes
when the oven door is opened;
4. The key turns to child lock by holding it down
for three seconds; in the standby mode, hold
it down once, it is locked; press it again to
unlock.
02
Setting key: preset and time-delay
1. In any programs standby mode, press this key to
enter the preset mode
and preset icon is ON;
2.After any programs working end, Press this key to
enter the time-delay function sates and the time-
delay icon is ON;
03
BACK key: press this key to return to the previous
setting mode before start working, and press it again
to return again.
04
Selection key (Reverse function):
1.Select 9 DIY regular function modes and 10
specific working modes;
2.Adjust the time;
3.Adjust the temperature.;
05
ON/OFF key: press this key to activate all icons to
light up; In the activation or working status of the
(11,4
®
0
<
(!)
7
machine press this key to exit the running mode, and
the machine will return to the standby status.
06
Selection key (Forward function):
1.Select 9 DIY regular function modes and 10
specific working modes
in a forwarding sequence;
2.Adjust the time;
3. Adjust the temperature
07
ENTER key:
1.Start;
2.Pause;
3.Enter.
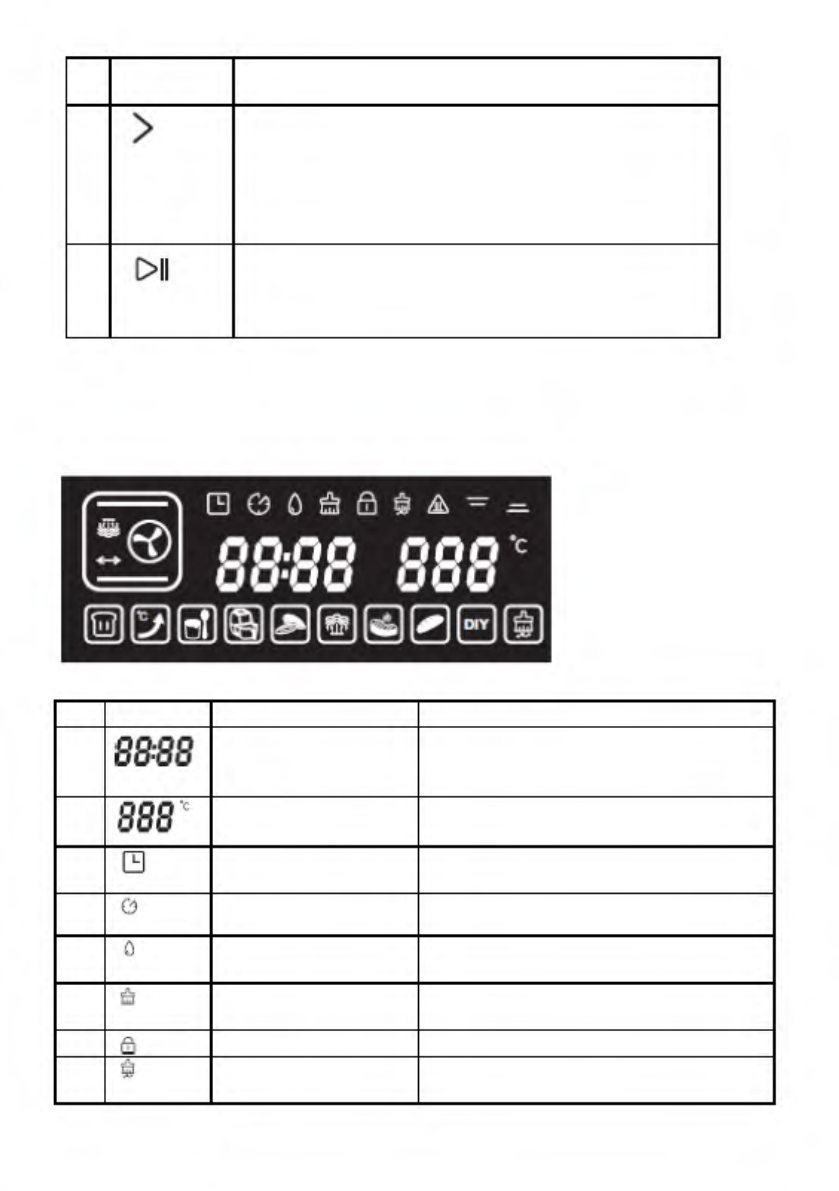
DISPLAY PCB
Function
Description
1.
Time
The first two LEDs are hours (0-
24)and the second two LEDs are
minutes (0-59)
2.
Temperature
Adjustable range: 30°C - 230 °C
3.
Preset function
prompt
4.
Working time
-delay prompt
5.
Water level icon
Icon is always ON for water; a
flashing light means a lack of water.
6.
Prompt for cleaning
of water tray
7.
Children lock
8.
Prompt for
descaling
>
1>
11
88:88
888
·c
(9
(;)
0
e
©
1!/4
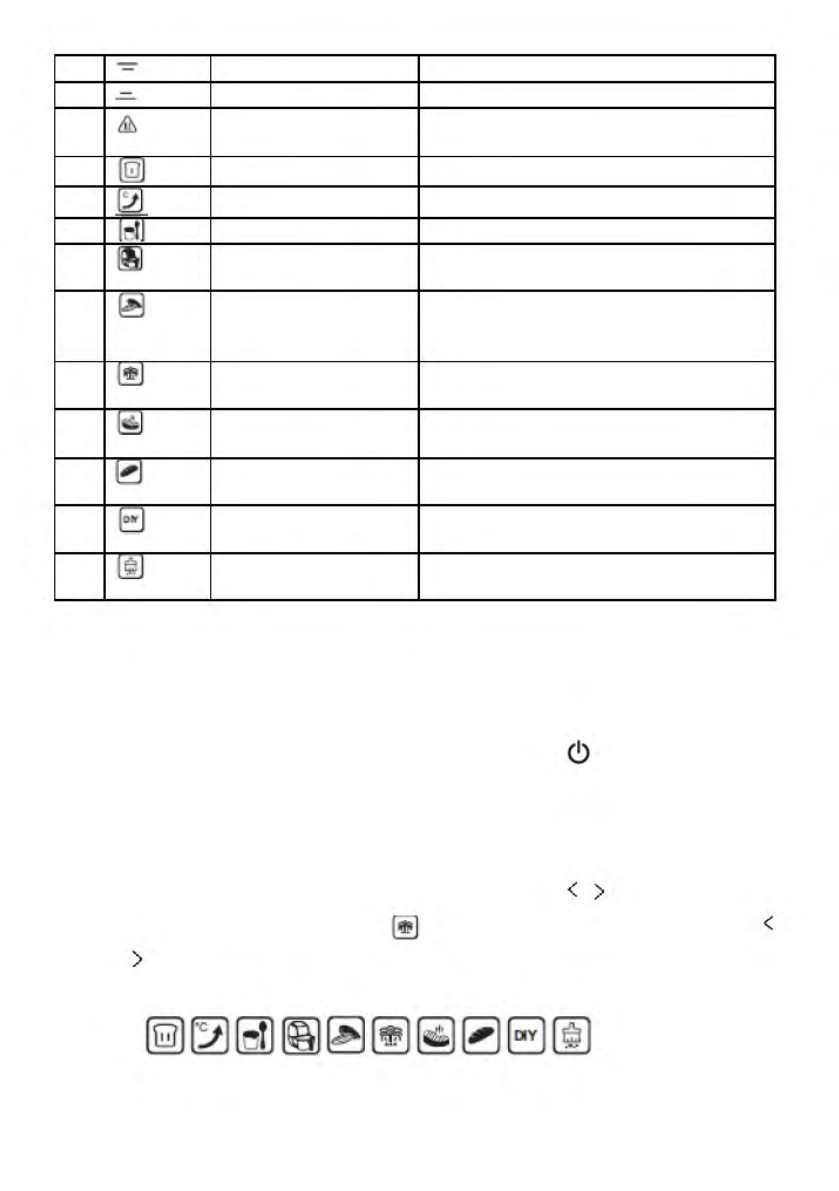
8
9.
Top heater pipe
10.
Bottom heater pipe
11.
Prompt for a high
temperature
12.
Ferment
13.
Preheat
14.
Making Yogurt
15.
Air Fryer
This menu contains 9 programs and
recipes
16.
Dry fruit
and bake nuts
This menu contains 9 programs and
recipes for different fruits and bake
different nuts
17.
steam menu
This menu contains 9 programs and
recipes for different food
18.
Roast meat
This menu contains 9 programs and
recipes for fish and different meat
19.
Bake
This menu contains 9 programs and
recipes for different bread cake
20.
DIY mode
Baking method and time shall be set
by customers themselves
21.
Descaling
Remind to clean the scale in the
evaporating heater (steam heater)
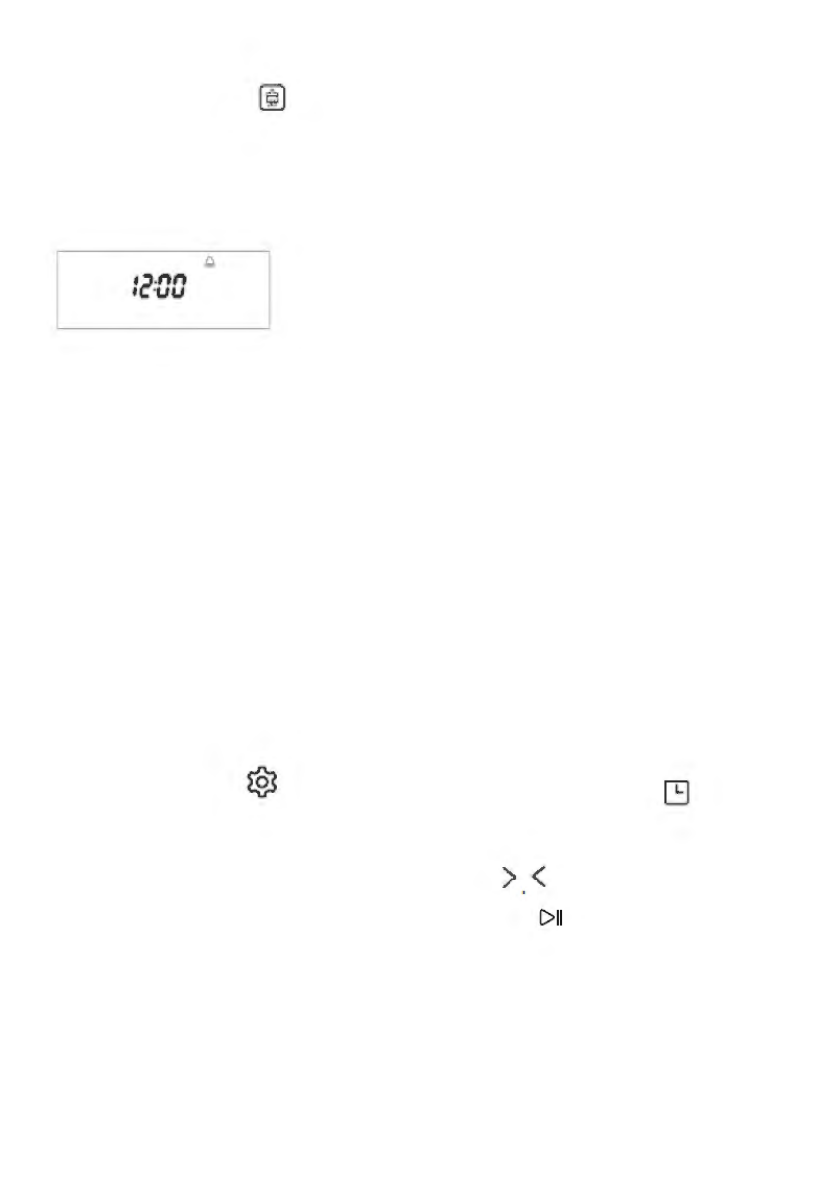
Operating Instructions
1. First Energization
The machine enters the full-screen standby interface after a “beep” sound
when it is energized firstly by touching power ON .
During the setting process, if there is no operation for continuous in three
minutes all current settings will be cancelled and the machine will return to
the standby interface for a standby status.
2. Menu Selection
In the standby status, press the selection key to enter the menu
selection mode. Default menu , steam function, press selection keys
to move left or right to select the menu mode.
-
-
a1
[
(i)
j
l~J
l
ell
Ill
~
~
~
~
e:J
~
< > <
>
9
1) Ferment (steam function, default temperature 40 adjustable among 30-50
time adjustable among 0-7 hours)
2) Preheat (temperature is not adjustable). It is set as 180°C. When the
temperature reaches 180°C, the work is over, the display shows “END” and the
buzzer will beep for 10 times to prompt that the preheating work is completed
and you can continue the baking operation;
3) Making Yogurt (default temperature 45°C that is not adjustable, and default
time of 8 hours that is not adjustable)
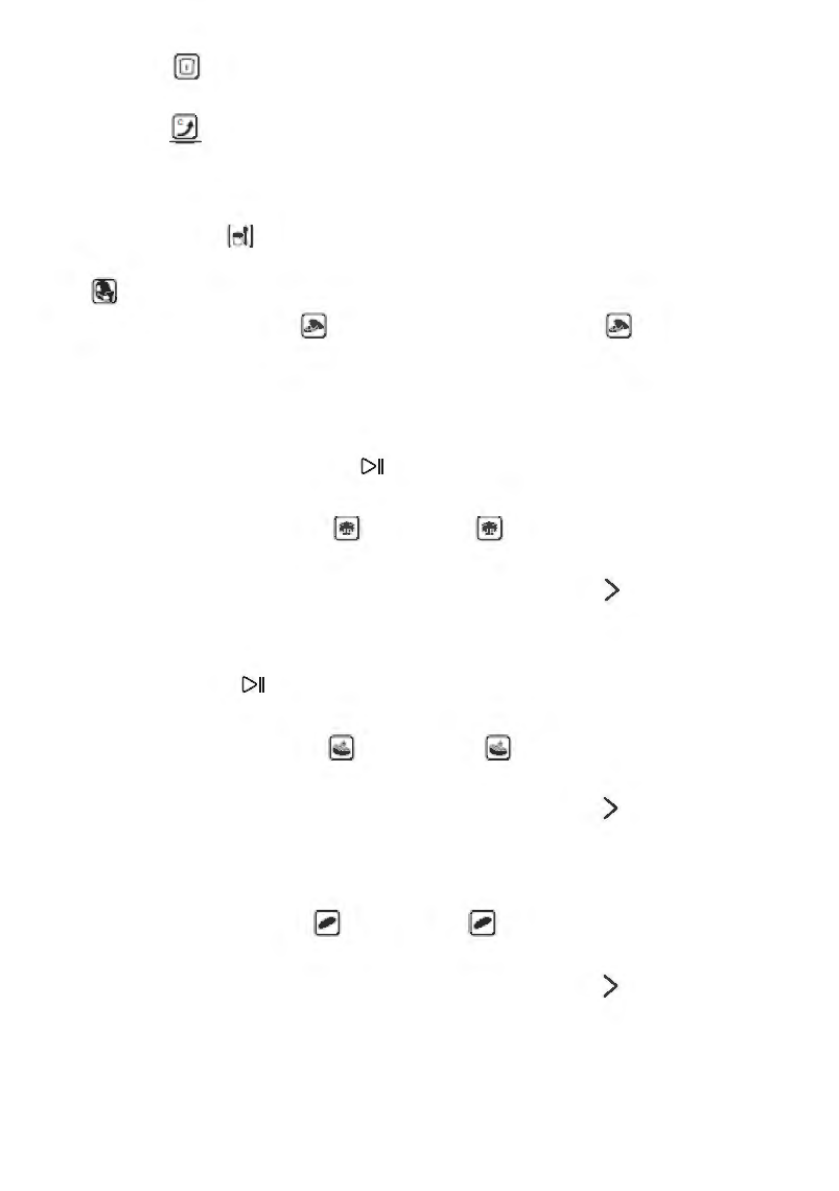
4) It is for Air fryer function and includes 9 programs.
5) Dry fruits or bake nuts . When this menu is selected icon is ON, and
the temperature display column will show “L-1”, and meanwhile, the time
display column will show the required working time. Press the selection key,
the temperature display column will show “L-2”, “L-3”, “L-4”, … “L-9”...“L-1”, and
repeat this circle, and the corresponding time column will show the required
time. Press the ENTER key , the machine begins to work and the time
begins to count down.
6) When this menu “Steam” is selected icon is ON . The temperature
display column will show “E-1”, and meanwhile, the time display column will
show the required working time. Press the selection key “ , the temperature
display column will show “E-1”, “E-2”, “E-3” … “E-9”.. “E-1”, and repeat this
circle, and the corresponding time column will show the required time. Press
the ENTER key , the machine begins to work and the time begins to count
down.
7) When the menu “Roast” , is selected icon is ON. The temperature
display column will show “F-1”, and meanwhile, the time display column will
show the required working time. Press the selection key , the temperature
display column will show “F-1”, “F-2”, “F-3” … “F-9”.. “F-1”, and repeat this
circle, and the corresponding time column will show the required time. Press
the ENTER key, the machine begins to work and the time begins to count down.
8) When the menu “Bake” , is selected icon is ON. The temperature
display column will show “H-1”, and meanwhile, the time display column will
show the required working time. Press the selection key , the temperature
display column will show “H-1”, “H-2”, “H-3” … “H-9”.. “H-1”, and repeat this
circle, and the corresponding time column will show the required time. Press
the ENTER key, the machine begins to work and the time begins to count down.
C>
II
~ ~
>
C>
II
>
>
10
9) When the menu , is selected, the “steam” function icon in upper left corner
is ON. The display column at the left side of the screen will show the
corresponding function icon, as shown in the following figure. There are 9 DIY
regular function modes. Each gear of the key corresponds to a function. The
key moves a gear, the function icon will automatically jump down to flash, and
the frame will not flash. After the desired function is selected, it can be
confirmed by press the ENTER key .
10) When the menu “Descaling” is selected, the , icon is ON to remove
the scale. (Working time of 50 minutes is not adjustable. The work process
cannot be paused.)
3. Setting of working hours and temperature
After the desired function is selected, it shall be confirmed by pressing the
ENTER key to enter the setting of working hours. The hour bit will flash. Press
the selection key to set the hour bit. After it is confirmed by pressing the ENTER
key, the minute bit will flash, and then press the selection key to set the minute
bit. After it is confirmed by pressing the ENTER key, the temperature bit will
flash, and then press the selection key to set the working temperature for “Top
heater pipe” and “Bottom heater pipe”. After the setting of working temperature
is finished, press the ENTER key to start working.
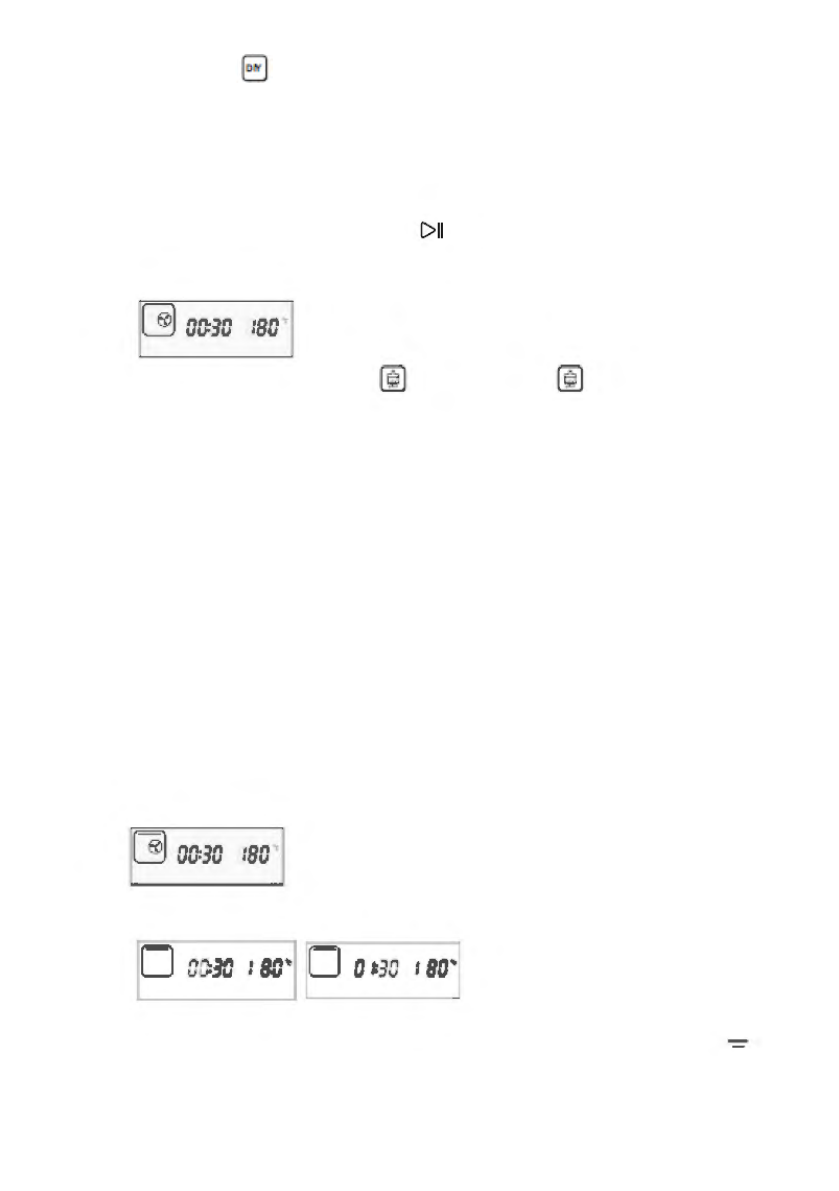
For example, the setting of “Top heater pipe” working mode”:
1. Select function
2. Setting of working hours
3. Setting of working hours and temperature, top heater pipe icon will
flash.
C>II
~
arno
:
sa
liJ
~
00:30
1
80
0
OC:
30
:
BC
..
, 0 0~
30
:
so
·
11
4. Start work
Attention: all functions shall be adjusted according to this adjustment order
except for the fixed time and temperature.
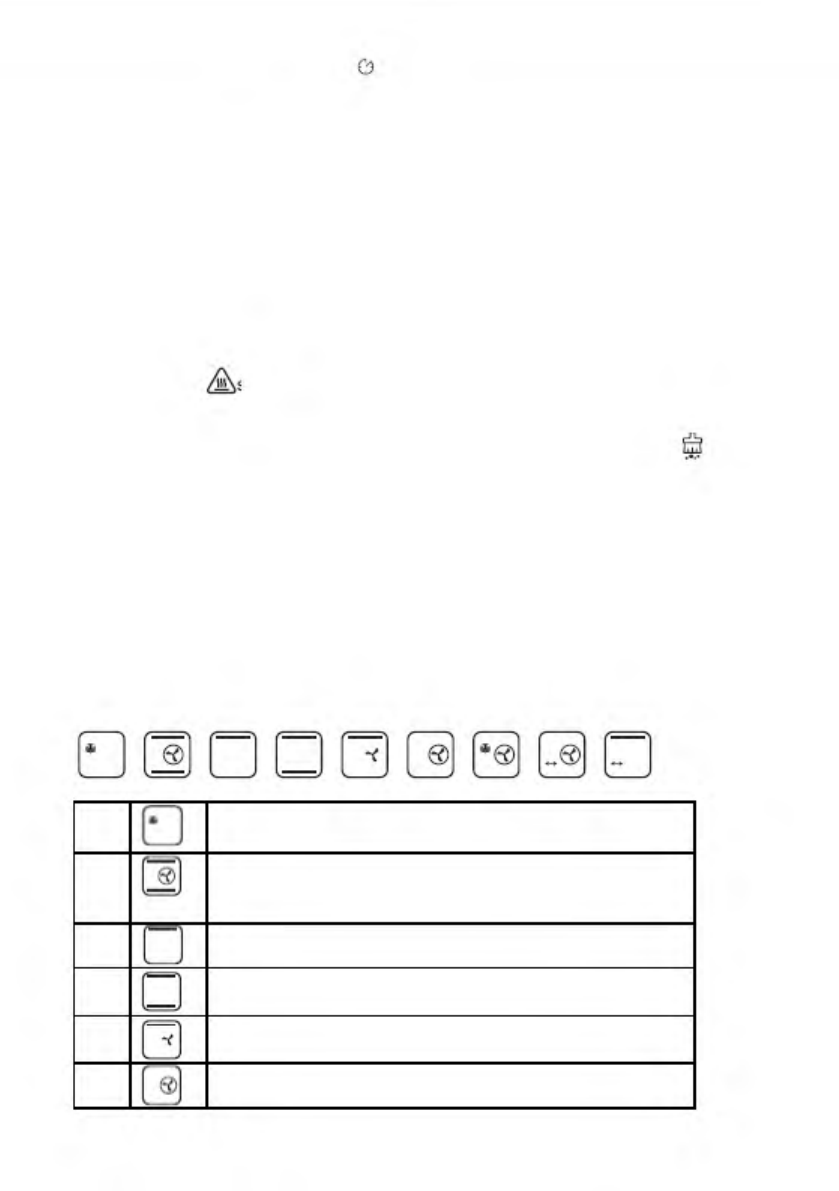
Note: water tank icon will be displayed when a steam-related function is
selected (such as, steam, high-temperature steam, ferment, unfreeze etc.), for
example:
5. During the work
1) Pause
During the working process, the machine will pause the work if the
ENTER key , is pressed, the working time will stop the
countdown, the display interface will stay in the working state
interface, and the time bit number will keep its original data to flash
and beat, which indicates that the machine is in a working status
of pause. Press the ENTER key again, the machine is started to
continue the work until the cooking is completed.
2) Add the time and adjust the temperature in the midway
During the cooking/Baking / Roasting process, if you want to adjust
the cooking time or temperature, the operation is as follows:
① Press Setting key until the “Time-delay” icon on the screen
is ON. At this time, the minute bit will flash. The minute bit can be
adjusted by pressing the selection key (setting of hour bit is not
available for delay time function).
② After the minute bit is adjusted, press the ENTER key to enter the
setting of temperature. If you do not need to adjust the temperature,
please press the ENTER key to directly start the work;
③After the temperature is adjusted, press the ENTER key to start the
work;
,_
IEJ
OQ30
100
'I
C>U
0
< >
12
④ The time-delay function is not available for the descaling
program. After it is completed, the system directly enters the END
interface.
6. End of Work
1) After the program process is ended, “END” appears on the display
screen, and the buzzer will beeps for 10 times, which indicates that the
cooking is completed. Afterwards, you can open the door to take out
the food or the system will automatically exit to the standby status five
minutes later.
2) After the program is over or in the standby state, for a pause or stop in
the midway, the display screen will show the high-temperature prompt
icon so long as the Oven cavity temperature is over 50℃ and The
centrifugal fan will delay the working time for 3 minutes.
3) After the program is completed with the steam function icon will
flash on the screen, which reminds the user to take out the water tank
and drain the water in the evaporator, and then pour away the residual
water from water holder. This icon will flash for 1 minute.
Note: removal of residual water and icon display are available only
when there are steam-related functions while evaporating heater is
working.
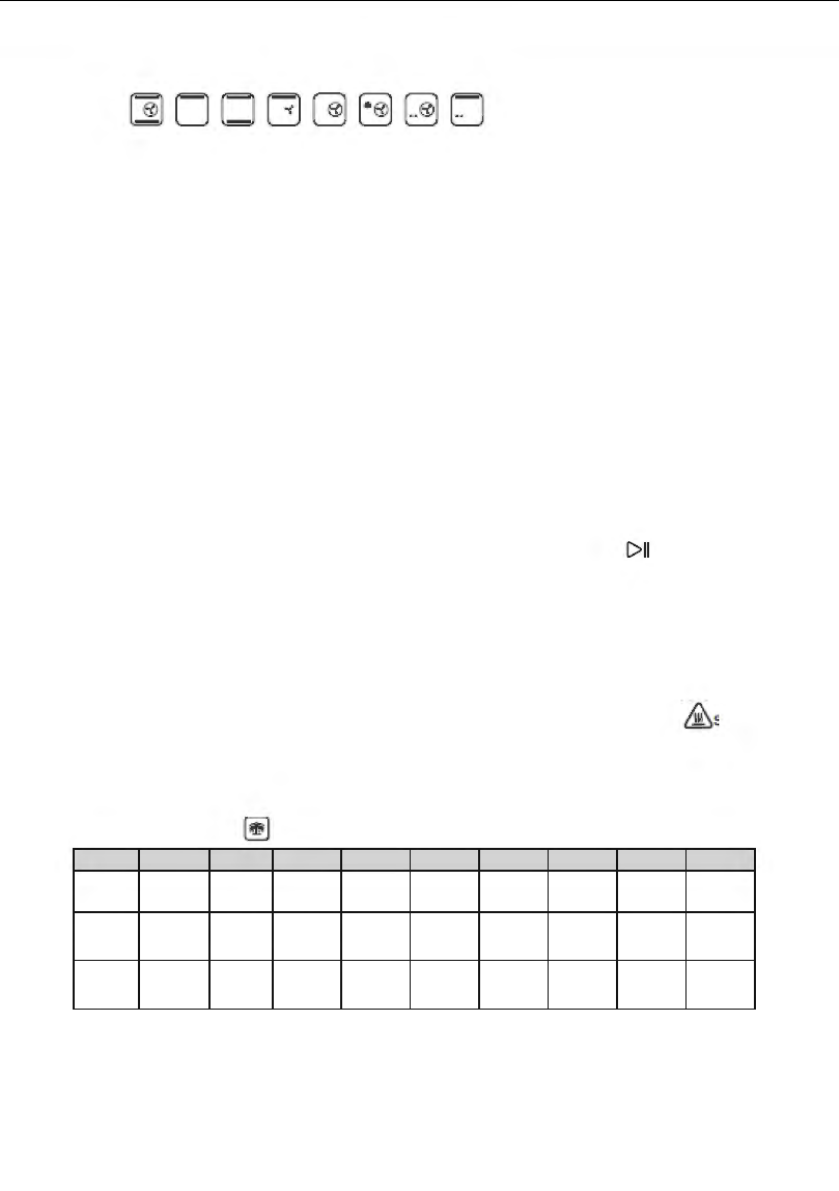
7. DIY function modes
1.
Steam
2.
Strengthening heating
(Back heater convection + top heater pipe + bottom
heater pipe)
3.
Top Heater pipe
4.
Top/bottom heater pipe
5.
Hot air convection (top Heater pipe + rear fan)
6.
Back heater convection (Back heating + rear fan)
[)
[]]
00
G
~~
~ O
u
[])
I l
D
G
I
Ell
[

13
7.
High-temperature steaming (steam + Back heater
convection)
8.
Back heater convection + turning fork
9.
Top Heater pipe + turning fork
1) DIY Steam
Adjustable temperature range: 50-110°C, with each adjusting scale of 5°C.
In the standby status, open the oven door, take out the water tank to fill the
water to its maximum scale; put in the water tank and food and then close
the oven door.
Press the selection key “ ” to enter the steam mode. At this time, the
steam icon will flash, and the indicator light of water
tank/time/temperature is ON. Press the ENTER key, hour icon will shine.
Press the SELECTION key to select the time as required (default value is
0, ranging from 0-6). After it is selected, press the ENTER key to enter the
minute selection mode and then, the minute icon will flash. Press the
SELECTION key to select the required time (default value is 30, ranging
from 0-59). After it is selected, press the ENTER key to enter the
temperature selection mode and then, the temperature icon will flash.
Press the SELECTION key to select the required temperature (default
value is 100, ranging from 50-110). After the selection, press the ENTER
key.
If the water tank is not put in or runs out of water, the machine will give an
alarm (icon flashing and audible alarm); if there is a water shortage
alarm, please open the oven door to add water and then close the door to
automatically start the work.
After the steam function is completed, the user shall be prompted to drain
the residual water from the water holder and .icon will flash on the
screen to remind the user to drain the residual water from the water holder.
After the end of the cooking, the buzzer will beep for 10 times and then
stop. Afterwards, user can open the door to take out the food. If there is no
operation within five minutes, the system will automatically return to the
standby interface.
~
[
-aj
0
[J
14
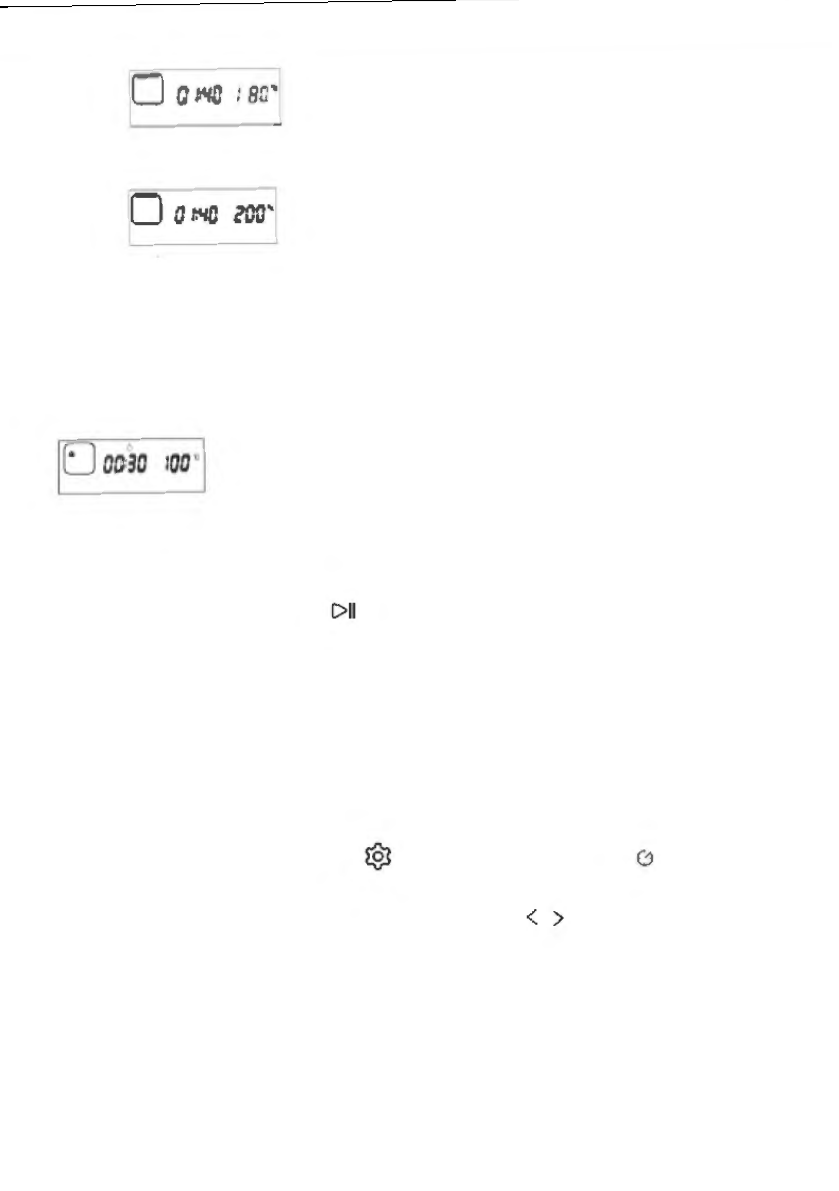
2) DIY Other Roast Modes
Adjustable temperature range: 100-230. The default working temperature
is 180 and the time is adjustable. Open the oven door in the standby state,
put in the food and then close the door.
Press the Selection key to enter the roast mode. The icon of this mode will
flash, and the indicator light of time/temperature is ON. Press the ENTER
key, the “hour” icon will flash. Press the Selection key to select the required
time (default value is 0, ranging from 0-3). After it is selected, press the
ENTER key to enter the minute selection mode and then, the minute icon
will flash. Press the SELECTION key to select the required time default
value is 30, ranging from 0-59). After it is selected, press the ENTER key
to enter the temperature selection mode and then, the temperature icon will
flash. Press the SELECTION key to select the required temperature
(default value is 180, ranging from
100-230). After the selection, press the ENTER key, the indicator light of
Bottom heating pipe is ON and the temperature icon will flash. Press the
SELECTION key to select the required temperature (default value is 180,
ranging from 100-230). After pressing the ENTER key , the machine
starts to work.
After the end of the cooking, the buzzer will beep for 10 times and then
stop. Afterwards, user can open the door to directly take out the food. If
there is no operation within five minutes, the system will automatically
return to the standby interface.
After the cooking is completed, a high-temperature indication will be
displayed as long as the temperature of cavity exceeds 50℃.
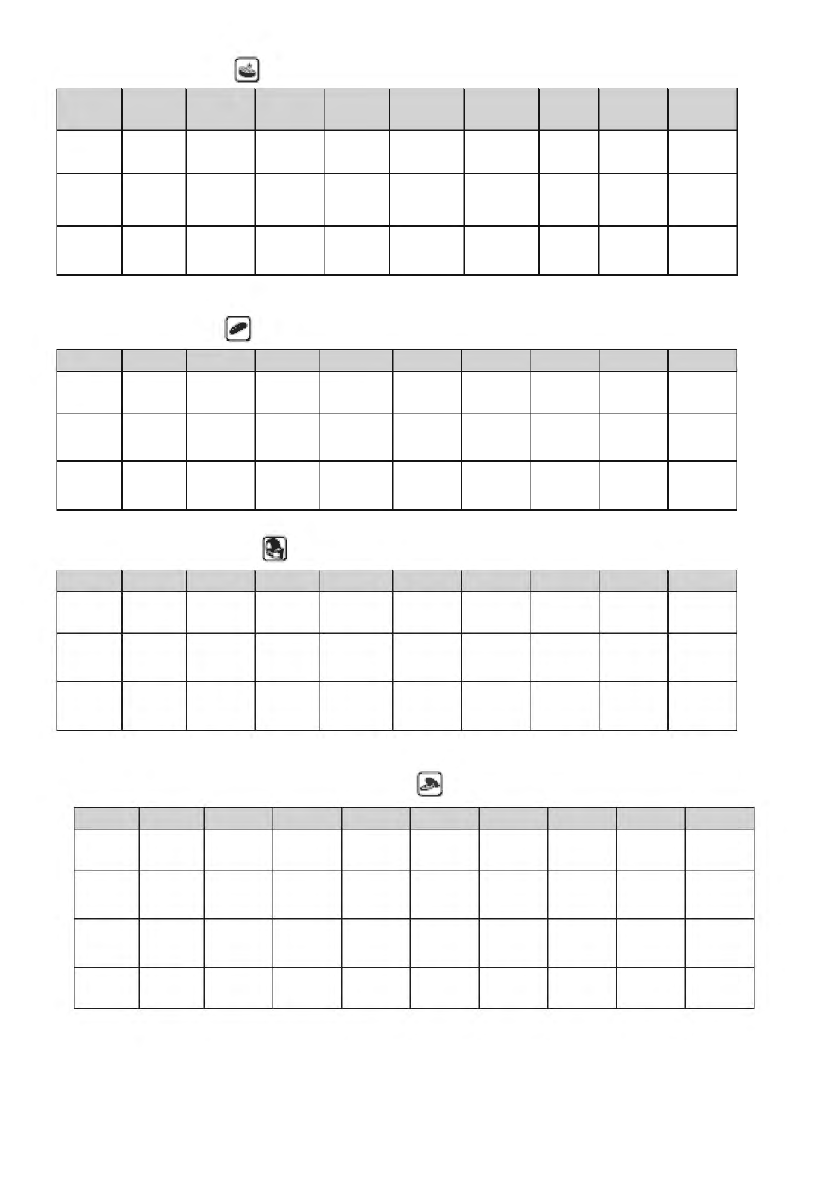
Menu
1. “Steam” menu
Code
E-1
E-2
E-3
E-4
E-5
E-6
E-7
E-8
E-9
Food
Style
Steam
Vegetable
Steam
Rice
Steam
Fish
Steam
Shrimp
Steam
Crab
Steam
Eggs
Steam
Chicken
Steam
Papaya
Steam
Potatoes
Heating
time
(minute)
16
50
20
15
30
16
30
35
30
Heating
temperatur
e (°C)
100
100
100
100
100
100
100
100
100
1>
11
15
2. “Roast” menu
Code
F-1
F-2
F-3
F-4
F-5
F-6
F-7
F-8
F-9
Food
Style
Roast
Chicken
Roast
Steak
Roast
Muttons
Roast
Salmon
Roast
Chicken legs
Roast
Saury
Roast
Chips
Roast
Shrimp
Roast
Sausages
Heating
time
(minute)
35
12
35
20
26
20
12
15
10
Heating
temperatur
e (°C)
230
230
200
220
200
220
180
180
200
3. “Bake” menu
Code
H-1
H-2
H-3
H-4
H-5
H-6
H-7
H-8
H-9
Food
Style
Baguette
bread
Wheat
bread
Pizza
Yogurt
cheese cake
Chiffon
cake
Chocolate
cake
Cookies
Puff
Egg tart
Heating
time
(minute )
16
20
22
60
50
50
14
32
22
Heating
temperatur
e (°C)
180
180
180
150
150
150
180
180
180
4. “Air Fryer” menu
Code
P-1
P-2
P-3
P-4
P-5
P-6
P-7
P-8
P-9
Food
Style
Pork
Chops
Chicken
Wings
Chicken
Kabobs
Onion
Meatballs
Pita Chips
Chips
Croutons
Mini Pizza
Bacon
Heating
time
(minute )
20
23
18
18
7
12
14
18
15
Heating
temperatur
e (°C)
210
200
180
210
220
180
140
180
200
5. “Dry Fruits and bake Nuts” menu
Code
L-1
L-2
L-3
L-4
L-5
L-6
L-7
L-8
L-9
Food
Style
Dry
Banana
Dry
Apple
Dry
Raisins
Dry
Kiwi
Dry
lemon
Almonds
Walnut
Macadamia
Nut
Cashew
Nut
Heating
time
(minute)
360
360
420
360
360
10
12
12
12
Heating
temperatur
e (°C)
65
65
90
65
65
140
160
160
160
Working
mode
back
Heater
back
Heater
back
Heater
back
Heater
back
Heater
Top/bottom
Heater pipe
Top/bottom
Heater Pipe
Top/bottom
Heater Pipe
Top/bottom
Heater Pipe
------
16
Other Functions
■ Descaling function
Default time is 50 minutes, which is not adjustable
1. When the accumulated working time of heating pipe of evaporating heater
reaches 100 hours, the system will remind the user to remove the scale of
evaporating heater (user can also start the descaling function automatically).
At this moment, the descaling icon on the screen will flash.
2. The descaling mixture (water and clearing media) is prepared according to the
mixing ratio of 1:8 and then put into the water tank after an even mixing. The
dosage of descaling mixture in the water tank may not be lower than the
descaling scale of water tank.
3. After the descaling mixture or agent is added into the water tank and the oven
door is closed, press the SELECTION key to select the descaling function and
then press the ENTER key to start the descaling work.
4. The countdown mode is used for the product. When there are still 20 minutes,
the user is reminded to pull out the water tank to drain the descaling agent and
replace the clean water. After the water tank is inserted, the machine begins to
work. When there are still 10 minutes, the user is reminded again to pull out the
water tank to replace the clean water. After the water tank is inserted, the
machine begins to work. After the completion, the user will be prompted.
■ Setting Key function
Presetting time: During any program selection or standby mode, Press
Setting Key , it will start preset time setting, and Icon is on, the
Hour LED flashing (Preset time is 0-24 hours adjustable), after hour
confirmed, the Minute LED flashing, after minute confirmed, Interface
return to program selection mode, press key select program, after
Program selected, press the ENTER key to start this selected
program.
Presetting:
After presetting time starting, the preseted time interface and selected
program interface will display Alternately every 5 seconds;
,:,.
nn
•c·
uu
>.<
C>II
17
If the Setting function shall be ended, user can directly press the POWER
key to exit from the setting working mode and the system will automatically
return to the standby interface.
■ Lighting function
After the key is activated, the illuminating light will be ON for 3 minutes by
pressing the key Lighting/Child Lock, and it will go out by pressing the key
again.
■ Children Lock
After entering the working state, children lock icon is ON by holding down
the key Lighting/ Children Lock, and all keys or buttons are locked. They
cannot be unlocked unless user holds down the key Lighting/Children Lock
again.
■ Water level detection protection
When the working state of steam mode is started, if water shortage is
detected, the machine will stop the work and the buzzer will give an alarm,
and then all keys or buttons are invalid. The machine resumes the work
after the water is added.
■ Open/close protection of oven door
In the door-opening state, the startup becomes unavailable; during the
working process, the machine suspends the work if user opens the oven
door. The machine automatically resumes the work after the oven door is
closed.
ENVIRONMENT FRIENDLY DISPOSAL
You can help protect the environment!
Please remember to respect the local regulations: hand in the
non-working electrical equipments to an appropriate waste disposal center.
The packaging material is recyclable. Dispose of the packaging in an
environmentally friendly manner and make it available for the recyclable
material collection-service.
0
-

18
Cleaning and maintenance
1. Please turn off the steam oven and unplug the power cord from the outlet before
cleaning the cavity;
2. Do not clean the bakeware surface with metal tool or grinding material because
there is a non-sticky coating on the surface.
3. Please keep the cavity clean frequently. When good or grease is splashed onto
the inner wall, it can be wiped with a damp cloth rather than any hard substance.
If the inner wall of the oven is dirty, user can clean it with soft lotion rather than
rough and abrasive lotion;
4. It is recommended to use the pure water or distilled water for the cooking
purpose of the steam oven. If the tap water is used for a long time, there will be
scale on the inner walls of the cavity;
5. The water tank shall be checked regularly. If necessary, the water tank shall be
taken out horizontally. The water tank shall be cleaned and wiped gently with a
soft cloth. After the wiping or cleaning of the inner wall, the water tank shall be
put back to its original place.
6. After the cooking is completed, the residual water in the water holder shall be
removed.
7. The sealing surface of the oven door shall be cleaned frequently and wiped
with a soft dry cloth.
8. If the steam oven will not be used for a long time, the power plug shall be
unplugged and the cavity shall be cleaned and then the steam oven shall be
placed in a dry environment without corrosive gas.
9. The product must be repaired by a professional maintenance staff in case of
any failure. Do not disassemble and overhaul it by yourself.
10. Do not clean the glass of oven door with a rough detergent or sharp metal
scraper because it may lead to the smashing of the glass.
11. The power cord shall be unplugged when cleaning the cavity or replacing the
bulb.
12. Do not use the steam cleaner.
Accessories
NO.
Part Name
Qty
Grill
Bakeware
Fork Handle (For 40L only)
1
Fork Assembly (for 40L only)
1
Glove or Handle
Instruction manual
Table of contents
Languages:
Popular Oven manuals by other brands


Hotpoint
Hotpoint DQ891 Instructions for installation and use

AEG
AEG COMPETENCE D5701-4 Installation and operating instructions

Bosch
Bosch HBG73R550B instruction manual

Häfele
Häfele HO-2K65A instruction manual

Gaggenau
Gaggenau EB 240 Operating and installation instructions

Ninja
Ninja FOODI DT200UK instructions


