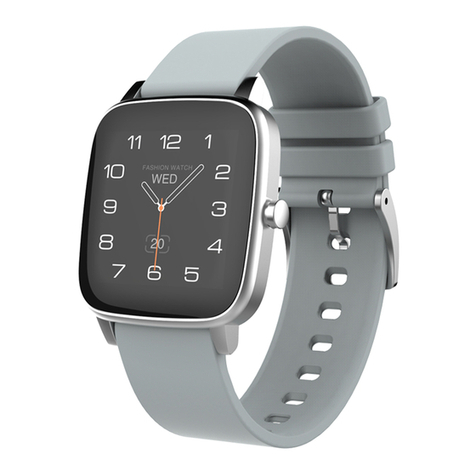
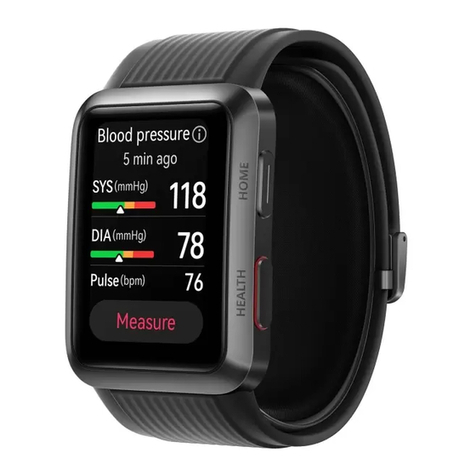
Starvox L8STAR Operating manual

SmartWatches
QuickUseGuide
Pleasereadthismanualcarefullybeforeuseforproperinstallationandquickuse.
Duetoproductupgrades,somefunctionsmaybeadjusted,pleaseprevailinkind.
TheProductFeatures
SportsMode
History
Compass
Environment
Stopwatch
HeartRate
Calendar
Alarm
Settings
Bluetooth
一、 WatchIntroduction
1,TheKeyInstructions

●Powerkey:longpress2~3secondstostart/turnoff,shortpresstooffthescreen.
●Functionkeys:longpresstoincreaseandkeepthescreenbrightness,longpressagaintoreducethe
brightness.Intheintercominterface.
2,TheScreenDisplay
●Maininterface:interfaceiconsarehumidity,temperature,clock,step,systemdate,batterylogo,the
followingfortheelevation,pressure.
●MainMenu:StandbySlidethescreentothelefttoenterthemainmenu(thedefaultisthefirst
intercom),slideupanddownthescreentoswitchtoothermainmenu,slidethescreentotherightto
exit.
●Functionmenu:Inthemainmenuinterface,clickonthescreentoenterthecorrespondingfunction
menu,slidethescreentotherighttoexit.
二、 OperatingInstructions
1,WatchPre‐charge
Asshownintheletterwithathimbleofthechargingbasefastenedtothebackofthewatch,notethe
positioningdirectionofthethimble,thenconnectthechargingcable,theotherendconnectedtothe
chargerorcomputerUSBinterface,startcharging,Thebatteryforaboutanhourcanbefilled.
Note:Duringcharging,thechargingiconwillscrolluntilitstopsfull.
1,WatchBoot

Thewatchtogetoutdoorsoragoodplacewherethesignalisgood,longpressthebootbuttonfor2to3
seconds,thebootscreenappears,intothebootstate
三、 TheMenuFunction
1,Standby Interface Operation
●Long press the screen appears clock dial,there are several different styles of dials
to choose from
●Long press the function key can improve and maintain the screen brightness, long press
again can reduce the brightness, And within the specified time without the operation into
the off screen
●Long press the power key, turn off the watch.
●Swipe the screen to the left to enter the main menu interface.
●Boot state, quickly flip the arm (wrist), you can light up the screen.
2,TheMenuInterfaceOperation
●Main menu interface, slide up and down the screen, you can switch to other main menu.
●Select a main menu, click on the screen, you can enter the appropriate application
interface.
●Press and hold the function key to increase and maintain the screen brightness
●Slide the screen to the right to return to the standby screen

3,Sportinterface
●Slide the main menu up and down and click on the sport icon to enter the preparation
interface
●sport state, the data will change, at any time to record the current movement of the
value, including the center of the screen heart rate data, movement speed, consumption
of calories, the lower movement distance and movement time.
●Long press the function key to improve and maintain the screen brightness, press again
to reduce the brightness and can enter the state.
●Slide the screen to the right to return to the standby screen.
Note: Heart rate data need to open heart rate function to show.
4,TheSportDataInterface
● Slide the main menu up and down and click the sport data icon to enter the data
classification interface
●Click a classification option to enter the data list interface.
●Click on a time record to view details
●The movement data is displayed on the screen in the order of the time list.
●Slide the screen to the right to return to the standby screen.
5,CompassInterface

●
S
in
t
●
W
di
r
in
d
An
t
●
S
6,En
v
●
S
ap
p
●
A
te
m
●
S
7,Sto
S
lide the m
t
erface.
W
hen the ap
p
r
ection of t
d
icator scr
e
t
arctic dir
S
lide the s
v
ironmentDi
s
S
lide the m
a
p
lication i
A
pplication
m
perature,
S
lide the s
pwatchfunc
t
ain menu u
p
p
lication
i
he arrow, d
e
en displa
y
ection
creen to t
h
s
play
a
in menu u
p
nterface.
interface
humidity,
a
creen to t
h
t
ion
p
and down
i
nterface a
p
raw 8 shape
y
ed, N lett
e
h
e right t
o
and down
a
shows fou
r
a
ltitude a
n
h
e right t
o
and click
ppears to
c
s in the ai
r
e
r on behal
f
o
return t
o
a
nd click o
n
r
current
e
n
d pressur
e
o
return t
o
the compas
c
alibrate t
r
, when cal
i
f
of the No
r
o
the stand
n
the envi
r
e
nvironmen
t
e
.
o
the stand
s icon to
e
he prompt
i
bration is
r
th Pole, S
b
y screen.
r
onment dis
p
t
al data, f
b
y screen.
e
nter the
a
i
con, acco
r
completed,
letter re
p
p
lay icon
t
f
rom top to
a
pplicatio
n
r
ding to th
e
the compas
s
p
resents th
e
t
o enter th
e
bottom ar
e
n
e
s
e
e
e

●Slide the main menu up and down and click the stopwatch icon to enter the application
interface.
●Select the timer mode, click on the middle digital area, you can slide up and down the
screen to modify the hour: minute: second number, set the timer level, then press the Start
to turn on the countdown, click the End to turn off the countdown
●Stopwatch mode, click Start to open the timer, click the End off the timer.
●Slide the screen to the right to return to the standby screen.
8,HeartRateFunction
●Slide the main menu up and down and click on the heart rate icon to enter the application
interface
●Into the application interface, the watch attached to the wrist, and then press the
function key to start up the heart rate, the interface appears the current heart rate
data. short press the function key again to close.
●The top of the screen shows heart rate, the bottom is the blood pressure (telescopic
pressure and diastolic blood pressure)
●Slide the screen to the right to return to the standby screen.
Note: The watch indicator (inside the back of the watch) senses a reflective object, and
the heart rate data appears. To restore the heart rate data to zero, you need to keep
the watch high and the data sampling time takes 15 seconds.
9,CalendarFunction

●Slide the main menu up and down and click on the calendar icon to enter the application
interface.
●The application interface displays the date of the day, sliding the screen up and down
to switch to another date.
●Click the calendar icon at the bottom of the screen to view the calendar and browse up
and down.
●Slide the screen to the right to return to the standby screen.
10,AlarmFunction
●Slide the main menu up and down and click the alarm icon to enter the application
interface.
●In application interface click the circle symbol on the right of the switch button at
the bottom of the screen to turn on the alarm. Click the time zone to enter the setting
interface. By clicking and sliding the screen, you can set the alarm time, the number of
repetitions and the alarm tone.
●Click the bar bar on the left of the switch button at the bottom of the screen to turn
off the alarm
●Slide the screen to the right to return to the standby screen.
11,SettingsMenu

●Slide the main menu down and click the Settings icon to enter the application interface
●Application interface shows several settings options, from top to bottom are Bluetooth,
time, volume, display, click to modify and save.
●Under the option item, slide down the screen also can restore the factory settings and
view the watch information
●Slide the screen to the right to return to the standby screen.
12,BluetoothFunction
●In the settings menu, select the Bluetooth settings option, enter the Bluetooth settings
interface, open the Bluetooth and enter the menu switch settings option.
●Select your need and tick in the dial, call records, phone book, SMS and music check
box , these function will display to the main menu list.
●Open the Bluetooth of the smart phone and search to the watch, in the pop-up dialog box
click on the consent (synchronous phone book, synchronous SMS), pairing success, select
the appropriate menu in the main menu, enter the function interface.

●Select the dial menu, enter the picture 1 interface, enter the number and press the dial
key, you can dial the call, while the watch can also answer the call, during the call,
slide up and down the screen to adjust the call volume, press the hang key to refuse /
end the call. Slide the screen back to the right.
●Select the callog, display the smart phone-side callogs , the phone has recently dialed,
received, missed calls are synchronized display in the watch, according to the watch
storage space will automatically delete the earliest records. Slide the screen back to
the right.
●Select the phone book, display the smart phone-side contacts, up to 250. Click the contact
to view the details or dial the call. Slide the screen back to the right.
●Select the music, watch synchronize the smart phone-side music, click the middle button
to play / pause, left and right arrow keys to switch songs, up and down arrow keys to adjust
the volume. Slide the screen back to the right。
●Check the message, the main menu will also display the SMS icon, select it, the list
shows the smart phone side of the received messages, up to 50. Slide the screen back to
the right
Note: open the Bluetooth, the same time the smartphone to open the Bluetooth and actively
search the watch to match, and agreed to synchronize the phone book and SMS, pairing success,
you can synchronize the smart phone on the phone book, call records, text messages,music
and call dialing function
四、 UseandMaintenance
This watch is a high-end technology product, please be careful to use. The following
suggestions will enable users to better use and maintain this watch.
Place the watch parts out of the reach of children.
Keep the watch dry, rain, moisture and various liquids or moisture that may contain
corrosion of minerals.

Do not place the watch in a dusty, dirty place or use the watch
Do not place the watch in high temperature, high temperature may shorten the life
of electronic devices, destroy the battery, and make some plastic parts deformation or melting.
Do not place the watch in a low temperature area. When the watch from low temperature
to high temperature, the internal may produce moisture, may cause damage to the circuit board.
Do not attempt to disassemble the watch, improper handling of non-professionals may
cause damage to the device.
Do not throw, hit the watch, rude use may damage the internal motherboard.
Do not use irritating chemicals, detergents, or corrosive cleaners to clean your watch.
To clean the watch, gently wipe with a rag dipped in mild soapy water.
Do not apply paint to watch. Pigments may interfere with the active parts of the device
and affect normal operation
Use of qualified replacement straps, unauthorized straps or other parts that may
damage the watch.
When using the watch, take the volume, the screen backlight time shorter and other
energy-saving way to help extend the watch's standby time.
Do not touch the metal parts (except the specially configured charger interface and
data cable interface) with the mobile phone charger interface to avoid short circuit.
Threepacksofvouchers
Username Contact
number
Zipcode
Useraddress
Hostnumber Attachment
model
Hostbody
number
Accessories
factoryserial
number
Intothe
networklogo
Commodity
origin
Enterthe
networkcard
number
Salesunit Contact
number
Zipcode
Salesaddress
Salesdate Invoicenumber
Note:Thiscardisauthorizedtoselltheunitafterthesealtotakeeffect
Maintenancerecords
DateofrepairFaultdescriptionRepairprocessingRepairmanRepairunitseal

Note:maintenancebytheauthorizedmaintenanceunit,fillinthemaintenancerecordsandstamped,
otherwisethemaintenancerecordsareinvalid.
Warranty
Undernormaluse,theproductwarrantyisaround1year.Whichbatteryanddatalinewarrantyperiod
of3months.Damagecausedbyhumancausesisnotwarranted.Includingbutnotlimitedtowear,dirt,
fallorcrush,waterandsoon.
Damagecausedbynaturaldisasterssuchasfires,floods,lightningstrikesandsoonisnotcoveredbythe
warranty
FCCWarning
ThisdevicecomplieswithPart15oftheFCCRules.Operationissubjecttothefollowingtwoconditions:
(1)Thisdevicemaynotcauseharmfulinterference,and(2)thisdevicemustacceptanyinterference
received,includinginterferencethatmaycauseundesiredoperation.
NOTE1:Anychangesormodificationstothisunitnotexpresslyapprovedbythepartyresponsiblefor
compliancecouldvoidtheuser'sauthoritytooperatetheequipment.

