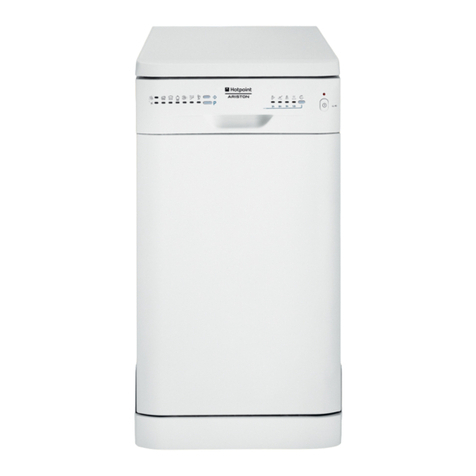
Statesman Appliances BDW60 User manual

Please read these instructions carefully before use and retain for future reference.
Before switching on your appliance – Always check for any damage that may have been caused in transit.
Instruction Manual
BDW60/12
INTEGRATED DISH WASHER

2
CONTENTS
Important Safety Instructions ........................................3
Specication..................................................................4
Appliance Overview.......................................................4
Installation .....................................................................5
Operating Instructions............................................. 6-11
Cleaning and Maintenance..........................................11
Fuse Replacement ......................................................13
Trouble Shooting Guide......................................... 13-15

3
IMPORTANT SAFETY INSTRUCTIONS
Read and follow all of the instructions even if you feel you are familiar with the product,
and nd a place to keep this manual handy for future reference.
Important: This product is intended for domestic indoor household use only.
When using electrical appliances, basic safety precautions should always be followed:
1. Onlyaqualiedelectriciancaninstall,connectorrepairthisappliance.Donotinstalloroperate
the appliance if it has been damaged.
2. Ensure the appliance is installed according to the installation instructions provided.
3. Donotchangethespecicationsormodifythisappliance.
4. Check the voltage of the appliance matches the household voltage, which is located on the
rating label.
5. All appliances containing any electrical components must be earthed.
6. The appliance is not intended to be operated by means of an external timer or remote control.
7. This appliance is not designed to be used by people (including children) with reduced physical,
sensorial or mental capacity, or who lack experience or knowledge about it, unless they have
had supervision or instructions on how to use the appliance by someone who is responsible for
their safety.
8. Cleaning and user maintenance shall not be made by children.
9. Children shall not play with the appliance.
10.Donotleanorsitorplaceaheavyloadontheopendoorasthismaycausetheappliance
to overturn.
11. When the appliance is being installed ensure that the appliance does not stand or trap the
electrical cable.
12. Only use detergents and rinse aids recommended for dishwashers.
13. Only put items into the appliance that are dishwasher safe.
14. Place knives and other sharp-ended objects into the cutlery tray with the blade down.
15. It is not recommended to open the door of the appliance whilst in use as the hot water may
owout.
16.Itisnotrecommendedtooverllyourapplianceasitmaydamagetheappliance.
17. The appliance plug must be accessible after installation.
18. Use of an extension cord is not recommended with this product.
19. When disconnecting from the electricity supply, pull the plug, not the cord.
WARNING: The appliance is heavy and care is needed when unpacking and moving it. Get extra
help and only hold the appliance by the casing – never hold by the lid or the trim.
WARNING: Risk of child entrapment.
Beforedisposaloftheoldappliance,makesurethatanylockingmechanismshavebeenbrokeno,
doors have been removed but drawers have been left in so that children cannot easily climb inside.
Also remove the plug so the appliance is unusable.

4
SPECIFICATION
Capacity 12 Place Settings
Height 820mm - 870mm
Width 596mm
Depth 550mm
Net Weight 38kg
Power Input 220-240V, 50Hz
Total Power 2200W
Heating Power 2000W
Pump Power 100W
DrainPumpPower 30W
Water Supply Pressure 0.03 MPa (0,3 bar)-1MPa (10bar)
Current 10A
APPLIANCE OVERVIEW
1. Upper basket with racks
2. Upper spray arm
3. Lower basket
4. Lower spray arm
5. Filters
6. Rating plate
7. Control panel
8. Detergentandrinse-aiddispenser
9. Cutlery basket
10. Salt dispenser
11. Upper basket track latch
12. Active drying unit: This system
provides better drying performance
for your dishes.

5
Location
• Whendecidingwheretoplaceyourappliance,ensuretochooseaplacewhereyoucan
easily load and unload the dishes.
• Ensurethatthereisamainselectricalsocket;waterinletanddrainclosebytoconnectthe
appliance to.
• Donotplacetheappliancewherethetemperatureislikelytofallbelow0°C.
• Beforeinstallingtheapplianceensureallpackaginghasbeenremoved.
• Wheninstallingtakecaretonotsquashthewaterinletandoutlethoses.
• Ensurethattheapplianceislevel,ifnotadjusttheappliancesadjustablefeet.
• Onlyusethewaterinletpipesuppliedwiththeappliance.
INSTALLATION
Connection
• Connectthewaterinlethosetothewater
supply, check for any leaks.
• Ifthewaterpressureisabove10bars,
a pressure relief valve should be used.
• Thewateroutletcaneitherbeconnectedtoa
water drain or to a sink outlet.
• Theconnectionshouldbeaminimumof50cm
andamaximumof110cmfromtheoor.
• Thedrainhoseshouldbenolongerthan4min
length to ensure good performance of
the appliance.

6
OPERATING INSTRUCTIONS
Before using your Appliance
• Fillthesaltcompartmentwithsalt.
• Pulloutthelowerbasketandunscrewthesaltcompartmentcover
• Add2kgofsalt(nottablesalt)intothesaltcompartmentandllwithwateruntilalmostfullbut
notoverowing.Toensurebesteciencytheapplianceneedssoftwater,hardwaterwillincrease
the likelihood for scale build up in the appliance
• Replacethesaltcompartmentcover.
Water Hardness Setting
• Theappliancecomeswithawaterhardnesssettingtohelpreducescalewithintheappliance.
• Checkthehardnessofyourwaterbyusingthesuppliedtestingstrip.

7
Water British
hardness hardness Hardness level indicator
level dE
1 0-6 L1 is seen on display
2 7-14 L2 is seen on display
3 15-21 L3 is seen on display
4 22-28 L4 is seen on display
5 28-39 L5 is seen on display
6 40-63 L6 is seen on display
• Toselectthecorrectsettingforyourarea,pressandholdtheProgramSelectionButton.
• WhilststillholdingtheProgramSelectionButton,pressthePowerOn/OButton.
• KeeptheProgramSelectionButtonpresseduntil“SL”disappearsfromtheProgramDisplay.
• ReleasetheProgramSelectionButtonafter“SL”hasdisappeared.
• ThewaterhardnesssettingcannowbesetbypressingtheProgramSelectionButtonuntil
the required setting is found.
• PressthePowerOn/OButtontosavethesettingstomemory.
Detergent and Rinse Aid
• Onlyusedetergentsandrinseaidsdesignedtobeusedwithdishwashers.
• Tollthedetergentcompartment,pushthelatchonthedetergentcompartmentandopen.
• Pourthedetergentintothecompartmentusingthedetergent
level lines (a) to determine how much is needed. For heavily
soiled dishes use the higher level.
• Ifusingadetergenttabletthenjustplaceinthedetergent
compartment.
• Tolltherinseaid,tohelppreventwaterstains,removethe
rinse aid compartment cover.
• Fillwithrinseaiduntiltherinseaidlevelbecomesdark.

8
• Replacetherinseaidcompartmentcover
• Therinseaidlevelcanbeadjustedifyourdishesareshowingsignsofwaterstainsafterwash,
turn the rinse aid indicator level using a screw driver.
• Theserackscanalsobeusedtoplacelongutensilson.
Loading the Appliance
• Ontheupperbaskettherearedishracks,whenthesearein
the down position they can be used to place cups on them,
when in the up position you can place long glasses on
the basket.
• Theupperbasketsheightcanbeadjustedbyremovingfromonesetofrailsandbeing
placed on the other set, ensure to replace the bracket retainer. This will allow
multi-functional use of the basket.

9
• Thelowerbasketshouldbeusedfor
plates, saucepans and dishes.
When using the cutlery tray ensure to
place all knives and sharp cutlery with
the blades pointing down.
• Ensurethatnodishestouchthe
spray arms of the appliance as this
could damage the appliance and
the dishes
USING YOUR APPLIANCE
1.PowerOn/OButton
2.ProgramDisplay
3. Program Selection Button
4.DelayTimerButton
5.DetergentButton(3in1)
6. Pre-Wash Button
7. Half Load Button
8.SaltWarningIndicator/
Rinse Aid Warning Indicator
/EndofProgramIndicator

10
• PressthePowerOn/OButton
• SelectthedesiredprogrambypressingtheProgramSelectionButtonuntiltherequired
program shows.
• Tochangeaprogramwhilstawashingprogramison,openthedoorslightly,thiswillstopthe
appliance;selectthenewprogrambypressingtheProgramSelectionButton.Onceselected
close the door, the appliance will resume on the new selected program.
• Tocancelaprogramwhilstawashingprogramison,openthedoorslightly,thiswillstopthe
appliance;pressandholdtheProgramSelectionButtonfor3seconds,theEndofProgram
Indicatorwillashand“1”willshowontheProgramDisplay.Closethedoorandthedischarge
processwillstart;thewaterwilldischargeforabout30seconds.Oncecompletetheappliance
will buzz 5 times and the End of Program Indicator will show. Allow the appliance to cool before
opening to allow excess steam to evaporate.
• Ifanyadditionalprogrammesi.e.DelayTimerisrequired,thesecanbesetnow.
Important:Iftheselectedprogramhastobecancelled,pressthePowerOn/OButton.
Delay Start
• Todelaythestarttimeoftheselectedprogram(upto19hours)presstheDelayTimerButton,
“1h”appearsontheProgramDisplay
• ToincreasetheDelayTime,continuetopresstheDelayTimerButtonuntiltherequiredtime
is found.
• Tochangeorcancelthedelayedstarttime,presstheDelaytimerButtonagain.
Programme Descriptions

11
Tablet Detergent Button
This is for when using combined detergent tablets (salt and rinse aid). To activate press the Tablet
DetergentButtonwhilstsettingtheprogrammes.
Pre-wash
Thepre-washprogramwillhelptoimprovethewashingperformanceoftheappliance;itwillchange
the temperature and washing time of some of the programmes.
Important: If the pre-wash program is not compatible with the selected program then the
appliance will buzz. To activate press the Pre-Wash Button whilst setting the programmes.
Half Load
Thehalfloadprogramhas3dierentoptions;
• Ifcupsanddishesareonboththeupperandlowerbasket,select
• Ifonlycupsandglassesareontheupperbasket,select
• Ifonlythelowerbasketisused,select
Important: If the half load program is not compatible with the selected setting, then the appliance
will buzz. After use, remember to cancel the half load program unless it is required for the next wash.
Warning Indicators
• SaltWarningIndicator:theindicatorwillcomeonwhenthesaltneedsrelling.
• RinseAidIndicator:theindicatorwillcomeonwhentherinseaidneedsrelling.
• EndofProgramIndicator;whentheprogramiscompletetheindicatorwillcomeonandthe
appliance will buzz 5 times.
• Whenthewashingisnished,remembertoswitchotheappliancebypressingthePower
On/OButton.
Cleaning and Maintenance
Switchotheelectricalsupplyandremovetheplugfromthemainssocketbeforecleaning.
Important:Donotuseabrasivecloths,powders,householdcleaners,bleachorwaxpolishtoclean
the appliance as these can leave a smell in the appliance and can damage the exterior.
Interior
Use a dishwasher cleaning solution in the appliance, ensuring to read the instructions before use,
this should be done whilst the appliance is empty.
• Cleanthesealsoftheappliancebywipingwithacleandampcloth.
• Cleaningoftheltersandsprayarmsshouldbedoneatleastoneaweek.

12
Filters
• Toremovethelter,pulloutthelowerbasketandturnthelter
clockwise and remove it.
• Pullthecourselteroutofthemicrolterandrinseboth
with water until clean.
• Removethemetallterandcleanwithwater.
• Retthemetallterandinsertthecourselterintothemicrolterand
reinsert into the appliance. Turn in an anti-clockwise direction until
locked into place.
Important:Neverusetheappliancewithoutthelters.
Spray Arms
• Itisimportanttocheckiftheholesintheupperandlowersprayarms
areclogged;iftheyarethentheapplianceisnotworkingcorrectly.
Hose Filter
• Ifahoselterhasbeenattachedduringinstallationthiswillalsoneedtobechecked,whilst
checkingthehoselteritisrecommendedtocheckthatthehoseisstillinworkingorder.
Thehoseltercanbecleanedinwarmwater.

13
FUSE REPLACEMENT
(Moulded Plug Top – Class I)
Removethefusecoverwithasmallatheadscrewdriver.
Take out the fuse and replace with a new fuse of the
same Amp. Replace the fuse cover and push back into
place.
TROUBLESHOOTING
If you are having problems with your appliance, please use our troubleshooting guide below.
IfyouareunabletoresolvetheissueusingthisguidepleaseringourCustomerServiceDepartment
on 0844 848 5861. Please have the model code and purchase information available.
Appliance does
not work
Mains plug is not plugged in
or is loose.
Fuse has blown or is
defective
Check fuse, replace if necessary.
Socket is defective Mains malfunctions are to be
corrected by an electrician.
Thewatertapisturnedo. Ensure the water tap is on.
The appliance door is not closed
properly.
Thewaterinletlterormachine
ltersareblocked.
Checkallltersandunblockif
necessary.
The detergent compartment was
wetwhenlled.
Ensure the detergent
compartmentisdrybeforelling.
The water drain hose is blocked
or is twisted.
Check the drain hose for
blockages and any twists.
Insert mains plug.
Fault Possible cause Solution
Detergentisleft
inside the detergent
compartment.
Check that the door is fully
closed
Water is left in the
appliance.
Power failure. Check to see if you have had a
power cut.
Filters are blocked. Cleanlter.
Water inlet failure. Check the water inlet connector.
Programhasnotnished. Check the End of Program Indicator
The appliance
stops during a wash
program.
Program can be on standby
mode
Check to see what program is set.

14
Water stains are
on dishes
Salt level is low. Rellwithsalt.
Fault Possible cause Solution
Rinse aid level is low. Rellrinseaid.
Not enough detergent. Add more detergent
Salt Compartment cover is lose
or not on.
Check the salt compartment cover.
Water hardness setting set to low. Change the water hardness setting.
Appliance is making
a lot of noise whilst
in use.
Dishesplaceincorrectly. Check the placing of the dishes.
Spray arms hitting the dishes. Check is anything is in the way of
the spraying arms.
Disheswontdry A program without a dry setting
has been selected.
Change the setting.
Rinse aid level is too low. Rinse aid level is too low.
Dishesunloadedtofast. Allow to cool and excess steam
to evaporate.
Food waste left
on dishes.
Dishesstackedincorrectly. Restack dishes.
Food has been left for a long time
on dishes before being washed.
Rinse before placing in the
appliance.
Filter blocked. Cleanlters
Water drain pump blocked. Check and clean if necessary.
Spray arms blocked. Remove and wash.
Baskets overloaded. Remove some items.
Dishesleaningagainsteachother Restack dishes.
Error codes have
appeared.
See table opposite

15
Failure codes and what to do in case of failure

0844 848 5861
38 Bluestem Road,
Ransomes Europark
Ipswich, IP3 9RR
This manual suits for next models
1
Table of contents

