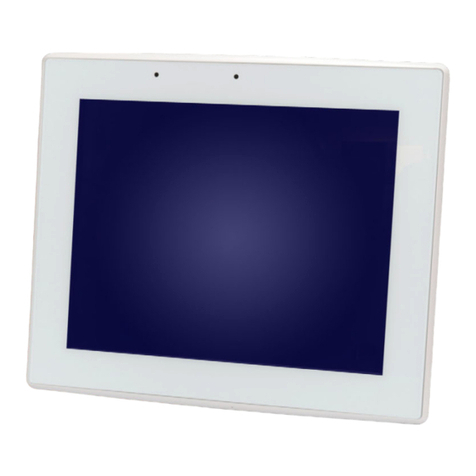
STAX Z11 User manual

1. Plug in the ETH cable into the LAN port on the back
of the terminal and the other end into your router.
2. From the main screen tap the Wifi symbol in the
upper le hand corner
3. Select ETH for Ethernet
4. Press OK to connect
5. The screen should now display LAN ACTIVE with
an IP address
CONNECT VIA WIFI
1. From the main screen tap the Wifi symbol in
the upper le hand corner
2. Select WIFI
3. Select your Wifi network
4. Enter your Wifi network’s password and press
the OK buon
5. The screen should now show CONNECTED
with an IP address
1. Tap on the CREDIT/DEBIT icon on your terminal
home screen
2. Tap on the SALE icon
3. Input the SALE AMOUNT and press OK
4. Manually input card #
5. Follow the CNP prompts (input exp. date,
ZIP code etc)
6. Transaction processes, sales receipt prints with
details of transaction
CREDIT SALE
CREDITDEBIT SALE CARD NOT PRESENT
1. Tap on the CREDIT icon on your terminal home screen
2. Tap on the SALE icon
3. Input the SALE AMOUNT and press OK
4. Tap the card(contactless only) or insert chip card
5. If prompted, confirm the sale amount by tapping
YES or NO
6. Transaction processes, sales receipt prints with
details of transaction
1. Tap on the DEBIT icon on your terminal home screen
2. Tap on the SALE icon
3. Input the SALE AMOUNT and press OK
4. Tap the card (contactless only), swipe or insert
chip card
5. Cardholder inputs PIN on terminal PIN Pad or
external PIN Pad and presses OK
6. Transaction processes, sales receipt prints with
details of transaction
DEBIT SALE
1. Tap the THREE LINES icon
2. If prompted, input Manager Password (1234
default) to access the Core menu
3. Tap APPLICATIONS
4. Tap DVCREDITAPP
5. Tap SETUP
6. If prompted, input Manager Password (1234 default)
7. Tap TRANS PROMPTS
8. Tap CLERKS
9. Tap PROMPT
10. Tap to select desired option
11. To return to the home screen press the RED key
2 times
TURN SERVER & CLERK PROMPT ONOFFCONNECT VIA ETHERNET
Touch Screen Models
Quick Reference Guide
support@staxpayments.com | staxpayments.com
9

1. Tap the STAR icon
2. If prompted, input Manager Password (1234
default) to access the favorites menu then tap the
Green buon
3. Tap REPRINT RECEIPT
4. If prompted, input Manager Password (1234 default)
5. Tap desired option (LAST, BY TRANSACTION # or
BY CARD NUMBER)
6. Follow prompts and transaction receipt prints
1. Tap the STAR icon
2. If prompted, input Manager Password (1234 default)
3. Tap TRANSACTION # (please see steps on reseing
favorites menu if you do not see this selection)
4. Transaction amount appears, input TIP AMOUNT
and press OK
5. If prompted, confirm the tip amount by tapping
YES or NO
6. Repeat steps 5 and 6 as needed
7. Press the RED key to exit to main menu aer all
desired tips have been adjusted
1. Tap on the CREDIT icon on your terminal home screen
2. Tap on the RETURN icon
3. Input the RETURN AMOUNT and press OK
4. Tap the card (contactless only), swipe, insert chip
card or manually enter card #
5. If prompted, confirm the sale amount by tapping
YES or NO
6. Transaction processes, sales receipt prints with
details of transaction
RETURN
REPRINT RECEIPT
EDIT TIPS BY TRANSACTION #
1. Tap on the CREDIT icon on your terminal home screen
2. Tap on the VOID icon
3. Input the VOID AMOUNT and press OK
4. If prompted, confirm the void amount by tapping
OK or CANCEL
5. If prompted, input Manager Password (1234 default)
6. Tap the card (contactless only) or insert chip card
7. Transaction processes, sales receipt prints with
details of transaction
1. Tap the STAR icon
2. If prompted, input Manager Password (1234
default) to access the favorites menu and tap the
green buon
3. Tap VOID TRANSACTION
4. If prompted, input Manager Password (1234 default)
5. Tap BY TRANSACTION #
6. Input TRANSACTION # to be voided and press OK
7. Confirm the void transaction by tapping SELECT
8. If prompted, confirm the void amount by tapping
OK or CANCEL
9. If prompted, input Manager Password (1234 default)
10. The void is processed. Void receipts will print with
details of the transaction
VOID CARD PRESENT
VOID BY TRANSACTION# CARD NOT PRESENT
1. From the main screen tap the STAR icon to access
the FAVORITES menu
2. If prompted, input Manager Password (1234 default)
3. Tap SETTLE DAILY BATCH
4. If prompted, input Manager Password (1234 default
5. Terminal communicates with the host
6. Selement Report prints
SETTLE DAILY BATCH
1. Tap the THREE LINES icon
2. If prompted, input Manager Password (1234 default)
3. Tap UTILITIES
4. Tap FAVORITES
5. Tap RESET
6. Tap YES when asked to RESET TO DEFAULT
7. Press RED key to exit to main menu
RESET FAVORITES MENU
Touch Screen Models
Quick Reference Guide
support@staxpayments.com | staxpayments.com
1. From the main screen tap the THREE LINES icon
2. If prompted, input Manager Password (1234 default)
3. Tap UTILITY
4. Tap SETTINGS
5. Tap Date & Time
6. Ensure date is correct by entering it in this format
MM:DD:YYYY and press OK
7. Ensure time is correct by entering it in this format
HH:MM:SS in military time and press OK
8. Press RED key until you reach home screen
CHANGE DATE & TIME

1. Tap the STAR icon
2. If prompted, input Manager Password (1234
default) to access the favorites menu then tap the
Green buon
3. Tap REPRINT RECEIPT
4. If prompted, input Manager Password (1234 default)
5. Tap desired option (LAST, BY TRANSACTION # or
BY CARD NUMBER)
6. Follow prompts and transaction receipt prints
1. Tap the STAR icon
2. If prompted, input Manager Password (1234 default)
3. Tap TRANSACTION # (please see steps on reseing
favorites menu if you do not see this selection)
4. Transaction amount appears, input TIP AMOUNT
and press OK
5. If prompted, confirm the tip amount by tapping
YES or NO
6. Repeat steps 5 and 6 as needed
7. Press the RED key to exit to main menu aer all
desired tips have been adjusted
1. Tap on the CREDIT icon on your terminal home screen
2. Tap on the RETURN icon
3. Input the RETURN AMOUNT and press OK
4. Tap the card (contactless only), swipe, insert chip
card or manually enter card #
5. If prompted, confirm the sale amount by tapping
YES or NO
6. Transaction processes, sales receipt prints with
details of transaction
RETURN
REPRINT RECEIPT
EDIT TIPS BY TRANSACTION #
1. Tap on the CREDIT icon on your terminal home screen
2. Tap on the VOID icon
3. Input the VOID AMOUNT and press OK
4. If prompted, confirm the void amount by tapping
OK or CANCEL
5. If prompted, input Manager Password (1234 default)
6. Tap the card (contactless only) or insert chip card
7. Transaction processes, sales receipt prints with
details of transaction
1. Tap the STAR icon
2. If prompted, input Manager Password (1234
default) to access the favorites menu and tap the
green buon
3. Tap VOID TRANSACTION
4. If prompted, input Manager Password (1234 default)
5. Tap BY TRANSACTION #
6. Input TRANSACTION # to be voided and press OK
7. Confirm the void transaction by tapping SELECT
8. If prompted, confirm the void amount by tapping
OK or CANCEL
9. If prompted, input Manager Password (1234 default)
10. The void is processed. Void receipts will print with
details of the transaction
VOID CARD PRESENT
VOID BY TRANSACTION# CARD NOT PRESENT
1. From the main screen tap the STAR icon to access
the FAVORITES menu
2. If prompted, input Manager Password (1234 default)
3. Tap SETTLE DAILY BATCH
4. If prompted, input Manager Password (1234 default
5. Terminal communicates with the host
6. Selement Report prints
SETTLE DAILY BATCH
1. Tap the THREE LINES icon
2. If prompted, input Manager Password (1234 default)
3. Tap UTILITIES
4. Tap FAVORITES
5. Tap RESET
6. Tap YES when asked to RESET TO DEFAULT
7. Press RED key to exit to main menu
RESET FAVORITES MENU
Touch Screen Models
Quick Reference Guide
support@staxpayments.com | staxpayments.com
1. From the main screen tap the THREE LINES icon
2. If prompted, input Manager Password (1234 default)
3. Tap UTILITY
4. Tap SETTINGS
5. Tap Date & Time
6. Ensure date is correct by entering it in this format
MM:DD:YYYY and press OK
7. Ensure time is correct by entering it in this format
HH:MM:SS in military time and press OK
8. Press RED key until you reach home screen
CHANGE DATE & TIME

1. Tap the STAR icon
2. If prompted, input Manager Password (1234
default) to access the favorites menu then tap the
Green buon
3. Tap REPRINT RECEIPT
4. If prompted, input Manager Password (1234 default)
5. Tap desired option (LAST, BY TRANSACTION # or
BY CARD NUMBER)
6. Follow prompts and transaction receipt prints
1. Tap the STAR icon
2. If prompted, input Manager Password (1234 default)
3. Tap TRANSACTION # (please see steps on reseing
favorites menu if you do not see this selection)
4. Transaction amount appears, input TIP AMOUNT
and press OK
5. If prompted, confirm the tip amount by tapping
YES or NO
6. Repeat steps 5 and 6 as needed
7. Press the RED key to exit to main menu aer all
desired tips have been adjusted
1. Tap on the CREDIT icon on your terminal home screen
2. Tap on the RETURN icon
3. Input the RETURN AMOUNT and press OK
4. Tap the card (contactless only), swipe, insert chip
card or manually enter card #
5. If prompted, confirm the sale amount by tapping
YES or NO
6. Transaction processes, sales receipt prints with
details of transaction
RETURN
REPRINT RECEIPT
EDIT TIPS BY TRANSACTION #
1. Tap on the CREDIT icon on your terminal home screen
2. Tap on the VOID icon
3. Input the VOID AMOUNT and press OK
4. If prompted, confirm the void amount by tapping
OK or CANCEL
5. If prompted, input Manager Password (1234 default)
6. Tap the card (contactless only) or insert chip card
7. Transaction processes, sales receipt prints with
details of transaction
1. Tap the STAR icon
2. If prompted, input Manager Password (1234
default) to access the favorites menu and tap the
green buon
3. Tap VOID TRANSACTION
4. If prompted, input Manager Password (1234 default)
5. Tap BY TRANSACTION #
6. Input TRANSACTION # to be voided and press OK
7. Confirm the void transaction by tapping SELECT
8. If prompted, confirm the void amount by tapping
OK or CANCEL
9. If prompted, input Manager Password (1234 default)
10. The void is processed. Void receipts will print with
details of the transaction
VOID CARD PRESENT
VOID BY TRANSACTION# CARD NOT PRESENT
1. From the main screen tap the STAR icon to access
the FAVORITES menu
2. If prompted, input Manager Password (1234 default)
3. Tap SETTLE DAILY BATCH
4. If prompted, input Manager Password (1234 default
5. Terminal communicates with the host
6. Selement Report prints
SETTLE DAILY BATCH
1. Tap the THREE LINES icon
2. If prompted, input Manager Password (1234 default)
3. Tap UTILITIES
4. Tap FAVORITES
5. Tap RESET
6. Tap YES when asked to RESET TO DEFAULT
7. Press RED key to exit to main menu
RESET FAVORITES MENU
Touch Screen Models
Quick Reference Guide
support@staxpayments.com | staxpayments.com
1. From the main screen tap the THREE LINES icon
2. If prompted, input Manager Password (1234 default)
3. Tap UTILITY
4. Tap SETTINGS
5. Tap Date & Time
6. Ensure date is correct by entering it in this format
MM:DD:YYYY and press OK
7. Ensure time is correct by entering it in this format
HH:MM:SS in military time and press OK
8. Press RED key until you reach home screen
CHANGE DATE & TIME

1. Tap the STAR icon
2. If prompted, input Manager Password (1234
default) to access the favorites menu then tap the
Green buon
3. Tap REPRINT RECEIPT
4. If prompted, input Manager Password (1234 default)
5. Tap desired option (LAST, BY TRANSACTION # or
BY CARD NUMBER)
6. Follow prompts and transaction receipt prints
1. Tap the STAR icon
2. If prompted, input Manager Password (1234 default)
3. Tap TRANSACTION # (please see steps on reseing
favorites menu if you do not see this selection)
4. Transaction amount appears, input TIP AMOUNT
and press OK
5. If prompted, confirm the tip amount by tapping
YES or NO
6. Repeat steps 5 and 6 as needed
7. Press the RED key to exit to main menu aer all
desired tips have been adjusted
1. Tap on the CREDIT icon on your terminal home screen
2. Tap on the RETURN icon
3. Input the RETURN AMOUNT and press OK
4. Tap the card (contactless only), swipe, insert chip
card or manually enter card #
5. If prompted, confirm the sale amount by tapping
YES or NO
6. Transaction processes, sales receipt prints with
details of transaction
RETURN
REPRINT RECEIPT
EDIT TIPS BY TRANSACTION #
1. Tap on the CREDIT icon on your terminal home screen
2. Tap on the VOID icon
3. Input the VOID AMOUNT and press OK
4. If prompted, confirm the void amount by tapping
OK or CANCEL
5. If prompted, input Manager Password (1234 default)
6. Tap the card (contactless only) or insert chip card
7. Transaction processes, sales receipt prints with
details of transaction
1. Tap the STAR icon
2. If prompted, input Manager Password (1234
default) to access the favorites menu and tap the
green buon
3. Tap VOID TRANSACTION
4. If prompted, input Manager Password (1234 default)
5. Tap BY TRANSACTION #
6. Input TRANSACTION # to be voided and press OK
7. Confirm the void transaction by tapping SELECT
8. If prompted, confirm the void amount by tapping
OK or CANCEL
9. If prompted, input Manager Password (1234 default)
10. The void is processed. Void receipts will print with
details of the transaction
VOID CARD PRESENT
VOID BY TRANSACTION# CARD NOT PRESENT
1. From the main screen tap the STAR icon to access
the FAVORITES menu
2. If prompted, input Manager Password (1234 default)
3. Tap SETTLE DAILY BATCH
4. If prompted, input Manager Password (1234 default
5. Terminal communicates with the host
6. Selement Report prints
SETTLE DAILY BATCH
1. Tap the THREE LINES icon
2. If prompted, input Manager Password (1234 default)
3. Tap UTILITIES
4. Tap FAVORITES
5. Tap RESET
6. Tap YES when asked to RESET TO DEFAULT
7. Press RED key to exit to main menu
RESET FAVORITES MENU
Touch Screen Models
Quick Reference Guide
support@staxpayments.com | staxpayments.com
1. From the main screen tap the THREE LINES icon
2. If prompted, input Manager Password (1234 default)
3. Tap UTILITY
4. Tap SETTINGS
5. Tap Date & Time
6. Ensure date is correct by entering it in this format
MM:DD:YYYY and press OK
7. Ensure time is correct by entering it in this format
HH:MM:SS in military time and press OK
8. Press RED key until you reach home screen
CHANGE DATE & TIME
Table of contents
