Steltronic ST-HB32 Operating manual

Steltronic
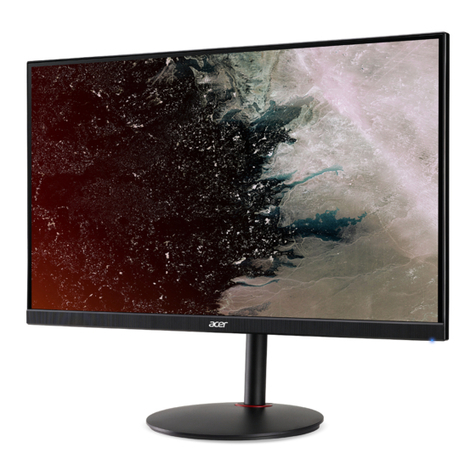
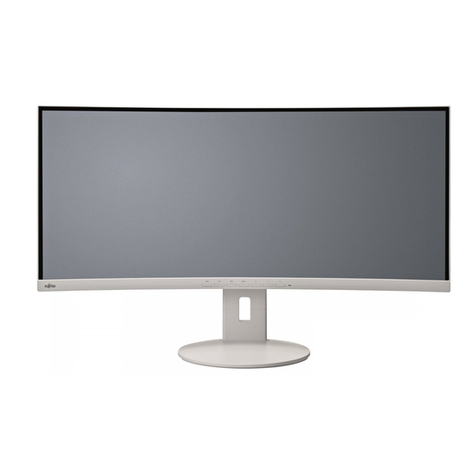
ST-HB32 LCD 32” 16/9 Monitor
User and Installation Manual
Steltronic S.p.A.
Via Artigianale 34, 25082 Botticino Sera Brescia - Italy
Tel: +39 030 2190811 fax: +39 030 2190798
http://www.steltronic.com
Worldwide Service: + 39 030 2190830
Email: service@steltronic.com
US Steltronic: +1 (909) 287-0712
service.usa@steltronic.com

Pg. 2 of 28
Rev A.
STELTRONIC S.p.A.
Botticino Sera (BS) - ITALY
Tel +39 030 2190811 - Fax +39 030
2190798 http://www.steltronic.com
Steltronic
ST-HB32 LCD 32”
16/9 Monitor
User and Installation Manual June 2007
Index
MONITOR ADJUSTMENTS and TECHNICAL SPECIFICATIONS
1.0 Monitor technical specification Pg. 03
2.0 OSD Screen Adjustments Pg. 05
MONITOR’S INSTALLATION
3.0 Pre-installation requirements Pg. 11
4.0 Monitor dimensions Pg. 12
5.0 Available monitor supports Pg. 13
5.1 Fixing the Brackets to the ceiling Pg. 14
5.2 Assembly the Frame for single monitor [Configuration A] Pg. 17
5.3 Hanging 2 near monitors [Configuration B] Pg. 18
5.4 Hanging 2 monitors with Central Plate [Configuration C] Pg. 19
5.5 Hanging 3 near monitors [Configuration D] Pg. 21
6.0 Connecting the Lane computer (SUPERELEX) to the monitor Pg. 23
6.1 Wins software settings for 16:9 monitors Pg. 24
6.1 Connecting the Lane computer (V.L.C.) to the monitor Pg. 25
7.0 Display Video signal (Superelex lane computer) Pg. 26
7.1 Display Video signal (V.L.C. lane computer) Pg. 27

Pg. 3 of 28
Rev A.
STELTRONIC S.p.A.
Botticino Sera (BS) - ITALY
Tel +39 030 2190811 - Fax +39 030
2190798 http://www.steltronic.com
Steltronic
ST-HB32 LCD 32”
16/9 Monitor
User and Installation Manual June 2007
[1.0] Monitor Technical specifications
[1.1] General description
ST-HB32A1X is a 32” TFT Liquid Display with 16-CCFL Backlight unit and 1-ch LVDS interface.
This display supports 1366x 768 WXGA format and can display true 16.7M colours (8-bit/color).
The inverter module for backlight is built-in.
NOTE: the monitor is not equipped with speakers and RF module for Radio Frequency TV reception.
[1.2] Features
- High brightness (500 nits)
- High contrast ratio (1200:1)
- Fast response time ( Gray to Gray average 6.5 ms)
- High colour saturation NTSC 75%
- Max resolution 1360 x 768@60 Hz
- LVDS interface
- Low colour shift function option
- Ultra wide viewing angle :176(H)/ 176(V) Super MVA technology
-Support PIP/PAP function
- Configurable ambient light sensor
- VGA/DVI input support Video sync – 720p
- OSD menu controls by Remote controller, OSD button& RS232C controller
[1.3] General Specifications
Active Area 708.954mm(H) x 398.592mm(V) (32.02”diagonal)
Bezel Opening Area 714.96mm(H) x 404.6mm(V)
Driver Element a-si TFT active matrix
Pixel Number 1366 x R.G.B x 768 pixel
Pixel Pitch(sub-Pixel) 0.1730(H) x 0.5190(V)
Pixel Arrangement RGB vertical stripe
Display Colours 16.7M Color
Display operation Mode Transmissive mode / Normally black -
Surface Treatment Anti-Glare coating(Haze 25%), Hard coating (3H)
[1.4] Electrical Specifications [a]
Power source Power Input 100VAC~240VAC (Worldwide)
Operation Mode 250W (Max) Power
consumption Power Saving Mode 20W(Max) W
Storage Temper. Min -20 ~ Max60 Celsius
Operating Temper. Min 5 ~ Max 40 Celsius

Pg. 4 of 28
Rev A.
STELTRONIC S.p.A.
Botticino Sera (BS) - ITALY
Tel +39 030 2190811 - Fax +39 030
2190798 http://www.steltronic.com
Steltronic
ST-HB32 LCD 32”
16/9 Monitor
User and Installation Manual June 2007
[1.5] Electrical Specifications [b]
LCD PANEL:
Max.Resolution 1360 x 768@ 60Hz -
Brightness 500 Nits
Contrast Ratio 1200
Response time Typ. 6.5 ms(Gray to Gray) ms
Aspect Ratio 16 :9
GRAPHIC:
Separate Sync. LVDS Level -
Horizontal Sync. Positive / Negative -
Vertical Sync. Positive / Negative -
Input Connector D-Sub 15 pins, DVI-D 24 pins, -
SCAN RATE:
Horizontal 26~91 KHz
Vertical 50~85 Hz
PERFORMANCE:
Auto Adjust Clock, Phase, H-Position &-V Position -
Screen Scaling VGA/SVGA/XGA/WXGA - Full Screen Display
Power Management VESA DPMS, DVI DMPM -
Color Adjustment User, 6500K, 5400K ,3200K & 9300K -
OSD Language English
[1.6]Safety
This Product was tested to the following standards and found Compliance with the following standards:
FCC:CFR47 Part 15 / CISPR 22 3rd Edition:1997, Class B
ANSI C63.4. 2003
Canadian ICES-003
CE:EN 55022. 1998+A1. 2000+A2. 2003, Class B
EN 55024. 1998+A1. 2001+A2. 2003 IEC 61000-4 Series
EN 61000-3-2. 2000& EN61000-3-3. 1995+A1. 2001
UL:UL 60950-1. 2003, First Edition
CSA C22.2 No. 60950-1-03 1stEd.April 1, 2003
TUV: EN 60950-1/A11:2004
[1.7] Dimensions and weight
Dimension(w/o stand) 671.2*413.2*82.32 (W*D*H) mm
Net weight 16.5 KG Physical
Gross weight 20 KG

Pg. 5 of 28
Rev A.
STELTRONIC S.p.A.
Botticino Sera (BS) - ITALY
Tel +39 030 2190811 - Fax +39 030
2190798 http://www.steltronic.com
Steltronic
ST-HB32 LCD 32”
16/9 Monitor
User and Installation Manual June 2007
[2.0] OSD Screen Adjustments
The monitor could be adjusted using the Remote control or directly from OSD panel accessible on rear
of the monitor. Main power switch is located on the rear of the monitor, close to the AC plug input.
monitor’s rear
OSD panel
Remote Control
[1] Power ON/STANDBY
[2] Enter – Activate selection
[3] Menu RIGHT
[4] Menu LEFT
[5] Menu DOWN
[6] Menu UP
[7] MENU (Exit)- Access Main Menu/sub-
menu(Quick menu selection)
[8] EXIT (one Level UP)
[9] AUTO –Adjust clock, phase, H position,
V position automatically
[10] PIP (picture in picture)
[11] SOURCE (input source selection)
[12] SWITCH (PIP switch)
Main Power
Switch
OSD
Control panel
1
1
3
7
2
2
3
4
5
6
4
6
5
7
8
9
1
0
11
12

Pg. 6 of 28
Rev A.
STELTRONIC S.p.A.
Botticino Sera (BS) - ITALY
Tel +39 030 2190811 - Fax +39 030
2190798 http://www.steltronic.com
Steltronic
ST-HB32 LCD 32”
16/9 Monitor
User and Installation Manual June 2007
WARNING:
The SOURCE input Selection for Scoring is VGA
The Monitor detect automatically the active Source, if the Lane computer it will be power
off/restart, monitor switch the screen on the next available source (if connected).
To switch the screen back to SCORE press vary time SOURCE button on remote control
until the VGA input will be display on OSD message.
Factory DEFAULT SETTINGS AND ADJUST RANGE
Item Factory Default Adjust Range
Power Switch OFF ON/OFF
Brightness 80 0~100
Contrast 50 0~100
Color Temperature User USER/6500K/9300K
Red 50
0~255
Green 50
0~255
Blue 50
0~255
OSD Language English English
Auto configuration ON ON/OFF
SUGGESTED MONITOR SETTINGS FOR STELTRONIC SCORE
[1]INPUT SOURCE
Press vary time SOURCE button on Remote control until VGA screen appear on OSD
[2] MENU DISPLAY
Press <MENU> <ENTER> <Arrow DOWN> to display the Menu; use <Arrow LEFT>
<Arrow RIGHT> for changing value.
Brightness 60 Contrast 60
Hue 8 Saturation 70
Flesh-Tone OFF Black Level 55
[3] MENU IMAGE
Press <MENU> <ENTER> <Arrow RIGHT> <Arrow DOWN> to display the Menu; use
<Arrow LEFT> , <Arrow RIGHT> for changing value.
Scaling FILL Noise Reduction OFF
Angle Filtering OFF Film Mode Detect ON
Sharpness 15

Pg. 7 of 28
Rev A.
STELTRONIC S.p.A.
Botticino Sera (BS) - ITALY
Tel +39 030 2190811 - Fax +39 030
2190798 http://www.steltronic.com
Steltronic
ST-HB32 LCD 32”
16/9 Monitor
User and Installation Manual June 2007
OSD tree menu

Pg. 8 of 28
Rev A.
STELTRONIC S.p.A.
Botticino Sera (BS) - ITALY
Tel +39 030 2190811 - Fax +39 030
2190798 http://www.steltronic.com
Steltronic
ST-HB32 LCD 32”
16/9 Monitor
User and Installation Manual June 2007

Pg. 9 of 28
Rev A.
STELTRONIC S.p.A.
Botticino Sera (BS) - ITALY
Tel +39 030 2190811 - Fax +39 030
2190798 http://www.steltronic.com
Steltronic
ST-HB32 LCD 32”
16/9 Monitor
User and Installation Manual June 2007

Pg. 10 of 28
Rev A.
STELTRONIC S.p.A.
Botticino Sera (BS) - ITALY
Tel +39 030 2190811 - Fax +39 030
2190798 http://www.steltronic.com
Steltronic
ST-HB32 LCD 32”
16/9 Monitor
User and Installation Manual June 2007
Next chapters
are for
installation crew only

Pg. 11 of 28
Rev A.
STELTRONIC S.p.A.
Botticino Sera (BS) - ITALY
Tel +39 030 2190811 - Fax +39 030
2190798 http://www.steltronic.com
Steltronic
ST-HB32 LCD 32”
16/9 Monitor
User and Installation Manual June 2007
[3.0] Pre-installation requirements
MONITOR STRUCTURE
The center owner must supply an adequate support structure for hanging monitors, in compliance with
local regulations. Each monitor (including support steel but NOT chains or steel cables) weighs about
16 Kg /35.3 pounds, each lane computer (usually installed near the monitors) about: 3.5Kg / 8 pounds
The support structure in the center must be inspected and approved by authorized personnel in
compliance with local regulations.
The center owner(s) are responsible for the installation and approval of the support structure.
The support structure should be in place and approved before scoring system installation starts and
sheet approval must be shown to distributor or seller of scoring system.
ELECTRICAL INSTALLATION
Each monitor receives power from a dedicated outlet, one connector per monitor. AC input could be
powered on/off via Software*, otherwise it’s possible switch the monitors from ON to STAND-BY using
the remote control.
Each electrical line must be controlled by a dedicated magneto-thermic switch as described in the
“power supply connection” section of the Scoring Pre-installation manual.
Steltronic S.p.A. supplies one power cord for each monitor with a VDE connector on it, 1.8 meters long
(6 feet); the customer must provide one AC power outlet for each monitor at most 1.5 meters (about 4
feet) from the lane computer itself.
The customer is responsible for the installation and approval of the electrical supply used for the
scoring system. The installation of the electrical supply should be done and approved before the
scoring system is installed and sheet approval should be shown
to the seller or distributor of the scoring system.
Further information on the electrical requirements for the scoring system are available in the pre-
installation manual available from the seller or distributor as well as from Steltronic directly by sending
*the availability of this feature depends by Lane computer model.

Pg. 12 of 28
Rev A.
STELTRONIC S.p.A.
Botticino Sera (BS) - ITALY
Tel +39 030 2190811 - Fax +39 030
2190798 http://www.steltronic.com
Steltronic
ST-HB32 LCD 32”
16/9 Monitor
User and Installation Manual June 2007
[4.0] Monitor Dimensions
ALL DIMENSIONS ARE IN MILLIMETRES
Monitor weight: 16,5KG

Pg. 13 of 28
Rev A.
STELTRONIC S.p.A.
Botticino Sera (BS) - ITALY
Tel +39 030 2190811 - Fax +39 030
2190798 http://www.steltronic.com
Steltronic
ST-HB32 LCD 32”
16/9 Monitor
User and Installation Manual June 2007
[5.0] Available monitor’s supports
The monitor’s could be installed in 4 different ways:
[A] SINGLES
Each monitor is in the center
of each bowling lane
[B] 2 NEAR MONITOR
2 monitors, one near the other
at the center of the ball return
[C] 2 MONITOR + CENTRAL PLATE
The 2 monitor are divided
by a central plate
[D] 3 NEAR MONITOR
3 monitors, one near each other
at the center of the ball return.
The third monitor (central) is used to
display Video signal
All of the hanging method use the same way for hung the structure to the ceiling using a vertical “T”
bracket which can either be attached directly to the ceiling or to another hanging support using, chains,
steel cable or floor bolts (NOT SUPPLIED BY STELTRONIC). The monitors can be inclined to a max
angle of 20 degrees.
Washer, bolt, screws and metric nut for assembly the structure will be supplied by Steltronic,
chain, fisher, etc for fix the T bracket to ceiling must be supplied by installers.

Pg. 14 of 28
Rev A.
STELTRONIC S.p.A.
Botticino Sera (BS) - ITALY
Tel +39 030 2190811 - Fax +39 030
2190798 http://www.steltronic.com
Steltronic
ST-HB32 LCD 32”
16/9 Monitor
User and Installation Manual June 2007
[5.1] Fixing the Brackets to the ceiling
NOTE: All hanging method use the same “T” bracket
for support the monitor to the ceiling. The number of the brackets necessary depends by
the number of the monitors.
Each “T” Bracket includes 2 M8 eye bolts, these can be used with chain or steel cable; alternatively the
“T” bracket can be fixed directly to a concrete ceiling with fisher. The distance between the center of
the 2 eye bolts is 35 centimeters.
To fix the monitor frame to the “T” bracket use 2 M8x55 bolts
(bolts + washers + self locking nuts) fixed to the “L” adjustable
supports.
The “L” supports allow to vary the monitor inclination up to a
maximum of 20 degrees.
Place the plastic cup into the tube for close the holes.

Pg. 15 of 28
Rev A.
STELTRONIC S.p.A.
Botticino Sera (BS) - ITALY
Tel +39 030 2190811 - Fax +39 030
2190798 http://www.steltronic.com
Steltronic
ST-HB32 LCD 32”
16/9 Monitor
User and Installation Manual June 2007
Installation with chain
Installation on concrete ceiling
Warning: the “T” bracket for single monitor installation must be fixed without chain for
preventing possible monitor oscillation: It’s possible add an horizontal bar between the 2
brackets using the 2 extra hole on the top of each bracket.
The monitors could be fix on the “T” bracket in 2
different high:
A = 66 centimetres
B = 46 centimetres
Minimum clearance from ground to the bottom
of the monitors: 2.5 meters / 8 feet.

Pg. 16 of 28
Rev A.
STELTRONIC S.p.A.
Botticino Sera (BS) - ITALY
Tel +39 030 2190811 - Fax +39 030
2190798 http://www.steltronic.com
Steltronic
ST-HB32 LCD 32”
16/9 Monitor
User and Installation Manual June 2007
The distance between the 2 “T” bracket depends by choose of the installation’s method:
79,4 CM 79,4 CM 79,4 CM
95,4 CM

Pg. 17 of 28
Rev A.
STELTRONIC S.p.A.
Botticino Sera (BS) - ITALY
Tel +39 030 2190811 - Fax +39 030
2190798 http://www.steltronic.com
Steltronic
ST-HB32 LCD 32”
16/9 Monitor
User and Installation Manual June 2007
[5.2] Assembly the Frame for single monitor [Configuration A]
Description Q.ty STEL CODE
Monitor Frame 01 MC0023A
“L” adjustable support (LF) 01 MW0129A
Square M6 Snap-Nut 03
Screw M6x16 07
Flat washer (for M6 screw) 07
Grip washer (for M6 screw) 04
N^ 01
KIT K0082A
“T” bracket 01 MW0127C
M8 L=60 eyebolts 02
M8 self nut 04
M8 nut 02
M8 washer 04
M8X60 screw 02
Holes stopper (Ø4CM) 03
N^ 01
KIT K0083A
Insert the 3 M6 Snap-nut [A]
In the holes of MC0023A Frame
Attach the “L” adjustable support MW0129A
to the frame using 3 M6x16 screws+ washers
The 4 external hole of
MC0023A frame match
with the monitor VESA
holes (200X200mm).
Fix the MC0023A Frame to the monitor using 4
M6x16 screws provided with 4 Flat washers + 4
grip washers (the grip washer must be placed
between screws head and flat washer).
A
A
A

Pg. 18 of 28
Rev A.
STELTRONIC S.p.A.
Botticino Sera (BS) - ITALY
Tel +39 030 2190811 - Fax +39 030
2190798 http://www.steltronic.com
Steltronic
ST-HB32 LCD 32”
16/9 Monitor
User and Installation Manual June 2007
[5.3] Hanging 2 near monitors [Configuration B]
Description Q.ty STEL CODE
Monitor Frame 01 MC0023A
“L” adjustable support (LF) 01 MW0129A
“L” adjustable support (RT) 01 MW0130A
“V” angle support 01 MW0164A
Square M6 Snap-Nut 06
Screw M6x16 14
Flat washer (for M6 screw) 14
Grip washer (for M6 screw) 08
N^ 02
KIT K0082A
“T” bracket 02 MW0127C
M8 L=60 eyebolts 04
M8 self nut 08
M8 nut 04
M8 washer 08
M8X60 screw 04
Holes stopper (Ø4CM) 06
N^ 02
KIT K0083A
FOR BOTH MONITORS: assembly and fix the Frame MC0023A to each monitor as explained on single
monitor installation (chapter 5.2); hang the monitors one the brackets, then remove the 4 monitors’
handle [A] [B].
Using the handle screws, fix the “V” angle support MW0164A to each
monitor. The MW0164A is provide to closing an align the 2 monitors
together.
A
B

Pg. 19 of 28
Rev A.
STELTRONIC S.p.A.
Botticino Sera (BS) - ITALY
Tel +39 030 2190811 - Fax +39 030
2190798 http://www.steltronic.com
Steltronic
ST-HB32 LCD 32”
16/9 Monitor
User and Installation Manual June 2007
[5.4] Hanging 2 monitors with Central Plate [Configuration C]
Description Q.ty STEL CODE
Monitor Frame 01 MC0153A
“L” adjustable support (LF) 01 MW0129A
“L” adjustable support (RT) 01 MW0130A
Central plate 01 PA049A
Vertical bar 02 MW0154A
Square M6 Snap-Nut 06
Screw M6x16 14
Flat washer (for M6 screw) 14
Grip washer (for M6 screw) 08
N^ 02
KIT K0082A
Screw M6x30 V Head 08
M6 self-nut 08
M4x20 screw 04
Flat washer for M4 screw 04
N^ 01
KIT K0084A
“T” bracket 02 MW0127C
M8 L=60 eyebolts 04
M8 self nut 08
M8 nut 04
M8 washer 08
M8X60 screw 04
Plastic bung Diam. 4CM 06
N^ 02
KIT K0083A
Insert 3 M6 Snap-nut in each vertical bar [A] MW0154A and fix the “L” adjustable support MW0129A
to one vertical bar and the “L” MW0130A to the other. Use 3 M6x16 screws+ washers for each bar.

Pg. 20 of 28
Rev A.
STELTRONIC S.p.A.
Botticino Sera (BS) - ITALY
Tel +39 030 2190811 - Fax +39 030
2190798 http://www.steltronic.com
Steltronic
ST-HB32 LCD 32”
16/9 Monitor
User and Installation Manual June 2007
To fix each vertical bar to the frame use 4 M6x30 “V head”
screws with M6 self-nut, taking care about perpendicular of the
assembly.
Fix the vertical bar to the MC0153A structure:
The vertical bar [1] with the MW0129A support must be fixed on the left side of the frame[1] MC0153A.
The vertical bar [2] with MW0130A support must be fixed on the right side of the frame MC0153A.
Before to proceed with fixing the frame to the monitors, remove the monitor’s handles that interfere
with the frame.
The MC0153A frame has the holes that match with the monitor’s VESA
standard (200X200mm).
Fix the frame to each monitor using 4 M6x16 screws + 4 Flat washers + 4
grip washers (the grip washer must be placed between screws head and flat
washer).
Now hang the monitor structure on the “T” bracket
CENTRAL PLATE: remove the 4 monitor’s cover screws [A]; place the Central Plate between the 2
monitors and use number 4 M4x20 screws + washer to fix the plate to the monitors.
1 2
A
A
A
A
Table of contents
