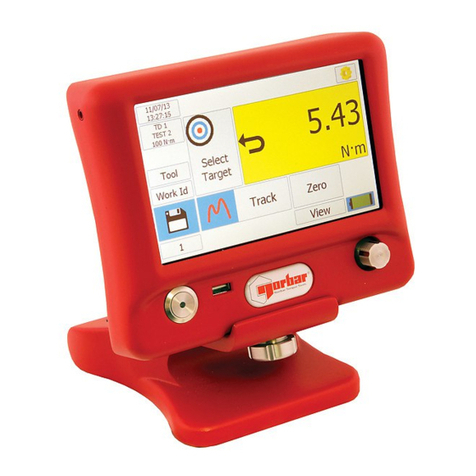
STEMCELL STEMvision User manual

TECHNICAL MANUAL
STEMvision™
Automated Colony-Forming
Unit (CFU) Assay Reader


STEMCELL TECHNOLOGIES INC.’S QUALITY MANAGEMENT SYSTEM IS CERTIFIED TO ISO 13485. PRODUCTS ARE
FOR RESEARCH USE ONLY AND NOT INTENDED FOR HUMAN OR ANIMAL DIAGNOSTIC OR THERAPEUTIC USES UNLESS OTHERWISE STATED.
TOLL-FREE PHONE 1 800 667 0322 PHONE +1 604 877 0713 VERSION 01
[email protected] TECHSUP[email protected] FOR GLOBAL CONTACT DETAILS VISIT WWW.STEMCELL.COM DOCUMENT #10000005577
i
Table of Contents
1.0Safety Information and Warnings........................................................................................................1
2.0Introduction ...........................................................................................................................................2
3.0STEMvision™ System ..........................................................................................................................5
3.1Unpacking and Setup ........................................................................................................................ 6
3.2Startup ............................................................................................................................................... 6
3.3Shutdown........................................................................................................................................... 6
4.0STEMvision™ Acquisition Application.............................................................................................10
4.1STEMvision™ Acquisition User Interface Overview........................................................................ 10
4.2Loading a SmartDish™ Plate .......................................................................................................... 11
4.2.1SmartDish™ Incubation Tips....................................................................................................... 11
4.3Controlling Stage Position ............................................................................................................... 11
4.4User, Sample, and Image Identification........................................................................................... 12
4.4.1User Identification........................................................................................................................ 12
4.4.2Sample Identification ................................................................................................................... 12
4.4.3Image Identification ..................................................................................................................... 16
4.5Setting Focus and Illumination......................................................................................................... 17
4.6Image Acquisition ............................................................................................................................ 19
4.6.1Selecting Wells ............................................................................................................................ 19
4.6.2Acquiring Images......................................................................................................................... 20
5.0STEMvision™ Analyzer Application .................................................................................................21
5.1User Interface Overview .................................................................................................................. 22
5.2Analysis Setup ................................................................................................................................. 23
5.2.1Generating CFU Assay Report Forms (Human only).................................................................. 23
5.2.2Preview of Result Images (Human and Mouse).......................................................................... 24
5.3Image Analysis ................................................................................................................................ 24
5.3.1Selecting Images for Analysis ..................................................................................................... 24
5.3.2Analyzing STEMvision™ Acquired Images................................................................................. 25
5.3.3HL7 Data Export (Human Only) .................................................................................................. 26
6.0Viewing Results...................................................................................................................................27
6.1Viewing Human CFU Assay Report Forms ..................................................................................... 27
6.2Viewing Individual Images ............................................................................................................... 28
6.2.1Read-Only View........................................................................................................................... 28
6.2.2Using the STEMvision™ Colony Marker Application .................................................................. 28
6.3Manually Scoring an Acquired Image.............................................................................................. 32
6.4Editing Results................................................................................................................................. 33

STEMCELL TECHNOLOGIES INC.’S QUALITY MANAGEMENT SYSTEM IS CERTIFIED TO ISO 13485. PRODUCTS ARE
FOR RESEARCH USE ONLY AND NOT INTENDED FOR HUMAN OR ANIMAL DIAGNOSTIC OR THERAPEUTIC USES UNLESS OTHERWISE STATED.
TOLL-FREE PHONE 1 800 667 0322 PHONE +1 604 877 0713 VERSION 01
[email protected] TECHSUP[email protected] FOR GLOBAL CONTACT DETAILS VISIT WWW.STEMCELL.COM DOCUMENT #10000005577
ii
6.5Updating Sample Reports with Manually Modified Results ............................................................. 34
7.0Creating a Summary Table of Colony Counts in Microsoft® Excel .............................................. 35
7.1Creating a Summary Table for Individual Plates or Wells................................................................ 36
7.2Creating a Summary Table Based on Search Criteria..................................................................... 36
7.3Acquisition and Analyzer Logs ......................................................................................................... 36
8.0Care and Maintenance ....................................................................................................................... 37
8.1Normal Maintenance ........................................................................................................................ 37
8.2Verification of Stage Positioning ...................................................................................................... 37
8.3Cleaning an External Spill ................................................................................................................ 38
8.4Cleaning an Internal Spill ................................................................................................................. 38
8.5Malfunction ....................................................................................................................................... 38
9.0Specifications ..................................................................................................................................... 39
10.0Appendix 1: Examples of “Lab” and “Parent” Human CFU Assay Report Forms ...................... 40

STEMCELL TECHNOLOGIES INC.’S QUALITY MANAGEMENT SYSTEM IS CERTIFIED TO ISO 13485. PRODUCTS ARE
FOR RESEARCH USE ONLY AND NOT INTENDED FOR HUMAN OR ANIMAL DIAGNOSTIC OR THERAPEUTIC USES UNLESS OTHERWISE STATED.
TOLL-FREE PHONE 1 800 667 0322 PHONE +1 604 877 0713 VERSION 01
[email protected] TECHSUP[email protected] FOR GLOBAL CONTACT DETAILS VISIT WWW.STEMCELL.COM DOCUMENT #10000005577
1
1.0 Safety Information and Warnings
STEMvision™ Instrument (Catalog # 22000) must be operated by trained professionals and is intended for
research use only. Not intended for human or animal diagnostic or therapeutic uses.
For operation, STEMvision™ should be placed on a clean, flat surface free of any foreign objects or debris
and insulated from excessive vibration. There should be at least 10 cm (4 in) of clearance on each side of the
instrument.
Always connect the power supply to a 3-prong, grounded AC outlet rated 100V/240V, 50/60 Hz, 1.6A, 1Ph
using the AC power cord provided with STEMvision™. Before plugging the instrument in, be sure that a fuse
rated 250 V 2A Fast Blow is installed.
Under normal operating conditions, it is not necessary to open any part of the STEMvision™ other than the
enclosure door. To reduce the risk of electrical shock, ensure that the instrument is unplugged prior to
accessing openings other than the enclosure door.
Do not allow fluids to enter the interior of the STEMvision™ instrument. In the event of such a spill, disconnect
the power cable before cleaning. See section 8.4 for spill cleanup instructions.
Operate STEMvision™ at 15 - 30°C, in an environment with a relative humidity of 20 - 85%. STEMvision™
should be used indoors only. STEMvision™ does not require placement in a biohazard safety cabinet and is
not specified for use inside an incubator or cold room.
STEMvision™ weighs 27 kg (59 lb). Exercise caution when moving STEMvision™. It is recommended that
two people are present to lift or move the instrument safely.
This device complies with Part 15 of the FCC Rules. Operation is subject to the following two conditions:
(1) this device may not cause harmful interference, and (2) this device must accept any interference received,
including interference that may cause undesired operation.
In case of malfunction, call STEMCELL Technologies Inc. for service. Service performed by anyone other
than a STEMCELL Technologies representative will void the warranty associated with STEMvision™. There
are no user-serviceable parts inside the instrument and the outer casing of STEMvision™ should never be
removed.
STEMvision™ is manufactured and distributed by STEMCELL Technologies Inc., 1618 Station Street,
Vancouver BC, Canada V6A 1B6. Call 1-604-877-0713 or toll-free 1-800-667-0322 within North America.

STEMCELL TECHNOLOGIES INC.’S QUALITY MANAGEMENT SYSTEM IS CERTIFIED TO ISO 13485. PRODUCTS ARE
FOR RESEARCH USE ONLY AND NOT INTENDED FOR HUMAN OR ANIMAL DIAGNOSTIC OR THERAPEUTIC USES UNLESS OTHERWISE STATED.
TOLL-FREE PHONE 1 800 667 0322 PHONE +1 604 877 0713 VERSION 01
[email protected] TECHSUP[email protected] FOR GLOBAL CONTACT DETAILS VISIT WWW.STEMCELL.COM DOCUMENT #10000005577
2
2.0 Introduction
STEMvision™ is an automated instrument and computer system that is designed specifically for imaging,
classifying, and counting hematopoietic colonies produced by human or mouse progenitor cells in the colony-
forming unit (CFU) assay. For human assays, STEMvision™ separately counts colonies derived from
erythroid progenitor cells (colony-forming units-erythroid [CFU-E] and burst-forming units-erythroid [BFU-E]),
uni- or bi-potent myeloid progenitor cells (colony-forming units granulocyte [CFU-G], colony-forming units
macrophage [CFU-M], and colony-forming units granulocyte-macrophage [CFU-GM]), or multi-potent
progenitor cells (colony-forming units granulocyte, erythrocyte, macrophage, megakaryocyte [CFU-GEMM])
that develop in conventional 14-day CFU assays of bone marrow (BM), mobilized peripheral blood (MPB), or
umbilical cord blood (CB) cells. STEMvision™ can also count the total number of colonies in a faster 7-day
CFU assay of CB cells that has been developed for CB banks. A summary of human STEMvision™ Analysis
Packages used for different human CFU assays is described in Table 1. For mouse assays, STEMvision™
can count the total number of colonies in CFU assays (ranging from 7 - 14 days) or colonies derived from
erythroid or myeloid progenitor cells in lineage-specific media. A summary of mouse STEMvision™ Analysis
Packages is described in Table 2.
STEMvision™ is designed for use with MethoCult™ media (see Table 1 and Table 2 for the appropriate
MethoCult™ formulation for different STEMvision™ CFU assays) and meniscus-reducing SmartDish™
cultureware (Catalog #27370). STEMvision™ is optimized for analysis of CFU assays that do not contain
background red blood cells (RBCs). RBCs must be cleared from fresh human bone marrow and mobilized
peripheral blood samples using HetaSep™ (Catalog #07906) or from human cord blood with HetaSep™ or
ErythroClear™ (Catalog #01739) before setting up the CFU assay. For complete instructions on how to set up
CFU assays, refer to the Technical Manual: Human Colony-Forming Unit (CFU) Assays Using MethoCult™
(Document #28404) or the Technical Manual: Mouse Colony-Forming Unit (CFU) Assays Using MethoCult™
(Document #28405) available at www.stemcell.com or contact us to request a copy.
STEMvision™ eliminates the inter- and intra-individual and laboratory variation associated with manual colony
scoring by using sophisticated image acquisition and analysis software to identify and classify hematopoietic
colonies. The morphological criteria for classifying the different sub-types of CFUs are applied consistently,
facilitating standardization of the CFU assay and ensuring accurate, reproducible results. Each 35 mm culture
is imaged in approximately 30 - 45 seconds and an entire SmartDish™ 6-well plate is imaged in
approximately 3 minutes. Analysis can be completed offline in about 6 minutes per plate for human assays or
3 minutes per plate for mouse assays. For high throughput processing, 20 plates containing 120 cultures can
be imaged in about 80 minutes, with the image analysis executed overnight. Digital images of the entire
culture can be permanently archived for future reference.
For human assays, the results of 7-day and 14-day CFU assays produced by STEMvision™ can be printed in
two different report formats. A “Lab” format report contains detailed information on the CFU assay for the
laboratory or transplant physician. A second “Parent” report form is suitable for presentation of the CFU assay
results to parents banking their child’s CB with a private bank for potential future autologous use.
In the following sections, each of these aspects of using STEMvision™ will be described in detail.
Prior to using STEMvision™, please ensure that you have read section 1.0: Safety Information and Warnings.

STEMCELL TECHNOLOGIES INC.’S QUALITY MANAGEMENT SYSTEM IS CERTIFIED TO ISO 13485. PRODUCTS ARE
FOR RESEARCH USE ONLY AND NOT INTENDED FOR HUMAN OR ANIMAL DIAGNOSTIC OR THERAPEUTIC USES UNLESS OTHERWISE STATED.
TOLL-FREE PHONE 1 800 667 0322 PHONE +1 604 877 0713 VERSION 01
[email protected] TECHSUP[email protected] FOR GLOBAL CONTACT DETAILS VISIT WWW.STEMCELL.COM DOCUMENT #10000005577
3
Table 1: Summary of STEMvision™ Assays and MethoCult™ Media for Identifying Human CFU Types
TISSUE
CFU
ASSAY
DURATION
COLONY
TYPES IDENTIFIED BY
STEMvision™
METHOCULT™
MEDIUM
STEMvision™ ANALYSIS
PACKAGE
STEMvision™
ASSAY TYPE
FIELD**
PRINTED
CFU ASSAY
REPORT
FORM
Cord Blood
(CB) 7 days
Total CFUs
without distinction of
colony types
MethoCult™ Express
(Catalog #04437)
STEMvision™
Human Cord Blood
7-Day CFU Analysis Package
(Catalog #22001)
Human CB
7-Day
Lab
Parent
Cord Blood
(CB) 14 days
BFU-E
CFU-G/M/GM
CFU-GEMM
MethoCult™ H4034 Optimum
(Catalog #04034) STEMvision™ Color
Human Cord Blood
14-Day CFU Analysis Package
(Catalog #22005)
Human CB
14-Day Lab
Parent
CFU-G/M/GM
MethoCult™ H4035 Optimum
without EPO
(Catalog #04035)
Human CB
14-Day EPO-Free
Bone
Marrow
(BM)
14 days
BFU-E
CFU-E*
CFU-G/M/GM
CFU-GEMM
MethoCult™ H4034 Optimum
(Catalog #04034) STEMvision™ Color
Human Bone Marrow
14-Day CFU Analysis Package
(Catalog #22006)
Human BM
14-Day
Lab
CFU-G/M/GM
MethoCult™ H4035 Optimum
without EPO
(Catalog #04035)
Human BM
14-Day EPO-Free
Mobilized
Peripheral
Blood
(MPB)
14 days
BFU-E
CFU-G/M/GM
CFU-GEMM
MethoCult™ H4034 Optimum
(Catalog #04034) STEMvision™ Color
Human Mobilized Peripheral Blood
14-Day CFU Analysis Package
(Catalog #22007)
Human MPB
14-Day
Lab
CFU-G/M/GM
MethoCult™ H4035 Optimum
without EPO
(Catalog #04035)
Human MPB
14-Day EPO-Free
Abbreviations: BFU-E: burst-forming unit-erythroid; CFU-E: colony-forming unit-erythroid; CFU-G/M/GM: colony-forming unit-granulocyte/macrophage/granulocyte-macrophage; CFU-
GEMM: colony-forming unit-granulocyte, erythrocyte, macrophage, megakaryocyte; EPO: erythropoietin; BM: bone marrow; MPB: mobilized peripheral blood; CB: cord blood.
*Counting of CFU-E is optional.
**Assay types are selected by the user when using the STEMvision™ Analysis application.

STEMCELL TECHNOLOGIES INC.’S QUALITY MANAGEMENT SYSTEM IS CERTIFIED TO ISO 13485. PRODUCTS ARE
FOR RESEARCH USE ONLY AND NOT INTENDED FOR HUMAN OR ANIMAL DIAGNOSTIC OR THERAPEUTIC USES UNLESS OTHERWISE STATED.
TOLL-FREE PHONE 1 800 667 0322 PHONE +1 604 877 0713 VERSION 01
[email protected] TECHSUP[email protected] FOR GLOBAL CONTACT DETAILS VISIT WWW.STEMCELL.COM DOCUMENT #10000005577
4
Table 2: Summary of STEMvision™ Assays and MethoCult™ Media for Identifying Mouse CFU Types
TISSUE CFU ASSAY
DURATION
METHOCULT™
MEDIUM
COLONY
TYPES SUPPORTED
BY THE MEDIUM
COLONY
TYPES IDENTIFIED
BY STEMvision™
STEMvision™ ANALYSIS
PACKAGE
STEMvision™
ASSAY TYPE FIELD*
Bone
Marrow
(BM)
7 - 12 days
MethoCult™ GF
M3434
(Catalog #03434)
BFU-E
CFU-GM
CFU-GEMM
Total CFUs
STEMvision™ Mouse Total
CFU Analysis Package**
(Catalog #22008)
Mouse Total
7 - 12 days
MethoCult™ GF
M3534
(Catalog #03534)
CFU-GM Myeloid CFUs
STEMvision™ Mouse Myeloid
CFU Analysis Package**
(Catalog #22009)
Mouse Myeloid
7 - 14 days
MethoCult™ SF
M3436
(Catalog #03436)
BFU-E Erythroid CFUs
STEMvision™ Mouse Erythroid
CFU Analysis Package
(Catalog #22011)
Mouse Erythroid
Abbreviations: BFU-E: burst-forming unit-erythroid; CFU-GM: colony-forming unit-granulocyte-macrophage; CFU-GEMM: colony-forming unit-granulocyte, erythrocyte, macrophage,
megakaryocyte; BM: bone marrow.
*Assay types are selected by the user when using the STEMvision™ Analysis application.
**Total CFU and Myeloid CFU algorithms are identical; analysis packages only differ by name and medium used.

STEMCELL TECHNOLOGIES INC.’S QUALITY MANAGEMENT SYSTEM IS CERTIFIED TO ISO 13485. PRODUCTS ARE
FOR RESEARCH USE ONLY AND NOT INTENDED FOR HUMAN OR ANIMAL DIAGNOSTIC OR THERAPEUTIC USES UNLESS OTHERWISE STATED.
TOLL-FREE PHONE 1 800 667 0322 PHONE +1 604 877 0713 VERSION 01
[email protected] TECHSUP[email protected] FOR GLOBAL CONTACT DETAILS VISIT WWW.STEMCELL.COM DOCUMENT #10000005577
5
3.0 STEMvision™ System
The STEMvision™ instrument consists of an imaging module that enables the acquisition of high resolution
composite images of hematopoietic colony assays plated in SmartDish™ cultureware (each plate consisting
of 6 x 35 mm wells), Catalog #27370. Key components of the instrument include a macro zoom lens, a CCD
digital camera and a robotic stage that moves the culture plate over the lens in increments as images are
acquired. In addition, a heater allows the interior temperature of the acquisition chamber to be warmed to
prevent the formation of condensation on the inside of the SmartDish™ lid.
The imaging system is controlled from a separate computer, provided with the instrument.
Note: The computer provided with STEMvision™ does not contain anti-virus software. Users are encouraged
to check with their own IT department to determine what anti-virus software is required or recommended at
their institution.
The software applications included in the STEMvision™ system are:
STEMvision™ Acquisition - for acquiring images of CFU assay cultures
STEMvision™ Analyzer - for analyzing culture images using CFU assay algorithms specific for
different hematopoietic colony and tissue types
STEMvision™ Colony Marker - for viewing acquired images, and if desired, manual scoring and
editing of automated results
STEMvision™ has been optimized for use with SmartDish™ cultureware and MethoCult™ media. It is not
recommended for use with different cultureware or media that has not been tested and approved by
STEMCELL Technologies. Refer to Table 1 and Table 2 for a summary of the different types of CFU assays
and recommended MethoCult™ media that are compatible with STEMvision™. For use with other
MethoCult™ formulations, please contact STEMCELL Technologies at techsupport@stemcell.com.

STEMCELL TECHNOLOGIES INC.’S QUALITY MANAGEMENT SYSTEM IS CERTIFIED TO ISO 13485. PRODUCTS ARE
FOR RESEARCH USE ONLY AND NOT INTENDED FOR HUMAN OR ANIMAL DIAGNOSTIC OR THERAPEUTIC USES UNLESS OTHERWISE STATED.
TOLL-FREE PHONE 1 800 667 0322 PHONE +1 604 877 0713 VERSION 01
[email protected] TECHSUP[email protected] FOR GLOBAL CONTACT DETAILS VISIT WWW.STEMCELL.COM DOCUMENT #10000005577
6
3.1 Unpacking and Setup
A STEMCELL Technologies representative or trained individual will unpack and set up STEMvision™ in your
laboratory. They will connect the STEMvision™ instrument to the computer and verify the stage calibration,
function, and positioning.
Note: Stage positioning can be verified using the calibration plate provided with STEMvision™ (section 8.2).
Adjustments should only be performed by STEMCELL Technologies qualified personnel.
3.2 Startup
1. Ensure that the STEMvision™ enclosure door (Figure 1F) is closed.
2. Turn ON STEMvision™ using the power switch located on the back of the instrument (Figure 2A).
Note: A green indicator light on the front of the instrument (Figure 1C) will indicate that the instrument is
turned on.
3. Turn ON the heater using the switch located on the front of the instrument (Figure 1B). Proper
pre-warming of the internal chamber will minimize the formation of condensation on the SmartDish™
plate lid.
Note: A red indicator light on the front of the instrument (Figure 1C) will show that the heater is turned on.
4. Allow the inner chamber to warm up for about 10 minutes before inserting a SmartDish™ plate. Cultures
should not be removed from the incubator until they are ready to be put inside STEMvision™ for imaging.
Note: STEMvision™ is not specified for use as an incubator.
5. Proceed with image acquisition (section 4.0).
3.3 Shutdown
1. Turn OFF the heater using the switch located on the front of the instrument (Figure 1B).
2. On the computer, exit the STEMvision™ Acquisition software application.
3. Turn OFF STEMvision™ using the power switch located on the back of the instrument (Figure 2A).
Note: Both indicator lights on the front of the instrument (Figure 1C) will turn off.

STEMCELL TECHNOLOGIES INC.’S QUALITY MANAGEMENT SYSTEM IS CERTIFIED TO ISO 13485. PRODUCTS ARE
FOR RESEARCH USE ONLY AND NOT INTENDED FOR HUMAN OR ANIMAL DIAGNOSTIC OR THERAPEUTIC USES UNLESS OTHERWISE STATED.
TOLL-FREE PHONE 1 800 667 0322 PHONE +1 604 877 0713 VERSION 01
[email protected] TECHSUP[email protected] FOR GLOBAL CONTACT DETAILS VISIT WWW.STEMCELL.COM DOCUMENT #10000005577
7
Figure 1. Front View of the STEMvision™ Instrument

STEMCELL TECHNOLOGIES INC.’S QUALITY MANAGEMENT SYSTEM IS CERTIFIED TO ISO 13485. PRODUCTS ARE
FOR RESEARCH USE ONLY AND NOT INTENDED FOR HUMAN OR ANIMAL DIAGNOSTIC OR THERAPEUTIC USES UNLESS OTHERWISE STATED.
TOLL-FREE PHONE 1 800 667 0322 PHONE +1 604 877 0713 VERSION 01
[email protected] TECHSUP[email protected] FOR GLOBAL CONTACT DETAILS VISIT WWW.STEMCELL.COM DOCUMENT #10000005577
8
Figure 2. Back View of the STEMvision™ Instrument

STEMCELL TECHNOLOGIES INC.’S QUALITY MANAGEMENT SYSTEM IS CERTIFIED TO ISO 13485. PRODUCTS ARE
FOR RESEARCH USE ONLY AND NOT INTENDED FOR HUMAN OR ANIMAL DIAGNOSTIC OR THERAPEUTIC USES UNLESS OTHERWISE STATED.
TOLL-FREE PHONE 1 800 667 0322 PHONE +1 604 877 0713 VERSION 01
[email protected] TECHSUP[email protected] FOR GLOBAL CONTACT DETAILS VISIT WWW.STEMCELL.COM DOCUMENT #10000005577
9
Figure 3. Front View of the STEMvision™ Instrument with the Enclosure Door Open

STEMCELL TECHNOLOGIES INC.’S QUALITY MANAGEMENT SYSTEM IS CERTIFIED TO ISO 13485. PRODUCTS ARE
FOR RESEARCH USE ONLY AND NOT INTENDED FOR HUMAN OR ANIMAL DIAGNOSTIC OR THERAPEUTIC USES UNLESS OTHERWISE STATED.
TOLL-FREE PHONE 1 800 667 0322 PHONE +1 604 877 0713 VERSION 01
[email protected] TECHSUP[email protected] FOR GLOBAL CONTACT DETAILS VISIT WWW.STEMCELL.COM DOCUMENT #10000005577
10
4.0 STEMvision™ Acquisition Application
The STEMvision™ Acquisition application is used to set up and control all aspects of CFU assay image
acquisition. The application can only be run when the STEMvision™ instrument is turned on.
Note: Do not turn off the STEMvision™ instrument while the STEMvision™ Acquisition application is running.
If the instrument is accidentally turned off, re-initialize the instrument by clicking on “Stage” in the Menu Bar
and selecting “Initialize”. Alternatively, restart the application, however, any Sample ID information will need to
be re-entered.
4.1 STEMvision™ Acquisition User Interface Overview
1. Turn ON the STEMvision™ instrument as described in section 3.2.
2. Start the STEMvision™ Acquisition application on the computer by double-clicking the icon on the
desktop. The user interface of the STEMvision™ Acquisition application is shown in Figure 4.
Note: At initial startup of the application, the stage will complete a self-calibration routine. This movement
of the stage is normal.
Figure 4. The STEMvision™ Acquisition Application upon Startup.
The main Control Panel menu is on the right and the Preview Window is on the left.

STEMCELL TECHNOLOGIES INC.’S QUALITY MANAGEMENT SYSTEM IS CERTIFIED TO ISO 13485. PRODUCTS ARE
FOR RESEARCH USE ONLY AND NOT INTENDED FOR HUMAN OR ANIMAL DIAGNOSTIC OR THERAPEUTIC USES UNLESS OTHERWISE STATED.
TOLL-FREE PHONE 1 800 667 0322 PHONE +1 604 877 0713 VERSION 01
[email protected] TECHSUP[email protected] FOR GLOBAL CONTACT DETAILS VISIT WWW.STEMCELL.COM DOCUMENT #10000005577
11
Menu Bar: Located along the top of the application window. It provides access to additional
instrument settings.
Preview Window: Located on the upper left side of the application window. The live camera image is
shown in this window. The preview window can be viewed at two different resolutions, click on
“Preview” in the Menu Bar and select “Full” to view a larger preview at higher resolution.
Control Panel: The entire grey area located on the right side of the application window. It provides
quick access for controlling all major features of the application, and fields for unique sample and
user/operator identification.
4.2 Loading a SmartDish™ Plate
SmartDish™ plates can be imaged with their lids on or off. If plates are to be imaged with the lids on, it is
important to ensure that condensation does not collect on the surface of the lids. For more information, see
section 4.2.1.
1. Click the “Load Plate” button in the Control Panel to move the stage into the correct position for plate
loading.
2. Open the STEMvision™ enclosure door (Figure 1F) and load a SmartDish™ plate onto the sample tray
(Figure 3A). It is very important to ensure that the plate is properly inserted and sits completely flat on the
tray.
Note: SmartDish™ plates should be handled with gloves to avoid creating fingerprints on the bottom of
the plate that can affect image acquisition.
3. Close the STEMvision™ enclosure door.
4.2.1 SmartDish™ Incubation Tips
To avoid condensation from collecting on SmartDish™ lids, ensure that the SmartDish™ plates are moved
quickly from the incubator to the STEMvision™ instrument. In the event that excessive condensation does
appear, users can gently wick away the condensation with a non-abrasive towel.
4.3 Controlling Stage Position
The stage located inside the instrument moves the sample tray on which the SmartDish™ is placed. There
are different ways to move the position of the tray and SmartDish™:
Moving to the Center of the Stage: Click on “Stage” in the Menu Bar and select “Center”. This will
center the stage and will place the SmartDish™ in close proximity to the heater. This will minimize the
formation of condensation on the SmartDish™ lid.
Moving to a Specific Well: Click on “Utility” in the Menu Bar and select “Well Navigator”. A new
dialog box (Well Navigator) will appear showing a schematic image of the SmartDish™ plate.
Right-click on the desired well and the stage will move to the center of the selected well.
Note: The selected well will be highlighted in turquoise in the Well Navigator dialog box window and
its live image will be shown in the Preview Window.
Using the Joy Pad: The Joy Pad is located at the bottom of the Control Panel. To use it, click and
drag the red dot of the Joy Pad in the desired direction. The live image will be displayed in the
Preview Window.
Note: Moving the red dot away from the center of the Joy Pad increases the speed of the stage
movement.

STEMCELL TECHNOLOGIES INC.’S QUALITY MANAGEMENT SYSTEM IS CERTIFIED TO ISO 13485. PRODUCTS ARE
FOR RESEARCH USE ONLY AND NOT INTENDED FOR HUMAN OR ANIMAL DIAGNOSTIC OR THERAPEUTIC USES UNLESS OTHERWISE STATED.
TOLL-FREE PHONE 1 800 667 0322 PHONE +1 604 877 0713 VERSION 01
[email protected] TECHSUP[email protected] FOR GLOBAL CONTACT DETAILS VISIT WWW.STEMCELL.COM DOCUMENT #10000005577
12
Entering XY Coordinates: The position of the stage is displayed as XY coordinates at the bottom of
the Control Panel. These coordinates indicate the position of the stage in millimeters relative to the
origin of the stage’s calibrated range of travel. Click on “Stage” in the Menu Bar and select “Move To”,
then enter the desired XY coordinates in the new dialog box. Click on “Move” to automatically move
the stage to the specified XY coordinates.
4.4 User, Sample, and Image Identification
4.4.1 User Identification
The “User ID” field in the Control Panel identifies the instrument operator by the Windows User Login name.
The User ID is recorded in the acquisition log file (section 7.3).
4.4.2 Sample Identification
Each sample can be identified by Plate ID, Well ID, and Sample ID, as described below. This information is
then used in naming acquired images (section 4.4.3), generating log files (section 7.3), and/or the human
“Lab” and “Parent” CFU assay report forms (section 6.1).
Note: When manually entering Plate ID and Sample ID information, avoid punctuation marks, spaces, and
characters not compatible with the Microsoft® Windows® file naming system, such as “/”, “\”, “*”, and “?”.
Plate ID:
Automatic Entry - Click on “Plate ID” in the Menu Bar (at the top of the application window) and select
“Automatic”. The default Plate ID name generated is based on the acquisition date and time in the following
format: YYYYMMDD-HHMM indicating year, month, day, hour, and minutes, respectively
(e.g. 20141103-1331 for November 3, 2014 at 1:31 PM).
Manual Entry - Enter any name in the “Plate ID” field in the Control Panel.
Well ID:
This is generated automatically and corresponds to the wells (A1 through B3) as seen in the Well Navigator
dialog box in Figure 5.

STEMCELL TECHNOLOGIES INC.’S QUALITY MANAGEMENT SYSTEM IS CERTIFIED TO ISO 13485. PRODUCTS ARE
FOR RESEARCH USE ONLY AND NOT INTENDED FOR HUMAN OR ANIMAL DIAGNOSTIC OR THERAPEUTIC USES UNLESS OTHERWISE STATED.
TOLL-FREE PHONE 1 800 667 0322 PHONE +1 604 877 0713 VERSION 01
[email protected] TECHSUP[email protected] FOR GLOBAL CONTACT DETAILS VISIT WWW.STEMCELL.COM DOCUMENT #10000005577
13
Figure 5. Well Navigator Dialog Box
Sample ID:
The Sample ID information may be imported into the STEMvision™ Acquisition application via a CSV file or
entered manually in the “Sample ID information” dialog box.
Important: For human assays, if printed “Lab” or “Parent” CFU assay report forms will be required, the
sample ID information must be entered via a CSV file.

STEMCELL TECHNOLOGIES INC.’S QUALITY MANAGEMENT SYSTEM IS CERTIFIED TO ISO 13485. PRODUCTS ARE
FOR RESEARCH USE ONLY AND NOT INTENDED FOR HUMAN OR ANIMAL DIAGNOSTIC OR THERAPEUTIC USES UNLESS OTHERWISE STATED.
TOLL-FREE PHONE 1 800 667 0322 PHONE +1 604 877 0713 VERSION 01
[email protected] TECHSUP[email protected] FOR GLOBAL CONTACT DETAILS VISIT WWW.STEMCELL.COM DOCUMENT #10000005577
14
Automatic Entry of Sample IDs from a Pre-Populated CSV File
Sample information must be entered and saved in a CSV file before starting image acquisition. An example of
a CSV file with 18 comma-separated columns is located on the desktop of the STEMvision™ computer upon
installation of the device software.
1. Ensure a CSV file is populated with data and formatted correctly. The file must consist of 18 comma-
separated columns. Refer to Table 3 for guidelines on entering information in the file.
Table 3: Column Properties in the CSV file.
COLUMN INFORMATION TRACKED IN
COLUMNS FORMAT EXAMPLE
A Sample ID 30 characters max 123456ABC
B Patient Name 30 characters max Sara Smith
C Parent Name 1 30 characters max John Smith
D Parent Name 2 30 characters max Emma Smith
E Gender
-1 (Not Specified)
0 (Female)
1 (Male)
0
F Birth Date/Time
month/day/year hh:min
in numeric format (hours in
24h format)
6/21/2012 13:21
G Birth Hospital 30 characters max St Paul’s
H Obstetrician Name 30 characters max Peter Johnson
I Test Number 30 characters max T001
J
Number of Nucleated Cells per mL
for the sample plated in the CFU
assay.
Numeral 12000000
K Number of Cells Plated per Well Numeral 20000
L Pre-processed Volume in µL Numeral 43000
M Processed Volume in µL Numeral 21000
N Sample Type
-1 = Not Specified
0 = Fresh whole
1 = Fresh processed
2 = Frozen whole
3 = Frozen processed
3
O Assay Setup Date/time
month/day/year hh:min
in numeric format (hours in
24h format)
6/22/2012 16:31:00
P Sample Received Date/time
month/day/year hh:min
in numeric format (hours in
24h format)
6/21/2012 17:21:00
Q MethoCult™ Formulation 30 characters max H4034
R MethoCult™ Catalog Number 30 characters max 04034/12E12345

STEMCELL TECHNOLOGIES INC.’S QUALITY MANAGEMENT SYSTEM IS CERTIFIED TO ISO 13485. PRODUCTS ARE
FOR RESEARCH USE ONLY AND NOT INTENDED FOR HUMAN OR ANIMAL DIAGNOSTIC OR THERAPEUTIC USES UNLESS OTHERWISE STATED.
TOLL-FREE PHONE 1 800 667 0322 PHONE +1 604 877 0713 VERSION 01
[email protected] TECHSUP[email protected] FOR GLOBAL CONTACT DETAILS VISIT WWW.STEMCELL.COM DOCUMENT #10000005577
15
2. Click on “Plate ID” in the Menu Bar and select “Sample ID Information”.
3. Click the “Import from CSV file” button in the new dialog box and browse to select the populated CSV file.
The list of samples extracted from the CSV file will appear on the left side of the dialog box window under
“Sample ID List” (Figure 6).
Optional: Sample information may be modified, or additional sample information can be entered manually
in the dialog box fields. Click “Add/Modify this Sample ID” at the bottom of the dialog box when finished.
4. Click the “Done” button once the data for all desired wells has been entered.
Figure 6. Sample ID Information Dialog Box
Manual Entry of Sample ID Information
1. Click on “Plate ID” in the Menu Bar and select “Sample ID Information”.
2. Populate the fields of the “Sample ID Information” dialog box with the relevant information.
3. Click the “Add/Modify this Sample ID” button when finished populating the fields. The sample will appear
on the left side of the dialog box under “Sample ID List” (Figure 6).
4. Continue adding new Sample ID information as required.
5. Click the “Done” button when all samples to be imaged have been added to the list.
Note: Any Sample ID information added manually will be cleared on shutdown of the STEMvision™
Acquisition application. In order to save Sample ID Information, populate a CSV file as described under
“Automatic Entry of Sample IDs from a Pre-Populated CSV File”.

STEMCELL TECHNOLOGIES INC.’S QUALITY MANAGEMENT SYSTEM IS CERTIFIED TO ISO 13485. PRODUCTS ARE
FOR RESEARCH USE ONLY AND NOT INTENDED FOR HUMAN OR ANIMAL DIAGNOSTIC OR THERAPEUTIC USES UNLESS OTHERWISE STATED.
TOLL-FREE PHONE 1 800 667 0322 PHONE +1 604 877 0713 VERSION 01
[email protected] TECHSUP[email protected] FOR GLOBAL CONTACT DETAILS VISIT WWW.STEMCELL.COM DOCUMENT #10000005577
16
Manual Definition of User Definable Fields (UDFs)
In addition to the CB-specific sample information entered in the “Sample ID Information” dialog box (Figure 6),
customized sample information can in entered in up to 4 UDFs.
1. Click on “Plate ID” in the Menu Bar and select “Define UDF Titles”.
2. Enter the customized UDF names into the UDF fields.
Note: The customized UDF names will be set as defaults for future sessions but can be changed at any
time. The UDF information can be found in the acquisition data log files (section 7.3).
4.4.3 Image Identification
To select the root folder where the acquired images, data log files (section 7.3), and analysis files will be
saved, click on the folder icon button in the Control Panel (see Figure 6) and select the root folder in the
dialog box (Browse for Folder).
Note: By default, images will be saved in the folder specified during the previous acquisition session.
Each time a set of images is acquired, a new image sub-folder will be created in the root folder. The image
sub-folder name corresponds to the Plate ID (e.g. Plate1), whereas the image filename corresponds to the
Plate ID_Well ID.jpg (e.g. Plate1_A1.jpg).
To include the Sample ID in the image filename, click on “Plate ID” in the Menu Bar and select “Include
Sample ID in Image File Name”. The image filename will then correspond to Plate ID_Well ID_Sample ID.jpg
(e.g. Plate1_A1_Sample1.jpg).
Note: Once selected, “Include Sample ID in Image File Name” will be set as the default file naming convention
for future acquisition but can be changed again at any time.
Refer to section 4.4.2 for more information on Plate ID, Well ID, and Sample ID.
Table of contents
