ennoLogic eA990R User manual

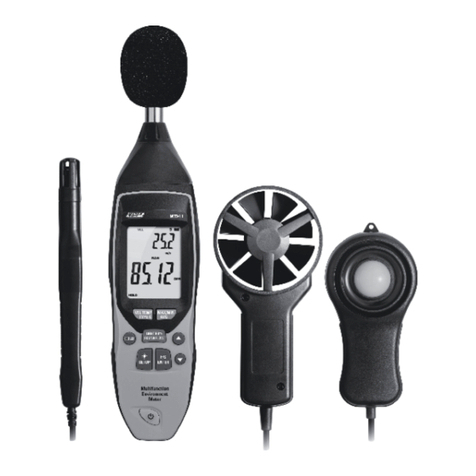
eA990R Digital Anemometer
User Manual

1. Overview
Thank you for purchasing the ennoLogic eA990R anemometer,
a high quality instrument which measures 8 parameters:
•Wind Speed (mph, m/s, ft/min, knots, km/h)
•Wind Chill (°C / °F)
•Air Temperature (°C / °F)
•Humidity (%)
•Heat ndex (°C / °F)
•Dew Point ((°C / °F)
•Barometric Pressure (hPa, mbar, inHg)
•Pressure & Relative Altitude (m, ft)
The eA990R anemometer comes with many powerful features
including the following:
•LCD with White Backlight
•Beaufort Scale
•Maximum, Minimum, and Average Reading Display
•Hold Function
•Rechargeable Li- on battery
•Low Battery ndicator
•Auto Power Off (with override option)
•Calibration Function
•CE Certified & RoHS Compliant
Important: This meter is accurate at low and mid-range air speeds.
Consistent use at very high speeds, e.g. from the window of a fast
moving car will damage the impeller’s bearing and reduce accuracy.

Specifications:
Parameter Units Range Resolution Accuracy
Wind Speed
mph 0 to 65 0.2
±5%
m/s 0 to 30 0.1
ft/min 0 to 5860 19
knots 0 to 55 0.2
km/h 0 to 90 0.3
Wind Chill
oC 0 to 30m/s, -45
to 10 0.1 ±1
oF 0 to 65 mph,
-49 to 50 0.1 ±1.8
emperature
oC -29 to 70 0.1 ±1
oF -20 to 158 0.1 ±1.8
Relative
Humidity %RH 0 to 100 0.1 ±2%
Heat Index
oC 0 to 100%RH,
21.1 to 54.4 0.1 ±2
oF 0 to 100%RH,
70 to 130 0.1 ±3.6
Dew Point
oC -29 to 70 0.1 ±2
oF -20 to 158 0.1 ±3.6
Barometric
Pressure
hPa 10 to 1100 0.1 ±1.5
mbar 10 to 1100 0.1 ±1.5
inHg 0.29 to 32.48 0.01 ±0.05
Altitude m -700 to 9000 1 ±12
ft -6000 to 30000
3 ±50

Operating emperature 32oF to 122oF (0oC to 50oC)
Operating Humidity 10% to 90% RH
Storage emperature 14oF to 140oF (-10oC to 60oC)
Storage Humidity 10 to 75% RH
Battery Lithium Polymer, 300mAh, rechargeable
Current Consumption 11 mA (14 mA with backlight on)
Size 4.5” x 1.8” x 1” (115*45*25 mm)
Weight 2.5oz. (70g)
Product Description:
1. Vane mpeller
2. Temperature & Humidity Sensors
3. LCD with Backlight
4. Max Button

5. Backlight Button
6. Units Button
7. Mode Button
8. Power Button
9. Battery Charge Port
10. Lanyard Attachment Point
11. Tripod Mount
How to Use Your Anemometer
Turning the Anemometer On and Off
Press the Power button briefly to turn the anemometer on.
Press the Power button for more than one second to turn the
anemometer off.
After 5 minutes without any operation the anemometer will power
off automatically.
o disable Auto Power Off hold the Backlight button down while
turning the unit on. You will see the Power Symbol appear on the
LCD (top right). Warning, if you disable Auto Power Off, the meter
will stay on until the battery runs out unless you turn it off manually
by holding down the Power Button.
acklight
Press the Backlight button briefly to turn the backlight on or off.

Cycling Through Measurement Parameters
Press the Mode button briefly to change the displayed parameter.
The instrument will cycle through the parameters in the following
order:
Wind Speed » Wind Chill » emperature » Relative Humidity » Heat
Index » Dew Point » Barometric Pressure » Pressure Altitude.
Hold Function
To freeze the current reading, press the Backlight button for more
than 2 seconds. Press it again for more than 2 seconds to exit this
mode.
Changing the Measurement Units
n any measurement parameter mode briefly press the Units button
to change the measurement unit displayed. For example, in wind
speed mode choose between mph, m/s, ft/min, knots, and km/h.
Max/Min/Avg Value Measurement Function
This function allows you to track the maximum, minimum and
average of your readings for any parameter each time you power on
the unit.
n any measurement parameter mode briefly press the Max button
to display the Maximum Reading. A second press will display the
Minimum, a third press will display the Average and a fourth press
will return the meter to the real-time current readings.

Max: n this mode the meter will display the maximum value
registered since it was powered on.
Min: When in this mode the meter will display the minimum value.
AVG: When in this mode the meter will display the average of all
values since it was powered on.
NO E: he Max, Min and Avg values will be reset when the meter is
turned off.
eaufort Scale
The Beaufort scale categorizes wind speed according to observed
conditions at sea or on land:
0 - Calm (<1mph)
1 - Light air (1-3mph)
2 - Light breeze (4-7mph)
3 - Gentle breeze (8-12mph)
4 - Moderate breeze (13-18mph)
5 - Fresh breeze (19-24mph)
6 - Strong breeze (25-31mph)
7 - Near gale (32-38mph)
8 - Gale (39-46)
9 - Strong gale (47-54mph)
10 - Storm (55-63mph)
11 - Violent storm (64-72mph)
12 - Hurricane (>73mph)
The Beaufort scale is displayed in all parameter modes according to
current wind speed (see display legend).

Parameter 1: Wind Speed
To measure wind speed, hold the anemometer into the wind or air
flow you want to measure, and the device instantly begins displaying
wind speed in miles per hour (mph). To change the unit, press the
Units button. To capture and hold a reading press and hold the
Backlight button for more than 2 seconds. This is handy for
measuring air flow in difficult situations.
To track maximum, minimum, and average readings simply press the
Max button briefly to cycle through them. For average readings,
keep in mind that periods of zero wind speed may skew your
average. n this case you may want to restart the unit to reset the
Max/Min/Avg data.
1. Wind Speed Units: mph, m/s, ft/min, knots, km/h
2. Max/Min/Avg ndicator
3. Hold Current Wind Speed Reading
4. Beaufort Scale
5. Wind Speed Value

Parameter 2: Wind Chill
Wind chill is the perceived lowering of air temperature experienced
on exposed skin due to wind. The faster the wind blows, the more
readily it cools your skin as it replaces the ambient warm air
surrounding your skin. n other words, the air “feels” colder than it is
because of the chilling effect of the wind.
Wind Chill is expressed as a temperature which is typically lower
than the air temperature. Wind chill temperature is valid only for
temperatures at or below 50 °F with wind speeds above 3.0 mph.
To measure wind chill, press the Mode button once after turning on
the unit.
1. Wind Chill Units: oF or oC
2. Max/Min/Avg ndicator
3. Hold Current Wind Chill Reading
4. Beaufort Scale
5. Wind Chill Value

Parameter 3: Temperature
After turning the unit on, press the Mode button twice to display
temperature. To take a measurement, hold the anemometer so air
passes through it. Temperature response depends upon air flow
through the unit due to the location of the temperature sensor inside
the unit. Response may be slow at zero air flow (5 to 10 minutes),
but typically only takes 30-60 seconds in steady air flow.
1. Temperature Units: oF or oC
2. Max/Min/Avg ndicator
3. Hold Current Temperature Reading
4. Beaufort Scale
5. Temperature Value

Parameter 4: Relative Humidity
Relative humidity is the amount of moisture in the air compared to
the maximum amount of moisture the air can "hold" at that
temperature.
To measure relative humidity, turn on the anemometer, and press
the Mode button 3 times. The display will show “%RH” below the
value of relative humidity.
Relative humidity and temperature are measured by the same
sensor. This sensor is located behind the small hole left of the
impeller above the display.
1. Relative Humidity Units: %RH
2. Max/Min/Avg ndicator
3. Hold Current Relative Humidity Reading
4. Beaufort Scale
5. Relative Humidity Value

Parameter 5: Heat Index
The heat index is what the temperature feels like to the human body
when relative humidity is combined with air temperature. Heat index
is only valid at temperatures at or above 80 °F.
The human body cools itself by perspiration, which removes heat
from the body by evaporation. High relative humidity slows
evaporation, which slows down heat removal from the body. This
causes the feeling of being overheated. Heat index is attempt to
measure this apparent temperature.
To measure it, press the Mode button 4 times after turning on the
unit.
1. Heat ndex Units: oF or oC
2. Max/Min/Avg ndicator
3. Hold Current Heat ndex Reading
4. Beaufort Scale
5. Heat ndex Value

Parameter 6: Dew Point Temperature
The dew point is the temperature at which air is saturated with
water vapor. When air has reached the dew-point temperature the
water vapor is condensing at the same rate at which liquid water is
evaporating. Below the dew point, water will begin to condense on
surfaces forming dew, or particles in the air forming clouds and fog.
To measure dew point, power on the anemometer and press the
Mode button 5 times until “Dew Point” is displayed in the upper left
corner.
1. Dew Point Temperature Units: oF or oC
2. Max/Min/Avg ndicator
3. Hold Current Dew Point Temperature Reading
4. Beaufort Scale
5. Dew Point Temperature Value

Parameter 7: arometric Pressure
Barometric pressure is the force per unit area exerted by the entire
column of air above that area. Barometric pressure measurements
are displayed by the anemometer in inches of mercury (inHg),
hectopascal (hPa), or millibar (mbar).
Standard sea-level pressure, by definition, equals 29.92 inches of
mercury. Variations in sea-level pressure are quite small: the highest
and lowest sea-level pressures ever recorded are 32.01 inHg in
Siberia and 25.9 inHg during a typhoon in the South Pacific.
To measure barometric pressure, turn on the anemometer and press
the Mode button 6 times until inHg is displayed. Press the Units
button to change the units to hectopascal or millibar.
1. Barometric Pressure Units: inHg, hPa, mbar
2. Max/Min/Avg Barometric Pressure Reading Display
3. Hold Current Barometric Pressure Reading
4. Beaufort Scale
5. Barometric Pressure Value

Parameter 8: Pressure Altitude & Relative Altitude
The eA990R measures pressure altitude and not absolute altitude
(unlike a GPS). Pressure altitude is a relative altitude measurement
based on barometric pressure. Pressure altitude is the altitude
indicated by an altimeter that is adjusted to measure height above
the Standard Datum Plane. The Standard Datum Plane is a
theoretical level where the weight of the atmosphere is 29.92 inches
of mercury. As atmospheric pressure changes, the Standard Datum
Plane may be below, at, or above sea level.
Pressure altitude is most commonly used for aviation planning.
To measure pressure altitude, press the Mode button 7 times after
turning on the anemometer. Press the Units button to switch from
feet to meters.
1. Altitude Units: ft, m
2. Max/Min/Avg ndicator
3. Hold Current Altitude Reading
4. Beaufort Scale
5. Altitude Value

Relative Altitude Measurement:
The ennoLogic anemometer is able to display relative altitude (also
referred to as climb or ascent/descent). Relative altitude allows you
to measure changes in altitude from the point where you enter
“Relative Altitude” mode. To enter this mode, press the Mode
button until you get to altitude, then press and hold the Units
button for five seconds. The LCD will first display REL and then set
the altitude to zero. From then on, the altitude reading will display
the difference between your newly set zero reference altitude and
your current position. To change back to Pressure Altitude, press and
hold the Units button again for five seconds.
Calibrating Your Anemometer:
NO E: DO NO A EMP O CALIBRA E WIND SPEED UNLESS YOU
HAVE ACCESS O A CALIBRA ION SOURCE FOR AIR FLOW!
Your anemometer was calibrated at the factory. But you can
recalibrate it if you want by following these steps:
Step 1: To enter calibration mode, hold the Mode button down
while turning on the anemometer.
Step 2: Use the table below to find the parameter to calibrate. Use
the Max and Units buttons to select the number for the parameter
you wish to calibrate. Press the Power button to begin calibration.

Number Calibration Function Mode
1 Wind Speed
2 Temperature
3 Relative Humidity
4 Barometric Pressure
5 Pressure Altitude
6 Display Battery Voltage
Step 3: Press the Backlight and Mode buttons to choose the digit
you wish to change (the selected digit will flash). Use the Max and
Units button to change the value.
Step 4: Press the Power button for more than 2 seconds to store the
new value and to exit calibration mode.
(Note: To restore factory default calibration settings, hold the Units
button down while turning on the anemometer.)
Calibrating Barometric Pressure
To calibrate barometric pressure use a reliable instrument or trusted
source for barometric and altitude readings for your local area.
Calibrating Altitude
Calibrating altitude is not as simple as entering the desired altitude
value in feet. The altitude displayed by the anemometer is pressure
altitude, and for every atmospheric pressure there is a corresponding
default pressure altitude:
http://www.csgnetwork.com/pressurealtcalc.html. That’s why the
altitude displayed by your anemometer typically does not match the
true altitude at your location. The anemometer works like an
altimeter.

f you want to calibrate the altitude to your current true local
altitude, you must subtract a pressure dependent offset from the
altitude value you want to calibrate for. This offset depends on the
current atmospheric pressure at the time of calibration. To
determine the offset, you calibrate the anemometer to an altitude of
"00000". Then turn it back on (into normal operating mode) and read
the altitude. This is your offset. Subtract the offset from your true
local altitude, and calibrate the anemometer to the resulting value.
Example: Your anemometer displays a pressure reading of 29.95
inHg. Turn it off and hold the Mode button down and turn it back on
again to enter calibration mode. Press the Max button several times
until the number on the display shows "5", the code for altitude.
Press the Power button. The display will now show a value that is
actually the default pressure altitude at the current atmospheric
pressure, in this case -0026 feet. gnore this value and set all digits to
0 so the display shows "00". Then turn the anemometer off.
Now turn the anemometer back on and press the Mode button 7
times until the display shows altitude. The value displayed is the
pressure-dependent offset that you have to subtract from your true
local altitude. n our example the offset is "-371". We want to
calibrate for an altitude of 500ft, our true local altitude. So we
subtract -371 from 500 feet: 500 - (-371) = 871. This is the altitude
value we have to calibrate for so the anemometer will display an
altitude of 500 feet.
Turn the unit off, and enter altitude calibration mode again. This
time, change the digits to "00871" and press the Power button until
the unit turns off to store this value.

Turn the anemometer back on and check the altitude. ts displayed
value will now be very close to 500 feet (499 feet in this example,
resolution is limited by barometric pressure resolution.)
Keep in mind that your new altitude reading is still pressure
dependent. So any changes in atmospheric pressure will change the
altitude reading. But calibrating to a true known local altitude can
still be very useful if the atmospheric pressure stays roughly the
same, and you want to use the anemometer to determine altitude
while hiking or climbing, for instance.
attery Replacement:
This anemometer uses a rechargeable 3.7V Lithium-Polymer battery
that is built-in and is not intended to be replaced by the user. This
battery can be recharged through a Micro USB charge port at the
bottom of the unit. This port functions as a charge port only, and
cannot be used for data transfer or communication with a computer.
The battery should be recharged if the anemometer fails to power on
or if the battery icon indicates low power (see below). To charge the
battery use the included USB charging cable to connect the
anemometer to a standard 5V USB charger or a computer’s USB port.
Low Power, charge battery soon
Battery charging
Battery fully charged

Digital Anemometer ennoLogic eA990R
Made in China
User Manual Version 1.2. Revised 06/11/2020.
© 2020 ennoLogic®. All rights reserved.
PO Box 25207, Eugene, OR 97402 U.S.A.
http://ennologic.com
Table of contents
Other ennoLogic Measuring Instrument manuals
