Stereo-link SL1200 User manual
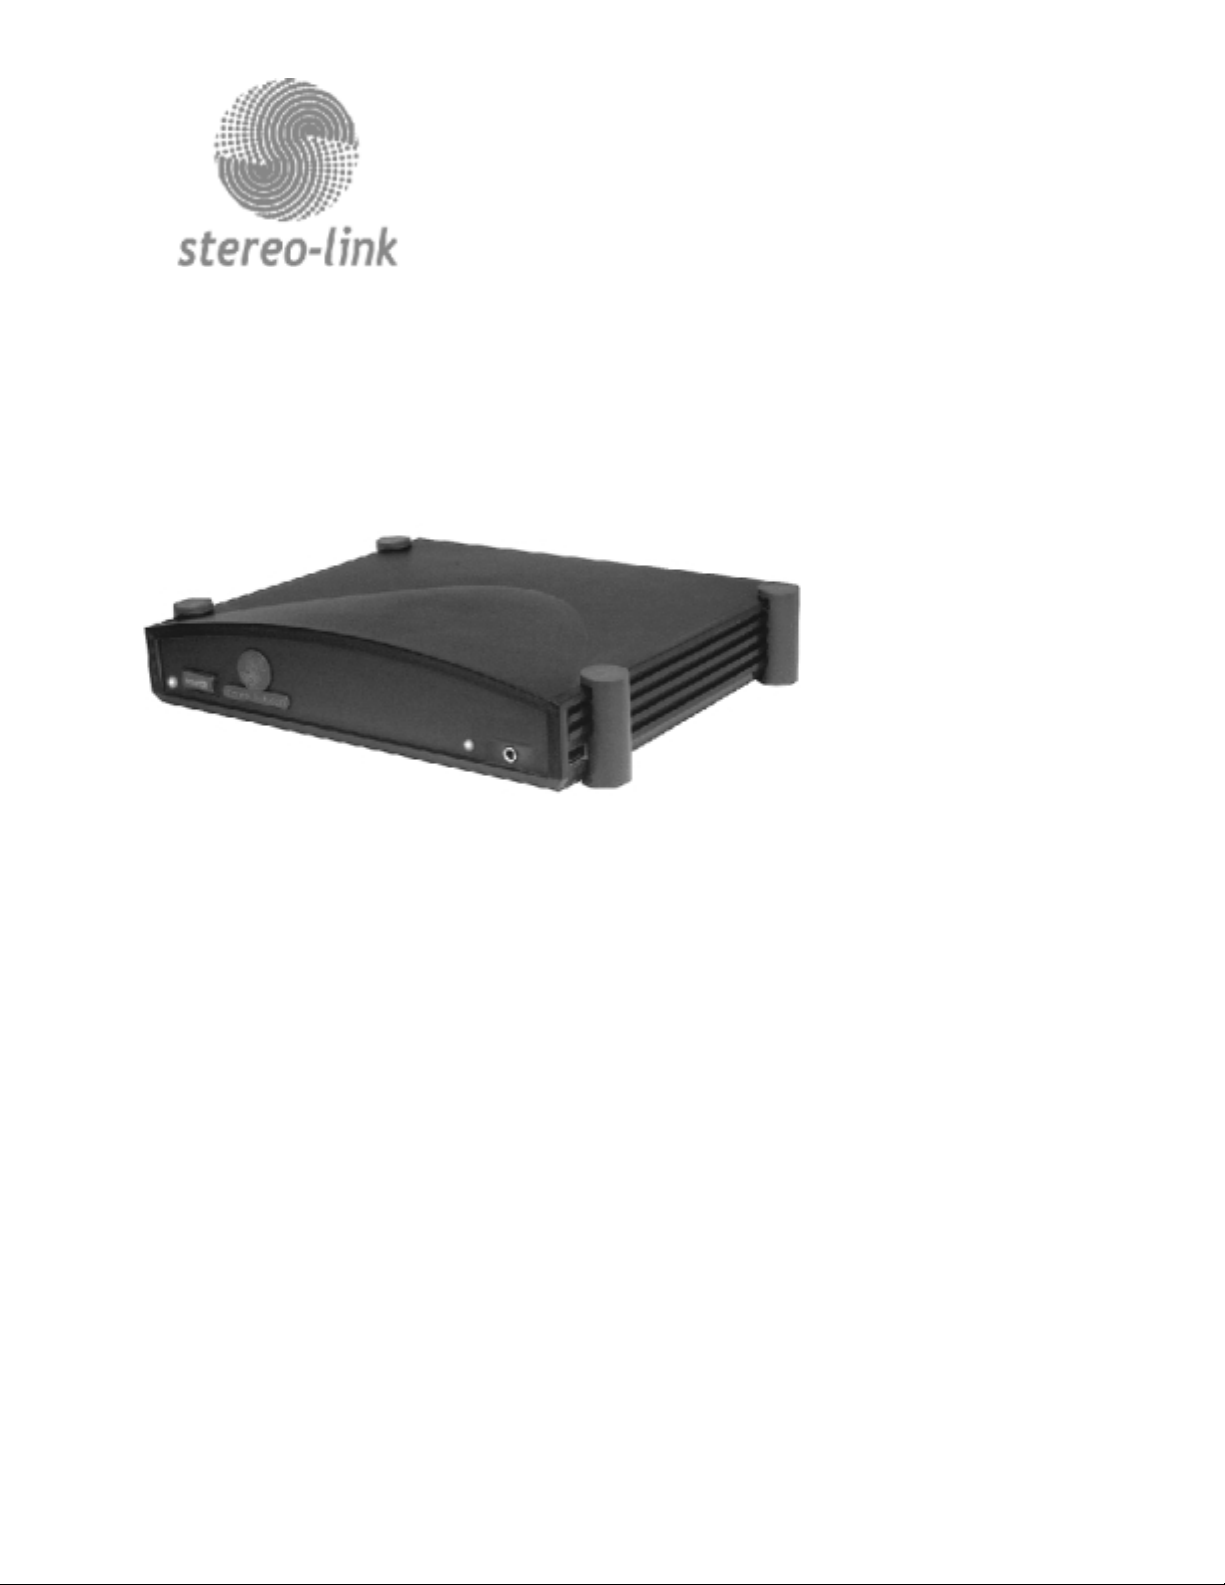
SL1200
IT’S YOUR MUSIC.
WE MAKE THE MOST OF IT.


1
CONTENTS
FCC Radio Frequency Interference Statement for Model
SL1200 ....................................... 2
IMPORT NT S FETY INSTRUCTIONS ................ 3
What’s In The Box ................................... 5
Model 1200 - Features ................................ 5
Setting up the SL1200 ................................ 7
Using with a Windows PC .............................. 8
Using with a Macintosh ............................... 10
Tips nd Suggestions ................................ 11
Volume, ass & Treble Control Settings .................. 11
Playing Audio CDs on your CD ROM Drive ............... 12
Audio Quality & Sample Files .......................... 14
Troubleshooting - General ............................ 14
Troubleshooting - Windows ........................... 15
Troubleshooting - Mac ............................... 16
Software .......................................... 17
Support ........................................... 18
Model 1200 Specifications ............................ 19
stereo-link Limited Warranty ......................... 20

2
FCC Radio Frequency Interference Statement for Model SL1200
This equipment has been tested and found to comply with the limits for a Class
digital device, pursuant to Part 15 of the FCC Rules. These limits are
designed to provide reasonable protection against harmful interference in a
residential installation. This equipment generates, uses, and can radiate radio
frequency energy and, if not installed and used in accordance with the
instructions, may cause harmful interference to radio communications.
However, there is no guarantee that interference will not occur in a particular
installation. If this equipment does cause harmful interference to radio or
television reception, which can be determined by turning the equipment off
and on, the user is encouraged to try to correct the interference by one or
more of the following measures:
# Reorient or relocate the receiving antenna.
# Increase the separation between the equipment and receiver.
# Connect the equipment into an outlet on a circuit different from
that to which the receiver is connected.
# Consult the dealer or an experienced radio TV technician for help.
Shielded cables must be used with this unit to ensure compliance with
the Class B FCC limits. If the cables supplied with your unit also contain
additional components, such as ferrites, then these components were required
to achieve compliance and should not be removed.
Warning: Changes or modifications to this unit not expressly approved by
the party responsible for compliance could void the user's authority to operate
the equipment.

3
CAUTION: TO REDUCE THE RISK OF ELECTRIC SHOCK,
DO NOT REMOVE COVER (OR BACK)
NO USER-SERVICEABLE PARTS INSIDE
REFER SERVICING TO QUALIFIED SERVICE PERSONNEL
IMPORTANT SAF TY INSTRUCTIONS
This product is not intended to be serviced. Should the product
cease to function in its intended manner, it should be returned to
the manufacturer or be discarded.
RE D INSTRUCTIONS – All the safety and operating instructions should be
read before the product is operated.
RET IN INSTRUCTIONS – The safety and operating instructions should be
retained for future reference.
HEED W RNINGS – All warnings on the product and in the operating
instructions should be adhered to.
FOLLOW INSTRUCTIONS – All operating and use instructions should be
followed.
CLE NING – Unplug this product from the wall outlet before cleaning. Do
not use liquid cleaners or aerosol cleaners. Use a damp cloth for cleaning.
TT CHMENTS – Do not use attachments not recommended by the product
manufacturer as they may cause hazards.
W TER ND MOISTURE – Do not use this product near water – for
example, near a bath tub, wash bowl, kitchen sink, or laundry tub; in a wet
basement; or near a swimming pool; and the like.
POWER SOURCES – This product should be operated only from the type of
power source indicated on the marking label. If you are not sure of the type of
power supply to your home, consult your product dealer or local power
company. For products intended to operate from battery power, or other
sources, refer to the operating instructions.
POWER-CORD PROTECTION – Power-supply cords should be routed so

4
that they are not likely to be walked on or pinched by items placed upon or
against them, paying particular attention to cords at plugs, convenience
receptacles, and the point where they exit from the product.
OVERLO DING – Do not overload wall outlets, extension cords, or integral
convenience receptacles as this can result in a risk of fire or electric shock.
OBJECT ND LIQUID ENTRY – Never push objects of any kind into this
product through openings as they may touch dangerous voltage points or short-
out parts that could result in a fire or electric shock. Never spill liquid of any
kind on the product.
SERVICING – Do not attempt to service this product yourself as opening or
removing covers may expose you to dangerous voltage or other hazards. Refer
all servicing to qualified service personnel.
D M GE REQUIRING SERVICE – Unplug this product from the wall
outlet and refer servicing to qualified service personnel under the following
conditions:
- When the power-supply cord or plug is damaged,
- If liquid has been spilled, or objects have fallen into the product,
- If the product has been exposed to rain or water,
- If the product does not operate normally by following the operating
instructions. Adjust only those controls that are covered by the operating
instructions as an improper adjustment of other controls may result in damage
and will often require extensive work by a qualified technician to restore the
product to its normal operation,
- If the product has been dropped or damaged in any way, and
- When the product exhibits a distinct change in performance – this indicates
a need for service.
REPL CEMENT P RTS – When replacement parts are required, be sure
the service technician has used replacement parts specified by the
manufacturer or have the same characteristics as the original part.
Unauthorized substitutions may result in fire, electric shock, or other hazards.
S FETY CHECK – Upon completion of any service or repairs to this
product, ask the service technician to perform safety checks to determine that
the product is in proper operating condition.
HE T – The product should be situated away from heat sources such as
radiators, heat registers, stoves, or other products (including amplifiers) that
produce heat.

5
What’s In The Box
# stereo-link model 1200 US Audio Playback System
# US cable - 3 meters standard
# RCA Audio cable - 3 meters standard
# Power cord
Model 1200 - Features
* Direct digital audio path via US . True Plug and Play performance.
Easy to set up, requires no additional software.
* Compatible with all existing music player software (such as MP3,
AAC, Liquid Audio, Real Audio, QuickTime, Windows Media, etc)
* 20 bit Digital to Analog Conversion produces high quality, detailed
sound.
* Special circuitry isolates your audio system from your computer.
* Supports a wide range of sampling rates without sample rate
conversion and the distortion that introduces.
* Optimized for CD audio sampling rate of 44.1 kHz.
* Extremely low distortion headphone amplifier - good enough for
audiophile quality headphones.
* ass and Treble Controls available under PC control. ass boost up
to 24 d with corner frequency at 75 Hz. Gives the ability to
compensate deep bass without adversely affecting midrange quality.

6
Power L D - Lights Green when the AC Power is ON
Power Switch - Push utton AC Power ON/OFF switch
USB Active L D - Lights to Indicate US Audio is being received
Headphone Jack - 3.5 mm stereo jack, output of headphone amplifier
Headphone Volume - Thumbwheel volume control for headphone amplifier
Power In - IEC 320 type inlet, accepts power cord with C7 connector
USB In -accepts end of US cable with type “ ” plug.
Audio Line Out - Twin RCA phono jacks. Line Level (2.0 V max) output.
Use these to connect to your Receiver or Amplifier.
7
W RNING: Always keep the volume of your stereo amplifier or
receiver set to minimum while you are making connections. This will
prevent you from accidentally damaging the speakers. When everything is
connected and powered on, then you can adjust the volume.
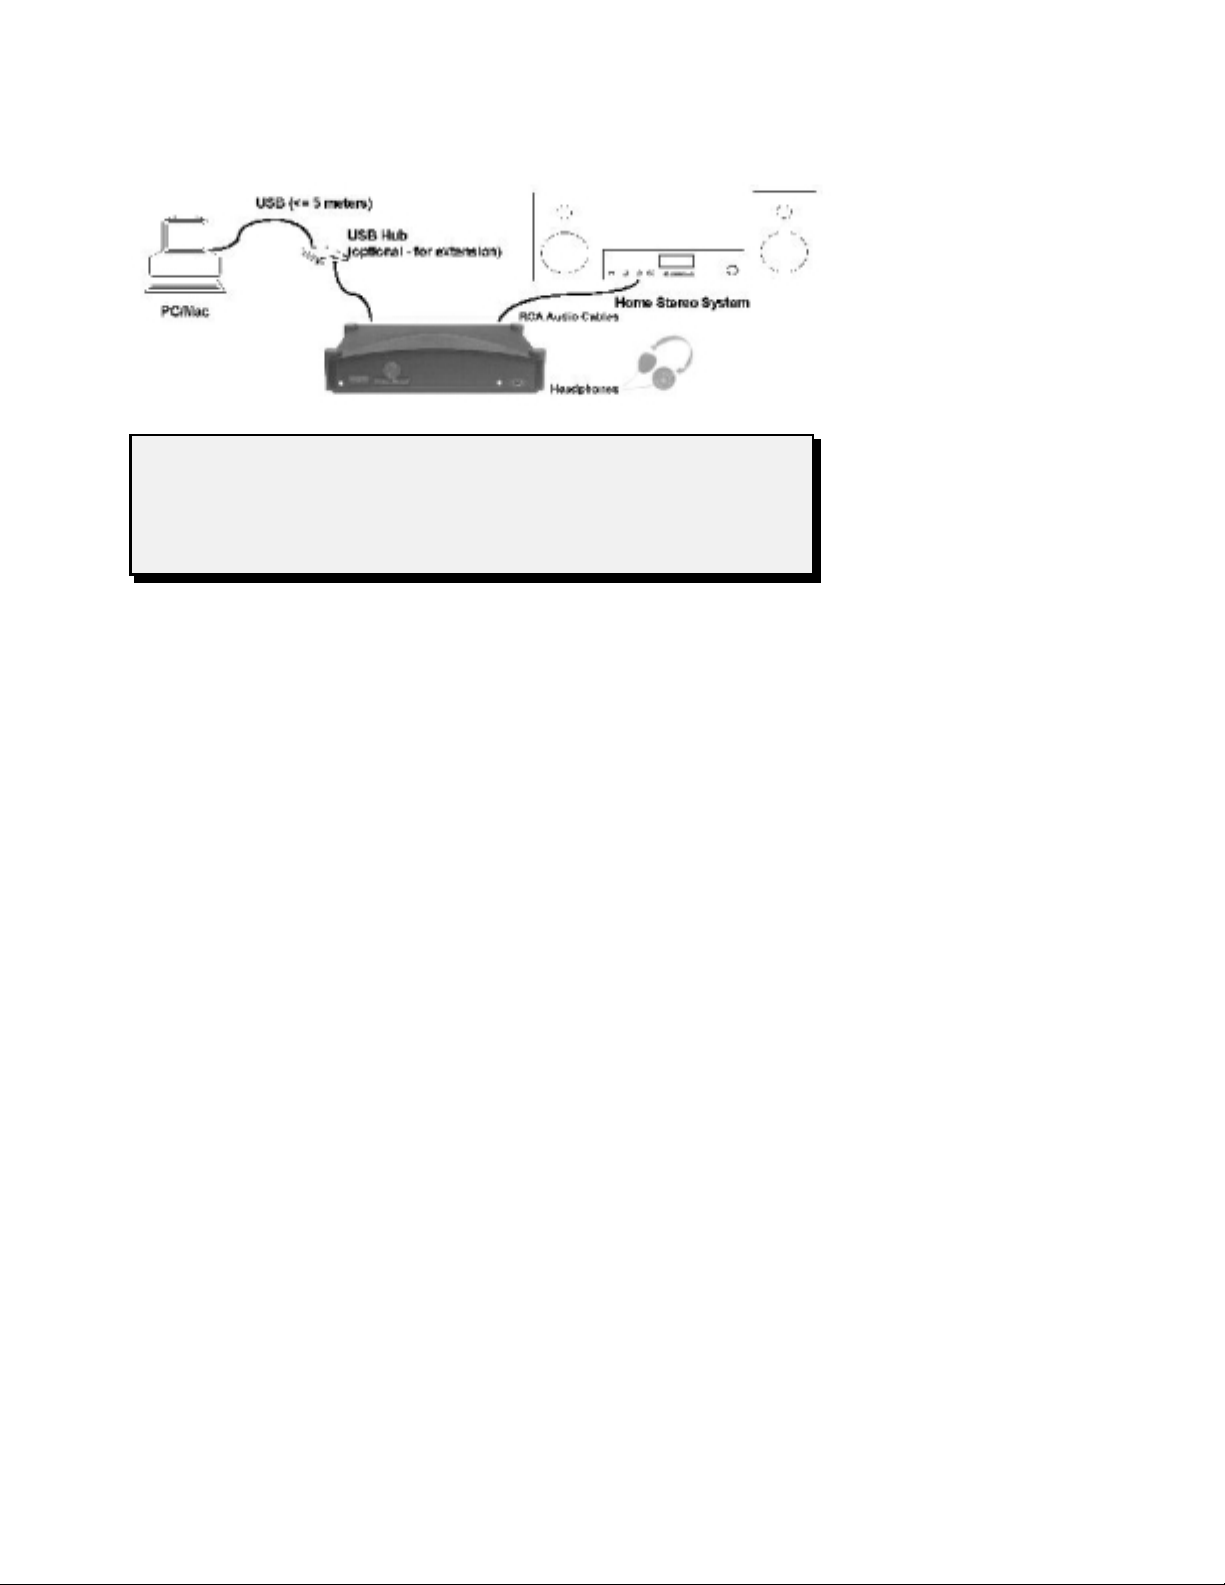
Setting up the SL1200
Setting up your Model 1200 is a simple procedure. Refer to the diagram
above.
1 Attach the power cord that came with the unit to the AC POWER IN
receptacle on the back of the unit. Keep the power OFF until you finish
making all of the connections.
2 Connect the US cable between your PC or Mac and your stereo-link. The
two ends of the cable have different connectors, so it can only be connected
one way.
8
IMPORT NT NOTE: Use only US cables rated for “FULL SPEED”
with this product. If the cable supplied with your unit contains a ferrite,
you need to use this ferrite in order to comply with FCC requirements.
Generally, a US cable is limited to a maximum length of 5 meters
(approx 16.5 ft). If you need to extend the distance further, it is best to
use a US Hub between each 5 meter length of cable. (NOTE: The stereo-
link is self powered; it does not draw any power through the US cable. If
you are using the hub only with the stereo-link unit, this means you can
NOTE: The audio cable which connects the stereo-link to your
receiver/amplifier can be much longer than the US cable. However, you
should use only good quality shielded cable for very long runs. Visit the
stereo-link Website and click on PRODUCTS, then ACCESSORIES to
see what optional cables are available.
TIP: You can position the 1200 vertically to save space.
3 Using the RCA audio cables included with the SL1200, or similar high
quality cables, connect the audio outputs (labeled R & L) to a line level input
on your amplifier or receiver (usually labeled as AUX, CD, DVD, etc). The
PHONO jacks should NOT be used.
- Connect a pair of headphones to the jack on the front panel whenever you
want to listen privately.
Using with a Windows PC
Hardware Requirements
stereo-link products are designed to work with any PC with a built-in US port,
including the most recent “legacy-free” machines. You can also add US

9
capability to older machines. For this you will need to purchase and install a
US PCI adapter, available at most computer stores.
Software Requirements
Support for US Audio is available only with Windows 98, 98 SE, ME &
Windows 2000. It will NOT work with Windows 95 or NT 4.0.
If you are running the original Windows 98 release, you should first upgrade
the US drivers. Start up your internet connection and click on START, then
WINDOWS UPDAT . Select the "Windows 98 Customer Service Pack". Make
sure you re-start Windows before you connect the SL1200 for the first time.
If you encounter any problems downloading or installing the Windows 98
upgrade, you should contact Microsoft for help. Stereo-link will not be able to
assist you with these problems. For general information on Windows, visit the
Microsoft Website at:
http://www.microsoft.com/windows/default.asp
Connecting the SL1200
efore connecting the SL1200 for the first time, make certain you have your
original Windows installation disks available. You may need to use them to
install the proper drivers. The 1200 does not require any special drivers or
software of its own.
You are now ready to turn the stereo-link on. After you push the Power utton,
the LED next to the button will light to indicate that the power is ON.
Windows should now detect new hardware, and attempt to load the appropriate
US drivers. If Windows does not detect new hardware when the Power is
switched ON, then try restarting your PC. Windows should detect the new
hardware when it re-starts.
The stereo-link uses the standard US audio drivers that come with Windows.
The actual procedure may vary a little, depending on whether you have installed
a US audio device and how Windows was installed on your PC. Windows will
need to install 3 types of drivers, all of which should be on your hard disk
already or on the Windows 98 installation CD. To make certain everything is
set up properly, you should restart Windows before trying to use the stereo-
link.
If you’re computer already has sound playback capability (using a built-in sound

10
card & speakers), Windows will not switch over to the stereo-link until you
select it as your Preferred Playback Device.
To do this, open My Computer, then open the Control Panel, followed by the
Multimedia icon (see figure below). On the Audio tab, use the pulldown menu
under Playback, find US Audio Device, and select it. (If no US device
appears in the list, Windows has not recognized the 1200. Make certain it is
powered on, then re-start Windows, and repeat these steps).
Click on Advanced Properties, and set
sample rate conversion quality to EST.
If you want to use the stereo-link
exclusively, then you should also check
the “Use only preferred devices” box.
This will prevent Windows from
switching back to your sound
card/speakers.
Click OK, then OK again.
You should now be ready to play music!
WARNING: Some player applications will “Freeze-up” if you disconnect
or turn off the SL1200 while the player is open. If this happens, Windows
Using with a Macintosh
Hardware Requirements
stereo-link products are designed to work with any Macintosh with a built-in
US port (e.g. iMac, i ook, G3 & G4 etc). US Audio is not currently
supported with the use of ‘add-on’ cards.
Software Requirements
Support for US Audio is available only with Mac OS 9 and above. efore you
can install the Model 1200, you need to make sure it has Mac OS 9 installed,

11
and that is has at least the 9.0.4 update with 1.0.4f8 or higher of the US Audio
Drivers. To find out what Mac OS version you have, open the Apple Menu, then
click on About This Computer.
If you have a version earlier OS 9, you will need to upgrade to OS 9 first. If you
need to update to 9.0.4 or higher from OS 9, use the Software Update control
panel. If you have problems (which could happen when using certain Internet
Service Providers or Networks), download this update from the Apple
Software Update web page at
http://asu.info.apple.com/
and follow the instructions provided by Apple.
If you wish to play Audio CD’s and are using OS 9, you may also wish to install
the Multimedia Update 1.0, available on Apple’s software update sites. This
update will prevent audio CDs from skipping .
If you have any problems downloading or installing any of the Mac updates,
contact Apple for help. stereo-link will not be able to assist you with these
problems.
Connecting the SL1200
The SL1200 is self-powered and may be connected to any available US port. It
does not require any special drivers or software of its own.
You are now ready to turn the stereo-link on. After you push the Power utton,
the LED next to the button will light to indicate that the power is ON. The Mac
OS will detect the SL1200 and load the drivers. This may take about 5 seconds.
During this time it is best if you do not touch the mouse or keyboard. After the
unit is recognized, the Mac will automatically change the "built-in" sound to use
the 1200. You can check to make sure this has happened properly. Open the
Apple Menu and select Apple System Profiler. Click on the Devices and
Volumes tab. The US section should show Audio devices available.

12
Using With Linux
Hardware Requirements
See the Windows PC section above.
Software Requirements
Support for US Audio is available in kernel version 2.4.0 and higher.
ackport patches are available for the 2.2.x series kernels but we recommend
the 2.4.x series for stability. The kernel must be compiled with US audio
support either statically or as loadable modules.
For more information on compiling the Linux kenel see
http://www.linuxdoc.org/HOWTO/Kernel-HOWTO.html.
Connecting the SL1200
The SL1200 is self-powered and may be connected to any available US port. It
does not require any special drivers or software of its own.
You are now ready to turn the stereo-link on. After you push the Power utton,
the LED next to the button will light to indicate that the power is ON.
You may wish to test your configuration by typing the following at the
command prompt: cat /bin/sh > /dev/dsp [dsp1, etc.]. If the green light next to
the headphone jack doesn’t light up check the following:
#You built your kernel with US Audio support
#If you used dynamic modules you enabled the dynamic
module loader
#You mounted the US filesystem
Rebooting with the 1200 connected and on will produce messages in
/var/log/messages that will be helpful in debugging any issues you may be
having.

13
Tips And Suggestions
NOT : The stereo-link will usually be referred to as the Speaker or
“built-in” by Windows and the Mac. This can be confusing.
Volume, Bass & Treble Control Settings
To use the full resolution of the 1200 and obtain the highest quality sound, you
should set the Volume on your computer to MAX, and use the volume controls
on your stereo, or the headphone amplifier. In this mode, the ass and Treble
controls on your stereo-link will be disabled.
In Windows, get to the PC's Mixer
controls by double-clicking on the speaker icon that appears next to the time
display on the task-bar. Set the Speaker, Wave and CD Player Volume
controls to maximum (as shown in the figure on the left).
On a Mac, open the Apple Menu, then Control Panels. Select Sound. Click on
Speaker Setup. Adjust the volume controls to maximum.
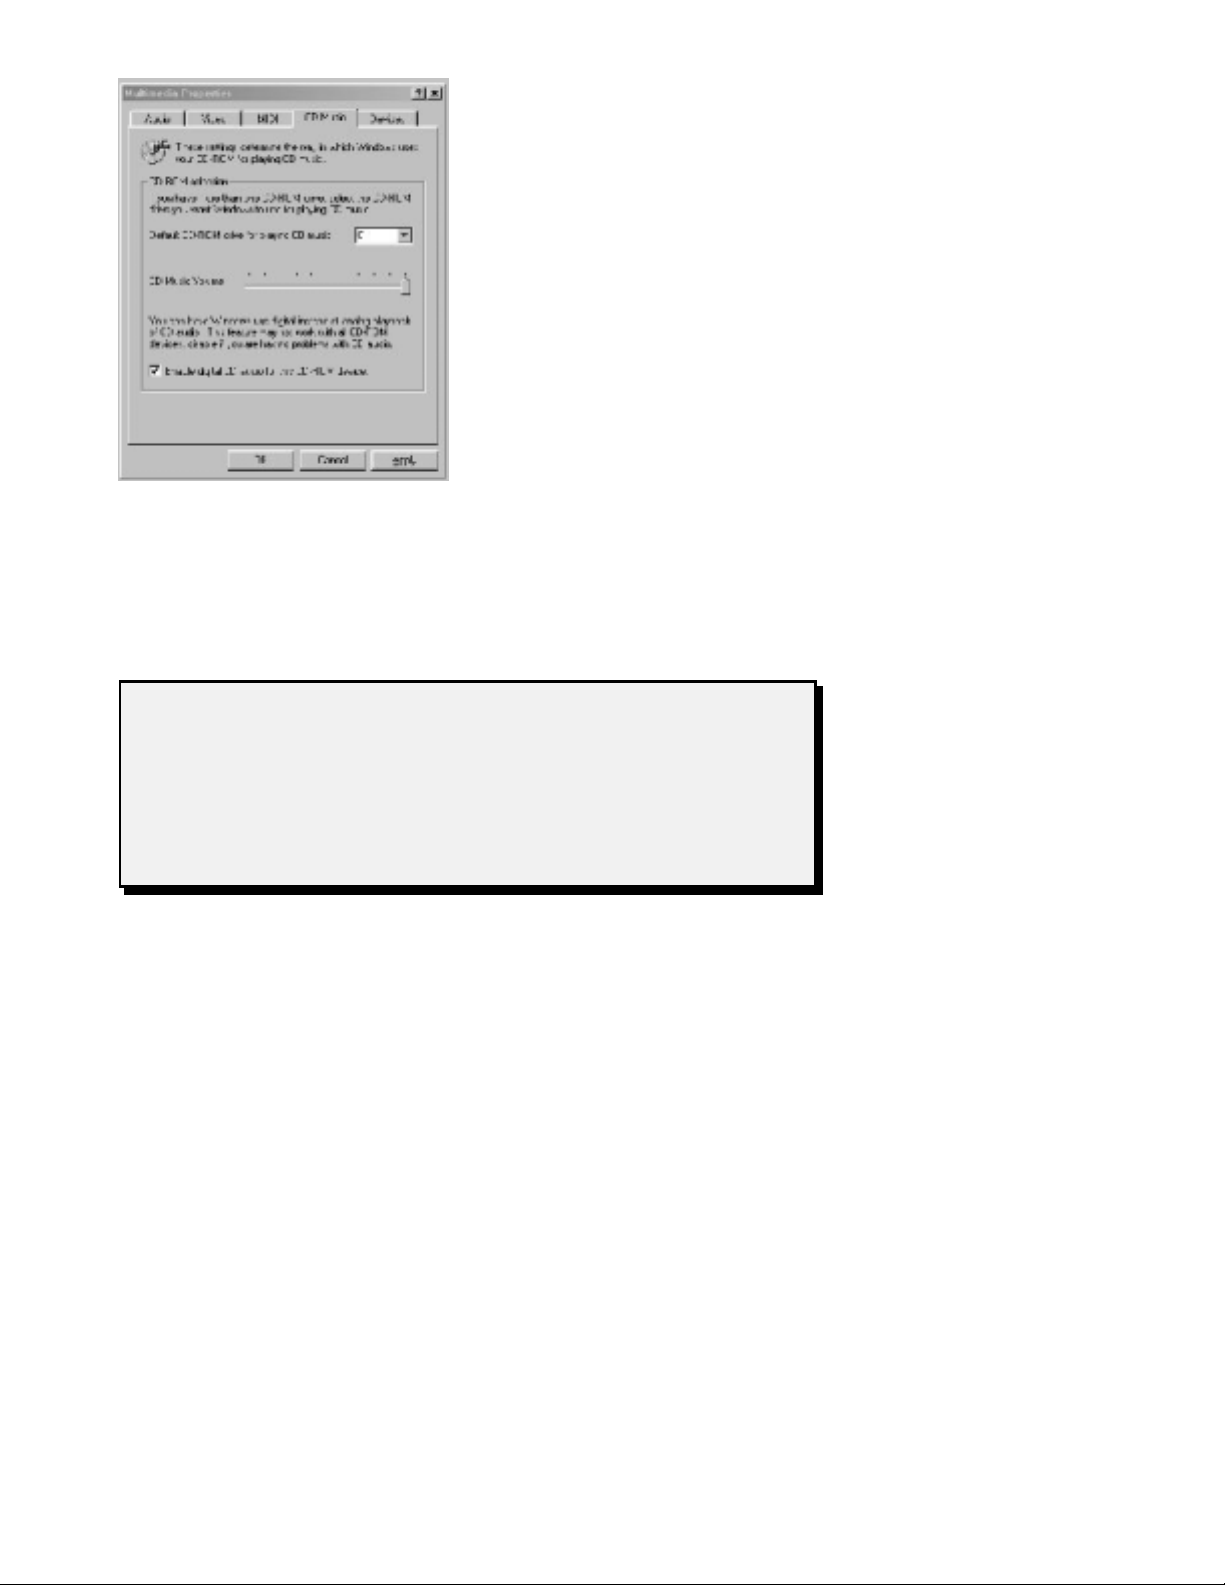
Playing udio CDs on your CD ROM Drive
To play your audio CDs through your stereo-link, you must have a CD ROM
drive that supports Digital Audio Extraction.(DAE). CD ROM drives vary in
their ability; all CD Recordable drives are capable of DAE, while not all CD
ROM drives are.
14
NOTE: Microsoft has confirmed the following problem with Windows 98.
An audio CD that is playing through a US device may stop when you open
a command prompt window. The music may also randomly stop playing, the
speaker icon on the task bar may disappear, or the progress counter in the
CD Player tool may never change from 00:00. If you experience this
problem, contact Microsoft Product Support Services to obtain a fix.
Windows:
To use your CD Drive as an audio CD
player, you need to configure it for
Direct Digital Connection. If your CD
ROM DOES NOT support Digital Audio
Extraction, these items will not be
available and appear greyed out.
Windows 98:
Open My Computer, open Control
Panel, then open the Multimedia icon.
Select the CD Music tab
Put a check in “Enable digital CD audio
for this CD-ROM device”.
For Windows 2000:
Right-click on my computer, then click on the device manager tab
DVD\CD-ROM drives
name of particular drive
Select and get the properties, go to properties tab and select Enable digital
CD audio box for Digital CD Playback.
Macintosh:
Newer Macintosh computers use digital audio CD playback, and are therefore
compatible with US audio. On these computers, you do not need to select the
CD as the input source in the Sound control panel or Control Strip to listen to
audio CDs.

15
udio Quality & Sample Files
When you use your PC’s CD ROM drive with your stereo-link to play Audio
CDs, you will achieve the same level of audio playback quality that you would
get from a good quality component type Audio CD player.
Playing other types of Audio Media files, such as MP3, may give you varying
levels of quality, since there are many factors that contribute to what you hear;
how carefully the original source was recorded , how it was digitally extracted
from a CD, the data rate at which it was coded, the type of coder used and even
the options selected on a particular coder. At stereo-link, we think you deserve
to hear just how good a well recorded and coded file can sound. So we will be
featuring music on our Website for downloading. Visit us at
http://www.stereo-link.com
and click on the GOODI S tab. There you will find the current selection
available for free.. These will be chosen for the quality of the original
recording, and encoded at a high bit rate (usually using the High Quality
Variable it Rate option). A lower quality preview excerpt will be available so
you listen before you spend your time downloading. Visit us often and enjoy!
Troubleshooting - General
Sound Quality
Q. I’m listening to streaming music with the Sl200, and its still sounds bad. It
has these funny swishing and gurgling sounds. In fact, I don’t remember hearing
them with my computer speakers.
. Unfortunately, we can’t do anything about the sound quality of the source
you are trying to play - we just let you hear it better. Unless you have a
broadband internet connection, most of the streaming audio you will play will
be highly compressed (that is necessary to get it to you through a slow modem
connection). This kind of compression produces artifacts, (such as gurgling,
warbling, swishing sounds) which become part of the sound file you are trying
to play. You might not have noticed it before because the computer sound
system you were listening to before did not provide the detail and clarity of
your home stereo system.

16
Troubleshooting - Windows
General Computer & US problems
Q. I’m having problems and I think it’s the US on my Windows computer.
What do I need to know?
. Intel, OPTi, ALi, VIA, and other chip manufacturers all make different US
chip sets used by various computer and add-on cards manufacturers. Microsoft
requires drivers for each of the different hardware implementations, and
supplies many of these with Windows 98, 2000 & ME. There may also be
upgraded drivers coming from these companies as they release new hardware
and correct bugs that are discovered. Sometimes, the changes may even require
a motherboard IOS upgrade. If you have an older computer, it is quite
possible that you will need to upgrade your motherboard IOS and get a driver
from the chip set company. Check with your computer’s manufacturer for the
latest information.
Q: Can you identify my motherboard manufacturer?
: We do not design or manufacturer motherboards, and are not able to provide
this service. IF you have an Award or AMI IOS, try one of these websites. it
may be able to help you identify your motherboard by IOS number.
http://www.ping.be/bios/index.html?http://www.ping.be/bios/numbers.shtml
http://www.ping.be/bios/index.html?http://www.ping.be/bios/numbersami.shtml
Q I'm hearing Window's sound effects ("tada!", etc.) from my home stereo
speakers. How do I stop that?
. There is no way to keep these sounds from playing if you are also using your
computer for other tasks at the same time you are playing music. The only
solution is to turn them off completely.

17
Windows 98
You can eliminate all the system sounds by using the Sounds option in Control
Panel to select the "No Sounds" scheme.
Windows 2000
Open the "Sounds and Multimedia" control panel. You can eliminate all the
system sounds by using the Sounds panel to select the "No Sounds" scheme. If
you have multiple audio devices, you can also use the Audio panel to select a
specific audio device for Sound Playback.
Q. When I try to play something the first time after turning on the 1200, I get a
strange error message. ( Music Match: WaveOut Format not supported,
Winamp: MMSYSTEM002 device ID has been used that is out of range
of your system)
. Sometimes, Windows does not properly recognize a US device like the
stereo-link, and it thinks there is not one available. If this should occur, you
should keep the stereo-link powered on and Restart Windows. When Windows
resumes, you should be able to start your player without getting the error
message.
Sound still comes out of my computer speakers
Q. I’ve turned on the 1200 and try to play something, but the sound still comes
out of my computer speakers.
. You need to select the stereo-link (US audio device) as your audio output.
Windows will not change this automatically. See the instruction in the section
Installing on a Windows PC above.
Playing CDs with your CDROM Drive
Q. RealPlayer and other sound sources come out to the Model 1200,
but playing an audio CD with my CDROM drive on my PC comes out on
my old sound card. My Audio panel has Playback set as US Audio.
What gives?
. Your CDROM player is probably an old unit, which cannot send the
digital format sound data over your computer's bus. Instead, it

18
has a direct connection (a cable) to your sound card. You'll need
a newer CDROM, capable of playing digital data, to use with the Model
1200.
Troubleshooting - Mac
Q. My Mac switches to the Model 1200 whenever it is present. Can I switch
back to my internal speakers, if I want?
. You will have to disconnect the stereo-link (or turn it off). The Mac will
automatically switch back to internal audio.
Table of contents


