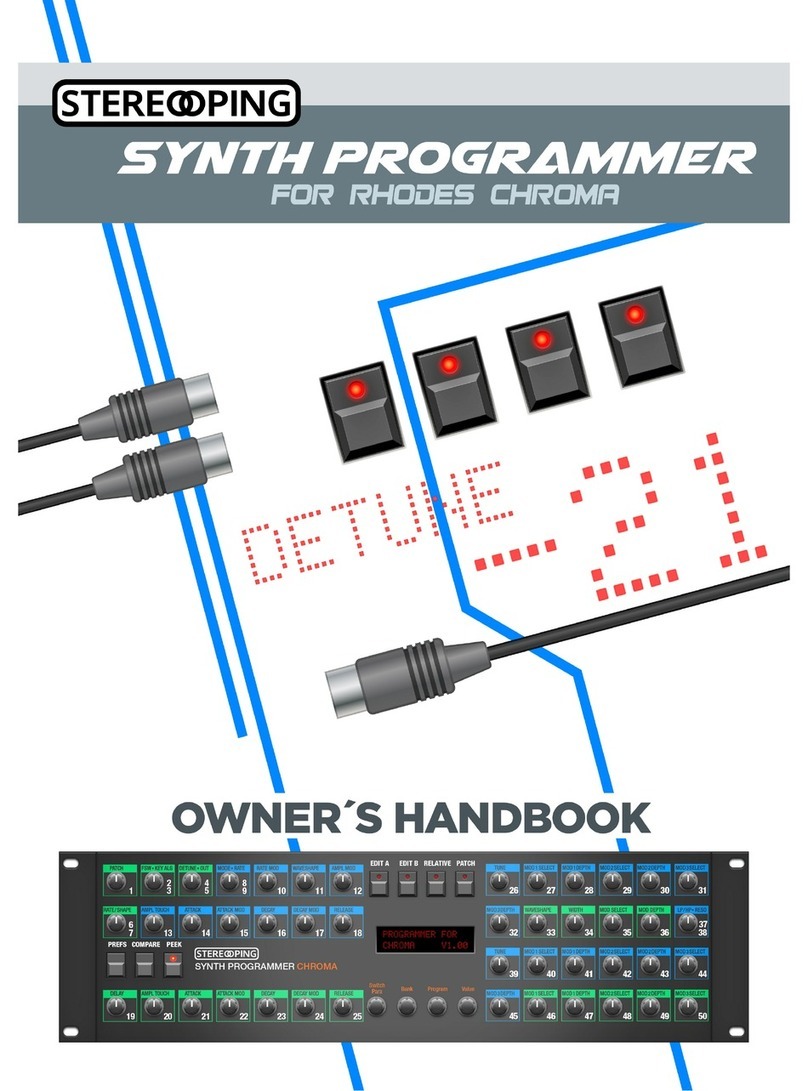
Stereoping synth programmer User guide


___________________________________________________________________________________________________________2
Synth Programmer for Waldorf Microwave – Operation manual V 1.0 – 01/ 018
© Stereoping Germany, Meschede 018

___________________________________________________________________________________________________________3
General features of the Synth Programmer...............................................................................................................................4
Special features of the edition for Waldorf Microwave............................................................................................................4
Technical handling........................................................................................................................................................................4
1.Connections and integration into your setup................................................................................................5
Power supply..................................................................................................................................................................................5
Midi connections...........................................................................................................................................................................5
2.Settings and workflow...................................................................................................................................... 6
Settings on the Microwave...........................................................................................................................................................6
Settings on the Synth Programmer.............................................................................................................................................6
Synchronisation.............................................................................................................................................................................6
Saving..............................................................................................................................................................................................6
3.Overview............................................................................................................................................................ 7
Function keys.................................................................................................................................................................................7
PLAY Mode......................................................................................................................................................................................7
Button 'PREFS'................................................................................................................................................................................7
Button 'COMPARE'.........................................................................................................................................................................7
Button 'CHORD'.............................................................................................................................................................................7
Button 'MOD'.................................................................................................................................................................................7
Button 'MULTI'...............................................................................................................................................................................7
Button 'PEEK'..................................................................................................................................................................................8
Button 'PATCH'...............................................................................................................................................................................8
4. LAY Mode.......................................................................................................................................................... 9
The three different Volumes of the Microwave..........................................................................................................................9
Parameter groups.........................................................................................................................................................................9
Wavetable selection....................................................................................................................................................................10
Wave Envelope.............................................................................................................................................................................10
Program Name............................................................................................................................................................................10
5.MODULATION Mode........................................................................................................................................ 11
Value Speedup by pot.................................................................................................................................................................11
6.MULTI EDIT Mode............................................................................................................................................. 12
Multi Request...............................................................................................................................................................................1
Dials on the left side...................................................................................................................................................................1
Dials on the right side.................................................................................................................................................................1
Setup Left / Right and the 3rd Setup turn dial........................................................................................................................13
Instrument Swapping.................................................................................................................................................................13
7. ATCH Mode..................................................................................................................................................... 14
8. REFS und MIDI BY ASS MODE....................................................................................................................... 15
Midi Bypass Mode.......................................................................................................................................................................15
9.RANDOMIZER................................................................................................................................................... 16
Keep request................................................................................................................................................................................16
Randomizer Modes and their effect.........................................................................................................................................17
10.CHORD MEMORY............................................................................................................................................ 18
Triggernotes.................................................................................................................................................................................18
Chord Setup.................................................................................................................................................................................18
Learning modes 'Toggle' and 'Hold'..........................................................................................................................................18
11.CC to SysEx translator................................................................................................................................... 19
12.Updating Firmware....................................................................................................................................... 20
13.Imprint........................................................................................................................................................... 21
Synth Programmer for Waldorf Microwave – Operation manual V 1.0 – 01/ 018
© Stereoping Germany, Meschede 018

___________________________________________________________________________________________________________4
General features of the Synth Programmer
The Stereoping Programmer offers 45 control dials, 4 endless encoders and a 16x2 characters OL D display to
for convenient and intuitive sound shaping of your Waldorf Microwave. At the moment you turn a knob, the
programmer sends the suitable command into your synthesizer which immediately changes it's sound.
•Highly specialized hardware midicontroller for Waldorf Microwave
•Convertable from 19“ rackmount to desktop usage – and back
•45 dials, 4 encoders, 2x16 character OL D display
•Firmwareupdate over Sys x-Dump
•Current draw 100 mA
•Weight 2.650g
•Size without rackmount brackets, incl. knobs and rubber feet ca. 430 x 130 x 85 mm
Special features of the edition for Waldorf Microwave
•Visual design suitable to the Microwave
•simplified and quick access to the modulation possibilities
•Performance orientiented Multi dit Mode
•Program name can be typed on the keyboard, the Mod Wheel shifts cursor
•'Midi CC' to 'Sys x'-translator to automate your Microwave with ordinary CC-messages
•Patch-Randomizer
•6 voice Chord Memory with 6 saveable Chord-Slots
Technical handling
The Synth Programmer was built to be used in a comfortable music studio environement. You can operate it
under free skies of course. But please keep in mind, it uses electricity for proper operation and therefore is quite
sensitive to water, drinks or other fluids. xcessive heat or exposition to sunlight is also not advised.
Your programmer has got a neat OL D display. The OL D technology is quite young. As none really can
guarantee how long it will keep it's perfect function after displaying the same content for hours or even days, we
integrated a screensaver to mutiply the lifetime of the display. If the programmer is not touched for longer than
23 minutes it will fall into screensaver mode and switch the OL D display off – the L Ds in the buttons above the
display will start to blink slowly. The programmer awakes immediately if a knob is moved or notes are being sent
through it.
Some 'No-need-to-worry' information: the datasheet of the display claims 50.000 hours until it has lost 50 % of it's
brightness. If you would use your programmer 5 hours on each day of the year this will take over 7 years – even with
deactivated screensaver.
Synth Programmer for Waldorf Microwave – Operation manual V 1.0 – 01/ 018
© Stereoping Germany, Meschede 018

Connections and integration into your setup ____________________________________________________________5
1. Connections and integration into your setup
Power supply
You can use any ordinary 9 Volt DC powersupply to operate your controller. The connector should have lus on
it's center pin and Ground - sometime labeled as 'Minus' - on the outside. The Synth Programmer has a
protection diode for not doing any harm if the polarity of the power supply is wrong, it just won't work. The
current of the PSU should at least offer about 200 mA (=0.2 A). If it supplies more current (e.g. 500mA) this is fine
and won't cause problems.
lease do NEVER use a powersupply which has an 'AC'-Output. AC means alternate current. AC-PSUs have
the letter combination AC/AC or a sinewave symbol besides the word 'output'.
Midi connections
The Stereoping Programmer has 3 Midi jacks which should be cabled like that:
•MIDI 1 - OUT -> MIDI IN of your Microwave
•MIDI 1 - IN -> MIDI OUT of the Microwave
•MIDI 2 - IN -> MIDI OUT of your Midi interface/sequencer/keyboards
Both jacks of Midi 1 connect the Programmer with your synth in a loop. This seems unconventional but it is
necessary: the Synth Programmer must hold the same patch data in it's memory as your Microwave. This data
exchange runs through MIDI 1 IN / OUT.
A Synthesizer would not make any sense if it could not receive midinotes, modulation wheel changes etc. These
are coming into the programmer over the MIDI 2 IN jack from your keyboard/DAW/sequencer. They will be
merged with your parameter changes and sent together to the synthesizer.
Synth Programmer for Waldorf Microwave – Operation manual V 1.0 – 01/ 018
© Stereoping Germany, Meschede 018

Settings and workflow____________________________________________________________________________________6
2. Settings and workflow
Settings on the Microwave
•MIDI Param - Midi Chan. - sould be set to the same midichannel as the Synth Programmer
•Midi Param - Prog Change → 'on'
•Midi Param - PC Maps → 'off'
•Device Param. - Dev. Number → 0
Settings on the Synth Programmer
•PR FS 1/4 MIDICHANN L should be set on the same midichannel as the Microwave
•PR FS 2/4 DeviceNr should be set to the same Device Number as the Microwave
Synchronisation
Directly after powerup the Programmer is 'empty', it should be feeded with the parameter data of the currently
selected Microwave program. As the Programmer has no idea about all the original values of the patch, the
display shows questionmarks instead. In addition some features like Compare or the Modulations Mode are
locked.
To get the Microwave and the Programmer in sync:
•select PATCH to enter Patch Mode
•use the endless encoders to dial in the program number currently active in the Microwave
( ncoder 2 sets bank A,B,C,D - ncoder 3 changes numbers)
•select Y S
… more on the Patch mode in Chapter 7. Patch Mode
Saving
Saving your program must be accomplished on the Microwave itself, the Programmer does not offer any
possibility to save your patch or call the Microwave to do so.
By the way, the Microwave unfortunately does not display realtime midi parameter updates on it's display. This is
not an issue of the Synth Programmer :-)
Synth Programmer for Waldorf Microwave – Operation manual V 1.0 – 01/ 018
© Stereoping Germany, Meschede 018

Overview_________________________________________________________________________________________________7
3. Overview
Let's take a quick look on the user interface first. Details to the different modes and buttons are following behind
– if necessary at all.
The 45 turn dials are – you guess it already – for direct changing of the parameters of the Microwave.
The 4 endless encoders are for finetuning values on features tweaked best in fine steps and with a display. There
are 4 lines, each starting on an encoder and ending in a corner of the display. This should help finding the right
encoder of the parameter you want to change.
The 7 buttons change main modes, allow program comparison or control the Chord Memory. The 4 buttons
above the display sometimes have a secondary function:
Function keys
In modes like COMPAR , CHORD S TUP, PATCH & RANDOMIZ R the 4 buttons above the display act as special
keys to execute different menu functions. A button acting as function key has it's L D shining and a command
printed in capitals in the 1st line of the display.
Example: hold PATCH down for seconds to enter the RANDOMIZER. The LEDs of the buttons MOD, MULTI and PATCH
will light up to show they are function keys, below the display sais DO+M, DO and XIT. On pressing PATCH again, XIT is
executed and you are leaving Randomizer. By pressing MULTI (='DO') the Programmer would send a random patch to
the Microwave.
PLAY Mode
After powerup or if no other mode is selected you are directly in LAY MODE. This is the main mode you will
spend most time in: here you change the parameters of the Microwave with the knobs. Details to PLAY Mode
follow in Chapter 5. Play Mode
Button 'PREFS'
Press REFS to enter the Programmer's menu with it's preferences. Any changes you make here will
automatically be saved on exiting. The settings are also preserved after powering the Programmer down of
course. Holding the PR FS button for longer than 2 secs. activates MIDI BY ASS MODE. Details on all PR FS
parameters and the MIDI BYPASS MOD will follow in Chapter 8. PR FS and MIDI BYPASS MOD
Button 'COMPARE'
Use COM ARE to switch between your original patch inside the Microwave and your edited patch. As long as
compare is active and you hear the original patch, the turn dials are locked.
Line 2 of the display shows 'Original Patch' to make clear you actually are listening to the original patch as it was
coming out of the Microwave's memory. Line 1 displays the command 'K P?' and button No. 4. above the
display is bright. If you desire to keep this original patch just press this function key. Your edited patch will be
replaced by the original patch and the Programmer jumps back into PLAY mode. Or you simply press COMPAR
again to revert to your edited patch.
Button 'CHORD'
This enables/disables CHORD MEMORY. Holding the button for 2 seconds umps into the CHORD S TUP menu.
All infos and details about this in Chapter 10. Chord Memory.
Button 'MOD'
In MODULATION MODE you will be offered a comfy access to all modulations slots of the Microwave. Press
MOD again to leave Mod Mode. More on this Chapter 5. Modulation Mode
Button 'MULTI'
Pressing MULTI jumps into MULTI EDIT MODE. This mode makes things easier setting up the Microwaves Multi
Mode. The pots to the right can be assigned any multi parameter which can then be tweaked with pots for the
first 6 Multi instruments. The pots on the left side allow to send any Control Change message numbers which
can lead to powerful modulation sessions when using prepared patches. Press MULTI again to leave this mode.
Any details about the Mutli mode in Chapter 6. Multi Mode
Synth Programmer for Waldorf Microwave – Operation manual V 1.0 – 01/ 018
© Stereoping Germany, Meschede 018

Overview_________________________________________________________________________________________________8
Button 'PEEK'
Press EEK to toggle EEK mode on and off. While P K is active any knob fiddling brings the parameter to
display without changing the value or sending anything to the Microwave.
Hint: If you just need to PEEK one or two parameters only and want to avoid clicking ON/OFF, ON/OFF, ON/OFF there is
a shortcut: keep PEEK pressed. If you hold the PEEK button longer than ½ a second on activating, it will be immediately
disabled again as soon as you lift it again. This saves half of the 'Clicks'. As long as PEEK is down you can peek as many
parameters as you like of course.
Note: PEEK is not available in Modulation mode as the values can only be changed by encoders there.
Button 'PATCH'
This leads to the ATCH-Mode, the place to select patches on your Microwave. As soon as you select a program
here, the Synth Programmer will cause the Microwave to call this program and send the parameter values to the
Programmer for both to be in sync. More on this in Chapter 7. Patch Mode
By holding PATCH for 2 seconds you enter the Programmers Randomizer. Any deatils on this in Chapter 9.
Randomizer
Synth Programmer for Waldorf Microwave – Operation manual V 1.0 – 01/ 018
© Stereoping Germany, Meschede 018

PLAY Mode_______________________________________________________________________________________________9
4. LAY Mode
This is the active mode right after powerup. On turning a dial you change the parameter inside the Microwave
while the Programmer's display shows all the details. It provides 4 (or 5) informations:
•to the upper left you see the parameter group (e.g.
OSC1, WAV2, LFO1 etc.)
•right behind follows the parameter name (e.g.
Waveform)
•lower left in brackets is the original value of this
parameter as it is (still) saved in the Microwave. As long
as you did not request any patch from the Microwave
the Programmer displays questionmarks. Exception: if
you are in Randomizer befinden, you will see the current
value of the Random-Patch, NOT the original value of the
Microwave program
•Lower right you find the new value changing quickly
with your moving of the turn dial. It can be finetuned
with encoder 3 (Why encoder 3? Because the line
printed on the faceplate leads from encoder 3 to the
lower right corner of the display)
If the Programmer's PR FS parameter MultInstSwap is set to ON, you will be provided another information in the
upper right corner. You will see a tiny number between 1 and 6. It stands for the currently active Multi
Instrument which will be addressed from edits in Play Mode. If the instrument does not fit to the last requested
program, questionmarks will be displayed for the original values. More information on that in the Chapter for
Multi Mode. If the Microwave is used in SINGL Mode you can safely ignore this little number
The three different Volumes of the Microwave
The knob in the upper right corner labeled VOLUM addresses the Microwave Program Parameter „Sound Vol“,
you find it in the Microwave menu under „Volume/Filter“. It determines the Volume of the current program and is
saved together with it.
In addition the Microwave supplies a global „Master Volume“ (to be found in „Volume/Tune“) which will NOT be
addressed by the Programmer. It sets the overall volume for the whole synth. If it is set to 0 you will not hear
anything at all, no matter which value Program Volume has. „Master Volume“ is preserved, even when switching
the Microwave off.
Lastly the Microwave also listenes to Control Change #7, aka 'Midi Volume'. This also is independent from Master
Volume and Sound Volume. If your Synth keeps quiet although Master AND Program Volume are up, please
check if your DAW or Keyboard accidently sent CC#7 with value 0 into your Microwave. Midi Volume is reset to
127 (fully up) when powering up the Microwave, changes of Midi Volume will not saved anywhere in the
Microwave.
Parameter groups
A complete Program of the Waldorf Microwave contains 165 parameters, your Programmer just offers 45 turn
dialy. You ask yourself 'Where is the rest?' The rarely used parameter are grouped by function and spread on sub
pages. They will be selected and changed with the encoders. If a parameter group offers sub parameters is
indicated by the groupname printed in CAPITALS. xample: the parameter group „Vcf“ is printed normal, there
are no additional parameters here. Whereas „VOL nv Amnt“ is part of the group „VOL“ where you find the sub
parameter „Keytrack“.
Following are all parameter groups with the associated, 'hidden' parameters in brackets:
•OSC1 (Bend Range, Pitch Mode)
•WAV 1 (Wavetable, Env Velocity, Keytrack, Wave Mode)
•OSC2 (Bend Range, Pitch Mode)
•WAVE (Wavetable, Env Velocity, Keytrack, Wave Mode)
•GLID (Mode, Type, Temperment, Patch Name)
•LFO1 (Humanize, Sync, Delay, Attack, Decay)
Synth Programmer for Waldorf Microwave – Operation manual V 1.0 – 01/ 018
© Stereoping Germany, Meschede 018

PLAY Mode_____________________________________________________________________________________________10
•LFO2 (Shape, Humanize, Phase Shift)
•VOL (Keytrack)
•WAV NV (Time 7/8, Level 7/8, Key Off Point, Loop Start, Loop Mode)
Now how do you select and change these sub parameters?
•ncoder 1 enters (on the 1st tick) or scrolls (with the following ticks) through the different parameter
groups (e.g. from OSC1 to WAV 1 to OSC2 etc.)
•ncoder 2 changes the selected parameter. A prefex in form of „3/5“ signalizes you are on parameter 3
of a total of 5.
•ncoder 3 changes value
As soon as you move a pot again, the Programmer jumps out of the submenu. The lastly selected page of a
parameter group is remembered btw.: if you were in WAV 1 on page 3/4 'Keytrack', you will find yourself there
again when entering WAV 1 sub menu later.
For parameters in submenus you will directly see the current value , there is no original value in brackets
Wavetable selection
You might ask yourself why the essential parameter Wavetable is 'hidden' in WAV 1 and WAV 2 submenu? Well,
Wavetable is best selected by encoder, a pot would not make much fun. And it is far better protected against
accidently changes.
Now as we all know, most of the Microwave users crank as mad on the STARTWAV parameter after changing
WAV TABL to check out the sound of the available waves and get a feeling for the wavetable's sound. For not
being forced to head back into the submenu parameter WAV TABL after touching STARTWAV we programmed
an exception here: it is no problem at all to crank on STARTWAV as mad while being on the submenu parameter
for WAV TABL . The Programmer stays on WAV TABL while both STARTWAV pots can be changed. You can use
both in conjunction.
Wave Envelope
Wave nvelope is special. It offers 8 Levels and 8 Times. To much to be layed out completely with dedicated pots.
With the lower right row of 6 pots you can change the first 6 Times/Levels, step 7 and 8 are (unfortunately)
hidden in the submenu. After touching one of the envelope's pots, you can toggle between Levels and Times
with the 4th encoder labeled 'L/T'.
Program Name
Program Name is also special. Waldorf hided it under „Pan/Glide“. This is where you also find it on the
Programmer: page 4/4 in GLID submenu. The 2nd display line shows the complete program name. ncoder 3
selects letter position. ncoder 4 changes letter. You can have it easier, please read on ...
We implemented something funny we got to know on the Kawai SX-210: selecting letters with the keyboard!
Being on the PROGRAM NAM page play some notes on your keyboard, each key selects another
letter/number/sign. Heavy press: CAPITAL L TT R; mellow keypress: normal letter. One more: you can use the
Modulation Wheel to shift the cursor :-)
Synth Programmer for Waldorf Microwave – Operation manual V 1.0 – 01/ 018
© Stereoping Germany, Meschede 018

MODULATION Mode____________________________________________________________________________________11
5. MODULATION Mode
The Microwave has got quite powerful modulation possibilities. The modulation slots are not organized in one
place. The engineers have spread them all over the parameter pool, near the parameter they should modulate.
The Stereoping Programmer wants to simplify the access to this modulation zoo. As mentioned above you enter
this mode by pressing MOD.
In Mod Mode the type printed in blue on the faceplate gets valid. You will see lots of points and some
strange descriptions like 'M2'. A blue dot simply means this parameter can be modulated. Pots without blue dots
or type do not have any function at all in this mode.
In Mod Mode the pot are just SELECTING the modulations Slots. Setting the modulations source, control or
amount will be accomplished by encoders and display.
Let's take VCF NV Attack for example. Below you see a blue
dot, this can be modulated. To get the values on screen jump
into Modulation Mode and move the pot of 'VCF NV Attack'.
The display instantly shows all modulation parameters for VCF
NV Attack. In the example pic to the right it will be modulated
by LFO 1 with the amount of +28.
For some more important parameters like e.g. Cutoff, the
Microwave offers two modulation slots. One is more complex
supplying an additional 'Controller' and a simpler secondary.
This second slot hides behind the type 'M2' mentioned above.
As usual: follow the faceplate's encoderlines to find out which
encoder changes what:
•ncoder 1 allows scrolling though all available
modulation slots. Quite versatile for a quick overview
which slots got any amount at all
•ncoder 2 changes the source in the lower left
•ncoder 3 allows finetuning of amount (lower right). Quick changes of amount are explained below
•ncoder 4 is only important for the more complex slots as it changes the CONTROLL R
Value Speedup by pot
For getting quicker on changing amount we used some free pots for special tasks – you find them in the lower
right corner of the Programmer.
•Moving the dial labeled Z RO immediately sets amount to +00
•The pot with the blue type VALU allows direct adjustment of the amount
Synth Programmer for Waldorf Microwave – Operation manual V 1.0 – 01/ 018
© Stereoping Germany, Meschede 018

MULTI DIT Mode______________________________________________________________________________________12
6. MULTI EDIT Mode
Note: in the following we are always talking of 6 Multi Instruments. This amount is related to the limited number of 6
Instruments which can be edited by the Programmer. The Microwave itself offers a total of 8 Multi Mode Instruments,
but the last can not be edited by the Programmer.
This modes makes things easier for Multi Programs as you can change any 4 Multi parameters for the first 6
Multi instruments at once with the pots in the right half of the Programmer. In addition the pots on the left side
make up a 6 channel Midi-CC# mixer which can really rock when being used in conjunction with prepared
programs making use of incoming CC-changes.
When leaving Multi Mode all your settings for CC numbers or selected Multi parameters will be saved and also
preserved after power down.
Multi Request
Before finetuning your Multi Program, it would be helpful to get the data into the Programmer as it perfectly can
display the original values on it's display. You need to manually request the currently selected Multi Program of
the Microwave. To engage a Multi Request hold the MULTI key for 2 seconds, no matter if you are in LAY
Mode or already in MULTI Mode. After successful transfer of data, the OK.-screen will also supply the number
of active instruments inside the Multi.
Dials on the left side
The 3 rows of knobs in the left half of the Programmer send any 3 Control Change Messages (Midi-CC#) on the
Midichannels the first 6 Multi Instruments are set to. Huh? What for? If you prepare Programs to make use of
these CC-numbers as modulation sources you suddenly get a powerful modulation mixer.
Dials on the right side
You can assign any Multi parameter to the 4 rows of knobs on
the right side. ach knob in a row is dedicated to one of the
first 6 Multi instruments. Having assigned 'Instrument mode' to
row one and turning knob No. 3 leads to the picture on the
right side.
•In the upper left corner the Multi Instrument Number
is displayed. You can scroll the instruments manually
with encoder 1.
•Directly behind is the current row which can also be
scrolled by using encoder 4.
•in the upper right corner the original value of this
parameter in the Multi program is shown. If you did not
request the currently selected Multi from the
Microwave, a questionmark is displayed instead.
•In the lower left corner you find the Multi parameter currently assigned the row. You can change it with
encoder 2 or in Setup described below.
•Finally the value you already changed with the pot sits in the lower right corner. As usual you can
finetune it by moving encoder 3.
For a Multi channel Multi program you might e.g. assign the following Multi parameters:
•row 1: Finetune
•row 2: Transpose
•row 3: Pan
•row 4: Volume.
For finetuning a layersound maybe:
•row 1: Volume
•row 2: Velo Limit H
•row 3: Velo Limit L
•row 4: Output Select
Synth Programmer for Waldorf Microwave – Operation manual V 1.0 – 01/ 018
© Stereoping Germany, Meschede 018

MULTI DIT Mode______________________________________________________________________________________13
Setup Left / Right and the 3rd Setup turn dial
The last three knobs on the left Programmer side have special functions:
Setup L opens a setup screen where to assign the desired CC numbers to each row. ncoder 1 & 4 change the
row in the first line, encoder 2 & 3 change the CC number. The CC messages will always be sent on the
midichannels of the first 6 Multi instruments. Column 1 sends on the channel for Instrument 1, column 2 on the
midichannel of Intrument 2 etc. While being in 'Setup L' the type on the 3. Setup pot saying 'L: CC#“ is valid.
Use is for quickly changing the desired CC-number. Getting from 1 to 120 would take a while using encoders.
Setup R causes the Programmer to enter Setup for the turn dials to the right where you can assign Multi
Parameters. It's the same as above, ncoder 1 & 4 change row, 2 & 3 change the parameter.
Hint: Assigning Multi parameters to each of the 4 rows is also possible through the encoders directly in the normal
display, appearing while pot fiddling on the right side. Use the encoders to switch instruments and rows for quick
access to all Multi parameters.
While being in 'Setup R' the type saying 'R: Multi Name' on the 3rd Setup dial is valid. Touching it enters
Multi Name edit mode. The pot itself shifts the cursor position, encoder 3 changes the current letter. The funny
naming tool using keyboard keys is working here as well (see Chapter 4. PLAY Mode – Patch Name).
Instrument Swapping
Now things will become a bit complicated. The Microwave offers 8 edit buffers, meaning it can hold 8 edited
programs in memory at the same time without having to save anything. This starts to make sense when using
Multi Mode. 8 edit buffers allow to jump between Multi mode and up to 8 Programs in Single Mode to tweak the
Program's parameters without always having to save after each change on a program.
Your Synth Programmer can only hold ON Program in memory for displaying original values. But nothing holds
it back from sending Parameter edits to each of the first 6 Multi-Instruments. This is exactly what you will allow
on setting the PR FS Parameter MultInstSwap to ON: being in MULTI Mode each of the 6 pot columns (no matter
if left or right) silently sets the target instrument where all the parameter tweaks in PLAY Mode will be sent to.
This has nothig to do with the midichannel and also works on layer sounds when multiple Programs use the
same midichannel.
Example: You got a Multimode using 3 instruments. In Multimode you turn a pot in column 3, no matter if left (CC) or
right (Multi parameter). Now jump back in Programmer's Play Mode. You will see a little '3' behind a dashed line in the
upper left corner of the display. Every tweak you are fiddling now in Play Mode will be sent to Microwaves Multi
Intrument No. 3. The downside: original values will only be displayed for the patchnumber you recently requested. The
Programmer does not check if or where the Program is assigned anywhere in Microwave's MULTI Mode. This feature
only works in one direction for technical reasons. Nevertheless it's a powerful feature.
If this whole bunch is confusing und you don't want to use it, just set MultInstSwap in PREFS to OFF. The
Programmer does not take Multi Instrument numbers into account and always serves Instrument 1.
Synth Programmer for Waldorf Microwave – Operation manual V 1.0 – 01/ 018
© Stereoping Germany, Meschede 018

PATCH Mode____________________________________________________________________________________________14
7. ATCH Mode
Note: use Patch Mode of the Programmers only in conjunction with Microwave's Single Mode. While the Microwave is in
Multi Mode, the Programmer faultly requests the currently active Instrument number and not the Program number you
tuned in.
This is the mode to select Single Programs on your Microwave. Use ncoders 2 & 3 to select the Microwave's
current Program Number (or any other) and press Y S. The Microwave MIDI Parameter „Prog Change“ is
hopefully set to „ON“, causing the Microwave to jump to the desired Program Number. Afterwards the
Programmer automatically requests the Program parameter data to allow displaying the original values in it's
display when turning knob.
Unfortunately the Microwave does not send any Program-Changes. This is why the Programmer can not sync
itself automatically if you select Programs directly on the Microwave. If you prefer selecting Programs on the
Microwave you perfectly can request the Program manually afterwards to get it into the Programmer.
After successful request the display should show something as
in the pic to the right. In the upper left corner you see the
currently requested Program Number. All parameters of this
Program are now in the Programmer's memory.
Using RV and NEXT you can scroll through the Programs.
Helpful to find the right Sound. Incoming Midi notes are
forwarded to the Microwave of course to check out the
Program instantly. After each Program change the Programmer
is automatically up to date parameter-wize.
The 2nd line of the display shows the Program Number.
Now you are at Program A04 and want to jump quickly to C31?
Use encoders 2 & 3 for tuning in the desired Program.
ncoder 2 changes Bank A,B,C and D.
ncoder 3 sets the Number.
Confirm with YES
Press XIT to leave Patch Mode
Note: The requested patch will be associated with the currently active Multi Instrument. As explained in the Chapter
MULTI Mode the Programmer can only display original values for the Multi Instrument which was currently active while
requesting the Single Program. Which is 1 after powerup (or if the PREFS parameter MultInstSwap is set to OFF).
Synth Programmer for Waldorf Microwave – Operation manual V 1.0 – 01/ 018
© Stereoping Germany, Meschede 018

PR FS und MIDI BYPASS MOD _________________________________________________________________________15
8. REFS und MIDI BY ASS MODE
PR FS menu offers 5 pages. The currently selected will be displayed in the upper left corner in format '2/5' e.g.
You can swap pages with encoder 1 and 4. Values can be changed with encoder 2 and 3.
•'1/5 Midichannel' – this is where to set the Programmer's Midichannel. It should fit the current
midichannel of your Microwave.
•'2/5 DeviceNr' – the Device Number should also match the Microwave's Nr. – normally 000.
•'3/5 Block rgChg'
◦Y S : incoming Program Change messages from DAW or Keyboard will be blocked by the
Programmer and NOT forwarded to the Microwave.
◦NO: incoming Program Change messages will be processed and passed to the Microwave. The
Microwave calls the desired Program and the Programmer will request it afterwards for both to be in
sync.
•'4/5 MultInstSwap'
◦ON: if the Programmer is in Multi Mode the 6 knob columns (no matter if left or right) select the
targeted Multi Instrument where parameter changes will be sent to when being back in
Programmer's PLAY Mode.
◦OFF: parameter changes in PLAY Mode will always be sent to Multi Instrument 1. Details about that in
Chapter 6. MULTI EDIT Mode
•'5/5 Screensaver'
◦Y S means the display falls asleep after 23 Minuten inactivity. This can increase lifetime of OL D
displays. As soon as you move a knob or some mididata is detected on the programmers Midi In the
display wakes up.
You can leave this mode by pressing the PR FS button again. If you changed any of the values, your new settings
are saved automatically.
Midi Bypass Mode
The PR FS button got a secondary function. By holding it for 2 seconds the Programmer jumps into MIDI
BY ASS MODE. Being in MIDI BYPASS MOD most of the routines of the Programmer are skipped and any midi
data coming in on MIDI IN 2 will be forwarded unprocessed and unfiltered to your Microwave on MIDI OUT 1 -
as if your Programmer would not be in between at all. This mode is quite useful if you want to dump some
soundbanks into the Microwave. You can leave MIDI BYPASS MOD at any time pressing PR FS again.
Synth Programmer for Waldorf Microwave – Operation manual V 1.0 – 01/ 018
© Stereoping Germany, Meschede 018

RANDOMIZ R___________________________________________________________________________________________16
9. RANDOMIZER
To enter Randomizer please hold the PATCH button for 2 seconds until the display shows 'OK'. The Randomizer
creates random patches as well as some typical preset sounds, to have a clean starting point for your own
creations. It's aim is not to spill patch junk, needing 25 attempts until coming up with something valuable. The
Randomizer follows some special rules. On the other side you hardly can expect 50 attempts to create 50
breathtaking top patches.
Warning: specially for Mode set to 4 the Randomizer might create Programs being significantly louder
compared to e.g. the Presets with Mode 0. Volume modulations add up, envelopes acting negative on VCA
holding it permanently open or other strange coincidences. Do not make the mistake cranking your volume up if
you still hear nothing after having pressed DO the 4th time. The 5th press surely will generate a brutal sound
being able to make damage to your loudspeakers or ears if the Volume of your speakers or headphone is set to
high.
The 4 Buttons above the Display execute the following commands:
•'DO+M' – creates a random sound WITH
modulations. Sources and Controls for Modes from
0 to 3 will be randomized between the following
('tame') Sources: LFO1&2, Filter nv, Wave nv,
Keytrack, Velocity and ModWheel. In Mode 4 all
sources will be used. Amount raises with mode. See
explanation below.
•'DO' – creates a random Patch based on the
parameters explained below. All modulations set to
OFF
•'KEE ' - will appear below the P K button after
having created a random sound. If you like to keep it,
press this button. Your old patch B FOR entering
Randomizer will be rejected and your random sound
will become the current patch held in Programmer's
memory.
•'XIT' – press this to exit Randomizer and return to PLAY mode. If you created a random patch it will be
rejected and the Patch before entering Randomizer will be restored.
In the second display line you can take influence on fortune:
•encoder 2 selects the reset: Init, Bass, Orgn, Perc or Pad.
•encoder 3 changes 'Mode' between 0 and 4 to increase the amount of randomization. Mode 0 sends the
preset without any randomization. If something different should happen on pressing 'DO' over and over
again, 'Mode' should be at least 1.
Keep request
You created the random patch of your life and want to keep
it? You surely pressed K P already. A safety request
appears on screen then as shown to the right.
Pressing 'KEE &XIT' rejects the old Program before entering
Randomizer. Your random patch replaces it and is now the
currently editied Program in PLAY Mode.
Press 'BACK' and you find yourself in Randomizer again.
Synth Programmer for Waldorf Microwave – Operation manual V 1.0 – 01/ 018
© Stereoping Germany, Meschede 018

RANDOMIZ R___________________________________________________________________________________________17
Randomizer Modes and their effect
ffects on the modulations when pressing DO+M are printed in blue
Mode 0: Just the Randomizer Preset is sent to the Microwave. No randomization at all.
Modulations Amount between -10 and +10 respectively -1 to +1 for Wave/Noise Vol Mod
Mode 1: OSC 1&2 in octaves, OSC 2 Detune between -12 and +12
Random values for Wavetable, Startwave and -sample
Wave 1 & 2 Volume between 3 and 5, Noise always 0
all remaining parameters keep unchanged from the Randomizer Preset
Modulations Amount -20 to +20 respectively -2 to +2 for Wave/Noise Vol Mod
Mode 2: OSC1 in octaves, OSC2 in famous intervals (minor & major third, quart, fifth, seventh, nineth)
OSC 2 Detune between -15 and +15
Glidetime max. 5
Wave 1 & 2 Volume between 2 and 6, Level for Noise 0 with 60% probability
Moderate nvelope Attack-times (Volume & Filter) and nv Amounts
no Filter nvelope Delay
Modulations Amount -30 to +30 rsp. -3 to +3 for Wave/Noise Vol Mod
Mode 3: OSC 1 und 2 in famous intervals
Glidetime max. 30
Volume nvelope Attacks max. 50, Decays max. 80, Filter nvelope Delay max. 30
Wave 1 & 2 Volume between 1 und 7, Level for Noise 0 with 30% probability
Volume nvelope Velocity and Volume Keytrack not negative
Cutoff min. 40, VCF Keytrack between -20 and +40
all remaining parameters randomized
Modulations Amount -40 to +40 rsp. -4 to +4 for Wave/Noise Vol Mod
Mode 4: full chaos
full Modulations Amount, all Mod-sources used
Tip: if the Randomizer has set Cutoff to 002 again and you wont hear anything … all turn dials are fully functional
in randomizer :-)
Synth Programmer for Waldorf Microwave – Operation manual V 1.0 – 01/ 018
© Stereoping Germany, Meschede 018

CHORD M MORY_______________________________________________________________________________________18
10. CHORD MEMORY
The CHORD Button simply switches CHORD M MORY on and off. A Chord Memory allows to play a previously
learnt chord chromatically by just pressing one key. The lowest note of the chord is the base note, all remaining
notes will be shifted in their learnt interval above the base note.
The Chord Memory of the Synth Programmers offers six 'Chord Slots' which can be quickly selected by pressing
notes on the keyboard! Your 6 chords keep saved in Programmer's memory even after switching it off.
Triggernotes
The 6 chord memos will be selected each by it's own keyboard note, the triggernote. It allows switching chords
over midi to be automated easily in a song. The triggernotes are also used in Chord Setup to learn the chord. You
can program and use the chord memory completely from the keyboard without switching between Programmer
and keyboard.
To avoid collision of triggernotes and normal play notes, setup also offers changing the position of the
triggernotes. But they always are placed on succeeding keys, e.g. C2, C#2, D2,D#2 etc.
On activating or changing chord slots, the display shortly shows the currently selected Chord Slot and the
triggernote, e.g. „Sl: 2 Nt:2 Tr:C “ (Slot 2, using 2 notes in total, triggernote C1)
Chord Setup
To enter CHORD SETU keep the CHORD key pressed for
2 seconds. This is the mode to learn new chords, set Strum
or shift the triggernotes.
The display shows the following:
Sl:2 – You are currently working on slot 2. Change the slot
with enocder 1 or using the triggernotes
Nt:3 – The current chord slot uses 3 notes. This will be
updated automatically on learning a chord
Tr:C3# – The triggernote for this slot is C3#. Shift all
triggernotes using encoder 4. Remember: the triggernotes
for all 6 slots are succeeding. Changes on one slot alters all
others as well.
Strm:00 – the Strum-time is a short delay before triggering
the next note of the current chord. Possible values range
from 0 to 99. Change strum time using encoder 2.
Mode:Tgl/Hld – The Chord learn mode, use encoder 3 to toggle between 'Toggle' and 'Hold'.
Being in Chord-Setup you can play your chords and swap slots as outside the Setup. The big difference in Setup:
while holding a triggernote you learn the new chord. Display shows 'L ARN!' instead of the triggernote. The
first incoming note will erase the old chord in memory. As soon as you do not SAV on exit, nothing is lost.
Learning modes 'Toggle' and 'Hold'
In learning mode 'Hold' you just hold your chord until you lift the triggernote. In 'Toggle' mode you do not need
to hold the desired keys, making things easier on chords with widely spread notes. Press a note to add it to the
chord. Press it again to remove it from the stack.
Lifting the triggernote saves your new chord in the current slot and you can start testing your chord on the
keyboard.
You can leave Chord-Setup by pressing CHORD again. On leaving you will be asked whether to save or reject
your changes. The buttons above the display offer 3 options:
•SAV – all changes in the chord slots will be saved
•BACK – leads back into the Chord Setup
•XIT – Chord Setup will be left without making any changes
Synth Programmer for Waldorf Microwave – Operation manual V 1.0 – 01/ 018
© Stereoping Germany, Meschede 018

CC to Sys x translator__________________________________________________________________________________19
11. CC to SysEx translator
Maybe you like to automate cutoff, envelope times or other
parameter in your song? This is where the CC-translator comes into
play, it converts ordinary Midi Control Change messages into the
complex Sys x-Strings your Microwave needs to see for parameter
changes.
Setup a 'mixermap' or 'Dashboard' (or whatever it is called) in your
DAW with sliders or turn dials sending Midi-Controller-Change
messages (CC). You just need to assign the CC number associated to
your desired parameter to such a control (according to the table). By
moving or automating this control inside your DAW or sequencer the
Programmer translates the DAW's CC-output into Sys x-commands
and sends them to the Microwave which immediately changes it's
sound.
To avoid intersections with Standard-CCs like Volume (#7) or panning
(#10) some CC-numbers are left out. The CC data must be sent on the
same midichannel as your Programmer and Microwave is set to.
Notes: Some parameter like e.g. Vcf Env Amount are bipolar offering a
range from -64 to +63. TO archive a value of 0 you have ti send the CC
value of 64.
Due to technical reasons the Programmer does not show permanent
value changes when translating CC into SysEx data.
Synth Programmer for Waldorf Microwave – Operation manual V 1.0 – 01/ 018
© Stereoping Germany, Meschede 018

Updating Firmware_____________________________________________________________________________________20
12. Updating Firmware
The day may come you want to update your edition or try out another. Your Synth Programmer offers a
firmware update mode for this. After entering this mode you just send a firmware-file into the controllers Midi IN
2 jack. The firmwares in Sys x-format are all compatible with your Programmer and freely available on our
website. You can dump them with any standard Sys x dump tool of which several are available as freeware for
different operating systems. An exmaple for PC is 'MidiOX', for the Mac you could use 'Sys x Librarian'.
The technical part:
•Switch off the Stereoping Programmer
•Connect MIDI OUT of your Midi-Interface directly to the jack MIDI 2 IN of the Programmers using a short
cable of good quality
•There are some preferences in most Sys x-Dump Programs like 'Delay between Buffers' or 'Delay after
F7'. Please choose something around 100mS (Milliseconds) here.
•Hold MOD and power up your Programmer. The Display should read 'BOOTLOAD R'
•Load the new Firmware into your Sys x-Dump Program and send it out
•The display shows OS-Version and progresst. After about 2 minutes the Programmer restarts
•If you will get an error on the screen please try another cable or increase the delay mentioned above.
The firmware update erases all REFS settings. All 6 Chord Memory slots will be reset to factory settings.
Synth Programmer for Waldorf Microwave – Operation manual V 1.0 – 01/ 018
© Stereoping Germany, Meschede 018
Other manuals for synth programmer
3
Table of contents
Other Stereoping Recording Equipment manuals
Popular Recording Equipment manuals by other brands

ION
ION TAPE 2 GO quick start guide
Korg
Korg Toneworks AX10A owner's manual
Winmate
Winmate M-Series user manual
Weinzierl
Weinzierl KNX IP Interface 740.1 wireless Operation and installation manual

Epson
Epson C823461 (Ethernet) user guide
Dometic
Dometic Waeco MagicSpeed CBI 100 Installation and operating manual
