Sterling Leisure Products XP1 User manual
XP1, XP2, Passion, Essence, Desire, Pure, Pristine
OWNER’S MANUAL
6101 4
th
St. N.
St. Petersburg, FL 33714
800.749.8003
www.SterlingLeisure.com
Part Number 7876
Revised 07/09

Owner’s Information
Dealer:
Date Purchased: __________________________
Company: __________________________
Address: __________________________
Telephone: __________________________
Installer:
Date Installed: __________________________
Company: __________________________
Address: __________________________
Telephone: __________________________
Hot Tub:
Date Delivered: __________________________
Model: __________________________
Color: __________________________
Serial Number: __________________________
Your unique hot tub serial number is located on a data plate outside the
cabinet at ground level directly below the topside control panel. When
calling for service, have your serial number in hand.
MODEL ID # 1401–LP–MA–NO–63
SERIAL #: ########
1234 678

Page 1
For HELP, call 800.749.8003
S
S
St
t
te
e
er
r
rl
l
li
i
in
n
ng
g
g
L
L
Le
e
ei
i
is
s
su
u
ur
r
re
e
e
H
H
Ho
o
ot
t
t
T
T
Tu
u
ub
b
b
™
™
™
O
O
Ow
w
wn
n
ne
e
er
r
r’
’
’s
s
s
M
M
Ma
a
an
n
nu
u
ua
a
al
l
l
T
T
Ta
a
ab
b
bl
l
le
e
e
o
o
of
f
f
C
C
Co
o
on
n
nt
t
te
e
en
n
nt
t
ts
s
s
Introduction ........................................................................................ 2
Important afety Information ............................................................... 3
ite election and Installation ............................................................. 7
tartup ............................................................................................. 14
Water Balancing ............................................................................... 20
Topside Controls .............................................................................. 21
Operating Instructions ....................................................................... 33
tereo ystem .................................................................................. 35
Cover ............................................................................................... 37
Frequently Asked Questions ............................................................. 38
Troubleshooting ................................................................................ 41
Maintenance and Care ...................................................................... 49
pecifications ................................................................................... 54
Certificate of Verification ................................................................... 68
Important: terling Leisure is dedicated to offering you the best in customer
satisfaction and service. Be sure to read, complete, sign, and send in the
limited warranty card within 30 days of purchase to ensure you understand
what you are entitled to in terms of service. If you have any questions, you can
call our customer care center, at 800.749.8003.
Printed in the U. .A.
Revised 07/09
Copyright © 2009, Premium Leisure LLC. All rights reserved. No portion of this manual may be reproduced in any manner
without express written permission of Premium Leisure LLC. terling Leisure Hot Tubs
™
and Thermazone
™
are
trademarks of Premium Leisure LLC. All other brands, product names, company names, trade names, trademarks, and
service marks used are the property of their respective owners. Premium Leisure LLC may make product modifications
and enhancements. pecifications may change without notice. International products may be configured differently to
meet local electrical requirements. Dimensions are approximate. Patents pending.

Page 2
For HELP, call 800.749.8003
I n t r o d u c t i o n
Your choice of a terling Leisure Hot Tub
™
indicates that you are devoted to
excellence. The management and staff appreciate your patronage and takes
pride in the tradition of quality hot tubs that our company represents.
To properly acquaint yourself with your hot tub, we suggest that you take time to
read through this manual before hook up and operation. Doing so will familiarize
you with important operating and safety procedures, thereby ensuring an
enjoyable experience right from the start.
If you need any more information than this manual provides, feel free to visit our
Web site at www. terlingLeisure.com or call our customer care center, at
800.749.8003.
WARNING: This manual was written to ensure the proper use and installation
of your hot tub. Any modifications to the procedures outlined in
this manual may result in voiding your warranty.
This manual and its contents are subject to change without notice. Although we
have prepared this manual as accurate as possible, we are not liable for errors or
omissions; loss, injury, or damages caused by improper installation; or use of hot
tub (improper or otherwise).
You new hot tub is made with quality synthetic cabinet materials. ynthetic
materials won’t fade and are nearly invulnerable to mold and mildew. Where
wood splits, cracks, and stains, synthetic materials stand in timeless perfection.

Page 3
For HELP, call 800.749.8003
I m p o r t a n t a f e t y I n f o r m a t i o n
Read and Follow All Instructions
A
A
AV
V
VE
E
E
T
T
TH
H
HE
E
E
E
E
E
I
I
IN
N
N
T
T
TR
R
RU
U
UC
C
CT
T
TI
I
IO
O
ON
N
N
!
!
!
• Water will splash out of the hot tub during normal use. Install an adequate
perimeter around your hot tub that provides sound footing thereby helping to
avoid falls, slips, and accidents while preventing damage to fine floors and
wood finishes.
• DO NOT use a wall switch, ground fault circuit interrupter, circuit breaker,
fuse, or plugging and unplugging the hot tub as a means of turning your hot
tub on or off for normal everyday use.
• DO NOT permit any electrical appliance within 5 feet (1.5m) of the hot tub
(such as a light, telephone, radio, or television). Do not operate such an
appliance from either inside the hot tub or when you are wet unless such
appliances are built-in by the manufacturer.
• DO NOT bring electrical appliances into or near the hot tub (with the
exception of a space heater used for troubleshooting). Call 800.749.8003 for
instructions on this procedure.
• DO NOT connect auxiliary components (such as headphones, cables, and
additional speakers) to the stereo (if equipped).
• DO NOT leave the CD/DVD access door open on the stereo (if equipped).
• Replace audio/video components only with identical components.
WARNING: People with infectious diseases should not use a hot tub.
WARNING: Do not use a hot tub immediately following strenuous exercise.
WARNING: Do not use your hot tub without filters installed. Filters serve as a
barrier against bodily entrapment against the filter suction
fittings.
WARNING: Persons with chemical sensitivities should consult a doctor
before using your hot tub.
WARNING: ome types of hair dye can react with the sanitizers in your hot
tub water causing your hair to change color. Use your hot tub at
your own risk.

Page 4
For HELP, call 800.749.8003
Risks of Burns
• Before entering a hot tub, measure the water temperature with an accurate
thermometer since the tolerance of temperature-regulating devices may vary
by as much as ±5°F (±2°C).
• Test the water with your hand before entering the hot tub to be sure it’s
comfortable.
Risk of Electrocution
DANGER: RI K OF ELECTRICAL HOCK: Always install your hot tub at
least 5 feet (1.5m) from any metal surfaces (unless each metal
surface is permanently connected by a minimum #6 American wire
gauge [AWG] (10mm
2
) solid copper conductor to the provided
ground connector).
Connect all metal equipment, metal enclosures of electrical
equipment, metal water pipes, or conduits to the provided ground
connector with a minimum #6 AWG (10 mm
2
) solid copper
conductor.
DANGER: RI K OF INJURY: For cord-connected/convertible units, replace
damaged cord immediately. Do not bury cord. Connect to a
grounded, grounding-type receptacle only.
WARNING: RI K OF INJURY: This product uses a ground-fault circuit
interrupter (GFCI) located in the main panel. This GFCI must be
tested prior to each hot tub use.
Risks to Children
DANGER: RI K OF CHILD DROWNING: Extreme care must be exercised to
prevent unauthorized access by children. To avoid accidents,
ensure that children cannot use the hot tub unless they are
supervised at all times. Always cover the hot tub and use safety
locks.
WARNING: RI K OF CHILD INJURY: Do not permit children to use the hot
tub unless they are closely supervised at all times. Lower water
temperatures are recommended for children. Children are
especially sensitive to hot water.
Page 5
For HELP, call 800.749.8003
Risks of Hyperthermia
WARNING: To reduce the risk of injury, the water temperature in a hot tub
should never exceed 104ºF (40ºC). Water temperatures between
100ºF (38ºC) and 104ºF (40ºC) are considered safe for a healthy
adult. Lower water temperatures are recommended for young
children, senior citizens, and when hot tub use exceeds 10
minutes.
WATER TEMPERATURE IN EXCE OF 100ºF (38ºC) MAY BE
INJURIOU TO YOUR HEALTH.
Because excessive water temperatures have a high potential for causing fetal
damage during early pregnancy, pregnant or potentially pregnant women should
limit water temperatures to 100ºF (38ºC). Before entering a hot tub, measure the
water temperature with an accurate thermometer. The tolerances of water
temperature-regulating devices vary.
Hyperthermia occurs when the internal temperature of the body reaches a level
several degrees above the normal body temperature of 98.6ºF (37ºC). The
symptoms of hyperthermia include drowsiness, lethargy, and an increase in the
internal temperature of the body. The effects of hyperthermia include:
• Unawareness of impending hazard
• Failure to perceive heat
• Failure to recognize the need to exit hot tub
• Physical inability to exit hot tub
• Fetal damage in pregnant women
• Unconsciousness and danger of drowning
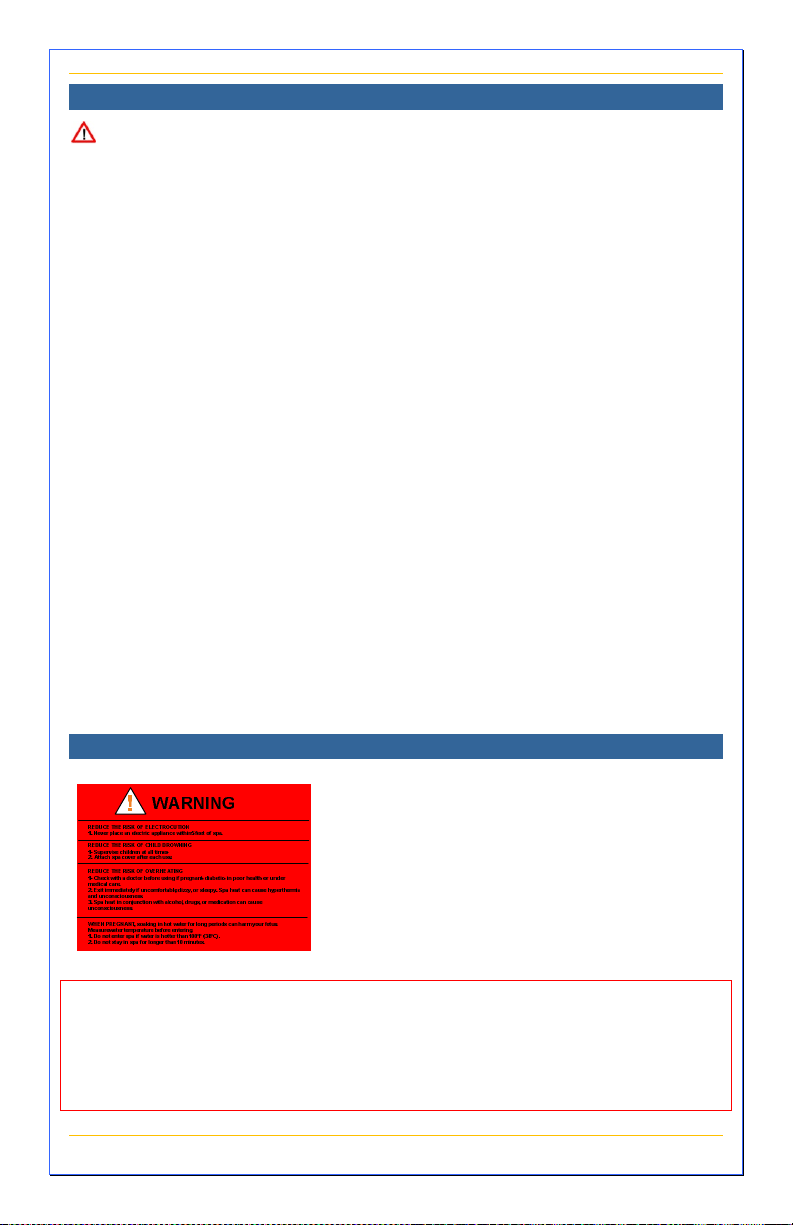
Warning ign
Warning ign Must Be Posted – The red
WARNING sign like the one shown here is
packed with your new hot tub. This sign must
be posted in a prominent place in close
proximity to the hot tub installation site
immediately upon completion of hot tub
installation.
Important: It is extremely important that this sign be permanently placed in clear
view of persons using the hot tub. Occasional hot tub users may not be aware of
some of the dangers hot water poses to pregnant women, small children, and
people under the influence of alcohol. If you did not receive a warning sign or
your sign has become damaged, please call our customer care center, at
800.749.8003 for a replacement.

Page 6
For HELP, call 800.749.8003
Basic afety Guidelines
Your hot tub is meant to be enjoyable, healthful, and relaxing. Below are some
basic safety guidelines to follow every time you use your hot tub.
• Always check the temperature of your hot tub before entering. High water
temperatures can be hazardous to your health.
• Persons suffering from heart disease, diabetes, high or low blood pressure,
and pregnant women should consult a doctor before using your hot tub.
• Persons under the influence of medication, drugs, or alcohol should not be
allowed into your hot tub.
• Remove all jewelry, metal, and watches from your person before entering
your hot tub.
• Do not allow children to use your hot tub without continuous supervision of
an adult.
• Do not use your hot tub alone.
• Test the ground fault circuit interrupter (GFCI) breaker prior to using your hot
tub each time to ensure it operates properly.
• Any electrical devices near your hot tub must be GFCI protected and out of
reach from inside the hot tub.
• Keep all breakables away from the hot tub area.
• Lock the cover on your hot tub when not in use.
• Enter and exit the hot tub slowly. Wet surfaces can be slippery.
• Prolonged immersion can be hazardous to your health.
• Maintain water chemistry in accordance with manufacturer’s instructions.
For Hot Tubs Equipped with Audio Components
Audio components are optional and not available on all models.
WARNING: Prevent Electrocution: Do not connect any auxiliary
components – for example, cable, additional speakers,
headphones, etc., – to the system.
Caution: Risk of Electric hock: Do not leave audio compartment door
open. Replace audio components only with identical components.

Page 7
For HELP, call 800.749.8003
i t e e l e c t i o n a n d I n s t a l l a t i o n
Proper planning is an important consideration when installing your new hot tub.
ite selection is a critical step and requires serious thought. Planning ahead
makes the installation process easier. The following information is provided to
assist you in site preparations.
1) Always comply with local building codes and obtain any necessary permits.
You may also need to consult with an engineer to address your specific
design needs.
2) Contact an electrician to assess your electrical needs, install wiring, and
assure a safe operation.
3) Position your hot tub with proper access to water, drainage, and electricity.
4) Place your hot tub on a uniform solid, flat surface designed to properly
support its weight. For external installations, a 4-inch (10 cm) thick cement
pad suffices. ee page 8 for conduit entry locations for your model hot tub.
5) For internal installations, check the load carrying capabilities of the floor on
which the hot tub will reside. Most homes meet the requirement of 80
pounds per square foot.
6) Assure that your hot tub will fit into the space you have chosen and the
delivery route will accommodate its large size.
7) Provide adequate ventilation for the humidity created by your hot tub. In
most cases, a Hot Tub Hard Cover is sufficient.
8) Protect the pump and all equipment from the weather by ensuring the
cabinet panels are secure at all times.
9) Allow 36 inches (1 meter) of unobstructed access to all sides of your hot tub
for normal servicing. Your hot tub is not designed to be recessed in the
ground or in a deck.
Figure 1 – Clearances and upport

Page 8
For HELP, call 800.749.8003
The following dimensions can be used to determine the proper location of
submerged conduits in concrete slab installations. All dimensions are made from
the outside of the hot tub’s frame with the access panels removed. The topside
control panel is shown at bottom of diagram for reference.
Figure 2 – Conduit Entry Location Reference Points
Model Dimension A Dimension B
XP1 18” (46 cm) 40” (102 cm)
XP2 21” (53 cm) 17” (43 cm)
Passion
Essence
Desire
Pure
Pristine
Table 1 – Conduit Entry Location Dimensions
10) Consider positioning your hot tub out of or adequately protecting it from the
wind. Just as people can get cold on cool/windy days, so can your hot tub.
Windy environments can significantly increase operating costs.
11) Consider using an insulating pad. In cold climates, the ground can rob heat
from the hot tub and increase your operating costs.

Page 9
For HELP, call 800.749.8003
Electrical pecifications
Important – Qualified and licensed electricians must perform all electrical
hookups. The following specifications must be followed in order to ensure proper
performance and safety.
WARNING: tarting an incorrectly wired hot tub could cause severe damage
to the mechanical equipment or even bodily harm. Have your
licensed electrician verify GFCI wiring with the diagrams on
pages 10-13 prior to starting the hot tub or call the technical
support line at 800.749.8003.
Caution: Failure to abide by specifications listed may result in damage to the
equipment and will void the warranty.
All hot tubs must be wired with the appropriately sized wiring. Failure to do so will
cause equipment damage and will not be covered under your warranty.
All hot tubs must be over current protected with a built-in GFCI in the service
panel.
Model
Volts
(V)
Freq.
(Hz)
Rating
(A)
GFCI
(A)
Wire size from GFCI
to Main Panel
*†
Equipment
Pack
XP1, XP2 240 60 48 60
6-3 plus ground (up to 130’)
4-3 plus ground (up to 230’)
2-3 plus ground (up to 360’)
TA3/4
Passion,
Essence,
Desire, Pure,
Pristine
240 60 48 60
6-3 plus ground (up to 130’)
4-3 plus ground (up to 230’)
2-3 plus ground (up to 360’)
EL2000
Table 2 – Wire ize Chart
WARNING: Disconnect electrical power before servicing. Before obtaining
access to terminals, all supply circuits must be disconnected.
WARNING: Test the GFCI (or RCD) before each use.
Our hot tubs are certified by Intertek Testing, NAa Ltd.
Ontario, Canada to C A-C22.2 No. 218.1-M89 and AN I/UL
1563 standards.
*
Wire size may need to be reduced at GFCI to fit into the breaker
†
olid copper

Page 10
For HELP, call 800.749.8003
Parts with extra low voltage not exceeding 12v must be inaccessible to a person
in the hot tub. Earthed appliances must be permanently connected to fixed
wiring. Parts incorporating electrical components, except remote control devices,
must be located or fixed so that they cannot fall into the hot tub.
Means for disconnection must be used in fixed wiring in accordance with wiring
rules.
Important – To allow the 240V GFCI to function properly, connect the white
Neutral wire from the hot tub to the Neutral terminal on the GFCI breaker, not the
Neutral bus in the GFCI breaker box. An improperly connected Neutral causes
the GFCI breaker to trip.
Wiring Diagrams
GFCI
G
N
D
N
E
U
T
Correct
To
pa
To
Main
Hot Tub GFCI Breaker Box Wiring
Incorrect
2 White wires
on Neutral Bus
3 White wires
on Neutral Bus
GFCI
G
N
D
N
E
U
T
To
Main
To
pa
Figure 3 – 240V GFCI Wiring

Page 11
For HELP, call 800.749.8003
Figure 4 –Wiring Diagram for XP1 and XP2 models
ingle-phase 240V Domestic version
ee wire size chart on page 9.

Page 12
For HELP, call 800.749.8003
Figure 5 –Wiring Diagram for Passion, Essence,
Desire, Pure, and Pristine models
ee wire size chart on page 9.

Page 13
For HELP, call 800.749.8003
Figure 6 –Board Diagram for Passion, Essence,
Desire, Pure, and Pristine models
ingle-phase 240V Domestic version
Page 14
For HELP, call 800.749.8003
t a r t u p
Important – Read these step-by-step startup procedures before starting your hot
tub. Failure to follow any of these steps listed may result in damage to the
equipment and may void your warranty.
Note: If you are unsure of any of the above startup procedures, please call our
customer care center at 800.749.8003. For best results, read each step in
its entirety before proceeding.
Caution: Running the hot tub pump dry (without water running through it) can
cause IMMEDIATE damage and will void the warranty! Be sure that
the hot tub is installed properly in accordance with the instructions in
this manual.
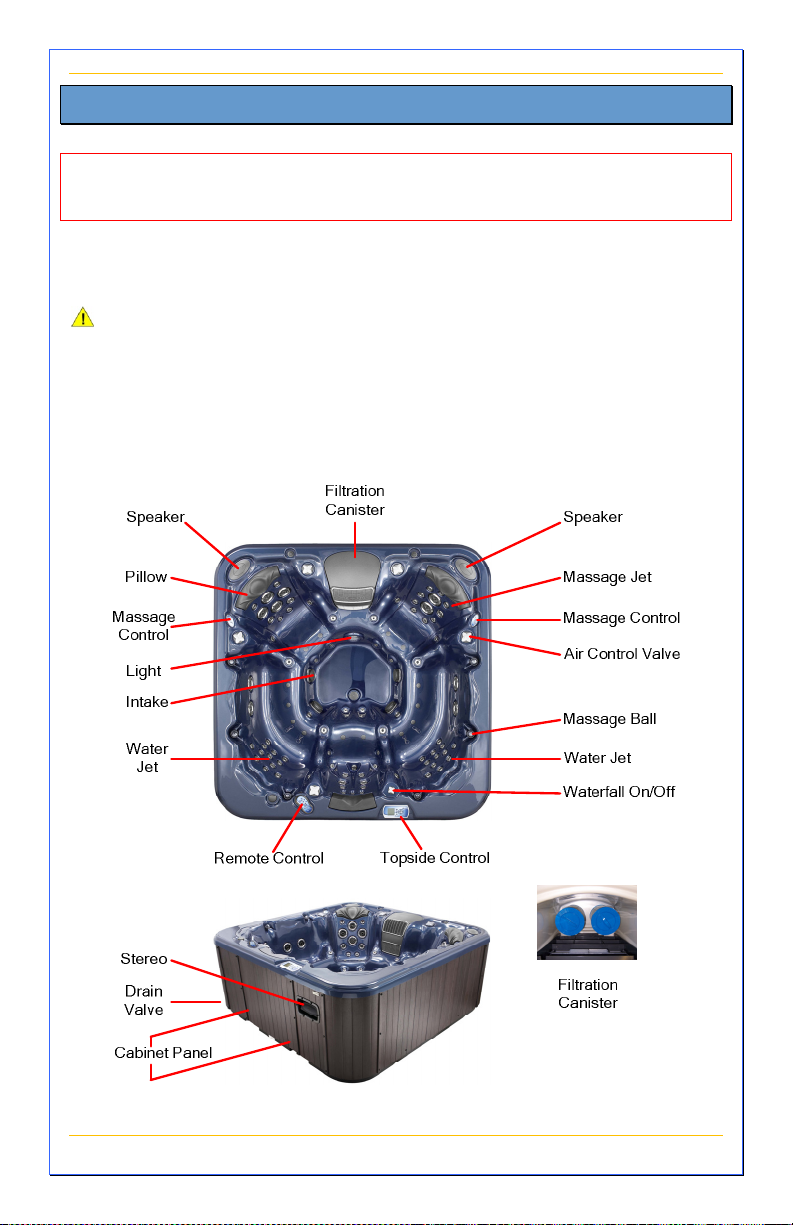
Refer to the following picture for an explanation of your hot tub’s controls,
components, and technical terms. Note that not all models have all features and
components.
Figure 7 – Callouts
Page 15
For HELP, call 800.749.8003
Before Adding Water
Before adding water, go through these simple steps now to prevent common
issues when setting up your hot tub for the first time. Verify that the following
have all been rechecked.
1. Turn off all power to the hot tub at the main breaker panel.
2. Open the side panels to access the internal components.
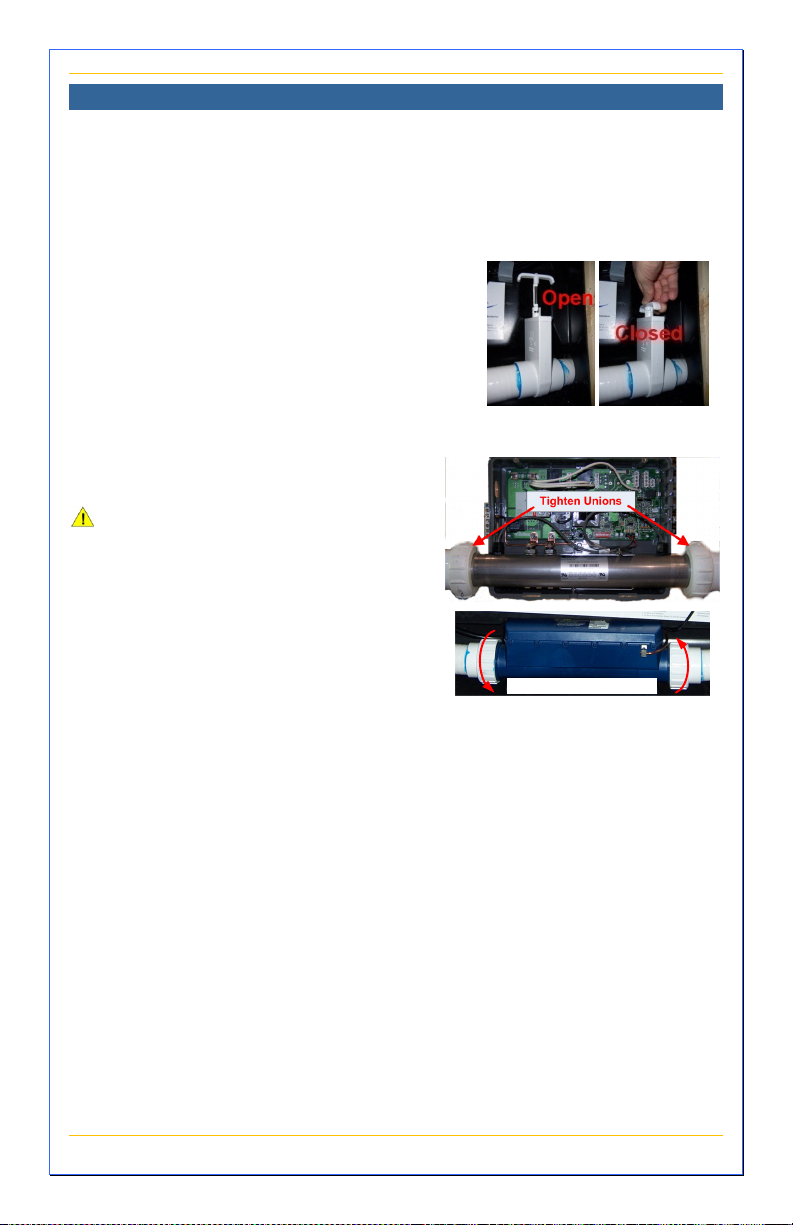
3. Check that all slide valves are opened (T-
handles pulled out) to the heater and all
pumps.
4. Check that there are no obvious signs of
loose wires or broken pipes.
Figure 8 - Valve Open/Closed
5. Check that the two heater unions are
hand tight.
Caution: Do not use a wrench. Over-
tightening may cause damage
to unions and gaskets, which
will not be covered under
warranty.
Tighten Directions
Figure 9 - Unions Tight
6. Check that the unions on all pumps are tight.
7. Clean out any foreign debris from within the service access area or inside of
the hot tub itself.
8. With the drain open and filters removed, thoroughly rinse out the hot tub with
warm water until the drained water runs clear. Run water through the
filtration canister and jet lines to remove any incidental dust, dirt, and debris
that may have accumulated during shipment or installation. Drain all water
completely.
9. Make sure that the hot tub drain valve is closed and the cap is on tight (see
page 50).
10. Install the filter(s) in the filtration canister.
11. Check that all of the hot tub jets are open (turned full counter-clockwise).
12. Now is the best time to clean and polish the surfaces of your hot tub (see
pages 49-51).
Page 16
For HELP, call 800.749.8003
Filling Your Hot Tub
Now it's time to fill your hot tub with water. Do not turn on
the electricity yet until the hot tub is completely filled. To
properly fill your hot tub:
1. Make sure that the filters (in the filtration canister) are
gently screwed into place. Turn them clockwise until
they stop being careful not to over-tighten them (this
avoids cracking the filter).
2. Connect a standard garden hose to a faucet with
regular cold tap water (not softened water or hot water).
Figure 10 – Filtration Canister
Caution: The water from your hot water tank should not be used to fill the hot
tub.
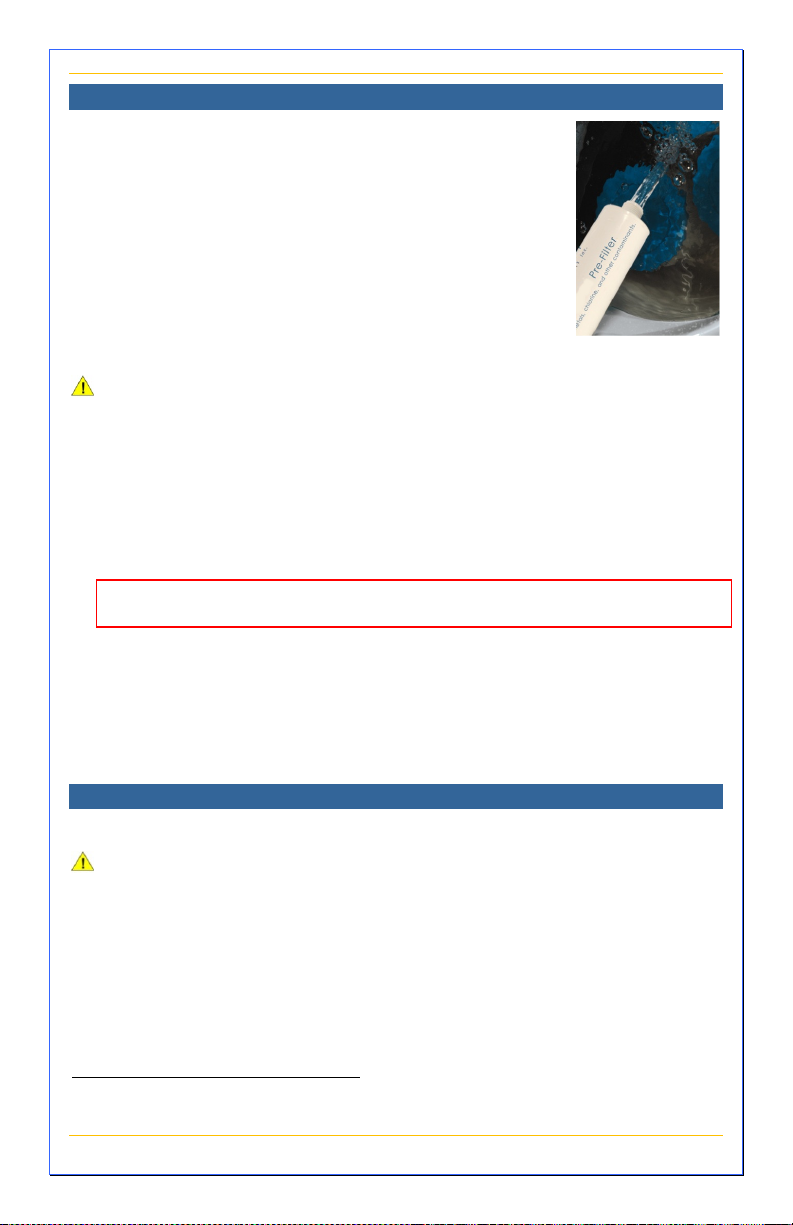
3. Put the pre-filter (if equipped
‡
) on the other end of the hose, point the pre-
filter into a suitable drain, turn on the water, and allow any sediment to be
flushed down the drain. Once the water stream runs clear, turn off the hose.
4. Put the pre-filter (if equipped) into the filtration canister and turn on the hose.
5. Fill slowly. If too much water pressure is used, foaming water can force air
into the pipes and cause startup problems.
Important: To assure that the pump is properly primed, fill the hot tub
through the filter area only.
6. Fill the hot tub until the water level is about 1” above all jets (or about ½”
below the pillow). Do not over fill.
Note: Every person entering a hot tub displaces a given volume of water, so
adjust water level to the number of people regularly using the hot tub.
Turn off the hose and check again for any small leaks.
Operational Checks, XP1 and XP2
Note: For Passion, Essence, Desire, Pure, and Pristine models, see page 19.
Caution: Do not turn on any pump until your hot tub is properly filled with
water. Running any pump without water in your hot tub can cause
IMMEDIATE damage, which is not covered under warranty!
By now you have rechecked your tub’s mechanical connections and filled it with
water to about 1” above all jets by adding cold tap water through the pre-filter (if
equipped). Turn on power to the hot tub at the main breaker panel and test the
operation of the electrical system. If you encounter a problem, please reference
the troubleshooting guide on page 41.
‡
Pre-filters are available by calling 800.749.8003

Page 17
For HELP, call 800.749.8003
1. Turn on the breaker and test the operation of the Ground-Fault Circuit
Interrupter (GFCI) breaker by pushing the small button. This should
automatically trip the hot tub's circuit breaker.
DANGER: If this breaker does not trip, immediately call your electrician.
Do not use your hot tub!
Only if pushing this button successfully trips this circuit breaker should you
reset this breaker and proceed to the next step.
2. Go to the topside control
panel and look at the
display. The system goes
through a startup
sequence after which the
circulation pump starts and
the panel displays the
current water temperature.
Figure 11 – Topside Buttons
3. Press the Pump 1 button . You should hear the first pump turn on,
see water circulating in the hot tub, and see the icon swirl on the display.
4. Press the Pump 1 button again. You should hear the first pump turn on a
higher speed and the icon swirl faster.
Caution: If water does not flow from the jets after 2 minutes, turn power
off at the main panel and bleed air from the system (see page
38). Turn power on again. ometimes momentarily turning a
pump off/on will prime it. Only do this four times.
5. If the water is running smoothly through the lines, open the air control valve
and you should see an increase in jet pressure. Check and adjust the water/
airflow of every jet if necessary.
Each jet in your hot tub can be adjusted for massage intensity and
directional flow. Turn the outer jet dial counterclockwise to increase the
water volume and clockwise to turn it off. Pivot the angle of a jet to achieve
an optimal massage.
Adding an air mixture intensifies the level of your massage. Turn the air
control valve counterclockwise to increase the air mixture and clockwise to
turn it off.
To minimize heat loss, close the air control valve when your hot tub is not in
use.
6. Press the Pump 1 button a third time to turn Pump 1 off. A built-in timer
automatically turns Pump 1 off after 20 minutes, unless the pump manually
has been deactivated first.

Page 18
For HELP, call 800.749.8003
7. If equipped, press the ON/OFF button on the left-hand Massage
equencer control panel.
8. Press the Pump 2 button . If Pump 2 has not primed after 3 minutes
repeat same priming procedure of step 3 above for Pump 1. Check and
adjust the water and airflow of every jet from Pump 2 if necessary.
Note: If equipped, your hot tub automatically tests the four massage sequencers
for 45 seconds (a total of 3 minutes). Please wait for this test to complete before
touching any of the controls.
9. For two 1-speed pump models, press the Pump 2 button a second time to
turn it off. For two 2-speed pump models, press the Pump 2 button a
second time to turn it on high and again to turn it off. A built-in timer
automatically turns Pump 2 off after 20 minutes.
10. Press the ON/OFF button on the right-hand Massage equencer control
panel.
11. Press the Pump 3 button (if equipped). If Pump 3 has not primed
after 3 minutes repeat same priming procedure of step 3 above for Pump 1.
Check and adjust the water and airflow of every jet from Pump 3 if
necessary.
Note: Your hot tub automatically tests the four massage sequencers for 45
seconds (a total of 3 minutes). Please wait for this test to complete before
touching any of the controls.
12. Press the Pump 3 button a second time to turn off Pump 3. A built-in timer
automatically turns Pump 1 off after 20 minutes.
13. Press the Light button to turn the Light on. Press this button again to
cycle through the five colors (red, blue, green, white, and yellow). Once a
desired color is found, pressing this button again stays on this color.
14. Press the Light button again to turn it off. A built-in timer automatically turns
the Light off after two hours.
15. Press the Next Page button .
16. Press the Blower button to turn on the air blower (if equipped).
Check that air goes to the air jets on the bottom of each seat.
17. Press the Blower button again to turn the Blower off. A built-in timer
automatically turns the Blower off after 20 minutes.
Note: When temperature limits allow, a circulation pump and ozone generator
run continuously to help keep your water clean.
This manual suits for next models
6
Table of contents
Other Sterling Leisure Products Hot Tub manuals

Popular Hot Tub manuals by other brands


Jacuzzi
Jacuzzi J-400 Series Installation manual and use & maintenance

ZEN
ZEN Cedar ASSEMBLY, INSTALLATION & MAINTENANCE INSTRUCTIONS

glass 1989
glass 1989 LIS 151 manual

Coast Spas
Coast Spas Infinity Cascade II owner's manual

Coast Spas
Coast Spas Patio Series owner's manual

Aquatic
Aquatic SERENITY STUDIO 18 Specification sheet


