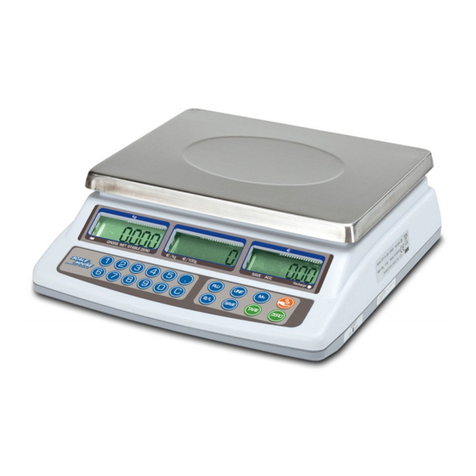
Sterling Scale XC880A User manual

Rev 2.5 8/17/2009
Model XC880A
High Accuracy Parts Counting
Weigh Scale
Owners Manual
Copyright 2006 Sterling Scale Co., Inc.
20950 Boening r. • Southfield, Mi 48075
Phone: 248-358-0590 • Fax: 248-358-2275
www.sterlingscale.com

XC880A OWNERS MAN AL
1. GETTING STARTED ................................................................................................. 1
1.1 UNPACKING AN ASSEMBLY ............................................................................................ 1
1.2 SCALE INFORMATION RECOR .......................................................................................... 2
2. OPERATION ............................................................................................................. 3
2.1 KEYBOAR ATA ENTRY ............................................................................................... 3
2.2 WEIGHING OPERATIONS .................................................................................................. 4
2.3 COUNTING ..................................................................................................................... 5
2.4 CHECK WEIGHING ........................................................................................................ 11
3. SPECIAL FEAT RES ................................................................................................ 13
3.1 CLOCK ....................................................................................................................... 13
3.2 AU IBLE BEEPER ....................................................................................................... 13
3.3 MEMORY USAGE INFORMATION .................................................................................... 14
3.4 KEYBOAR LOCK ........................................................................................................ 14
3.5 CUSTOM KEYBOAR SETUP .......................................................................................... 14
3.6 USER PASSWOR ......................................................................................................... 15
3.7 CUSTOM PROMPTING .................................................................................................... 16
4. PARAMETERS .......................................................................................................... 17
4.1 PARAMETER ACCESS .................................................................................................... 17
4.2 CALIBRATION .............................................................................................................. 18
4.3 FILTERING AN AVERAGING ........................................................................................ 20
4.4 MOTION BAN ........................................................................................................... 21
4.5 ZERO TRACKING ......................................................................................................... 21
4.6 FAST STEPPING ......................................................................................................... 22
4.7 QUICK CONFIGURE ....................................................................................................... 22
5. MEMORY F NCTIONS ......................................................................................... 24
5.1 A ING RECOR S ..................................................................................................... 24
5.2 ELETING RECOR S ................................................................................................. 25
5.3 E ITING RECOR S .................................................................................................... 25
5.4 REVIEWING RECOR S ................................................................................................. 27
5.5 PRINTING FILES .................................................. 27
6.1 SET POINTS ............................................................................................................... 28
6.2 REMOTE SWITCHES ..................................................................................................... 30
7. COMM NICATION ................................................................................................. 31
7.1 OUTPUT FORMATS ...................................................................................................... 31
7.2 ATA FORMAT .......................................................................................................... 40
7.3 PORT CONNECTIONS ..................................................................................................... 40
7.4 PRINTING LABELS ......................................................................................................... 41
7.5 SUPPLIER/SHIP TO ........................................................................................................ 42
i

XC880A OWNERS MAN AL
7.6 SERIAL NUMBER .......................................................................................................... 43
7.7 STATION I NUMBER ................................................................................................... 43
7.8 LABEL STORAGE .......................................................................................................... 43
8. SPECIFICATIONS ..................................................................................................... 45
8.1 PHYSICAL SPECIFICATIONS ........................................................................................... 45
8.2 ELECTRICAL SPECIFICATIONS ........................................................................................ 45
8.3 WEIGHING SPECIFICATIONS .......................................................................................... 46
8.4 COMMUNICATION SPECIFICATIONS .................................................................................. 46
9. Q ICK REFERENCE CHART ................................................................................. 47
10. OPTIONS ................................................................................................................... 48
10.1 SERIAL FLASH MEMORY .......................................................................................... 49
10.2 BARCO E PRINTER ..................................................................................................... 50
10.3 ANALOG OUTPUT ....................................................................................................... 50
10.4 REMOTE SCOREBOAR ISPLAY ................................................................................... 51
10.5 REMOTE CHECK-WEIGHER ISPLAY ............................................................................. 52
ii

XC880A OWNERS MAN AL
NOTE: All information contained within this manual is subject to change without notice.
No part of this document may be copied without the express written consent of Sterling
Scale Co.
1. Getting Started
Congratulations on your purchase of the XC880A High Accuracy Parts Counting
Scale. Since 1962, Sterling Scale Co. has been manufacturing quality scales and
weighing systems for industry. All Sterling Scale models are covered by a full one-year
limited warranty against defects in materials and workmanship. Ask your dealer, or
contact Sterling Scale Co. for warranty details.
1.1 Unpacking and Assembly
This section will describe the proper unpacking and assembly of your new XC880A
High Accuracy igital Weigh Scale. These instructions should be followed to avoid
damage to the load cell, or electronics. This section only applies to desk top versions of
the XC880A.
1. Remove the XC880A from the shipping container. The package should contain
the following items. Contact your dealer or Sterling Scale Co. if any items are
missing:
•This Users Manual on C .
•(1) XC880A Console.
•(1) Platter Support Assembly.
•(2) Platter Support Screws.
•(1) Platter Cover.
•(1) 1.2A Power Adapter.
•(1) Accessory Pack.
2. Remove the XC880A console assembly from the packaging, and place on a hard
work surface. Please retain the box and all packaging materials in case future
shipping becomes necessary. Shipping without the original packaging could void
your warranty.
3. Locate the platter support assembly, and the two platter support screws. Line up
the mounting holes on the platter assembly, and the two platter support screws.
Line up the mounting holes on the platter support with the two threaded holes in
the load cell. Insert and tighten screws.
CAUTION: Do not over tighten screws or apply excessive downward force. his
could cause irreparable damage to the load cell, and will void the warranty.
4. Locate the platter cover. Line up the (4) posts on the bottom of the cover with the
matching holes on the platter support. Gently push down on the platter cover
until the posts are fully inserted into the holes.
1

XC880A OWNERS MAN AL
5. After installation of the cover, ensure that no part of the platter touches or rubs
against the console enclosure. This will cause unstable and inaccurate weight
readings. Since you didn’t over-tighten the screws, the platter may be turned
slightly, right or left, to position it so it does not touch the enclosure. If the platter
will not move with medium pressure, the screws are too tight. If so, repeat step 3.
6. The XC880A is now ready for operation. Locate the AC power adapter, and
remove it from its box. Plug the adapter into a 110 VAC wall outlet. The power
input connector is located on the rear panel of the XC880A, next to the power
switch. Ensure the switch is in the OFF position and plug the power adapter into
the power input connector.
7. Turn the switch on. The XC880A will go through a short power on routine, after
which the scale will be ready for counting and weighing operations described in
the following chapters.
1.2 Scale Information Record
Record specific scale information below. This information will be useful when
contacting Sterling Scale for technical support or special programming concerns.
Model No: XC880A Serial No:
Capacities: Scale 1: X Scale 2: X .
Scale 3: X Scale 4: X .
ate Purchased: / / . From: .
2

XC880A OWNERS MAN AL
2. Operation
This section will guide the user through the basic operation of a standard
XC880A. It contains procedures for weighing and counting as well as explanations of
the various keyboard functions. NOTE: Some functions may not be present if the scale
is running a special program. See the original invoice, or contact Sterling Scale or your
Sterling distributor for specific details concerning special systems.
NOTE: The alphanumeric display of the XC880A provides information and prompting.
All prompts that require a YES or NO response (in the configuration modes) will time
out after approximately ten (10) seconds if no key is pressed. The XC880A will then
return, unaffected, to its previous operational mode.
2.1 Keyboard Data ntry
The XC880A is equipped with a 48 key alpha numeric keyboard to allow
the user to enter data, respond to prompts, and perform functions. Many of the
keys, when used along with the SHIFT key will perform certain scale functions
during normal operation.
When prompting for data, the user may enter numeric or upper case alpha
characters directly along with 11 special characters when pressed after the SHIFT
key. These characters, except for ‘/’ correspond to the shift characters on keys 1 –
0 on a standard PC keyboard and are listed in the table below.
Keystrokes Character
SHIFT – 1 !
SHIFT – 2 @
SHIFT – 3 #
SHIFT – 4 $
SHIFT – 5 %
SHIFT – 6 ^
SHIFT –7 &
SHIFT – 8 *
SHIFT – 9 (
SHIFT – 0 )
SHIFT – P /
3

XC880A OWNERS MAN AL
2.2 Weighing Operations
2.2.1 Zeroing The Scale
uring regular use, the displayed weights may shift due to
temperature changes or load cell fluctuation. The XC880A may be zeroed
at any time by pressing the ‘ZERO’ key. The XC880A will read the
weight until motion is within the allowable window, then that weight
becomes the new zero point.
Should the operator inadvertently press the ‘ZERO’ key with
weight present on the scale, the previous zero value can be restored by
pressing ‘SHIFT’ followed by the ‘ZERO’ key.
2.2.2 Changing Units
The XC880A will display weight and calculate quantities using 1
of 4 possible units of measure, Pounds, Kilograms, Grams, and Ounces.
The operator may toggle through the choices by pressing the ‘SHIFT’ key
followed by the ‘6’ (units) key. If the key is released immediately, the
units setting will be toggled to the next choice, and the display will change
accordingly. If the key is held down, the alphanumeric LC displays the
available unit choices one at a time. When the desired choice is displayed,
simply release the key and the currently displayed unit will become the
active units setting. The proper LE on the front panel will also be lit to
indicate the current unit of measure.
2.2.3 Tare Weights
The XC880A allows the user to remove tare weight in one of two
Methods, pushbutton, or direct keyboard entry.
Direct Tare Entry: If the tare weight is known, the user may
enter it directly through the keyboard, and press the ‘TARE’ key. If the
entered value is not greater than the scale capacity, it will be removed
from the displayed weight, and the XC880A will enter the net weight
mode.
Auto Tare: The user may tare the container weight by placing an
empty container on the scale and pressing ‘SHIFT’ followed by the
‘TARE’ key. The XC880A will sample the weight until stable. If a valid
tare weight is present, the XC880A will enter the net weight mode, and
display the net weight.
Clearing the Tare Weight: The tare weight may be cleared by
pressing ‘SHIFT’ followed by the ‘RESET’ key, or by entering a tare
weight of 0.
Displaying the Tare Weight: Pressing, and holding the ‘TARE’
key, while in net weight mode will display the current tare weight on the
alphanumeric display. It will be displayed until the ‘TARE’ key is
released.
4

XC880A OWNERS MAN AL
2.3 Counting
The XC880A may be used as a high accuracy piece counter. The
following sections describe the various methods of counting.
2.3.1 Variable Sample Counting
Below is the procedure to initiate a piece count using the variable
sample method which allow the operator to enter any quantity greater than
1 as the sample weight.
1. Starting from the weighing mode, load at least two sample
parts into the scale.
NOTE: o achieve greater accuracy in the final count, use as
many samples as possible. If the sample is too small, the
XC880A will indicate the number of additional pieces needed.
Remove the sample and press SHIF then RESE . Using the
increased sample, repeat step 1.
2. Enter the number of pieces loaded followed by the ‘COUNT’
key.
3. The XC880A samples the weight and calculates the average
piece weight (APW) using the entered value.
4. When the APW is successfully calculated, the XC880A enters
the count mode, and the current quantity is continually updated
on the main display. The alphanumeric LC displays the
current weight and the calculated APW.
5. The count mode may be exited by pressing the ‘SHIFT’ key
followed by ‘RESET’. This returns the XC880A to gross
weight mode.
5

XC880A OWNERS MAN AL
2.3.2 Fixed Sample Counting
The user may count by the fixed sample method. This is the
Simplest counting method, and is initiated in the following manner.
1. Starting from the weighing mode, load samples on scale.
Press the ‘COUNT’ key. The current fixed sample is displayed
on the alphanumeric LC .
2. If the ‘COUNT’ key is held down, the fixed sample value will
scroll through all possible choices. When the desired sample is
displayed, simply release the key. The available fixed sample
choices are 5, 10, 20, 50, or 100. The chosen sample now
becomes the fixed sample value.
3. The XC880A samples the weight, calculates the APW, and
enters the count mode. The data is displayed as with the
previous counting method. (see also NOTE from 2.2.1 step 1)
2.3.3 Auto Scale Select
The XC880A can be programmed to automatically switch scale
inputs between the sampling and counting scales when initiating a piece
count. The procedure below shows how to set up this feature in a multiple
scale system.
1. Press the SHIFT key followed by RESET to close any
currently open file, and place the scale in weigh mode.
2. Press the SHIFT key followed by ‘C’ (F3). Press ENTER until
prompted to “SET SMP/CNT?”.
3. Press ‘1’ or ‘Y’ to set up the scales. If there is more than one
scale present in the system, The XC880A prompts with
“SET SAMPLE SCALE?”
a. Press ‘1’ or ‘Y’ to set the sample scale. The display will
read “SELECT A SCALE” followed by a list of
available scales. Press the number corresponding to the
desired scale to be used as the sample scale or P to
prompt for the scale when sampling.
b. Press ‘0’ or ‘N’ to bypass sample scale selection.
6

XC880A OWNERS MAN AL
4. The display prompts to “SET COUNT SCALE?”
a. Press ‘1’ or ‘Y’ to set the count scale in the same
manner as with the sample scale.
b. Press ‘0’ or ‘N’ to bypass count scale selection.
5. If ‘0’ or ‘N’ was pressed at step 3 the XC880A prompts to
“RESET SMP/CNT?” Press ‘1’ or ‘Y’ to reset the sample and
count scales and disable automatic scale select. Press ‘0’ or ‘N’
to continue using the currently selected sample and count
scales.
2.3.4 Direct APW Counting
If the actual average piece weight is known, the user may enter it
(when in the weigh mode) through the numeric keypad and press the
‘APW’ key. The entered value will be used as the APW to calculate the
quantity placed on the scale, and the data is displayed as with the previous
counting methods.
2.3.5 Counting From Memory
Another method of counting is to call up previously stored part
numbers from memory, which will use a stored APW value to calculate
the count. Follow the procedure below to count from memory.
1. Starting in the weigh mode, press the ‘ENTER’ key. The
XC880A prompts operator for Part Number, the most recently
used part number will be displayed. Press ENTER to count that
particular part or enter the desired number through the
keyboard.
The XC880A searches for the part in memory. One of the
following will occur.
a. If the requested part file is found, the stored APW is
loaded, and used to calculate the quantity. If no APW
was stored under that part, and the prompt to count
parameter is enabled, the XC880A prompts the operator
to sample or enter an APW value. If the APW is not
calculated here, the file will be opened in weight only
mode.
7

XC880A OWNERS MAN AL
b. If not found, the XC880A will prompt user for data
fields to store for that part number. When all data has
been prompted for, the operator is given a choice to
“STORE IN MEMORY?”. Press ‘1’ or ‘Y’ to add the
record to memory. Press ‘0’ or ‘N’ to use data
temporarily. All entered data will be lost when the file
is closed, and no accumulated totals can be stored.
2. The calculated quantity will be updated on the main display,
and the net weight, along with the APW are displayed on the
alphanumeric LC . To display file info while in memory
mode, press and hold the ‘P’ key. The part number and part
name will be displayed on the alphanumeric LC until the key
is released.
2.3.6 Accumulation
When a file is opened from memory, the quantities and/or weights
may be accumulated, and stored in the part number file by pressing the
‘SHIFT’ key and one of the following:
1. The ‘M+’ or ‘7’ key will add the current quantity and weight
to the active files total quantity and weight, which will then be
displayed momentarily on the alphanumeric display.
2. The ‘M-‘ or ‘8’ key will cause the current quantity and/or
weight to be subtracted from the totals, and updated.
Once an accumulation has been performed, the weight must be
removed from the scale before another accumulation will be allowed.
2.3.7 Clearing Accumulated Quantities
The accumulated piece quantities for each file may be individually
cleared in the following manner.
1. Call up the desired part number as in section 2.2.4, if not
already active.
2. Press the SHIFT key followed by ‘C’ key (F3).
3. The operator is prompted with “CLEAR TOTAL?”. Press ‘1’
or ‘Y’ to clear the accumulated totals for that part number.
Press ‘0’ or ‘N’ to cancel.
8

XC880A OWNERS MAN AL
2.3.8 Reverse Sampling
The XC880A can determine the count of a full or partially full
container using the reverse sampling method. To obtain an accurate count
using this method, the operator must know the container’s tare weight.
Follow the procedure below for reverse sample counting.
1. Press SHIFT-RESET to enter the gross weigh mode, place
container with parts to count onto the scale.
2. Enter the tare weight of the container as described in
2.1.3.
3. Press ‘SHIFT’ followed by the ‘COUNT’ key. The
XC880A Prompts: “REMOVE SAMPLES PRESS ENTER.”
Remove a number of parts and again press ENTER.
4. The XC880A prompts the operator for the number of
pieces removed. Input the number of pieces that were removed
(must be greater than 1) and press ‘ENTER’.
5. The weight is again sampled, and the APW is calculated using
the weight of the removed pieces. ata is displayed as in 2.2.1.
2.3.9 APW nhance
The XC880A contains a user settable function to perform
enhancement of the calculated APW up to a preset quantity. If enabled,
this function will recalculate the average piece weight when motion
settles, while the count is below the preset value. The APW will be
updated on the prompting display whenever an adjustment is made.
Follow the steps below to setup and use the APW enhance function.
Note: he APW enhance function requires the motion sensing be set to
any value other than OFF. If set to OFF this function will be disabled
automatically. See section 4.4 for details on motion sensing.
1. Press SHIFT – C. The current setting for APW Enhance will
be displayed. Press SCALE SELECT to toggle the setting
ON/OFF.
2. If the function was enabled, the operator will be prompted for
the max enhance quantity. Enter the desired preset quantity.
3. Perform a sample count using at least 3 pieces. The weight
and quantity are displayed on the small prompting display.
4. Add a number of additional parts, and wait for the motion
indicator to turn off. The XC880A will recalculate the APW
using the currently displayed quantity, and if different, will
display the new APW.
9

XC880A OWNERS MAN AL
5. The operator may repeat step 4 to achieve greater accuracy in
the calculated quantity, until the displayed quantity reaches
the preset value. At which point enhancement will be
disabled until the next sample routine is performed.
10

XC880A OWNERS MAN AL
2.4 Check Weighing
The XC880A may be used to quickly check packages for acceptable
weight or count, using previously stored values. It will notify the operator of the
status of the loaded package in a number of possible ways. This section will
explain the various methods of manual check weighing available with the
XC880A.
2.4.1 Setup
The check-weighing functions are activated, and setup through the
set point parameter. Section 6.1 will provide more details on set points.
Follow the procedure below to initiate check weighing.
1. Press ‘SHIFT’ followed by the ‘3’ (SETPT) key.
2. The XC880A displays the current set point mode. Press the
‘SCALE SELECT’ key to scroll through the possible choices
until ‘CMP’ is displayed. Press ‘ENTER’.
3. The user is now prompted to select the desired ‘SETPOINT
ATA’. Use SCALE SELECT to scroll through the following
choices until the desired setting is displayed, then press
‘ENTER’.
GROSS WEIGHT: Uses the Gross weight loaded on scale to
determine status.
NET WEIGHT: Uses the Net weight to determine status of
loaded packages.
QUANTITY: Uses the calculated quantity to determine check
status.
4. UNITS: Use SCALE SELECT to scroll through the
available weighing units.
5. The XC880A prompts for the ‘LOW LIMIT’. Enter the
numeric value for the minimum acceptable limit. Press
ENTER.
11

XC880A OWNERS MAN AL
The XC880A prompts for the ‘HIGH LIMIT’. Enter the
numeric value for the maximum acceptable limit. The XC880A
will use these values to determine if the package is acceptable.
Press ‘ENTER’.
6. The operator is prompted with ‘AU IBLE?’. If desired, press
‘1’. The scale will now give an audible signal of various tones
to reflect the check weigh status. If the package is under
weight, the beeper will emit a slow beep. If the package is over
weight, a fast beep will be emitted. When the package being
checked is within the acceptable limits, a steady beep is
emitted.
8. Set point motion if selected will wait for a stable weight
reading before performing a check weighing operation. (See
also section 4.4)
2.4.2 Display
The XC880A will display the check weigher status in different
ways, depending on the preference of the user.
1. The check-weigher LE display on the front panel
provides the user with 3 lights to indicate the current status. These
include an Amber colored ‘UN ER’ lamp to indicate the
package is under weight, a Red ‘OVER’ lamp indicates an
overweight package, and a Green ‘OK’ lamp, which will light if
the package is within the acceptable limits.
2. The external setpoint outputs are also updated to reflect the
status of the check-weigher. These may be connected to
optional remote indicators, or to other control devices to
perform special operations.
See section 6.1 for details on external set point outputs.
12

XC880A OWNERS MAN AL
3. Special Features
The following will describe the special features and functions of the XC880A.
3.1 Clock
The XC880A contains a real time clock, which will display the time and
date on the alphanumeric LC . Below are procedures for setting and displaying
the clock.
3.1.1 Setting The Clock
The time and date clock contained in the XC880A can be set in the
following manner.
1. Press the ‘SHIFT’ key followed by either the ‘.’ Or ‘T’ key.
The XC880A prompt to ‘SET TIME?’. Press ‘1’ to set time.
2. The XC880A now prompts to ‘ENTER HOUR (0-12)’. Enter
a numeric value between 1, and 12 for the current hour. Press
‘ENTER’.
3. The XC880A prompts to ‘ENTER MINUTE’. Enter a numeric
value between 0 and 59 to set the current minute. Press
‘ENTER’.
4. The XC880A prompts with ‘PM?’. Press ‘1’ if current time is
PM, or ‘0’ if AM.
5. The XC880A prompts to ‘SET ATE?’. Press ‘1’ to adjust the
date.
6. The XC880A prompts for ‘MONTH ’. Enter a numeric value
between 1 and 12 to set the current month. Press ‘ENTER’.
7. The operator is now prompted for ‘ ATE (1-31)’. Enter a
numeric value between 1 and 31 to set the current date. Press
‘ENTER’.
8. The XC880A prompts for ‘YEAR’. Enter the year. The display
will read ‘TIME- ATE SET’, then return to its previous state.
3.2 Audible Beeper
The XC880A is equipped with an audible beeper used to indicate key
presses and to alert the operator in certain situations. The beeper can be disabled /
enabled by pressing ‘SHIFT’ followed by the ‘B’ key. This will toggle the
current state of the beeper output with a brief message displayed to inform the
operator that the beeper is off.
The beeper is also used for audible check weighing as described in section
2.3.1. isabling the beeper in the above manner will not disable the audible check
weighing function.
13

XC880A OWNERS MAN AL
3.3 Memory Usage Information
The operator may check the amount of memory space currently being used.
To display this information, press ‘SHIFT’ then press and hold the ‘M’ key. The
XC880A will display the number of part numbers, and transactions in currently in
memory. When released, the scale returns to its previous state.
3.4 Keyboard Lock
The keyboard may be locked to prevent accidental key presses. This feature
can be activated by pressing the numeric ‘8’ key, followed by ‘PARM’. The
operator is then given a choice to lock out the keyboard. Press ‘1’ or ‘Y’ to lock
the keyboard. Press ‘0’ or ‘N’ to cancel the operation.
If the keyboard is locked, and a key is pressed, the XC880A will prompt
the operator to unlock the keyboard. Pressing ‘1’ will unlock the keys and allow
all scale functions to be performed. If NO is selected, the keyboard will remain
locked.
3.5 Custom Keyboard Setup
The XC880A keyboard can be programmed by the user to react to certain
keystrokes in various ways during operation. To access the keyboard setup
routine, press ‘SHIFT’ – ‘K’ and the XC880A will prompt the operator through
the setup. The parameters, and their possible settings are listed below.
PB Tare Setup: Allows user to customize the Pushbutton Tare.
•Shift + Tare: Operator presses Shift key then Tare key to tare
off the current weight loaded on the scale.
•Tare: Operator presses Tare key to Tare off the weight.
•Tare – Hold 2 Secs.: Operator holds down the Tare key for
approximately 2 seconds to tare off the weight.
Close File Setup: etermines how a part file is closed.
•Shift + Reset: Operator presses Shift then Reset to close an
open part file.
•Reset: File is closed when Reset key is pressed.
•Reset – Hold 2 Secs: Operator holds down the Reset key to
close the file.
Use Cust Prompts?: Allows the user to enable and setup custom prompting.
See section ?.? for details on custom prompting.
Prompt Tare: If enabled, the operator will be prompted to enter tare weight
when opening a part file that has no stored tare weight. The
operator can, however leave the tare at 0.0 if desired.
Repeat Prompts: If enabled, the XC880A will display the last used value
when prompting for data (Part Number, escription, etc..).
14

XC880A OWNERS MAN AL
Prompt to Count: Enabling this function will cause the XC880A to prompt
the operator for an Average Piece Weight (APW) when
opening a part file which has no saved APW. See section 2.2.5
for details on APW prompting. If the operator chooses not to
enter or calculate the APW, the file will be opened in Weight
Mode only.
Prompt Setpoints: If enabled, the operator will be prompted for setpoint data
when opening a part file that has no stored setpoint mode. See
section 6.1 for details on setpoint setup.
3.6 User Password
The XC880A allows the entry of a user programmable password to protect
certain functions, or memory operations from unauthorized access. When shipped
from the factory, the XC880A will have no user password set. Follow the
procedures below to enter or change the user password.
3.6.1 Changing/Clearing The User Password
The user code may be changed or cleared in the following manner.
1. Press the ‘SHIFT’ key followed by the ‘P’ key.
The XC880A prompts to ‘CHANGE PASSWOR ?’ Press ‘1’
to continue or ‘0’ to cancel and jump to step 6..
2. The XC880A now prompts the user to enter the current
Password. The code being changed must be known to continue.
Enter the code followed by the ‘ENTER’ key. If the incorrect
code was entered, “INCORRECT CO E!’ will be displayed
momentarily and the user will against be prompted for the
correct code.
3. The XC880A prompts to ‘ENTER NEW CO E’. The user
may now enter the desired password of up to 16 alphanumeric
characters. Up to this point, the code change may be canceled
by pressing the ‘RESET’ key, which will cause the XC880A to
prompt for ‘CANCEL CHANGE?’. Pressing ‘1’ at this time
will cancel the operation and retain the previous code.
Pressing ‘0’ will again prompt for a new code.
4. Once the desired password has been entered, press the
‘ENTER’ key. The user is prompted to re-enter the password.
If both passwords match, the XC880A momentarily displays
“PASSWOR CHANGE ” and returns to its previous state.
The new code is stored and becomes effective at this time.
5. If ‘NO’ was chosen in step 2, The XC880A prompts to
“CLEAR PASSWOR ?”
a. Press ‘1’ or ‘Y’, and the operator is prompted to enter
the current password. If correct, the password is reset
and will not be prompted for.
15

XC880A OWNERS MAN AL
b. Press ‘0’ or ‘N’ to cancel, and return scale to its
previous state.
3.6.2 Lost Passwords
There is a special code stored in memory, which is not accessible
to the user. This code is used by service technicians to access calibration.
Should the stored password be forgotten or lost, a Sterling Scale ealer,
Representative, or Service Technician can use this code to clear the
current password and allow access. Note: he Service Password may
only be used to enter calibration routines or to clear the password. It will
not allow access directly to files or other functions protected by the user
code.
3.7 Custom Prompting
The XC880A allows the user to setup and use custom prompts when
opening a part file. Up to four custom prompts may be used, and they are
limited to 16 characters each. Custom prompt 1 will replace “Part No.”
when opening a file, and the data associated with this prompt is stored in
the file as the part number.
Prompts 2 – 4 are not associated with any stored value, but the
entered data (up to 16 characters) is held in RAM memory while the part
file is open, and can be outputted to a printer or other peripheral devices
using the special output capabilities of the XC880A.
To enable and/or setup custom prompts, enter the Custom
Keyboard Setup routine as described in section 3.5 and enter data as
prompted by the XC880A.
16

XC880A OWNERS MAN AL
4. Parameters
This section will describe the user programmable parameter setup, with an
explanation of each parameter and its associated settings. The XC880A has several
programmable parameters. These parameters reside in the system’s Flash memory and
can be setup by the user to fit the specific needs of an application.
4.1 Parameter Access
Parameters are accessed through the keyboard by first entering the code for
the desired parameter followed by the ‘PARM’ key located in the numeric section
of the keyboard. Once a parameter is accessed, the user will be prompted to enter
data, or press certain keys. Certain functions may be password protected to guard
against unauthorized access. See section 3.6 for details on using and changing the
password.
Code escription Password
0 Remote Switch Setup N
1 N
2 Scale Calibration and Setup Y
3 igital Filter. 3 Settings. LOW – ME - HIGH N
4 Averaging. 4 Settings. OFF – HIGH N
5 Motion Band. 21 Settings OFF – 2.0 Grads in .1 Grad
increments
N
6 Optional Analog output set up if installed N
7 Zero Tracking. 2 Settings. ON / OFF N
8 Keyboard Lock. 2 Settings ON / OFF N
9 Fast Stepping. 2 Settings ON / OFF N
Table 4.1.1. Quick Reference Chart
17
Table of contents
