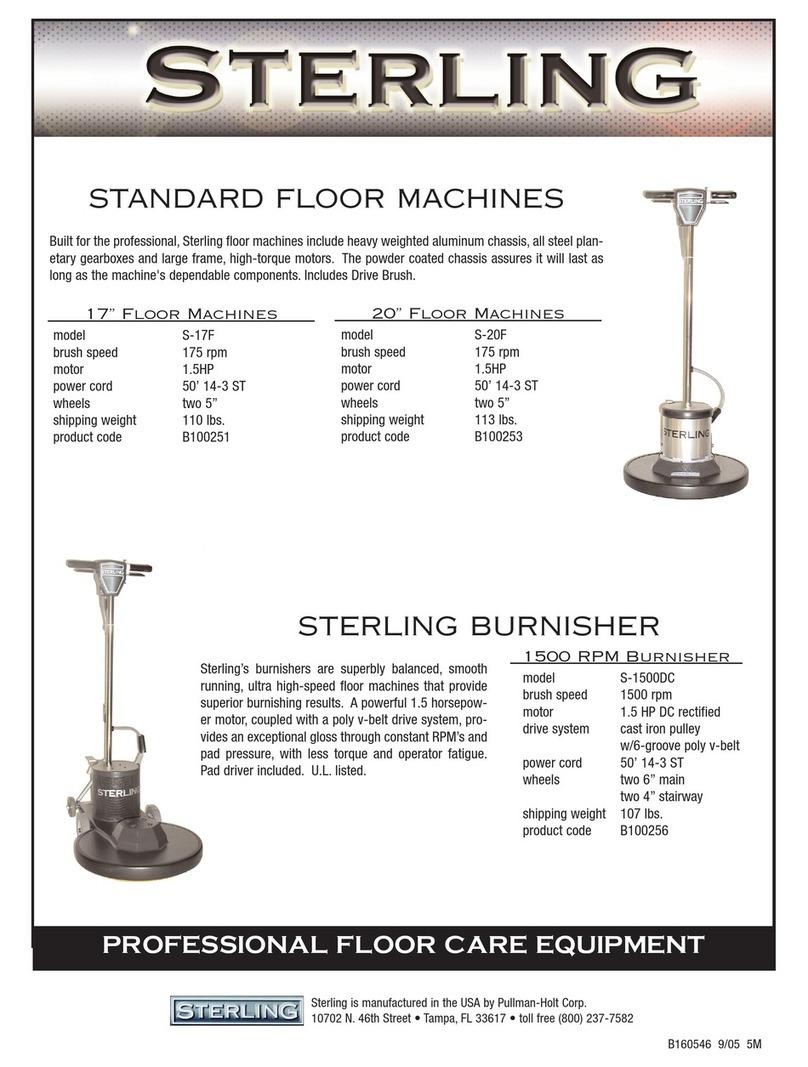
Sterling S17F User manual

Floor Machines
(Models: S17F & S20F)
Sterling Floor Machines are constructed using a combination of high quality materials and
precision workmanship. Every part used in the manufacturing of this product have passed
stringent quality standards before assembly and a nal inspection of the oor machine before
packaging and shipment. This oor machine was packaged carefully to prevent damage in
transit. Should any damage occur, please le a claim immediately with the transportation car-
rier delivering the product to you.
Warranty claims will be processed through an authorized Sterling Service Center unless other
prior arrangements have been made with an authorized Sterling personnel. Please call Sterling
Customer Service at 844-822-7787 for the nearest Authorized Sterling Service Center.
To receive quality service, please note and record the serial number of the oor machine. You
will need the serial number when processing a warranty claim or when ordering replacement
parts. The serial number is found on the data plate located on the machine chassis.
Important Safeguards
WARNING: Risk of explosion. Floor sanding can result in an explosive mixture of ne dust and air. Use the oor
machine for sanding only in a well-ventilated area free form any ame or match. A Sterling HEPA Air Scrubber is also
recommended for dust management.
WARNING: Risk of re: Do not use with a ammable or combustible liquid to clean a oor.
MOTOR VOLTAGE RATING: Sterling oor machines are powered by 1.5 HP AC Commercial Grade Motors. Be sure
your power supply reects the voltage rating on the motor nameplate. Voltage decreases of more than 10% can cause
the motor to fail.
EXTENSION CORDS: Machines that have 3 wire cords requiring grounding must only be used with extension cords
that have 3-prong grounding type plugs and 3-pole receptacles. Be sure not to use an extension cord that is not dam-
aged or having a defective plug. To determine the minimum wire size required, refer to the chart below:
Minimum Wire Size (AWG) of Extension Cord
Nameplate Total Extension Cord Length (Feet)
Rating-Amps 25 50 75 100 125 150 175 200
0-10.0 18 18 16 16 14 14 12 12
10.1-13.0 16 16 14 14 14 12 12 12
13.1-15.0 12 12 12 12 12 12 12 -

Assembly: Refer to separate assembly instruction sheet enclosed.
Handle Position: Adjust the handle to the desired height and lock cam handle lever.
WARNING: Do not turn machine when handle is in upright locked position.
About the Machine
WARNING RISK OF POTENTIAL INJURY: To reduce the risk of injury, unplug before adding the drive pad assem-
bly or any other service to the machine.
WARNING: Improper connection of the machine grounding conductor can result in a risk of electric shock.
GROUNDING: This machine must be grounded. If it should malfunction or breakdown, grounding provides a path
of least resistance for electric current to reduce the risk of electric shock. This machine is equipped with a cord having
equipment grounding conductor and grounding plug. The plug must be inserted into an appropriate outlet that is
properly installed and grounded in accordance with all local codes and ordinances.
Consult with a qualied electrician or technician if you are in doubt as to the electrical outlet being properly ground-
ed. Do not modify the plug equipped with this machine. If the machine does not t the electrical outlet, arrange for a
proper outlet to be installed by a qualied electrician.
This machine is for use on a nominal 120-volt circuit. It has a grounded plug that looks like the plug illustrated in
Figure A below. A temporary adapter that looks like the adapter illustrated in Figures B and C may be used to connect
this plug to a 2-pole receptacle as shown in Figure B if a properly grounded receptacle is not available. The temporary
adapter should be used only until a properly grounded outlet (Figure A) can be installed by a qualied electrician. The
green colored ear, lug, or the like extending from the adapter must be connected to a permanent ground such as a
properly grounded outlet box cover. Whenever the adapter is used, it must be held in place by a metal screws.
NOTE: In Canada, the use of a temporary adapter is not permitted by the Canadian Electrical Code.
Brush Attachment Removal:
With cable unplugged, LOCK handle in upright position and tilt machine back on the handle until the underside of the
machine is visible. For scrubbing, polishing brushes and/or pad drivers which utilize synthetic oor pads, position the
three slots of the center clutch plate over the three lugs on the gearbox or transmission. Turn the brush to the left, as far
as it will go until secure and in a ready-to-use position. If using synthetic oor pads, it is easier to attach the oor pad
prior to installing drive pad assembly. To remove, turn the brush or pad driver to the right and disengage the cloth plate
from the gearbox or transmission.

OPERATING THE FLOOR MACHINE
Connect power cable to a proper electrical outlet. Activate motor by releasing the safety latch located on front of handle switch
box, and, at the same time, squeeze the trigger levers below the main handle grips.
This machine is designed to move from side to side. To guide right, raise the handle slightly. The higher the handle is raised, the
faster the machine will move to the right. Conversely, to guide left, lower the handle. The more the handle is lowered the faster the
machine will move left.
WARNING: DO NOT LEAVE A PLUGGED-IN MACHINE UNATTENDED.
SELECTING PROPER SIZE OF BRUSH/PAD DRIVER:
Sterling Floor Machines come in 17-inch and 20-inches diameters. This is the nominal machine size based on a scrubbing or
shampoo brush reaching a full spread under the weight of the oor machine. The block diameter of brush or pad driver is normal-
ly two (2) inches less than the nominal brush size. A 20-inch brush has a block diameter of 18-inches. The underside diameter of
the oor machine deck is commonly 1.5 to 2 inches smaller than the nominal size of the machine. Note: The cleaning path of the
oor machine, i.e. 17-inch or 20-inch, is dene by the brush spread (under the weight of the oor machine), or using a diameter
oor pad that matches the oor machine model number, S17F (17” pad) or S20F (20” pad).
CARE AND MAINTENANCE
This machine will provide many years of trouble free service provided it is given proper care during use, transporting
and storage. A severe drop or high impact against stationary objects may result in damage and invalidate the warran-
ty. For best results, use a synthetic oor pad that is clean and cut evenly so there is a minimum of wobble or vibration.
Change synthetic oor pads often since a heavily loaded pad could throw the machine o-balance.
CAUTION: Do not lubricate this machine. Lubrication has been applied and is permanently sealed at the factory
STORAGE: Remove the brush or pad driver when storing your oor machine. Pads can be cleaned by washing in
warm water and a mild detergent, rinsing, and hanging up to dry.

Troubleshooting Guide
Machine will not start
• Powercordnotproperlyengagedintoelectricalwalloutlet.
• Circuitbreakertrippedorblownbuildingfuse.
• Damagedpowercordorplug
• Defectivewireconnectioninsideswitchbox.
• Defectiveon/oswitch.
• Defectivestart-upcapacitor.
• Defectivepigtailconnection
• Defectivemotor.
Machine starts but won’t reach or hold running speed (may be accompanied by a“clicking”noise)
• Defectivemotorstartingswitch.
• Replacebothrotatingandstationaryportionsofswitch.
• Buildingcircuitisoverloaded.
• Electricalshortexistswithinthemachine.
• Floorpadisloadedexcessivelywithdirtoroorsolutionresidue.
• Lowvoltage(electricalsupply).
• Undersizedextensioncord.
7545 Irvine Center Dr., Ste. 200 •Irvine, CA 92618
Toll Free: 844 VACS R US or 844-822-7787 •Fax: 949-623-8305
SterlingNA.com
This manual suits for next models
1
Table of contents
Other Sterling Floor Machine manuals
Popular Floor Machine manuals by other brands
NSS
NSS Predator CXC Information & operating instructions
Windsor
Windsor Chariot 2 iGloss 20 operating instructions

Advance acoustic
Advance acoustic ET600 Instructions for use
Tornado
Tornado 64220 Operation & maintenance manual
Nacecare
Nacecare Sweeptec ST50BT owner's manual

U.S. Products
U.S. Products ADVANTAGE-400H Series Information & operating instructions

XAACT
XAACT Xtract 200 Information & operating instructions
DiamaPro Systems
DiamaPro Systems DX22-E owner's manual
Nilfisk-Advance
Nilfisk-Advance Sprite Plus 12 Instructions for use

Kärcher
Kärcher K 970 manual
Superabrasive
Superabrasive LAVINA 32-X user manual
Kärcher
Kärcher KMR 1550 B operating instructions

