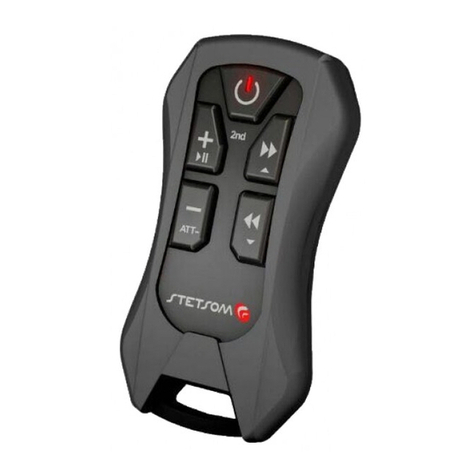
StetSom SX2 Lighl User manual

ALCANCE 200M ÁREA VISADA
RANGE 200M VIEWED AREA
ALCANCE 200M ÁREA ABIERA
EM CONFORMIDADE
19599_R2
Led indicador de transmissão
Power
APERTO LONGO: Função Liga/Desliga.
TOQUE BREVE: 1º Passo p/ bloqueo de teclas
Avanço ()
Retrocesso ()
Sobe Pasta ()
Desce Pasta ()
Volume (+)
Volume (–)
Play/Pause ( )
Atenuação (ATT–)
Alça para cordão de pescoço
Holster de proteção
Cordão de Pescoço
• Apresentação:
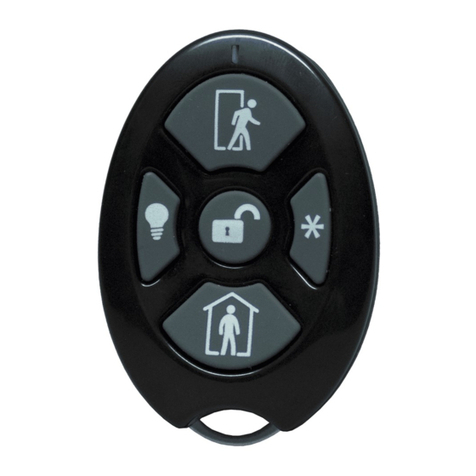
O SX2 Light foi desenvolvido para comandar equipamentos de áudio e vídeo a longa
distância. Devido a sua tecnologia de rádio frequência (RF) é possível controlar seu
equipamento em até 200m de distância em área aberta (visada).
Sua transmissão é feita em FSK reduzindo interferências externas, seu código é
criptografado e com tecnologia de código rolante que impede a sua clonagem.
3
2
7
4
8
5
6
9
1
12 13
3
2
7
4 8
5 9
6
1
11
10
PORTUGUÊS
• Descrição:
10
11
12
13
CONTROLE DE
LONGA DISTÂNCIA LIGHT

OSX2LightjásaidefábricaconguradonopadrãodeCD Player Pioneer, caso você
possua um aparelho de outra marca ou modelo siga os seguintes passos:
1. Procure o código do seu aparelho na Tabela de Códigos “Memória” (Verso).
2. Pressione a tecla MEM (17) na central RX2. O Led indicador (18) irá piscar rápido.
3. Pressione no controle TX2 Light a primeira tecla da tabela de códigos, o Led indicador
(18) apagará por um instante e voltará a piscar rápido.
4. Pressione no controle TX2 Light a segunda tecla da tabela de códigos, o Led indicador
(18) apagará por um instante e voltará a piscar rápido.
5.Porm,pressioneaterceiratecladatabela.OLedindicador(18)iráapagar.Sua
central está programada para o aparelho escolhido.
O TX2 Light possui um sistema de prevenção ao aperto acidental das teclas do
controle.
Siga os seguintes passos, para bloqueio e desbloqueio do seu controle:
1. Dê um breve toque na tecla POWER (02) e o Led indicador de transmissão (01)
permanecerá aceso.
2. Aperte ao mesmo tempo as teclas Desce Pasta () (06) e Atenuação (ATT–) (10). O
Led indicador de transmissão (01) piscará 2 vezes indicando o bloqueio do controle, ou
piscará 5 vezes indicando o desbloqueio do controle.
O SX2 Light sai de fábrica sincronizado.
Caso o proprietário adquirira novos controles TX2 Light para sua equipe ou reposição,
siga os seguintes passos.
ATENÇÃO:Antesderealizarosincronismocertique-sedequenãohajanoraiode
alcance da central nenhum outro controle TX operando, pois o mesmo poderá interferir.
– Siga os passos a seguir para sincronizar:
1. Pressione a tecla SYNC (16) da central RX2 Light. O Led indicador (18) irá piscar.
2. Pressione uma das teclas do controle TX2 Light com exceção da tecla POWER (02).
3. O Led indicador (18) para de piscar. O sincronismo está concluído.
-Sincronismodeaté8controles TX2 Light por central RX2 Light, permitindo que
várias pessoas de uma equipe controlem o mesmo equipamento.
-MaiorquantidadedemodelosdeCD/DVD-Playersjádisponíveisnamemória.
-Funçãobloqueiodeteclas,evitaoacionamentoacidentaldasteclasdocontrole.
-Sequênciadecomandos“Volume(–)”atravésdafunçãodeatenuação(ATT–).
- Instalando seu SX2 Light:
A central pode ser instalada escondida ou em algum lugar visível para monitoramento
do seu Led indicador (18).
É importante que sua antena (19) não seja bloqueada pela lataria do carro ou peças
metálicas que funcionam como um escudo para a recepção dos sinais de rádio frequência.
Elapoderácarrenteàbordadajanelajáqueovidronãobloqueiaarecepção,oudentro
do painel e gavetas.
O cabo de alimentação (15) é polarizado. A via que possui tarja branca deve ser
ligada ao positivo e a via preta ao negativo. A alimentação pode ser uma bateria
automotiva, bateria de 9V ou mesmo uma porta USB.
OTransmissorinfravermelho(14)deveráserxadoemalgumpontoapontandopara
opaineldoequipamentoasercontrolado,certique-sedequenadaestejaentreosdois.
1614 15
18 19
17
Transmissor Infravermelho (3m)
Cabo de Alimentação (50cm)
Tecla Sincronismo (SYNC/RESET)
Tecla Memória (MEM)
Led Indicador
Antena
14
15
17
16
18
19
• Recursos:
• Congurando o SX2 Light para controlar o seu CD/DVD Player:
• Bloqueio ou Desbloqueio das teclas:
• Sincronizar o Controle:
OBS: Instale o mais longe possível dos amplicadores, isso
evitará, interferências de rádio frequência.
1
2
LED
+12V (PRETO E BRANCO)
GND (PRETO)

– Desfazendo o sincronismo de um único controle:
1. Pressione a tecla SYNC (16) da central RX2 Light. O Led indicador (18) irá piscar.
2. Mantenha pressionada a tecla POWER (02) do controle TX2 Light que deseja excluir.
3. O Led indicador (18) para de piscar. A exclusão está concluída.
– Desfazendo o sincronismo de todos os controles:
1. Pressione a tecla SYNC (16) da central RX2 Light. O Led indicador (18) irá piscar.
2. Pressione a tecla MEM (17) da central RX2 Light. O Led indicador (18) irá piscar
mais rápido e apagar. A exclusão está concluída.
- Restaurando a conguração de fábrica:
Mantendo a tecla SYNC/RESET (16) pressionada por 5 segundos o Led indicador
(18)irápiscareaconguraçãodefábricaserárestaurada.Osincronismodoscontroles
TX2 Light será mantido.
– Indicação de bateria fraca:
Ao soltar a tecla do controle TX2 Light o Led indicador de transmissão (01) e o Led
indicadordacentral(18)permanecerãoacesospor1segundo.Recomenda-seatroca
dabateriaporumanova,modeloCR2032,poisocontrolepoderáperdereciênciana
transmissão.
O transmissor TX2 Light possui um sistema que se auto desliga caso qualquer tecla
quepressionadapormaisde10segundosevitandooconsumoindevidodabateria.
Ao soltar a tecla, o sistema volta a funcionar normalmente.
– Troca da bateria do transmissor TX2 Light:
Remova o Holster, destrave a caixa plástica do controle, retire a placa eletrônica
da caixa plástica, substitua a bateria descarregada por uma nova observando a
polaridade indicada, o Clip deve estar em contato com o terminal POSITIVO da bateria.
Alimentação:
Central: 5 a 16V DC
Controle: Bateria CR2032 (3V)
Consumo Máximo:
Central: 30mA
Controle: 15mA
Dimensões:
Central: 10,0 x 25,0 x 55,0 mm
Controle: 16,5 x 39,0 x 74,0 mm
Peso:
Central: 39g
Controle: 27g
• Especicações Técnicas:
• Diagnósticos:
OBS: Para sincronizar mais de um controle (máximo 8), repita os passos de 1 a
3. Caso seja sincronizado mais de 8 controles, este novo controle irá sobrepor o
sincronismo do controle mais antigo.
Transmission indicator LED
Power
PRESS AND HOLD:On/OFunction.
QUICK CLICK: 1st Step to Key Lock.
Fast Forward ()
Rewind ()
Up Folder ()
Down Folder ()
Volume (+)
Volume (–)
Play/Pause ( )
Attenuation (ATT–)
Ring for neck lanyard
Protective Holster
Neck lanyard
• Introduction:
SX2 Light was designed to remotely control audio and video equipment. Its radio
frequency(RF)technologyallowsyoutocongureyourequipmentfromupto200maway
inopenair(line-of-sight).
It transmits in FSK to reduce external interference. Its code is encrypted and protected by
rolling code technology to prevent cloning.
3
2
7
4
8
5
6
9
1
12 13
3
2
7
4 8
5 9
6
1
11
10
ENGLISH
• Description:
10
11
12
13

-Upto8TX2LightcanbesynchronizedwithoneRX2Lightreceivermakingitpossible
forseveralpeopleonateamtocongurethesameequipment.
-LargernumberofCD/DVDPlayermodelsalreadyavailableinitsmemory.
-Keylockfunctionpreventsaccidentalactivationofthecontrolkeys.
-Sequenceofcommands“Volume(-)”availablethroughtheattenuationfunction(ATT-).
- Installing your SX2 Light:
You can install the receiver in a hidden place or somewhere visible so that you can
monitor its LED indicator (18).
It is important that the antenna (19) is not blocked by the car’s body or other metal parts
that will obstruct the reception of the radio waves. It may be installed parallel to the edge
of a window since glass does not block the reception or inside the glove compartment and
drawers.
The power cord (15) is polarized. The wire with a white stripe should be connected to
the positive terminal and the black wire to the negative one. The power source can be an
automotive battery, 9V battery or even a USB port.
The Infrared Transmitter (14) should be placed so that it points toward the control panel
oftheequipmenttobecongured,makesurenothingisbetweenthetwo.
1614 15
18 19
17
Infrared transmitter (3m)
Power cable (50cm)
Synchronization key (SYNC/RESET)
Memory Key (MEM)
LED indicator
Antenna
14
15
17
16
18
19
• Important Features:
NOTE: Install as far away from ampliers as possible
this avoids radio frequency interference.
The SX2 Light is already set up in the Pioneer CD Player standard, if you have a
dierentbrandormodel,followthesesteps:
1. Search for your device’s code in the Table of “Memory” Codes (See Back).
2.PresstheMEMkey(17)ontheRX2receiver.TheLEDindicator(18)willashrapidly.
3.OntheTX2Lighttransmitterpresstherstkeyonthetable,theLEDindicator(18)will
turnoforamomentandthenashagain.
4. On the TX2 Light transmitter press the second key on the table, the LED indicator (18)
willgooutforamomentandthenashagain.
5. Lastly, press the third key on the table. The LED indicator (18) will go out. Your receiver
is now programmed for your chosen device.
The TX2 Light has a system that prevents the transmitter’s keys from being accidentally
pressed.
Follow these steps to lock and unlock the keys on your transmitter:
1. Tap on the key POWER (02), the transmission indicator LED (01) will remain on.
2. Press the Down Folder () (06) and Attenuation (ATT–) (10) keys at the same time.
The transmission indicator LED (01) will blink 2 times to indicate the keys are locked or 5
times to indicate the keys are unlocked.
The SX2 Light receiver and transmitters are paired before they leave the factory.
If the owner purchases new TX2 Light transmitters for his team or replaces an old one,
follow the steps below.
ATTENTION: Before synchronizing your equipment, make sure there are no other
transmitters operating within range of the receiver since they may interfere.
– Follow the steps below to synchronize:
1.PresstheSYNCkey(16)ontheRX2Lightreceiver.TheLEDindicator(18)willash.
2. Press any one of the TX2 Light transmitter’s keys except for the POWER key (02).
3. The LED indicator (18) stops blinking. Synchronization is complete.
• Conguring the SX2 Light to control your CD/DVD Player:
• Lock or Unlock the keys:
• Synchronizing your Control:
1
2
LED
+12V (BLACK/WHITE)
GND (BLACK)

– To desynchronize a single transmitter:
1. Press the SYNC button (16) on the RX2 Light receiver. The LED indicator (18) will
ash.
2. Press the MEM key (17) on the RX2 Light receiver. The LED indicator (18) will blink
fasterandturno.Alltransmittershavebeendeleted.
– Restoring Factory Settings:
Hold the SYNC/RESET key (16) down for 5 seconds. The LED indicator (18) will
ashand the factorysettings will berestored.Thesynchronizationof theTX2 Light
transmitters will be maintained.
– Indications of a weak battery:
When the TX2 Light transmitter’s key is released, the transmission indicator LED
(01) and the receiver’s LED indicator (18) will remain on for 1 second. We recommend
that you replace the battery with a new one, model CR2032, since the transmitter’s
eciencywilldecrease.
TheTX2Lighttransmitterturnsitselfoifanykeyispressedformorethan10seconds
to avoid draining the battery. When you release the key, the system will return to normal.
– Changing the battery of the TX2 Light Transmitter:
Remove the Holster, loosen the two screws on the back and remove the circuit
board from its plastic housing. Replace the old battery with a new one being careful to
maintain the correct polarity; the Clip must be in contact with the POSITIVE terminal of
the battery.
Power Source:
Receiver: 5 a 16V DC
Transmitter: CR2032 Battery (3V)
Maximum Current Consumption:
Receiver: 30mA
Transmitter: 15mA
Dimensions:
Receiver: 10,0 x 25,0 x 55,0 mm
Transmitter: 16,5 x 39,0 x 74,0 mm
Weight:
Receiver: 39g
Transmitter: 27g
• Techinical Specications:
• Diagnosing a Problem:
NOTE: Repeat steps 1 through 3 to synchronize more than one transmitter (maxi-
mum 8). If more than 8 transmitters are synchronized, the newest transmitter will
override the synchronization of the oldest one.
LED indicador de transmisión
Power
PULSAR LARGO: Función Encendido/Apagado.
CLIC RÁPIDO: 1º Paso el Bloqueo de Teclas.
Avanzar ()
Retroceder ()
Sube Carpeta ()
Baja Carpeta ()
Volumen (+)
Volumen (–)
Play/Pause ( )
Atenuación (ATT–)
Manija para collar.
Acabamiento Protector
Collar
• Presentación:
El SX2 Light fue desarrollado para comandar equipos de audio y video a larga
distancia. Debido a su tecnología de radio frecuencia (RF), es posible controlas tu equipo
de música hasta 200m de distancia en área abierta.
Su transmisión se hace en FSK, lo que reduce interferencias externas. Su código es
encriptado y con tecnología de código rotativo que impide su clonaje.
3
2
7
4
8
5
6
9
1
12 13
3
2
7
4 8
5 9
6
1
11
10
ESPAÑOL
• Descripción:
10
11
12
13

-Sincronismodehasta8controlesTX2 Light por central RX2 Light, lo que permite a
varios integrantes de un equipo controlar el mismo aparato.
-MayorcantidaddemodelosdeCD/DVD-Playeryadisponiblesenmemoria.
-Funciónbloqueadoradebotones,evitaelaccionamientoaccidentaldelosbotones
del control.
-Secuenciasdecomandos“Volumen(-)”atravésdelafuncióndeAtenuación(ATT-).
- Para instalar el SX2 Light:
Se puede instalar la central escondida o en un lugar visible para monitoreo de su led
indicador (18).
Es importante que su antena (19) no sea bloqueada por el carenaje del auto o piezas
metálicas que funcionan como escudo a la recepción de las señales de radiofrecuencia.
Se podrá ponerla al borde de la ventana, ya que el vidrio no bloquea la recepción, o
dentro del salpicadero.
El cable de alimentación (15) es polarizado. La vía posee tarje blanco y se debe
conectarlo al positivo y la vía negra, al negativo. La energía puede ser una batería
automotora, batería de 9V o incluso una salida USB.
El transmisor infrarrojo (14) se deberá jarlo en algún punto direccionado hacia la
pantalla del equipo que será controlado. Asegúrate de no haber impedimentos entre los
aparatos..
1614 15
18 19
17
Transmisor infrarrojo (3m)
Cable de energía (50cm) (negro y blanco)
Botón de Sincronismo (SYNC/RESET)
Botón de Memoria
LED indicator
Antena
14
15
17
16
18
19
• Recursos:
OBS: Instálalo lo más lejos posible de los amplicadores. Eso
evitará interferencias de radiofrecuencia.
El SX2 Light ya sale de fábrica sincronizado con el CD-Player Pioneer. Si tienes un
aparato de otra marca o modelo, es tan solo seguir esas orientaciones:
1. Busca el código de tu aparato en la Tabla de Códigos “Memoria” (al verso);
2. Pulsa el botón MEM (17) en la central RX2. El led indicador (18) se quedará intermitente.
3. Pulsa el control TX2 Light al primer botón de la tabla. El led indicador (18) se apagará
por un momento y volverá a encender y quedarse intermitente.
4. Pulsa en el control TX2 Light el segundo botón de la tabla. El led indicador (18) se
apagará un momento y volverá a quedarse intermitente.
5. Aln,pulsaeltercerbotóndelatabla.Elledindicador(18)seapagaráytucentral
estará programada para el equipo elegido.
EL TX2 Light posee un sistema de prevención de pulsadas accidentales de los botones
del control. Sigue los siguientes pasos para el bloqueo o desbloqueo de tu control:
1. Pulse el botón Power. El led de transmisión (01) se quedará encendido.
2. Pulsa a la vez los botones de Baja Carpeta ()(06) y Atenuación (ATT–) (10). El
led indicador de trasmisión (01) destellará dos veces indicando el bloqueo del control, o
destellará 5 veces indicando el desbloqueo del control.
Este aparato ya sale sincronizado desde la fábrica.
Caso quieras adquirir nuevos controles TX2 Light para tu equipo o tan solo reposición,
sigue estos pasos:
OBS: Antes de realizar la sincronía, asegúrate de que no haya otra central de control
operando cerca del alcance de tu control TX, pues podrá causar interferencias.
– Pasos para la sincronía:
1. Pulsa el botón SYNC (16) de la central RX2 Light. El led indicador (18) quedará intermi-
tente.
2. Pulsa uno de los botones del control TX2 Light excepto el botón Power (02).
3. Elledindicadoryanosequedaráintermitente.Lasincroníaestánalizada.
• Para congurar el SX2 Light como controlador de CD/DVD-Player:
• Bloqueo o desbloqueo de botones:
• Para Sincronizar el Control:
1
2
LED
+12V (NEGRO/BLANCO)
GND (NEGRO)

– Para deshacer la sincronía de un solo control:
1. Pulsa el botón SYNC (16) de la central RX2 Light. El led indicador (18) se quedará intermi-
tente.
2. Mantenga presionada la tecla Power (02) del control TX2 Light que desea eliminar.
3. Elledindicador(18)yanosequedaráintermitente.Lasincroníaestánalizada.
– Para deshacer la sincronía de todos los controles:
1. Pulsa el botón SYNC (16) de la central RX2. El led indicador (18) se quedará intermitente.
2. Pulsa el botón MEM (17) de la central RX2 Light. El led indicador (18) se quedará intermi-
tenteymásrápido,luegoseapagará.Laexclusiónestaránalizada.
- Para restaurar las conguraciones de fábrica:
Si mantienes el botón SYNC/RESET (16) pulsado por 5 segundos, el led indicador
(18)sequedaráintermitenteylaconguracióndefábricaserestaurará.Lasincronía
de los controles TX2 Light será mantenida.
– Indicación de Batería Débil:
Si dejas de pulsar el botón del control TX2 Light y el led indicador de transmisión
(01) permanece encendido junto al led indicador de la central (18) por 1 segundo, se
recomienda cambiar la batería por una nueva, modelo CR2032, pues el control podrá
perdersuecienciaenlatransmisión.
El transmisor TX2 Light posee un sistema que se apaga solo siempre que cualquier
botón permanezca pulsado por más de 10 segundos, evitando el consumo indebido de
batería. Cuando se deja de pulsar el botón, el sistema vuelve a funcionar normalmente.
– Cambio de batería del transmisor TX2 Light:
Remueve el acabamiento protector, desconecta la caja plástica del control, retira el
tablero electrónico de la caja plástica, sustituye la batería descargada por una nueva,
observando la polaridad indicada, el clip deberá estar en contacto con el terminal
POSITIVO de la batería.
Energia:
Central: 5 a 16V DC
Control: Bateria CR2032 (3V)
Consumo Máximo:
Central: 30mA
Control: 15mA
Dimensiones:
Central: 10,0 x 25,0 x 55,0 mm
Control: 16,5 x 39,0 x 74,0 mm
Peso:
Central: 39g
Control: 27g
• Especicações Técnicas:
• Diagnósticos:
OBS: Para sincronizar más de 1 control (como máximo 8), basta repetir los pasos
de 1 a 3. Caso haya la sincronía de más de 8 controles, el nuevo control irá sobre-
ponerse a la sincronización del control más antiguo.
• Tabela de Códigos “Memória”:
• Table of “Memory” Codes:
• Tabla de códigos “Memoria”:
SEQUENC. TECLAS (KEYS)
PIONEER - CONTROL DEFAULT / PADRÃO
PIONEER - CONTROL DEFAULT / PADRÃO / QXE1044
PIONEER - CONTROL DEFAULT / PADRÃO / QXA3548
DEH-1480UB DEH-1580UB DEH-2280UB DEH-3180UB DEH-3480UB DEH-4280SD
DEH-4380UB DEH-5280SD DEH-6280BT DEH-6380SD DEH-6480BT DEH-7380BT
DEH-8380SD DEH-P4080UB DEH-P4180SD DEH-P5080UB DEH-P5180UB DEH-X1780UB
DEH-X1880UB DEH-X3580UI DEH-X3780UI DEH-X4880BT DEH-X6580BT DEH-X6780BT
DEH-X8580BT DEH-X8780BT MVH-1480UB MVH-158UI MVH-358BT MVH-8280BT
MVH-8380BT MVH-X178UI MVH-X378BT MVH-X568BT
SEQUENC. TECLAS (KEYS)
PIONEER - CONTROL DEFAULT / PADRÃO / CXC5717
DEH-6980IB DEH-8980BT DEH-P6080UB DEH-P7180UB DEH-P7880MP DEH-P7980UB
DEH-P9880BT
SEQUENC. TECLAS (KEYS)
PIONEER - CONTROL DEFAULT / PADRÃO / CXE2833 +
PIONEER - CONTROL DEFAULT / PADRÃO / CXE3877 +
AVH-2380DVD AVH-5480DVD AVH-P3280BT AVH-P3380BT AVH-P4280DVDAVH-P4380DVD
AVH-P5280BT AVH-P6380BT
SEQUENC. TECLAS (KEYS)
PIONEER - CONTROL DEFAULT / PADRÃO / CXE5116 + -
AVH-1480DVD AVH-2480BT AVH-X1580DVDAVH-X2580BTAVH-X7580BT
SEQUENC. TECLAS (KEYS)
PIONEER - CONTROL DEFAULT / PADRÃO CXE5125
DVH-7580AV DVH-7780AV DVH-8480AVBT DVH-8780AVBT
SEQUENC. TECLAS (KEYS)
ALPINE - DEFAULT / PADRÃO -
CDE-133BT IVE-W530
SEQUENC. TECLAS (KEYS)
BZ - DEFAULT / PADRÃO
BZ1570 BZ407 BZ750
SEQUENC. TECLAS (KEYS)
BOOSTER - DEFAULT / PADRÃO -
BMP-1450USB BMP-2100USB -
BMP-1250UB +
BDVD-5350UB
BMTV-9600DVUBT -
BDVM-8340MP +
BDVM-8365MP -

SEQUENC. TECLAS (KEYS)
MOX - DEFAULT / PADRÃO + -
MO-DVD7040 MO-DVD9087
SEQUENC. TECLAS (KEYS)
ORBE - DEFAULT / PADRÃO +
8901 +
SEQUENC. TECLAS (KEYS)
LENOXX - DEFAULT / PADRÃO -
AD-1828 -
SEQUENC. TECLAS (KEYS)
LG - DEFAULT / PADRÃO - +
LCF600UR LCF800 LCS311UR LCS320UB LCS321UB LCS500Ux
LCS510IR LCS700BR
SEQUENC. TECLAS (KEYS)
DOTCOM - DEFAULT / PADRÃO + +
DC-308 + +
SEQUENC. TECLAS (KEYS)
H-BUSTER - DEFAULT / PADRÃO +
HBD-7688AV HBD-9150AV HBD-9200AV HBD-9350AV
SEQUENC. TECLAS (KEYS)
JVC - DEFAULT / PADRÃO - -
KD-AR555 KD-AR565 KD-AR755 KD-AR765S KD-R209UR KD-R219
KD-R329 KD-R409UR KD-R419 KD-R429 KD-R439 KD-R449
KD-R450 KD-R459 KD-R460 KD-R469 KD-R519UR KD-R650
KD-R660 KD-R729BT KD-R739BT KD-R750 KD-R760 KD-R859BT
KD-R869BT KD-R959BT KD-R969BT KD-X200 KD-X210 KD-X220
KD-X310BT KD-X320BT
SEQUENC. TECLAS (KEYS)
KENWOOD - DEFAULT / PADRÃO
DPX502BT DPX592BT DPX702BH DPX792BH KDC-358U KDC-BT265U
KDC-BT362U KDC-BT365U KDC-BT558U KDC-BT562U KDC-BT565U KDC-BT6052U
KDC-BT765HD KDC-BT855U KDC-BT858U KDC-BT955HD KDC-BT958HD
KDC-HD455U KDC-MP1045 KDC-MP1048 KDC-MP152U KDC-MP2045U KDC-MP2048U
KDC-MP2052U KDC-MP362BT KDC-MP365BT KDC-X300 KDC-X398 KDC-X399
KDC-X494 KDC-X496 KDC-X497 KDC-X500 KDC-X595 KDC-X598
KDC-X599 KDC-X697 KDC-X700 KDC-X897 KDC-X898 KDC-X996
KDC-X997 KDC-X998
SEQUENC. TECLAS (KEYS)
NAPOLI - DEFAULT / PADRÃO -
CDMP-3618 CDMP-6338USB -
CDMP-3936 -
SEQUENC. TECLAS (KEYS)
SONY - DEFAULT / PADRÃO
CDX-GT217X CDX-GT227X CDX-GT267X CDX-GT317X CDX-GT40UX CDX-GT417UX
CDX-GT427UX CDX-GT437UX CDX-GT617UX CDX-GT627UX MEX-1GPX
SEQUENC. TECLAS (KEYS)
PHILIPS - DEFAULT / PADRÃO +
CE120 CEM2000 CEM210 CEM220 CEM3000
SEQUENC. TECLAS (KEYS)
POSITRON - DEFAULT / PADRÃO - -
SP4300AV SP4310AV SP6300AV SP6700DTV - -
SP6900NAV SP8330BT SP8650DTV SP8960NAV - -
SP6110AV SP6111AV SP6551DTV SP6861NAV -
SP6320BT +
SP8550DTV + +
SP8990 +
SEQUENC. TECLAS (KEYS)
ROADSTAR - DEFAULT / PADRÃO -
RS-7790DMTS -
RS-3130UDV -
SEQUENC. TECLAS (KEYS)
SKY - DEFAULT / PADRÃO +
SKY 0001 +
SKY 0002 +
SKY 0003 + +
SKY HDTV -
SEQUENC. TECLAS (KEYS)
PHILCO - DEFAULT / PADRÃO + -
PCA530 + -
SEQUENC. TECLAS (KEYS)
CASKA - DEFAULT / PADRÃO +
CASKA MULTIMÍDIA +
SX2 LIGHT AMARELO
SX2 LIGHT GRAFITE
SX2 LIGHT AZUL
SX2 LIGHT PRETO
SX2 LIGHT BRANCO
SX2 LIGHT VERMELHO

CERTIFICADO DE GARANTIA
A STETSOM, através da sua rede de Assistência Técnica Autorizada, garante ao comprador
dos produtos serviço de Assistência Técnica sem custo de substituição dos componentes ou partes,
bemcomomão-de-obranecessáriaparareparosdeeventuaisdefeitosdevidamenteconstatadoscomo
sendo de fabricação. Os reparos serão promovidos pela Assistência Técnica Autorizada especialmente
designada pela STETSOM.
CONSULTE A RELAÇÃO DE POSTOS AUTORIZADOS NO SITE:
wwww.stetsom.com.br/sac
Caso não localize assistência técnica em sua cidade, entre em contato conosco:
SAC 3003-1900 ou 18 2104-9412
CONDIÇÕES DE PRAZO DA GARANTIA:
A nossa garantia é de 1 (um) ano contra defeitos de fabricação. A sua validade é iniciada a partir da data
da Venda ao Consumidor FINAL.
Para fazer uso dos benefícios desta garantia, é necessária a apresentação de um dos documentos:
NOTA DE VENDA ao Consumidor Final, GARANTIA ESTENDIDA ou este CERTIFICADO devidamente
preenchido.
GARANTIA ESTENDIDA:
Acesse o site: www.stetsom.com.br/garantiaestendida e registre sua compra com a CHAVE DO
PRODUTO.
(Chave do produto está na etiqueta do produto acima do número de série. Ex.: SQS 122S5P145785).
CASOS EM QUE SE PERDE A GARANTIA:
Perde a garantia do produto:
1 -Após 1 ano da emissão da nota scal de venda ao consumidor ou 1 ano do preenchimento do
certicadodegarantia(datadoecarimbadopelolojistaouinstalador)ou1anodadatadefabricação.
2-Violaçãodosselosdegarantia,alteraçãoouremoçãodonúmerodesérieoulotedoproduto.
3-Seoprodutosofrermauuso,descuidoscausadosporacidentecomo:Água,Fogo,Queda,instalado
em condições adversas as orientações contidas no manual de instalação que acompanha o produto.
4-Danosealteraçõesnocircuitoouadaptaçãodepeçasnãooriginais.
5-Utilizarinstalaçãoforadasespecicaçõestécnicasdomanual.
DÚVIDAS E ORIENTAÇÕES:
A STETSOM oferece um serviço de atendimento ao consumidor (SAC) para esclarecer dúvidas e
orientações sobre os produtos e serviços. Entre em contato conosco através dos canais:
Telefone: 3003-1900 custo de uma ligação local.
ATENÇÃO:
OUVIR MÚSICA ACIMA DE 85 DECIBÉIS PODE CAUSAR DANOS AO SISTEMA AUDITIVO / LEI FEDERAL Nº 11.291/06
The STETSOM, through its network of Authorized Service guarantees the buyer of the Technical
Assistance Service products cost of replacement components or parts and hand labor required to repair
any duly observed defects as manufacturing. Repairs will be promoted by the Authorized Technical
Assistance specially designated by STETSOM.
CHECK THE STATIONS OF RELATIONSHIP AUTHORIZED ON SITE:
www.stetsom.com.br/en/assistencias-tecnica
If you do not locate technical assistance in your city, please contact us at:
USA 786 265 1960 or BR +55 18 2104-9412
WARRANTY TERM CONDITIONS:
Our warranty is 1 (one) year against manufacturing defects. Its validity starts from the date and Sale
Consumer FINAL.
Tomakeuseofthebenetsofthiswarranty,thepresentationofthedocumentsrequiredbelow:SALES
Note to the end consumer or this completed CERTIFICATE.
CASES THAT LOSE THE WARRANTY:
Lose the product warranty:
1-1yearaftertheissuanceoftheinvoiceofsaletotheconsumeror1yearofcompletingcerticateof
warranty (dated and stamped by the retailer or installer) or 1 year from date of manufacture.
2-Violationofseals,alterationorremovaloftheserialnumberorbatchoftheproduct.
3-Iftheproductsuermisuse,oversightscausedbyaccidentas:Water,Fire,Fall,installedinadverse
conditions the guidelines contained in the installation manual that came with the product.
4-Damagesandchangesinthecircuitoradaptationofnon-originalparts.
5-Useinstallationoutsidethespecicationsmanualtechniques.
QUESTIONS AND GUIDELINES:
The STETSOMoersacustomercareservice(SAC)toanswerquestionsandguidanceonproductsand
services. Please contact us through the channels:
Phone: USA 786 265 1960 cost of a local call.
WARRANTY INFORMATION
Revendedor Carimbo:
Dealer Stamp:
Revendedor con sello:
Data da Compra:
Date of Purchase:
Fecha de compra:
Mês/Ano de fabricação:
Month/Year manufacturing:
Mes/Año de fabricación::
Série:
Serie:
Serie:

STETSOM INDUSTRIA ELETRÔNICA LTDA. - CNPJ: 61.974.911/0001-04
RUA MARIANO ARENALES BENITO, 645 - DISTRITO INDUSTRIAL - CEP 19043-130 - PRESIDENTE
STETSOM, a través de su red de Asistencia Técnica Autorizada, garantiza al comprador de los
productos, el servicio de Asistencia Técnica sin costos de sustitución de los componentes o piezas,
así como mano obrera necesaria para arreglos de eventuales defectos debidamente constatados
como siendo desde su fabricación. Los arreglos se harán pos la Asistencia Técnica Autorizada,
especialmente designada por STETSOM.
CONSULTE LA RELACIÓN DE AUTORIZADOS EN EL SITIO:
www.stetsom.com.br/es/assistencias-tecnica/
Si no hay asistencia para tu ciudad, contáctanos
SAC+55182104-9412
CONDICIONES DE PLAZOS PARA GARANTÍA:
Garantizamoselproductoenhasta1(uno)añoencontralosdefectosdefabricación.Sucaducidadse
inicia a partir de la Fecha de Venta al Consumidor Final.
Para beneciarse de la garantía, se necesita presentar la siguiente documentación: BOLETA DE
VENTA al Consumidor Final, Garantía Extendida o esta misma CERTIFICACIÓN debidamente
rellenada.
SITUACIONES DE PÉRDIDA DE LA GARANTÍA
Se acaba la garantía del producto:
1-Pasado1añodelaemisióndelaboletadeventaalconsumidoro1añodespuésderellenado
laCERTIFICACIÓNDEGARANTÍA(Fechadoyselladoporelvendedoroinstalador)o2añosdela
fecha de fabricación.
2-Violacióndelossellosdegarantía,cambiosoretiradadelnúmerodeserieolotedelproducto.
3- Mal usodelproducto,descuido yaccidentescomo:agua,fuego, caída,instalaciónincorrectao
diferente de lo aconsejado en este manual.
4-Dañosocambiosenelcircuitooadaptacióndepiezasnooriginales.
5-Instalaciónendesacuerdoconlasespecicacionestécnicasdeestemanual.
DUDAS Y ORIENTACIONES:
STETSOM ofrece un servicio de atención al consumidor (SAC) para aclarar dudas y orientar acerca de
los productos y servicios. Contáctenos a través de los canales:
TeléfonoUSA7862651960orBR+55182104-9412
Correoelectrónico:[email protected]-Sitioweb:www.stetsom.com.br
CERTIFICADO DE GARANTÍA DICAS PARA MELHOR O DESEMPENHO DO PRODUTO
• Instaleacentrallongedechapas,superfíciesmetálicas,centraisdealarme,amplicado-
res, fontes/carregadores, módulos de injeção eletrônica e outros equipamentos eletrônicos.
• Deixeaantenadoreceptoresticada,nosentidoverticaleemlocalquesejavisual.Re-
comenda-seinstalaracentralpróximaaovidrotraseiro.
• Obstáculos como paredes, muros, árvores, estruturas metálicas, linhas de transmissão
de energia, podem atenuar e reduzir o alcance de operação do aparelho.
• Certique-sedequeoemissorinfravermelhoestejaapontandoparaoCD/DVDPlayer
e que não existam obstáculos como, por exemplo, encosto de cabeça, pen drive ou porta
objetos. A incidência direta de luz solar sobre o CD/DVD Player pode prejudicar a recepção
dos comandos infravermelhos enviados.
CONSEJOS PARA UN MEJOR RENDIMIENTO DEL PRODUCTO
• Instalarel centro lejos de placas,superciesmetálicas,paneles de control, amplicadores,
equipos de / cargadores, módulos de inyección de combustible y otros equipos electrónicos.
• Deje que la antena del receptor estirado en la dirección vertical y la ubicación que es visual. Se
recomienda instalar el interruptor siguiente a la ventana trasera.
• Obstáculos, como paredes, cercas, árboles, estructuras de acero, líneas de transmisión de
energía, puede mitigar y reducir el alcance de funcionamiento de la unidad.
• Asegúrese de que el emisor de infrarrojos está apuntando al reproductor de CD / DVD y no hay
obstáculos tales como, apoyo para la cabeza, pen drive u objetos portuarias. La incidencia directa
de la luz solar en el CD / DVD puede perjudicar la recepción de comandos infrarrojos enviadas.
TIPS FOR BETTER PRODUCT PERFORMANCE
• Installthepowerplantawayfrommetalplates,metalsurfaces,alarmpanels,ampliers,
power supplies / chargers, electronic injection modules and other electronic equipment.
• Leave the receiver antenna taut, vertically and in a place that is visual. It is recommended
to install the control unit near the rear window.
• Obstacles such as walls, walls, trees, metal structures, power transmission lines, can
attenuate and reduce the scope of operation of the apparatus.
• Make sure that the infrared emitter is pointing to the CD / DVD Player and that there
are no obstacles such as head restraint, pen drive, or object holder. The direct incidence of
sunlight on the CD / DVD Player may impair the reception of the infrared commands sent.
• Localrecomendado,pelosme-
lhores prossionais do ramo de
som automotivo.
• Recommended place, by the
best professionals in the eld of
automotive sound.
• Lugar recomendado, por los
mejoresprofesionalesenelcam-
po del sonido automotriz.
Table of contents
Languages:
Other StetSom Remote Control manuals
Popular Remote Control manuals by other brands

Conrad
Conrad 87 84 66 operating instructions
Spectravision
Spectravision PL-REM-200 owner's manual

Wordene modz
Wordene modz Xbox One 5000+ Mod Operation instructions
Insignia
Insignia NS-RMT3D21 user guide
IHP
IHP RC-S-TOUCH Installation and operation instructions
Tripp Lite
Tripp Lite Keyspan URM-15T quick start guide
