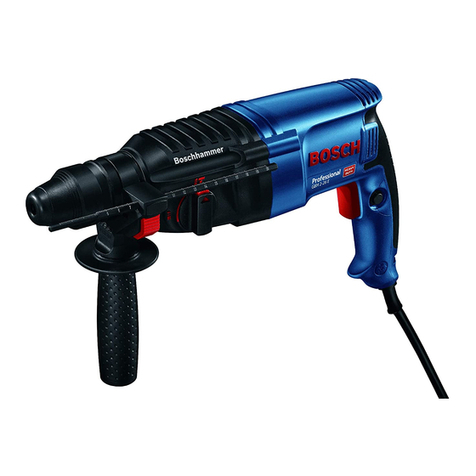
Sthor 79053 User manual

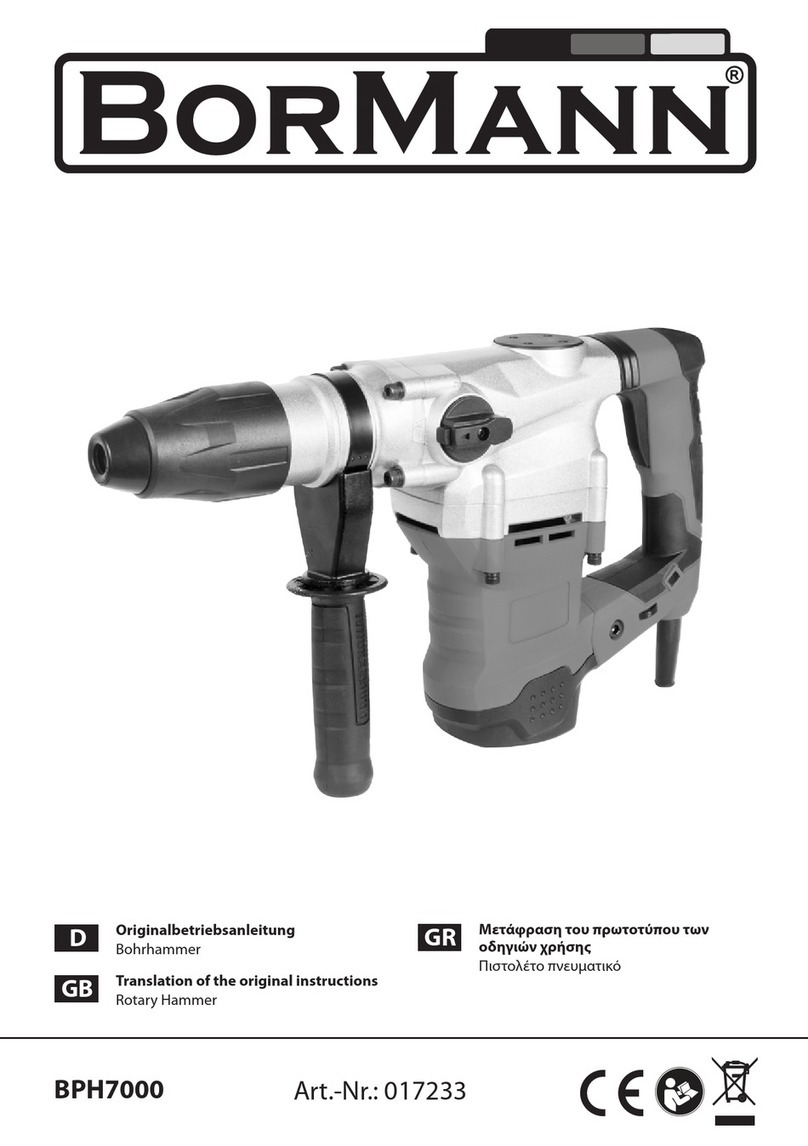
MŁOTOWIERTARKA
ROTARY HAMMER
BOHRHAMMER
ПЕРФОРАТОР
ПЕРФОРАТОР
PERFORATORIUS
URBJMAŠĪNA AR ĀMURU
VRTACÍ KLADIVO
VŔTACIE KLADIVO
FÚRÓKALAPÁCS
CIOCAN ROTOPERCUTOR
MARTILLO PERFORADOR
PL
GB
D
RUS
UA
LT
LV
CZ
SK
H
RO
E
79053

INSTRUKCJA ORYGINALNA
2
PL GB D RUS UA LT LV CZ SK H RO E
TOYA S.A. ul. Sołtysowicka 13-15, 51-168 Wrocław, Polska
Rok produkcji:
Production year: Produktionsjahr:
Год выпуска:Рік випуску:
Pagaminimo metai:
2017 Ražošanas gads:
Rok výroby: Rok výroby:
Gyártási év: Anul producţiei utilajului:
Año de fabricación:
I II
III IV
V VI
VII VIII
6
4
3
2
1
7
8
9
10
13
11
12
5

INSTRUKCJA ORYGINALNA 3
PL GB D RUS UA LT LV CZ SK H RO E
1. korpus z rękojeściągłówną
2. włącznik elektryczny
3. blokada włącznika
4. przełącznik rodzaju pracy
5. przełącznik kierunku obrotów
6. uchwyt wiertarski
7. rękojeść dodatkowa
8. przewód sieciowy
9. ogranicznik głębokości wiercenia
10. osłona uchwytu wiertarskiego
11. przecinak SDS Plus
12. przebijak SDS Plus
13. wiertła SDS Plus
1. Gehäuse mit Hauptgriff
2. Elektroschalter
3. Blockade des Schalters
4. Schalter für die Betriebsart
5. Schalter für die Drehrichtung
6. Bohrfutter
7. Zusätzlicher Handgriff
8. Netzanschlussleitung
9. Begrenzer für die Bohrtiefe
10. Abdeckung des Bohrfutters
11. Meißel SDS Plus
14.Dorn SDS Plus
13. Bohrer SDS Plus
1. корпус сосновной рукояткой
2. кнопка включения
3. блокировка кнопки включения
4. переключатель режима работы
5. переключатель направления вращения
6. патрон
7. вспомогательная рукоятка
8. сетевой кабель
9. ограничитель глубины сверления
10. пылезащитный колпак патрона
11. зубило SDS Plus
12. шлембур SDS Plus
13. сверла SDS Plus
1. корпус зосновною рукояткою
2. кнопка ввімкнення
3. блокування кнопки ввімкнення
4. перемикач режиму роботи
5. перемикач напрямку обертання
6. патрон
7. допоміжна рукоятка
8. мережевий кабель
9. обмежувач глибини свердління
10. пилозахисний ковпак патрона
11. зубило SDS Plus
12. бур SDS Plus
13. свердла SDS Plus
1. корпус зосновною рукояткою
2. кнопка ввімкнення
3. блокування кнопки ввімкнення
4. перемикач режиму роботи
5. перемикач напрямку обертання
6. патрон
7. допоміжна рукоятка
8. мережевий кабель
9. обмежувач глибини свердління
10. пилозахисний ковпак патрона
11. SDS Plus tipo kirstukas
12. SDS Plus tipo prakalas
13. SDS Plus tipo grąžtai
1. korpuss ar galveno rokturu
2. elektrisks ieslēdzējs
3. ieslēdzēja blokāde
4. darba režīma pārslēdzējs
5. rotāciju virziena pārslēdzējs
6. urbjmašīnas turētājs
7. papildu rokturis
8. barošanas vads
9. urbšanas dziļuma ierobežotājs
10. urbjmašīnas turētāja aizsegs
11. SDS Plus griešanas ierīce
12. SDS Plus caursišanas ierīce
13. SDS Plus urbji
1. skříňnářadí s hlavní rukojetí
2. elektrický spínač
3. aretace spínače
4. přepínačpracovního režimu
5. přepínačsměru otáček
6. vrtací sklíčidlo
7. přídavná rukojeť
8. síťový kabel
9. dorazová tyčpro nastavení hloubky vrtání
10. protiprachový kryt na sklíčidlo
11. upichovací nůž SDS Plus
12. průbojník SDS Plus
13. vrtáky SDS Plus
1. skriňa náradia s hlavnou rukoväťou
2. elektrický spínač
3. aretácia spínača
4. prepínačrežimu práce
5. prepínačsmeru otáčok
6. vŕtacie skľučovadlo
7. pomocná rukoväť
8. sieťový kábel
9. dorazová tyčka na nastavenie hĺbky vŕtania
10. kryt proti prachu na skľučovadlo
11. pretínak SDS plus
12. priebojník SDS plus
13. vrtáky SDS plus
1. test a főfogantyúval
2. elektromos kapcsoló
3. a kapcsoló retesze
4. munkamód átkapcsoló
5. forgásirány váltó
6. fúrótokmány
7. kiegészítőnyél
8. hálózati kábel
9. furatmélység határoló
10. fúrótokmány védőburkolata
11. SDS Plusz véső
12. SDS Plusz lyukasztó véső
13. SDS Plusz fúrófej
1. carcasăcu mâner principal
2. comutator electric
3. blocadăcomutator
4. comutator tip de lucru
5. comutator direcţie turaţie
6. mandrină
7. mâner adiţional
8. cablu de alimentare
9. limitator de adâncime de găurire
10. carcasămandrină
11. daltăSDS Plus
12. daltăpentru perforare SDS Plus
13. burghie SDS Plus
1. armazón con mango principal
2. interruptor
3. bloqueo del interruptor
4. selector del modo de trabajo
5. selector de la dirección de rotación
6. mandril
7. mango adicional
8. cable
9. limitador de la profundidad de perforación
10. protección del mandril
11. cortador
12. perforador
13. taladros SDS Plus
1. body with the main handle
2. electric switch
3. switch lock
4. operating mode selector
5. rotation selector
6. chuck
7. additional handle
8. power supply cord
9. drilling depth limiting device
10. protection of the drilling chuck
11. SDS Plus chisel
12. SDS Plus puncher
13. SDS Plus drills
PL GB D
RUS UA LT
LV CZ SK
HROE

INSTRUKCJA ORYGINALNA
4
PL GB D RUS UA LT LV CZ SK H RO E
Przeczytaćinstrukcję
Read the operating instruction
Bedienungsanleitung durchgelesen
Прочитать инструкцию
Прочитать iнструкцiю
Perskaityti instrukciją
Jālasa instrukciju
Přečtet návod k použití
Prečítaťnávod k obsluhe
Olvasni utasítást
Citeşti instrucţunile
Lea la instrucción
800 W
230 V~ 50 Hz
0-1000 min-1
Używaćgogli ochronnych
Wear protective goggles
Пользоваться защитными очками
Користуйтесь захисними окулярами
Vartok apsauginius akinius
Jālieto drošības brilles
Používej ochranné brýle
Používaj ochranné okuliare
Használjon védőszemüveget!
Intrebuinţeazăochelari de protejare
Use protectores del oído
Używaćochrony słuchu
Wear hearing protectors
Пользоваться средствами защиты слуха
Користуйтесь засобами захисту слуху
Vartoti ausines klausai apsaugoti
Jālieto dzirdes drošības līdzekļu
Používej chrániče sluchu
Používaj chrániče sluchu
Használjon fülvédőt!
Intrebuinţeazăantifoane
Use protectores de la vista
Stosowaćrękawice ochronne
Schutzhandschuhe verwenden
Необходимо пользоваться защитными
перчатками
Слід користуватися захисними рукавицями
Vartoti apsaugines pirštines
Lietot aizsardzības cimdus
Používejte ochranné rukavice
Používajte ochranné rukavice
Használjon védőkesztyűt
Utilizarea mănuşilor de protrcţie
Use guantes de protección
24mm
40mm
13mm
Maksymalna średnica wiercenia w stali
Maximum drilling diameter in steel
Maximaler Durchmesser zum Bohren in Stahl
Максимальный диаметр отверстия - сталь
Максимальний діаметр отвору - сталь
Maksimalus gręžimo pliene skersmuo
Urbšanas maksimāls diametrs tēraudā
Maximální průměr vrtání do oceli
Maximálny priemer vŕtania do ocele
Maximális furatátmérőacélban
Dimensiune maximăde găurire în oţel
Diámetro máximo de la perforación en acero
Maksymalna średnica wiercenia w drewnie
Maximum drilling diameter in wood
Maximaler Durchmesser zum Bohren in Holz
Максимальный диаметр отверстия - дерево
Максимальний діаметр отвору - дерево
Maksimalus gręžimo medienoje skersmuo
Urbšanas maksimāls diametrs kokā
Maximální průměr vrtání do dřeva
Maximálny priemer vŕtania do dreva
Maximális furatátmérőfában
Dimensiune maximăde găurire în lemn
Diámetro máximo de la perforación en madera
Maksymalna średnica wiercenia w betonie
Maximum drilling diameter in concrete
Maximaler Durchmesser zum Bohren in Beton
Максимальный диаметр отверстия - бетон
Максимальний діаметр отвору - бетон
Maksimalus gręžimo betone skersmuo
Urbšanas maksimāls diametrs betonā
Maximální průměr vrtání do betonu
Maximálny priemer vŕtania do betónu
Maximális furatátmérőbetonban
Dimensiune maximăde găurire în beton
Diámetro máximo de la perforación en concreto
Moc znamionowa
Rating power
Nennleistung
Номинальная мощность
Номінальна потужність
Nominali galia
Nomināla spēja
Jmenovitý výkon
Menovitý výkon
Névleges teljesítmény
Consum de putere nominală
Potencia nominal
Stosowaćochronędróg oddechowych
Use the respiration protection
Atemwege schützen!
Применять защиту дыхательных путей
Користуйтеся захистом дихальних шляхів
Taikyti kvėpavimo takųapsaugą
Lietojiet elpošanas traktu aizsardzību
Používejte prostředky na ochranu dýchacích cest
Používajte prostriedky na ochranu dýchacích ciest
Használjon légzésvédőálarcot
Utilizaţi apărători ale căilor respiratorii
Proteja las vías respiratorias
Napięcie i częstotliwość znamionowa
Rating voltage and frequency
Spannung und Nennfrequenz
Номинальное напряжение ичастота
Номінальна напруга та частота
Įtampa ir nominalus dažnis
Nomināls spriegums un nomināla frekvence
Jmenovité napětí a frekvence
Menovité napätie a frekvencia
Névleges feszültség és frekvencia
Tensiunea şi frecvenţa nominală
Tensión y frecuencia nominal
Znamionowa prędkość obrotowa
Nominal rotation
Nennumdrehungsgeschwindigkeit
Номинальные обороты
Номінальні оберти
Nominalus apsisukimųgreitis
Nomināls griezes ātrums
Jmenovité otáčky
Menovité otáčky
Névleges fordulatszám
Viteza de rotire nominală
Velocidad de la rotación nominal
Przełącznik kierunku obrotów
Rotation direction switch
Umschalter für die Drehrichtung
Реверсивный переключатель
Реверсивний перемикач
Apsisukimųkrypties perjungiklis
Apgriezienu virziena pārslēdzējs
Přepínačsměru otáčení
Prepínačsmeru otáčok
Forgásirány váltó
Comutatorul direcţiei de rotire
Interruptor de la dirección de la rotación

INSTRUKCJA ORYGINALNA 5
PL GB D RUS UA LT LV CZ SK H RO E
SDS+
0-5000 min
-1
Energia udaru
Impact energy
Stossenergie
Энергия удара
Енергія удару
Smūgio energija
Sitiena enerģija
Energie příklepu
Energia príklepu
Ütési energia
Energia percuţiei
Energía del impacto
3,5 J
Ustawienie narzędzia w uchwycie
Tool positioning in the chuck
Einstellen des Werkzeuges in der Halterung
Установка инструмента впатроне
Кріплення інструмента впатроні
Įrankio nustatymas griebtuve
Ierīces uzstādīšana turētājā
Nastavení nástroje v upínacím přípravku
Nastavenie nástroja v upínacom prípravku
A szerszám beállítása a tokmányban
Fixarea sculei în portsculă
Posicionamiento de la herramienta en el mandril
Częstotliwość udaru
Impact frequency
Stossfrequenz
Частота удара
Частота удару
Smūgiųdažnis
Sitiena frekvence
Frekvence příklepu
Frekvencia príklepu
Ütési frekvencia
Frecvenţa bătăilor de percuţie
Frecuencia del impacto
System mocowania narzędzia roboczego
Working tool attaching system
Befestigungssystem für das Arbeitswerkzeug
Система крепления рабочего инструмента
Система кріплення робочого інструмента
Darbinio įrankio įtvirtinimo sistema
Darbarīka stiprināšanas sistēma
Systém upínání pracovního nástroje
Systém upínania pracovného nástroja
A munkaszerszám rögzítési rendszere
Sistem de fixarea sculei de lucru
Sistema de fijar la herramienta de trabajo
Druga klasa bezpieczeństwa elektrycznego
Second class of insulation
Zweite Klasse der elektrischen Sicherheit
Второй класс электрической безопасности
Другий клас електричної ізоляції
Antros klasės elektrinėapsauga
Elektrības drošības II. klase
Druhá třída elektrické bezpečnosti
Druhá trieda elektrickej bezpečnosti
Második osztályú elektromos védelem
Securitatea electricăde clasa a doua
Segunda clase de la seguridad eléctrica

INSTRUKCJA ORYGINALNA
6
PL GB D RUS UA LT LV CZ SK H RO E
ОХРАНА ОКРУЖАЮЩЕЙ СРЕДЫ
Данный символ обозначает селективный сбор изношенной электрической иэлектронной аппаратуры. Изношенные электроустройства – вторичное сырье, в
связи счем запрещается выбрасывать их вкорзины сбытовыми отходами, поскольку они содержат вещества, опасные для здоровья иокружающей среды! Мы
обращаемся кВам спросьбой об активной помощи вотрасли экономного использования природных ресурсов иохраны окружающей среды путем передачи
изношенного устройства всоответствующий пункт хранения аппаратуры такого типа. Чтобы ограничить количество уничтожаемых отходов, необходимо
обеспечить их вторичное употребление, рециклинг или другие формы возврата.
ОХОРОНА НАВКОЛИШНЬОГО СЕРЕДОВИЩА
Вказаний символ означає селективний збір спрацьованої електричної та електронної апаратури. Спрацьовані електропристрої євторинною сировиною, узвязку
зчим заборонено викидати їх усмітники зпобутовими відходами, оскільки вони містять речовини, що загрожують здоровю та навколишньому середовищу!
Звертаємося до Вас зпросьбою стосовно активної допомоги угалузі охорони навколишнього середовища та економного використання природних ресурсів шляхом
передачі спрацьованих електропристроїв увідповідний пункт, що займається їх переховуванням. Зметою обмеження обєму відходів, що знищуються, необхідно
створити можливість для їх вторинного використання, рециклінгу або іншої форми повернення до промислового обігу.
KÖRNYEZETVÉDELEM
A használt elektromos és elektronikus eszközök szelektív gyűjtésére vonatkozó jelzés: A használt elektromos berendezések újrafelhasználható nyersanyagok – nem szabad
őket a háztartási hulladékokkal kidobni, mivel az emberi egészségre és a környezetre veszélyes anyagokat tartalmaznak! Kérjük, hogy aktívan segítse a természeti források-
kal való aktív gazdálkodást az elhasznált berendezéseknek a tönkrement elektromos berendezéseket gyűjtőpontra történőbeszállításával. Ahhoz, hogy a megsemmisítendő
hulladékok mennyiségének csökkentése érdekében szükséges a berendezések ismételt vagy újra felhasználása, illetve azoknak más formában történővisszanyerése.
OCHRONA ŚRODOWISKA
Symbol wskazujący na selektywne zbieranie zużytego sprzętu elektrycznego i elektronicznego. Zużyte urządzenia elektryczne sąsurowcami wtórnymi - nie wolno wyrzucać
ich do pojemników na odpady domowe, ponieważzawierająsubstancje niebezpieczne dla zdrowia ludzkiego i środowiska! Prosimy o aktywnąpomoc w oszczędnym gospo-
darowaniu zasobami naturalnymi i ochronie środowiska naturalnego przez przekazanie zużytego urządzenia do punktu składowania zużytych urządzeńelektrycznych. Aby
ograniczyćilość usuwanych odpadów konieczne jest ich ponowne użycie, recykling lub odzysk w innej formie.
UMWELTSCHUTZ
Das Symbol verweist auf ein getrenntes Sammeln von verschlissenen elektrischen und elektronischen Ausrüstungen. Die verbrauchten elektrischen Geräte sind Sekundär-
rohstoffe – sie dürfen nicht in die Abfallbehälter für Haushalte geworfen werden, da sie gesundheits- und umweltschädigende Substanzen enthalten! Wir bitten um aktive
Hilfe beim sparsamen Umgang mit Naturressourcen und dem Umweltschutz, in dem die verbrauchten Geräte zu einer Annahmestelle für solche elektrischen Geräte gebracht
werden. Um die Menge der zu beseitigenden Abfälle zu begrenzen, ist ihr erneuter Gebrauch, Recycling oder Wiedergewinnung in anderer Form notwendig.
OCHRANA ŽIVOTNÉHO PROSTREDIA
Symbol poukazuje na nutnosťseparovaného zberu opotrebovaných elektrických a elektronických zariadení. Opotrebované elektrické zariadenia sú zdrojom druhotných
surovín – je zakázané vyhadzovaťich do kontejnerov na komunálny odpad, nakoľko obsahujú látky nebezpečné ľudskému zdraviu a životnému prostrediu! Prosíme o
aktívnu pomoc pri hospodárení s prírodnými zdrojmi a pri ochrane životného prostredia tým, že opotrebované zariadenia odovzdáte do zberného strediska opotrebovaných
elektrických zariadení. Aby sa obmedzilo množstvo odpadov, je nutné ich opätovné využitie, recyklácia alebo iné formy regenerácie.
OCHRANA ŽIVOTNÍHO PROSTŘEDÍ
Symbol poukazuje na nutnost separovaného sběru opotřebovaných elektrických a elektronických zařízení. Opotřebovaná elektrická zařízení jsou zdrojem druhotných
surovin – je zakázáno vyhazovat je do nádob na komunální odpad, jelikož obsahují látky nebezpečné lidskému zdraví a životnímu prostředí! Prosíme o aktivní pomoc při
úsporném hospodaření s přírodními zdroji a ochraněživotního prostředí tím, že odevzdáte použité zařízení do sběrného střediska použitých elektrických zařízení. Aby se
omezilo množství odpadů, je nevyhnutné jejich opětovné využití, recyklace nebo jiná forma regenerace.
VIDES AIZSARDZĪBA
Simbols rāda izlietoto elektrisko un elektronisko iekārtu selektīvu savākšanu, Izlietotas elektriskas iekārtas ir otrreizējas izejvielas – nevar būt izmestas ar mājsaimniecības
atkritumiem, jo satur substances, bīstamas cilvēku veselībai un videi! Lūdzam aktīvi palīdzēt saglabāt dabisku bagātību un sargāt vīdi, pasniegšot izlietoto iekārtu izlietotas
elektriskas ierīces savākšanas punktā. Lai ierobežot atkritumu daudzumu, tiem jābūt vēlreiz izlietotiem, pārstrādātiem vai dabūtiem atpakaļcitāformā.
APLINKOS APSAUGA
Simbolis nurodo, kad suvartoti elektroniniai ir elektriniai įrenginiai turi būti selektyviai surenkami. Suvartoti elektriniai įrankiai, – tai antrinės žaliavos – jųnegalima išmesti į
namųūkio atliekųkonteinerį, kadangi savo sudėtyje turi medžiagųpavojingųžmgaus sveikatai ir aplinkai! Kviečiame aktyviai bendradarbiauti ekonomiškame natūraliųišteklių
tvarkyme perduodant netinkamąvartoti įrankįįsuvartotųelektros įrenginiųsurinkimo punktą. Šalinamųatliekųkiekiui apriboti yra būtinas jųpakartotinis panaudojimas,
reciklingas arba medžiagųatgavimas kitoje perdirbtoje formoje.
PROTEJAREA MEDIULUI
Simbolul adunării selective a utilajelor electrice şi electronice. Utilajele electrice uzate sunt materie primărepetată– este interzisăaruncarea lor la gunoi, deoarece conţin
substanţe dăunătoare sănătăţii omeneşti cât dăunătoare mediului! Vărugăm deci săaveţi o atitudine activăîn ceace priveşte gospodărirea economicăa resurselor naturale
şi protejarea mediului natural prin predarea utilajului uzat la punctul care se ocupăde asemenea utilaje electrice uzate. Pentru a limita cantităţile deşeurilor eliminate este
necesarăîntrebuinţatrea lor din nou , prin recyklind sau recuperarea în altăformă.
PROTECCIÓN DEL MEDIO AMBIENTE
El símbolo que indica la recolección selectiva de los aparatos eléctricos y electrónicos usados. ¡Aparatos eléctricos y electrónicos usados son reciclados – se prohíbe tirarlos
en contenedores de desechos domésticos, ya que contienen sustancias peligrosas para la salud humana y para el medio ambiente! Les pedimos su participación en la tarea
de la protección y de los recursos naturales y del medio ambiente, llevando los aparatos usados a los puntos de almacenamiento de aparatos eléctricos usados. Con el fin
de reducir la cantidad de los desechos, es menester utilizarlos de nuevo, reciclarlos o recuperarlos de otra manera.
ENVIRONMENTAL PROTECTION
Correct disposal of this product: This marking shown on the product and its literature indicates this kind of product mustn’t be disposed with household wastes at the end of
its working life in order to prevent possible harm to the environment or human health. Therefore the customers is invited to supply to the correct disposal, differentiating this
product from other types of refusals and recycle it in responsible way, in order to re - use this components. The customer therefore is invited to contact the local supplier office
for the relative information to the differentiated collection and the recycling of this type of product.

INSTRUKCJA ORYGINALNA 7
PL
CHARAKTERYSTYKA NARZĘDZIA
Ręczna młotowiertarka jest narzędziem zwykłym, II klasy izolacji, przeznaczonym do wykonywania otworów oraz kucia w betonie,
kamieniu naturalnym, sztucznym, marmurze itp. za pomocąnarzędzi roboczych wyposażonych w chwyt SDS Plus. Przyrząd
zostałzaprojektowany do użytku wyłącznie w gospodarstwach domowych i nie może byćwykorzystywany profesjonalnie, tj. w
zakładach pracy i do prac zarobkowych. Prawidłowa, niezawodna i bezpieczna praca elektronarzędzia jest zależna od właściwej
eksploatacji, dlatego:
Przed przystąpieniem do pracy z narzędziem należy przeczytaćcałą instrukcjęi zachowaćją.
Za szkody powstałe w wyniku nie przestrzegania przepisów bezpieczeństwa i zaleceńniniejszej instrukcji dostawca nie ponosi
odpowiedzialności.
WYPOSAŻENIE
W opakowaniu fabrycznym powinny sięznajdować(II):
- młotowiertarka,
- przecinak SDS Plus,
- przebijak SDS Plus,
- wiertła SDS Plus,
- rękojeść dodatkowa,
- gumowa osłona uchwytu SDS Plus,
- pręt ograniczający głębokość wiercenia
PARAMETRY TECHNICZNE
Parametr Jednostka miary Wartość
Numer katalogowy 79053
Napięcie znamionowe [V] ~230
Częstotliwość znamionowa [Hz] 50
Moc znamionowa [W] 800
Obroty znamionowe [min-1] 0 - 1000
Max. średnica otworu (beton) [mm] 24
Masa [kg] 2,9
Poziom hałasu
- ciśnienie akustyczne [dB(A)] 89,4 ± 3,0
- moc LwA [dB(A)] 100,4 ± 3,0
Klasa izolacji II
Poziom drgań(wiercenie z udarem / kucie) [m/s2] 14,936 ± 1,5 / 14,898 ± 1,5
Stopieńochrony IP20
OGÓLNE WARUNKI BEZPIECZEŃSTWA
UWAGA! Przeczytaćwszystkie poniższe instrukcje. Nieprzestrzeganie ich może prowadzićdo porażenia elektrycznego, pożaru
albo do uszkodzeńciała. Pojęcie „narzędzie elektryczne” użyte w instrukcjach odnosi siędo wszystkich narzędzi napędzanych
prądem elektrycznym zarówno przewodowych jak i bezprzewodowych.
PRZESTRZEGAĆPONIŻSZYCH INSTRUKCJI
Miejsce pracy
Miejsce pracy należy utrzymywaćdobrze oświetlone i w czystości. Nieporządek i słabe oświetlenie mogąbyćprzyczynami
wypadków.
Nie należy pracowaćnarzędziami elektrycznymi w środowisku o zwiększonym ryzyku wybuchu, zawierającym palne
ciecze, gazy lub opary. Narzędzia elektryczne generująiskry, które mogąspowodowaćpożar w kontakcie z palnymi gazami
lub oparami.
Nie należy dopuszczaćdzieci i osób postronnych do miejsca pracy. Utrata koncentracji może spowodowaćutratękontroli
nad narzędziem.
Bezpieczeństwo elektryczne
Wtyczka przewodu elektrycznego musi pasowaćdo gniazdka sieciowego. Nie wolno modyfikowaćwtyczki. Nie wolno
stosowaćżadnych adapterów w celu przystosowania wtyczki do gniazdka. Niemodyfikowana wtyczka pasująca do gniazdka

INSTRUKCJA ORYGINALNA
8
PL
zmniejsza ryzyko porażenia prądem elektrycznym.
Unikaćkontaktu z uziemionymi powierzchniami takimi jak rury, grzejniki i chłodziarki. Uziemienie ciała zwiększa ryzyko
porażenia prądem elektrycznym.
Nie należy narażaćnarzędzi elektrycznych na kontakt z opadami atmosferycznymi lub wilgocią.Woda i wilgoć, która
dostanie siędo wnętrza narzędzia elektrycznego zwiększa ryzyko porażenia prądem elektrycznym.
Nie przeciążaćkabla zasilającego. Nie używaćkabla zasilającego do noszenia, podłączania i odłączania wtyczki od
gniazdka sieciowego. Unikaćkontaktu kabla zasilającego z ciepłem, olejami, ostrymi krawędziami i ruchomymi elemen-
tami. Uszkodzenie kabla zasilającego zwiększa ryzyko porażenia prądem elektrycznym.
W przypadku pracy poza pomieszczeniami zamkniętymi należy używaćprzedłużaczy przeznaczonych do pracy poza
pomieszczeniami zamkniętymi. Użycie odpowiedniego przedłużacza zmniejsza ryzyko porażenia prądem elektrycznym.
W przypadku, gdy używanie elektronarzędzia w środowisku wilgotnym jest nieuniknione, jako ochronęprzed napięciem
zasilania należy stosowaćurządzenie różnicowoprądowe (RCD). Zastosowanie RCD zmniejsza ryzyko porażania prądem
elektrycznym.
Bezpieczeństwo osobiste
Przystępuj do pracy w dobrej kondycji fizycznej i psychicznej. Zwracaj uwagęna to, co robisz. Nie pracuj będąc zmę-
czonym lub pod wpływem leków lub alkoholu. Nawet chwila nieuwagi podczas pracy może prowadzićdo poważnych obrażeń
ciała.
Używaj środków ochrony osobistej. Zawsze zakładaj gogle ochronne. Stosowanie środków ochrony osobistej, takich jak
maski przeciwpyłowe, obuwie ochronne, kaski i ochronniki słuchu zmniejszająryzyko poważnych obrażeńciała.
Unikaj przypadkowego włączenia narzędzia. Upewnij się, że włącznik elektryczny jest w pozycji „wyłączony” przed pod-
łączeniem narzędzia do sieci elektroenergetycznej. Trzymanie narzędzia z palcem na włączniku lub podłączanie narzędzia
elektrycznego, gdy włącznik jest w pozycji „włączony” może prowadzićdo poważnych obrażeńciała.
Przed włączeniem narzędzia elektrycznego usuńwszelkie klucze i inne narzędzia, które zostały użyte do jego regulacji.
Klucz pozostawiony na obracających sięelementach narzędzia może prowadzićdo poważnych obrażeńciała.
Utrzymuj równowagę. Przez cały czas utrzymuj odpowiedniąpostawę.Pozwoli to na łatwiejsze zapanowanie nad narzę-
dziem elektrycznym w przypadku niespodziewanych sytuacji podczas pracy.
Stosuj odzieżochronną. Nie zakładaj luźniej odzieży i biżuterii. Utrzymuj włosy, odzieżi rękawice robocze z dala od rucho-
mych części narzędzia elektrycznego. Luźna odzież, biżuteria lub długie włosy mogązaczepićo ruchome części narzędzia.
Stosuj odciągi pyłu lub pojemniki na pył, jeśli narzędzie jest w takie wyposażone. Zadbaj o to, aby je poprawnie podłą-
czyć.Użycie odciągu pyłu zmniejsza ryzyko poważnych obrażeńciała.
Użytkowanie narzędzia elektrycznego
Nie przeciążaj narzędzia elektrycznego. Używaj narzędzia właściwego do danej pracy. Odpowiedni dobór narzędzia do
danej pracy, zapewni wydajniejsząi bezpieczniejsząpracę.
Nie używaj narzędzia elektrycznego, jeśli nie działa jego włącznik sieciowy. Narzędzie, które nie daje siękontrolowaćza
pomocąwłącznika sieciowego jest niebezpieczne i należy je oddaćdo naprawy.
Odłącz wtyczkęod gniazdka zasilającego przed regulacją, wymianąakcesoriów lub przechowywaniem narzędzia. Pozwo-
li to na uniknięcie przypadkowego włączenia narzędzia elektrycznego.
Przechowuj narzędzie w miejscu niedostępnym dla dzieci. Nie pozwól pracowaćosobom nieprzeszkolonym w zakresie
obsługi narzędzia. Narzędzie elektryczne może byćniebezpieczne w rękach nieprzeszkolonej obsługi.
Zapewnij właściwąkonserwacjęnarzędzia. Sprawdzaj narzędzie pod kątem niedopasowańi luzów ruchomych części.
Sprawdzaj czy jakikolwiek element narzędzia nie jest uszkodzony. W przypadku wykrycia usterek należy je naprawić
przed użyciem narzędzia elektrycznego. Wiele wypadków jest spowodowanych przez niewłaściwe konserwowane narzędzia.
Narzędzia tnące należy utrzymywaćczyste i naostrzone. Właściwie konserwowane narzędzia tnące jest łatwiej kontrolować
podczas pracy.
Stosuj narzędzia elektryczne i akcesoria zgodnie z powyższymi instrukcjami. Stosuj narzędzia zgodnie z przeznaczeniem
biorąc pod uwagęrodzaj i warunki pracy. Stosowanie narzędzi do innej pracy niżzostały zaprojektowane może zwiększyć
ryzyko powstawania niebezpiecznych sytuacji.
Naprawy
Naprawiaj narzędzie tylko w uprawnionych do tego zakładach, używających tylko oryginalnych części zamiennych. Za-
pewni to właściwe bezpieczeństwo pracy narzędzia elektrycznego.
DODATKOWE INSTRUKCJE BEZPIECZEŃSTWA
Zakładaćochronniki słuchu podczas pracy wiertarkąudarową.Narażanie na hałas może spowodowaćutratęsłuchu.
Narzędzia używaćz dodatkowymi rękojeściami dostarczonymi z narzędziem. Utrata kontroli może spowodowaćosobiste
obrażenia operatora.
Stosowaćmaski przeciwpyłowe. Użycie masek przeciwpyłowych zmniejsza ryzyko poważnych obrażeńciała.
Podczas wykonywania pracy, w której narzędzie wstawione może zetknąć sięz ukrytym przewodem pod napięciem

INSTRUKCJA ORYGINALNA 9
PL
trzymaćnarzędzie elektryczne za pomocąizolowanych uchwytów. Narzędzie wstawiane podczas kontaktu z przewodem
pod napięciem może spowodować, że metalowe elementy narzędzia mogąsięznaleźć pod napięciem, co może spowodować
porażenie elektryczne operatora narzędzia.
MONTAŻELEMENTÓW WYPOSAŻENIA
UWAGA! Montażwyposażenia może byćdokonywany tylko przy odłączonym napięciu zasilającym. Wyciągnąć wtyczkęprzewo-
du narzędzia z gniazda sieciowego!
Montażrękojeści dodatkowej (III)
Założyćrękojeść dodatkowąw żądanym położeniu i zacisnąć jądokręcając rękojeść uchwytu.
Montażogranicznika głębokości wiercenia (IV)
Jeżeli na wyposażeniu młota znajduje sięogranicznik głębokości wiercenia można go zamocowaćdo rękojeści dodatkowej.
W zależności od sposobu mocowania należy wsunąć ogranicznik w otwór w rękojeści dodatkowej, a po ustaleniu właściwego
położenia zamocowaćza pomocą, przycisku, pokrętła lub dokręcając rękojeść dodatkową.
PRZYGOTOWANIE DO PRACY
Przed rozpoczęciem pracy należy sprawdzićczy korpus obudowy oraz przewód przyłączeniowy z wtyczkąnie sąuszkodzone.
W przypadku stwierdzenia uszkodzeńzabrania siędalszej pracy!
Uwaga! Wszystkie czynności związane z wymianąnarzędzi roboczych (wiertła i przecinaki z chwytem SDS Plus), montażem
osłon i prowadnic, regulacjąitp. należy przeprowadzaćprzy wyłączonym napięciu zasilającym narzędzie, dlatego przed przystą-
pieniem do tych czynności: Wyciągnąć wtyczkęprzewodu narzędzia z gniazda sieciowego!
Zakładanie narzędzi roboczych SDS Plus w uchwycie narzędziowym
Oczyścićwybrane narzędzie z brudu i rdzy oraz posmarowaćuchwyt SDS Plus cienkąwarstwąsmaru.
Przyciągnąć ku sobie uchwyt narzędziowy i przytrzymaćw tej pozycji (V).
Włożyćoczyszczone narzędzie do otworu. W razie potrzeby przekręcićnarzędzie, aby bez oporu weszło do uchwytu.
Puścićuchwyt, narzędzie powinno sięautomatycznie zablokowaćw uchwycie.
Sprawdzićczy narzędzie jest pewnie osadzone. W tym celu wystarczy spróbowaćwyciągnąć narzędzie z uchwytu SDS-Plus.
Jeśli wiertło lub przecinak wysuwa sięz uchwytu, ponowićczynności montażowe.
Ustawianie kierunku obrotów (VII)
Ustawićprzełącznik kierunku obrotów zgodnie ze strzałkami obroty w prawo – strzałka skierowana ku przodowi narzędzia, obroty
w lewo – strzałka skierowana ku tyłowi narzędzia.
Uwaga! Zmiana kierunku obrotów może byćdokonana jedynie przy odłączonym napięciu zasilającym!
Ustawianie rodzaju pracy (VI)
Funkcja pracy z udarem ułatwia wiercenie przy wykonywaniu otworów w betonie, murze i twardych materiałach ceramicznych
(twarde cegły, kamienie, marmur). W tym celu przełącznik udaru ustawićna pracęz udarem, symbol wiertła i młotka.
W czasie wiercenia otworów w innych materiałach, funkcjęwiercenia z udarem należy wyłączyć, ustawiając przełącznik na pracę
bez udaru, symbol wiertła.
Możliwe jest teżustawienie funkcji kucia, w tym trybie zostająodłączone obroty, nie zostaje natomiast wyłączony udar.
W tym celu należy nastawićprzełącznik trybu pracy w pozycjękucia, symbol młotka.
Czynności przygotowawcze
Wybieraćwłaściwe narzędzie robocze i zamontowaćje w uchwycie narzędziowym.
Ustawićprzełącznik rodzaju pracy w odpowiednie położenie: symbol młotka – kucie; symbol młotka i wiertła – wiercenie z udarem;
symbol wiertła – wiercenie bez udaru; młotek ze strzałką– ustawienie położenia dłuta.
Założyćochronniki słuchu, ochronęoczu, rękawice robocze.
Włożyćwtyczkęprzewodu do gniazda sieci elektrycznej.
Przyjąć pozycjęgwarantującązachowanie równowagi, chwycićoburącz młotowiertarkęi uruchomićjąnaciskając palcem włącznik
elektryczny (VIII).
Przytrzymaćnarzędzie w tym stanie kilka minut, aby smar dotarłdo wszystkich elementów mechanizmu napędowego.
Wyłączyćmłotowiertarkęprzez zwolnienie włącznika.
Uwaga! W razie wystąpienia podejrzanych zgrzytów, trzasków itp. Natychmiast wyłączyćmłotowiertarkęz sieci elektrycznej
i przekazaćjądo przeglądu uprawnionemu zakładowi serwisowemu.

INSTRUKCJA ORYGINALNA
10
PL
UŻYTKOWANIE NARZĘDZIA
Uwaga! W czasie użytkowania młotowiertarki należy stosowaćochronniki słuchu!
Stosowanie prawego lub lewego kierunku obrotów
Obroty prawe stosowaćw trakcie wiercenia powszechnie stosowanymi wiertłami prawoskrętnymi. Obroty lewe stosowaćw przy-
padku zakleszczenia sięwiertła prawoskrętnego w materiale.
Stosowanie blokady włącznika
Blokadęwłącznika zaleca sięwykorzystywaćw przypadku długotrwałego wiercenia, na przykład przy wierceniu w betonie, murze
itp. W tym celu przy wciśniętym włączniku wcisnąć kciukiem przycisk blokady i puścićwłącznik. W celu zwolnienia blokady wy-
starczy przycisnąć włącznik elektryczny.
Wiercenie w drewnie
Przed wykonaniem otworu zaleca sięzamocowaćobrabiany materiałściskami stolarskimi lub w imadle, a następnie punktakiem
lub gwoździem ustalićmiejsce wiercenia. W uchwyt wiertarski zamocowaćwłaściwe wiertło, ustalićprędkość, podłączyćwiertarkę
do sieci elektrycznej i rozpocząć wiercenie. W przypadku wykonywania otworów przelotowych zaleca siępod materiałpodło-
żyćpodkładkędrewnianą, dzięki czemu krawędźotworu u wylotu nie będzie poszarpana. W przypadku wykonywania otworów
o dużych średnicach wcześniej zaleca sięwywiercićmniejszy otwór prowadzący.
Wiercenie w metalach
Zawsze należy pewnie zamocowaćobrabiany materiał. W przypadku cienkiej blachy zaleca siępodłożyćpod niąkawałek drewna,
aby uniknąć niepożądanych zagięć itp. Następnie zaznaczyćmiejsca wykonywania otworów punktakiem i rozpocząć wiercenie.
Używaćwiertełdo stali. W przypadku wiercenia w żeliwie białym zaleca sięużywanie wiertełz końcówkami z węglików spieka-
nych. Przy wierceniu większych otworów zaleca sięwykonanie wcześniej mniejszego otworu prowadzącego. Przy wierceniu
w stali do chłodzenia wiertła używaćoleju maszynowego. W przypadku aluminium stosowaćjako chłodziwo terpentynęlub parafi-
nę. W przypadku wierceniu w mosiądzu, miedzi lub żeliwie nie należy stosowaćśrodków chłodzących. W celu schłodzenia często
wyjmowaćwiertło z materiału aby pozwolićmu na ostygnięcie.
Wiercenie w materiałach ceramicznych
Wiercenie w twardych, zwartych materiałach: beton, twarda cegła, kamień, marmur itp.
Przy odłączonej od sieci elektrycznej młotowiertarce zamocowaćdo uchwytu narzędziowego wiertło.
W razie potrzeby zamontowaćogranicznik głębokości wiercenia.
Przełącznikiem trybu pracy wybraćwiercenie z udarem lub jeżeli jest dostępne, to wiercenie bez udaru.
Włożyćwtyczkędo gniazda sieci elektrycznej, włączyćwłącznikiem młotowiertarkęi rozpocząć pracę.
W czasie pracy stosowaćregularne przerwy - nigdy nie dopuszczaćdo nadmiernego nagrzania młotowiertarki i narzędzia.
Wiercenie z udarem zaleca sięstosowaćtylko w przypadku zwartych materiałów ceramicznych jak: beton, twarda cegła, kamień
itp. W przypadku wiercenia otworów o dużych średnicach zaleca sięwykonanie otworu wstępnego o mniejszej średnicy, a następ-
nie użyćwiertła o docelowej średnicy. Należy stosowaćwiertła przeznaczone do wiercenia udarowego.
Nie zaleca sięstosowaćwiercenia udarowego w przypadku materiałów ceramicznych o luźnej strukturze takich, jak: glazura,
miękka cegła, tynk itp. Wiercenie udarowe w takich materiałach może doprowadzićdo zniszczenia materiału.
Młotowiertarka jest wyposażona w sprzęgło zapobiegające przeciążeniu silnika elektrycznego w przypadku gdy narzędzie wsta-
wiane zostanie zatrzymane w wyniku pracy. Na przykład w przypadku natrafienia w pręt zbrojeniowy. W takim wypadku wiertło
przestanie sięobracać, mimo że silnik elektryczny nadal będzie pracował.
Także wywieranie zbyt dużego nacisku w trakcie pracy może spowodowaćzadziałanie sprzęgła.
W takim wypadku należy wycofaćnarzędzie wstawiane z otworu, sprawdzićczy młotowiertarka pracuje poprawnie, a następnie
wznowićpracęprzykładając tylko taki nacisk jaki jest konieczny do poprawnej pracy. W przypadku natrafienia na pręt zbrojeniowy
lub inne ukryte przeszkody metalowe, należy je przewiercićbez udaru za pomocąwiertła przeznaczonego do wiercenia w metalu
o tej samej średnicy co wiertło udarowe, a następnie kontynuowaćwiercenie w materiale ceramicznym.
Wiercenie w glazurze, miękkiej cegle, tynku itp.
Wiercićjak w przypadku materiałów twardych lecz bez udaru. Co pewien czas wyjmowaćwiertło z wierconego otworu w celu
usunięcia pyłu i odpadów. W trakcie wiercenia naciskaćnarzędzie ze stałą siłą.
Ustawianie położenia dłuta
Niektóre narzędzia wstawiane przeznaczone do kucia w celu bezpiecznej i ergonomicznej pracy wymagająustawienia pod
określonym kątem, na przykład dłuta lub przecinaki. Można do tego celu użyćodpowiednego trybu pracy. Zamocowaćnarzę-
dzie wstawiane w uchwycie zgodnie z zaleceniami podanymi w instrukcji. Ustawićprzełącznik na symbol młotka ze strzałką,
a następnie nacisnąć włącznik. Narzędzie wstawiane zacznie siępowoli obracaćzgodnie z wybranym kierunkiem obrotów.

INSTRUKCJA ORYGINALNA 11
PL
Zwolnićnacisk na włącznik po osiągnięciu przez narzędzie wstawiane pożądanej pozycji. Przestawićprzełącznik trybu pracy
w pozycjękucie – symbol młotka, a następnie rozpocząć pracę.
Kucie
Przy odłączonej od sieci elektrycznej zamocowaćdo uchwytu narzędziowego żądane narzędzie: przecinak lub przebijak.
Ustawićprzełącznik rodzaju pracy w pozycjękucie. Włożyćwtyczkędo gniazda sieci elektrycznej, włączyćwłącznikiem młoto-
wiertarkę, poczekaćdo osiągnięcia pełnej prędkości i rozpocząć pracę.
Podczas kucia nie należy wbijaćnarzędzia wstawianego zbyt głęboko w obrabiany materiał. Należy skuwaćmateriałcienkimi
warstwami, nie wywierając zbyt dużego nacisku na młotowiertarkę.
Wycinanie otworów
Wiertarka może byćwykorzystana do wykonywania większych otworów w drewnie za pomocąspecjalnych wierteło stałej śred-
nicy lub wymiennych końcówek z zestawu pił- wyrzynarek do otworów. W celu uniknięcia powstania zadziorów, poszarpanych
krawędzi wykonywanego otworu u wylotu otworu, pod materiałpodłożyćkawałek drewna odpadowego.
Używanie przystawek
Wiertarki ze zmiennym kierunkiem obrotów nie powinny byćużywane do napędu przystawek roboczych.
Osłona uchwytu wiertarskiego
Jeżeli młotowiertarka została wyposażona w gumowąosłonęuchwytu wiertarskiego, to zaleca sięjąużyćw przypadku wiercenia
gdzie wiertło jest skierowane do góry, na przykład wierceniu w suficie. Po zamontowaniu wiertła w uchwycie należy nałożyćna
nie osłonę. Pyłi odpady powstające podczas wiercenia będągromadziły sięw osłonie, co zapobiegnie zanieczyszczeniu uchwytu
wiertarskiego. Po skończonej pracy osłonęzdjąć z wiertła, oczyścićz pyłu i odpadków, a następnie opłukaćpod strumieniem
letniej wody.
Uwagi dodatkowe
W czasie pracy nie należy wywieraćzbyt dużego nacisku na obrabiany materiałi nie wykonywaćgwałtownych ruchów, aby nie
spowodowaćuszkodzenia narzędzia roboczego i wiertarki. W czasie pracy stosowaćregularne przerwy. Nie wolno dopuścićdo
przeciążenia narzędzia, temperatura powierzchni zewnętrznych nigdy nie może przekroczyć60OC. Po zakończonej pracy wyłą-
czyćwiertarkę, wyjąć wtyczkęprzewodu narzędzia z gniazda sieciowego i dokonaćkonserwacji i oględzin.
Deklarowana, całkowita wartość drgańzostała zmierzona za pomocąstandardowej metody badańi może byćużyta do porówna-
nia jednego narzędzia z drugim. Deklarowana, całkowita wartość drgańmoże zostaćużyta we wstępnej ocenie ekspozycji.
Uwaga! Emisja drgańpodczas pracy narzędziem może sięróżnićod zadeklarowanej wartości, w zależności od sposobu użycia
narzędzia.
Uwaga! Należy określićśrodki bezpieczeństwa mające chronićoperatora, które sąoparte na ocenie narażenia w rzeczywistych
warunkach użytkowania (wliczając w to wszystkie części cyklu pracy, jak na przykład czas kiedy narzędzie jest wyłączone lub
pracuje na biegu jałowym oraz czas aktywacji).
Smarowanie
Zawsze przed użyciem wiertełlub przecinaków należy je dokładnie oczyścići posmarowaćchwyt SDS Plus cienkąwarstwą
smaru. Zaleca sięstosowanie smaru przeznaczonego do uchwytów wiertarskich SDS Plus. W przypadku niewłaściwej pracy
mechanizmu udarowego, jednąz przyczyn może byćniedostateczne smarowanie przekładni i zespołu korbowego tłoka udaru.
Zaleca sięstosowanie smaru przeznaczonego do przekładni zębatych i korbowych. Uzupełnianie smaru zaleca sięwykonaćw
uprawnionym zakładzie serwisowym.
KONSERWACJA I PRZEGLĄDY
UWAGA! Przed przystąpieniem do regulacji, obsługi technicznej lub konserwacji wyciągnij wtyczkęnarzędzia z gniazdka sieci
elektrycznej. Po zakończonej pracy należy sprawdzićstan techniczny elektronarzędzia poprzez oględziny zewnętrzne i ocenę:
korpusu i rękojeści, przewodu elektrycznego z wtyczkąi odgiętką, działania włącznika elektrycznego, drożności szczelin wentyla-
cyjnych, iskrzenia szczotek, głośności pracy łożysk i przekładni, rozruchu i równomierności pracy. W okresie gwarancji użytkownik
nie może domontowaćelektronarzędzi, ani wymieniaćżadnych podzespołów lub części składowych, gdyżpowoduje to utratę
praw gwarancyjnych. Wszelkie nieprawidłowości obserwowane przy przeglądzie, lub w czasie pracy, sąsygnałem do przeprowa-
dzenia naprawy w punkcie serwisowym. Po zakończeniu pracy, obudowę, szczeliny wentylacyjne, przełączniki, rękojeść dodatko-
wąi osłony należy oczyścićnp. strumieniem powietrza (o ciśnieniu nie większym niż0,3 MPa), pędzlem lub suchąszmatkąbez
użycia środków chemicznych i płynów czyszczących. Narzędzia i uchwyty oczyścićsuchączystąszmatą.

12
GB
ORIGINAL INSTRUCTIONS
PROPERTIES OF THE TOOL
The manual hammer drill is an ordinary electric tool, insulation Class II, which has been designed for drilling and hammering in
concrete, natural and artificial stone, marble, etc., using working tools with an SDS Plus chuck system. The hammer drill permits
continuous adjustments of rotation of the spindle and by deactivation of the hammering action it permits drilling in such materials
as: wood, metal or plastics. The tool has been designed solely for household use. It is prohibited to use it for professional and
lucrative purposes. A correct, reliable and safe operation of the tool depends on its correct use, so:
Read the operating manual thoroughly before work and keep it for future reference.
The supplier shall not be held responsible for any damage occurred as a result of failure to observe safety regulations and
indications contained in this manual.
ACCESSORIES
The package provided by the manufacturer should contain (II):
- hammer drill
- SDS Plus chisel
- SDS Plus puncher
- SDS Plus drills
- additional handle
- drilling depth limiting device
- protection of the drilling chuck
TECHNICAL PARAMETERS
Parameter Unit of measurements Value
Catalogue number 79053
Nominal voltage [V] ~230
Nominal frequency [Hz] 50
Nominal power [W] 800
Nominal rotation [min-1] 0 - 1000
Maximum hole diameter (concrete) [mm] 24
Mass [kg] 2,9
Level of noise
- acoustic pressure LpA ± K [dB(A)] 89,4 ± 3,0
- power LwA ± K [dB(A)] 100,4 ± 3,0
Level of vibration (main handle / additional handle) [m/s2] 14,936 ± 1,5 / 14,898 ± 1,5
Class of insulation II
Grade of protection IP20
GENERAL SAFETY CONDITIONS
NOTE! Get acquainted with all the instructions below. Failure to observe them may lead to an electric shock, fire or injuries. The
notion of electric tool used in the instructions applies to all the tools which are powered with electric current, both wire tools and
wireless ones.
OBSERVE THE FOLLOWING INSTRUCTIONS
Place of work
The place of work must be properly illuminated and clean. Disorder and poor illumination may be a cause of accidents.
Do not work with electric tools in explosive environments, or those which contain inflammable liquids, gases or vapours.
Electric tools generate sparks, which may cause a fire in case of contact with inflammable gases or vapours.
Do not allow children and outsiders to the place of work. A lack of concentration may result in a loss of control over the tool.
Electric safety
The plug of the power supply cable must fit the mains socket. Do not modify the plug. Do not use any adapters whatsoever
in order to adapt the plug to the socket. Unmodified plug which fits the socket reduces the risk of an electric shock.
Avoid contact with grounded surfaces, such as pipes, heaters and refrigerators. Grounding of the body increases the risk
of an electric shock.

13
GB
ORIGINAL INSTRUCTIONS
Do not expose electric tools to precipitation or humidity. Water and humidity which gets into the electric tool increases the
risk of an electric shock.
Do not overload the power supply cable. Do not use the power supply cable in order to carry the tool or to connect and
disconnect the plug from the mains socket. Avoid contact of the power supply cable with heat, oils, sharp tools and
moving elements. Damage to the power supply cable increases the risk of an electric shock.
In case work is realised outside closed areas, it is necessary to use extension cords designed for applications outside
closed areas. Using a correct extension cord permits to reduce the risk of an electric shock.
If operating a power tool in a damp location is unavoidable, use a residual current device (RDC) protected supply. Use of
an RCD reduces the risk of electric shock.
Personal safety
Commence work in good physical and psychological conditions. Pay attention to what you do. Do not work if you are
tired or under effects of medicines or alcohol. Even a moment’s inattention during work may lead to serious injuries.
Always use individual means of protection. Always wear goggles. Using individual means of protection, such as dust-masks,
protective shoes, helmets and hearing protections permits to reduce the risk of serious injuries.
Avoid accidental activation of the tool. Make sure the switch is in the OFF position, before you connect the tool to the
mains. Holding the tool with a finger on the switch or connecting an electric tool when the switch is in the ON position may lead
to serious injuries.
Before you turn an electric tool on remove all the spanners and other tools, which have been used for adjustments. A
spanner left on rotating elements of the tool may lead to serious injuries.
Keep your balance. Maintain an appropriate position. It will permit to control the electric tool in case of unpredicted situations
during its operation.
Use protective clothes. Do not wear loose clothes or jewellery. Keep your hair, clothes and gloves away from moving
elements of the electric tool. Loose clothes, jewellery or long hair may get caught on moving elements of the tool.
Use dust extractors or dust containers, if the tool is equipped with any. Make sure they are properly connected. Using of
dust extractors permits to reduce the risk of serious injuries.
Operation of the electric tool
Do not overload the electric tool. Use a proper tool for the given purpose. A correct selection of the tool for the given work
will result in a more efficient and safer work.
Do not use the electric tool if the switch is not functioning properly. A tool which may not be controlled by means of a switch
is dangerous and must be repaired.
Disconnect the plug from the mains socket before any adjustment, replacement of accessories or storage of the tool. It
will permit to avoid accidental activation of the electric tool.
Store the tool away from children. Do not allow untrained persons to operate the tool. An electric tool may be dangerous
in hands of an untrained person.
Make sure the tool is properly maintained. Check the tool in order to detects any unfitting or loose moving elements.
Check whether the elements of the tool are not damaged. In case any damaged elements of the tool are detected, they
must be repaired before the electric tool is operated. Many accidents are caused by improper maintenance of tools.
Cutting tools must be sharp and clean. Properly maintained cutting tools are easier to control during work.
Use electric tools and accessories in accordance with the aforementioned instructions. Use the tool in accordance with
its purpose, taking into account the kind and conditions of work. Should the tool be used for other applications than the ones
it has been designed for, the risk of a dangerous situation increases.
Repairs
The tool may be repaired only by authorised service centres, which must use solely original spare parts. It will guarantee
a proper level of safety of operation of the electric tool.
ADDITIONAL SAFETY CONDITIONS
Wear ear protectors. Exposure to noise can cause hearing loss.
Use auxiliary handles supplied with the tool. Loss of control can cause personal injury.
Use anti-dust mask. Use of the anti-dust mask reduces the risk of the personal injury.
During the work, hold power tool by insulated gripping surface, because inserted tool may contact with hidden “live”
wire. Cutting a “live” wire may make exposed metal parts of the power tool “live” and could give the operator an electric shock.
INSTALLATION OF THE ACCESSORIES
ATTENTION! Installation of the accessories must be carried out when the power supply voltage is disconnected. Remove the plug
of the cord of the tool from the mains socket!

14
GB
ORIGINAL INSTRUCTIONS
Installation of the additional handle (III)
Install the additional handle in the desired position and tighten it, turning the grip of the handle.
Installation of the drilling depth-limiting device (IV)
If the hammer drill is equipped with a drilling depth-limiting device, it may be installed on the additional handle.
Depending on the installation system the limiting device should be inserted into the hole in the additional handle, and once the
right position has been determined, it should be fastened with a button, handwheel or turning the additional handle.
PREPARATION FOR WORK
Before work may commence, it is necessary to make sure the enclosure and the cord with plug are not damaged. In case any
damage is detected, it is prohibited to continue working!
Attention! All actions consisting in replacement of the working tools (drill and cutter with the SDS Plus chuck system), installation
of guards and guides, adjustments etc. must be carried out when the power supply voltage is disconnected: Remove the plug of
the cord of the tool from the mains socket!
Installation of SDS Plus working tools in the tool chuck
Clean the selected tool of dirt and rust and lubricate The SDS Plus chuck with a thin layer of grease.
Tool the tool chuck towards you and maintain it in this position (V).
Insert a clean tool in the opening. If necessary, turn the tool, so that it enters the chuck without resistance.
Release the chuck; the tool should lock automatically in the chuck.
Make sure the tool is securely installed, trying to remove it from the SDS-Plus chuck. If the drill or the cutter can be removed from
the chuck, the installation procedure must be repeated.
Setting the direction of the rotation (VII)
Set the rotation switch in accordance with the arrows; right rotation – the arrow pointing to the front of the tool, left rotation – the
arrow pointing to the back of the tool.
Attention! The direction of the rotation of the tool may be changed only if the power supply voltage is off!
Selection of kind of operation (VI)
The hammer action operation facilitates drilling in concrete, walls and hard ceramic materials (hard bricks, stones, marble). The
hammer action selector must be set to hammer action indicated with a symbol of a drill and a hammer.
While drilling in other materials, the hammer action function must be deactivated, setting the selector to the drill symbol.
It is also possible to set the hammering function. In this mode rotation is stopped, but the hammer action is still on.
In order to do so, set the operating mode selector to the hammer symbol.
Preparation
Select adequate tools and install them in the chuck.
Set the operating mode selector to the adequate position: hammer symbol – hammering; hammer and drill symbol – drilling with
hammer action; drill symbol – drilling without hammer action; hammer with an arrow – setting the position of the position of the
chisel.
Wear hearing and eyes protection, and protective gloves.
Plug the cord to the mains.
Adapt a position that guarantees equilibrium, grab the hammer drill with both hands and start it pressing the electric switch (VIII).
Hold the tool for a couple of minutes, so that the lubricant reaches all the elements of the drive mechanism.
Turn the hammer drill off, releasing the switch.
Attention! In case any suspicious sounds are detected the hammer drill must be immediately disconnected from the mains. Have
it inspected by an authorised service point.
USING THE TOOL
Attention! While operating the hammer drill, it is required to use hearing protection!
Right or left rotation
Right rotation should be used while drilling with common right turn drill. Left rotation must be used if the right turn drill is jammed
in the material.
Using the switch lock
It is recommended to use the switch lock in case of long drilling, e.g. in case of drilling in concrete, walls, etc. While the switch

15
GB
ORIGINAL INSTRUCTIONS
is pressed, press the lock button with your thumb and release the switch. In order to release the lock, it is sufficient to press the
electric switch.
Drilling in wood
Before drilling, it is recommended to fix the material to be processed with a clamp or in an anvil, and then using a punch or a nail
mark the place of drilling. Install the drill in the chuck, set the speed, connect the drill to the mains and start drilling. In case of
drilling through the material, it is recommended to place a wooden pad under the material, so that the edge of the hole at the outlet
will be smooth. In case of drilling large diameter holes, it is recommended to drill first a smaller guide hole.
Drilling in metals
It is always necessary to fix the material to be processed securely. In case of thin sheet metal, it is recommended to place a piece
of wood under it, so as to avoid any deformations. Then mark the places of drilling using a punch and start drilling. Use drills for
steel. In case of drilling in white cast iron, it is recommended to use drills with sintered carbide bits. While drilling larger holes, it is
recommended to drill first a smaller guide hole. While drilling steel, cool the drill with machine oil. In case of drilling in aluminium,
use turpentine oil or paraffin to cool the drill. In case of drilling in brass, copper or cast iron do not use any substances to cool the
drill. In order to cool it, is required to remove it frequently from the material.
Drilling in ceramic materials
Drilling in hard and compact materials: concrete, hard bricks, stone, marble etc.
While the hammer drill is disconnected from the mains, install a drill in the chuck.
If necessary, install the drilling depth-limiting device.
Set the operating mode selector to drilling with hammer action, or if it is available, to drilling without hammer action.
Plug the tool to the mains, turn the hammer drill on with the switch and start work.
During work make regular breaks – avoid overheating of the hammer drill and the tool.
Drilling with hammer action is recommended only in case of compact ceramic materials: concrete, hard bricks, stone etc. In case
of drilling holes of large diameter, it is recommended to drill first a smaller guide hole, and then use a drill of the final diameter. Use
drills designed for hammer action drilling.
It is not recommended to use the hammer action function in case of ceramic materials of loose structure, such as: glaze, soft
bricks, plaster, etc. Hammer action drilling in such materials may damage the material.
The hammer drill is equipped with a clutch that prevents overloading of the electric motor in case when the tool is jammed during
work, for example as a result of hitting a reinforcement wire. In such cases the drill will stop rotating, although the electric motor
is still working.
Also excessive pressure exerted on the tool during work may cause activation of the clutch.
In such cases remove the tool from the hole, make sure the hammer drill is functioning correctly and then resume work, applying
only the pressure which is necessary for proper operation. In case a reinforcement rod or another hidden metal obstacle is hit,
drill it using the hammer action function and a drill for metal of the same diameter as the hammer action drill, and then continue
drilling in the ceramic material.
Drilling in glaze, soft brick, plaster, etc.
Drill as in case of hard materials, but without hammer action. From time to time remove the drill from the hole, in order to remove
dust and debris. While drilling press the tool with constant strength.
Adjustments of the angle of the chisel
Certain hammering tools require adjustments to a certain angle, in order to guarantee a safe and ergonomic operation, for
example chisels and cutters. It is possible to use for this purpose an adequate operating mode selector. Install the tool in the
chuck in accordance with the recommendations indicated in the manual. Set the selector to the hammer symbol with an arrow,
and then press the switch. The tool will start to rotate in accordance with the selected direction of rotation. Release the switch,
once the tool has reached the required position. Set the operating mode selector to the hammering position – hammer symbol,
and then start work.
Hammering
While the tool is disconnected from the mains install the required tool in the chuck: cutter or punch.
Set the operating mode selector to the hammering position. Plug the drill to the mains, turn the hammer drill on with the switch,
wait until it has reached the full speed and start work.
During hammering, do not drive the tool too much into the material to be processed. Hack the material off in thin layers, not
exerting excessive pressure on the hammer drill.
Carving holes
The drill may be used to carve larger holes in wood, using special drills of fixed diameter or interchangeable bits from the saw set
– jig-saws. In order to obtain smooth edges of the outlet of the hole, place a piece of wood under the material.

16
GB
ORIGINAL INSTRUCTIONS
Using attachments
Drills with adjustable direction of rotation should not be used with attachments.
Protection of the drilling chuck
If the hammer drill is equipped with a rubber protection of the chuck, then it is recommended to use it in case of drilling with the
drill pointing up, e.g. for drilling in ceilings. Once the drill has been installed in the chuck, place the protection on it. Dust and debris
generated during drilling will accumulate in the protection, which permits to keep the chuck clean. Once work has ended, remove
the protection from the drill, remove dust and debris from the protection, and then rinse it under lukewarm water.
Additional remarks
During work do not exert excessive pressure on the material to be processed and do not make abrupt movements, so as not
to damage the tool and the drill. Make regular breaks during work. Avoid overloading the tool. The temperature of the external
surfaces must not exceed 60OC. Once work has been finished, turn the drill off, unplug it from the mains and proceed to
maintenance and inspection.
The declared total value of vibrations has been determined by means of a standard method and it may be used for comparative
purposes. The declared total value of vibrations may be applied in the preliminary assessment of exposure.
Attention! The emission of vibrations during work with the tool may differ from the declared value, depending on the use of the
tool.
Attention! It is required to determine safety means to protect the operator, which are based on assessment of exposure under
real operating conditions (including the whole working cycle, as for example the time when the tool is of or idling, and the time of
activation).
Lubrication
Before each use of drills or cutters they must be thoroughly cleaned and the SDS Plus chuck must be lubricated with a thin layer
of grease. It is recommended to use grease designed for the SDS Plus chucks. In case of incorrect operation of the hammer
action mechanism, one of the reasons may be incorrect lubrication of the gear and the crank assembly of the hammer action
piston. It is recommended to use grease designed for toothed and crank gears. It is recommended to have grease refilled in an
authorised service point.
MAINTENANCE AND OVERHAUL
ATTENTION! Before any adjustment, technical service or maintenance operations unplug the tool. Once the operations have been
finished, the technical conditions of the tool must be assessed by means of external evaluation and inspection of the following
elements: body and handle, conductor with a plug and deflection, functioning of the electric switch, patency of ventilation slots,
sparking of brushes, noise level of functioning of bearings and gears, start-up and smoothness of operation. During the guarantee
period, the user cannot dismantle the electric tools or change any sub-assemblies or elements, since it will cancel any guarantee
rights. All irregularities detected at overhaul or during functioning of the tools are a signal to have the tool repaired at a service
shop. Once the functioning has been concluded, the casing, ventilation slots, switches, additional handle and protections must be
cleansed with a stream of air (at a pressure not exceeding 0.3 MPa), with a brush or a cloth without any chemical substances or
cleaning liquids. Tools and handles must be cleansed with a clean cloth.

17
ORIGINALANLEITUNG
D
MERKMALE DES WERKZEUGES
Handschlagbohrmaschine mit Hammerfunktion ist ein einfaches Werkzeug der zweiten Isolationsklasse zur Ausführung von Öff-
nungen in Beton, Naturstein, künstlichen Gestein, Marmor mittels Arbeitswerkzeugen mit dem SDS Plus Griff. Eine einwandfreie
und sichere Funktion des Elektrowerkzeuges hängt von der vorschriftsmäßigen Bedienung deshalb:
Vor dem Arbeitsbeginn die Bedienungsanweisung durchlesen und aufbewahren.
Der Lieferant trägt keine Verantwortlichkeit für Schaden, welche durch Nichtbeachtung der Sicherheitsvorschriften und Anwei-
sungen der vorliegenden Bedienungsanleitung entstanden sind.
ZUBEHÖR
In der Originalverpackung sind enthalten:
- Handschlagbohrmaschine
- Meißel SDS Plus
- Dorn SDS Plus
- Bohrer SDS Plus
- Zusatzhandgriff
- Handgriff-Gummischutz SDS Plus
- Anschlagstab für die Begrenzung der Bohrtiefe
TECHNISCHE PARAMETR
Parameter Maßeinheit Größe
Katalognummer 79053
Nennspannung [V] ~230
Nennfrequenz [Hz] 50
Nennleistung [W] 800
Nenndrehzahl [min-1] 0 - 1000
Max. Bohrungsdurchmesser (Beton) [mm] 24
Masse [kg] 2,9
Geräuschpegel
- Geräuschdruck [dB(A)] 89,4 ± 3,0
- Leistung LwA [dB(A)] 100,4 ± 3,0
Isolationsklasse II
Schwingungspegel [m/s2] 14,936 ± 1,5 / 14,898 ± 1,5
Schutzart IP20
ALLGEMEINE SICHERHEITSBEDINGUNGEN
ACHTUNG! Die nachstehenden Anweisungen durchlesen. Die Nichteinhaltung der nachstehenden Anweisungen kann einen
elektrischen Schlag, Brand oder Körperverletzungen führen. Der Begriff „Elektrowerkzeug” bezieht sich auf alle mit dem elek-
trischen Strom angetriebenen Werkzeuge sowohl mit der Netzleitung als auch ohne Netzleitung.
DIE NACHSTEHENDEN ANWEISUNGEN EINHALTEN!
Arbeitsplatz
Der Arbeitsplatz soll gut beleuchtet sein und In der Sauberkeit gehalten werden. Das Durcheinander und nicht ausreichende
Beleuchtung können Arbeitsunfälle verursachen.
Die Elektrowerkzeuge dürfen in der Umgebung mit erhöhter Explosionsgefahr, oder brennbaren Flüssigkeiten Gasen
oder Dunste nicht verwendet werden. Die Elektrowerkzeuge erzeugen Funken, die in Berührung mit brennbaren Gasen oder
Dunsten Brand verursachen können.
Kindern und unbefugte Personen fern von dem Arbeitsplatz halten. Die Konzentrationsschwäche kann zum Verlieren des
Beherrschens über dem Werkzeug führen.
Elektrische Sicherheit
Leitungsstecker muss an die Netzsteckdose passen. Der Stecker darf nicht modifiziert werden. Keine Adapter zur An-
passung des Leitungssteckers an die Netzsteckdose verwenden. Der nicht modifizierte Leitungsstecker, der genau an die
Netzsteckdose passt vermindert die Gefahr des elektrischen Schlages.
Den Kontakt mit geerdeten Flächen wie Rohre, Heizkörper, Kühlschränke vermeiden. Die Körpererdung erhöht das Ri-

18 ORIGINALANLEITUNG
D
siko des elektrischen Schlages. Die Elektrowerkzeuge dürfen dem Einfluss von atmosphärischen Niederschlägen oder
Der Feuchtigkeit nicht ausgesetzt werden. Wasser und Feuchtigkeit, die in das Innere des Elektrowerkzeuges eindringen,
erhöhen die Gefahr des elektrischen Schlages.
Den Netzkabel nicht überlasten. Die Netzkabel nicht zum Tragen, Abschalten und Einschalten des Leitungssteckers zum
Netzsteckdose verwenden. Den Kontakt des Leitungskabels mit der Wärme, Öl, scharfen Kanten und beweglichen Teilen
vermeiden. Beschädigung des Leitungskabels erhöht die Gefahr des elektrischen Schlages.
Be idem Einsatz außerhalb der geschlossener Räumen sollen für Außen geeignete Verlängerungsschnüre verwendet
werden. Die Verwendung der geeigneten Verlängerungsschnüre vermindert die Gefahr des elektrischen Schlages.
In dem Fall, wenn der Einsatz des Elektrowerkzeuges in einem feuchten Umfeld unvermeidlich ist, dann muss man als
Schutz vor der Spannung der Stromversorgung ein Differentialstromgerät (RCD) verwenden. Die Anwendung des RCD
verringert das Risiko eines elektrischen Stromschlags.
Personensicherheit
Dei Arbeit soll bei guter körperlicher und geistlicher Verfassung ausgeführt werden. Immer darauf achten was gemacht
wird. Die Arbeit darf nicht bei der Ermündung oder unter Einfluss von Alkohol oder Medikamenten ausgeführt werden.
Sogar eine momentane Unaufmerksamkeit während der Arbeit kann zu ernsthaften Körperverletzungen führen.
Die persönlichen Schutzmittel verwenden. Immer die Schutzbrille tragen. Die Verwendung von persönlichen Schutzmitteln
wie Staubmasken, Schutzschuhe, Helme und Gehörschutz vermindern die Gefahr der ernsthaften Körperverletzungen.
Das zufällige Einschalten des Elektrowerkzeuges vermeiden. Bitte prüfen ob der Schalter in der Stellung „AUS” steht
bevor das Elektrowerkzeug an das elektrische Netz angeschlossen wird. Das Halten der Finger auf dem Schalter oder
Anschluss des Elektrowerkzeuges bei dem eingeschalteten Schalter kann zu ernsthaften Körperverletzungen führen.
Vor Einschalten des Elektrowerkzeuges sollen alle Schlüssel und Werkzeuge entfernt werden, die zur Einstellung ver-
wendet worden waren. Der an den beweglichen Teilen des Werkzeuges hintergelassene Schlüssel kann ernsthafte Körperver-
letzungen herbeiführen.
Gleichgewicht halten. Durch die ganze Zeit entsprechende Arbeitsstellung einnehmen. Dadurch lässt sich das Elektrowerk-
zeug in den unerwarteten Notfällen bei der Arbeit leichter beherrschen.
Schutzkleidung tragen. Keine lose Kleidung oder Schmuck tragen. Haare, Kleidung und Arbeitshandschuhe fern von
den beweglichen Teilen des Elektrowerkzeuges halten. Lose Kleidung, Schmuck oder lange Haare können an die bewegliche
Teile des Elektrowerkzeuges anhaken.
Staubabsaugung oder Staubbehälter verwenden falls das Werkzeug damit ausgestattet wird. Bitte sorgen Sie dafür
damit sie sachgemäß angeschlossen sind. Verwendung der Staubabsaugung vermindert die Gefahr der ernsthaften Körper-
verletzungen.
Verwendung des Elektrowerkzeuges
Das Elektrowerkzeug nicht überlasten. Das zur ausführende Aufgabe geeignete Werkzeug verwenden. Entsprechende
Auswahl des Werkzeuges gewährleistet eine leistungsfähige und sichere Arbeit.
Das Werkzeug darf nicht verwendet werden, falls der Netzschalter nicht funktioniert. Das Werkzug, welches sich mit dem
Schalter nicht kontrollieren lässt, ist gefährlich und soll zur Reparatur geliefert werden.
Den Leitungsstecker von der Netzsteckdose herausziehen wenn das Werkzeug eingestellt oder Zubehör ausgetauscht
bzw. das Werkzeug aufbewahrt wird. Dadurch wird das zufällige Einschalten des Elektrowerkzeuges vermieden.
Das Elektrowerkzeug vor den Zutritt von Kindern schützen. Die bei der Bedienung des Werkzeuges nicht eingeschulten
Personen dürfen das Werkzeug nicht verwenden. Das Elektrowerkzeug kann in den Händen der nicht geschulten Personen
gefährlich sein.
Entsprechende Instandhaltung des Werkzeuges gewährleisten. Das Werkzeug auf nicht eingepasste Teile und Spiele
der beweglichen Teile prüfen. Bitte überprüfen, ob irgendein Bestandteil des Werkzeuges nicht beschädigt ist. Die Stö-
rungen sollen vor dem Einsatz des Werkzeugen beseitigt werden. Viele Unfälle sind durch nicht sachgemäße Instandhaltung
des Werkzeuges verursacht.
Schneidewerkzeugen sollten sauber und geschärft sein. Sachgemäß geschärfte Schneidenwerkzeuge lassen sich besser
während der Arbeit kontrollieren.
Dei Elektrowerkzeuge und Zubehör gemäß der vorstehenden Anweisungen benutzen. Die Werkzeuge entsprechend der
Aufgabe und die Arbeitsbedingungen einsetzen. Die nicht bestimmungsgemäße Verwendung des Werkzeuges kann das
Risiko der Gefahren erhöhen.
Instandsetzungen
Die Werkzeuge sollen nur in den autorisierten Werkstätten bei der Verwendung der Originalersatzteile repariert werden.
Dadurch wird die entsprechende Arbeitssicherheit des Elektrowerkzeuges gewährleistet.
ZUSÄTZLICHE SICHERHEITSHINWEISE
Während der Arbeit mit der Schlagbohrmaschine sind Ohrenschützer anzulegen. Die ständige Lärmbelastung kann zu
einem Gehörverlust führen.

19
ORIGINALANLEITUNG
D
Das Werkzeug ist mit einem zusätzlichen Haltegriff zu benutzen, der mit dem Werkzeug angeliefert wird. Der Verlust der
Kontrolle über das Werkzeug kann persönliche Verletzungen des Bedieners hervorrufen.
Ebenso sind Staubschutzmasken zu verwenden. Der Gebrauch von Staubschutzmasken verringert das Risiko von ernsthaften
Körperverletzungen.
Während der Ausführung der Arbeiten, bei denen das eingesetzte Werkzeug sich mit einer verdeckten Leitung unter
Spannung berühren kann, ist das Elektrowerkzeug an den isolierten Griffen zu halten. Das eingesetzte Werkzeug kann bei
Kontakt mit einer spannungführenden Leitung bewirken, dass im Ergebniss dessen die Metallelemente unter Spannung stehen,
was wiederum zu einem elektrischen Stromschlag des Werkzeugbedieners führen kann.
MONTAGE DER AUSRÜSTUNGSELEMENTE
HINWEIS! Die Montage der Ausrüstung darf nur bei abgetrennter Stromversorgungsspannung erfolgen. Der Stecker der An-
schlussleitung des Werkzeuges ist aus der Netzsteckdose zu ziehen!
Montage des zusätzlichen Handgriffes (III)
Den zusätzlichen Handgriff in die gewünschte Lage bringen und ihn zusammendrücken, wobei der Handgriff des Futters ange-
schraubt wird.
Montage des Begrenzers der Bohrtiefe (IV)
Wenn sich bei der Ausrüstung des Bohrhammers ein Begrenzer der Bohrtiefe befindet, kann man ihn an den zusätzlichen Hand-
griff befestigen.
In Abhängigkeit von der Art der Befestigung muss man den Begrenzer in das Loch im Zusatzgriff schieben und nach Ermittlung
der richtigen Lage und mit Hilfe einer Taste, Stellrades oder durch Anschrauben des Zusatzgriffes befestigen.
BETRIEBSVORBEREITUNG
Vor Arbeitsbeginn muss man überprüfen, ob das Gehäuse und die Anschlussleitung mit Stecker nicht beschädigt sind. Beim
Feststellen von Beschädigungen ist der weitere Funktionsbetrieb verboten.
Hinweis! Alle Tätigkeiten im Zusammenhang mit dem Wechsel der Arbeitswerkzeuge (Bohrer und Bohrmeißel mit dem Schaft
SDS Plus), der Montage von Abdeckungen und Führungen, mit der Regelung usw. müssen bei ausgeschalteter Spannung der
Stromversorgung f+r das Werkzeug durchgeführt werden. Deshalb gilt vor Aufnahme dieser Tätigkeiten: Den Stecker der Lei-
tung des Werkzeuges aus der Netzsteckdose ziehen!
Einlegen der Arbeitswerkzeuge SDS Plus in das Werkzeugfutter
Das ausgewählte Werkzeug von Schmutz und Rost reinigen und das Futter SDS Plus mit einer dünnen Schmiermittelschicht
einreiben. Ziehen Sie das Werkzeugfutter zu Ihnen und halten Sie es in dieser Position (V).
Das gereinigte Werkzeug in die Öffnung legen. Bei Bedarf das Werkzeug verdrehen, bis es ohne Widerstand in das Futter geht.
Das Futter loslassen, das Werkzeug sollte sich automatisch im Futter blockieren.
Prüfen Sie jetzt, ob das Werkzeug im Futter fest sitzt. Zu diesem Zweck reicht es aus, wenn man probiert, das Werkzeug aus
dem Futter SDS Plus herauszuziehen. Sollte der Bohrer oder der Bohrmeißel sich aus dem Futter schieben, dann muss man die
Montagetätigkeiten wiederholen.
Einstellen der Drehrichtung (VII)
Den Drehrichtungsschalter entsprechend den Pfeilen einstellen, Drehungen nach rechts – der Pfeil ist zum vorderen Teil des
Werkzeuges gerichtet, Drehungen nach links – Pfeil ist nach hinten gerichtet.
Hinweis! Eine Drehrichtungsänderung darf nur bei abgetrennter Spannung der Stromversorgung erfolgen.
Einstellen der Betriebsart (VI)
Die Betriebsfunktion mit Stoß bzw. Schlag erleichtert das Bohren im Beton, Mauer und harten keramischen Materialien (harte Zie-
gel, Steine, Marmor). Zu diesem Zweck stellt man den Schalter für mit oder ohne Schlag auf den Betrieb mit Schlag, d.h. auf das
Symbol Bohrer und Hammer, ein. Dagegen ist beim Bohren in andere Materialien die Funktion Bohren mit Schlag auszuschalten
und den Schalter auf die Position Bohren ohne Schlag, d.h. auf das Symbol des Bohrers, zu stellen.
Möglich ist auch die Einstellung der Schmiedefunktion. In dieser Betriebsart bleiben die Umdrehungen abgeschaltet und der Stoß
bzw. Schlag bleibt in Funktion.
Zu diesem Zweck muss man den Schalter für die Betriebsart auf die Position des Schmiedens, das Symbol des Hammers,
stellen.
Vorbereitende Tätigkeiten
Die richtigen Arbeitswerkzeuge auswählen und sie im Werkzeugfutter montieren.
Den Schalter für die Betriebsart in die entsprechende Stellung bringen: Symbol des Hammers – Schmieden; Symbol des Hammers

20 ORIGINALANLEITUNG
D
und Bohrers – Schlagbohren; Symbol des Bohrers – Bohren ohne Schlag; Hammer mit Pfeil – Einstellen der Meißelstellung.
Gehör- und Augenschutz anlegen, Arbeitshandschuhe tragen.
Leitungsstecker in die Netzsteckdose stecken.
Eine Position einnehmen, die das Halten des Gleichgewichts garantiert, beidhändig den Bohrhammer ergreifen und in Betrieb
nehmen, in dem man mit dem Finger den Elektroschalter betätigt (VIII).
Das Werkzeug ist in diesem Zustand einige Minuten zu halten, damit das Schmiermittel in alle Elemente der Antriebsmechanik
gelangt.
Durch die Freigabe des Schalters wird der Bohrhammer ausgeschaltet.
Hinweis! Treten verdächtige Quietsch- und Knackgeräusche usw. auf, ist der Bohrhammer sofort auszuschalten, vom Netz zu
trennen und zur Durchsicht an einen berechtigten Servicebetrieb zu übergeben.
NUTZUNG DES WERKZEUGES
HINWEIS! Während der Nutzung des Bohrhammers müssen Gehörschutzmittel getragen werden!
Verwendungt der rechten oder linken Drehrichtung
Die Rechtsdrehungen verwendet man beim Bohren mit den allgemein üblichen rechtsdrehenden Bohrern. Die Linksdrehungen
dagegen in dem Fall, wenn der rechtsdrehende Bohrer sich im Material verklemmt hat.
Anwendung der Schalterblockade
Die Schalterblockade wird beim lange andauernden Bohren empfohlen, zum Beispiel beim Bohren im Beton, Mauer usw. Zu
diesem Zweck drückt man bei eingedrücktem Schalter mit dem Daumen die Taste für die Blockade und lässt den Schalter los. Zur
erneuten Freigabe der Blockade reicht es aus, den Elektroschalter zu betätigen.
Bohren in Holz
Vor dem Bohren wird empfohlen, das zu bearbeitende Material mit Schraubzwingen oder im Schraubstock zu befestigen und
anschließend mit einem Körner oder Nagel den Punkt der Bohrung zu kennzeichnen. Im Bohrfutter ist dann der entsprechende
Bohrer zu montieren, die Geschwindigkeit festzulegen, die Bohrmaschine an das Elektronetz anzuschließen und mit dem Bohren
zu beginnen. Beim Realisieren von Durchgangsbohrungen wird empfohlen, unter das Material eine Holzunterlage zu legen, wo-
durch die Kante der Bohrung beim Austritt nicht gerissen wird. Beim Ausführen von Bohrungen mit großem
Durchmesser ist es ratsam, vorher erst ein kleineres Führungsloch zu bohren.
Bohren im Metall
Das zu bohrende Material muss man immer sicher befestigen. Bei einem dünnen Blech ist es außerdem ratsam, einen Holzklotz
unterzulegen, um so unerwünschte Verbiegungen usw. zu vermeiden. Danach muss man die Stelle der Bohrung mit einem
Körner kennzeichnen und mit dem Bohren beginnen, wobei Metallbohrer zu verwenden sind. Beim Bohren in Weißguss wird die
Verwendung von Bohrern mit Spitzen aus Karbidlegierung empfohlen. Beim Bohren von größeren Bohrungen ist immer ist immer
das Vorbohren eines Führungsloches mit kleinerem Durchmesser ratsam. Bohrt man in Stahl, muss zum Kühlen des Bohrers
Maschinenöl verwendet werden. Bei Aluminium verwendet man dagegen als Kühlmittel Terpentin oder Parafin. Bohrt man in
Messing, Kupfer oder Gusseisen sind keine Kühlmittel einzusetzen. Um hierbei zu kühlen nimmt man den Bohrer öfter aus dem
Material, um ihm das Abkühlen zu ermöglichen.
Bohren in Keramikmaterial
Bohren im harten, kompakten Material, wie: Beton, Hartziegel, Stein, Marmor usw.
Der Bohrer ist im Werkzeugfutter zu montieren, wenn der Bohrhammer vom Elektronetz abgetrennt ist.
Im Bedarfsfall kann man einen Begrenzer der Bohrtiefe montieren.
Mit dem Schalter für die Betriebsart wählt man das Schlagbohren oder, wenn es zugänglich ist, das Bohren ohne Schlag.
Den Stecker in die Netzsteckdose stecken, mit dem Schalter den Bohrhammer einschalten und mit der Arbeit beginnen. Während
der Arbeit sind regelmäßige Pausen einzuhalten – ein übermäßiges Erhitzen des Bohrhammers und des Werkzeuges darf nicht
zugelassen werden.
Das Schlagbohren wird nur bei kompakten keramischen Materialien empfohlen, wie z.B. Beton. Hartziegel, Stein usw. Bei den
Bohrung mit großem Durchmesser ist eine Vorbohrung mit kleinerem Durchmesser und danach mit einem Bohrer des zielgerich-
teten Durchmessers ratsam. Weiterhin muss man auch spezielle Bohrer zum Schlagbohren verwenden.
Das Schlagbohren wird bei Keramikmaterialien mit losen Strukturen, z.B. wie Glasur, Weichziegel, Putz usw., nicht empfohlen.
Das Schlagbohren kann bei solchen Materialien zur Zerstörung führen.
Der Bohrhammer ist mit einer Kupplung ausgerüstet, die einer Überlastung des Elektromotors vorbeugt, und zwar in dem Fall,
wenn das eingesetzte Werkzeug im Ergebnis der Arbeit angehalten wird, z.B. dann, wenn man auf einen Bewehrungsstab trifft. In
solch einem Fall dreht sich der Bohrer nicht weiter, obwohl der Elektromotor weiterhin in Funktion ist.
Auch wenn bei der Arbeit ein zu großer Druck ausgeübt wird, kann es zum Ansprechen der Kupplung kommen. In solch einem
Table of contents