Stirling Black Edition MD 18610 User manual

INSTRUCTION MANUAL
AFTER SALES SUPPORT
AUS 1300 884 987
www.medion.com.au
Overlock Sewing Machine
Model Number MD 18610
MODEL: MD 18610 PRODUCT CODE: 701495 09/2020
1 2 3 4 5 6
7
8
9
10
11
12
13
14
15
16
17
18
19
20
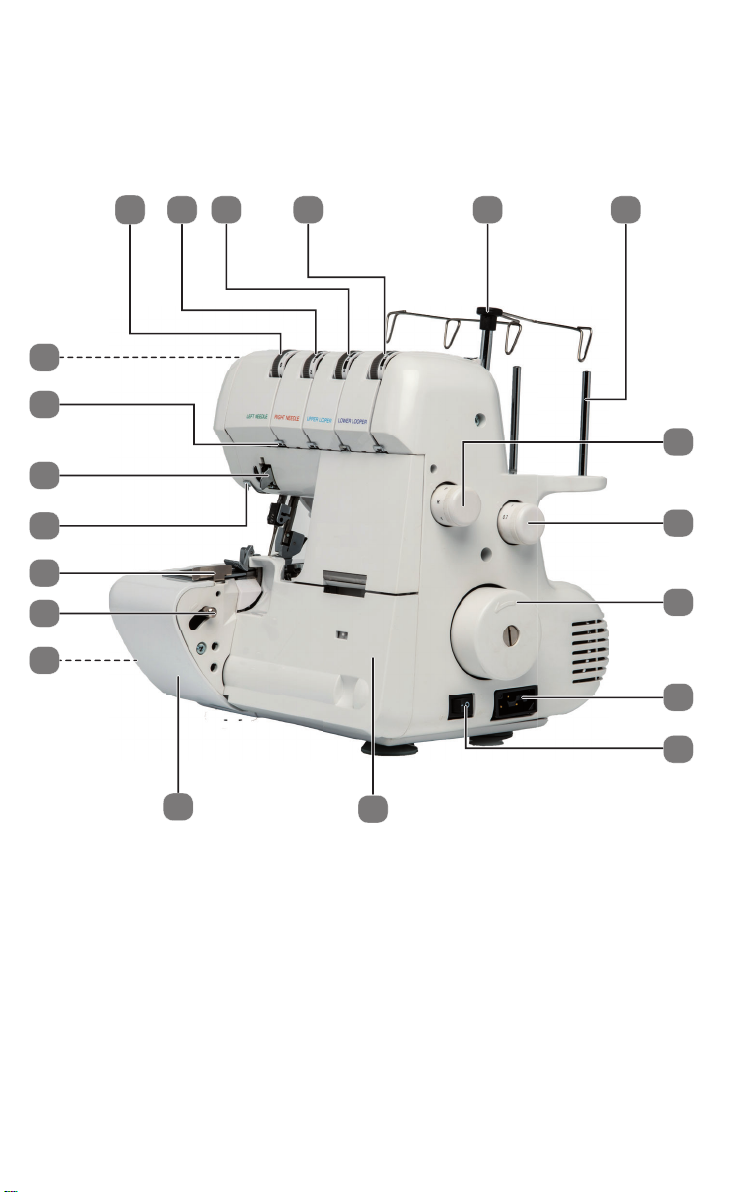
Main components

Main components
1) Thread tension dial – left needle (A)
2) Thread tension dial – right needle (B)
3) Thread tension dial – upper looper (C)
4) Thread tension dial – lower looper (D)
5) Telescopic thread guide bar
6) Spool pin
7) Stitch length dial
8) Differential feed dial
9) Hand wheel
10) Socket for foot control
11) On/Offswitch
12) Front cover
13) Free arm
14) Cutting width adjustment knob (left-hand side of machine)
15) Lever for opening free arm
16) Edge guide
17) Cord guide for filler cord/decorative yarn
18) Thread guides for needle threads
19) Upper thread guide
20) Presser foot pressure adjustment dial (rear of machine)

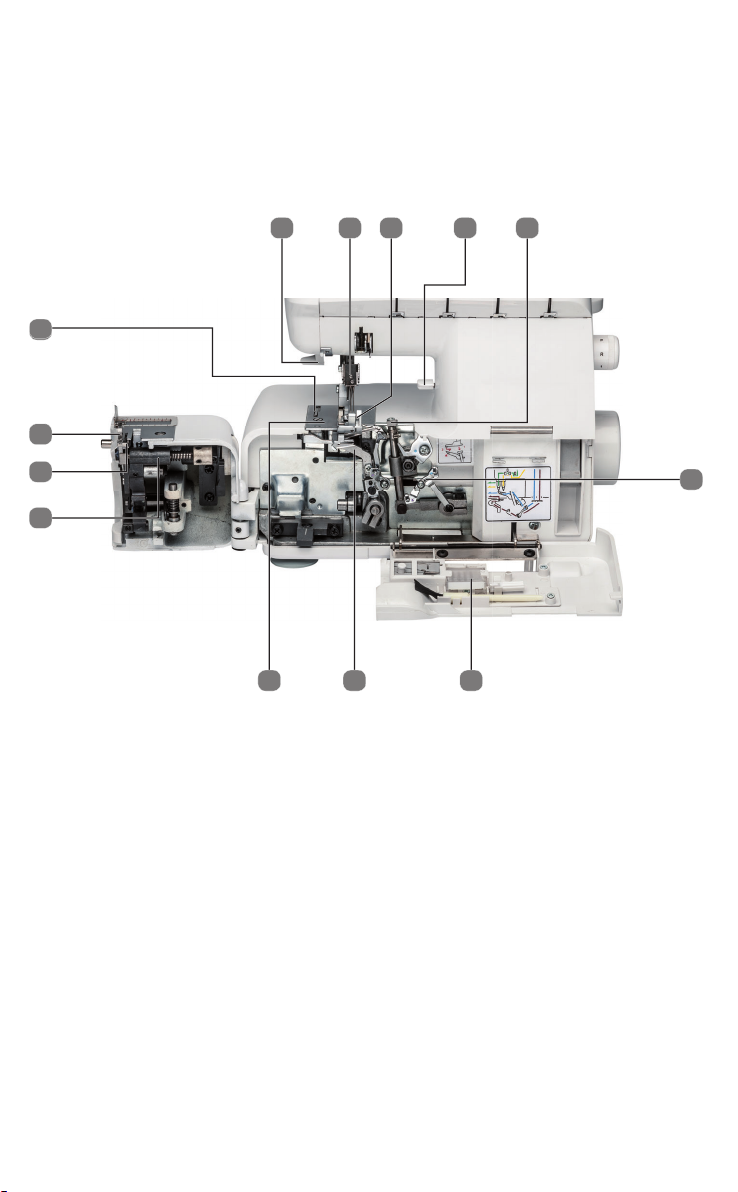
Sewing mechanism
21) Lever for lifting presser foot
22) Needles
23) Presser foot
24) Lever for thread cutter
25) Upper looper
26) Lower thread guide
27) Accessory compartment
28) Lower looper
29) Needle plate
30) Knife mounting
31) Lower knife
32) Upper knife
33) Thread cutter
22
32
23
33
24 25
26
272829
30
21
31
Sewing mechanism
Table of contents


