manuals.online logo
Brands
  1. Home
  2. •
  3. Brands
  4. •
  5. StoneAge
  6. •
  7. Indoor Fireplace
  8. •
  9. StoneAge Patio Series User manual

StoneAge Patio Series User manual

Once the kit is assembled, finish application may begin. Any masonry-compatible finish, such as stucco, tile, brick, man-made stone, pavers or
natural stone, may be used with all Stone Age products, and may be applied directly to the outside of the units. Customization is very simple, as
standard concrete block may be directly applied around any unit to create a different shape or profile, before application of the finish material.
Step 7
Install rear throat piece
Step 8
Add front throat piece
Step 9
Install chimney
Step 1
Build base from block
(optional)
Step 2
Install baseplate
Step 3
Add 1st sidewalls
Step 4
Add 2nd level of walls
Step 5
Install backplate
Stone Age recommends using our Multi-Purpose
Ready-Mix for the assembly of all Stone Age products.
Minimum
Requirements
for Footing
24” 36” 48”
Thinner Finishes-
Fabricated Stone,
Stucco, Stain or Tile
A
B
C
4” - 6”
Varies
40”
6” - 8”
By
52”
8” - 10”
Project
64”
Thicker Finishes-
Full Veneer Natural
Stone or Brick
A
B
C
8” - 12”
Varies
46”
12” - 18”
By
58”
18” - 24”
Project
70”
Patio Series
Fireplaces
Steps for Construction:
Installation of the Stone Age Contractor Series fireplace is very simple.
Project and site preparation should include pouring a reinforced concrete
footing for the unit. Depth of the footing and specific reinforcement
requirements, such as piering, should be determined based on size of the unit,
type of finish material to be applied, local soil stability, climate and building
customs. Use the chart at right as a minimum guideline.
1) Determine the desired height of the firebox floor. Use concrete block to
build the base to place the firebox at the desired height above the finished
grade or the footing.
2) Once the base is level and square, set the baseplate #2. Level it front to
back and side to side. Next, if using firebrick, install pieces #3 through #4 in
order shown in the images. If using Stone Age Refractory Panels, install them
before pieces #3 through #4. Keep each piece level and plumb as you go up.
3) It is the easiest to install the firebrick inside the firebox AFTER piece #4 and
before piece #8. Line the floor, then the back and then sidewalls. Apply ¼”
thick layer cement to the back of brick and ¼” mortar joint around the brick.
NOTE: add extra cement to mixture when applying brick and add water to
thin down mixture. You want your cement richer and wetter when applying
firebrick. If using Stone Age Multi-Purpose Ready-Mix, it is not necessary to
add water to the mix.
4) Continue installation of pieces #8 thru #9A. (Note: 48” units require #11
throat adapter, which mounts atop #8). You are now ready for the installation
of a custom hearth if desired, and to begin exterior finishing.
5) IMPORTANT NOTE: Unit should not be fired for 28 days after
completion, to allow full curing of mortar and to release moisture within the
fireplace components. Break in or cure the fireplace by building 3 small fires
before building a larger fire.
Front
Side
A
B
C
Reinforced
Footing with
Piers
2 3 3
3 3
4
8
8
9A
9A
Step 6
Install firebrick
(optional)
Notes:
Do not install within 8 feet of combustible materials.
Firebrick or Refractory Panels are not required, but may be installed if desired.
Fireplace may be installed on a raised base of concrete block.
No more than 4 feet of additional chimney should be added to fireplace kit.
Installation of a chimney cap is strongly recommended.
Note: Concrete block
for base not included
Part # / Name 24” PS 36” PS 48” PS
#2 Baseplate 34”w x 33”d 46”w x 33”d 58”w x 33”d
#3 Sidewall 11”t x 33”d 11”t x 33”d 11”t x 33”d
#4 Backplate 22½”t x 28”w 22½”t x 40”w 22½”t x 52”w
#8 Throat 19”Sq at top x16”t 23”Sq at top x16”t 23”d x 30”w x 16”t
#9A Flue 19”Sq x 6”t 23”Sq x 6”t 23”Sq x 6”t
#11 Throat Adapter N/A N/A 23”d x 30”w x 4”t
Outside Dimensions & Specifications
Firebox Outside Depth 33”d 33”d 33”d
Firebox Opening Height Straight: 23”t Straight: 23”t Straight: 23”t
Overall Height 54” 54” 58”
Overall Weight 1100 lbs 1500 lbs 1900 lbs
Finishing Specifications 49 Sq ft of surface, including
22 Ln ft of corners
71 Sq ft of surface, including
22 Ln ft of corners
94 Sq ft of surface, including
22 Ln ft of corners
Abbreviations: t = tall d = depth - from front to back sq = square w = width - from side to side
Recommended
Optional Items
Refractory Panel Kit
SAPS0212
©2011, Stone Age Manufacturing, Inc. 11107 E. 126th St. N., Collinsville, OK 74021 877-371-8861 www.stoneagemanufacturing.com
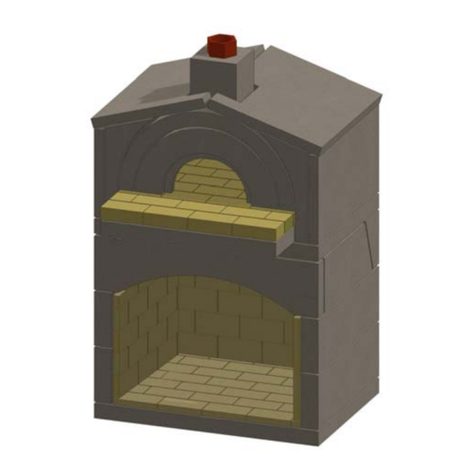
Construction Diagram Assembled Kit
Log Grate
Chimney Cap
Multi-Purpose Ready-Mix
Firebrick

Other manuals for Patio Series

1

Other StoneAge Indoor Fireplace manuals

StoneAge Mezzo SA-MPO-VFC User manual

StoneAge

StoneAge Mezzo SA-MPO-VFC User manual

StoneAge NA60IND User manual

StoneAge

StoneAge NA60IND User manual

StoneAge NA72IND User manual

StoneAge

StoneAge NA72IND User manual

StoneAge NA48IND User manual

StoneAge

StoneAge NA48IND User manual

StoneAge SA 24 User manual

StoneAge

StoneAge SA 24 User manual

StoneAge NA42IND User manual

StoneAge

StoneAge NA42IND User manual

StoneAge NA 24 User manual

StoneAge

StoneAge NA 24 User manual

StoneAge NA36IND Owner's manual

StoneAge

StoneAge NA36IND Owner's manual

Popular Indoor Fireplace manuals by other brands

Firenzo REAR OUTLET RU manual

Firenzo

Firenzo REAR OUTLET RU manual

Desa Wood Burning Fireplace owner's guide

Desa

Desa Wood Burning Fireplace owner's guide

Valor LEGEND G3 739JN Installation & owner's manual

Valor

Valor LEGEND G3 739JN Installation & owner's manual

Dimplex BLF74 owner's manual

Dimplex

Dimplex BLF74 owner's manual

Kratki.pl Foxtrot manual

Kratki.pl

Kratki.pl Foxtrot manual

Contura C 556 Installation instruction

Contura

Contura C 556 Installation instruction

Desa (V)V36N-B SERIES OWNER'S OPERATION AND INSTALLATION MANUAL

Desa

Desa (V)V36N-B SERIES OWNER'S OPERATION AND INSTALLATION MANUAL

Living Flame Aura Installation & operating instructions

Living Flame

Living Flame Aura Installation & operating instructions

Wildfire RAVEL 1500 User instructions

Wildfire

Wildfire RAVEL 1500 User instructions

kozy heat Slayton 42S Installation and operation manual

kozy heat

kozy heat Slayton 42S Installation and operation manual

Amantii ZECL-31-3228-STL Installation and operation instructions

Amantii

Amantii ZECL-31-3228-STL Installation and operation instructions

Monessen Hearth LO-Rider Designer Vent Free Fireboxes LSTF36 Installation and operating instructions

Monessen Hearth

Monessen Hearth LO-Rider Designer Vent Free Fireboxes LSTF36 Installation and operating instructions

Robinson Willey RIVIERA RS Installation & servicing instructions

Robinson Willey

Robinson Willey RIVIERA RS Installation & servicing instructions

Desa Comfort Glow LFP33NRA OWNER'S OPERATION AND INSTALLATION MANUAL

Desa

Desa Comfort Glow LFP33NRA OWNER'S OPERATION AND INSTALLATION MANUAL

Regency Greenfire GF1500NG Owners & installation manual

Regency

Regency Greenfire GF1500NG Owners & installation manual

Les foyers DON-BAR Fireplaces 9000 Installation, operation and maintenance manual

Les foyers DON-BAR Fireplaces

Les foyers DON-BAR Fireplaces 9000 Installation, operation and maintenance manual

Beper RI.503 use instructions

Beper

Beper RI.503 use instructions

Riello Burners MB8SE Installation, use and maintenance instructions

Riello Burners

Riello Burners MB8SE Installation, use and maintenance instructions

manuals.online logo
manuals.online logoBrands
  • About & Mission
  • Contact us
  • Privacy Policy
  • Terms and Conditions

Copyright 2025 Manuals.Online. All Rights Reserved.