6
FR
Nous vous remercions
de la confiance dont vous témoignez envers STOCH. Avec cet achat vous avez opté pour un produit de
qualité. Si vous avez malgré tout des suggestions pour l‘amélioration ou si vous deviez rencontrer un problème, nous
sommes avec plaisir à votre disposition.
Dans ce cas, contactez votre représentant, ou directement notre service clients, s‘il s‘agit d‘un problème urgent.
Salutations dévouées
SAV STORCH
Tél.: +49 (0) 2 02 . 49 20 - 112
Fax: +49 (0)2 02 . 49 20 - 111
Ligne d‘assistance SAV gratuite: +49 800 7 86 72 47
Service gratuit de commande par téléphone: +49 800. 7 86 72 44
Fax de commande gratuit: +49 800. 7 86 72 43
(uniquement en Allemagne)
Traduction des instructions d‘origine
Sommaire Page
Fournitures 6
Domaine d'application et fonction 6
Montage sur le Wamab 6
Montage sur le séparateur ColorFree top 7
Nettoyage de rouleaux de peinture 7
Pièces de rechange 7
Garantie 7
Montage sur le Wamab et
le séparateur ColorFree top
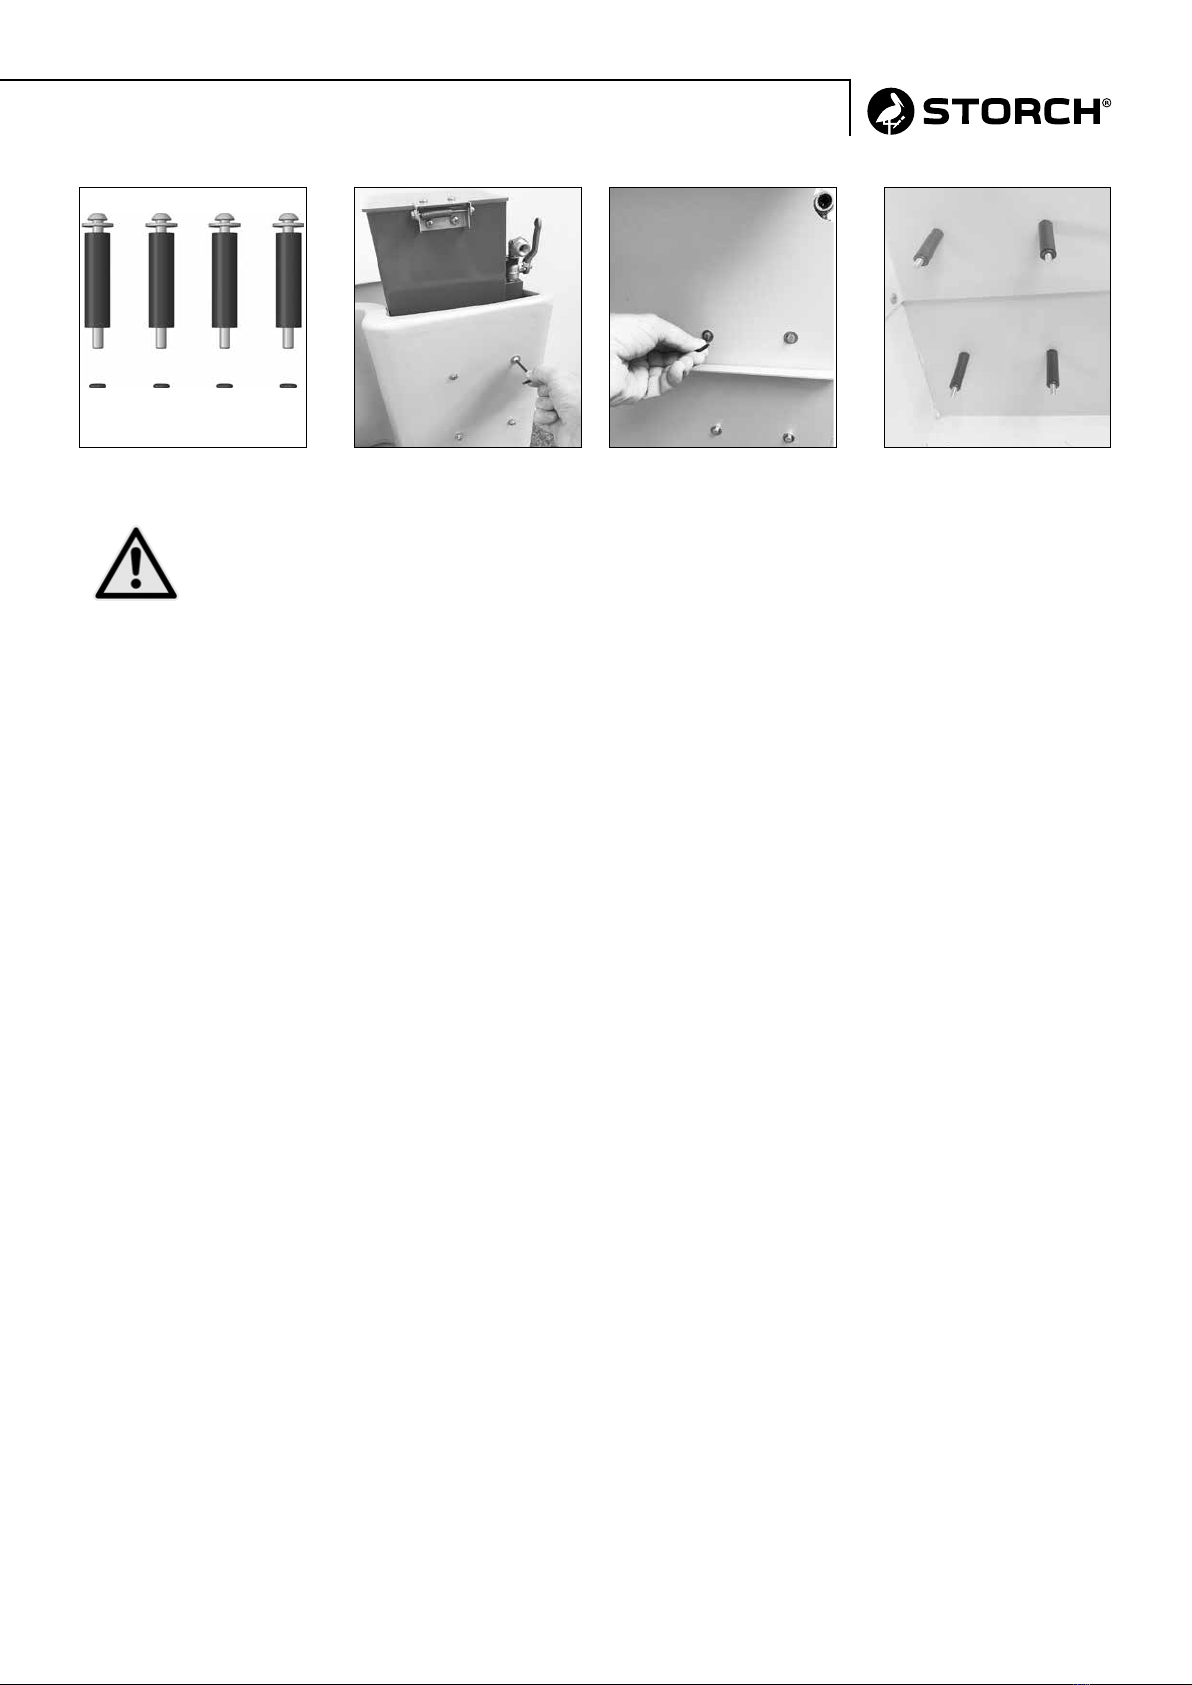
1.
Insérer la rondelle sur les vis de montage.
2.
Introduire ensuite les vis de montage par l'extérieur dans
les trous sur la paroi arrière du lavabo, puis glisser les
douilles d'écartement par la face intérieure du lavabo
sur les vis, suivies de respectivement un joint torique sur
chaque vis, à l'arrière de la douille d'écartement.
3.
Placer ensuite le Turbo-Wash sur les vis avec les douilles
d'écartement et le xer avec les vis aux douilles leté-
es prévues à cet effet, avant de serrer les vis de manière
homogène (clé Allen de 3 mm).
Fournitures
Turbo-Wash avec raccord fileté 1/2“, 2 x tuyau de raccor-
dement avec écrou-raccord 1/2“*, raccord de tuyau mâle
1/2“*, 4 x joints plats pour le tuyau*, kit de raccorde-
ment pour Wamab et ColorFree top avec respectivement
4 x vis M 5 x 60*, douille de montage*, rondelle*, joint
torique*.
* 61 71 00
Domaine d'application et fonction
Le nettoyeur de rouleaux de peinture est destiné au net-
toyage des rouleaux de peinture et au branchement à
l'alimentation en eau ou à la pompe de charge, réf. art.
61 70 75 pour le séparateur ColorFree top. Le rouleau de
peinture est entraîné par la pression d'eau et commence à
tourner. La rotation chasse la peinture rincée et l'eau de
lavage du rouleau, qui s'écoulent e-nsuite par le bas du
Turbo-Wash.
4.
Relier l'alimentation d'eau ou la pompe de charge au Tur-
bo-Wash avec le tuyau de raccordement fourni.
Veiller à insérer respectivement un joint pas dans un écrou
raccord du tuyau de raccordement.
5.
Contrôler ensuite si les raccords effectués sont étanches
en ouvrant la conduite d'arrivée d'eau et en ouvrant et
fermant le robinet à boisseau sphérique du Turbo-Wash.
Veiller au letage du raccord.
6.
Le Turbo-Wash réf. art. 19 52 00 est un appareil xe et
est positionné dans les bacs de lavage respectifs, puis rac-
cordé à l‘alimentation en eau ou à la pompe de charge réf.
art. 61 70 75.
* Pour Turbo-Wash réf. art. 61 71 00
ATTENTION : le rouleau de peinture doit
toujours être raclé avant le processus de lava-
ge et le produit collecté dans l'emballage.
Cela permet d'économiser du temps et de
l'eau.