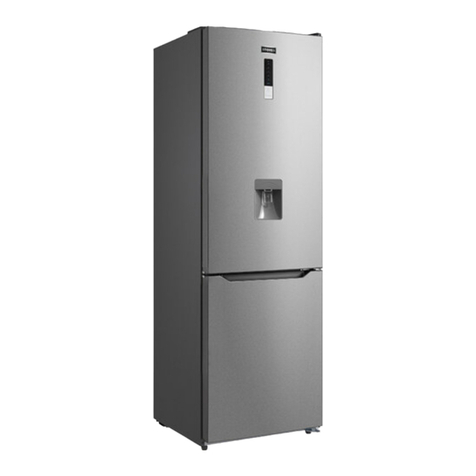
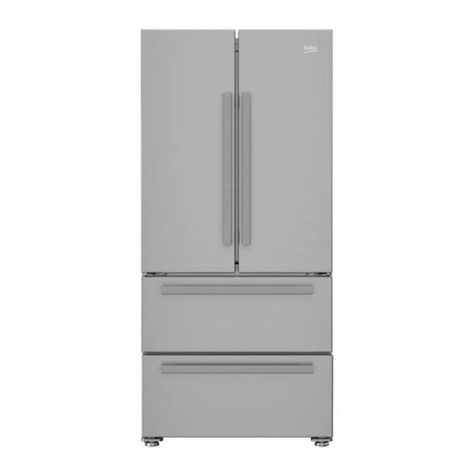
STOVES FD90B User manual

St o v e s F D 9 0 B
St o v e s F D 9 0 S S
User Manual
08xxxx
Stoves Customer Care
Please keep this handbook in a safe place.
Please fill in the model number
and serial number in the spaces provided below as they will assist us should you
need to call.
0844 815 3740
When you dial this number you will hear a recorded message and be given a
number of options. This indicates that your call has been accepted and is being
held in a queue. Calls are answered in strict rotation as our Customer Care
Representatives become available.
Enter appliance numbers here for future reference:
These numbers can be found on your appliances.
Outside the UK and Northern Ireland, refer to your local supplier.
Stoney Lane, Prescot, Merseyside, L35 2XW
Model No
Serial No

R600a

Do not splash water onto the appliance. Keep it away from places of high humidity
that may have adverse effect on the electric insulation performance.

Product description
Left door for refrigerator compartment
Upper door for freezer compartment
Lower door for freezer compartment
Right door for refrigerator compartment
Manual ice maker
Ice scoop
Partition plate for lower freezer drawer
Partition plate for upper freezer drawer
Upper freezer drawer
Lower freezer drawer
8
9
10
11
12
13
1
Left door for refrigerator compartment
Cantilever rack
Turnover beam
Sliding cantilever rack
Fruit and vegetable drawer
Small drawer
Big drawer
Drawer handle
Leveling leg
Switch for refrigerator compartment lamp
Top lamp for refrigerator compartment
Right door for refrigerator compartment
Butter box
Air duct cover plate
Folded cantilever rack
Side lamp for refrigerator compartment
Gallon bottle rack (With egg bracket)
Special-shaped bottle rack
Top lamp for freezer compartment
Upper door for freezer compartment
Lower door for freezer compartment
Decorative cover for bottom beam
2
3
8
9
10
4
5
6
7
11
12
13
14
19
20
21
15
16
17
18
22
6
8
9
10
11
12
13
Refrigerator body
1
2
3
4
5
6
7
8
9
10
11
1Display
Door handle
Drawer handle
2
3
4
5
6
7
05
1
2
3
4
5
7
14
16
12
13
15
17
18
19
20
21
22
0406

This product runs on an electricity
supply of 220-240V 50Hz and
must be earthed.
600a

This appliance
This appliance is intended to be used
in households but is not intended
to be used in applications such as:
– Staff kitchen areas in shops, offices
and other working environments;
– Farm houses and by clients in hotels,
motels and other residential
type environments;
– Bed and breakfast type environmen
-ts;
– Catering and similar non-retail
applications.

Freezer compartment
The temperature in the freezer
compartment is very low so it could
preserve the freshness of food for
long. Those that shall be stored for
long could be put in this compartment
but not exceed the storage period
specified on the packaging of each
You can take out the drawers of the
freezer compartment to increase its
capacity and store more food.
Food suggested to store in freezer
1. The upper drawer of the freezer
could be used to store fish, meat,
ice-cream and etc.
Taking-out and installation of the
lower freezer drawer
1. Pull out the lower freezer drawer
first.
2. Take out the two fixed screws from
the partition plate of the lower
freezer drawer with screw driver
and then take off the partition plate.
3. Take off the rear stopper for the
lower drawer as shown by Fig. A.
4. Take out the lower drawer body
with force as directed by the arrows
in Fig. B.
5. The installation of the lower drawer
body is conducted in the reverse
order. You should install the lower
drawer body first and then install
the rear stopper for the lower
drawer as shown in Fig. C. Finally,
both sides of the drawer shall be
connected to the position shown by
the arrows respectively.
6. The partition plate is installed into
the corresponding slots and then is
fixed with screws. The position of
the partition plate for the lower
drawer could be adjusted
according to your preference.
Don't remove the lower freezer drawer
if not necessary.
2. Ice storage box is used to store the
ice.
3. The lower drawer of the freezer is
used to store fish, meat and
packaged poultry meat.
11 1412
kind of food.
compartment
Rear stopper for the lower drawer
Partition plate for the
lower drawer
Insert into
the edge
Align with
the slot
Lower drawer body
Align with the slot
Positioning hole for
the partition plate
Food suggested to store in
refrigerator compartment
1. Cooked wheaten food, cans, milk,
2. Snack food, food subject to
tainting, dairy product
3. Cooked cold meat, sausage
5. Eggs, butter, cheese
7. Drinks, other bottled food
etc.
4. Fruit, vegetables
6. Cans, seasoning

13 14
Big drawer
The big drawer has a maximum load
of 10kg.
Pull out and install the big drawer
1. Pull out the big drawer;
2. Find the hook at the left and right
sides at the drawer bottom (shown
in the figure).
3. Hold the hook at two sides with a
nose pliers or tweezers and push it
up and out of the groove of sliding
rail, and take out the hook at the
other side with the same method.
4. Take out the drawer.
5. Install the drawer by putting the
hook into the right place.
Hook
Sliding rail
Big drawer
14
Assembly instructions of cold
storage door handle:
1. Firstly, take the handle set bolts out
from the refrigerator, use cross
recessed screwdriver to set the bolt
on the door. Fix it tight with all the
screw thread twisted through the
hole, as shown in the figure;
2. After the first step is completed,
take the Cold storage door handle
out from the box, place it as per the
direction shown in the figure (Note:
i.e. the direction which both screw
holes on the handle are close to the
edge), and hang the handle above
the set bolt;
3. Use the small hexagon spanner
supplied in the box to set the
handle fixing socket head cap
screws into both the small screwed
holes on the handle. After they are
screwed down, gently shake the
handle, so as to confirm that the
handle is well erected.
Assembly instructions of the
refrigeration door handle:
The assembly steps of the
refrigeration door handle is same with
that of the cold storage door handle.
Please note that: during the assembly
of the handle, the direction of tapping
hole is downward (to the ground).
Door handles
Scheme of installation of
cold storage door handle
Difference between the chilling and refrigeration
handle: lie them flat, the one with higher chordal
height is the refrigeration handle
Cold storage door handle
Refrigeration door handle
80
61
Inner socket head cap
screw for handle fixing
Chilling chamber
door handle
Inner socket head cap
screw for handle fixing
Bolt
Bolt

15 16
Remember a level refrigerator is necessary for getting the doors perfectly even.
If you need help, review the previous section on leveling the refrigerator.
When the left doors is lower than the right door(left). Or the right doors is lower
than the left door.
Making minor adjustments between doors
Do as follows
1) Raise the left door or the right door.
2) Insert the supplied fastener-ring using (2) using a pair of pliers (3) in the gap
between the hinge-grommet (1) and the lower hinge (4)The number of fasten-
rings you will need to insert depends on the gap.
1
2
3
4
Control buttons
1Temperature control
“∧”
2
Super cool mode
3
“∨”
4
Energy saving mode
5
Child Lock
6
Display items
7Refrigerator compartment icon
Fast-cooling icon
8
Fast-freezing icon
9
Refrigerator temperature
15
Freezer temperature
16
Energy-saving icon
10
Locked icon
11
Freezer compartment icon
14
Refrigerator indicate
12
Freezer indicate
13 Off icon: means refrigerator
shut down
17
Initial power-on status
11, 12, 14, 15 and 16 turn on at initial power-up. 8,9, 10, 13 and 17 do not turn on.
Locking and unlocking
In the unlock state (icon 11 does not turns on), push the key 6 to enter the lock state
and icon 11 turns on. In the lock state, push and hold the key 6 for 3 seconds, icon 11
turns off and the lock is cancelled. In the unlock state, in case of no other input of
any pushing after 25 seconds, it enters the lock state automatically.
The below functions can be performed while in the “Unlocked”status.
1
3
5
7 915
17 8
13 11
12 16
2
4
6
Introduction of Your Refrigerator's Functions
10
14

17 18
Introduction of Your Refrigerator's Functions
Energy saving mode
Entry: push the key 5, the icon 10 turns on. Choose the energy-saving mode to
operate the refrigeratory, and the mode operated before will be cancelled.
Exit: ① enter other modes ② push the key 2 or 4 to the set temperature ③ push
the key 5. When each condition mentioned above occurs, the refrigeratory exits
the energy-saving mode.
Fast-cooling mode
Entry: push the key 3, the icon 8 turns on. Choose the quick cooling mode to
operate the refrigerator. If the refrigerator is operating in the energy saving
mode, the energy saving mode exits.
Exit: ① enter the energy saving mode ② push the key 2 or 4 to the set
temperature ③ push the key 3. When each condition mentioned above occurs,
the refrigeratory exits the quick cooling mode.
Fast-freezing mode
Entry: push and hold the key 3 for 3 seconds, the icon 9 turns on. Choose the
quick-freeze mode to operate the freezer. If the freezer is operating in the
energy-saving mode, the energy-saving mode exits.
Exit: ① enter the energy-saving mode ② push the key 2 or 4 ③ push and hold
the key 3 for 3 seconds. When each condition mentioned above occurs, the
quick-freeze mode exits.
To set the temperature of the refrigerator compartment
Push the key 1until the display changes to refrigerator temperature setting.
The icon 124 turns on. Push the key 2 or 4 once, and the refrigerator setting
temperature changes 1℃ according to the regulation of “(8)- (2) -(8)”.
To set the temperature of the freezer compartment
Push the key 1 until the display changes to the freezer temperature setting. The
icon turns on. Push the key 2 or 4 once, and the freezer setting temperature
changes 1℃ according to the regulation of “(-15)- (-24)- (-15)”
Backlight action
When the refrigerator/ freezer door is open or any button is pressed,the
Function Display Screen will become illuminated.If no button is pressed and
the refrigerator/freezer door has remained open for 30 seconds,the Function
Display will turn off.
Cleaning and maintenance
Refrigerator's maintenance and repair
Cleaning
Clean regularly dust from the back of refrigerator and ground.
Clean regularly the space inside the refrigerator to avoid any unpleasant smell.
Before cleaning, pull out the plug and use soft towels and neutral detergent and
clean it finally with clear water. It is recommended to clean once half a year.
Never use following substances to clean the space inside the refrigerator:
Alkaline or weakly alkaline detergent (it might cause cracking of the liner and
plastic parts).
Soap powder, benzoline, thinner, alcohol and etc (might damage plastic parts).
Wipe off edible oil or flavoring immediately (might cause cracking of plastic parts)
Lights and replacement
Replace by professionals.
Refrigerator compartment keep fresh with optical wave (only some models)
Keep fresh with optical wave--- use the optical-wave lamp to maintain the
Photosynthesis of fruit and vegetables, prolong the growth period and keep it
fresh effectively.
Shutdown
When the refrigerator isn't used for a long period:
Pull out the power cable to avoid that the power cable gets old and causes
electric shock or fire.
Clean the space inside the refrigerator
Open the door for a period for drying, close the door with a gap left to avoid
unpleasant odor.
Power outage
Reduce the times of door opening during power outage, don't put fresh food
inside the refrigerator anymore.
Disposal
When you discard an unused refrigerator, remove the door seal to avoid locking
children inside the refrigerator.
Danger
Risk of child entrapment. Before you throw away your old refrigerator or freezer:
1. Take off the doors.
2. Leave the shelves in place so that children may not easily climb inside.

19
Please read the following contents before repair request:
If the situation doesn't turn better after you have checked all above items, please
contact with the after-sales Service Centers. If power cables are damaged, please
get it changed by the repairmen designated by our Service Centers to avoid any
risk.
Normal phenomena not regarded as malfunctioning
Refrigerant inside the capillary tubes of the refrigerator flow in high speed and
might have a few amount of bubbles. Hence, irregular noises might appear at the
outlet.
When the air humidity is excessively high, moisture or water droplets might appear
around the refrigerator's door. You just need to wipe it off.
No extension cord used
Whether the power is switched on, whether
the plug is secured?
Whether the voltage is too low?
Whether the temperature is set too high
(might reduce the temperature as required). ?
Whether too much food is stored?
Whether hot foot is stored?
Whether the door is opened and closed too
frequently?
Whether there is hot source around the
refrigerator?
Whether the door seal is closed?
Whether the ground is leveled and the
refrigerator is placed on leveled ground?
Whether accessories of the refrigerator are
put at the right position?
Whether the food is put near the air outlet?
Not working
Can't freeze properly
Loud noises
Food is frozen inside the
refrigerator compartment.
The refrigerator has unpleasant
smell
Ocurrence Possible cause / inspection itens
Solutions to problems
Food with special odor shall be tightly
wrapped.
Check whether the food has gone bad.
Clean inside the refrigerator.
For Your Safety
20
This manual suits for next models
1
Table of contents
Other STOVES Refrigerator manuals

STOVES
STOVES ST INT70FF User manual

STOVES
STOVES SXS905 SS User manual

STOVES
STOVES ST SXS909WTD Sta User manual

STOVES
STOVES ST NF60189WTDSta User manual

STOVES
STOVES 444444331 User manual

STOVES
STOVES SLA 800 Guide

STOVES
STOVES 444444332 User manual

STOVES
STOVES ST NF60189Sta User manual

STOVES
STOVES ST980SXS User manual

STOVES
STOVES ST SXS909 Whi User manual
Popular Refrigerator manuals by other brands

Miele
Miele KFN 12823 SD edt Operating and installation instructions

Baumatic
Baumatic BR16.2A user manual

Gram
Gram Type K Instructions for use

Dometic
Dometic RM2354 Installation and operating instructions

Frigidaire
Frigidaire GLRT184TC Factory parts catalog

KitchenAid
KitchenAid KURL104EPA Use & care guide