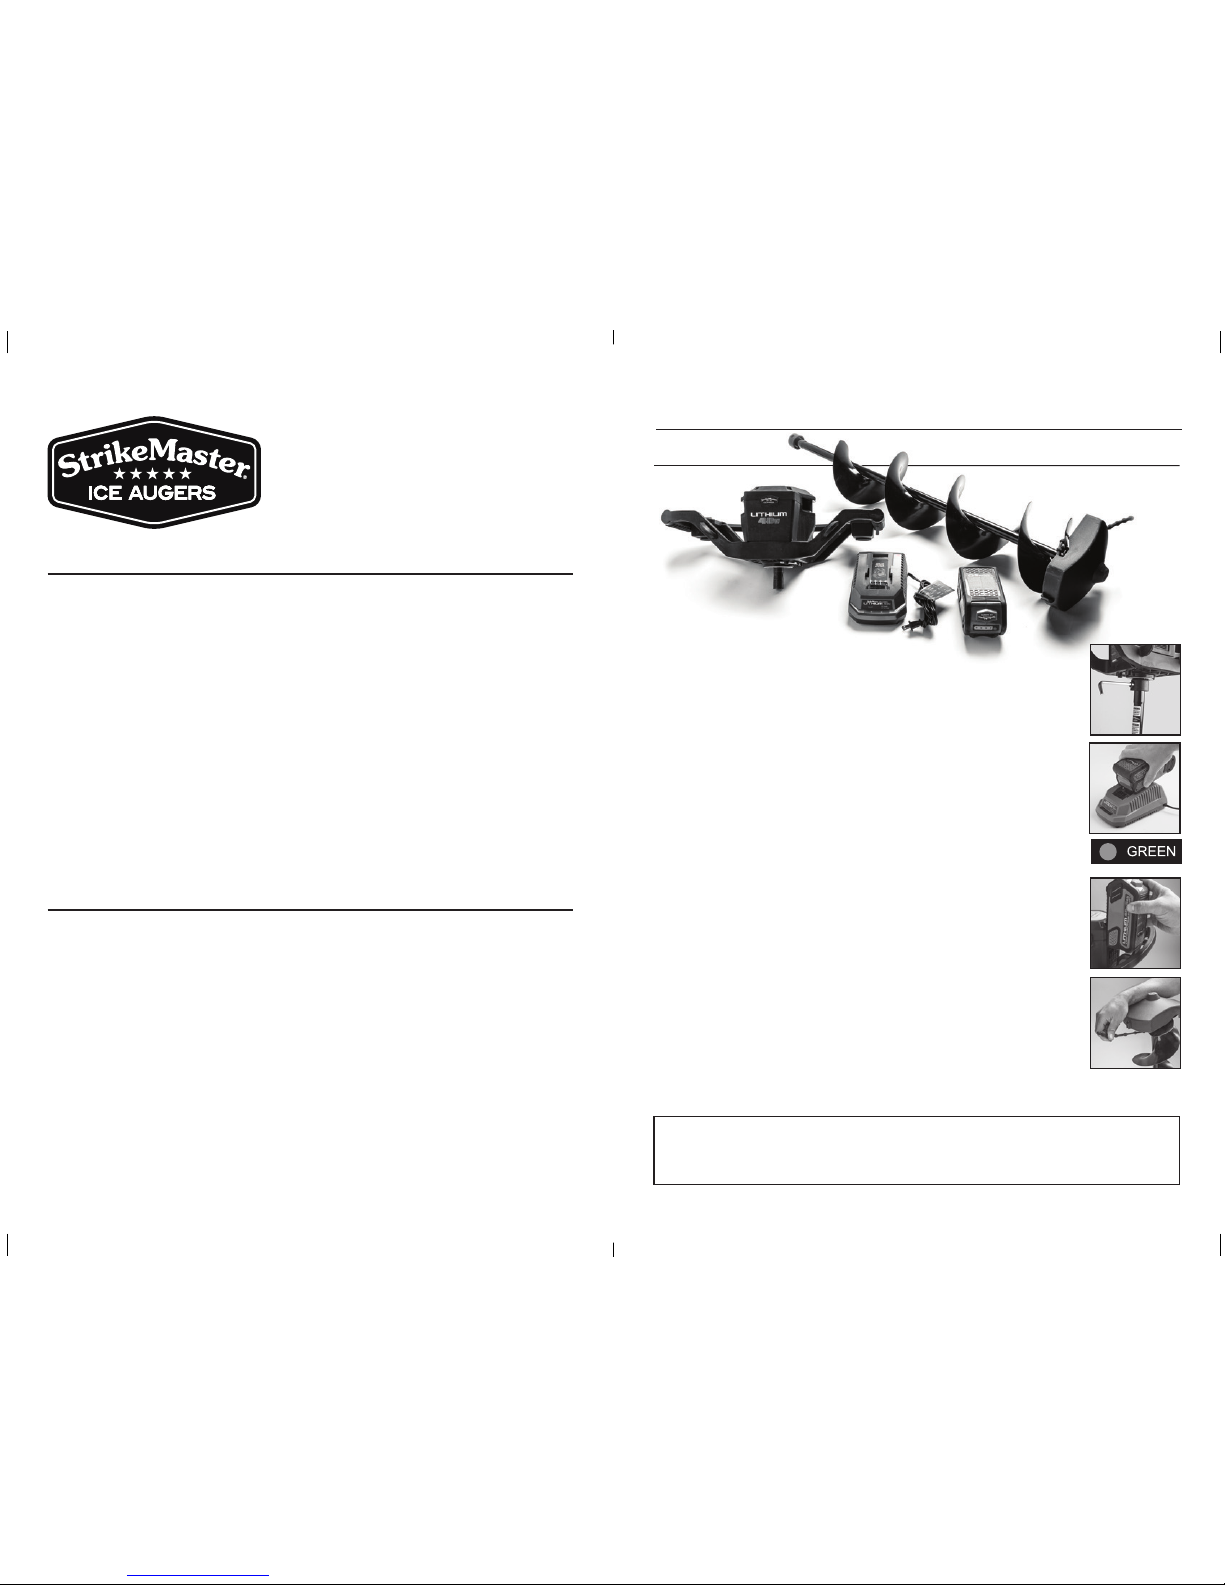
STRIKEMASTER Lithium 40v User manual

OWNER’S MANUAL
LITHIUM ION BATTERY
READ ALL SAFETY RULES AND INSTRUCTIONS CAREFULLY BEFORE OPERATING

STRIKEMASTER®LITHIUM 40v BATTERY CONTENTS
PRODUCT SPECIFICATIONS ........................................................... 01
QUICK START ................................................................................ 02
SAFETY INFORMATION .................................................................. 03
SYMBOLS .................................................................................... 04
KNOW YOUR BATTERY .................................................................. 05
OPERATION ................................................................................. 06
MAINTENANCE ............................................................................. 07
TROUBLESHOOTING ...................................................................... 07
ENVIRONMENTALLY SAFE BATTERY DISPOSAL .................................. 08
PRODUCT SPECIFICATIONS
COMPONENTS
• StrikeMaster Lithium 40v Lithium Ion Battery
• Rating: 36V DC 180Wh 40v Max
• Charge Time: 150 min. using StrikeMaster 40v Charging Base
• Weight: 3.53 lbs., (1.6 kg)
01

STRIKEMASTER®LITHIUM 40v BATTERY
QUICK START
STRIKEMASTER LITHIUM 40v 5 AMP HOUR BATTERY
1. Remove StrikeMaster Lithium 40v Battery from carton (Image 1).
2. Unpack Battery Charging base, slide Battery onto Battery Charging Base using the
channels on both sides as a guide. Press down until you hear it click in place.
Leave Battery on Battery Charging Base until fully charged (Image 2).
NOTE:
Battery is not fully charged when fi rst removed from box.
3. When Battery Charging Base indicator shows green, your Battery is
fully charged (Image 3).
4. Once Battery is fully charged remove from Battery Charging Base. Slide battery onto
Powerhead using the channels on both sides as a guide, pressing down until you
hear it click in place (Image 4).
5. Remove blade cover from bottom of spiral and stow in a safe place (Image 5).
Your StrikeMaster Lithium 40v is ready for use.
BATTERY CARE AND MAINTENANCE
1. Store Battery in a warm, dry location (35°F/ 2°C – 100°F/ 38°C).
2. IN SEASON
a. Keep Battery fully charged.
b. Store on a plugged in Battery Charging Base in a warm, dry location
(35°F/ 2°C – 100°F/ 38°C).
3. OFF SEASON
a. Charge Battery to full.
b. Store Battery in a warm, dry location (35°F/ 2°C – 100°F/ 38°C), off of Battery Charging Base.
c. If Battery is stored for a period longer than 6 months, Battery should be recharged back to full before use.
SAFETY INFORMATION
IMPORTANT SAFETY INSTRUCTIONS
SAVE THESE INSTRUCTIONS DANGER – TO REDUCE THE RISK OF FIRE OR ELECTRIC
SHOCK, CAREFULLY FOLLOW THESE INSTRUCTIONS
Read and understand all instructions before using this product. Failure to follow all instructions
listed below may result in electric shock, fi re, and/or serious personal injury.
W A R N I N G
Read all safety warnings and instructions. Failure to follow the warnings and instructions may result in electric
shock, fi re and/or serious injury.
W A R N I N G
For use only with StrikeMaster Battery Charging Base (LFV-CB). Use of another battery charger may present risk
of fi re or explosion.
• When charging, make sure temperature is between (35°F/2°C – 100°F/38°C)
• Keep Battery out of reach of children.
• Do not use a damp cloth or detergent on the Battery or Battery Charging Base.
• Always remove the Battery before cleaning, inspecting, or performing any maintenance on the tool.
• Have servicing performed by a qualifi ed repair person using only identical replacement parts. This will ensure
that the safety of the product is maintained.
• If the Battery case is cracked or damaged, do not insert into the charger. Replace the Battery.
• Battery powered Augers do not have to be plugged into an electrical outlet; therefore, they are always in
operating condition. Be aware of possible hazards when not using your battery tool or when changing
accessories. Following this rule will reduce the risk of electric shock, fi re, or serious personal injury.
• Do not place the Battery in high-temperature locations, such as near a fi re, heater, etc.
• Do not crush, drop or damage Battery. Do not use a Battery or charger that has been dropped or received a
sharp blow. A damaged battery is subject to explosion.
• Batteries can explode in the presence of a source of ignition, such as a pilot light. To reduce the risk of serious
personal injury, never use any cordless product in the presence of open fl ame. An exploded battery can propel
debris and chemicals. If exposed, fl ush with water immediately.
• Do not charge Battery in a damp or wet location. Following this rule will reduce the risk of electric shock.
• Under extreme usage or temperature conditions, battery leakage may occur. If liquid comes in contact with
your skin, wash immediately with soap and water. If liquid gets into your eyes, fl ush them with clean water for
at least 15 minutes, then seek immediate medical attention. Following this rule will reduce the risk of serious
personal injury.
• Keep Battery dry, clean, and free from oil and grease. Always use a clean cloth when cleaning. Never use
brake fl uids, gasoline, petroleum-based products, or any solvents to clean Battery.
• Dispose of used Battery promptly. Do not disassemble and do not dispose of in fi re.
• Do not use any alternative chemistries such as alkaline, standard (carbonzinc) or rechargeable
(ni-cad, ni-mh, etc.) batteries.
IMAGE 1
EXTREME COLD WEATHER OPERATION
The Lithium-Ion Battery can be used in temperatures down to (-4°F/ -20°C). If your Battery is not performing correctly, put
the Battery on the Powerhead, free spin auger out and above ice for 30 to 90 seconds depending on how cold the unit is (the
colder the unit, the more time to warm up). After this sequence the Battery will warm up and begin operating normally.
NOTE:
Always store Battery in a warm location.
IMAGE 1
02 03
IMAGE 2
IMAGE 3
IMAGE 4
IMAGE 5

04 05
SYMBOLS
The following signal words and meanings are intended to explain the levels of risk associated with this product.
SYMBOL SIGNAL MEANING
DANGER Indicates an imminently hazardous situation, which, if not avoided,
will result in death or serious injury.
WARNING Indicates an potentially hazardous situation, which, if not avoided,
could result in death or serious injury.
CAUTION Indicates an potentially hazardous situation, which, if not avoided,
may result in minor or moderate injury.
CAUTION (Without Safety Alert Symbol) Indicates a situation that may result in
property damage.
Some of the following symbols may be used on this product. Please study them and learn their meaning. Proper
interpretation of these symbols will allow you to operate the product better and safer.
SYMBOL NAME MEANING
V VOLTS Voltage
HzHERTZ Frequency (cycles per second)
W WATTS Power
or d.c. DIRECT CURRENT Type or a characteristic of current.
RPM NO LOAD SPEED Rotational speed at no load.
WET CONDITIONS ALERT Do not expose to rain or use in damp locations.
SAFETY ALERT Indicates a potentially personal injury hazard.
READ OWNER’S MANUAL To reduce risk of injury, user must read and understand owner’s
manual before using this product.
WET CONDITIONS ALERT
KNOW YOUR BATTERY
The safe use of this product requires an understanding of the information on the product and in this operator’s
manual as well as a knowledge of the project you are attempting. Before using this product, familiarize yourself
with all operating features and safety rules.
CAUTION
The battery used in this device may present a fi re or chemical burn if mistreated.
CAUTION
Risk of fi re and burns. DO NOT OPEN, CRUSH, HEAT ABOVE 212°F/100°C or INCINERATE.
Follow manufacturer’s instructions.
CAUTION
When Battery is not in use, keep it away from other metal objects, like paper clips, coins, keys, nails, screws or
other small metal objects that can make a connection from one terminal to another. Shorting the battery terminals
together may cause burns or a fi re.
CAUTION
Under abusive conditions, liquid may be ejected from the battery; avoid contact. If contact accidentally occurs,
fl ush with water. If liquid contacts eyes, additionally seek medical help. Liquid ejected from the battery may cause
irritation or burns.
CAUTION
Do not use a battery that is damaged or modifi ed. Damaged or modifi ed batteries may exhibit unpredictable
behavior resulting in fi re, explosion or risk of injury.
COOLING AIR PORT
BATTERY CONTACTS
RELEASE BUTTON
BATTERY CAPACITY
INDICATOR (BCI)BUTTON
INDICATOR LIGHTS

06 07
OPERATION
CHECKING BATTERY CAPACITY
NOTE
: The battery is not shipped fully charged. It is recommended to fully charge before first use to ensure that
maximum run time can be achieved. This lithium-ion battery will not develop a memory and may be charged
at any time. A fully discharged Battery will require approximately 150 minutes to fully charge from a discharged
state.
Press the Battery Capacity Indicator (BCI) Button. The lights will illuminate according to the batteries capacity level
as shown below.
LIGHTS CAPACITY
4 Green Lights Full Capacity
3 Green Lights 75% Capacity
2 Green Lights 50% Capacity
1 Green Lights 25% Capacity
Requires Charging Soon
Lights Go Out Less than 10% Capacity
Requires Immediate Charging
BATTERY PROTECTION FEATURES
40v lithium-ion batteries are designed with features that protect the lithium-ion cells and maximize
battery life.
CHARGING THE BATTERY
Batteries are shipped in a low charge condition to prevent possible problems. Therefore, you should
charge prior to first use. If the charger does not charge the Battery under normal circumstances, return
both the battery and charger to your nearest Authorized Service Center for electrical check.
•Charge the Battery only with the recommended charger.
•Connect the Charging Base to a power supply.
•For approved power sources, refer to the operator’s manual for the charger.
•Make sure the Battery is secured in the Charging Base before beginning operation.
•Press down on the Battery to be sure contacts on the Battery engage properly with contacts in the
Charging Base.
•The Battery may become slightly warm to the touch while charging. This is normal and does not
indicate a problem.
•Do not place the Charging Base and Battery in an area of extreme heat or cold. They will work
best at normal room temperature.
•When batteries become fully charged, unplug the Charging Base from the power supply and
remove the Battery.
MAINTENANCE
WARNING
To avoid personal injury, always remove the Battery from the Auger when cleaning or performing any maintenance.
WARNING
When servicing use only identical StrikeMaster replacement parts. Use of any other parts may create a hazard or
cause product damage.
GENERAL MAINTENANCE
•Brush or blow dust and debris out of the air vents using compressed air or a vacuum. Keep the air vents free of
obstructions, sawdust, and wood chips. Do not spray, wash, or immerse the air vents in water.
•Wipe off the housing and the plastic components using a dry, soft cloth. Do not use strong solvents or
detergents on the plastic housing or plastic components. Certain household cleaners may cause damage and
may cause a shock hazard.
STORAGE
•Always remove the Battery before storing the Charging Base or any time the Charging Base is unplugged.
•Do not place the Battery in the sun or in extremely warm environment. Keep at normal room temperature.
•If the battery will not be used for 6 months or more, please store the battery in a room temperature environment.
Please fully charge before storage.
WARNING
Do not at any time let brake fluids, gasoline, petroleum-based products, penetrating oils, etc. to come in contact
with plastic parts. Chemicals can damage, weaken or destroy plastic which may result in serious personal injury.
TROUBLESHOOTING
PROBLEM POSSIBLE CAUSE REMEDY/ACTION
The Battery charge is reduced The Battery has automatically Fully recharge the battery before use
after more than one month performed self-maintenance
of non-use to extend its life
BATTERY CAPACITY
INDICATOR (BCI) BUTTON LIGHT METER
EXTREME COLD WEATHER OPERATION
The Lithium-Ion Battery can be used in temperatures down to (-4°F/ -20°C). If your Battery is not performing correctly, put
the Battery on the Powerhead, free spin auger out and above ice for 30 to 90 seconds depending on how cold the unit is (the
colder the unit, the more time to warm up). After this sequence the Battery will warm up and begin operating normally.
NOTE:
Always store Battery in a warm location.

ENVIRONMENTALLY SAFE BATTERY DISPOSAL
The following toxic and corrosive materials are in the batteries used in this Battery:
Lithium Ion, a toxic material.
WARNING
All toxic materials must be disposed of in a specified manner to prevent contamination of the environment. Before
disposing of damaged or worn out Lithium-Ion Batterys, contact your local waste disposal agency, or the local
Environmental Protection Agency for information and specific instructions. Take the batteries to a local recycling
and/or disposal center, certified for lithium-ion disposal.
WARNING
If the Battery cracks or breaks, with or without leaks, do not recharge it and do not use. Dispose of it and replace
with a new Battery. DO NOT ATTEMPT TO REPAIR IT! To avoid injury and risk of fire, explosion, or electric shock,
and to avoid damage to the environment:
•Cover the battery's terminals with heavy-duty adhesive tape.
•DO NOT attempt to remove or destroy any of the Battery components.
•DO NOT attempt to open the Battery.
•If a leak develops, the released electrolytes are corrosive and toxic. DO NOT get the solution in the eyes or on
skin, and do not swallow it.
•DO NOT place these batteries in your regular household trash.
•DO NOT incinerate.
•DO NOT place them where they will become part of any waste landfill or municipal solid waste stream.
•Take them to a certified recycling or disposal center.
2-YEAR LIMITED WARRANTY
BATTERY WARRANTY
StrikeMaster® hereby warranties this product, to the original purchaser with proof of purchase,
for a period of two (2) years against defects in materials, parts or workmanship. Batteries
must be charged in accordance with the operator’s manuals directions and regulations in
order to be valid. StrikeMaster, at its own discretion will repair or replace any and all parts
found to be defective, through normal use, free of charge to the customer. This warranty
is valid only for units which have been used for personal use that have not been hired or
rented for industrial/ commercial use, and that have been maintained in accordance with the
instructions in the owner’s manual supplied with the product from new.
ITEMS NOT COVERED BY WARRANTY
1. Any part that has become inoperative due to misuse, commercial use, abuse, neglect,
accident, improper maintenance, or alteration; or
2.The unit, if it has not been operated and/or maintained in accordance with the owner’s
manual; or
3.Normal wear, except as noted below;
4. Routine maintenance items such as lubricants, bla de sharpening;
5.Normal deterioration of the exterior finish due to use or exposure.
TRANSPORTATION CHARGES
Transportation charges for the movement of any power equipment unit or attachment are the responsibility
of the purchaser. It is the purchaser’s responsibility to pay transportation charges for any part submitted for
replacement under this warranty unless such return is requested in writing by StrikeMaster.
08 09

OWNER’S MANUAL
READ ALL SAFETY RULES AND INSTRUCTIONS CAREFULLY BEFORE OPERATING

STRIKEMASTER®LITHIUM 40v CONTENTS
PRODUCT SPECIFICATIONS ........................................................... 01
QUICK START ........................................................................... 02-04
SAFETY INFORMATION ............................................................. 05-07
SYMBOLS .................................................................................... 08
KNOW YOUR ICE AUGER ............................................................... 09
ASSEMBLY ............................................................................... 10-11
OPERATION .................................................................................. 12
MAINTENANCE .............................................................................. 13
TROUBLESHOOTING ...................................................................... 14
PRODUCT SPECIFICATIONS
COMPONENTS
• StrikeMaster Lithium 40v Powerhead
• StrikeMaster Lithium 40v Battery - 40 volt, 5 amp hour
• StrikeMaster Lithium 40v Battery Charging Base
• StrikeMaster Lithium 8” or 10” Auger Spiral, Blades and Blade Cover
BATTERY CHARGING TIME
• 2.5 hours
TOTAL WEIGHT
8” Lazer........................................................................................................ 24 lbs./ 10.9 kg
10” Lazer.................................................................................................... 27 lbs./ 12.23 kg
01 02
STRIKEMASTER®LITHIUM 40v
QUICK START
ASSEMBLY
1. Remove all Lithium 40v contents from carton: Powerhead (A), Battery Charging
Base (B), Battery (C) and Auger Spiral (D), (Image 1).
2. Connect Powerhead to spiral, using collar bolt and hex wrench.
a. Collar bolt is located inside collar bolt threads at top of spiral (Image 2).
b. Two Hex wrench's are included: One is stored on the bottom of the Powerhead.
The other is taped to the mid-point of the spiral.
Remove hex wrench from spiral
before operating.
3. Slide Battery onto Battery Charging Base using the channels on both sides guide.
Press down until you hear it click in place. Leave Battery on Battery Charging Base
until fully charged (Image 3).
NOTE:
Battery is not fully charged when first removed from box.
4. When Battery Charging Base indicator shows green, your Battery is fully charged
(Image 4).
5. Once Battery is fully charged remove from Battery Charging Base. Slide battery onto
Powerhead using the channels on both sides as a guide, pressing down until you
hear it click in place (Image 5).
6. Remove blade cover from bottom of spiral and stow in a safe place (Image 6).
Your StrikeMaster Lithium 40v is ready for use.
FORWARD/ REVERSE
Your new StrikeMaster Lithium 40v has a forward and reverse capability. The Forward/
Reverse position needs to be selected when the spiral is at rest. If switched during use
the auger spiral will maintain its current direction until it comes to a complete stop.
Example: While drilling a hole in the forward position if switch is accidentally engaged into reverse
during drill cycle, the spiral will continue in forward until the power buttons are released and the
spiral comes to a complete stop.
LED WORKLIGHTS
Your New StrikeMaster Lithium 40v has two LED lights on the bottom side of the
Powerhead to illuminate the cutting area. The lights will turn on when the operating lock
lever and POWER button are engaged. The LED lights will remain on for 30 seconds
after POWER button is released.
IMAGE 2
IMAGE 3IMAGE 3
IMAGE 5
IMAGE 6
IMAGE 4
IMAGE 1
EXTREME COLD WEATHER OPERATION
The Lithium-Ion Battery can be used in temperatures down to (-4°F/ -20°C). If your Battery is not performing correctly, put
the Battery on the Powerhead, free spin auger out and above ice for 30 to 90 seconds depending on how cold the unit is (the
colder the unit, the more time to warm up). After this sequence the Battery will warm up and begin operating normally.
NOTE:
Always store Battery in a warm location.
(A)
(B) (C)
(D)

STRIKEMASTER®LITHIUM 40v BATTERY CHARGING BASE
QUICK START
1. Remove Lithium 40v Battery Charging Base from carton (Image 1). Plug in.
2. Unpack Battery, slide Battery onto Battery Charging Base using the channels on both
sides as a guide. Press down until you hear it click in place. Leave Battery on Battery
Charging Base until fully charged.
NOTE:
Battery is not fully charged when fi rst removed from box.
3. When Battery Charging Base indicator shows green, your Battery is
fully charged (Image 3).
Your StrikeMaster Lithium 40v Battery is ready for use.
Your StrikeMaster Lithium 40v Battery Charging Base has built in “Smart Charging
Technology”. The chart below shows you the correct charging procedure/occurrences
that could be experienced while charging.
IMAGE 2
IMAGE 3
IMAGE 1
STRIKEMASTER®LITHIUM 40v BATTERY
QUICK START
STRIKEMASTER LITHIUM 40v 5 AMP HOUR BATTERY
1. Remove StrikeMaster Lithium 40v Battery from carton (Image 1).
2. Unpack Battery Charging base, slide Battery onto Battery Charging Base using the
channels on both sides as a guide. Press down until you hear it click in place.
Leave Battery on Battery Charging Base until fully charged (Image 2).
NOTE:
Battery is not fully charged when fi rst removed from box.
3. When Battery Charging Base indicator shows green, your Battery is
fully charged (Image 3).
Your StrikeMaster Lithium 40v Battery is ready for use.
BATTERY CARE AND MAINTENANCE
1. Store Battery in a warm, dry location (35°F/ 2°C – 100°F/ 38°C).
2. IN SEASON
a. Keep Battery fully charged.
b. Store on a plugged in Battery Charging Base in a warm, dry location.
(35°F/ 2°C – 100°F/ 38°C).
3. OFF SEASON
a. Charge Battery to full.
b. Store Battery in a warm, dry location (35°F/ 2°C – 100°F/ 38°C), off of Battery Charging Base.
c. If Battery is stored for a period longer than 6 months, Battery should be recharged back to full before use.
IMAGE 2
IMAGE 3
IMAGE 1
EXTREME COLD WEATHER OPERATION
The Lithium-Ion Battery can be used in temperatures down to (-4°F/ -20°C). If your Battery is not performing correctly, put
the Battery on the Powerhead, free spin auger out and above ice for 30 to 90 seconds depending on how cold the unit is (the
colder the unit, the more time to warm up). After this sequence the Battery will warm up and begin operating normally.
NOTE:
Always store Battery in a warm location.
IMAGE 1

SAFETY INFORMATION
W A R N I N G
READ ALL SAFETY WARNINGS AND INSTRUCTIONS.
Failure to follow the warnings and instructions may result in electric shock, fire and/or serious injury.
OPERATOR’S RESPONSIBILITY
•Accurate, safe and effective use of this product is the operator’s responsibility.
•Read and follow all safety instructions.
•Maintain this machine according to directions and schedule included in this operator’s manual.
•Ensure that anyone who uses the machine is familiar with and understands all controls and safety precautions.
•Do not discard battery into trash can. Discard the battery according to your local, state or federal or
country’s regulations.
SAFETY MESSAGES
Your manual contains special messages to bring attention to potential safety concerns, as well as helpful operating
and servicing information. Please read all the information carefully to avoid injury and machine damage.
NOTE:
General information is given throughout the manual that may help the operator in the operation or service of
the product.
BEFORE OPERATING UNIT
Please read this section carefully. Read entire operating and maintenance instructions. Failure to follow instructions
could result in injury or death. Operate the machine according to the safety instructions outlined here and inserted
throughout the text. Anyone who uses this machine must read the instructions and be familiar with the controls.
IMPORTANT SAFETY PRECAUTIONS
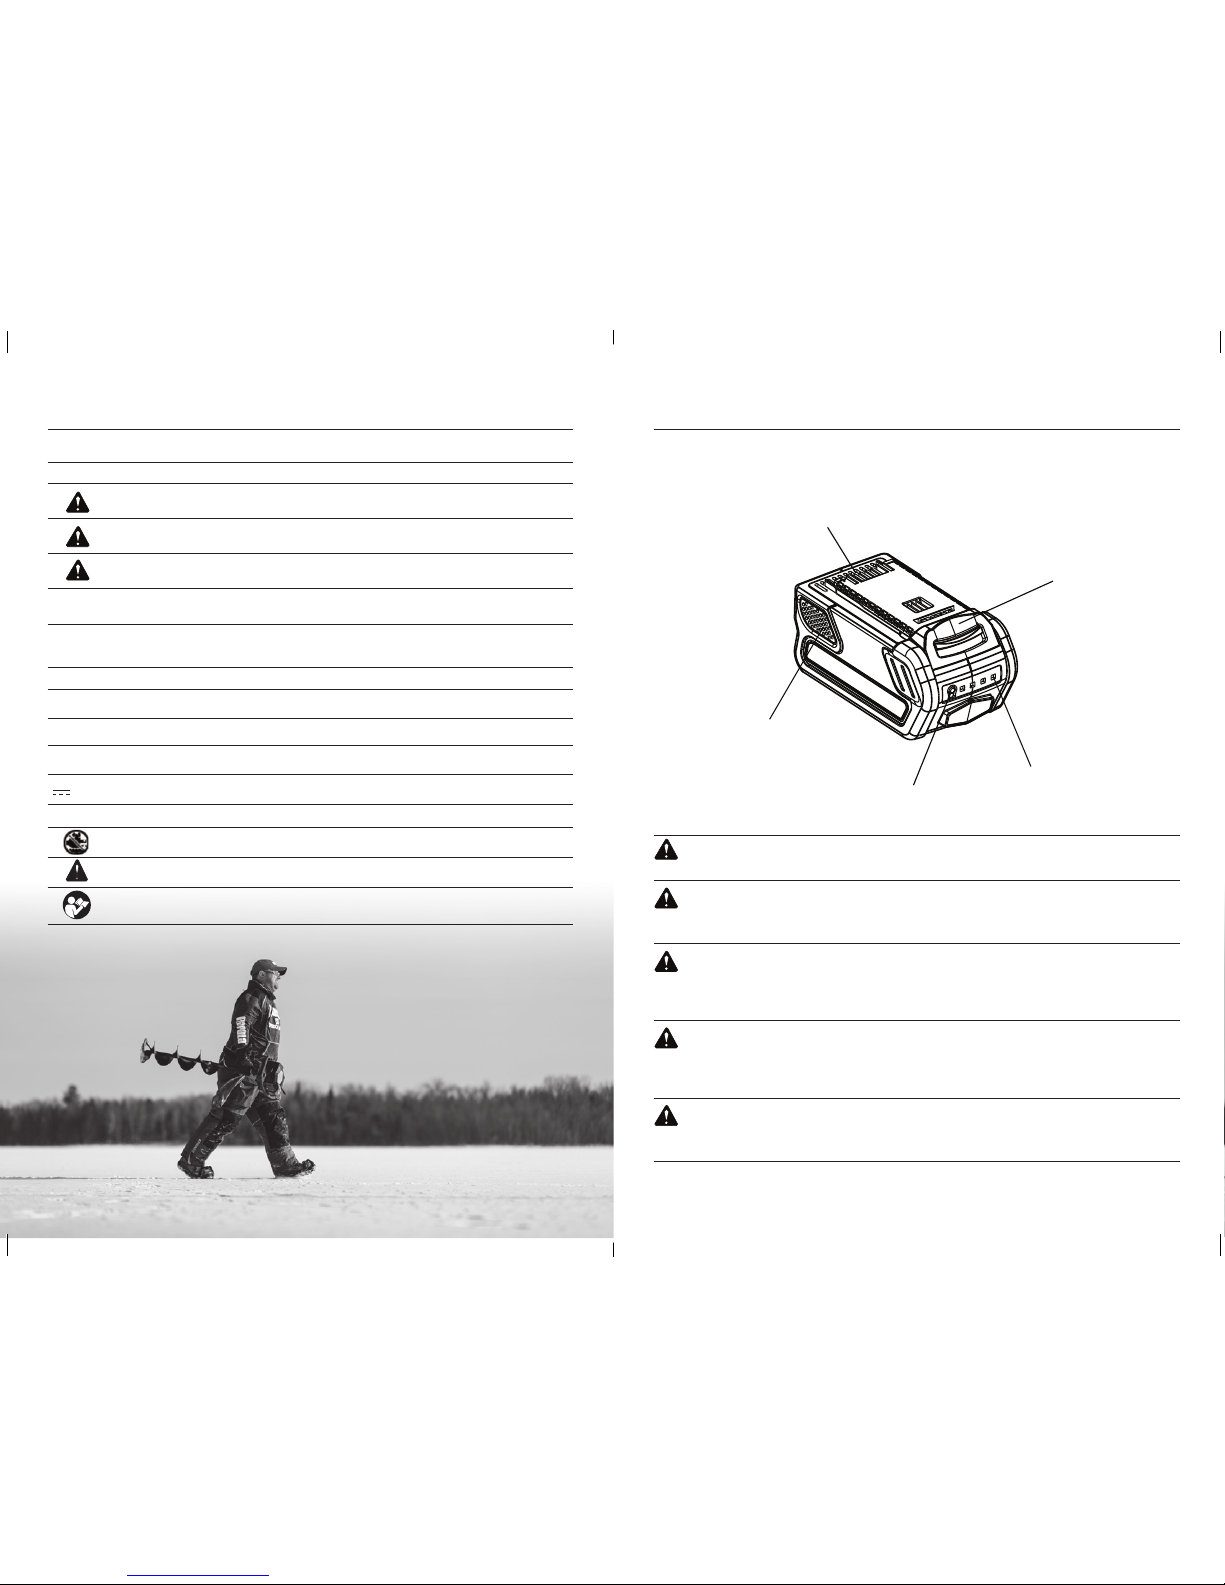
•Auger blades are very sharp. Use extreme caution when drilling a hole or replacing the blades.
Put the blade guard on after each use.
• Always keep hands, feet, hair, drawstrings, scarves, hats and loose clothing away from any moving
parts on the unit.
•Do not allow children to operate this unit. Do not allow adults to operate the unit without proper instruction.
•Do not operate any power equipment under the influence of alcohol or drugs.
•Keep all screws, nuts and bolts tight.
•The battery must be removed before any repairs are attempted.
•If the unit becomes unturnable in a hole, try reverse or remove the Battery before attempting to remove the
auger manually.
•DO NOT use this product for other than its intended purpose.
• DO NOT use attachments other than those available from StrikeMaster®.
• DO NOT alter this product in any manner; doing so is dangerous and will void the warranty.
• DO NOT continue to use this product in the event of mechanical failure.
• Check & tighten blade and collar bolts before each use.
• This product produces considerable cutting force that is felt by the operator.
Make sure your feet are firmly planted and a safe distance from spiral.
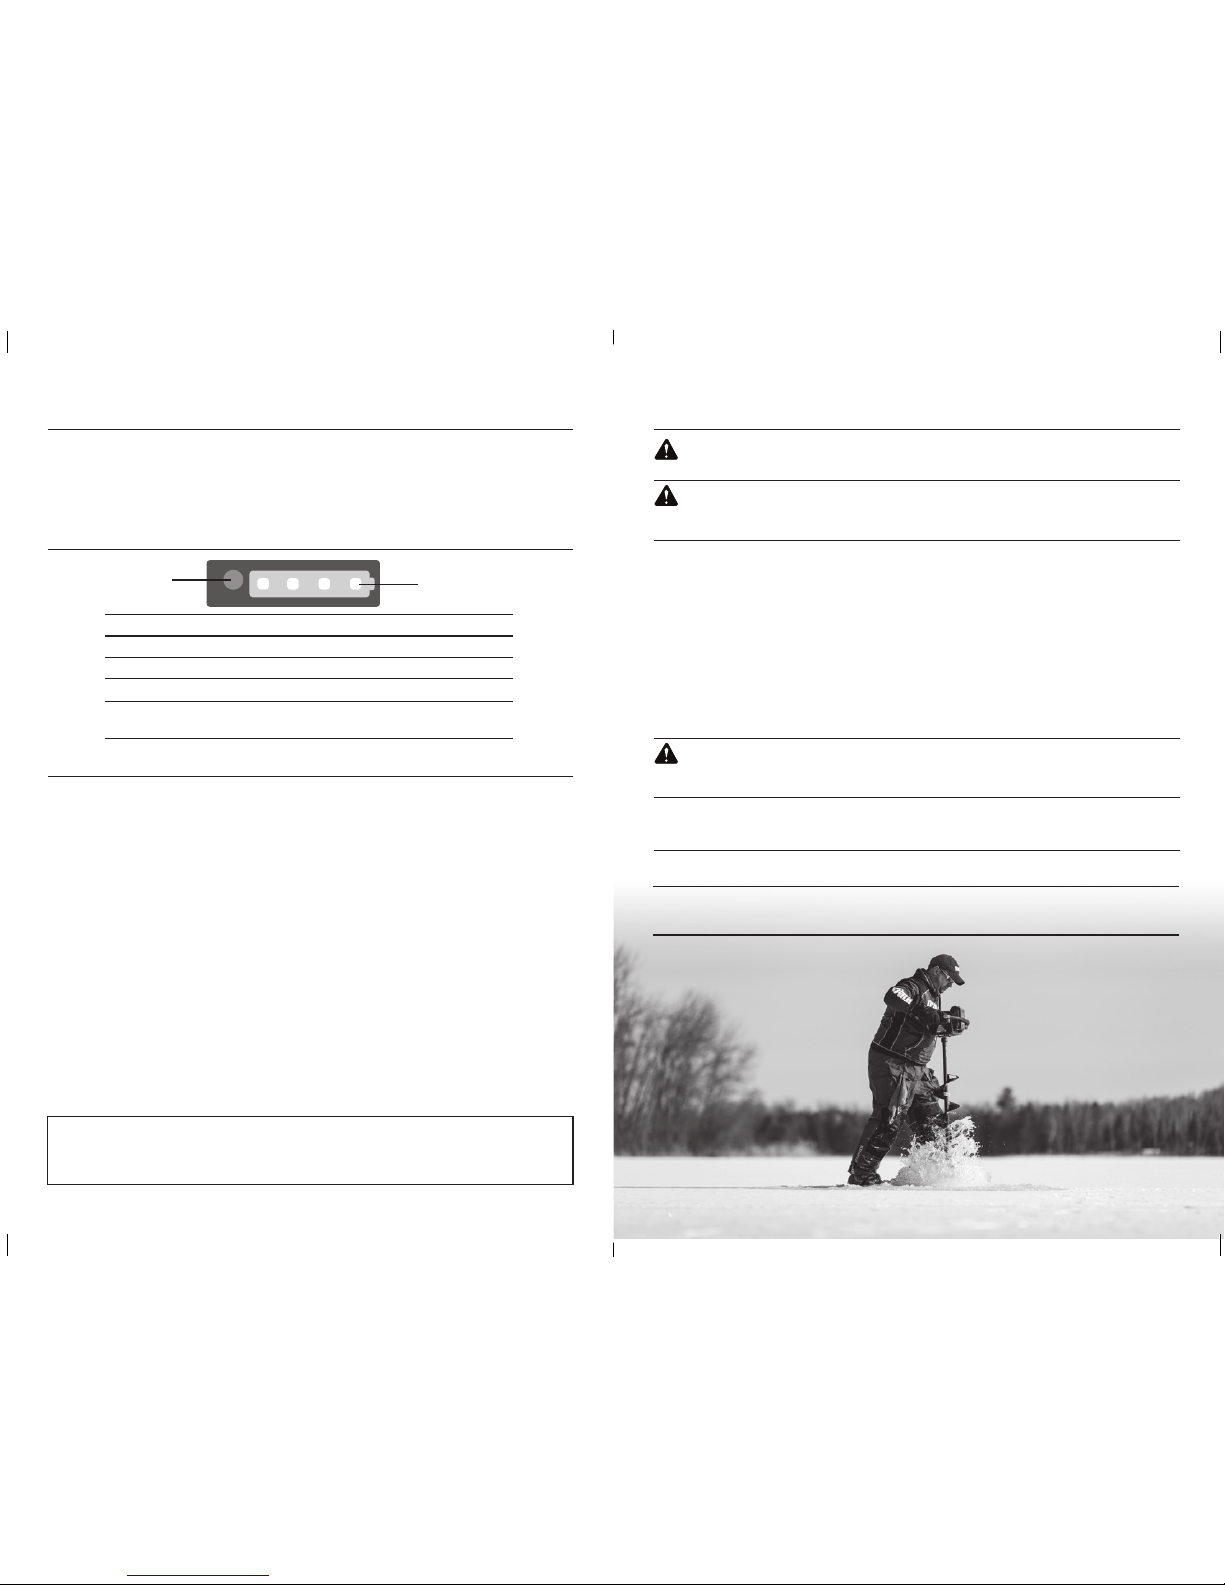
During operation, the unit could stop. If this happens, release the power button and operating lock lever. Reposition
your feet and grip the handles tightly, then squeeze operating lock lever and POWER button and lift the auger
gently. Make sure feet are firmly planted and that the handles are held securely while operating the auger.
When drilling ice holes, let the auger do the work. If auger begins to drill slowly, blades may need to be replaced.
DO NOT discard the battery into trash can. Discard the battery according to your local, state, federal or
country’s regulations.
SAFETY INFORMATION
SAFETY AND WARNING DECALS
The following contents of markings and labels are applied to the product, in addition to those shown in the rest of
the original operating instructions.
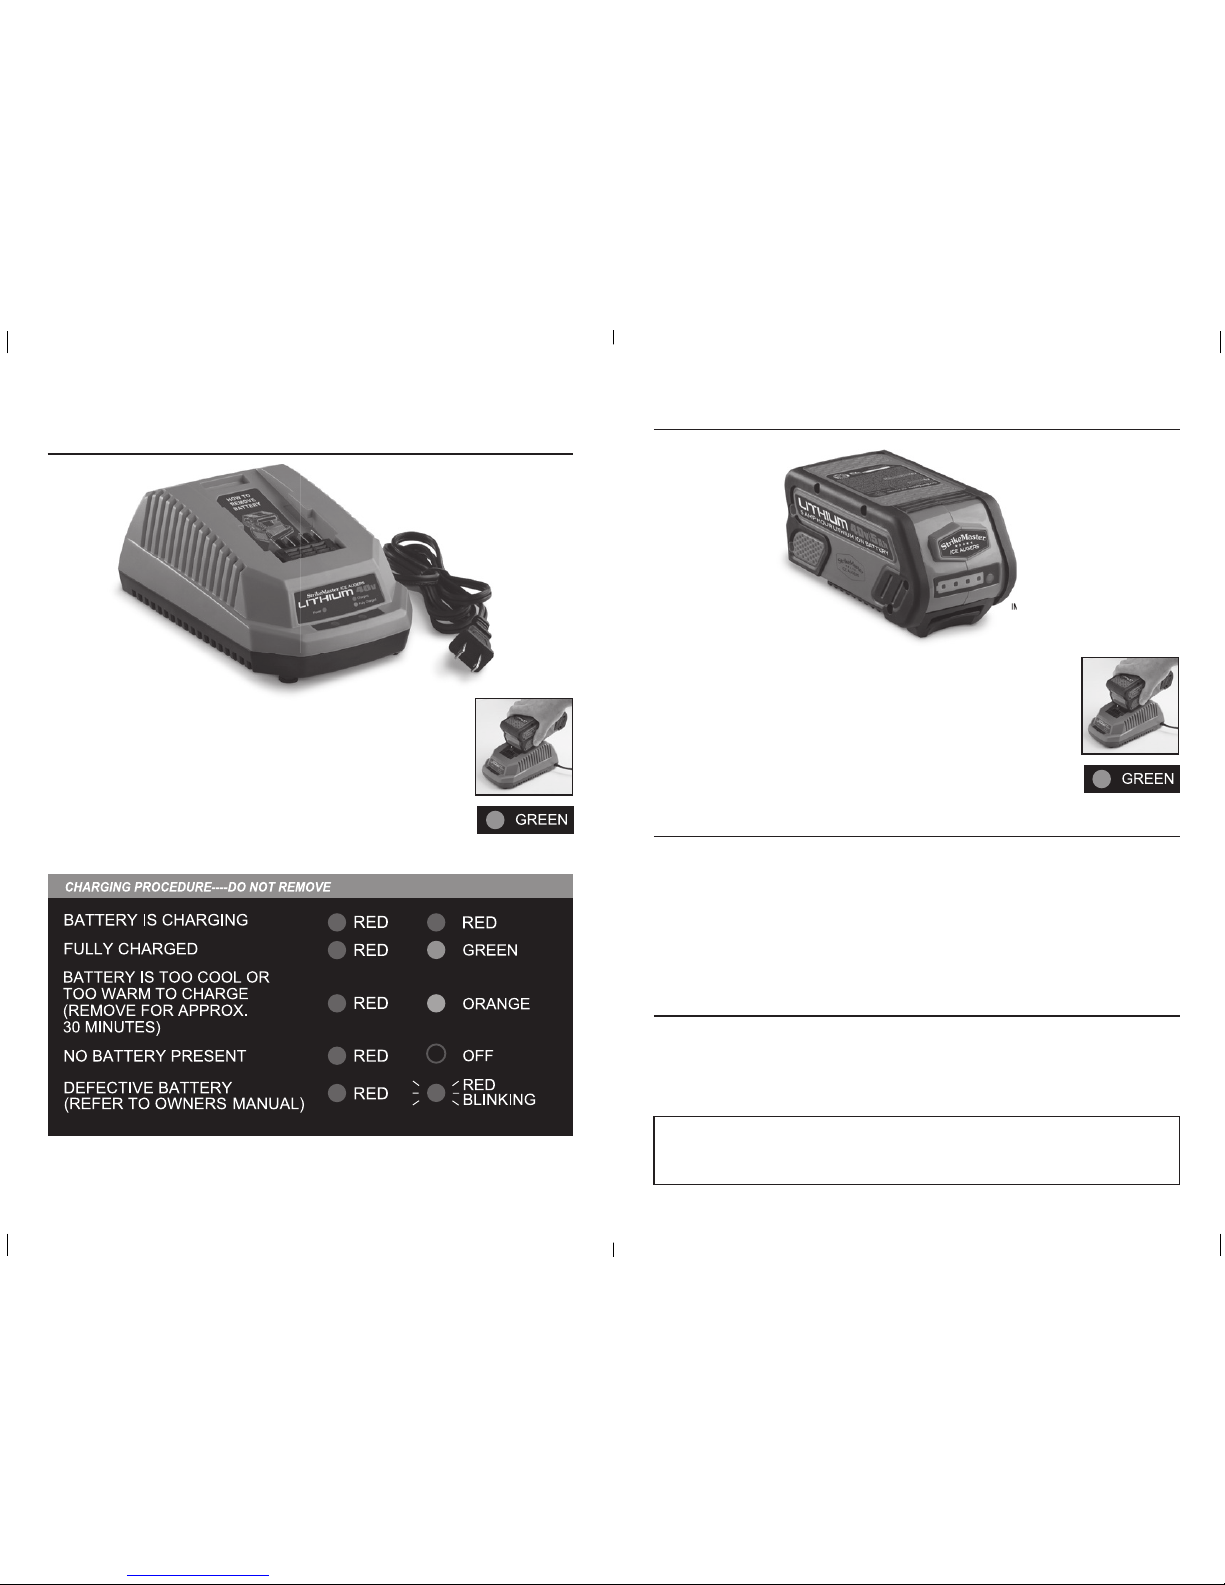
CAUTION
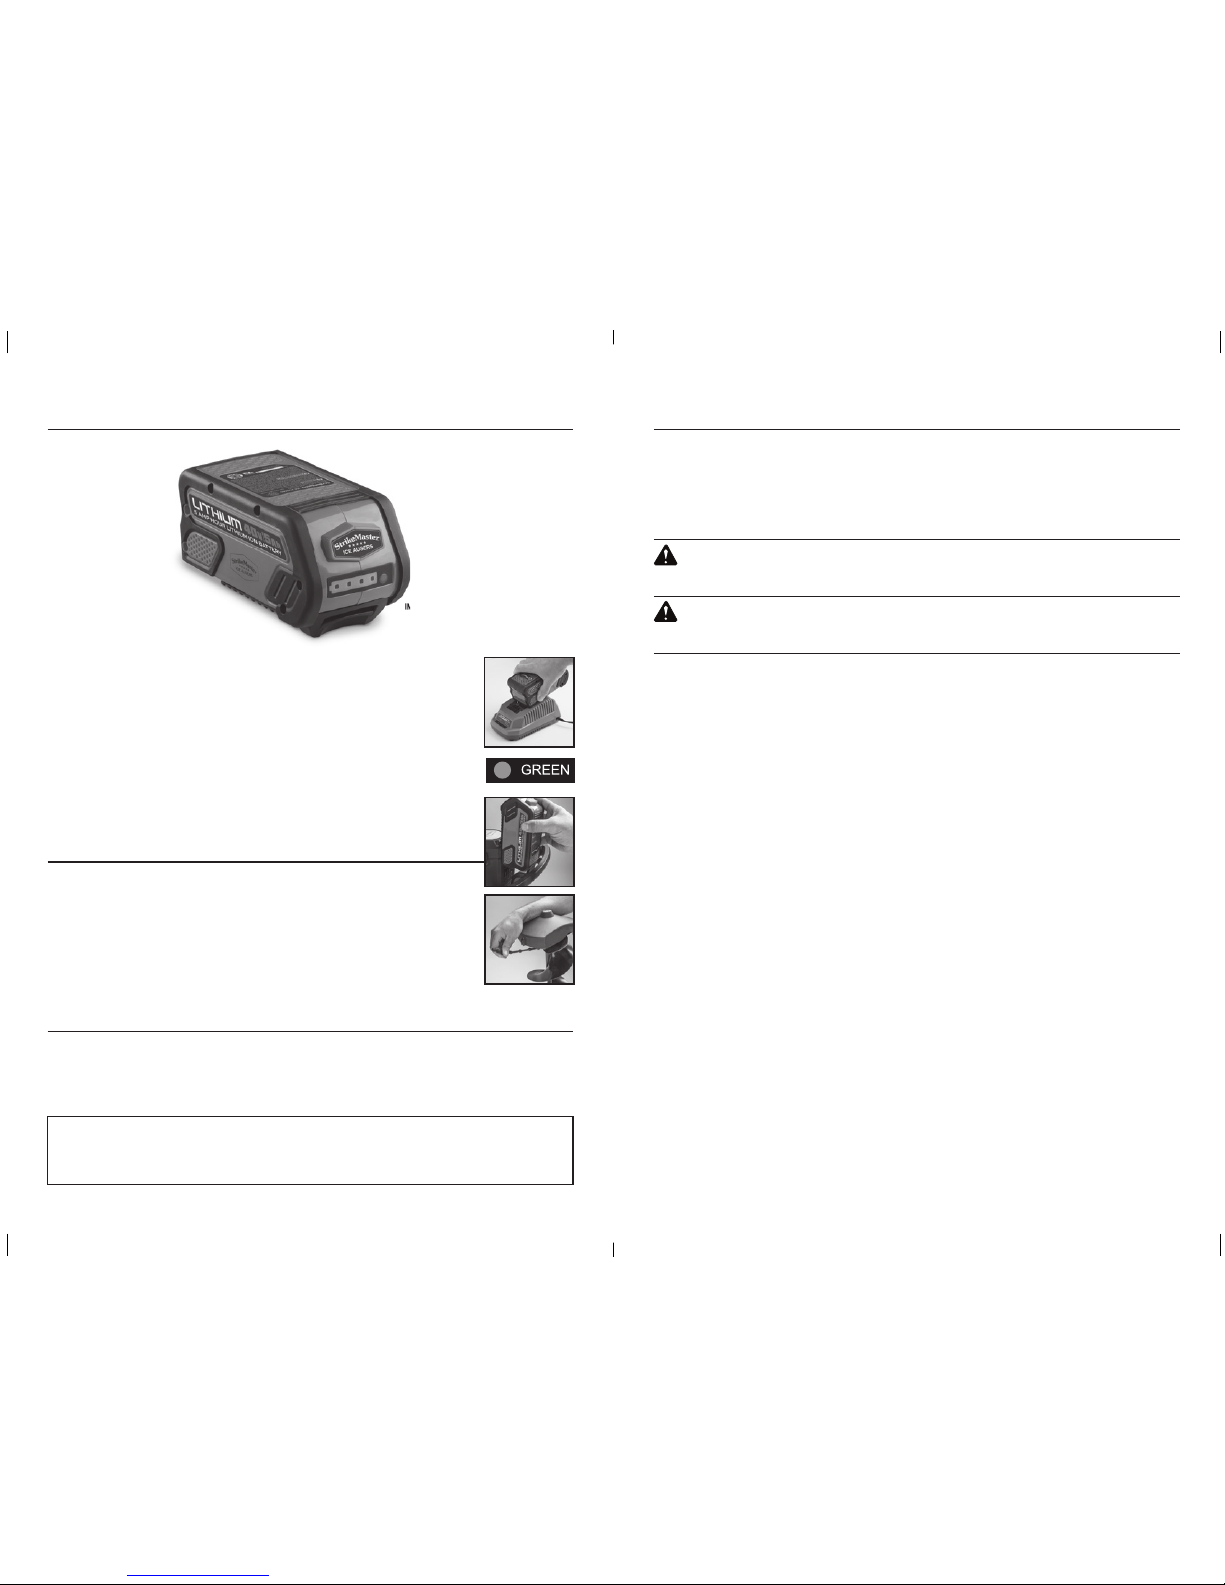
For outdoor use only. Charge StrikeMaster Lithium 40v 5 amp hour rechargeable batteries only using the
StrikeMaster Charging Base (LFV-CB). Other types of batteries may burst causing injury to persons or damage.
CAUTION
Risk of electric shock. Read and understand the owner’s manual before use. Only charge rechargeable batteries
(Model# LFV-B or LFV-BEU) with this Battery Charging Base. Charging batteries not designed for this Battery
Charging Base can cause personal injury or death. If any part of this Battery Charging Base is damaged, the
complete Battery Charging Base must be replaced.
WARNING
To reduce the risk of injury, read and understand the owner’s manual before use. Crushing, disassembly, shorting of
terminals or burning can cause personal injury or death. If Battery is not used correctly burns, explosion, and or fire
are possible. Charge only with Battery Charging Base (Model# LFV-CB or LFV-CBEU). Do not discard battery into
garbage can.
•Loss of control can cause personal injury.
•Know your Auger. Read owner’s manual carefully. Learn its applications and limitations, as well as the
specific potental hazards related to this Auger. Following this rule will reduce the risk of electric shock, fire, or
serious injury.
•Always wear eye protection with side shields marked to comply with ANSI Z87.1.
Following this rule will reduce the risk of serious personal injury.
•Protect your hearing. Wear hearing protection during extended periods of operation.
Following this rule will reduce the risk of serious personal injury.
•Battery powered Auger does not have to be plugged into an electrical outlet; therefore, they are always in
operating condition. Be aware of possible hazards when not using your auger or when changing
accessories. Following this rule will reduce the risk of electric shock, fire, or serious personal injury.
•Do not place Auger or Batteries near fire or heat. This will reduce the risk of explosion and possibly injury.
•Do not crush, drop or damage Battery. Do not use a Battery or Battery Charging Base that has been
dropped or received a sharp blow. A damaged Battery is subject to explosion. Properly dispose of a damaged
Battery immediately.
•Batteries can explode in the presence of a source of ignition, such as a pilot light. To reduce the risk of serious
personal injury, never use any cordless product in the presence of open flame. An exploded battery can propel
debris and chemicals. If exposed, flush with water immediately.
•Do not charge Battery in a damp or wet location. Following this rule will reduce the risk of electric shock.
•Keep Battery dry for best performance and longevity. Your Battery must be charged in a location where the
temperature is more than 35°F/2°C, but less than 100°F/38°C. To reduce the risk of serious personal injury,
do not store Battery outside or in vehicles.
•Under extreme usage or temperature conditions, battery leakage may occur. If liquid comes in contact with your
skin, wash immediately with soap and water. If liquid gets into your eyes, flush them with clean water for at least
10 minutes, then seek immediate medical attention. Following this rule will reduce the risk of serious personal injury.
SAVE THESE INSTRUCTIONS. REFER TO THEM FREQUENTLY AND USE THEM TO INSTRUCT OTHERS WHO
MAY USE THIS AUGER. IF YOU LOAN SOMEONE THIS AUGER, LOAN THEM THESE INSTRUCTIONS ALSO TO
PREVENT MISUSE OF THE PRODUCT AND POSSIBLE INJURY.

GENERAL POWER AUGER SAFETY WARNINGS
W A R N I N G
READ ALL SAFETY WARNINGS AND ALL INSTRUCTIONS.
Save all warning and instructions for future reference.
WORK AREA SAFETY
• Keep work area clean and well lit.
•Do not operate Auger in explosive atmospheres, such as in the presence of flammable liquids, gases or dust.
• Keep children and bystanders away while operating an Auger.
ELECTRICAL SAFETY
• Avoid body contact with earthed or grounded surfaces such as pipes, radiators, ranges and refrigerators.
• Do not expose Auger to rain or wet conditions.
•If operating an Auger or accessories in a damp location is unavoidable, use a residual current device (RCD)
protected supply.
PERSONAL SAFETY
• Stay alert, watch what you are doing and use common sense when operating a power tool. Do not use an
Auger while you are tired or under the influence of drugs, alcohol or medication.
• Use personal protective equipment. Always wear eye protection.
• Prevent unintentional starting. Ensure the switch is in the off-position before connecting to power source,
picking up or carrying the Auger.
• Remove hex wrench from Auger Spiral before turning the power tool on.
• Do not overreach. Keep proper footing and balance at all times.
•Dress properly. Do not wear loose clothing or jewelry. Keep your hair, clothing and gloves away from moving parts
• If devices are provided for the connection of dust extraction and collection facilities, ensure these are
connected and properly used.
AUGER USE AND CARE
• Do not force the Auger. Use the correct Auger for your application.
• Do not use the Auger if the switch does not turn it on and off
• Disconnect the Battery from the power source from the Auger before making any adjustments, changing
accessories, or storing Auger.
• Store idle Auger out of the reach of children and do not allow persons unfamiliar with the Auger or these
instructions to operate the Auger.
• Maintain Auger. Check for misalignment or binding of moving parts, breakage of parts and any other
condition that may affect the Auger’s operation. If damaged, have the Auger repaired before use.
• Keep cutting tools sharp and clean.
• Use the power tool, accessories and tool bits etc. in accordance with these instructions, taking into account
the working conditions and the work to be performed.
BATTERY TOOL USE AND CARE
• Recharge only with the charger specified by the manufacturer.
• Use Auger only with specifically designated Battery.
• When Battery is not in use, keep it away from other metal objects like paper clips, coins, keys, nails, screws,
or other small metal objects that can make a connection from one terminal to another
• Under abusive conditions, liquid may be ejected from the battery, avoid contact. If contact accidentally
occurs, flush with water. If liquid contacts eyes, additionally seek medical help.
SERVICE
• Have your Auger serviced by a qualified repair person using only identical replacement parts
ICE AUGER SAFETY WARNINGS
• Wear ear protectors. Exposure to noise can cause hearing loss.
• Hold Auger by insulated gripping surfaces when performing an operation where the cutting tool may contact
hidden wiring or its own cord. Contact with a “live” wire will make exposed metal parts of the tool “live” and
shock the operator
CALIFORNIA PROPOSITION 65
• WARNING: This product contains a chemical known to the State of California to cause cancer, birth defects,
or other reproductive harm.
SYMBOLS
The following signal words and meanings are intended to explain the levels of risk associated with this product.
SYMBOL SIGNAL MEANING
DANGER Indicates an imminently hazardous situation, which, if not avoided,
will result in death or serious injury.
WARNING Indicates an potentially hazardous situation, which, if not avoided,
could result in death or serious injury.
CAUTION Indicates an potentially hazardous situation, which, if not avoided,
may result in minor or moderate injury.
CAUTION (Without Safety Alert Symbol) Indicates a situation that may result in
property damage.
Some of the following symbols may be used on this product. Please study them and learn their meaning. Proper
interpretation of these symbols will allow you to operate the product batter and safer.
SYMBOL NAME MEANING
SAFETY ALERT Indicates a potentially personal injury hazard.
READ OWNER’S MANUAL To reduce risk of injury, user must read and understand owner’s
manual before using this product.
EYE PROTECTION Always wear eye protection with side shields marked to
comply with ANSI Z87.1.
EAR PROTECTION (Without Safety Alert Symbol) Indicates a situation that may result in
property damage.
V VOLTS Voltage
or d.c. DIRECT CURRENT Type or a characteristic of current.
RPM NO LOAD SPEED Rotational speed at no load.

KNOW YOUR ICE AUGER
The safe use of this product requires an understanding of the information on the product and in this owner’s manual
as well as a knowledge of the project you are attempting. Before using this product, familiarize yourself with all
operating features and safety rules.
DIRECTION CONTROL SWITCH (FORWARD/REVERSE)
Your ice auger has a direction control switch (forward/reverse) for changing the direction of auger.
OPERATING LOCK LEVER
Setting this operating lock lever in the OFF position helps reduce the possibility of accidental starting when not in
use. When you want to use this auger, you must pull up on the operating lock lever (deadman’s switch) lock-
out trigger first. Then, press down the POWER button. Keeping both engaged simultaneously.
LED WORKLIGHTS
The two LED worklights, located on the bottom of the two handles, illuminate when the operating lock lever
and POWER button are engaged. This provides extra light for increased visibility. LED lights remain on for 30
seconds after switches are released.
BATTERY CONNECTOR
The battery connector is used to connect Powerhead with the Battery.
HANDLE
DIRECTION CONTROL SWITCH
(FORWARD/REVERSE)
POWER HEAD
LED WORKLIGHTS
AUGER SPIRAL
40V 5AH BATTERY
40V BATTERY CHARGING BASE
OPERATING LOCK LEVER
HEX WRENCH
COLLAR BOLT
BATTERY
CONNECTOR
ASSEMBLY
PACKING LIST
1 Powerhead
1 Collar Bolt
2 Hex Wrenches
1 40v 5Ah Battery (Model# LFV-B/LFV-BEU�
1 40v Battery Charging Base (Model# LFV-CB/LFV-CBEU)
1 Auger Spiral
UNPACKING
Carefully remove the product and any accessories from the box. Make sure that all items listed in the packing list
are included.
Inspect the product carefully to make sure no breakage or damage occurred during shipping.
Donot discard the packing material until you have carefully inspected and satisfactorily operated the product.
W A R N I N G
READ ALL SAFETY WARNINGS AND ALL INSTRUCTIONS.
Do not use this product if it is not completely assembled or if any parts appear to be missing or damaged. Use of a
product that is not properly and completely assembled could result in serious personal injury.
W A R N IN G
READ ALL SAFETY WARNINGS AND ALL INSTRUCTIONS.
If any parts are damaged or missing do not operate this product until the parts are replaced. Use of this product
with damaged or missing parts could result in serious personal injury.
W A R N IN G
READ ALL SAFETY WARNINGS AND ALL INSTRUCTIONS.
Do not attempt to modify this product. Any such alteration or modification is misuse and could result in a
hazardous condition leading to possible serious personal injury.
KNOW THE PARTS OF THE POWERHEAD
POWERHEAD
DRIVE SHAFT
COLLAR
COLLAR BOLT
HEX WRENCH
AUGER SPIRAL

ASSEMBLY
NOTE: The StrikeMaster Lithum 40v comes with two hex wrenches: One is stored on the bottom of the Powerhead.
The other is taped to the the mid-point of the spiral.
Remove hex wrench from spiral before operating.
1. Unscrew the collar bolt from auger spiral with hex wrench.
2. The large and small holes from each component must line up before installing the bolt.
Push down and twist to line up holes.
3. It is recommended to grease inside collar and transmission output shaft on the Powerhead. Standard
automotive wheel bearing grease is suggested. Insert drive shaft into auger and install collar bolt.
4. Insert collar bolt into the large hole, passing through the drive shaft threads into the small hole of the auger.
Make sure collar bolt is tight. Some wiggle is normal between the Powerhead and auger. Check and tighten
often. Be sure collar bolt/head counter sinks past the outside face of the plastic collar.
W A R N IN G
IT IS RECOMMENDED THAT THE COLLAR BOLT BE CHECKED AND TIGHTENED IF NEEDED BEFORE
AND AFTER EVERY USE.
TO INSTALL/REMOVE THE BATTERY
TO INSTALL THE BATTERY
1. Remove StrikeMaster Lithium 40v Battery from carton.
2. Slide Battery onto Battery Charging Base using the channels on both sides as a guide.
Press down until you hear it click in place. Leave Battery on Battery Charging Base until
fully charged (Image 1).
NOTE:
Battery is not fully charged when first removed from box.
3. When Battery Charging Base indicator shows green, your Battery is fully charged
(Image 2).
4. Once Battery is fully charged remove from Battery Charging Base. Slide battery onto
Powerhead using the channels on both sides as a guide, pressing down until you
hear it click in place (Image 3).
TO REMOVE THE BATTERY
1. Depress the unlocking button on the Battery. Remove the Battery from the Powerhead.
W A R N IN G
BATTERY MUST BE FULLY CHARGED BEFORE FIRST USE.
BATTERY UNLOCKING
BUTTON
POWERHEAD
BATTERY
IMAGE 1
IMAGE 2
OPERATION
TO OPERATE POWER BUTTON - ON AND OFF
NOTE:
The StrikeMaster Lithium 40v is powered using the Lithium 40v Ion Battery (Model# LFV-B/LFV-BEU)
supplied with the unit.
1. Make sure your footing is secure and that you have the unit in the vertical position firmly in your hands.
2. Place Directional Control Switch in Forward position.
3. Pull up the operating lock lever (deadman’s switch), then press the POWER button. The auger will start drilling
and the LED worklights will turn on. LED lights will stay on for 30 seconds after power button is released.
4. To stop the auger, release the POWER button and the operating lock lever.
5. In the event your auger gets stuck during operation, reposition your feet and place Directional Control Switch to
Reverse position. This should release spiral from obstruction.
6. When the auger is not in use, remove the Battery for best performance.
NOTE:
If you are planning to use the Battery multiple times in a single outing, it is ideal to remove the battery and
place in a warm location. This is especially important in cold weather conditions.
W A R N IN G
Keep the operating lock lever and POWER button pressed while using the ice auger.
FORWARD/REVERSE (FIGURE 4)
1. Depress the direction control switch to the forward side. The auger will rotate clockwise.
2. Depress the direction control switch to the reverse side. The auger will rotate counter-clockwise.
3. The unit must come to a complete stop to change direction.
W A R N IN G
KEEP POWERHEAD CLEAR OF WATER.
2
1
FORWARD/ REVERSE NOTE: Forward/ Reverse
position needs to be selected when the spiral is
at rest. The auger spiral will maintain its current
direction until it comes to a complete rest.
Example: While drilling a hole in the forward position
if switch is accidentally engaged into reverse during
drill cycle, the spiral will continue in forward until the
power buttons are released and the spiral comes to a
complete stop.
IMAGE 3

MAINTENANCE
Read the maintenance schedule and observe these recommendations to extend the life of your ice auger.
Good maintenance is essential for safe, economical, and trouble-free operation. To help you properly care for
your Powerhead, the following pages include a maintenance schedule, routine inspection procedures, and
simple maintenance procedures using basic hand tools. Other service tasks that are more difficult, or require
special tools, are best handled by professionals and are normally performed by a technician or other qualified
mechanic.
The maintenance schedule applies to normal operating conditions. If you operate your Powerhead under
unusual conditions, such as sustained high-load, or use in unusually wet conditions, consult StrikeMaster®
customer service for recommendations applicable to your individual needs and use.
MAINTENANCE AND SCHEDULE
MAINTENANCE ITEM BEFORE EACH DAYS USE EVERY 400-500 COMPLETE
CHARGES/CYCLES
CHECK BOLTS AND NUTS X —
BATTERY CHARGE X —
PACK REPLACE — X
CYCLE
One complete use from full charge to no charge. (If used to 75% charge, it counts as 25% of cycle.
TRANSPORTING YOUR ICE AUGER
Remove the Battery when transporting the auger.
LONG-TERM STORAGE
If your ice auger will not be run for more than one month, prepare it for long-term storage.
1. Charge the battery to full and leave it off of the ice auger. DO NOT leave the Battery on the Battery Charging
Base.
2. Remove the auger from the Powerhead and apply a thin layer of grease to the driveshaft.
3. Remove all debris from Auger and Powerhead.
4. Keep in a dry, moisture-free area.
TROUBLESHOOTING
PROBLEM POSSIBLE CAUSE REMEDY/ACTION
Powerhead will not turn on Power Switch not Hold Power Switch for five seconds
depressed properly
Powerhead will not start and Battery too cold Remove Battery from the unit and place
the Battery indicates a in a warm location (inside a jacket pocket,
full charge vehicle or a small cooler with a warmer)
Powerhead starts then stops Battery low on power Charge Battery
Battery may be slightly Remove Battery from the unit and place
under temperature in a warm location (inside a jacket pocket,
vehicle or a small cooler with warmer.
In the event of the auger not operating or stalling during use the user may hear audible signals. To determine
what the audible signal is keep the operating lock lever (deadman’s switch) and POWER button engaged and
count number of beeps, then refer to the chart below.
STATEMENT BEEP TIME SOLUTION
Protection Over Current 1 Release trigger, lift and continue cutting
(spiral stoppage during cut) or move and cut in new location
Protection Voltage Battery Low 7 Recharge Battery
Place Battery in warm location
Protection High Temperature 13 Release trigger,
Let unit rest for five minutes
Battery Is Too Cold 6 Warm Battery to above -4°F, or try
running unit without any load until
Battery warms

OWNER’S MANUAL
LITHIUM ION
BATTERY CHARGER
READ ALL SAFETY RULES AND INSTRUCTIONS CAREFULLY BEFORE OPERATING

IMAGE 1
SAFETY INFORMATION
IMPORTANT SAFETY INSTRUCTIONS
SAVE THESE INSTRUCTIONS DANGER – TO REDUCE THE RISK OF FIRE OR ELECTRIC
SHOCK, CAREFULLY FOLLOW THESE INSTRUCTIONS
Read and understand all instructions before using this product. Failure to follow all instructions
listed below may result in electric shock, fi re, and/or serious personal injury.
W A R N I N G
FOR INDOOR USE ONLY
C A U T I O N
RISK OF ELECTRIC SHOCK. DRY LOCATION USE ONLY.
Store Indoors and do not expose to rain or water. Avoid direct sunshine.
C A U T I O N
RISK OF FIRE OR ELECTRIC SHOCK, DO NOT INTERCONNECT OUTPUT TERMINATIONS
C A U T I O N
CHARGE ONLY RECHARGEABLE LI-ION BATTERY PACK LFV-B/LFV-BEU, OTHER TYPES OF BATTERIES MAY
BURST CAUSING PERSONAL INJURY AND DAMAGE
D A N G E R
RISK OF ELECTRIC SHOCK. DO NOT TOUCH UNINSULATED PORTION OF OUTPUT CONNECTOR OR
UNINSULATED BATTERY TERMINAL
SAVE THESE INSTRUCTIONS
• This manual contains important safety and operating instructions for Battery Charging Base LFV-CB.
• Before using Battery Charging base, read all instructions and cautionary markings on Battery Charging Base,
Battery and StrikeMaster Lithium 40v Ice Auger.
• To reduce the risk of fi re and electric shock, install in a temperature- and humidity-controlled indoor area
relatively free of conductive contaminants.
• Use of an attachment not recommended or sold by Battery Charging Base manufacturer may result in a risk of
fi re, electric shock, or injury to persons.
• Following this rule will reduce the risk of electric shock, fi re, or serious personal injury.
• Do not abuse cord or Charging Base. Never use the cord to carry the Charging Base. Do not pull the charger
cord rather than the plug when disconnecting from electrical outlet. Damage to the cord or charger could occur
and create an electric shock hazard. Bring to an authorized service center if cords are damaged.
• Do not operate charger if it has received a sharp blow, been dropped, or otherwise damaged in any way. Take
it to an authorized service center for electrical check to determine if the charger is in good working order.
• Do not cover the ventilation slots on the top of the charger. Do not set the charger on a soft surface i.e. blanket,
pillow. Keep the ventilation slots of the charger clear.
• Do not probe the charger with conductive materials.
• Do not disassemble Charging Base. Take it to an authorized service center when service or repair is required.
Incorrect reassembly may result in a risk of electric shock or fi re.
• Disconnect Charging Base from the power supply when not in use. This will reduce the risk of electric shock
or damage to the charger if metal items should fall into the opening. It also will help prevent damage to the
Charging Base during a power surge.
• Do not use a damp cloth or detergent to clean the Battery or Charging Base. Clean / wipe down with a dry cloth.
• Do not allow the battery pack or charger to overheat. If they are warm, allow them to cool down. Recharge
only at room temperature.
STRIKEMASTER®LITHIUM 40v BATTERY CHARGING BASE
QUICK START
1. Remove Lithium 40v Battery Charging Base from carton (Image 1). Plug in.
2. Unpack Battery, slide Battery onto Battery Charging Base using the channels on both
sides as a guide. Press down until you hear it click in place. Leave Battery on Battery
Charging Base until fully charged.
NOTE:
Battery is not fully charged when fi rst removed from box.
3. When Battery Charging Base indicator shows green, your Battery is
fully charged (Image 3).
Your StrikeMaster Lithium 40v Battery is ready for use.
Your StrikeMaster Lithium 40v Battery Charging Base has built in “Smart Charging
Technology”. The chart below shows you the correct charging procedure/occurrences
that could be experienced while charging.

SAFETY INFORMATION
IMPORTANT SAFETY INSTRUCTIONS
SAVE THESE INSTRUCTIONS
(cont.)
• Unplug the Charging Base before cleaning and when there is no Battery in the charger.
•Do not try to connect two chargers together.
• Do not allow liquid inside the Charging Base.
• Do not try to use the charger for any other purpose than what is presented in this manual.
• Save these instructions. Refer to them frequently and use them to instruct others who may use this Auger. If you
loan someone this Auger, loan them these instructions also to prevent misuse of the product and possible injury.
• Confi rm the voltage in each country before using the Charging Base.
• If the shape of the plug does not fi t the power outlet, use an attachment plug adaptor of the proper confi guration
for the power outlet.
SYMBOLS
The following signal words and meanings are intended to explain the levels of risk associated with this product.
SYMBOL SIGNAL MEANING
DANGER Indicates an imminently hazardous situation, which, if not avoided,
will result in death or serious injury.
WARNING Indicates an potentially hazardous situation, which, if not avoided,
could result in death or serious injury.
CAUTION Indicates an potentially hazardous situation, which, if not avoided,
may result in minor or moderate injury.
CAUTION (Without Safety Alert Symbol) Indicates a situation that may result in
property damage.
Some of the following symbols may be used on this product. Please study them and learn their meaning. Proper
interpretation of these symbols will allow you to operate the product better and safer.
SYMBOL NAME MEANING
V VOLTS Voltage
HzHERTZ Frequency (cycles per second)
W WATTS Power
or d.c. DIRECT CURRENT Type or a characteristic of current.
RPM NO LOAD SPEED Rotational speed at no load.
WET CONDITIONS ALERT Do not expose to rain or use in damp locations.
SAFETY ALERT Indicates a potentially personal injury hazard.
READ OWNER’S MANUAL To reduce risk of injury, user must read and understand owner’s
manual before using this product.
WET CONDITIONS ALERT
KNOW YOU CHARGING BASE
The safe use of this product requires an understanding of the information on the product and in this owner’s manual
as well as a knowledge of the project you are attempting. Before using this product, familiarize yourself with all
operating features and safety rules.
This device complies with Part 15 of the FCC Rules. Operation is subject to the following two conditions:
(1) This device may not cause harmful interference.
(2) This device must accept any interference received, including interference that may cause undesired operation.
W A R N IN G
Changes or modifi cations to this unit not expressly approved by the manufacturer for compliance could void the
user’s authority to operate the equipment.
NOTE: This equipment has been tested and found to comply with the limits for a Class B digital device, pursuant to
Part 15 of the FCC Rules.
These limits are designed to provide reasonable protection against harmful interference in a residential installation.
This equipment generates, uses and can radiate radio frequency energy and, if not installed and used in
accordance with the instructions, may cause harmful interference to radio or television reception, which can be
determined by turning the equipment off and on, the user is encouraged to try to correct the interference by one or
more of the following measures:
• Reorient or relocate the receiving antenna.
• Increase the separation between the equipment and the receiver.
• Connect the equipment into an outlet on a circuit different from that to which the receiver is connected.
• Consult the dealer or an experienced radio/TV technician for help.
WARNING
Do not allow familiarity with products make you careless. Remember a careless fraction of a second is suffi cient to
infl ict serious injury.
WARNING
Do not use any attachments or accessories not recommended by the manufacturer of this product. The use of
attachments or accessories not recommended can result in serious personal injury.
CAUTION
Charge in a well ventilated area. Do not block charger vents. Keep them clear to allow proper ventilation.
COOLING AIR PORT
ELECTRICAL CONTACTS
LED LIGHTS
POWER CORD
WALL
MOUNTING
HOLES

OPERATION
CHARGING PROCEDURE
NOTE: The Battery Pack is not shipped fully charged. It is recommended to fully charge before fi rst use to ensure
that maximum run time can be achieved. This lithium-ion battery will not develop a memory and may be charged
at any time.
LOW VOLTAGE CHARGING
If the battery has been stored with little to no charge for a long period of time, the charger will go into recovery
mode, which will take 20 hrs. to fully charge the battery. This will enhance the life of the battery. Once it is fully
charged, the next charge will return to standard charging.
A fully discharged battery pack will require approximately 150 minutes (2.2Ah) to fully charge from a
discharged state.
1. Plug the Charging Base into an AC power outlet.
2. Insert the Battery into the Charging Base.
This is a diagnostic charger. The Charging Base LED Lights will illuminate in specifi c order to communicate the
current battery status. They are as follows:
FALSE DEFECT NOTE
When the Battery is inserted into the Charging Base and the status LED blinks RED, remove the Battery from the
charger for 1 minute, then reinsert. If the status LED blinks GREEN, then the Battery is properly charging. If the
status LED is still blinking RED, remove the Battery and unplug the Charging Base for 1 minute. After 1 minute,
plug in the Charging Base and reinsert the Battery. If the status LED blinks GREEN, then the Battery is properly
charging. If the status LED is still blinking RED, the Battery is defective and needs to be replaced.
NOTE:
When the red indictor fl ickers, pull out the Battery from the Charging Base and insert again within 2 hours.
If the indicator shows charging, that means the Battery is good. After 2 hours, please pull out the Battery and also
pull out the AC power plug of the Charging Base for 1 minute, and then insert the AC power plug and the Battery
again. If the indicator shows charging, that means the Battery is good. If not, the Battery needs to be replaced.
CHARGER LED LIGHTS
BATTERY
CHARGING BASE
OPERATION
CHARGING BASE MOUNTING
1. This Charging Base can be installed hanging on a wall using two screws (not included)
2. Locate the placement for the Charging Base to be wall mounted.
3. If fastening to wood studs use 2 wood screws.
4. Drill two holes 2-3/8” (6 cm) on center ensuring they are level.
5. If fastening to drywall use wall anchors and screws to secure the Charging Base to the wall.
6. This power unit is intended to be correctly orientated in a vertical or fl oor mount position.
NOTE:
If the Battery and the Charging Base won’t be used for a long time, remove the Battery from the Charging
Base and unplug the AC power plug.

MAINTENANCE
WARNING
To avoid serious personal injury, always remove the Battery from the Auger when cleaning or performng any
maintenance.
WARNING
When servicing, use only identical StrikeMaster replacement parts. Use of any other parts may create a hazard or
cause product damage
WARNING
It is not recommended to use compressed air as cleaning method of this charger. If cleaning with compressed air is
the only method to apply, always wear safety goggles or safety glasses with side shields when using compressed
air to clean tool. If the operation is dusty, also wear a dust mask.
GENERAL MAINTENANCE
•Brush or blow dust and debris out of the air vents using compressed air or a vacuum. Keep the air vents free of
obstructions, sawdust, and wood chips. Do not spray, wash, or immerse the air vents in water.
•Wipe off the housing and the plastic components using a dry, soft cloth. Do not use strong solvents or
detergents on the plastic housing or plastic components. Certain household cleaners may cause damage and
may cause a shock hazard.
STORAGE
•Always remove the Battery Pack before storing the Charging Base or any time the Charging Base is unplugged.
•Do not place the Battery Pack in the sun or in an extremely warm environment. Keep at normal room
temperature.
•If the battery will not be used for 3 months or more, store the Battery in a controlled temperature environment.
Fully charge before storage.
WARNING
Do not at any time let brake fluids, gasoline, petroleum-based products, penetrating oils, etc. to come in contact
with plastic parts. Chemicals can damage, weaken or destroy plastic which may result in serious personal injury.
TROUBLESHOOTING
PROBLEM POSSIBLE CAUSE REMEDY/ACTION
Charger doesn't work. Charger Battery or Charging Base 1) Try to remove and reinsert Battery in the
shows defective mode is defective or bad connection Charging Base
(LED flashes Red) between Battery and 2) Try charging a different battery
Charging Base 3) Unplug Charging Base and wait until
the red LED goes out. Then reconnect
the plug to power supply
Charging Base doesn't work. Battery is too hot or too cold Allow Battery to reach normal temperature.
Charging Base shows evaluation Charging will begin when Battery returns
mode (LED indicates Red to 37°F-117°F (3°C-47°C)
solid ON)
2-YEAR LIMITED WARRANTY
CHARGING BASE WARRANTY
StrikeMaster® hereby warranties this product, to the original purchaser with proof of purchase,
for a period of two (2) years against defects in materials, parts or workmanship. Batteries
must be charged in accordance with the owner’s manuals directions and regulations in order
to be valid. StrikeMaster, at its own discretion will repair or replace any and all parts found
to be defective, through normal use, free of charge to the customer. This warranty is valid
only for units which have been used for personal use that have not been hired or rented for
industrial/ commercial use, and that have been maintained in accordance with the instructions
in the owner’s manual supplied with the product from new.
ITEMS NOT COVERED BY WARRANTY
1. Any part that has become inoperative due to misuse, commercial use, abuse, neglect,
accident, improper maintenance, or alteration; or
2.The unit, if it has not been operated and/or maintained in accordance with the owner’s
manual; or
3.Normal wear, except as noted below;
4. Routine maintenance items such as lubricants, blade sharpening;
5.Normal deterioration of the exterior finish due to use or exposure.
TRANSPORTATION CHARGES
Transportation charges for the movement of any power equipment unit or attachment are the responsibility
of the purchaser. It is the purchaser’s responsibility to pay transportation charges for any part submitted for
replacement under this warranty unless such return is requested in writing by StrikeMaster.
Check out an excellent selection of fishing gear & accessories on our website.
Other manuals for Lithium 40v
5
This manual suits for next models
1
Table of contents
Other STRIKEMASTER Camera Accessories manuals