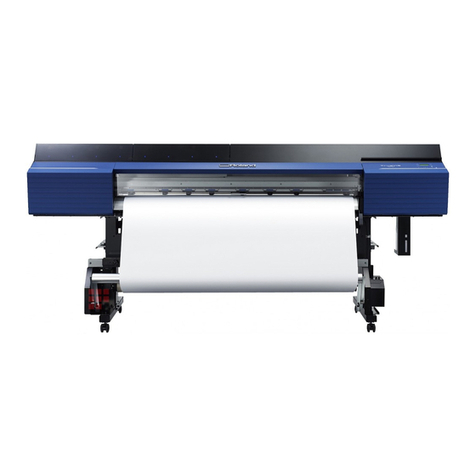
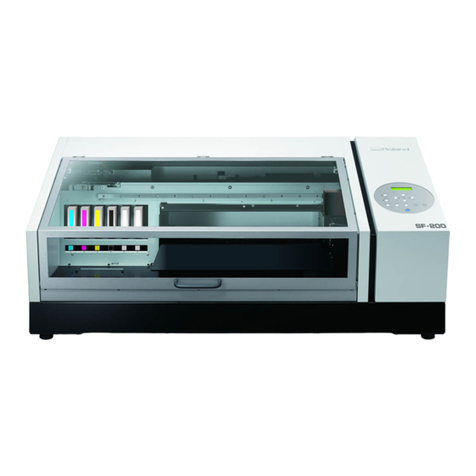
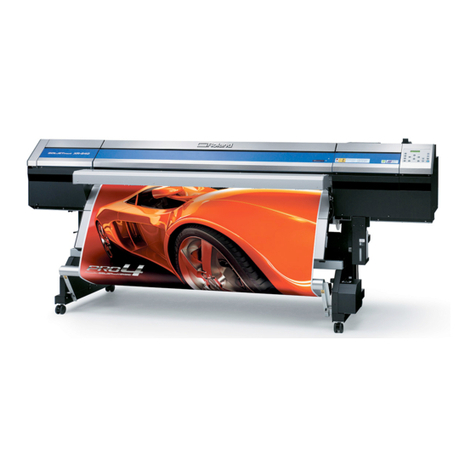
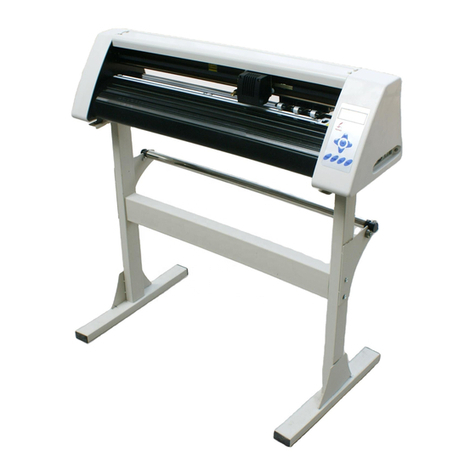
Strima AUDACES Jet Lux Plus User manual

AUDACES
1
Instruction Manual
Dear customer:
Thank you to purchase the AUDACES plotter!
Please read this instruction carefully before using our
plotter!
It is our pleasure that you have been one of our customers. In order to
enable you to grasp the AUDACES plotters as soon as possible, we have
compiled this instruction manual. You may obtain some basic knowledge:
system disposition, installing steps, and operating application method etc.
Please kindly be advised that you must read this instruction manual very
carefully, it’s helpful that you will understand the plotter very well. Any damage
caused by incorrect operation, we will not undertake the responsibility.
We have made our best effort to provide correct and reliable information in
this instruction manual. However, we could not completely guarantee that
there is no mistake in printing. If you find out the mistake in the booklet, please
inform us to make the corresponding correction.
In some cases, we possibly make some small adjustments in some
products in order to enhance the performance and reliability of the components
in the machine. This may lead to the actual situation of the machine slightly
inconsistent to those in the instruction manual. But the adjustments will not
have any effect on the use of the plotters.
If you encounter any problem in the using process of the plotter, please call
the service center of AUDACES, the hot line is: 0086519 86731568, or enter
the AUDACES corporation website at http://www.audaces.com/ to get the
technical support in the customer information feedback.
Thank you for your kind cooperation!
Audaces Automação e Informatica Industrial Ltda

AUDACES
2

AUDACES
3
Table of Contents
INSTRUCTION MANUAL.......................................................................................................... 1
TABLE OF CONTENTS.............................................................................................................. 3
CHAPTER 1 INTRODUCTION OF AUDACES PLOTTER............................................................. 5
1.1 PRINCIPAL CHARACTERISTICS ................................................................................................ 5
1.2 TECHNICAL PARAMETERS..................................................................................................... 5
1.3 DRIVE SOFTWARE.............................................................................................................. 6
CHAPTER 2 SYSTEM REQUIREMENTS.................................................................................. 7
2.1 CONNECTING OF POWER SOURCE ........................................................................................... 7
2.2 COMPUTER...................................................................................................................... 7
2.3 WORKING CONDITIONS....................................................................................................... 8
CHAPTER 3 GETTING ACQUAINTED WITH YOUR PLOTTER.................................................... 9
3.1 INSTALLATION OF PLOTTER ................................................................................................... 9
3.2 FRONT VIEW OF THE PLOTTER (FIGURE3-1)............................................................................... 9
3.3 OPERATOR PANEL.............................................................................................................. 9
3.3.1 The control button................................................................................................. 9
3.3.2 Indicator lights .................................................................................................... 10
3.3.3Functional buttons ............................................................................................... 11
CHAPTER 4 LOADING PRINTING MEDIA ............................................................................ 12
4.1 LOADING OF A NEW FEED ROLL ............................................................................................ 12
4.2 PAPER LOADING OF THE TAKE-UP ROLL .................................................................................. 12
4.3 THE DIRECTIONS OF THE MOVEMENT OF PAPER (FIGURE4-1) .................................................... 13
4.4 PAPER ROLL WEIGHT REQUIREMENT..................................................................................... 13
CHAPTER 5 CARTRIDGES.................................................................................................. 14
5.1 CARTRIDGE MODELS......................................................................................................... 14
5.2 INK LEVEL ...................................................................................................................... 14
5.3 REPLACING A CARTRIDGE ................................................................................................... 14
5.4 CLEANING A CARTRIDGE .................................................................................................... 15
5.5 ADJUSTMENT OF THE CARTRIDGE ......................................................................................... 15
CHAPTER 6 INSTALLATION AND USE OF THE SOFTWARE ................................................... 16
6.1 INSTALLING THE SOFTWARE ................................................................................................ 16
6.2 RUNNING THE SOFTWARE AND INTERFACE OF THE SOFTWARE....................................................... 19
6.2.1Running the software ........................................................................................... 19
6.2.2 Plotting ............................................................................................................... 19
6.2.3 Setup .................................................................................................................. 21
6.2.4 Plot history.......................................................................................................... 35
6.2.5 Backup ................................................................................................................ 36

AUDACES
4
6.2.6 Help .................................................................................................................... 37
CHAPTER 7 MAINTAINING AND TROUBLESHOOTING ............................................................. 38
7.1 CLEANING THE PLOTTER..................................................................................................... 38
7.2 LUBRICATING THE GUIDE TRACK ........................................................................................... 38
7.3 CLEANING THE PAPER ROLLS ............................................................................................... 38
CHAPTER 8 SOLUTIONS.................................................................................................... 39
8.1 GENERAL PROBLEMS ........................................................................................................ 39
8.2 SOFTWARE ERRORS.......................................................................................................... 39
8.3 PLOTTER ERRORS............................................................................................................. 40
8.4 PROBLEMS OF OUTPUT...................................................................................................... 41
CHAPTER 9 APPENDIX...................................................................................................... 42

AUDACES
5
Chapter 1 Introduction of AUDACES plotter
1.1 Principal Characteristics
The AUDACES series plotters are the professional Apparel CAD inkjet
plotters which have been specially developed for the Apparel industry by
AUDACES Science and Technology. The plotters have reasonable costs and
possess high output speed, high resolution, large output breadth, low work
noise, clear line shape, high precision, and completely automatic detection and
protection functions. They can be performed by 24 hours non-stop working
under unattended conditions. The plotters only require the general ink
cartridge and the ordinary drawing paper available on the market. This
overcomes the drawbacks of the traditional inkjet plotters that consume large
amount of special inks that are difficult to be purchased. Thus, the operation
cost can be greatly reduced.
Features
High printing speed: the printing speed can reach 70square meters/hour
with 300 dpi resolution.
Low cost: the cost (paper, ink) for printing each square meter is less
than USD0.05. In addition, all kinds of the paper (standard paper, hot
sensitive paper, recycled paper and so on) are applicable.
Compatible for Windows9X/ME/NT/2000 system
Modular design: the print head and cartridge can be easily replaced.
Self-cleaning: the print head can be automatically cleaned.
Automatic print head protection device.
Paper protection device: the paper damage which may occur in
traditional inkjet plotters can be efficiently avoided.
Self-examination: the plotter provides a series of simple
self-examinations to detect the running status. If necessary, the plotter
can be reset. Self-examination program and parameters are stored in
the memory and can be directly operated.
Automatic diagnosis: As the power source is turned on, the system will
automatically diagnose all functions of the plotter. When a mistake is
encountered, the plotter will give warning signal. The user may operate
the plotter by following the orders from the plotter, and find out the
problem.
1.2 Technical Parameters
Power source: 86-264V
Power consumption: 150W
Plotting speed: 70 m2/hour (two way direction), 40 m2/hour (single
direction)
Resolution: 300dpi
Deviations of unidirectional horizontal lines: <0.4mm/m

AUDACES
6
Deviations of unidirectional vertical lines: <0.4mm/m
Maximum printing length: 50m
Maximum printing width: 1.65m1.85m
Paper Type: 40-120g/m2 ordinary roller paper
Paper roll diameter Maximum: 24.1cm (9.5 ")
Paper Core Size 7.6cm ( 3" )
Plotter size: 2220×500×930;2400×500×930
Packing size: 2360×570×1060;2550×570×1060
1.3 Drive Software
The AUDACES Plotter Control Center and special USB driver software are
provided together with the plotter.

AUDACES
7
Chapter 2 System Requirements
2.1 Connecting of power source
An independent power with a proper earth grounded system is required.
The power supplier shall not be shared with other machines or devices. The
lightning preventing system is highly recommended. The operating voltage of
the plotter can be seen in the label on the back of the plotter. The voltage of the
AC power could not fluctuate beyond a range of ±8%. Please supply power for
the plotter with a 500W or higher UPS. Please confirm whether the supply
voltage matches with the marked voltage on the plotter! About the supply
voltage fluctuates cannot surpass 8%, please use the UPS 500W or above to
provide the power for the plotter.
The AUDACES plotter is shipped with a three-plug power cable. The
cable should always be used with a socket that is equipped to receive the
pronged plug.
Make sure the plotter is turned off. Plug one end of the power cable into the
connector of the plotter. Plug the power cord into an appropriate power outlet.
.
Turn the power switch to ON, the plotter will send out the short ' di ' beep,
indicated that the plotter self-check is successful, and status of the plotter is
normal. If the plotter does not give the short ' di ' beep, turn off the plotter and
wait for at least 10 seconds, then turn on the plotter again. Under normal
conditions, the indicator light on the control panel comes on.
Attention! Wait for at least 10 seconds to turn on the plotter again
after each normal shutdown.
2.2 Computer
Minimum requirements: CPU PII-350,64M RAM,10G HD,CD-ROM
Drive,Floppy Drive, 15” Display
Recommended system setup: CPU P4-1.7G,256M RAM,40G HD,CD
,Floppy Drive,17” Display
Operating system:Windows98, Windows2000, Windows XP
Warning: If the voltage of power source is not the same as
the marked voltage on the plotter, please contact your
supplier.

AUDACES
8
Connection to computer: make sure that the plotter is OFF, insert one of
the USB line ends into the computer USB port, and connect the other end to
the plotter USB port.
Attention: It would be better that a computer is specially used only for
the plotter. The USB port cannot be shared with other equipments.
Please do not install the special-plotter computer with drive programs for
other printer, the scanner or other devices.
2.3 Working Conditions
Temperature: 10℃- 30℃.
Humidity: 15%-85%RH non-condensation
Working conditions: clean environment, no strong electro-magnetic source
nearby will be better.
Attention: Temperature should not be higher than suggested one,
otherwise, possible effect to the performance of the plotter may occur.
Warning: The USB data cable can only be taken off after
the computer and the plotter are turned off. Do not use USB
hub, otherwise, the plotter could be damaged.

AUDACES
9
Chapter 3 Getting acquainted with your plotter
3.1 Installation of plotter
AUDACES plotters are the overall constructions, after you open the
packing case, only need to lift the plotter from the plywood board to a steady
position.
3.2 Front view of the plotter (Figure3-1)
Figure3-1
3.3 Operator panel
3.3.1 The control button
The control buttons are the input keyboard for the communication between
operator and computer. Basic operational orders can be made through the
control pad. Basic operations such as paper feed, paper unloading and loading

AUDACES
10
can be independently carried out without an online computer. The status of the
plotter can also be observed on the pad, such as proper connection of the AC
power, request for the replacement of the ink, the status of the system, etc.
The actual view of the control buttons is as following (Figure3-2):
Figure3-2
3.3.2 Indicator lights
Indicator Light of the power source (power):It indicates current state of
power source of the plotter. When the power source is normal or the power
switch is set to ON, the indicator light will be on. When the power source is not
in the normal state or the power switch is set to OFF, the indicator light will be
off.
Indicator Light of Pause (pause):It indicates current working condition of
the plotter. When the indicator light is on, the plotter is in a suspended state.
When the indicator light is off, the plotter is in the state of working.
Indicator Light of Error (error):It indicates current working condition of the
plotter. When the indicator light is on or flashes, errors occur in the plotter and

AUDACES
11
problems need to be solved. Otherwise the plotter is working in the normal
state.
Indicator Light of Ink out (ink out):It indicates current ink-level. When the
ink is run out, the indicator light will be on or flash.
3.3.3Functional buttons
Pause Button(PAUSE): This button is used in making the plotter enter or
exit the pause state. When the button is pressed for the first time(for 2-4
seconds), the plotter will enter the pause state and the indicator light of pause
will be on. When the button is pressed again, the plotter will exit the pause
state and the indicator light of pause will be off.
Paper Feed Button(DOWN):When the plotter is in the pause state,
pressing this button leads to paper feeding in the forward direction. Releasing
the button will stop paper feeding.
Paper Unloading Button(UP):When the plotter is in the pause state,
pressing this button leads to paper unloading. Releasing the button will stop
paper unloading. When you press the button for 3-4seconds or longer,the
plotter will enter the state of paper unloading at a high speed. Under such a
circumstance, paper unloading will be speeded up. Even if the button is
released, paper unloading will continue at a high speed. You may stop the
state of paper unloading at a high speed only by pressing the button of paper
feed or pause.
Warning: The pause period during the plotting should not be
over 2 minutes, or the cartridge may be damaged. It is normal that
the color may be faded as the plotter is restarted after a pause.

AUDACES
12
Chapter 4 Loading Printing Media
4.1 Loading of a new feed roll
Switch off the plotter, stand behind and face the plotter, and pull the feed
roll to the left by hand with a little strength. As the right side of the feed roll is
separated from the coupling, lift up the feed roll and take it off. Loosen the
internal hexagonal screws on the paper hub of the feed roll with a 5mm internal
hexagonal wrench and take off the old paper roll. Load a new paper roll, install
the paper hub, grip the paper roll tightly and beat it gently until it is not loose
between the paper hub and the paper roll. Move the paper roll (together with
the paper hub) and make the plotting paper in the middle of the feed roll. Then
tighten the internal hexagonal screws on the paper hub with the internal
hexagonal wrench. Install the feed roll to the plotter.
4.2 Paper loading of the take-up roll
Switch on the power, make the feed roll unload some paper (about 1m),
and then switch off the power. Open the cover of the plotter to a steady
position. Pull paper between the encoder-roller and the main beam, hold the
edge of paper and rock it gently to the left and to the right, until the paper is
level on the whole. Then cut surplus paper according to the position of the
take-up roll. Prepare 3-5 rubberized tapes and each is of 3cm-4cm in length. At
first, stick a rubberized tape on the center of paper and pull the tape to stick on
the take-up roll with a little strength. Then stick on other prepared tapes from
the center to both sides in proper order.After that, check whether the paper is
level. Switch on the power of the plotter, use the tension roll to press paper and
put it to the slide slot.
Up to this point, paper loading of the take-up roll is complete and the plotter
is ready for plotting.

AUDACES
13
4.3 The directions of the movement of paper (Figure4-1)
Figure4-1
4.4 Paper Roll Weight requirement
Do not use paper which is moist, torn or crumpled. Do not use paper with
holes or dirty dark spots which may lead to unclear printing result. Please use
smooth plotting paper of 40g-120g/m2 and the weight of paper roll shall be
less than 35~40kgs.

AUDACES
14
Chapter 5 Cartridges
5.1 Cartridge models
The cartridge used in AUDACES is HP 51645A or HP 51645B. It can be
purchased from your supplier or the HP Company.
5.2 Ink level
The following figure (Figure5-1) shows the position of the ink level marker
on the cartridge. When the marker changes color from green to other colors, it
means that the cartridge is out of ink. Please replace the cartridge.
Figure5-1
5.3 Replacing a cartridge
The cartridge can be replaced under two circumstances:
1. The plotter power status is ON. Under such a circumstance, click PAUSE
on the control pad to make the plotter paused.After that, open the cover of
the plotter, replace the cartridge, then close the cover and click PAUSE
again to make the plotter to be in the normal status.
2. The plotter power status is OFF. Firstly, switch on the plotter, plotter will
finish automatic cleaning print head process and then protect print head,
then open the top cover (please note that before open the top cover the
print head must stop steadily, otherwise, the plotter will alarm), the print
head will move slowly to the middle of the plotter, then switch off the plotter
and change the cartridge. Then close the top cover, switch on the plotter.
How to replace the cartridge: After cartridge stops steadily, lift the lock lever
on the cartridge holder, pull out the empty cartridge. Remove the nozzle
covering tape of a new cartridge carefully (Never touch the nozzle and the gold
contact points), install a new cartridge (Note: The insertion of cartridge must be
gentle, if you feel any resistance while pushing down the lock lever, stop.
Otherwise the cartridge may be damaged). Push down the lock lever of the
cartridge tightly, and close the top cover.
Inkout
indicator

AUDACES
15
Attention: It’s better that to replace a cartridge while plotter power
status is OFF to avoid any damage to cartridge.
5.4 Cleaning a cartridge
This plotter is equipped with automatic print head cleaning and protection
device. The dust accumulated on the nozzle can be automatically cleaned
during the printing process. When the plotting is stopped, the nozzle will be
automatically sealed to prevent the ink from being dried after a long period
time. At the same time, this can also prevent the nozzle from the dust
contamination. The cartridge can also be cleaned manually by taking off the
cartridge from the plotter and cleaning the nozzle gently with the soft cloth.
5.5 Adjustment of the cartridge
Adjustment of the cartridge:If the printed lines are jagged or not straight
(as shown in the following picture (Figure5-2), please adjust the cartridge.
Deviation of the ink reservoir
Figure5-2
Warning: Changing the cartridge in the plotting process may
damage the nozzle, please do not change the cartridge during the
plotting.

AUDACES
16
Chapter 6 Installation and use of the software
6.1 Installing the software
6.1.1 USB driver installation instructions
If the connection port between computer and plotter is USB port, the USB
driver software must be installed on your computer so that the plotter can be
operated normally.
Attention: Before the installation, please close all the running
programs as well as the anti-virus program, if your computer has
installed control center software of other edition, please uninstall them.
Turn off the computer and also the plotter; connect the USB cable to the
main-board port of the plotter and the computer USB port.
Turn on the plotter and computer; the computer can automatically find the
hardware. After a few moments, a message such as “New Hardware Found”
appears. The software can be installed according to following messages:
[1] -Choose the floppy disk installment, and then click “NEXT”.

AUDACES
17
[2] Choose search routine, click browsing, choose installation directory.
[3] If the system is WIN98, please choose Drive R:\USBDRIVER \WIN98.
If the system is WIN2000 or WIN-XP, please choose Driver R:\
USBDRIVER \WIN2K-XP.
Attention: You must choose the correct driver software; otherwise the
plotter will not work normally.

AUDACES
18
[4] And then click “NEXT”, follow below guide to finish the installation.
After seeing "Figure6-1", click "continue anyway". "Figure 2" means
installing successfully.
Figure6-1
Figure6-2
6.1.2 Running the installation software
Open the folder “Control center software” on the CD-ROM and double
click the “setup.exe”file, and then you can install the software according to
the prompts on the screen.

AUDACES
19
6.2 Running the software and interface of the software
6.2.1Running the software
Start the computer, enter the Windows system, and this program will be
started automatically. You can also click Start/Program/Start-up Program of
Audaces Ultraspool 8 in the Start menu to run the program. After the program
is started, it will be in a minimized state. Click AUDACES in the taskbar, an
icon (main interface) appears as shown in the figure (Figure6-3).
Figure6-3
Click <Setup>-<Plotter Type>, select “plotter type” according to your plotter,
there are one head, two head and four head three types, as below
picture(Figure6-4):
Figure6-4
The program will automatically detect the plotter is on line or not. If the
plotter has been correctly connected with the computer and powered on, the
green light in the bottom left corner of the Control Center is on, which shows
that the plotter is idle and the Plot button is available. Otherwise the red light is
on, and if click the Plot button, “not connect the plotter”box will pop up.
6.2.2 Plotting

AUDACES
20
The operation area includes:
<Plot>, <Stop>, <Pause>, <Continue>; <Directory>, <File>, <Merge>,
<Split>, <Stack>, <Up>, <Down>, <Delete>; and some auxiliary plotting
buttons: <Zoom in>, <Zoom out>, <Z+A>, <Eagle Eye>, <Bird's-Eye>,
<Enlargement>, <Box select>, <Pan>, <Measure>; and <Auto plot> tick box.
The window below the operation area is for “Prepare files to be plotted”
(Figure6-1). <Plotting times> is used to change the plotting quantity of a same
file.
The directory of plotting files can be changed by selecting <Directory>.
Click<File> to add the file to be plotted, this file name will be displayed in
the dialogue window.
If click <Delete>, the current file which already be chosen will be deleted.
If click <Up>, then the current file which already be chosen will be move
up. The button plays a role to change plotting priority in the process of auto
plot.
If click <Down>, then the current file which already be chosen will be move
down. The action is similar to that of <Up> previously discussed; only the
direction is opposite.
First add the file to be plotted, and then click the file, the analyzed pattern
will be displayed in the window below. After select a file to be plotted, click
<Plot>, the file will be plotted.
Click<Merge> and box select several files, a new file will be created, which
can realize two files or more output simultaneously.
While the file size exceeds the actual print range, we can click <Split>,
change the file width in Setup→Plotter parameter→Other into each size
what you want to split. And you may also split by rotating 90 degree
as needed. (Note: The connections of the splitting have been
marked with different gap dot lines.)
<Stack> can stack several files into one file by center aligned methods. For
example, same model with different size can be stacked into one marker.
During the plotting, if click <Pause>, the plotting will be paused, and
<Pause> will become <Continue> in several seconds.
If click <Continue>, then the file will be printed continuously.
If the user hopes to stop printing, please click <Pause> first, and then click
< Stop>, the plotting file will be stopped; in this case, the plotted file won’t
be deleted.
Table of contents

