StuntCams PV-AC100W User manual

PV-AC100W
HD WI-FI Power Adapter DVR
Quick Guide
A. Regarding the Device
1. Two Prong Power Supply
2. WI-FI On/Off & Client Button & WI-FI Reset
3. Slide cover
4. Memory Card Slot
5. USB Charge (DC 5V/1.1A)
6. Camera Lens
7. WI-FI & Client LED
REC & Motion Detect & No SD Card LED
B. Insert the SD Card
1) Pull○
3down, insert the SD Card correctly, press the SD Card for
take out the SD Card.
C. Change Power Plug Direction
1) Turn ○
ato left to loosen, turn ○
bto right for 90°to adjust the power plug direction,
Turn ○
aright to lock.

D.USB Charge
1)Plug USB cable into slot ○
5,and the other end connect to the device going to charge
E. Button Function
1) WI-FI On/Off:Press button ○
2to turn on WI-FI or turn off WI-FI
(Plug WF-AD1 DVR into power plug, then the WI-FI is on and recording.)
3) Reset WI-FI Default:Hold the button ○
2for 10 sec. till blue LED light fast flashing 2times.
F. LED Light
1) Blue LED Light On:WI-FI On
Blue LED Light Off:WI-FI Off
2) Red LED Light Blinking:Please check the SD card. (Can’t recognize the card or lack of memory capacity)
Red LED Light On:Recording
H. APP download QR Code (Scan the QR code to download the APP or directly type &
search “SecurePro” in App store or Google play for installation)

I. Establish WIFI connection (Android)
1) Start your smartphone APP.
1) Choosing the device’s WI-FI which you need to connect.

1) Enter the password.
(The factory initial password is 123456878.)
1) WI-FI connection.

1) Enter WI-FI connection.
* Establish WIFI connection (iOS)
1) Chose settings.

1) Chose Wi-Fi.
1) Choosing the host’s WI-FI which you need to connect.

1) Enter the password.
(The factory initial password is 12345678)
1) Confirm WI-FI has been connected.

II. APP UI description
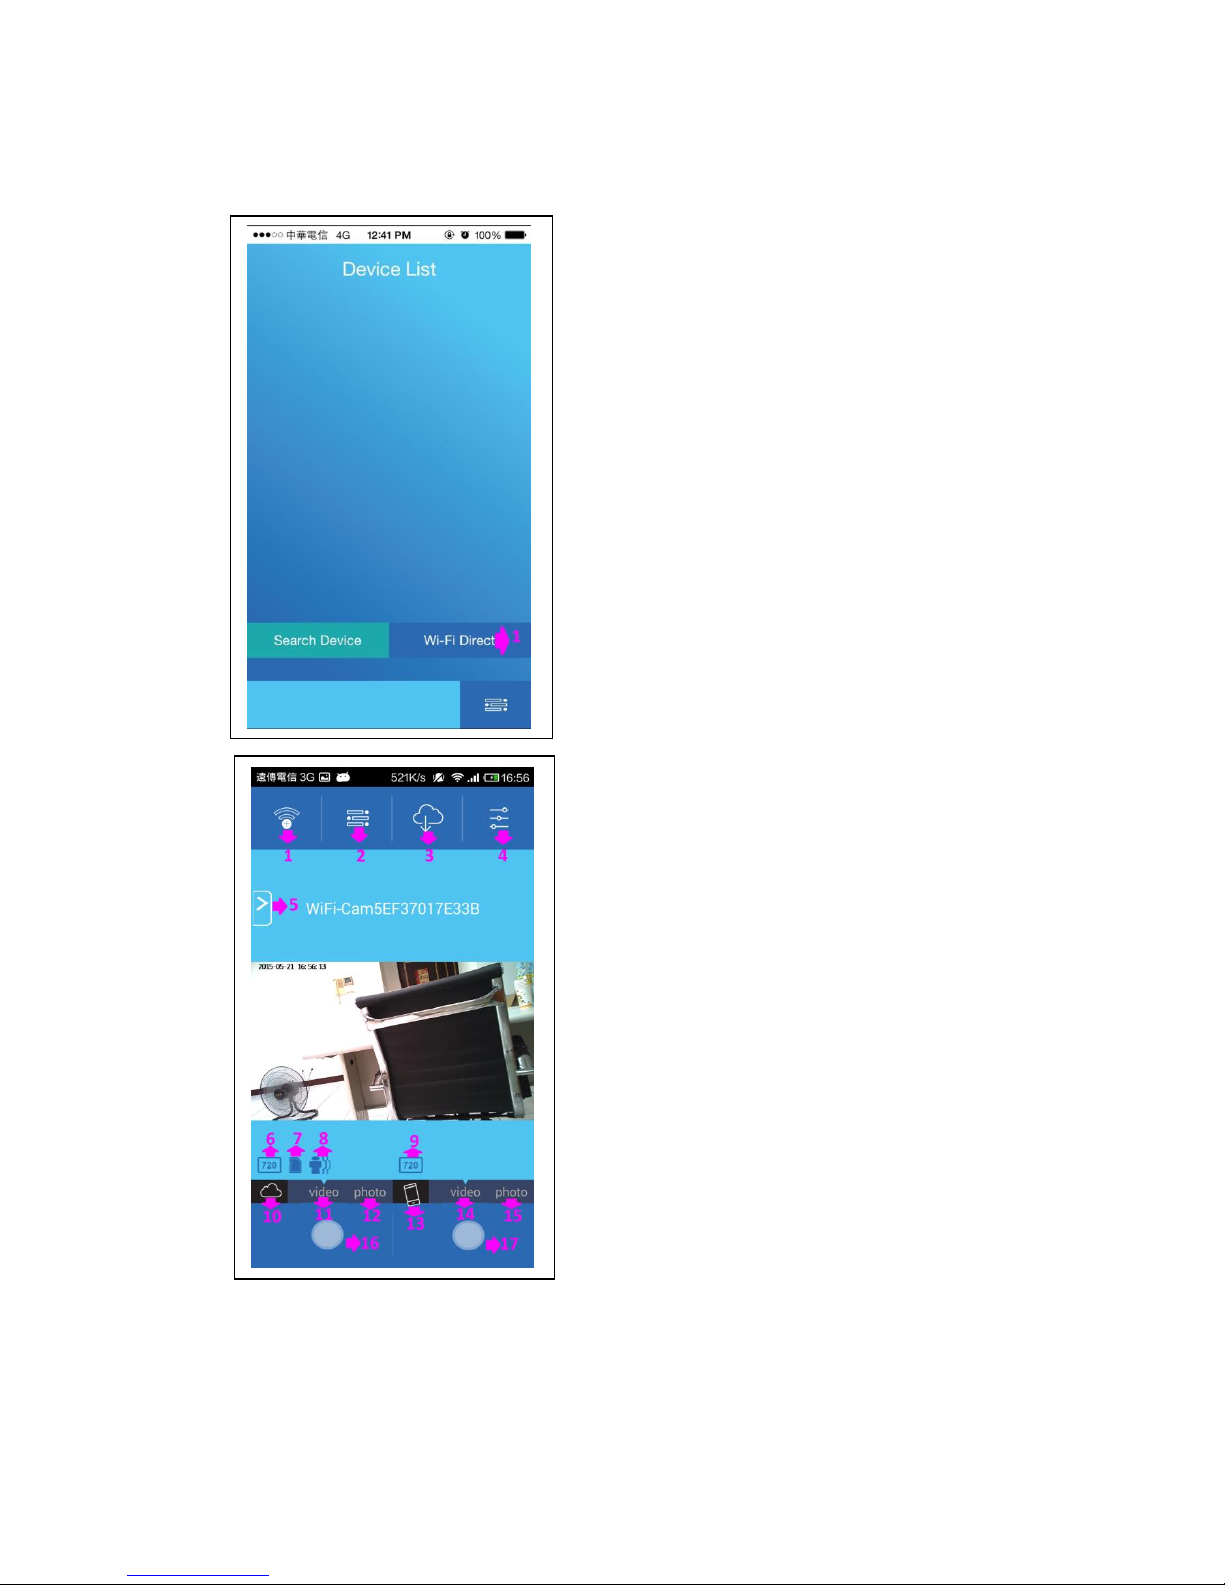
1) Push WI-FI Direct to enter into the preview mode
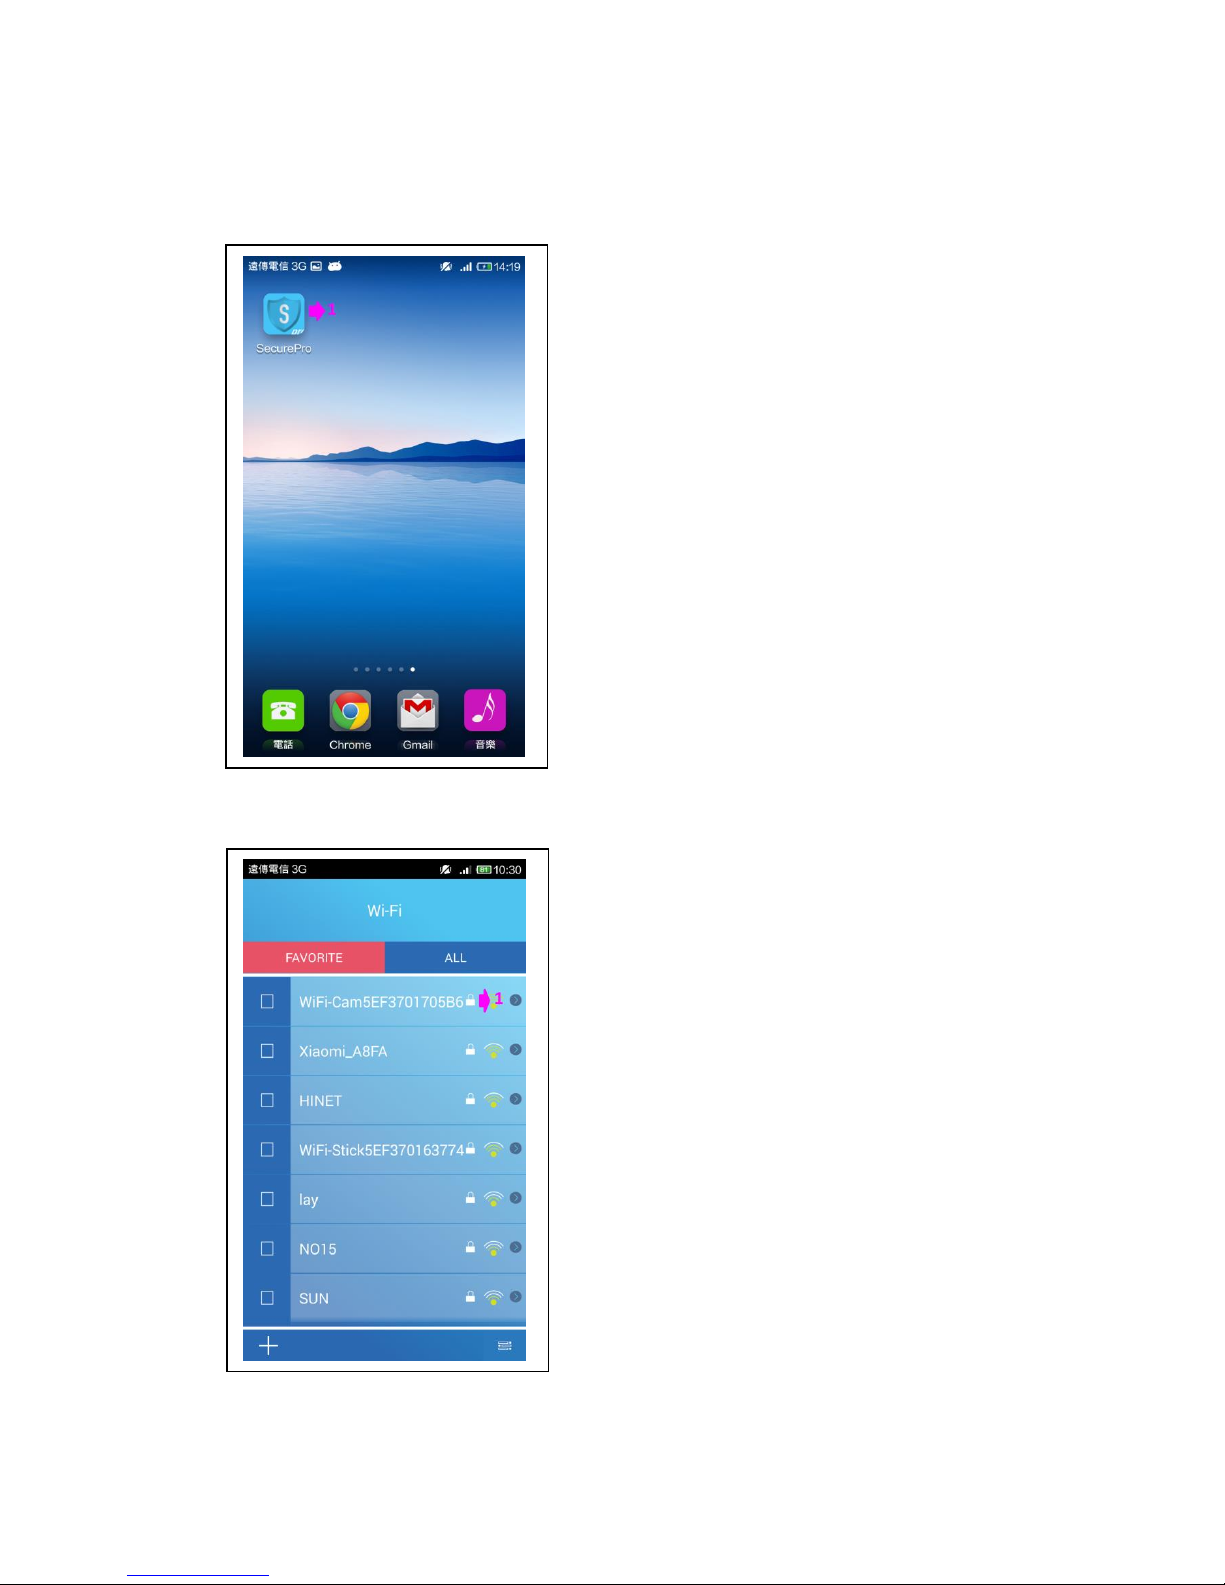
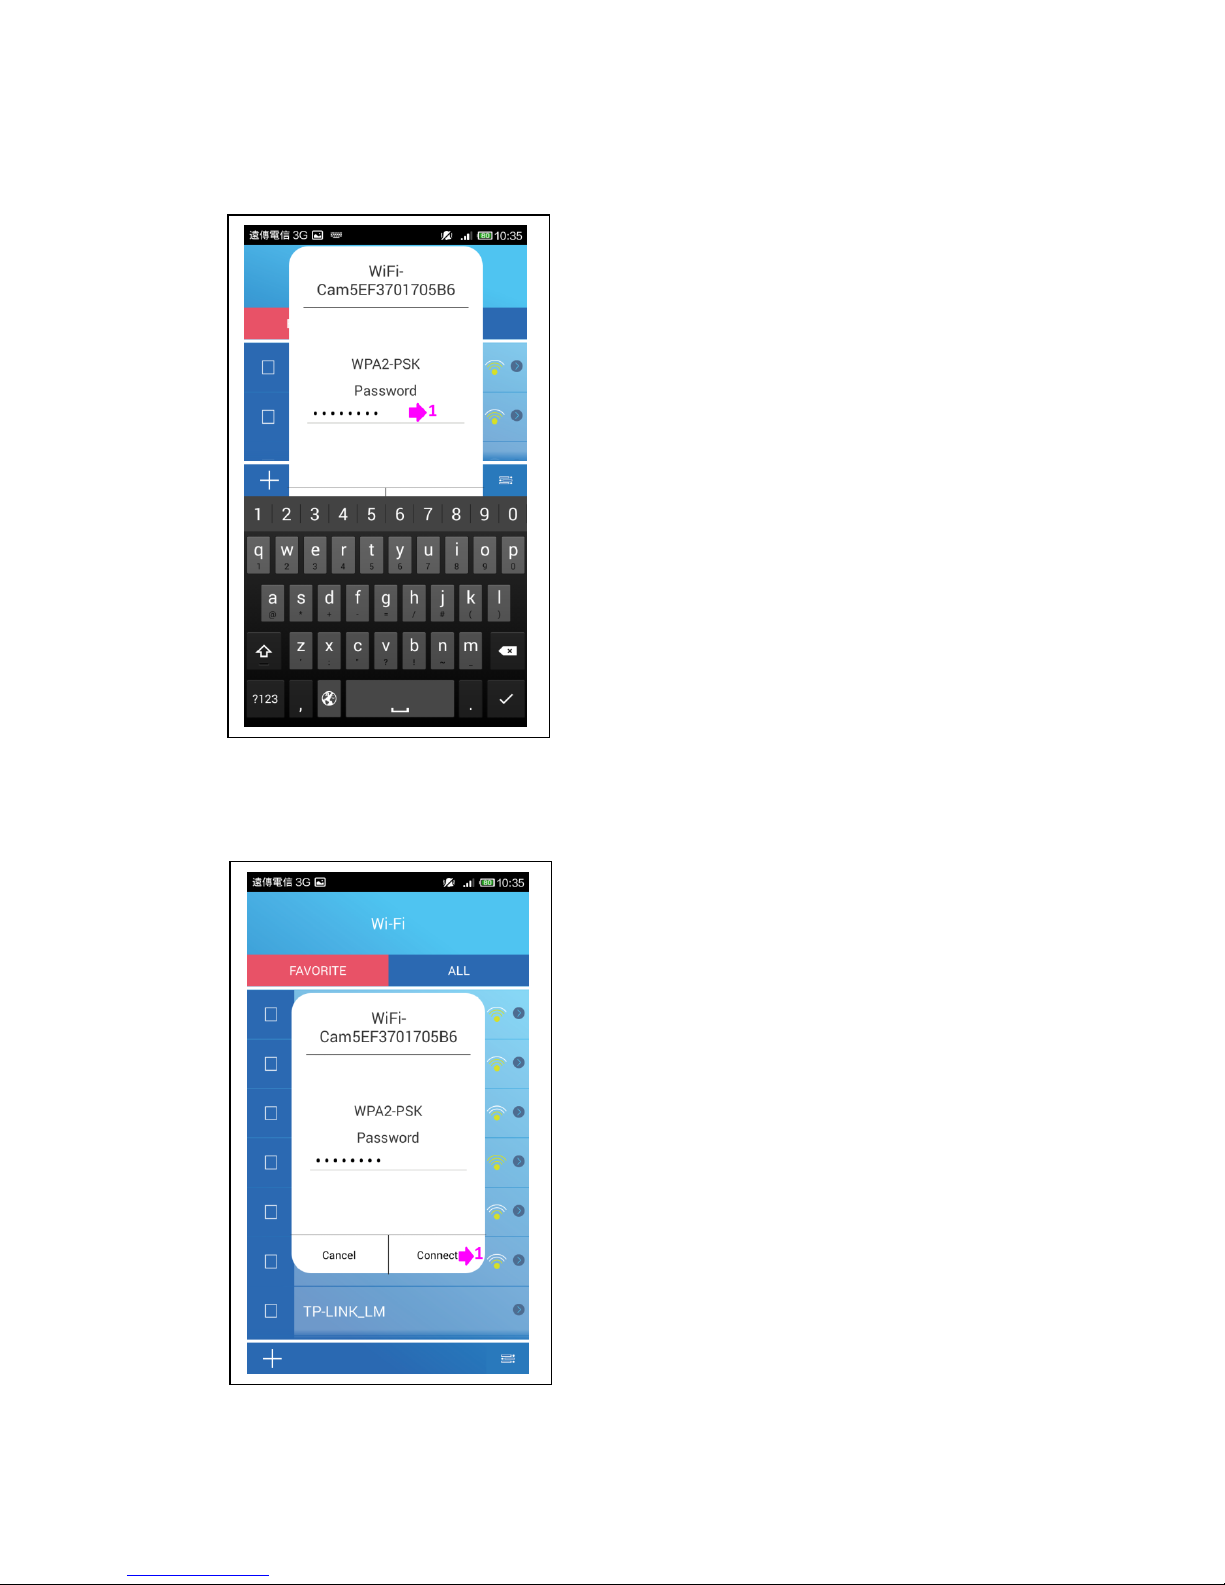
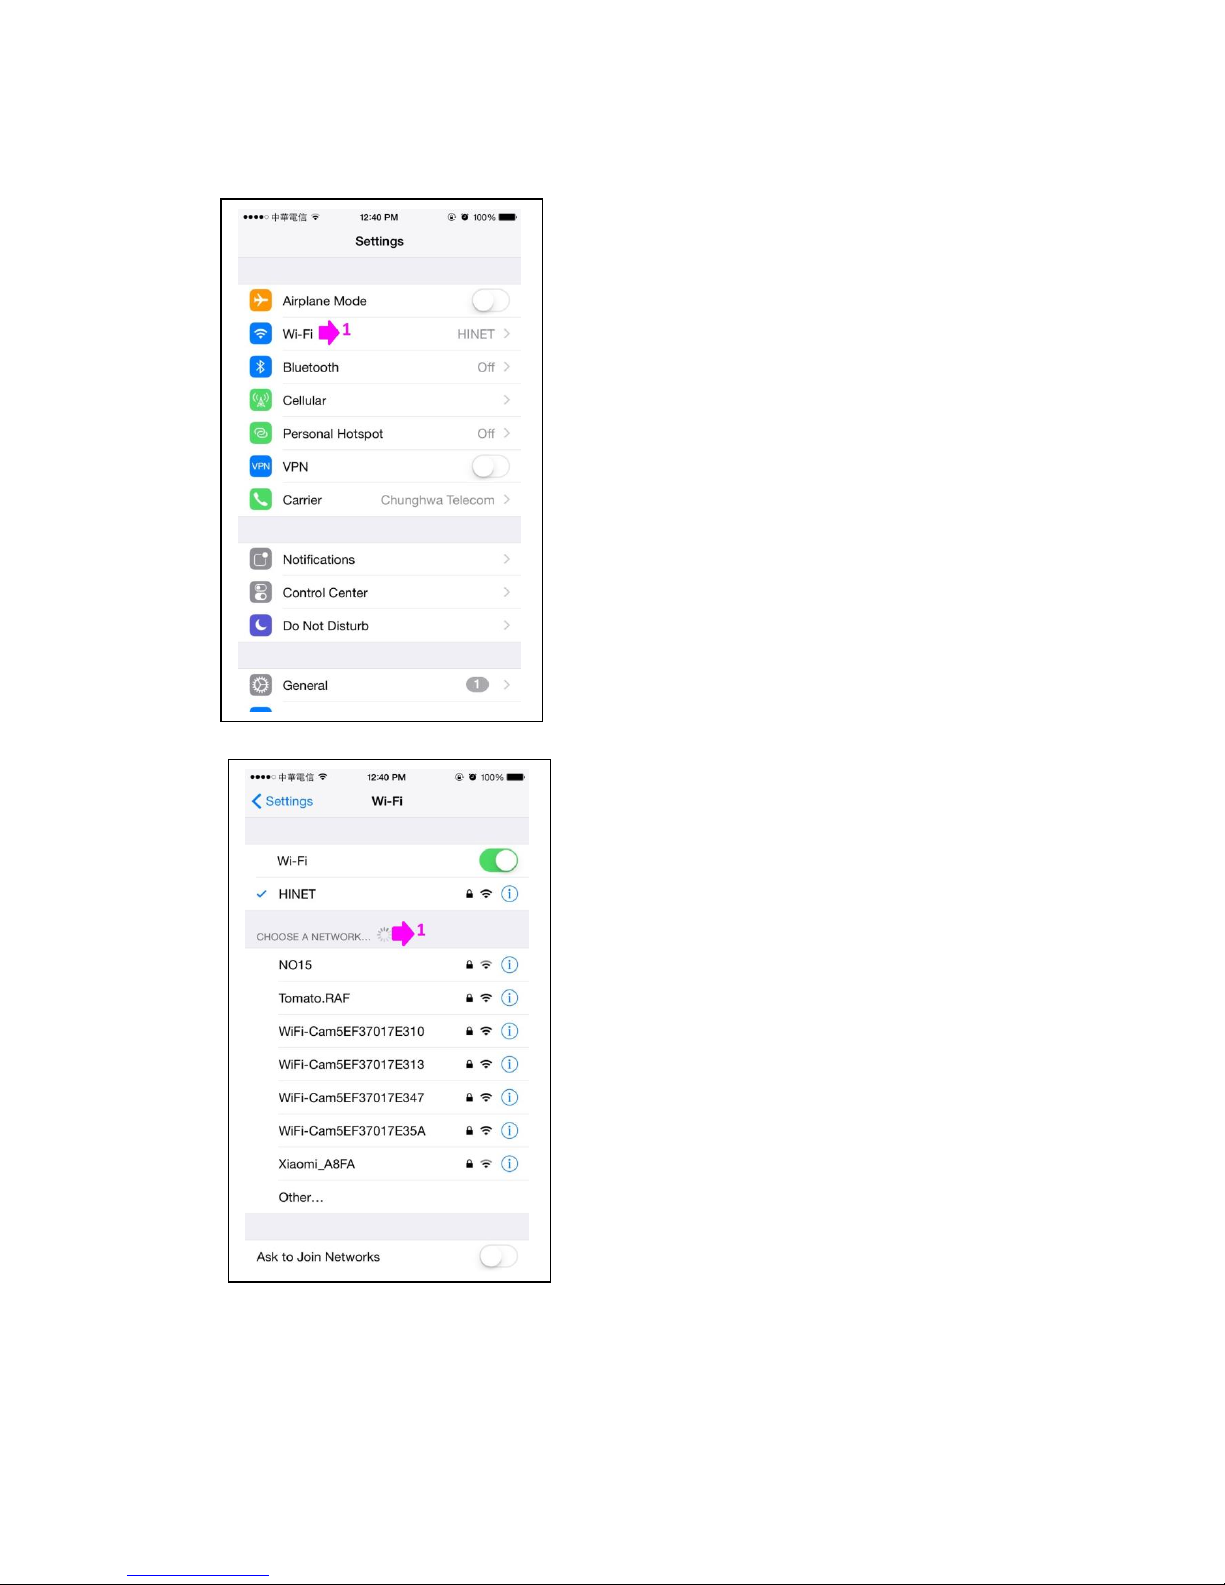
1) Back to WI-FI which you need to connect device list.
2) Cell phone video and Photo archive folder.
3) SD card video host and Photo archive folder.
4) Setting.
5) Quick setting.
6) Host SD card resolution when recording.
7) SD card reminder.
8) Motion detection recording.
9) Resolution when recording.
10) Host SD card recording icon.
11) Host SD card recording.
12) Host SD card photograph.
13) Smartphone recording icon.
14) Smartphone recording.
15) Smartphone photograph.
16) Host SD card recording button.
17) Smartphone recording button

1) Host SD card red light constant lighting while recording
2) Smartphone recording red light blinking.
Browsing Mobile Video and Photo Archive Information.
1) Film archives.
2) Photographic archives.
3) Film and photo all archive.
4) Mark archive what you need.
5) File name.
6) Mark all archive.
7) Unmark all archive.
8) Back to homepage.
9) Play button.
10) Delete button.

Play The Video File.
1) Video playback window.
2) Back to last page.
3) Pause button.
Browsing the Host SD Card Video and Photo Archive
Information.
1) Film archives.
2) Photographic archives.
3) Film and photo all archive.
4) Continuous video file named beginning with Rec.
5) Motion detection recording named beginning with
MRec.
6) Mark archive what you need.
7) File name.
8) Mark all archive.
9) Unmark all archive.
10) Back to homepage.
11) Download archive of SD card to smartphone.
12) Play button.
13) Delete button.

Setting
1) WI-FI setting.
2) Privacy setting.
(After switch privacy setting, entry APP and enter
password.)
3) Video setting.
4) Date and time setting.
5) System information.
6) Reset all setting.
7) Firmware upgrade.
8) Back to homepage.
*Choose APP, In the WI-FI list which you need to connect choose 2 (does not need to connect to host WI-
FI), you can view the last connected WI-FI mobile video host 1. Photo archive file has been downloaded
to mobile video. And you can view Photo archive files.
1) Last connected WI-FI host.
2) Browsing files icon.

WI-FI Setting
1) WI-FI host name.
2) WI-FI password
*You may change the default password to your preferred
here to keep the WIFI connection more confedential
3) Way of encryption.
4) WI-FI SSID invisible or not.
5) Host WI-FI off.
6) Back to homepage.
7) Back to last page.

1) Way of encryption.
2) Visible.
3) WEP encrypt(64bit):Original password 12345.
4) WPA/WPA2/PSK encrypt(128bit):
Original password 12345678.
1) Unit power on, WI-FI is always off
2) Unit power on, WI-FI is always on
3) No connection established for 1 minute,WI-FI turn
off
4) No connection established for 3 minute,WI-FI turn
off
5) No connection established for 5 minute,WI-FI turn
off
*Once WIFI turn off it has to be switched on from the
device, can’t be opened by the phone remotely

* After changing encryption, you need to entry WI-FI options of the device own and clear connection
information of device, then connecting the host with APP again, that changing encryption is successful.
(Different smartphone has different operation screen.)
*The way of removing the host WI-FI connection information in Android.


*The way of removing the host WI-FI connection information in iOS.


1) Privacy setting. (After privacy on, enter password.)
White doc on the left:Privacy off
White doc on the right:Privacy on
2) Privacy password. (Only number, no word limit.)
3) Confirm password again.
4) Back to homepage.
5) Back to last page
*Be aware the privacy function only lock on the running
of this APP, all other functions in the phone remain
normally.

Image Setting
1) Play parameters.
2) Resolution. (D1、720P)
3) Frame choice. (10、15、20、25)
Image Setting
1) Recording model.
(Continuous recording and Motion detecting video.)
*When execute the motion record, after setting it up in
the menu, it need to be pushed once for the either
record button on the preview page to start to operate.
2) Recording time. (1、3、5、10 min)
3) SD Over Write:
White dot on the left:Overwrite Setting off.
White dot on the right:Overwrite Setting on.
4) Back to homepage.
5) Back to last page.

Date and Time Setting
1) Time display function:
White dot on the left:Date display close.
White dot on the right:Date display open.
2) Date format.
3) Time format.
4) Synchronization with device time.
5) Confirm the setting.
System Information
1) Card Memory Capacity.
2) Card Memory Usage rate.
3) APP Version.
4) Device initial firmware version.
* Upgrading method of devices:
Saving the initial firmware on Micro SD card then put
the card into device, connecting device with
APP and choose initial firmware version.
Table of contents