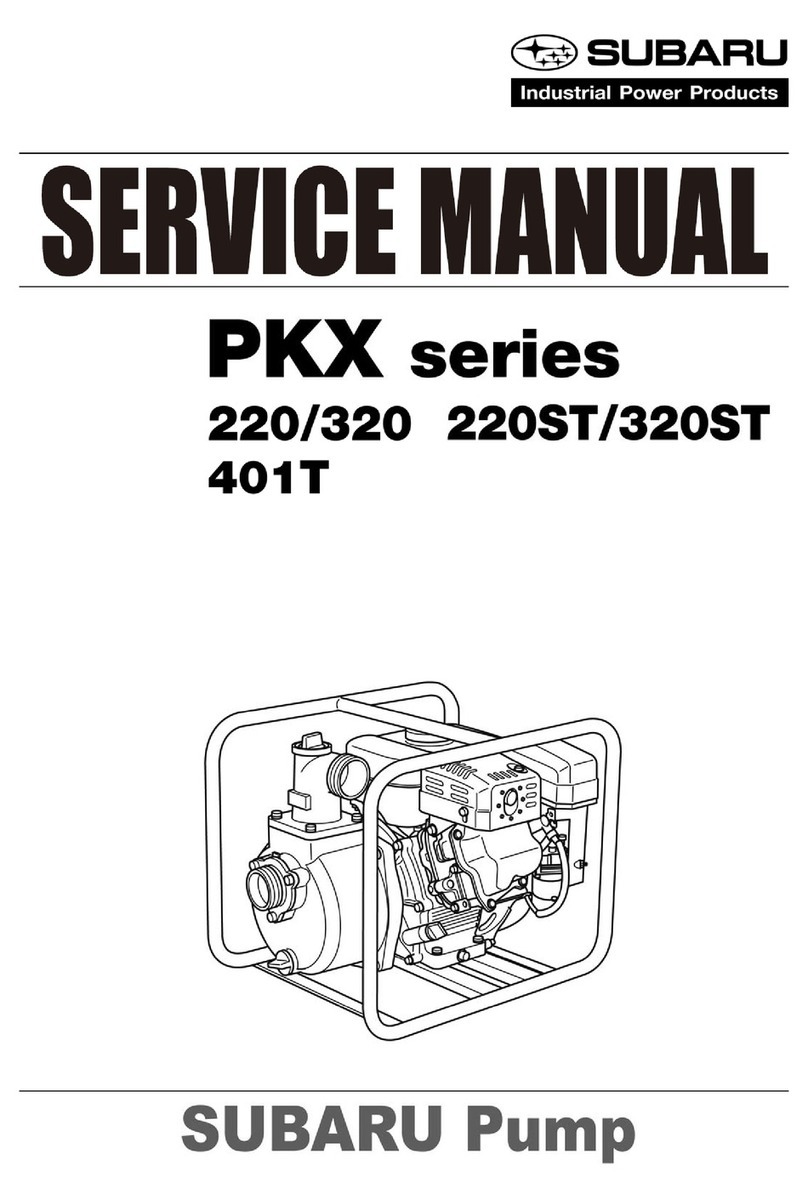
Subaru PTD 206 User manual

tNsrRucrtoNs FoR usE EE4N
MANUEL D'UT\LISAT\ON EE
BEDIENUNGSANLEITIJNG EE
GEBRUTKSAANWTJZTNG M
MANUAL DE i/NSTRIJCCTONES Eg
MANUALE D'USO E MANUTENZTONE III
MANTJAL DE INSTRUQ'ES Ef,
\AHfrE xPHtEax KAr tINTHPHEEAtnNriTirpo,V GE
TN9TRUKTTONSBOK M
BRUKSANVTSNTNG EE|
xAvrro-tn HUoLro-oHJEEr El
BRUGSANVISNING M
PyKoBoAcrBonooKcnnyATAquu M
Jl ^. *. .Yt .:l.rl-J,;l N

f erozoo,3o6,4o6 ,g@@
AJ P^&o
q} !:):-^' -w
R @@@
(D(D
(D@(D
K€) €=) A ,
M"d VYA
R @@@
@@
(D(D(D
(e)clO
WM1<7
R @@@
(D@
@ prozoo, 306, 406/206T, 306r

€,, PTOZOO, 306, 406/206T, 3067
B
@ ero+osr
tr
@ erozoo, 306, 406/206T, 306T
, \hL)%{l)]iil\E
i;P"-K*J9ffi
14ls.VA';rp
-M*;7R=', i
--.-
tr
PTD206, 306, 406/206T, 3067

e
o
PTD206, 306, 406/206T, 3067
@
PTD206, 306, 406/206T, 3067
@
PTD206, 306, 406/206T, 3067
@
ffir
o,a
K9,@m
o tl-L=
@
PTD206, 306, 406/206T, 3067
PTD405T
PTD4O5T
ffi1*
a-@% PTD4O5T
PTD4O5T

@ CE symbol label
@ Etiqu"t. au symbole CE
@ ertxerr tur cE-Symbote
6D etitet voor cE-symboten
@ Etiqueta con el simbolo cE @
@
@
@
CE-symbolmerke
CE-mlbrkeskilt
CE-tunnustarra
CE-markeskilt
@ eti"tr"tt" per simbolo CE
@ Etiqueta com o simbolo CE
@ errxdro pe ro otppolo CE
PTD206, 306, 406
PTD2O6T
PTD306T
PTD4O5T
CD
tffit
tlil @@
M t*lt'* I

EC. DECLARATION OF CONFORMITY
EG-KoNFoRMrrArseRrlAnuruc
oEctlRrrroru DE coNFoRMtrE 'Ec"
EU VERKLARING VAN CONFORMITEIT
DtcHtARAztoNE ol coruronutrA ec
AHAO>H >YMMOPOO>H: E.E.
DECLARACION DE CONFORMIDAD DE LA CE
cE-DECLARA9AO Oe COTTOnM|DADE
ec-r6RsAxnaN oM OvERENsrAnnnttelse
EC.YHDENMU KAISUUSSELVITYS
EC-KONFORMITETS DEKLARASJON
EU-DEKLARATION OM KONFORMITET
Manufacturer
Hersteller
Fabricant
Fabrikant
Costruttore
KqrqoKeuqornq
Fabricante
Fabricanle
Tillverkare
Valmistaja
Produsent
Fabrikanl
FUJI HEAVY INDUSTRIES LTD.
1 -7-2, Nishishinjuku, Shinjuku-ku,
Tokyo 1 60-831 6
Japan
Name and address of the person who keeps the Technical Documentation
Name und Anschrift der Person, die fr:ir technische Dokumentation verantlvortlich ist
Nom et adresse de la personne qui garde la Documentation Technique
Naam en adres van de degene bij wie de Technische Documentatie berust
Nome e indirizzo della persona che conserva la documentazione tecnica
'OvoUq KqL 6Leoeuvon uileueovou yrq rrq TsXVrK6q T€KUnpL6o€rg
Nombre y direcci6n del encargado de la documentaci6n t6cnica
Nome e endereqo do responsavel pela conservagao da Documentaqao T6cnica
Namn och adless gdllande den juridiska person som forvarar den iekniska dokumenlationen
Sen tahon nimi ja osoite, jonka hallussa teknillinen dokumentaatio on
Navn og adresse pa personen som star for teknisk domumentasjon
Navn og adresse pa den person, der opbevarer den tekniske dokumentation
FUJI HEAVY INDUSTRIES LTD
lndustrial Products Company
Saitama Plant
4-410 Asahi, Kitamoto City,
Saitama 364-8511
Japan
K. Kato Manager, Quality Control
Authorized Compiler ln The Community
Autorisiertes Montageunternehmen im Gebiet
Compilateur autor s6 dans Ia Communautd
Erkende vertegenwoordiger in het rayon
Compilatore attotizzato nella comunita
EYKEKprudvos 0ro Tqv Korvo'l ro peroy^uTr'oriq
Compilador autorizado en la Comunidad
Compilador autorizado na comunidade
Auktoriserad sammanstiillare inom gemenskapen
Paikallinen edustaja
Autorisert kompiiator i EU
Auloriseret computer i samfundet
Robin Europe GmbH
Willicher Damm 135-137 D-4'1066
Monchengladbach
Germany
Yoshimitsu Tateno
Product :Water Pump
Produkt :Wasserpumpe
Produit :Pompe a eau
Product :Waterpomp
Prodotto :Pompa acqua
npoiov :Avr^iq Nepoo
Producto :Bomba de agua
Produto :BombaHidraulica
Produkt :Vattenpump
Tuote :Vesipumppu
Produkt :Vannpumpe
Produkt :Vandpumpe
Trade name
Handelsbezeichnung
lvlarque d6pos6e
Handelsnaam
Denominazione commerciale
EUnoprK6 Ovopo
Nombre comercial
Nome comercial
Handelsnamn
Kauppanimi
Handelsnavn
Handelsbetegnelse
ROBIN PTD3O6
ROBIN PTD4O6
ROBIN PTD2O6T
ROBIN PTD3O6T
ROBIN PTD4OsT
ROBIN PTX2Ol
ROBIN PTX3O1
ROBIN PTX4Ol
ROBIN PTX2OlST
HOBIN PTX3OlST
HOBIN PTX2O'l7
ROBIN PTX3O1T
ROBIN PTX2O'lH
HOBIN PTX2O1 D
ROBIN PTX3O1 D
ROBIN PTV1O'1
ROBIN PTV1lO
ROBIN PTV4O6T
Description of the equipment Beschrijving van de apparatuur Descripci6n del equipo Laitteiston kuvaus
Beschreibung des Gerdts Descrizione dell'apparecchiatura Descrigao do equipamento Beskrivelse av utstyret
Description de l'6quipement neprypoen UrlxqwUqroq Beskrivning av utrustningen Beskrivelse af udstyret
The undersigned, Y Takeda, representing the manulacture, herewith declares lhat the product in conformity with the provisions
the following EC*directives;
Der Unterzeichnende, Y Takeda, den Hersteller reprasentierend, erklart hiermit, daB das Produkt mit den Forderungen der
folgenden EG-Amtsblattsvedugungen Libereinstimmt:
Le soussign6, Y Takeda, repr6sentant le Fabricant, d6clare que le produit est en con{ormit6 avec les Directives EC suivantes:
Ondergetekende, Y Takeda, in zijn hoedanigheid als vertegenwoordiger van de fabrikant, verklaart hierbij dat het product voldoet
aan de eisen zoals gelormuleerd in de volgende EU richtlijnen
ll sottoscritto Y Takeda, in rappresentanza del costruttore con il presente documento dichiara che il prodotto d conlorme alle
norme delle seguenti direttive EC:
O unoypdrpov, Y Takeda, ovlnpooonoq rou KorooKeuoorrl, Uero rrlq nopoUonq 6nA6ver o1 To npoiov ouro ovronoKpiveror
Us rouq KqvovroUouq rov oKoloueov odrlyrtlv rrlg Eivor:
EL firmante, Y Takeda, representando al fabricante, declara que el producto conforma las provisiones de las siguientes normativas de la CE:
O abaixo assinado, Y Takeda, representando o labricante, declara por meio desta que o produto esta em conformidade com as
disposigoes das seguintes directivas da CE:
Undertecknad, Y Takeda, representerande tillverkaren, forsekrar harmed att produkten ar i overensstammelse med bestammelserna
i foljande EG'direktiv:
Allekirjoittanut, Y Takeda, joka edustaa tuotetta, taten ilmoittaa, etta tuote on yhdenmukainen seuraavien EC-direktiivien sopimusehtojen kanssa;
Undertegnete og representant for produsenten, Y Takeda, erklerer herved at produktet er i samsvar med bestemmelsene i folgende EC-direktiver;
Undertegnede, Y Takeda, der representerer fabrikanten, erklerer hermed, at produklet er i overensstemmelse med de bestemmelse,
der findes i Iolgende EU-direktiver;

@ ce "yruot t"u"t
@ Etiquette du symbote CE
@ ertxerr ttir cE-symbote
@ etitet voor cE-symbolen
@ etiqueta con el simbolo CE @
@
@
@
CE-symbolmerke
CE-mlbrkeskilt
CE-tunnuslarra
CE-markeskilt
(i) eti"n"t" p"r simbolo cE
GD Etiqueta com o simboto cE
@ errxdro Fe ro oiFPoIo CE
PTD206, 306, 406
PTD2O6T
PTD3O6T
PTD4O5T
o
tm
Lil @@
M t:Yll'*l

References
Zur Bezugnahme
Fl6f6rences
Referenties
Riferimenti
Avoeop6q
Referencias
ReferAncias
Relerenser
Viitteet
Referanser
Referencer
2004t108tEc
2006t42tEC (98/37lEC)
2000t14tEc
l\,4easured Sound Power Level Nivel de potencta sonora medldo
Gemessener Schalldruckpegel Nivel de potdncla sonora medido
Niveau de puissance acoustique mesur6e Uppmdtt bullernive
Gemeten geluidsdrukniveau Mitattu eanivoimataso
Livello di rumore misurato N.4at lydeffektniva
Merpn06v Enin€oo loxuoq HXnrLK6v EfioUndv N/alt lydeffektniveau
PTD306
PTD4O6
PTD2O6T
PTD3O6T
PTD405T
PTX2Ol
PTX3O1
PTX401
PTX2O1 ST
108.1 dB
1 08.8 dB
1 08.1 dB
108.9 dB
'108.6 dB
100.9 dB
103.8 dB
1 04.8 dB
100.9 dB
PTX3O1 SI
PTX2OlT
PTX3OlT
PTX2Ol H
PTX2O1 D
PTX3O1 D
PTVl O'1
PTVl1O
PTV406T
103.8 dB
101.6 dB
104.4 dB
1 03.9 dB
98.2 dB
99.0 dB
99.8 dB
103.1 dB
1 05.5 dB
Guaranteed Sound Power level: Nivel de potencia sonola garantizado
Garantierter Schalldruckpegel: Nivel de potencia sonora garantido:
Niveau de puissance acoustique garantie: Garanterad bullerniva:
Opgegeven geluidsdrukniveau: Taattu aanivoimataso:
Livello di rumore garantitor Garantert lydeffektnive:
EyyufpevoEf,in€6oloxuoqHXnrKovEmopncbv: Garanteretlydetfektniveau:
PTD3O6
PTD406
PTD2O6T
PTD3O6T
PTD4O5T
PTX2O1
PTX3O1
PTX401
PTX2O1 ST
110 dB
110 dB
110 dB
110 dB
110 dB
103 dB
105 dB
106 dB
103d8
PTX3Ol ST
PTX2OlT
PTX3OlT
PTX2O1 H
PTX2O1 D
PTX3O1 D
PTVl O1
PTVl1O
PTV4O6T
105 dB
103 dB
106 dB
106 dB
100 dB
101 dB
100 dB
105d8
107 dB
Contormity Assessment Procedure Procedimiento de evaluacidn de conform dad
Bewertungsverfahren zur Feststelung der Ubereinstimmung Procedimento de avaliaqao da conformidade
Proc6d6 d'6valuation de conformit6 Proceduridr beddmning av dverensslemmelse
Toetsprocedure conformiteit Yhdenmukaisuuden arviointimenetelme
Procedura di valutazione di conformita Prosedyre for konformitetsvurdering
Arq6rKoolo €KTiuronq qvrqnoKpLonq Procedure anvendt ved bedommelse ai konlormitet
Annex V procedure
Reference to harmonized standards:
Verueis auf harmonisierte Normen:
R6l6rence pour harmoniser les normes:
Referentie aan geharmoniseerde standaarden:
Riferimento alle normative armonizzate:
Avogopo oro evqpuovrou6vq np6runq:
Other national standards or specifications used:
Andere angewandte nationale Normen oder Spezifikationen:
Aukes normes nationales ou spdcifications utilis6es:
Overige gebruikte nationale standaarden of specificaties:
Altre normative nazionali o specifiche impiegate:
AIIq KpqrKq np6runo n npo6roypqe6q nou Xpnouotrotrl8nKqv:
Otras normas nacionales o especificaciones utilizadas:
Outros padr6es ou especilicaQ6es nacionais utilizados:
Ovriga anvanda nationeila standarder eller tekniska specifikationer
N,4uut kaytetyt kansalliset standardit tai tekniset tiedot:
Andre anvendte standarder eller spesiiikasjoner:
Andre anvendte nationale standarder eller specifikationer:
/'u =1--
Signature: '/ =/"4/a
Y Takeda
Done al:
Ort:
Fail a
Plaats:
Firma:
AnUroupyngnKs
Hecho en:
Preparado em:
Ort:
Allekirjoituspaikka:
Utfort den:
Udlort:
Referencia a normas relacionadas: EN809
Refercncia para harmoniza. standards: EN5501 2
Henvisning till harmoniserade standarder: ISO 3744
Lahdev itlaukset standardien saamiseksi sopusoirtuun: CISPR 1 2
Referanse til samstemmende standarder:
Reference til harmoniseringsstandarder:
Kitamoto, JAPAN
Kilamoto, JAPAN
Kitamoto. JAPAN
Kitamoto, JAPAN
Kitamoto, JAPAN
Kitamoto, JAPAN
Kitamoto, JAPAN
Kitamoto, JAPAN
Kitamoto, JAPAN
Kitamoto, JAPAN
Kitamoto, JAPAN
Kitamoto. JAPAN
Date:
Datum:
Date;
Datum:
Preparato a:
H$epounvio:
Fecha:
Data:
Datum:
Paivamaara:
Dato:
Dato:
September.30. 2009
30. September 2009
30 septembre 2009
30 september 2009
30 settembre 2009
30 lenr6pPptog 2009
30 septiembre, 2009
30 de Setembro de 2009
30 september 2009
30. syyskuu. 2009
30. september, 2009
30. seplember 2009
General Manager, Quality Assurance
Generaldirektor, Qualitdtssicherung
Directeur general, Assurance de la qualit6
HooJddirecteur, Kwaliteitsbewaking
Direttore generale, Assicurazione Qualita
fevrKdq 6Leueuvrrilq, EqooedlLonq notdrnrqq
Director general, Seguro de calidad
Director geral, Garantia de Qualidade
General Direkt6r. kvalitetsoveruakning
Yleinen manageri, Laatuvakuutus
General bestyrer, kvalitetssikring

FOREWORD
Thank you very much for purchasing a ROBIN PUMP
This manual covers operation and maintenance of ROBIN PUMP
All information in this publication is based on the latest product information available at the time
of approval for printing. Please read this manual carefully before operating.
Please take a moment to familiarize yourself with the proper operation and maintenance
procedures in order to maximize the safe and efficient use of this product.
Keep this owner's manual at hand, so that you can refer to it at any time.
Due to constant efforts to improve our products, certain procedures and specifications are
subjected to change without notice.
When ordering spare parts, always give us the MODEL, PRODUCTION NUMBER and SERIAL
NUMBER of your product.
Please fill in the following blanks after checking the production number on your product.
(Location of label is different depending on the product
PROD No
CONTENTS Page
I.SAFETYPRECAUTIONS...., ..,.,.,2
2.COMPONENTS.... .........4
3.PRE.OPEMTIONFORSTARTING ...,,,,..5
4. OPERATINGYOURPUMP. ..........7
5."HOW-TO"MAINTENANCE..... ............8
6. PREPARATIONSFORSTORAGE,...,, ..,..10
7. EASYTROUBLESHOOTING. ...........11
B.SPEC|F|CAT|ONS... .......12
FOTEI Please refer to the illustrations on the back page of the front
cover or back cover for Fig.E to E indicated in the sentence.
N
specification.)
[--rr-i N' I
liiiiiil

1. SAFETY PRECAUTIONS
Please make sure you review each precaution carefully.
Pay special attention to statement preceded by the following words
7llllitlillllltl "wARNING" indicates a strong possibitity of severe personat injury or ross of rife if
instructions are not followed.
tllGllllllllll *cAUrtoN" indicates a possibitity of personat injury or equipment damase if
instructions are not followed.
lilf[ lFffilll: EXHAUST pREcAUroNs
- r Never inhale exhaust gasses.
l!il| They contain carbon monoxide, a colorless, odorless and extremely
dangerous gas which can cause unconsciousness or death.
r Never operate the pump indoors or in a poorly ventilated area, such as
tunnel, cave, etc.
r Exercise extreme care when operating the pump near people or animals
r Keep the exhaust pipe free of foreign objects.
fti!!ffi : REFUELTNG pREcAUnoNs
r Be sure to stop the pump prior to refueling.
r Do not overfill the fuel tank.
r lf fuel is spilt, wipe it away carefully and wait until the fuel has dried before
starting the engine.
r After refueling, make sure that the fuel cap is secured to prevent spillage.
lil$[lililll?l : FIRE pREVENnoN
r Do not operate the pump while smoking or near an open flame.
r Do not use around dry brush, twigs, cloth rags, or other flammable
materials.
r Keep cooling air intake (recoil starter area) and muffler side of the engine
at least '1 meter (3 feet) away from buildings, obstructions and other
burnable objects.
r Keep the pump away from flammables and other hazardous materials
(trash, rags, lubricants, explosives).
l|$tilllild : orHER SAFETY PREcAUrroNs
r Be careful of hot parts.
The muffler and other engine parts become very hot while the pump is
running orjust after it has stopped. Operate the pump in a safe area and
keep children away from the running pump.
-(-\-
-l'/'
-:'-6j-.^ --l-O
b.-Y I
d,:1.:. rt l
ojr
PTD206,306,406,206T,3067
ru
A lt'
h1@F
v)fu
Pr D 40 5+--'77--7--7777--72tr
W l'. V,
V)
d@ffirz
ll ll t:s-/ oll v)
t/)
2

r Operate the pump on a stable, level surface.
lf the engine is tilted, fuel spillage may result
NOTE
Operating the pump at a steep incline may cause seizure due to
improper lubrication even with a maximum oil level.
r Do not transport the pump with fuel in tank or with fuel strainer valve open
r Keep the unit dry (do not operate it in rainy conditions).
ffi : PRts-UPr,1{ArUN CHEUK'
r Carefully check fuel hoses and joints for looseness and fuel leakage.
Leaked fuel creates a potentially dangerous situation.
r Check bolts and nuts for looseness. A loose bolt or nut may cause serious
engine trouble.
r Check the engine oil and reflll if necessary.
r Check the fuel level and refill if necessary. Take care not to overfill the
tank.
r Keep cylinder fins and recoil starter free of dirt, grass and other debris.
r Wear snug fitting working clothes when operating the engine.
Loose aprons, towels, belt, etc., may be caught in the engine or drive train,
causing a dangerous situation.
4
l
.J
3

N
SYMBOLS
2. COMPONENTS
(See Fis. E)
LNOTE I eteas" refer to the illustrations on the back page of the front cover or back cover
for Fig.il toi8 indicated in thesentence.
WATER PUMP [PTD206, 306,406] (See Fig. E-O)
O Plug (Drain) @ Casing {D Instructions for use
@ Suction @ Fuel tank (This publication)
@ Delivery (D Plug (Priming) (D Tools
@ Air cleaner @ N/uffler @ Hose band
O Fuel injection pump @ Oil gauge
@ Speed control lever (E Recoil starter
O Fuel filter @ Pump strainer
@ Stop lever @ Hose coupling
Read manual, Shutt off fuel valve
when the engine is not in use.
Stay clear ol the hot surtace. Check for leakage
from hose and fittings.
Exhaust gas is poisonous.
Do not operute in an unventilated
room or enclosed arca. @Fire, open flame and smoking
prohibited.
Stop the engine before refueling. IHOT, avoid touching the hot area.
On (Bun) oEngine start
(Electilc staft) TT Fuel (gasoline) t+ Ptimet
oOff (stop) @Engine stop Eil Fuel (diesel) .'=N Push primer
Y' Engine oil @Cold engine NFuel shut-otl sDo not push primet
gAdd oil 0Warm engine Eil Fuel system
lailurc / mallunction 2X Two times
E3 Battery @Electrical prehat
(Low lffi-peaure sbl aidl lrl Choke
eFasI 6C- Run posilion +Plus ;
positive polarity
+Slow @+ StoD position Minus ;
negative polarity

N
Recommended engine oil:
Use diesel engine oil of class "CC" or "CD" (APl ranking)
according to the table below :
Temperature Viscositv orade of oil
+1 0'C to +40'C
(+50"F to +104'F) SAt 5U
-1 0'C to +20'C
(+14'F to +68'F) SAE 1OW-30
r Do not use gasoline engine oil.
Use diesel engine oil only.
r Low grade oil or deteriorated oil cause
engine trouble and shorten engine life.
r Do not screw in the oil gauge when checking
oil level.
4. GHECK FUEL (See rig. B-@, @)
Check fuel level
Do not refuel while smoking or near open
flame or other such potential fire hazards.
Otherwise fire accident may occur.
r Check fuel level at fuel level gauge.
r lf fuel level is low, refill with automobile diesel fuel
(ASrM D975).
Use automobile diesel fuel only.
Fuel tank capacity :
PTD2O6 .
PTD3O6 .
PTD4O5
b) Restarting the engine after the engine has stopped due
to fuel shortage.
c) Starting the engine after the fuel filter cleaning.
Air discharging procedure lsee Fig.tr-@)
Set the speed control lever at "HIGH" speed position and
pull lhe recoil starter handle slowly 2 or 3 times.
Air will be discharged from fuel line automatically.
O HIGH SPEED
O CAP NUT
r lf the fuel tank is refilled before it is emptied, air
discharge work is unnecessary.
r lf the high pressure pipe is disassembled for the
purpose of servicing injection nozzle, discharge
air from the high pressure pipe by the following
procedure :
Set the speed control lever at "HlGH" speed position
and detach the cap nut of the hjgh pressure pipe
on the side of lhe nozzle, and pull the recoil starter
handle slowly until sufficient fuel is injected.
When discharging air from fuel line, be sure to
fill fuel tank with enough fuel (at least 2 liter).
(PTD405T) (see Fig.El-@)
When filling the fuel tank with fuel for the first time, or
when the engine has run out offuel and has stopped, or
when the fuel fllter has been cleaned, be sure to
discharge air from the fuel system. Air in the fuel piping
makes it difficult to start the engine, and may cause
nozzle burn-out.
l) oPEN
O AIR VENT SCREW
O CAP NUT
a) Turn the fuel valve on the fuel filter to the OPEN
position.
b) Loosen the air vent screw for the fuel injection pump
and let the fuel flow out until it is free of air bubbles.
c) Loosen the high-pressure tube nut on the nozzle side
pull the recoil starter slowly until enough fuel comes
out.
lf your engine is an electric starter type, turn the key
swjtch to "START" position until enough fuel comes
out.
d) After the above step, check the tightened parts again.
Wipe off any spilt fuel before starting the
engine, otherwise fire accident may occur.
(L)
3.2
3.2
3.2
3.2
3.2
4.5
PTD2O6T .
PTD306T
PTD4O5T
Air discharge from fuel line
(PTD206, 306, 406 /206T, 306T)
Air discharge from fuel line is required only when starting
the engine in the following conditions :
a) Starting the brand new engine for the first trme.
6

5. CHECK PRIMING WATER (d) After the engine starts, allow the starter handle to
lSee Fig. E-@) return to its original position while still holding the
handle.
It is recommended that the water chamber of pump cas-
ing should be primed with full of water before operating. (e) Warm up the engine without a load for a 2 or 3
O PLUG(PRIMING) minutes.
Never attempt to operate the pump without
priming water or the pump will overheat.
Extended dry operation will destroy the
mechanical seal.
lf the unit has been operated dry, stop the
engine immediately and allow the pump to
cool before adding priming water.
6. CHECK ArR CLEANER (PTD405T)
(See Fig. E-O)
Check the air cleaner for proper oil level.
lf oil is lacking or is contaminated, add engine oil up to
the required oil level, or change it with fresh engine oil.
O ELEMENT
O OIL LEVEL
O OIL BOWL
4. OPERATING YOUR PUMP
(f) (PTD206, 306, 406/ 206T, 306T)
If the engine dose not start yet, pour 2 to 3 cc of
diesel fuel into an auxiliary fuel inlet locating by the
side of the rocker cover while pulling recoil starter
:,1rff:lJr;5"turn the prug in the inret port and EN
(See Fig.E-@)
2. RUNNING (See Fig.14)
After the engine starts, set the speed control lever at
the low speed position (L) and warm it up without a
load for a few minutes.
O LOW SPEED
@ HIGH SPEED
Gradually move the speed control lever toward the
high speed position (H) and set it at the required
engine speed.
NOTE
Whenever high speed operation is not required,
slow the engine down (idle), by moving the speed
control lever to save fuel and extend engine life.
1. STARTING (see Fig. B)
(a) Open the fuel valve. (PTD405T onlv)
(See Fig.E-O) 3' STOPPING (See Fig' E)
a) OPEN (a) Set the speed control lever to the low speed
position and allow the engine to run at low speed
(b) Set the speed control lever at the START position fot 2 or 3 minutes before stopping.
(HlcH SPEED). (See Fig.ts-@) lSee Fig.E-O)
O HIGH SPEED O LOW SPEED
(b) Close the fuel valve. (PTD405T only)
(c) Pull the starter handle slowly until passing the (See Fig.E-@)
compression point (resistance will be felt), then O CfOSe
return the handle to its original position
and pull briskly.
Do not pull out the rope all the way.
lSee Fis.lg-@)
O PULL BRISKLY
r Be sure to pull the recoil starter handle
forcibly.
r Do not pull out the rope all the way.
7

(See Fig. E tlrru E;
1. DAILY INSPECTION
items.
O Check primrng water
G) Excessive vibration,noise
O Enough fuel
@ Safe surroundings
O Clean air cleaner element
N lO Leakage offuel and engine oil
O Enough clean engine oil
G) Loose or broken bolts and nuts
Periodic Maintenance Schedule table
operation of your product.
Check the table below for periodic maintenance
intervals. The below chart is based on the normal
product operation schedule.
Replace rubber pipes for fuel passage every
two years. lffuel leakage is found, replace the
pipe immediately.
5. "HOW.TO" MAINTENANCE
2. PERIODIC INSPECTION
Before running the engine, check the following service Periodic maintenance is vital to the safe and efficient
Maintenance items 8
hours
(daily)
50
hours 100
hours 200
hours
(monthly)
500
hours 1 000
hours
(yearly)
1 500
hours
CLEAN ENGINE PUMP AND CHECK BOLT
AND NUTS X
(daily)
CHECK AND REFILL ENGINE OIL x (Refill daily up to upper limit)
CHANGE ENGINE OIL (.Notel)
(PTD206, 306, 406/ 206T, 306T) x (ln tial 25 ho r rs)
CHANGE ENGINE OIL (-Note1)
(PTD405T) X (ln tial 25 ho Jrs)
CLEAN AIR CLEANER
(AND ADD OIL PTD4O5T) x
REPLACE OR CLEAN OIL FILTER X
REMOVE THE PUMP CASING AND CLEAN X
CLEAN FUEL FILTER X
CHECK AND CLEAN NOZZLE
FOR FUEL INJECTION (-Note 2) X
CHECK AND ADJUST VALVE CLEARANCE
(-Note 2) x
DISCHARGE WATER FROM FUEL FILTER x
CLEAN CYLINDER HEAD (.Note 2) X
REPLACE FUEL LINES (.Note 2) X
OVERHAUL ENGINE (-Note 2) X
-NOTE: 1. lnitial oil change should be performed after first twenty-five (25) hours of operation.
Thereafter change oil every hundred (100) hours. (PTD206, 306, 406/ 206T, 306T)
Thereafter change oil every fifty (50) hours. (PTD405T)
Before changing oil, check for a suitable way to dispose of old oil.
Do not pour it down into sewage drains, onto garden soil or into open streams. Your local zoning or
environmental regulations will give you more detailed instructions on proper disposal.
-NOTE: 2. As to the procedures for these items, please refer to the SERVICE MANUAL or consult your nearest
Robin service dealer.
I

3, ENGINE OIL CHANGE AND OIL FILTER
CLEANING (See Fig. B-O)
lntervals for oil change
lnitial
oil change After first 25 hours of operation
Thereafter
Every 1 00 hours of operation
(PTD206, 306, 406/ 206T, 306T)
Every 50 hours of operation
(PTD405T)
Recommended engine oil:
Use diesel engine oil of class "CC" or "CD" (APl
ranking) according to the table below :
Oil capacity (Upper level) :
(PTD40sT)
(c) Replace the oil filter to the engine.
(d) Pour the engine oil up to upper level of the gauge and
run engine for several minutes.
Then, stop engine and let it stand for about '10
minutes.
Check the oil level again and add if necessary.
Do not use gasoline engine oil. Use diesel
engine oil only.
4. SERVICING THE AIR CLEANER
(See Fis. B-@, @)
(PTD206, 306, 406/ 206T, 306T) (See Fis.E-@)
lf the air cleaner elements are dirty or clogged with dust,
the engine performs poorly and sometimes results in
shortening of engine life. Always keep the air cleaner
elements clean.
O SECoNDARY ELEtllENT
@ PRIN/ARY ELEMENT
r Every 1 00 hours of operation, clean the primary and
secondary elements with detergent and water.
. Dry the elements thoroughly and then replace them
into the air cleaner.
r When operating the engine pump under extremely
dusty conditions, clean the air cleaner elements every
30 to 50 hours operalion.
r Do not clean elements in kerosene, gasoline,
diesel fuel or any other kinds of oil.
r Do nol wet elements before replacing into
the air cleaner.
(PTD40sT) (See Fig.E-@)
lf the air cleaner elements are dirty or clogged with dust,
the engine performs poorly and sometimeS results in
shortening of engine life. Always keep the air cleaner
elements clean.
O ELEMENT
O OIL LEVEL
O OIL BOWL
a) Every 1 00 hours of operation, clean the primary and
secondary elements with kerosene. After cleaning,
coal the secondary element with engine oil.
b) Refill engine oil up to the oil level.
r When operating the engine under extremely dusly
conditions, clean the air cleaner every 30 to 50 hours
of operation depending on the operating conditions.
E
(L)
PTD2O6 .
PTD3O6 ,
PTD4O6 .
PTD2O6T
PTD3O6T
PTD4O5T
0.9
0.9
0.9
0.9
0.9
1.1
O OIL FILTER
@ OIL GAUGE
O OIL INLET
(a) Remove drain plug from the engine pump base and
drain oil thoroughly.
It is advisable to drain oil while the engine is warm,
and remove the oil gauge for quick discharging-
(b) Remove oil filter from the crankcase, and clean it in
the clean fuel.
(PTD206, 306, 406/ 206T, 306T)
(c) Replace the oil filter and drain plug firmly.
(d) Pour fresh oil into the oil frller neck up to the upper
level mark of the oil gauge.
(e) Replace the oil gauge firmly.
I
Temperature Viscositv orade of oil
+10'C to +40"C
(+50'F to +104"F) SAE 30
-10'C to +20'C
(+14'F to +68'F) SAE 1OW-30

5. FUEL PIPE REPLACEMENT
(See Fio. [Z-@)
Replace rubber fuel pipes every 2 years.
If a fuel leak is found from a crack in fuel pipe, replace
the all rubber pipes at once.
6. CHECKING BOLTS, NUTS AND SCREWS
(See Fig. E-@)
Eil r Retighten loose bolts and nuts.
L:lIl r Check for fuel and oil leaks.
r Replace damaged parts with new ones.
7. CLEANING PUMP INSIDE (TRASH PUMP)
(See Fis. E-@)
r Turn the knob counterclockwise and open the
casing cover holder.
r Pull the casing toward you, and then remove the
casing and the inner casing.
r Clean the inside of pump casing and casing cover
with clean water.
6. PREPARATIONS FOR STORAGE
1. WATER (See Fig. B-O)
Drain all water from the drain plug.
0 pr-uc (DRATN)
When retightening drain plug, be sure to clean
the drain plug and the thread of casing.
Otherwise, the thread may be damaged.
2. DISCONNECT THE DELIVERY HOSE
Tilt the pump and drain all water from delivery hole.
Severe damage to pump may result if water freezes in
the pumping chamber.
3. DISCHARGE FUEL (See FiS. tr-@)
Do not smoke while discharging fuel, otherwise
the fire accident may occur.
(PTD206, 306, 406/ 206T, 306T)
r Remove the drain screw of the fuel filter.
(PTD405T)
I Open the fuel valve.
r Remove the injection pump bolt and discharge the
fuel from the fuel tank.
r Remove the fuel filter cup and discharge fuel from
the fuel filter
r After discharging the fuel, clean the fuel filter
element.
4. LUBRICATING ENGINE OIL
(See Fis. B-@)
r Change the used engine oil with fresh oil.
I Pour 4 to 5 cc engine oil into the auxiltary fuel
inlet and pull the recoil starter handle slowly 2 or 3
times. (Do not start the engine.)
r Be sure to put the plug into the inlet.
5. CLEAN AND STORE
r Slowly pull the recoil starter handle until resistance
is felt and leave it in that position.
r Clean the pump thoroughly with an oiled cloth, put
the cover on, and store the pump indoors in a well
ventilated, low humidity area.
to

7. EASY TROUBLESHOOTING
1. PUMP DOES NOT RUN
I Engine dose not start.
(See 7.-4'4. WHEN ENGINE DOES NOT START")
r Sticking of impeller.
(Disassemble and clean.)
2. PUMPING VOLUME IS SMALL
r Sucking air at suction side.
(Check piping at suction side.)
r Drop off engine output
(Consult your nearest dealer.)
r Breakage of mechanical seal.
(Consult your nearest dealer.)
r High suction lift (Lower.)
I Suction hose is too long or thin.
(Use a thick hose in minimum length.)
r Leak of water from water passage. (Stop ieaking.)
r Clogging of foreign substance in impeller.
(Disassemble and clean.)
r Wear of impeller.
r Strainer is clogged. (Ctean.)
r Engine speed is too low.
(Consult your nearest dealer)
3. PUMP DOES NOT SELFPRIME
r Suction of air at suction side.
(Check piping at suction side-)
r lnsufficient primlng water inside pump casing
(Prime fully.)
r lmperfect tightening of drain plug.
(Tighten the piugs completety.)
r Engine speed is too low.
(Consult your nearest dealer)
r Sucking air from mechanical seal.
(Consult your nearest dealer.)
4. WHEN ENGINE DOES NOT START :
r Perform the following checks before you take the
pump to your Robin dealer.
r lf you still have trouble after completing the checks,
take the pump to your nearest Robin dealer.
Are foreign substances contained in the fuel?
r Drain all the fuel from the fuel tank and check that
no foreign substances and/or water are contained in
the fuel.
r Clean the fuel filter.
ls there enough compression?
I lf compression is not sufficient, check the mounting of
the injection nozzle.
lf the mounting nuts are loose, tighten them.
(PTD206, 306, 406/ 206T, 306T)
ls fuel tak filled up? (See riS. B{0)
O Check the fuel gauge.
@ Chect if the speed control lever is in "High"
position.
@ Disconnect the high pressure pipe on the side of
the injection pump, and set the speed control lever
to the "high speed" position.
(PrD405r)
ls fuel being injected? (See Fig. E-€))
O Check that the fuel valve is open.
@ Check that the speed control lever is in the "high
speed'' position.
@ Loosen the air vent screw of the injection pump and
let the air out of the pump.
@ Disconnect the high pressure pipe on the side of
the inlection pump, and set the speed control lever
to the "high speed" position.
Turn the engine over manually and check if fuel is
injected. lf the fuel is not being injected, the dealer
or service shop should repair the unit.
N
1t
This manual suits for next models
5
Other Subaru Water Pump manuals
Popular Water Pump manuals by other brands

Aquatec
Aquatec 8800 Installation instructions manual

Wilo
Wilo Wilo-E 15/1-5 Installation and operating instructions

Pentair
Pentair Hydromatic S3S Installation and service manual

Neilsen
Neilsen CT5182 quick start guide

onga
onga Dominator 7535 owner's manual

Radicon
Radicon Benzlers Roloid Gear Pump Installation & maintenance