Suki WDH-716HF-16R User manual

SUKI
Dehumidier WDH-716HF-16R
User’s Manual
Lion Healthcare
PO Box 566, Cottesloe, WA, 6911

2
Structure and principle
Features...........................................................................................................................3
Specications................................................................................................................. 4
How dehumidifying works............................................................................................ 4
Device overview .............................................................................................................5
Operation
Control panel ..................................................................................................................5
Operation instructions.................................................................................................. 6
Continuous draining ......................................................................................................7
Maintenance
Storing the dehumidier .............................................................................................. 8
Important safeguards ................................................................................................... 8
Caring for the dehumidier.......................................................................................... 9
Troubleshooting .......................................................................................................... 10
Warning ........................................................................................................................10
Cautions ........................................................................................................................10
Contents
Before using your dehumidifier, please read the user’s manual carefully, in order to
ensure correct and safe use. After reading the manual, make sure it is stored in a safe
place for future reference if necessary.

3
Features
Powerful dehumidifying capability
The dehumidifier powerfully removes excess
moisture from the air creating a drier, healthier
home environment.
Excellent drying laundry function
The dehumidifier dries laundry quickly. This can
prevent laundry and furniture from becoming
damp and musty in a rainy season.
Quiet operation
The dehumidifier is suitable for over night
operation.
Drainage tank with a large capacity
3.5 litre capacity water tank means the
dehumidifier requires emptying less often.
Using refrigerant for protecting environment
The dehumidifier uses no CFC refrigerant
therefore protecting the environment.
Modern Design
The dehumidifier is compact with a streamlined
appearance and modem design.
The castors at the bottom allow easy mobility.
SAVE
Saving energy
The power consumption is low.

4
Specications
Power Supply
Moisture removal
Power input
Size of shell
Weight
Operating temperatureOperating temperature
Water tank
220 240V ~ 50Hz
(W x H x D) 580 x 340 x 245mm
8 L/D (27oC 60%RH) 16 L/D (30oC 80%RH)
320W
12.5kg
3.5 litres
5oC ~ 35oC
MODEL WDH-716-HF
• If the power cord on this unit is damaged it must be replaced by the manufacturer, its service agent or
qualified persons in order to avoid a hazard.
• This appliance is not intended for use by children or other persons without assistance or supervision
if their physical, sensory or mental capabilities prevent them from using it safely. Children should be
supervised to ensure that they do not play with the appliance.
Waste electrical products should not be disposed of with household waste.
Please recycle where facilities exist. Check with your local authority or retailer for recycling advice.
It draws in room air, cools it with a cooling unit,
and changes the humidity to drops of water.
The drops of water fall into a drainage tank.
The dehumidified air is re-heated by a heating
unit and discharged.
Steps ,,and are repeated to remove
humidity from the room.
After the air passes through the re-heating unit, its temperature will rise a little, so that the
temperature of the room will rise by 2 to 4oC. This is normal operation.
Cooling unit Re-heating unit
Moist air Dried air
Compressor Drainage tank
If you pour cold water into a cup, the air around the cup is cooled, and drops of water form on the
surface of the cup. The dehumidier takes advantage of this phenomenon to remove moisture.
How Dehumidifying Works

5
Device Overview
CONTROL
PANEL AIR
FILTER
DRAIN
BUCKET
CONTINUOUS
DRAINAGE HOLE
Control panel
OUTLET FOR
DEHUMIDIFIED
DRY AIR
TURNING
WHEEL
INTAKE OF
MOIST AIR

6
Operation Instructions
1. Make sure the plug is firmly plugged into the wall socket.
2. Make sure the device water tank is placed in its correct position. (After
powering on the device for the first time, if the full tank light lights up, just
pull out the water tank then push it back to the proper position).
3. Turn the control knob to the suitable humidity setting (usually at
normal position). If the humidity level is over 60oC, then the device
will start removing moisture. If the humidity indoors is high, then
turn the control knob to ‘continuous’.
4. When the humidity in the room reaches below 60oC then the device will stop operating.
5. When the humidity in the room is over 60oC then the device will start removing moisture again.
6. The circulation between points 3., 4. and 5. is controlled by the set humidity.
WHEN FULL TANK LIGHT IS ON
When the water tank is full, the indication light will light up, the device will stop operating. Remove
the water in the tank, then place the water tank back in it’s proper position, the device will start
operating again.
DEFROST
When operating in low temperatures (less than 12oC) the surface of the evaporator will accumulate
frost and effect the efficiency of the dehumidifier. When this happens the device will go into periodic
defrost mode automatically. This is quite normal. Defrost light will come on. The device will operate
in temperatures down to 5oC in the area it is being used. Defrost times may vary. If the dehumidifier
freezes up turn the device off and let ice melt then turn the device back on. If the device freezes up
again it may be that the temperature is lower than 5oC, if it is, then you should not run the device until
the temperature rises. If the device continues to freeze up it may need looking at, return it to the place
of purchase to be sent back for service.
START OPERATION
Remove the water in the water tank
with two hands

7
CONTINUOUS DRAINAGE OPTION
THE PROPER WAY TO PLACE THE WATER DRAINAGE PVC HOSE
When using continuous drainage, the PVC hose must be placed below the drainage hole. Avoid
uneven ground and kinking drainage hose.
Continuous Drainage
1. Put in the PVC hose into the back of the closed hole, then connect the PVC hose to the front.
• Prepare PVC hose to drain out water.
• Take out the stopple of the drainage outlet.
• Take out the soft cover, put it and tube stopple into the bucket for storage.
• Connect the PVC hose with the drainage outlet.
• Place the bucket in its original location.
2. Place water tank back in its original position.
Continuous drainage hole

8
When the device is not to be used for a long period of time
1. Fold up the power supply cord.
2. Discard any water left in the drainage tank and wipe away any remaining drops with a cloth.
3. Clean the air filter.
4. Store the device. Package the device to keep it free of dust, and keep it upright and store it in a
cool, dry place.
Storing the Dehumidier
Important Safeguards
Please note the following safety precautions when using the unit:
1. When the dehumidifier is used in the laundry, ensure there is adequate clearance between any
clothes and the device to prevent water dripping on the unit.
2. Before cleaning the device or when it is not in use for a long period of time, unplug the power cord.
3. Do not use the dehumidifier in the immediate surroundings of a bath, shower, or swimming pool.
4. Do not place the device close to a heater, or any appliance which will have a high temperature.
5. Do not place any objects into the air inlet or outlet.
6. Do not sit or stand on the unit.
7. Discard water that has collected in the tank regularly.
8. Do not place the dehumidifier in an enclosed area, ie. closets, which will prevent air circulation.
9. Do not use the dehumidifier for any purpose other than for which it was originally intended.
10. Install the external drain piping on a downhill gradient to ensure that condensed water can be
drained continuously.
11. If the supply cord is damaged, it must be replaced by the manufacturer or its service agent or a
similarly qualified person in order to avoid hazard.
12. The device is not intended for use by young children without supervision.

9
Before cleaning your dehumidier, rst ensure that the device is disconnected from power
supply.
1. Outer case:
Wipe the shell with a soft, slightly damp cloth. Do not immerse in any
liquid. Dry with a dry cloth. Do not use harsh abrasives or solvents.
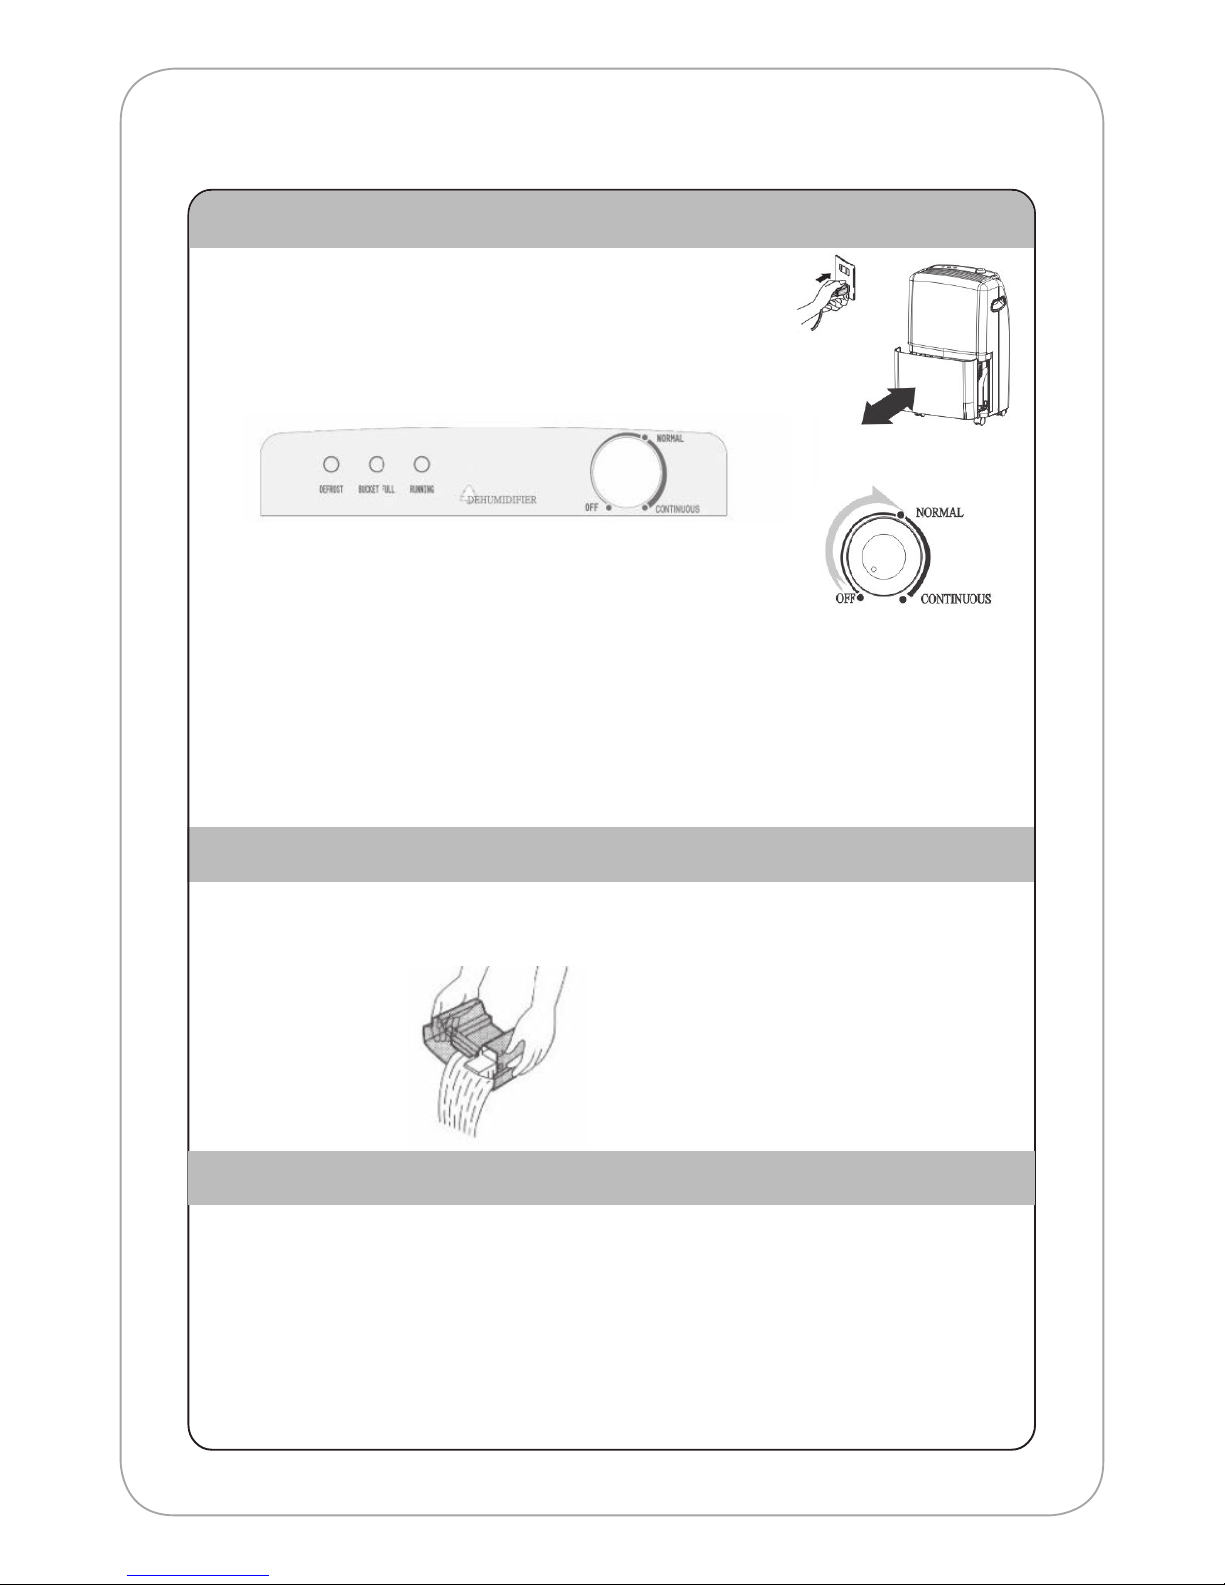
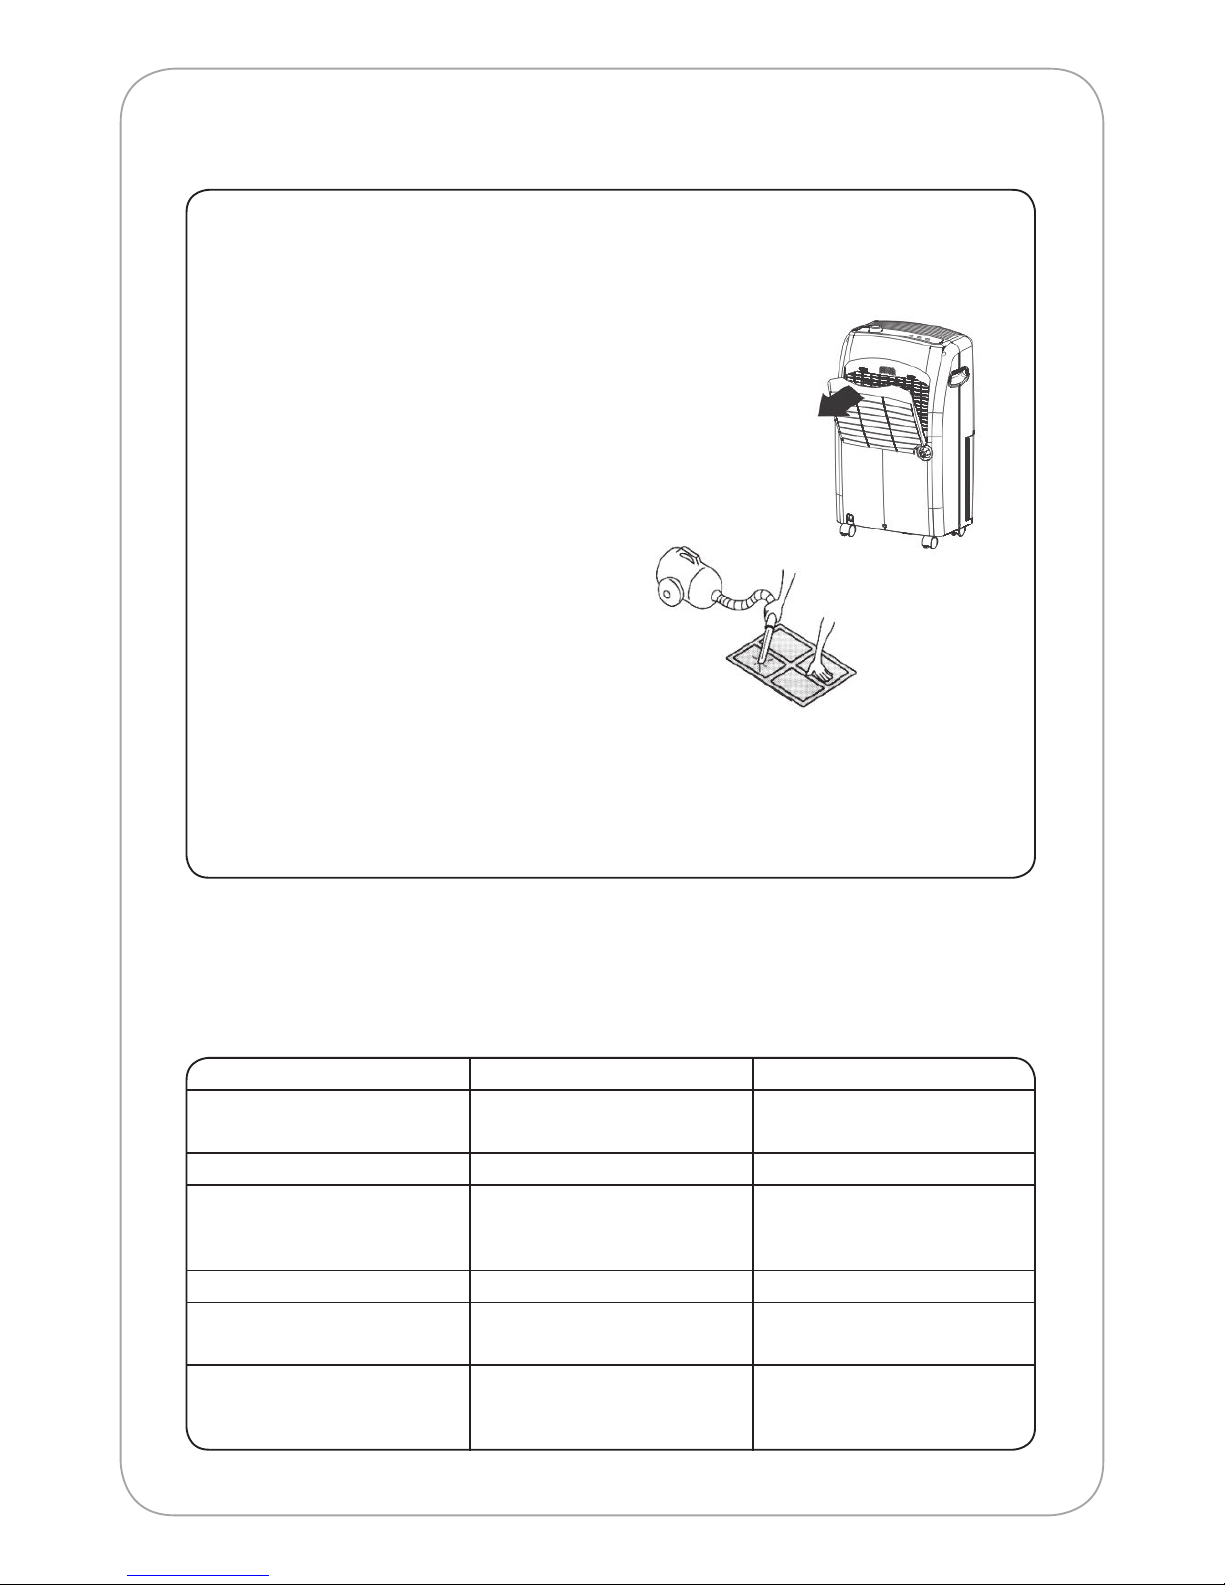
2. Air filter cleaning:
For best results, clean your air filter regularly, as it will become
clogged with dust over time.
• Pull out the filter gently.
• To clean the air filter, run a vacuum cleaner
lightly over the surface of the air filter to
remove dirt. If the air filter is very dirty,
wash it with warm water and a neutral
cleaning solvent and dry it thoroughly.
3. Insert to its original position.
Caring for your Dehumidier
Problem Possible cause Solution
Both fan and compressor not
working.
No power to unit. Check power to socket. Check
power switched on.
Compressor or fan not working. Motor failure. Faulty electronics. Return for service.
Not collecting water. Air intake filter blocked.
Refrigerant is low. Temperature
and humidity are too low.
Clean filter. Return for service.
Normal function.
Noisy unit. Floor uneven. Place on a level surface.
Condenser frozen. Filter is dirty. Temperature is too
low.
Clean filter. Switch off and wait for
temperature to rise.
Leaks. Bucket not installed properly.
Micro switch failure. Unit has
frozen.
Fit properly. Return for service.
Unplug and allow ice to melt.
Troubleshooting
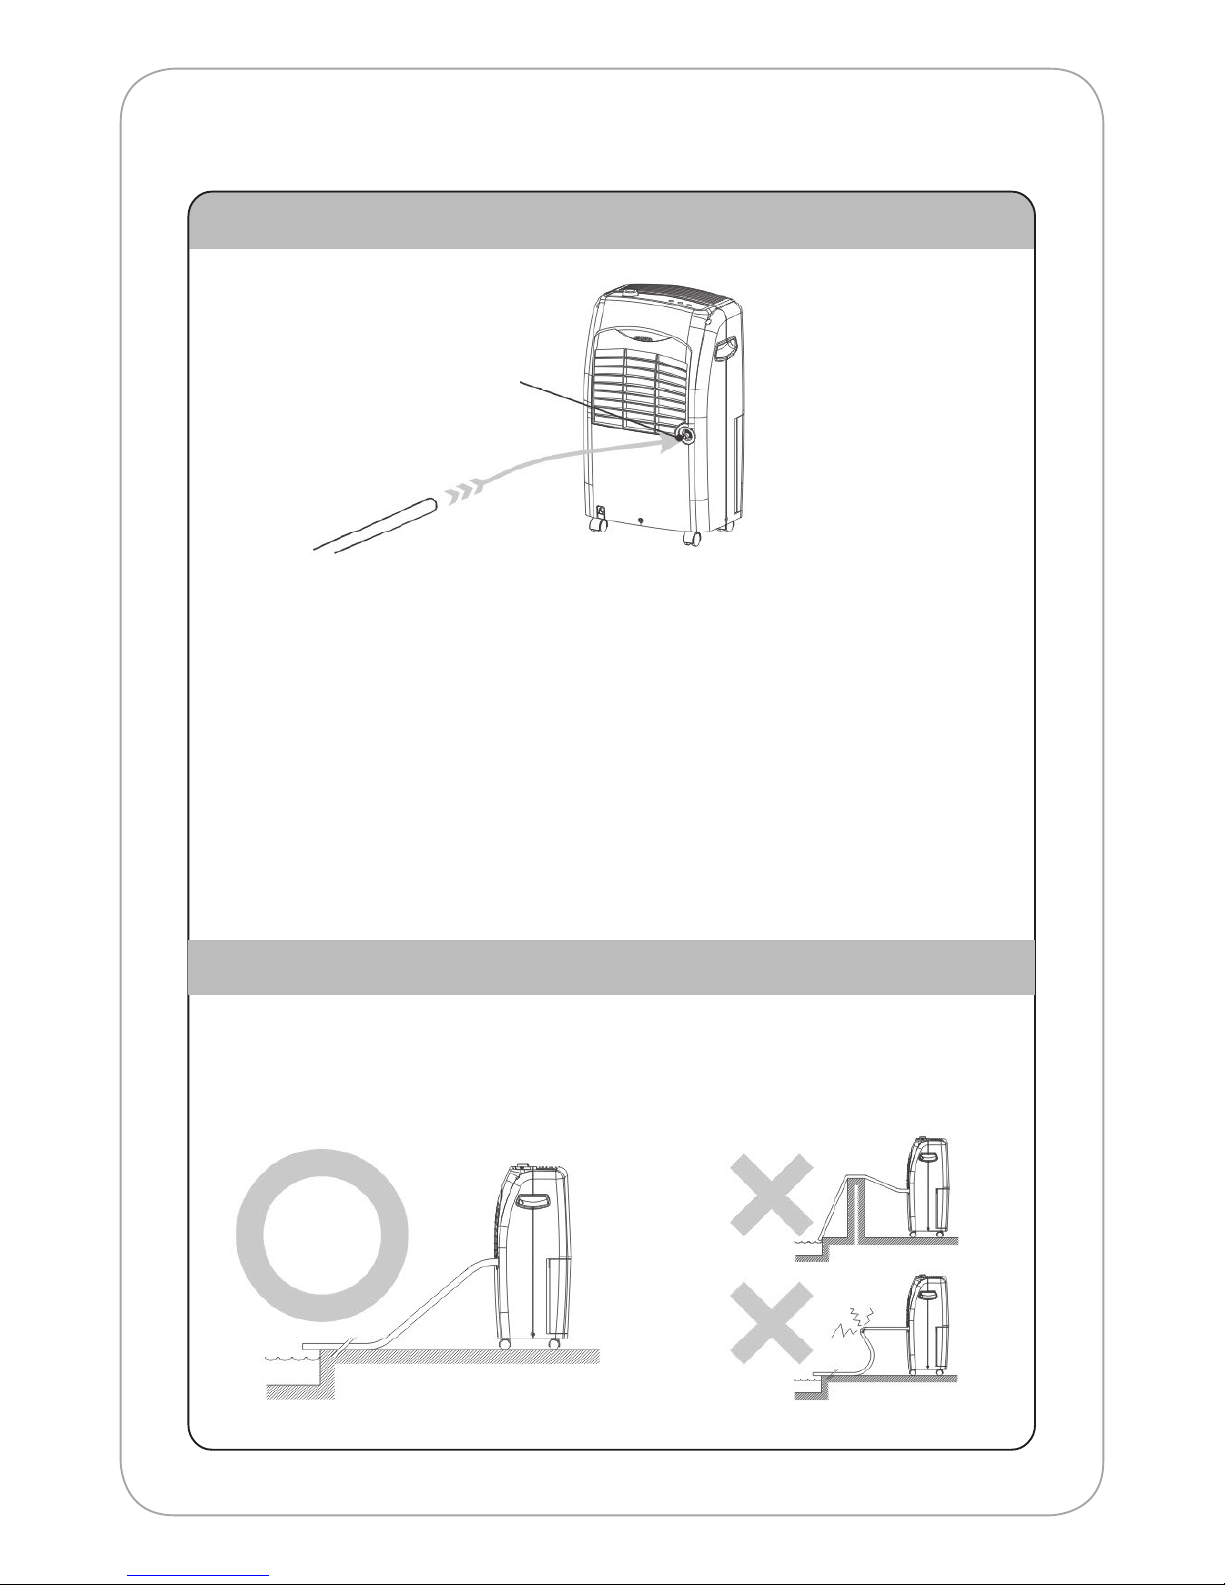
In case your dehumidier shows any abnormality, please check the items mentioned below rst:

10
Warning
Do not fold or knot the power
cord as shown below!
Make sure the plug is inserted
firmly and properly into the
outlet!
Do not insert multiple plugs
into the electrical socket as
shown below!
Make sure the plug is clean! After turning off the device,
unplug the power cord!
Do not plug in the power cord
if hands are wet!
Cautions
Do not place anything on top
of the control panel!
Do not cover the device’s air
vents!
Do not allow children to climb
on or play with the device!
Do not wet the device or
control panel!
Keep flammable materials away
from the device!
Contact a professional for
service repair!

11
Cautions
Do not pull the power cord as shown. Do not spray any aerosols near the device.
Ensure the device is placed on a flat surface. Always keep the device at least 20 cm away
from the wall to allow heat to dissipate properly.
Hang clothing at least 50 cm above the device.
Do not insert anything into the device. For best results close all windows and doors.
Keep the device away from all sources of heat. When moving or storing the device, do not
place it sideways or upside down.
Table of contents
Other Suki Dehumidifier manuals