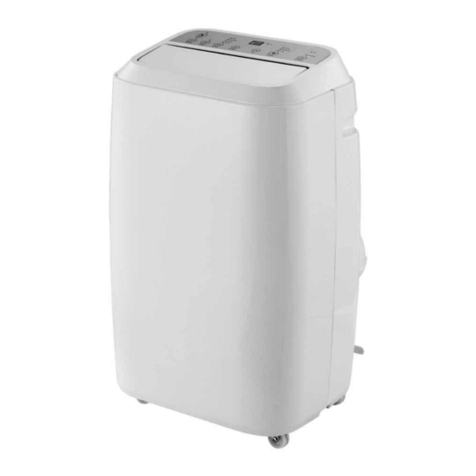
EUROM 38.039.2 Manual

Instructieboek / Instruction leaflet /
Bedienungsanleitung / Livret d'instructions/ Manuale di istruzioni /
Folleto de instrucciones / Manual de instruções
PAC 12.2 & 14.2
MOBIELE Airconditioner/Luchtontvochtiger
MOBILE Air conditioner/Dehumidifier
MOBILE Klimaanlage/Luftentfeuchter
Climatiseur/déshumidificateur MOBILE
Condizionatore/umidificatore MOBILE
Aire acondicionado / deshumidificador PORTÁTIL
Ar condicionado/Desumidificador MÓVEL
Art.nr. PAC12.2 : 38.039.2 Art.nr. PAC14.2 : 38.040.8

2
NL Deze symbolen op uw apparaat betekenen:
Dit apparaat is gevuld met Propaangas R290. De voorschriften van de
fabrikant aangaande gebruik en reparatie dienen absoluut opgevolgd te
worden!
Lees voor gebruik dit instructieboekje zorgvuldig en geheel door.
Installeer, gebruik of bewaar het apparaat niet in een ruimte, kleiner dan
15m².
EN These symbols on your device mean:
This appliance is filled with Propane gas R 290. Follow stricktly the
manufacturer’s instruction concerning use and repairs!
Before using the machine, carefully read this entire instruction manual.
Do not install, operate or store the device in a room smaller than 15m².
DE Diese Symbole auf Ihrem Gerät bedeuten:
Gerät ist mit Propangas R 290 gefüllt. Beachten Sie unbedingt die
Gebrauchs- und Reparaturrichtlinien des Herstellers!
Lesen Sie dieses Handbuch vor der Benutzung sorgfältig durch.
Installieren, verwenden oder lagern Sie das Gerät nicht in Räumen, die
kleiner als 15m² sind.
FR Ces symboles sur votre appareil signifient :
Cet appareil est rempli de gaz propane R 290. Respectez scrupuleusement
les instructions du fabricant concernant l'utilisation et les réparations!
Avant utilisation, lisez attentivement et entièrement le présent manuel
d’utilisation.
N'installez, n'utilisez ou ne stockez pas l'appareil dans un espace de moins
de 15m².

3
IT Questi simboli sul suo dispositivo indicano:
Questo dispositivo è riempito con gas propano R290. Le indicazioni del
costrutture sull’utilizzo e sulla riparazione devono assolutamente essere
seguite!
Prima dell’uso leggere attentamente e interamente il manuale delle istruzioni.
Installa, utilizza o conserva il dispositivo in un ambiente non più piccolo di
15m².
PT Estes símbolos no seu aparelho significam:
Que este aparelho foi enchido com gás propano R290. As instruções do
fabricante quanto à sua utilização e reparação devem ser escrupulosamente
seguidas!
Leia este manual de instruções atenta e completamente antes de utilizar..
Não instale, utilize ou armazene o dispositivo num espaço inferior a 15m².
ES Estos símbolos en su aparato indican que:
Este aparato contiene gas propano R290. ¡La normativa del fabricante sobre
el uso y las reparaciones debe cumplirse siempre y sin ninguna excepción!
Lea cuidadosa y completamente estas instrucciones antes de usar.
No instale, use ni guarde el aparato en un espacio de tamaño inferior a 15m².

4
NL
HARTELIJK DANK !
Hartelijk dank dat u voor deze EUROM airconditioner/luchtontvochti-ger gekozen hebt: u hebt
daarmee gekozen voor een uitstekend apparaat waar u ongetwijfeld jarenlang veel plezier van
zult hebben!
Om de werking zo veilig en probleemloos mogelijk te laten verlopen willen wij u dringend
adviseren het instructieboekje voor gebruik geheel en aandachtig door te lezen: het bevat
belangrijke veiligheidsinformatie, aanbevelingen enz., en helpt u maximaal profijt uit uw airco te
halen!
Wij raden u aan zowel het instructieboekje als de verpakking te bewaren: het boekje om het t.z.t
zonodig nogmaals te kunnen raadplegen, de verpakking om de airconditioner aan het eind van
het seizoen in op te ruimen.
Tenslotte wensen wij u veel plezier van uw airco toe!
TECHNISCHE GEGEVENS
MODEL
EUROM PAC12.2
EUROM PAC14.2
Koelcapaciteit
12000 BTU/uur
3500 Watt
14000 BTU/uur
4000 Watt
Max. stroomverbruik
1345 Watt
1538 Watt
Luchtverplaatsing
max.
450 m³ / uur
450 m³ / uur
Aansluitspanning
220–240V / 50Hz
220–240V / 50Hz
Geluidsniveau
65dB(A)
65dB(A)
Koelvloeistof
R290/210gr.
R390 / 210 gr.
Isolatieklasse
IP20
IP20
Ventilatorinstellingen
3
3
Werktemperatuur
18 - 35°C
18 - 35°C
Afvoerpijp
Ø 150 mm x 1500 mm.
Ø 150 mm x 1500 mm.
Netto gewicht
26 kg.
26 kg.
Afmetingen
44 x 33,5 x 71,5 cm (l x b x h)
VEILIGHEIDSINSTRUCTIES
Algemene veiligheid:
Dit apparaat is uitsluitend geschikt voor huishoudelijk gebruik.
Zorg er te allen tijde (ook tijdens transport!) voor dat het apparaat rechtop staat. Heeft het
apparaat toch (deels) horizontaal gelegen, wacht dan 2 uur voordat u het in gebruik neemt.
Die tijd heeft de compressor nodig om zijn werk correct te doen.
Zorg ervoor dat hij op een stevige, vlakke en horizontale ondergrond staat.
Zorg ervoor dat het apparaat tijdens de werking aan alle zijden minstens 50 cm. vrije ruimte
heeft.
Zorg ervoor dat stekker en stopcontact te allen tijde goed zichtbaar en bereikbaar zijn.
Plaats geen voorwerpen op het apparaat.
Laat een werkend apparaat niet zonder toezicht achter, ook niet even!
Gebruik het apparaat niet in de nabijheid van lichtontvlambare of explosiegevoelige stoffen
of brandstoffen. Gebruik ook geen verf, reinigingssprays, anti-insectensprays e.d. op of bij
het apparaat; dat kan het plastic deformeren of elektrische schade aanbrengen.
Blokkeer de roosters voor de inkomende en uitgaande luchtstromen niet: ook niet
gedeeltelijk. Dek het apparaat dus ook niet af: dit kan brand veroorzaken!

5
Steek geen vingers of voorwerpen als pennen enz. door de roosters het apparaat in en zorg
ervoor de ventilator niet te blokkeren.
Op kinderen, handelingsonbekwame personen en huisdieren dient toezicht te worden
gehouden om er zeker van te zijn dat zij niet met het apparaat spelen.
Dit apparaat kan door kinderen van 8 jaar en ouder en personen met verminderde fysieke,
zintuiglijke of geestelijke vaardigheden of gebrek aan ervaring en kennis worden gebruikt
wanneer er toezicht op hen wordt gehouden of wanneer zij instructies hebben ontvangen
aangaande het op veilige wijze gebruiken van het apparaat en begrijpen welke gevaren
eraan verbonden zijn. Kinderen mogen niet met het apparaat spelen. Reiniging en
gebruikersonderhoud mogen niet door kinderen zonder toezicht worden uitgevoerd.
Voorkom dat kinderen het apparaat aanraken of ermee spelen.
Stel het apparaat niet in werking wanneer u beschadigingen constateert aan apparaat,
elektrokabel of stekker, of wanneer het slecht functioneert, is gevallen of op andere wijze
een storing vertoont. Breng het complete apparaat terug naar uw leverancier of een erkend
elektricien voor controle en/of reparatie. Vraag altijd om originele onderdelen. Het apparaat
(incl. elektrokabel en stekker) mag uitsluitend worden geopend en/of gerepareerd door
daartoe bevoegde en gekwalificeerde personen.
Elektrische veiligheid:
Dit apparaat is alleen geschikt voor gebruik binnenshuis
Gebruik uitsluitend de stekker die van fabriekswege op het apparaat is gemonteerd en geen
andere aansluitingsvormen!
Het apparaat dient volgens de landelijke bedradingsvoorschriften te worden aangesloten.
Controleer voor gebruik of het stopcontact dat u wilt gebruiken geaard is, geen defecten
vertoont en of de spanning op het stopcontact, overeenkomt met die op het typeplaatje van
het apparaat. Schade, veroorzaakt door een foutieve spanning valt buiten de garantie!
Als het apparaat niet wordt gebruikt, of als u het schoonmaakt, er onderhoud aan uitvoert of
het verplaatst, schakel het dan éérst uit en neem vervolgens de stekker uit het stopcontact.
Beweeg en/of verplaats het apparaat altijd rustig!
Ook wanneer u het apparaat in gebruik neemt geldt: éérst de stekker in het stopcontact, dan
de schakelaar op de AAN-stand en dan pas de bedieningsknop gebruiken!
Gebruik het apparaat niet in een vochtige of natte omgeving, niet in de buurt van een bad,
douche of zwembad en spetter geen water, olie of wat voor vloeistof dan ook op of in het
apparaat.
Vermijd zoveel mogelijk het gebruik van verlengsnoeren. Is dit onvermijdelijk, gebruik dan
een snoer met voldoende capaciteit (minimaal 3 x 1,5 mm²) en houd het buiten de looproute!
Verplaats het apparaat niet door aan de elektrokabel te trekken en neem de stekker in de
hand als u die uit het stopcontact wilt nemen. Beschadig/vervorm/verander elektrokabel
en/of strekker niet; dat kan tot schade aan het apparaat of een elektrische schok leiden.
Schakel het apparaat onmiddellijk uit en neem de stekker uit het stopcontact wanneer u
vreemde geluiden hoort, geurtjes ruikt of rook ziet.
Als de elektrokabel, stekker of het apparaat zelf beschadigd of stuk is, dan wel storingen
vertoont, gebruik hem dan niet of schakel hem onmiddellijk uit en neem de stekker uit het
stopcontact. Apparaat, stekker en/of kabel dienen door een elektricien of een vergelijkbaar
gekwalificeerd persoon te worden gerepareerd/vervangen. Reparaties door ondeskundigen
doen de garantie vervallen en kunnen gevaarlijke situaties veroorzaken!
Veiligheid rond het koelmiddel R290:
Lees al deze waarschuwingen aandachtig door.
Dit apparaat bevat het koelmiddel R290. R290 is een koelmiddel conform de Europese
richtlijnen. Perforeer het koelcircuit nooit, R290 is brandbaar (GWP 3)!

6
Gebruik voor het ontdooiproces geen andere middelen dan aanbevolen door de fabrikant.
Dit apparaat dient te worden gebruikt en opgeslagen in een ruimte, waarin zich geen
bronnen van ontsteking bevinden, zoals open vuur of werkende gas- en elektrische
apparaten.
Perforeer geen van de onderdelen van het koelcircuit en steek het apparaat niet in brand.
Als het apparaat is geïnstalleerd, werkt of wordt opgeslagen in een niet-geventileerde ruimte
dan dient u maatregelen te nemen ter voorkoming van brand of explosie door weggelekt
koelmiddel. Zorg dan dat er zich geen enkele ontstekingsbron (als vuur, kachels, vonkende
elektrisch apparatuur, brandende cigaretten enz.) in dezelfde ruimte bevindt!
Het apparaat moet zodanig worden opgeslagen dat mechanische defecten worden
voorkomen.
Installeer, gebruik of bewaar het apparaat niet in een ruimte, kleiner dan 15m².
R290 is geurloos, u zult lekkage dus niet ruiken!
Personen die met een koelcircuit werken of daarop ingrijpen, dienen in het bezit te zijn van
de juiste certificering die afgegeven is door een geaccrediteerde instantie en waarmee wordt
verklaard dat de persoon in kwestie competent is om koelmedia te hanteren in
overeenstemming met een speciale beoordeling die door de verenigingen van de sector
erkend is.
De reparaties moeten uitgevoerd worden op grond van de aanbevelingen van de fabrikant
van het apparaat. Het onderhoud en de reparaties die de assistentie van ander
gekwalificeerd personeel vereisen, moeten uitgevoerd worden onder toezicht van iemand
die gespecialiseerd is in het gebruik van ontvlambare koelmedia.
Voor maximaal effect:
Overschrijd de aanbevolen maximaal te koelen ruimte niet
Plaats het apparaat niet in de buurt van een warmtebron, niet in dezelfde ruimte met een
wasdroger en niet in direct zonlicht.
Sluit ramen en deuren en houd gordijnen of luiken gesloten tijdens de zonnigste uren van de
dag
Houd de filters schoon
Temper temperatuur- en ventilatie-instellingen wanneer de ruimte de gewenste condities
heeft bereikt.
BESCHRIJVING

1 –voorpaneel
2 –luchtuitlaat
3 –bedieningspaneel
4 - handgreep
5 –luchtinlaat
6 –elektrokabel met stekker
7 –waterafvoer-continu
8 - aansluiting afvoerslang warme lucht
9 –luchtinlaat
10 –opruimplaats elektrokabel en stekker
11 –wateraftappunt
12 –wieltjes
13 - afstandsbediening
Toebehoren:
A –Afvoerslang warme lucht
B –Aansluitstuk raambalk
C –Aansluitstuk airco
D - Raambalk
INSTALLATIE
De EUROM PAC12.2 en PAC14.2 zijn mobiele airco’s/luchtontvochtigers die van kamer naar
kamer verplaatst kunnen worden.
Verwijder al het verpakkingsmateriaal en zorg er daarbij voor dat het apparaat steeds
rechtop blijft staan
Controleer voor gebruik of alle toebehoren aanwezig zijn en of apparaat en toebehoren geen
beschadigingen vertonen. Neem een beschadigd apparaat niet in gebruik maar ga er mee
terug naar uw leverancier!
Plaats het apparaat op een stevige, vlakke, droge en horizontale ondergrond in de buurt van
een stopcontact en afvoermogelijkheid voor de warme lucht, bijv. een venster dat een stukje
kan worden geopend. Zorg ervoor dat het apparaat aan alle zijden minstens 50 cm. vrije
ruimte heeft en houd rekening met alle aanwijzingen uit de veiligheidsinstructies.
Om te ontvochtigen sluit u nu een waterafvoerslang aan op de waterafvoer-continu (7).
Deze slang leidt u in een emmer of putje. De slang mag niet omhoog lopen! Uw apparaat is
nu gebruiksklaar.
Om te koelen hoeft u geen
waterafvoerslang aan te sluiten.
Plaats de raambalk sluitend in de
opening van het raam, zie afb. De
lengte van de raambalk is
verstelbaar van 67,5 tot 123 cm.
Draai het aansluitstuk voor de airco
op het ene-, en voor de raambalk op
het andere uiteinde van de
afvoerslang.
Schuif het aansluitstuk voor de airco in de daarvoor bestemde gleuven op de achterzijde van
de airco.
Bevestig het andere uiteinde van de afvoerslang in de opening raambalk, om de af te voeren
warme lucht naar buiten te leiden.

8
U kunt de afvoerslang ook zonder raambalk uit een openstaand raam hangen; deze
methode is evenwel minder effectief.
Voorkom knikken of bochten in de afvoerslang. Dit veroorzaakt opeenhoping van uitgestoten
vochtige lucht, wat lekkage, over-verhitting of uitschakeling van de airco tot gevolg kan
hebben.
Waarschuwing! Gebruik uw airco niet voordat hij volgens de hierboven beschreven
instructies is geïnstalleerd!
Waarschuwing! Zorg ervoor dat er geen water het apparaat kan binnendringen!
Waarschuwing! De lengte van de afvoerpijp is speciaal aangepast aan de techniek van
deze airco. Vervang hem dus niet door-, en verleng hem niet met een eigen slang, want dat
kan het functioneren van de airco negatief beïnvloeden. De slang kan worden uitgerekt,
maar om een optimaal effect te bereiken dient u de lengte zo kort mogelijk te houden.
Denk wel aan uw inbraakpreventie!
WERKING
Bedieningspaneel en afstandsbediening hebben dezelfde knoppen: u kunt er dus dezelfde
opdrachten mee geven. Het bedieningspaneel heeft daarnaast lampjes die tonen wat er is
ingesteld. Verder op het bedieningspaneel een W.F.-lampje (watertank vol) en een display dat
de temperatuur- en timerinstelling toont.
Controleer, vóór u uw airco in gebruik neemt:
Of hij volgens de voorschriften en de veiligheidsinstructies is geïnstalleerd
Of hij geen beschadigingen of gebreken vertoont
Of het stopcontact dat u wilt gebruiken de spanning afgeeft die op het typeplaatje van het
apparaat staat (220-240V / 50Hz)
Of er geen andere apparatuur op hetzelfde stopcontact is aangesloten
Wanneer dit allemaal in orde is kunt u de stekker in het stopcontact steken. Door nu op de
POWER-knop te drukken stelt u het apparaat in werking.
D.m.v. de MODE-knop kiest u voor een bepaalde functie: automatische werking, koelen,
ontvochtigen of ventileren. Elke keer wanneer u de knop indrukt, wisselt de functie. Het lampje
op het bedieninspaneel toont welke functie actief is. Wanneer u koelt of ontvochtigt, wacht dan
tot 3 minuten na het in- of uitschakelen alvorens het apparaat opnieuw in- of uit te schakelen.
Deze tijd heeft de compressor nodig voor herstel.
Automatisch koelen:
MODE indrukken tot het lampje AUTO oplicht.
Het apparaat zal, afhankelijk van de omgevingstemperatuur, automatisch een gewenste
temperatuur kiezen met de daarbij behorende functie: koelen, ontvochtigen of ventileren. Ook
dat lampje licht op.
Omgevingstemperatuur
< 23°C
23°C ≤ omg.temp ≤ 26°C.
≥ 26°C
Mode
Ventileren (fan)
Ontvochtigen (dehum)
Koelen (cool)
Gewenste temperatuur
21°C
23°C
25°C

9
Koelen:
MODE indrukken tot het lampje COOL oplicht.
TEMP+ / TEMP- (Λ/ V) indrukken om de gewenste kamertemperatuur in te stellen (van 16°C
tot 31°C).
SPEED indrukken om gewenste windsnelheid te selecteren (laag, medium of hoog).
Ontvochtigen:
Controleer vooraf of de waterafvoerslang is aangesloten, zie blz. 6!
MODE indrukken tot het lampje DEHUM oplicht.
De temperatuur wordt automatisch ingesteld op 2 graden onder de kamertemperatuur (16°C
tot 31°C).
De ventilatorsnelheid wordt automatisch ingesteld op laag (“LOW”).
Ventileren:
MODE indrukken tot het lampje FAN oplicht
SPEED indrukken om gewenste windsnelheid te selecteren (laag, medium of hoog).
Onder de functie ‘koelen’ en ‘ ontvochtigen’ zal het apparaat af en toe stoppen teneinde de
radiatoren de gelegenheid te geven te ontdooien. Na enkele minuten zal het apparaat weer
starten. Gebruik geen middelen om dit proces te versnellen en verander ondertussen geen
instellingen!
Wanneer u ‘koelen’ of ‘ ontvochtigen’ instelt zal het apparaat continu blijven werken, tenzij:
- de kamertemperatuur lager wordt dan de ingestelde temperatuur
- de timer op een eindtijd is ingesteld.
Timer:
Met de Timerknop kunt u de airco automatisch op een vooraf ingestelde tijd laten starten dan
wel stoppen.
Automatisch starten: Zet het apparaat aan en stel functie (MODE) en temperatuur in. Zet het
apparaat nu weer uit. Druk op de timerknop en kies d.m.v. de ‘up’ en ‘down’-knoppen (Λen V)
het moment dat u hem in werking wilt laten treden: elke keer wanneer u op Λ(up) drukt is dat
een uur later, elke keer dat u op V (down) drukt een uur eerder. Wanneer op het display bijv. 5
uur staat, zal de airco over 5 uur in werking treden.
Automatisch stoppen: de airco staat aan. Druk op de timerknop en kies d.m.v. de
temperatuurknoppen het moment dat u hem wilt uitschakelen: elke keer wanneer u op Λ(up)
drukt is dat een uur later, elke keer dat u op V (down) drukt een uur eerder. Wanneer op het
display bijv. 2 uur staat, zal de airco over 2 uur uitschakelen. De timer kan op 1 tot 24 uur
worden ingesteld.
Zwenken
Door tijdens de werking op de SWING-knop te drukken zal de klep (en daarmee de
luchtstroom) op en neer gaan bewegen. Nogmaals drukken en het zwenken stopt.
Slapen
Kies voor MODE ‘koelen’ (COOL) en stel een gewenste temperatuur in.
Druk op de knop ‘SLEEP’; na een uur zal het apparaat de gewenste temperatuur
automatisch met een graad verhogen, en na nog een uur met een tweede graad. Op deze
stand blijft het apparaat werken.
Door nogmaals op ‘SLEEP’ te drukken annuleert u de opdracht.

10
Waterafvoer
Tijdens het koelen onttrekt het apparaat water aan de lucht. Dit verdampt grotendeels weer,
maar evt. overtollig water hoopt zich op in het waterreservoir. Als dit vol is stoppen compressor
en motor automatisch en gaat het lampje ‘watertank vol’ (W.F.) branden.
Schakel in dat geval de airco uit en neem de stekker uit het stopcontact. Ledig de watertank
door het dopje A van het water-aftappunt te
draaien en de tank te laten leeglopen in een
putje of op te vangen in een bak o.i.d.
Vergeet naderhand niet het dopje weer op
de afvoer te draaien!
Hierna kunt u de airco weer gewoon in
gebruik nemen.
Bij ontvochtigen wordt meer water aan de
lucht onttrokken. Daarom wordt geadviseerd
tijdens het ontvochtigen een slang op de
waterafvoer-continu B aan te sluiten, en
deze naar een (lager gelegen) waterafvoer
leiden (continu-drainage).
Mocht ooit de waterpomp defect zijn en u
zou het apparaat toch willen gebruiken, sluit dan op één van de beide waterafvoerpunten een
slang aan voor continu-afvoer. Het apparaat kan dan gewoon werken.
Veiligheid
De PAC12.2 & 14.2 is voorzien van een oververhittingsbeveiliging die het apparaat uitschakelt
wanneer het oververhit raakt. Wanneer dit optreedt dient u de stekker uit het stopcontact te
nemen en de PAC12.2&14 minstens 30 minuten tijd te geven om af te koelen. Neem tevens de
oorzaak van de oververhitting weg: wordt het apparaat (deels) afgedekt? Staat het te dicht op
een muur of ander obstakel waardoor het onvoldoende lucht kan aanzuigen of uitblazen?
Hierna kunt u het apparaat weer op de normale wijze in gebruik nemen, maar houd de eerste
30 minuten goed in de gaten of er geen afwijkingen optreden. Vertoont het apparaat
afwijkingen, of treedt de oververhitting weer in werking zonder dat er een aanwijsbare oorzaak
is, neem dan contact op met uw leverancier of een erkend elektricien voor controle / reparatie.
SCHOONMAAK EN ONDERHOUD
Let op! Voor u schoonmaak- of onderhoudswerkzaamheden aan de airco uitvoert dient u het
apparaat altijd uit te schakelen en de stekker uit het stopcontact te nemen! Om de airco in
goede conditie te houden is regelmatig schoonmaken een vereiste!
Reiniging van de omkasting
Gebruik een zachte, vochtige doek om de kast af te wissen. Spuit hem nooit af en zorg ervoor
dat er geen water het apparaat binnendringt! Gebruik nooit agressieve reinigingsmiddelen,
benzine, wasmiddelen, chemisch geïmpregneerde doekjes of andere reinigingsoplossingen. Die
kunnen de kast beschadigen.
Droog het apparaat na met een zachte doek.
Reiniging van de filters
Reinig de filters elke twee weken; een airco met vuile filters werkt niet goed.
Open het rooster van de luchtinlaat en neem het filter eruit.
Reinig het filter in lauw-warm water (max. 40°C) met evt. een neutraal reinigingsmiddel. Laat
het filter in de schaduw goed drogen.

11
Plaats het filter terug in het rooster, en het rooster terug in het apparaat.
Pas op! De airco nooit laten werken zonder filters!
Einde-seizoen-reiniging
Wanneer het apparaat voor langere tijd wordt opgeslagen dient u de volgende maatregelen te
nemen!
Open het wateraftappunt (11) en laat het gecondenseerde water volledig weglopen. Laat het
apparaat enkele uren draaien op de ventilatorfunctie, zodat de airco vanbinnen kurkdroog is.
Schakel de airco uit, neem de stekker uit het stopcontact en maak het filter schoon en plaats
het terug, of vervang het.
Draai de afvoerslang van het apparaat, om beschadiging te voorkomen
Verpak de airco z.m. in de originele verpakking of in een plastic zak en zet hem op een droge
plaats voor de opslag, niet kleiner dan 10m². Zet geen zware voorwerpen op het apparaat.
PROBLEEMOPLOSSING
Wanneer uw apparaat hapert kunt u proberen of de onderstaande acties het probleem op
kunnen lossen. Is dat niet het geval, bied het apparaat dan ter reparatie aan bij een
gekwalificeerd elektrotechnicus.probeer nooit zelf reparaties uit te voeren!
Het apparaat start niet als ik op de AAN/UIT-knop druk
Zit de stekker in het stopcontact?
Is de aardlekschakelaar ingeschakeld? Geen stroomstoring?
Is de watertank wellicht vol? Ledig hem.
De kamertemperatuur is lager dan de ingestelde temperatuur; pas de ingestelde temperatuur
aan.
Het apparaat lijkt weinig uit te richten
Staat de temperatuur niet te hoog ingesteld?
Is er direct zonlicht? Sluit de gordijnen.
Staan er ramen en/of deuren open? Sluit ze.
Zijn er teveel mensen in de ruimte? De produceren warmte!
Is de ruimte te groot?
Staat er iets in de ruimte dat (veel) warmte produceert? Schakel het uit of verwijder het.
Is het filter stoffig, met vuil bedekt? Maak het schoon.
Is de luchtinlaat of –uitlaat(slang) geblokkeerd? Zorg voor een vrije luchtstroom.
Het apparaat produceert lawaai
Is de ondergrond van de machine wel stevig, effen en horizontaal?
Het stromende koelmiddel in het apparaat produceert ook enig geluid. Dit is normaal.
Het apparaat schakelt zichzelf uit
Mogelijk heeft de oververhittingbeveiliging het uitgeschakeld. Zie ‘Veiligheid’.
Foutmelding Code E0
De temperatuursensor is kapot. Laat hem vervangen. Het apparaat werkt ook zonder
temperatuurinstelling.
Foutmelding Code E2
De watertank zit vol. Schakel het apparaat uit en ledig hem handmatig. Schakel hem
vervolgens opnieuw in.
PROBEER NOOIT ZELF HET APPARAAT TE REPAREREN!

12
VERWIJDERING
Binnen de EU betekent dit symbool dat dit product niet met het normale
huishoudelijke afval mag worden afgevoerd. Afgedankte apparaten bevatten
waardevolle materialen die hergebruikt kunnen en moeten worden, om het
milieu en de gezondheid niet te schaden door ongereguleerde
afvalinzameling. Breng afgedankte apparatuur daarom naar een daarvoor
aangewezen inzamelpunt of wend u tot het bedrijf waar u het apparaat
gekocht hebt. Zij kunnen er voor zorgen dat zoveel mogelijk onderdelen van
het apparaat hergebruikt worden.

13
EN
THANKS!
Many thanks for choosing this EUROM equipment: you have chosen an excellent device that
you will be able to enjoy for many years to come!
In order to ensure it works as efficiently as possible, we advise you to read these instructions
carefully before using; the leaflet contains important safety information, recommendations etc.
and will help you get the very best from your equipment!
We recommend that you keep the instruction booklet and the packaging in a safe place; the
leaflet can then be used as reference material and the packaging can be used to store your
equipment at the end of the season.
Finally, we hope your air conditioner / dehumidifier perfectly meets your requirements!
TECHNICAL SPECIFICATIONS
MODEL
EUROM PAC12.2
EUROM PAC14.2
Cooling capacity
12000 BTU/hr
3500 Watt
14000 BTU/hr
4000 Watt
Max. power usage
1345 Watt
1538 Watt
Air displacement max.
450 m³ / hr
450 m³ / hr
Connected power
220–240V / 50Hz
220–240V / 50Hz
Sound power level
65dB(A)
65dB(A)
Cooling fluid
R290/210gr.
R390 / 210 gr.
Class of insulation
IP20
IP20
Fan settings
3
3
Operating temperature
18 - 35°C
18 - 35°C
Waste pipe
Ø 150 mm x 1500 mm.
Ø 150 mm x 1500 mm.
Net weight
26 kg.
26 kg.
Dimensions
44 x 33,5 x 71,5 cm (l x b x h)
SAFETY INSTRUCTIONS
General Safety:
This unit is exclusively intended for household use.
Always ensure (even during transport!) that the unit remains upright. If the unit has been
lying on its side, wait 2 hours before using. This time is required in order for the compressor
to function correctly.
Ensure that the unit is always placed on a sturdy, flat and horizontal surface.
Ensure that the unit has a free space of at least 50 cm on each side.
Make sure that the plug and socket remain visible and accessible at all times.
Do not place any objects in front of the air conditioning unit.
Never leave a functioning device unsupervised, not even for a moment!
Do not use the air conditioning unit in the vicinity of flammable or explosive substances or
fuels. Never use any paint, cleaning sprays, anti-insect sprays or similar near the unit; this
could deform the plastic or cause electrical damage.
Never block the grilles for incoming or outgoing air (not even partially). Never insert objects
such as pens into the device via the grilles and ensure that the ventilator does not become
blocked.
Children, disabled persons and pets should be supervised to ensure that they don’t play with
the appliance.

14
This appliance can be used by children aged from 8 years and above and persons with
reduced physical, sensory or mental capabilities or lack of experience and knowledge if they
have been given supervision or instruction concerning use of the appliance in a safe way
and understand the hazards involved. Children shall not play with the appliance. Cleaning
and user maintenance shall not be made by children without supervision. Avoid children
coming into contact or playing with the device.
Do not turn on the appliance if you have discovered damage to the appliance, cord or plug, if
the appliance is malfunctioning, if it has been dropped or if there are signs of any other
defect. Return the complete product to the vendor or to a certified electrician for inspection
and/or repair. Always ask for original parts. The appliance (incl. cord and plug) may only be
opened and/or repaired by properly authorised and qualified persons.
Electrical safety:
The air conditioning unit is only suitable for indoor use.
Only use the plug that is installed on the device in the factory and no other form of
connector!
The appliance shall be installed in accordance with national wiring.
Before use, check whether the socket voltage that you will be using corresponds to the
specification plate on the unit. Damage caused by incorrect voltage is not covered by the
guarantee!
If the air conditioning unit is not in use or you are cleaning or carrying out maintenance on it,
turn it off and remove the plug from the socket. Always turn off first and then remove the
plug!
Also, when you are going to use the device: first insert the plug into the socket, then switch
the device ON and then use the control button!
Do not use the air conditioning unit in a damp or wet environment and never splash water,
oil or any other liquid onto the device.
Avoid the use of extension cables if you can. If this is unavoidable, use a cable with
sufficient capacity (at least 3 x 1.5 mm²) and do not let it cross any walking routes!
Do not move the unit by tugging on the electric cable and never remove the plug from the
socket by pulling the cable. Do not damage/deform/change the electrical cable and/or plug.
This may damage the device or cause electrocution.
Switch the device off immediately and pull the plug out of the socket if you hear strange
sounds, smell odours or see smoke.Do not use the unit if the electrical cable, plug or device
is damaged or broken. The device, plug and/or cable must be repaired/replaced by an
electrician or another suitably qualified person. Repairs by unqualified persons will result in
the guarantee becoming null and void and could lead to dangerous situations!
Safety in relation to coolant R290:
Read these warning carefully.
This device contains the coolant R290. R290 is a coolant that complies with the relevant
European Directives. Never perforate the coolant circuit. R290 is flammable (GWP 3)!
Never use substances other than those recommended by the manufacturer for the
defrosting process.
This device must be used and stored in a room that does not contain sources of ignition,
such as open flames or gas and electrical devices in operation.
Do not perforate any of the components of the cooling circuit and do not set light to the
device.
If the device is installed, working or stored in an un-ventilated you must take measures to
prevent fire or explosions caused by leaked coolant. Ensure that there are absolutely no

15
sources of ignition (such as fire, heaters, sparking electrical equipment, lit cigarettes, etc.) in
the same room!
The device must be stored in such a way that mechanical defects are prevented.
Do not install, operate or store the device in a room smaller than 15m².
R290 is odourless, which means that you cannot smell leaks!
Persons working on the cooling circuit must be in possession of the correct qualifications
that state the person in question is competent to use coolant in accordance with a special
evaluation that is recognised by the sector association.
The repairs must be executed on the grounds of the recommendations of the manufacturer
of the device. Maintenance and repairs that require the assistance of other qualified persons
must be executed under supervision of someone who is specialised in the use of flammable
coolant.
For maximum effect:
Never exceed the recommended area to be cooled.
Do not place the unit in the vicinity of a heat source, not in the same room as a tumble dryer
and not in direct sunlight.
Close windows and doors.
Keep curtains or hatches closed during the sunniest hours in the day
Keep filters clean
Modify temperature and ventilation settings once the area has reached the required
condition.
DESCRIPTION
1 –front panel
2 –air outlet
3 –control panel
4 - handle
5 –air inlet
6 –electrical cable with plug
7 –water drain - constant
8 –hot air exhaust hose connector
9 –air inlet
10 –storage point for electrical cable and plug
11 –water drainage point
12 –castors
13 –remote control

Accessories:
A –Outlet hose hot air
B –Connector window panel
C –Connector air conditioner
D –Window panel
INSTALLATION
The EUROM PAC12.2/14 is a mobile air conditioning/dehumidifying unit that can be moved
from room to room. Install as follows:
Remove all packaging material and ensure that the unit remains in an upright position.
Before use, check that all accessories are present and that there is no damage to the
accessories or the unit itself. Do not use a damaged unit; take it back to your supplier!
Place the unit on a sturdy, flat, dry and horizontal base near an electrical socket and a
discharge point for hot air, e.g. a window that can be opened slightly. Make sure that the unit
has at least 50 cm of free space on all sides and take all safety instructions into account.
To dehumidify you now connect a water drainage hose to the water drain - constant (7).
This hose should lead to a bucket or drain. The hose should not run upwards! Your unit is
now ready for use.
In order to use the cooling function,
you do not need to connect the
water drainage hose. Place window
panel in the window opening, see
diagram. The length of the window
panel can be adjusted from 67.5 to
123 cm.
Screw on the connector for the air
conditioner on one end and the
connector for the window panel on
the other end of the outlet hose.
Slide the connector for the air conditioner into the appropriate slot on the rear of the unit.
Secure the other end of the outlet hose in the window panel opening so that it can remove
hot air outside.
You can also hang the outlet hose out of an open window; this method is less efficient
however.
Avoid bends or pinches in the pipe. These will lead to a build up of damp, waste air which
can cause leaks, overheating or lead to the air conditioning unit switching off.
Warning! Do not use your air conditioning unit until it has been installed according to the
instructions above!
Warning! Ensure that water cannot penetrate the device!
Warning! The length of the discharge pipe corresponds to the technique that is used in this
air conditioning unit. Do not replace or extend it using another pipe as this could have a
negative impact on the effectiveness of the unit. The hose can be stretched but must be kept
as short as possible in order to ensure optimum functioning.
Don’t forget about preventing access to burglars!

17
OPERATION
The control panel and remote control have the same buttons. This means that they give the
same commands. The control panel also has lights that indicate the mode set. The control
panel also has a W.F. light (water tank full) and a display that shows the temperature and timer
settings.
Before using the air conditioner, check:
That it has been installed according to safety instructions
That it is not damaged or broken
That the electrical socket that you wish to use has the same voltage as is given on the unit’s
specification plate (220-240V / 50Hz)
That no other devices are connected to the same socket
If this has all been checked, you can insert the plug into the socket. Start the unit by pressing on
the POWER button.
Use the MODE button to choose a specific function: automatic function, cooling, dehumidifying
or ventilate. Every time you press the button, the function changes. The light on the control
panel shows which function is active. If you are cooling or dehumidifying, wait for up to 3
minutes after switching on or off before switching the unit on or off again. The compressor
needs this time to recover.
Automatic cooling:
Press MODE until the AUTO indicator lights up.
The device will, depending on the ambient temperature, automatically select a desired
temperature with the accompanying function: cool, dehumidification or ventilation. This indicator
light will also activate.
Ambient temperature
< 23°C
23°C ≤ amb. temp ≤ 26°C.
≥ 26°C
Mode
Ventilation (fan)
Dehumidification (dehum)
Cooling (cool)
Desired temperature
21°C
23°C
25°C
Cooling:
Press MODE until the COOL indicator lights up.
Press TEMP+ / TEMP- (Λ/ V) to set the required temperature (from 16°C to 31°C)
Press SPEED to select desired fan speed (low, medium or high).
Dehumidifying:
Check that the water outlet hose is correctly connected, see page 6!
Press MODE until the DEHUM indicator lights up.
The temperature will be automatically set to 2 degrees below room temperature (16°C to
31°C).
The fan speed will be automatically set to ‘LOW’.
Ventilation:
Press MODE until the FAN light is lit

18
Press SPEED to select the desired air speed (low, medium or high).
When operating in the ‘cooling’ and ‘dehumidification’ modes, the device will occasionally stop
to allow the radiators to defrost. The device will start again after several minutes. DO not use
substances to accelerate this process and do not change the settings!
If you set the apparatus to ‘cooling’ or ‘dehumidifying’, it will continuously operate unless:
The room temperature becomes lower than the set temperature.
The timer is set to a final time.
Timer:
The Timer button allows you to automatically start or stop the air conditioner at a set time.
Automatic starting: Switch the device on and set the function (MODE) and temperature. Now
switch the device off again. Press the timer button and choose the moment that you would like it
to start working using the temperature buttons: each time you press Λ (up) the hour will
increase, each time you press V (down), the hour will decrease. If, for example, the display
shows 5 hours, the air conditioner will switch on in 5 hours.
Automatic stopping: the air conditioner is on. Press the timer button and choose the moment
that you would like it to stop working using the temperature buttons: each time you press Λ(up)
the hour will increase, each time you press V (down), the hour will decrease. If, for example, the
display shows 2 hours, the air conditioner will switch off in 2 hours. The timer can be set to
between 1 to 24 hours.
Swing
Pressing the SWING button during operation will make the flaps (and thereby the air stream)
move up and down. Press again to stop the swing action.
Sleep
Select the ‘cooling’ MODE (COOL) and set the desired temperature.
Press the ‘SLEEP’ button – the device will automatically increase the desired temperature by
one degree after one hour, and by a second degree after a second hour. The device will
continue to operate at this setting.
Cancel the command by pressing ‘SLEEP’ again.
Water outlet
During the cooling process, the device
removes water from the air. This largely
evaporates but any excess water is
collected in the water reservoir. If the water
reservoir in the device is full, the
compressor and the motor will stop
automatically and the ‘water tank full’ light
(W.F.) will come on. In this event, switch
the air conditioning unit off and remove the
plug from the socket.
Empty the water tank by unscrewing cap A
off the water drainage point and emptying
the tank into a pit or a container or similar
vessel. Remember to screw the cap back
on to the drainage point afterwards!
You can then use the air conditioner as normal again.

19
The dehumidification extracts more water from the air. This is why we recommend connecting
a hose to the water drainage –constant B during dehumidification and leading it to a (lower)
water drainage point (constant –drainage).
If the water pump is defective but you would still wish to use the device, connect a hose for
constant drainage to one of the water drainage points. It will be possible for the device to work
normally.
Safety
The PAC12.2 / 14 is fitted with an overheating safeguard that switches the unit off if it
overheats. If this should occur, you must remove the plug from the socket and leave the
PAC12.2 / 14 to cool for at least 30 minutes. Remove the cause of overheating - has the device
been (partially) covered? Is it too close to a wall or another obstacle, preventing it sucking in or
dispelling sufficient air?
You can then use the device normally again but keep an eye on it for the first 30 minutes to
ensure there are no further problems. If the device is showing signs of problems or the
overheating recurs, even though there is no obvious assignable cause, ask your supplier or a
recognised electrician to check/repair the unit.
CLEANING AND MAINTENANCE
Note! Before cleaning or carrying out maintenance work on the air conditioning unit, always
switch off and remove the plug from the socket! Regular cleaning is vital in order to keep the
unit in good working order!
Cleaning the housing
Use a soft, damp cloth to wipe the housing.
Never use aggressive cleaning products, petrol, detergent, chemically-impregnated cloths or
other cleaning solutions. These could damage the housing. Never spray the unit and ensure
that water never penetrates the device! Dry the unit with a soft cloth.
Cleaning the filters
Clean the filters once every two weeks; a unit with dirty filters will never work properly.
Open the grill of the air inlet and remove the filter.
Clean the filter in lukewarm water (max. 40°C), possibly with a neutral cleaning agent. Allow
the filter to dry thoroughly in the shade.
Put the filter back into the grill and the grill back into the device.
Take care! Never use the air conditioning unit without the filters!
End of season cleaning
If the device is to be stored for a long period, you must take the following measures!
Open the water drainage point (11) and allow the condensed water to drain out completely.
Run the unit for a few hours on fan function so that the unit is completely dry inside.
Then switch the air conditioning unit off, remove the plug from the socket and:
Clean the filter and either put it back or replace it.
unscrew the waste pipe from the device in order to prevent damage;
pack the air conditioning unit in its original packaging or in a plastic bag and place in a dry
place for storage, not smaller than 10m². Never place a heavy object on the unit.

20
TROUBLE SHOOTING
If your device is faulty, you can try to solve the problem by taking the following actions. If this is
not the case, the repairs must be executed by a recognised electrical engineer. Never attempt
to execute repairs independently!
The unit does not start if I press the ON/OFF button
Is the plug in the socket?
Is the earth leakage circuit breaker engaged? No power?
Is the water tank full? Empty it.
The room temperature is lower than the set temperature; amend the set temperature.
The unit doesn’t seem to be very effective
Is the temperature set too high?
Is there direct sunlight? Shut the curtains.
Are windows or doors open? Shut them.
Are there too many people in the room? They produce heat!
Is the space too big?
Is there an object in the room that is generating (a great deal of) heat? Switch it off or remove
it.
Is the filter dusty or covered in dirt? Clean it.
Is the air inlet or outlet (hose) blocked? Make sure there is free air flow.
The unit is making a noise
Is the surface underneath the machine sturdy and even?
The flow of coolant in the unit also produces a little noise. This is perfectly normal.
The unit switches itself off
The overheating safeguard may have switched the unit off. See ‘Safety’.
Error code E0
The temperature sensor is broken. Have it replaced. The unit works without temperature
setting.
Error code E2
The water tank is full. Switch the unit off and empty it manually. Switch it on again.
NEVER ATTEMPT TO REPAIR THE DEVICE YOURSELF!
REMOVAL In the EU this symbol indicates that this product not may be disposed of as
ordinary household waste. Old equipment contains valuable materials, suitable
for recycling. These materials should be made suitable for reuse in order to
prevent any adverse effects to health and the environment caused by
unregulated waste collection. Therefore, please make sure that you bring old
equipment to a designated collection point. Alternatively, contact the original
supplier, who can make sure that as many of the components as possible can
be recycled.
This manual suits for next models
3
Table of contents
Languages:
Other EUROM Dehumidifier manuals

EUROM
EUROM 371086 User manual

EUROM
EUROM LO50 User manual

EUROM
EUROM Desset Air 10 User manual

EUROM
EUROM LO80 User manual

EUROM
EUROM Polar 7001 User manual

EUROM
EUROM LO50 User manual

EUROM
EUROM DryBest 10 User manual

EUROM
EUROM DryBest 30 WiFi User manual

EUROM
EUROM LO50 User manual

EUROM
EUROM LO80 User manual
Popular Dehumidifier manuals by other brands

Fortress Technologies
Fortress Technologies FDH2814 user manual

Haier
Haier DM32M Use and care guide

Pneumatech
Pneumatech AD Series owner's manual

Royal Sovereign International
Royal Sovereign International RDHC-150P owner's manual

Cas Hire
Cas Hire WDS 40 operating instructions

Suntec Wellness
Suntec Wellness KLIMATRONIC DryFix 16 Operation manual