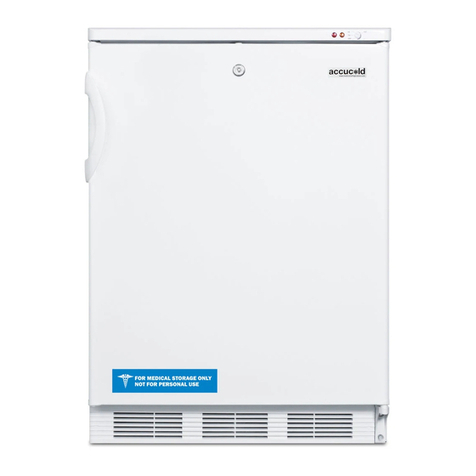
Summit FDRD152PL User manual

14.8 cu. ft. FRENCH DOOR REFRIGERATOR
WITH BOTTOM FREEZER DRAWERS
Models:
FDRD152PL
FDRD153SS
LRFD15
User Manual
BEFORE USE, PLEASE READ AND FOLLOW ALL SAFETY RULES AND OPERATING INSTRUCTIONS.

2
TABLE OF CONTENTS
Appliance Safety 3
Important Safeguards 3-4
Installation Instructions 5-7
Locating your Appliance 5
Leveling your Appliance 5
Disassembling and Reassembling the Freezer Drawer 6-7
Operating your Appliance 8-9
Control Panel 8
Controlling the Temperature 8
Glass Shelves and Door Racks 9
Drawers 9
Cleaning and Care 10
Exterior Cleaning 10
Interior Cleaning 10
Cleaning the Door Seals 10
Energy-Saving Tips 10
Troubleshooting 11
Disposal 12
Limited Warranty 14

3
APPLIANCE SAFETY
Your safety and the safety of others are very important.
We have provided many important safety messages in this manual and on your appliance. Always read
and obey all safety messages.
This is the Safety Alert Symbol. The symbol alerts you to potential hazards that
can kill or injure you and others. All safety messages will follow the Safety
Alert Symbol and either the words "DANGER" or "WARNING".
DANGER means that failure to heed this safety
statement may result in severe personal injury or
death.
WARNING means that failure to heed this safety
statement may result in extensive product
damage, serious personal injury, or death.
All safety messages will alert you about the potential hazard, tell you how to reduce the chance of injury,
and let you know what can happen if the instructions are not followed.
IMPORTANT SAFEGUARDS
Before the appliance is used, it must be properly positioned and installed as
described in this manual, so read the manual carefully. To reduce the risk of fire,
electrical shock or injury when using the appliance, follow basic precautions,
including the following:
•Plug into a grounded 3-prong outlet, do not remove grounding prong, do not use an adapter, and do
not use an extension cord.
•Replace all panels before operating.
•It is recommended that a separate circuit serving only your appliance be provided. Use receptacles
that cannot be turned off by a switch or pull chain.
•Never clean appliance parts with flammable fluids. These fumes can create a fire hazard or
explosion. And do not store or use gasoline or other flammable vapors and liquids in the vicinity of
this or any other appliance. The fumes can create a fire hazard or explosion.
•Before proceeding with cleaning and maintenance operations, make sure the power line of the unit is
disconnected. Failure to do so can result in electrical shock or death.
•Do not connect or disconnect the electric plug when your hands are wet.
•Do not attempt to repair or replace any part of your appliance unless it is specifically recommended in
this manual. All other servicing should be referred to a qualified technician.
•This appliance is CFC- and HFC-free and contains small quantities of Isobutane (R600a) which is
environmentally friendly, but flammable. It does not damage the ozone layer, nor does it increase the
greenhouse effect. Care must be taken during transportation and setting up of the appliance that no
parts of the cooling system are damaged. Leaking coolant can ignite and may damage the eyes.
•In the event of any damage:
oAvoid open flames and anything that creates a spark,
oDisconnect from the electrical power line,
oAir the room in which the appliance is located for several minutes, and
oContact the Service Department for advice.
•The more coolant there is in an appliance, the larger the room it should be installed in. In the event of
a leakage, if the appliance is in a small room, there is the danger of combustible gases building up.

4
For every ounce of coolant at least 325 cubic feet of room space is required. The amount of coolant in
the appliance is stated on the data plate on the back of the appliance. It is hazardous for anyone
other than an Authorized Service Person to carry out servicing or repairs to this appliance.
•Take serious care when handling, moving, and using the appliance to avoid either damaging the
refrigerant tubing or increasing the risk of a leak.
FOLLOW WARNING CALLOUTS BELOW ONLY WHEN APPLICABLE TO YOUR MODEL
•This unit is intended FOR INDOOR USE ONLY.
•Use two or more people to move and install appliance. Failure to do so can result in back or other
injury.
•To ensure proper ventilation for your appliance, at least 4 inches (100mm) of space should be kept
between the back of the unit and the wall to allow proper air circulation to cool the compressor and
condenser. Choose a well-ventilated area with temperatures above 60°F (16°C) and below 90°F
(32°C) (The optimal operating range is between 72º and 78ºF, or 23º to 26ºC.) This unit must be
installed in an area protected from the elements, such as wind, rain, water spray or drips.
•The appliance should not be located next to ovens, grills or other sources of high heat.
•Never place heavy objects or items containing water on top of the unit. Spilled water could deteriorate
the insulation of electrical components and result in electrical leakage.
•The appliance must be installed with all electrical, water and drain connections in accordance with
state and local codes. A standard electrical supply (115 V AC only, 60 Hz), properly grounded in
accordance with the National Electrical Code and local codes and ordinances, is required.
•Do not throw items onto the shelves and do not place items totaling more than 65 lbs. on each shelf.
The shelf could fall, possibly causing injury.
•Do not kink or pinch the power supply cord of the appliance.
•The size of the fuse (or circuit breaker) should be 15 amperes.
•It is important that the appliance be leveled in order to work properly. You may need to make several
adjustments to level it.
•All installations must be in accordance with local plumbing code requirements.
•Make certain that the pipes are not pinched, kinked or damaged during installation.
•Check for leaks after connection.
•Never allow children to operate, play with or crawl inside the appliance.
•Do not allow anyone to hang from the door or climb onto the unit. The unit could tip over and fall,
causing material damage and injury.
•Do not use solvent-based cleaning agents or abrasives on the interior. These cleaners may damage
or discolor the interior.
•This appliance is intended for storage and display of beverages for sale. Use this appliance only for
its intended purpose.
•Keep fingers out of the “pinch point” areas. Clearances between the doors and between the doors
and cabinet are necessarily small. Be careful closing doors when children are in the area.
Risk of child entrapment!
Child entrapment and suffocation are not problems of the past. Junked or abandoned appliances are still
dangerous, even if they will “just sit in the garage a few days”.
Before discarding your old refrigerator:
•Take off the doors
•Leave the shelves in place so that children may not easily climb inside.
- SAVE THESE INSTRUCTIONS -
5
INSTALLATION INSTRUCTIONS
•For proper installation, this refrigerator must be placed on a level surface of hard material that is
the same height as the rest of the flooring. The surface should be strong enough to support a
fully loaded refrigerator.
•The rollers are not casters and should only be used for forward or backward movement. Moving
the refrigerator sideways may damage your floor and the rollers.
Locating your Appliance
•In order to improve the efficiency of the cooling system and save energy, it is necessary to
maintain good ventilation around the appliance for the dissipation of heat. For this reason,
sufficient clear space should be available around the refrigerator.
•Keep the appliance out of direct sunlight, rain, or frost. Make the appliance is placed away from
heat sources, such as stoves, fires, or heaters.
•Avoid placing the appliance in a dry place to avoid moisture.
NOTE: Before connecting the appliance to the power source, let it stand upright for four hours, to
allow the refrigerant to flow back into the compressor.
•This appliance is intended for freestanding installation. Please allow these minimum clearances
to ensure the best operation and proper ventilation:
o1” on the side (and even more space to allow the doors to open wider than their width to
make it easier to remove shelves and storage bins)
o1” at the rear
o1” at the top
CAUTION: Be sure that airflow at the bottom of the appliance is not blocked.
•Place the appliance in a room with an ambient temperature between 50°F and 90°F. The
refrigerator may not work properly if it is left in temperatures above or below the indicated
temperature range.
Leveling your Appliance
For sufficient leveling and air circulating in the lower rear area of your appliance, the bottom feet may
be adjusted. You may adjust them manually by hand or by using a suitably sized wrench. To allow
the doors to self-close, tilt the appliance backwards by 10-15mm (1/3” – 2/3”).
NOTE: You may lay the refrigerator on its back in order to gain access to the base, you should rest it
on soft foam packaging or similar material to avoid damaging the backboard of the refrigerator.

6
Disassembling and Reassembling the Freezer Drawer
•The freezer section of your appliance contains an upper and lower drawer, two trays, and an ice
box.
•The drawers are removeable, and should you desire to remove the drawers to help move your
appliance, follow the steps below:
Removing the Freezer Drawer
1. Open the freezer door. Pull the adjusting block (A) of the drawer glides, and pull the freezer
drawer door out as far as it will go.
2. Remove the tray (B) by lifting it up, and out, as shown below.
3. Remove the freezer drawer by lifting it up and out of the unit.

7
Re-assembling the Freezer Drawer
Once your appliance is placed in its final location, re-assemble the drawer in the reverse order you
disassembled it.
1. Insert the drawer down and into your appliance, in the direction of the arrow below.
2. Put the tray on top of the drawer, and push it inward to enusre the tray’s rollers are set on the
freezer liner.
3. Push the freezer door closed.

8
OPERATING YOUR APPLIANCE
•When your appliance is powered on for the first time, the temperature control panel will
illuminate.
•If no buttons are pressed, and the doors are closed, the control panel will turn off after 60
seconds.
Control Panel
Switching Between Celsius and Fahrenheit
Press and hold TEMP for three seconds to toggle the display between Celsius and Fahrenheit.
Controlling the Temperature
•Press POWER for three seconds to turn the power on. Once on, press POWER for three
seconds to turn the power off. The display will show “OFF.”
NOTE: Setting the temperature of the appliance will set the average temperature. The exact
temperature may vary slightly depending on how much food is placed inside, how often the
doors are opened, and ambient room temperature.
Setting the Refrigerator Temperature
•Press ZONE until the Fridge icon is illuminated.
•When illuminated, press TEMP to cycle through the temperature setting each time the button is
pressed, from 46°F to 36°F (8°C to 2°C).
NOTE: Each press of the TEMP button advances the setting by one degree.
Setting the Freezer Temperature
•Press ZONE until the Freezer icon is illuminated.
•When illuminated, press TEMP to cycle through the temperature setting each time the button is
pressed, from 7°F to -11°F (-14°C to -24°C).
NOTE: Each press of the TEMP button advances the setting by one degree.

9
Super Cool
•The Super Cool function refrigerates your food faster.
•Press MODE to select the Super Cool function. The will be illuminated.
•The refrigerator temperature will be set to 36°F (2°C) for approximately three hours, after which,
the Super Cool function will turn off, and the temperature will return to the previously set
temperature.
Super Freeze
•Super Freeze will quickly lower the temperature of the freezer to freeze food faster.
•Press MODE to select the Super Freeze function. The will be illuminated.
•The freezer temperature will be set to -11°F for approximately 52 hours, after which, the Super
Freeze function will turn off, and the temperature will return to the previously set temperature.
•Press TEMP to manuals turn off Super Freeze and return your freezer to the previously set
temperature.
NOTE: It is not recommended to store bottles or can in the freezer when using Super Freeze mode,
as they may explode.
Energy Saving
This function reduces the energy consumption of the appliance, when you are away and not using
the appliance regularly.
•Press MODE until the energy saving icon is illuminated.
•The appliance will be automatically set to 43°F(6°C) in the refrigerator and 1°F(-17°C) in the
freezer.
•Press TEMP to turn off Energy Saving mode and return the appliance to its previously set
temperatures.
Open Door Alarm
If the refrigerator door is open longer than 2 minutes, the control panel will display “dr,” and an alarm
will sound. To turn off the alarm, close the door completely.
Glass Shelves and Door Racks
•The refrigerator compartment comes with four glass shelves and several door racks, which can
be placed at different heights, according to your needs.
•Pull the door racks straight up to remove.
•To adjust the interior shelves:
1. Remove any food stored on the shelf.
2. Gently pull the shelf forward until it clears the interior shelf guides.
3. When replacing a shelf, make sure there are no objects behind it, and gently push the shelf
all the way back into place.
NOTE: All the shelves are removable for cleaning.
Drawers
The drawers are mounted on telescopic extension slides, and can be removed by pulling the
drawers out as far as they can go, lifting the tray out, and lifting the front of the drawer until the back
released from the slides.

10
CLEANING AND CARE
CAUTION: Turn the appliance off and unplug the appliance before cleaning to reduce the risk of
electrical shock.
It is recommended the appliance be cleaned every two months.
Exterior Cleaning
•Wipe the control panel with a clean, soft cloth.
•Spray water onto a clean, soft cloth, instead of spraying directly onto the appliance to ensure an
even distribution of moisture.
•Clean the doors, handles, and cabinet surfaces with a mild detergent, and then wipe dry with a
soft cloth.
CAUTION: Do NOT use sharp objects to clean the exterior, as they are likely to scratch the surface.
Do NOT use thinner, car detergent, Clorox, ethereal oil, abrasive cleaners, or organic
solvents such as Benzene for cleaning. These materials may damage the surface of the
appliance or cause fire.
Interior Cleaning
•You should clean the appliance interior regularly. It will be easier to clean when food stocks are
low.Wipe the inside of the fridge freezer with a weak solution of bicarbonate of soda, and then
rinse with warm water using a wrung-out sponge or cloth. Wipe completely dry before replacing
the shelves and baskets. Thoroughly dryallsurfaces and removable parts.
•Although this appliance automatically defrosts, a layer of frost may occur on the freezer
compartments and interior walls, if the freezer door is opened frequents or kept open too long. If
the frost becomes too thick, choose a time when the supply of stored food is low, and follow
these steps:
1. Remove existing food and accessories baskets, unplug the appliance from the mains
power and leave the doors open. Ventilate the room thoroughly to accelerate the
thawing process.
2. When defrosting is completed, clean your freezer as described above.
CAUTION: Don't use sharp objects to remove frost from the freezer compartment. Only after the
interior is completely dry should the appliance be switched back on and plugged back
into the mains socket.
Cleaning the Door Seals
Take care to keep door seals clean. Sticky food and drinks can cause seals to stick to the cabinet and
tear when you open the door.Wash seal with a mild detergent and warm water. Rinse and dry it
thoroughly after cleaning.
NOTE: Make sure the door seals are completely dry before turning the appliance back on.
Energy-Saving Tips
•Try to avoid keeping the doors open for long periods of time.
•Ensure the appliance is located away from any sources of heat, such as direct sunlight, an
electric oven, etc.
•Don’t set the temperature colder than necessary.
•Wait for food to cool before storing.
•Please the appliance in a well-ventilated, humidity free room.

11
TROUBLESHOOTING
Ifyou experience a problem with your appliance or are concerned that the appliance isnot functioning
correctly, you can carry out some easy checks before calling for service, please see below.
Problem
Possible Cause and Solution
The appliance is not
working properly.
Check whether the power cord is plugged into the power outlet properly.
Check the fuse or circuit of your power supply, and replace it, if necessary.
It is normal that the freezer is not operating during the defrost cycle, or for
a short time after the appliance is switched on to protect the compressor.
Odors emitting from the
compartments.
The interior may need to be cleaned.
Some food, containers, or wrapping may cause odors.
The appliance is making
too much noise.
The sounds below are normal:
•The compressor operating noises.
•Air movement noise from the small fan motor in the freezer
compartment or other compartments.
•Gurgling sounds similar to water boiling.
•Popping noises made during automatic defrosting.
•Clicking noise before compressor starts.
Other unusual noises may be caused by the following reasons and may
need to be checked:
•The cabinet is not level.
•The back of the appliance touches the wall.
•Bottles or containers have fallen or are rolling.
The motor runs
continuously.
It is normal to frequently hear the sound of the motor, and it will run more
in the following circumstances:
•The temperature is set colder than necessary
•A large quantity of warm food has recently been stored in the
appliance.
•The ambient temperature where the appliance is located is too high.
•The doors are kept open too long or is opened too often.
•After installing the appliance or if the appliance has been turned off
for an extended period.
A layer of frost occurs in
the compartment.
•Check that the air outlets are not blocked by food and ensure food is
placed in the appliance to allow sufficient ventilation.
•Ensure the door is fully closed. To remove frost, please refer to the
“Cleaning and Care” section.
The temperature inside is
too warm.
You may have left the doors open too long or too frequently, the doors are
kept open by some obstacle, or the appliance is located with insufficient
clearance at the sides, back, and top
The temperature inside is
too cold.
Increase the temperature by following the “Control Panel” section
The doors can’t be easily
closed.
Check whether the top of the refrigerator is tilted back by 10-15mm (1/3-
2/3”) to allow the doors to self-close or if something is preventing the doors
from closing.
If you've checked the table above and find that you still need help with your refrigerator or freezer,
call our Customer Service facility at 800-932-4267 between 9:00AM and 5:00PM ET. We will do our
best to answer your questions.

12
DISPOSAL
CAUTION: It is prohibited to dispose of this appliance as household waste.
Packaging materials
Packagingmaterials with the recycle symbol are recyclable.Dispose of the packaging into a suitable
waste collection container to recycle it.
Before disposal of the appliance
1.
Pull out the mains plug from the mains socket.
2.
Cut off the power cord and discard with the mainsplug.
Correct Disposal of this Product
This symbol on the product or its packaging indicates that this product may not be
treated as household waste. Instead, it should be taken to the appropriate waste
collection point for the recycling of electrical and electronic equipment. By ensuring
this product is disposed of correctly, you will help prevent potential negative
consequences for the environment and human health, which could otherwise be
caused by the inappropriate waste handling of this product. For more detailed
information about the recycling of this product, please contact your local council,
your local household waste disposal service, or the shop where you purchased the
product.

13
NOTES

14
LIMITED WARRANTY
ONE-YEAR LIMITED WARRANTY
Within the 48 contiguous United States, for one year from the date of purchase, when this appliance is
operated and maintained according to instructions attached to or furnished with the product, warrantor will
pay for factory-specified parts and repair labor to correct defects in materials or workmanship. Service must
be provided by a designated service company. Outside the 48 states, all parts are warranted for one year
from manufacturing defects. Plastic parts, shelves and cabinets are warranted to be manufactured to
commercially acceptable standards, and are not covered from damage during handling or breakage.
5-YEAR COMPRESSOR WARRANTY
1. The compressor is covered for 5 years.
2. Replacement does not include labor.
ITEMS WARRANTOR WILL NOT PAY FOR:
1. Service calls to correct the installation of your appliance, to instruct you how to use your appliance, to
replace or repair fuses or to correct wiring or plumbing.
2. Service calls to repair or replace appliance light bulbs or broken shelves. Consumable parts (such as
filters) are excluded from warranty coverage.
3. Damage resulting from accident, alteration, misuse, abuse, fire, flood, acts of God, improper
installation, installation not in accordance with electrical or plumbing codes, or use of products not
approved by warrantor.
4. Replacement parts or repair labor costs for units operated outside the United States.
5. Repairs to parts or systems resulting from unauthorized modifications made to the appliance.
6. The removal and reinstallation of your appliance if it is installed in an inaccessible location or is not
installed in accordance with published installation instructions.
DISCLAIMER OF IMPLIED WARRANTIES –LIMITATION OF REMEDIES
CUSTOMER'S SOLE AND EXCLUSIVE REMEDY UNDER THIS LIMITED WARRANTY SHALL BE PRODUCT REPAIR
AS PROVIDED HEREIN. IMPLIED WARRANTIES, INCLUDING WARRANTIES OF MERCHANTABILITY OR FITNESS
FOR A PARTICULAR PURPOSE, ARE LIMITED TO ONE YEAR. WARRANTOR SHALL NOT BE LIABLE FOR
INCIDENTAL OR CONSEQUENTIAL DAMAGES. SOME STATES DO NOT ALLOW THE EXCLUSION OR LIMITATION
OF INCIDENTAL OR CONSEQUENTIAL DAMAGES, OR LIMITATIONS ON THE DURATION OF IMPLIED
WARRANTIES OF MERCHANTABILITY OR FITNESS, SO THESE EXCLUSIONS OR LIMITATIONS MAY NOT APPLY
TO YOU. THIS WARRANTY GIVES YOU SPECIFIC LEGAL RIGHTS AND YOU MAY ALSO HAVE OTHER RIGHTS,
WHICH VARY FROM STATE TO STATE.
Felix Storch, Inc.
Summit Appliance Division
An ISO 9001:2015 registered company
770 Garrison Avenue
Bronx, NY 10474
www.summitappliance.com
For parts and accessory ordering,
troubleshooting and helpful hints, visit:
www.summitappliance.com/support
WARNING: This product can expose you to chemicals including Nickel
(Metallic) which is known to the State of California to cause cancer.
For more information go to www.P65Warnings.ca.gov
Note: Nickel is a component in all stainless steel and some other metal compositions.
This manual suits for next models
2
Table of contents
Other Summit Freezer manuals

Summit
Summit FS60SSVH User manual

Summit
Summit ADFD2D24 User manual

Summit
Summit SPRF26 User manual

Summit
Summit FS20L User manual

Summit
Summit SCFM252WH/FC26 User manual

Summit
Summit FS22L User manual

Summit
Summit SCFM252W User manual

Summit
Summit SCFF55IM2DAL User manual

Summit
Summit CF12L User manual

Summit
Summit FS605 User manual

Summit
Summit CF11ES User manual

Summit
Summit FCL-44 User manual

Summit
Summit FS627SSHH User manual

Summit
Summit SCFR100MAN User manual

Summit
Summit accucold ACR45L User manual

Summit
Summit SCFU386CSS User manual

Summit
Summit UF850L User manual

Summit
Summit FS-56L User manual

Summit
Summit SCFF1842KS User manual

Summit
Summit WCH07W User manual