manuals.online logo
Brands
  1. Home
  2. •
  3. Brands
  4. •
  5. Summit
  6. •
  7. Range
  8. •
  9. Summit Electric Ranges User manual

Summit Electric Ranges User manual

Other Summit Range manuals

Summit RE304W User manual

Summit

Summit RE304W User manual

Summit PRO200SS Operating instructions

Summit

Summit PRO200SS Operating instructions

Summit REX205W Operating instructions

Summit

Summit REX205W Operating instructions

Summit PRO201 Operating instructions

Summit

Summit PRO201 Operating instructions

Summit REX242W User manual

Summit

Summit REX242W User manual

Summit PRO24G User manual

Summit

Summit PRO24G User manual

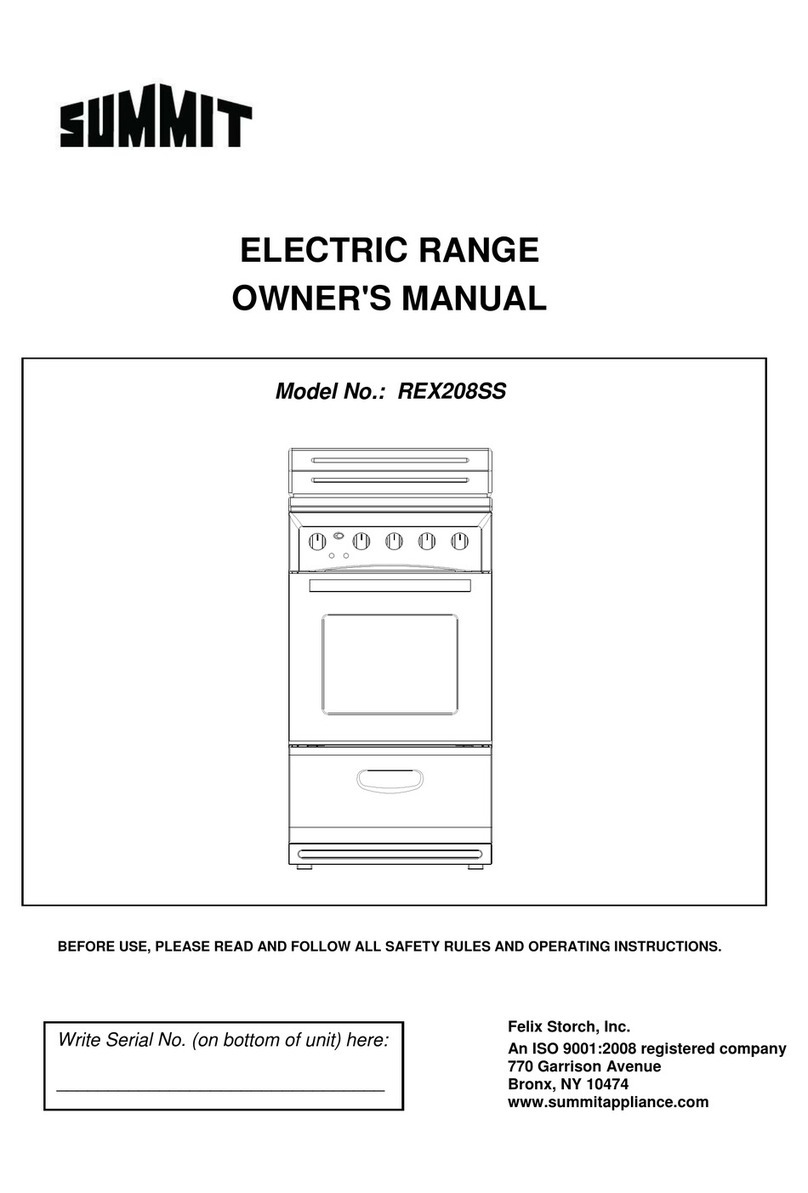
Summit REX208SS User manual

Summit

Summit REX208SS User manual

Summit WNM2107F User manual

Summit

Summit WNM2107F User manual

Summit PRO246SS Operating instructions

Summit

Summit PRO246SS Operating instructions

Summit RG200W Operating instructions

Summit

Summit RG200W Operating instructions

Summit R301W Guide

Summit

Summit R301W Guide

Summit CLRE24 User manual

Summit

Summit CLRE24 User manual

Summit TTM13027BKSW User manual

Summit

Summit TTM13027BKSW User manual

Summit RG306W Guide

Summit

Summit RG306W Guide

Summit REX204W User manual

Summit

Summit REX204W User manual

Summit R200W Guide

Summit

Summit R200W Guide

Summit RE201W Operating instructions

Summit

Summit RE201W Operating instructions

Summit RG244WS Operating instructions

Summit

Summit RG244WS Operating instructions

Summit REX205I Operating instructions

Summit

Summit REX205I Operating instructions

Summit REX2451SS Operating instructions

Summit

Summit REX2451SS Operating instructions

Popular Range manuals by other brands

Maytag MGR5875QDW - 30 Inch Gas Range Use and care guide

Maytag

Maytag MGR5875QDW - 30 Inch Gas Range Use and care guide

Frigidaire FFGF3024SS use & care

Frigidaire

Frigidaire FFGF3024SS use & care

Capital Precision Series GCR484W Specifications

Capital

Capital Precision Series GCR484W Specifications

Officine Gullo GGS8P Installation and use instruction

Officine Gullo

Officine Gullo GGS8P Installation and use instruction

LG LSD4913 Series owner's manual

LG

LG LSD4913 Series owner's manual

Kenmore 4101 - Elite 30 in. Slide-In Electric Range installation instructions

Kenmore

Kenmore 4101 - Elite 30 in. Slide-In Electric Range installation instructions

Moffat Blue Seal Evolution G576 Technical data sheet

Moffat

Moffat Blue Seal Evolution G576 Technical data sheet

CornuFé C1NF user guide

CornuFé

CornuFé C1NF user guide

GE JGS650SEFSS Dimensions and installation information

GE

GE JGS650SEFSS Dimensions and installation information

LG LDG3015ST Manual De Propietario

LG

LG LDG3015ST Manual De Propietario

Whirlpool RF350PXP Use and care guide

Whirlpool

Whirlpool RF350PXP Use and care guide

Samsung FCQ321HTUW Service manual

Samsung

Samsung FCQ321HTUW Service manual

Kenmore 790.45712 Use & care guide

Kenmore

Kenmore 790.45712 Use & care guide

Wolf CHR CHSSR owner's manual

Wolf

Wolf CHR CHSSR owner's manual

Smeg Built-in Microwave Oven Instructions for the user

Smeg

Smeg Built-in Microwave Oven Instructions for the user

Zanussi ZCG054G user manual

Zanussi

Zanussi ZCG054G user manual

GE JCSS630 quick start guide

GE

GE JCSS630 quick start guide

Samsung NX58M9960P series installation manual

Samsung

Samsung NX58M9960P series installation manual

manuals.online logo
manuals.online logoBrands
  • About & Mission
  • Contact us
  • Privacy Policy
  • Terms and Conditions

Copyright 2025 Manuals.Online. All Rights Reserved.

User - s Manual-
Electric Ranges
51 8900 Vl
Table of Contents
COI{TENTS PAGE
IMPORTANT SAFETY INSTRUCTIONS
COOK-TOP USE
OVEN USE
HO\ry TO OPERATE THE OVEN
SETTING THB CLOCK AND TIMER
GENERAL CARE AND CLEANING
BEFORE YOU CALL SERVICE
3
5
7
I
8
9
t2
IMPORTAI\T SAFETY INSTRT]CTIO]\S
READ ALL INSTRUCTIONS BEFORE USING THIS LTNIT
SAVE TI]ESE INSTRUCTIONS FOR FUTURE REFERENCE
'I'his manual mttst be followed to reduce potential risk of fire, electric shock, ol to prevent ir¡ur.y to pel.solls or.pr.operty da¡rage
when usir.rg the range.
Please pay attention to these words, which will alelt you about harrnful sitr-rations, ancl follow all give¡ instr.uctio¡s:
ifilhÑfÑG It rnay cause seliously harm, death or property clamage if you do not follow instructions.
film¡'t¡lÑllt may cattse injury or propelty danrage if you clo not follow instructior.rs.
a
a
a
a
a
a
a
a
a
a
a
a
ülttiñlññ ANrr-rrp DBvr c E
All ranges can tip,
L¡uly to persons could result.
Install anti-tip clevice packed with range,
See lnstallation Instructions.
To reclttce the risk of tipping, the range must be secured by properly installed anti-tip bracket provi¿ecl with the ra¡ge. please refer
to the anti-tip blacket installation instnlctions for proper installation.
SAFETY INFORMATIOI\
General:
use this appliance only for its intendecl pulpose as described in this rnanual.
Proper Installation - Be sttre your appliance is properly installed and grounded by a qualif,red technician.
Never use your appliance for warming or heating the room.
Do not leave children alone - Children should not be left alone or unattencled in l.he area where appliance is in use. They
should never be allowed to sit or stand on any part ofthe appliance,
Wear proper apparel - Loose-f,rtting or hanging garments shoulcl never be worn while using the appliance.
User servicing - Do not repair or replace any part of the appliance unless specifioally recomrnenclecl i¡ this rnanual. All other
selvicing shoulcl be referred to a qualified technician.
Storage in or on appliance - Flamrnable rnaterials should not be stoled in an oven, storage ch'awer or near surface units.
Do not use water on grease fires - Surother fire or flame, or use dly chernical or foarn-type extingLrisher.
' Use only dry potholders - Moist or darnp potholdels ou hot surfaces may result in bur¡s fi'om steam. Do ¡ot let potholclers
touch hot heating elernents. Do not use a towel or other bulky cloth.
' EeliS[NG Dã not allow anyone stepping, leaning or sitting on the dool or storage clrawel of this r¡nit. It may <iarnage the
range ancl could tip it over, resulting in serious burns or other injury.
' IEIEIIN. Do nor stot'e itetls of interest to children in the cabinets above a range or on the back gr,rard of a lange - chilcL.en
clirnbing on the range to leach iterns could be seriously injured.
¡ DO NOT TOUCH SURFACE UNITS, AREAS NEAR TI{ESE UNITS, HEATING ELBMENTS OR IN'|ERIOIì
SURFACES OF TllE OVEN. Both sulfaces units ar.rd oven heating elernents may be hot even thor.rgh they a¡e dark i¡ color,
Areas neal'sttt'face trnits and intelior sttrfaces of an oven rnay become hot enough to cause bLu.ns. Dirring á¡d after use, clo not
tottch, or let clothing or other flamurable llaterials contact surface units, areas near units, heati¡g ele¡reirts or inter.ior. surfaces
of oveu until they have had sufficient time to cool. Aurong these surfaces ale the oook top, surfÀces facing the cook top, the
oven vent opening and surfaces near this oper.ring, oven door al.rcl window.
'1
r
¡ Surface Cooking Units:
. Glazed cooking utensils - Only certain types of glass, glass/ceramic, ceramic, ealthetrware, or other glazed utensils ale
suitable fol lange-top service without breaking due to the sudclen change in temperature.
, . Utensils handles should be turned inward and not extend over adjacent surface units -- To reduce the risk of burns,
ignition of flarnmable materials, and spillage due to unintentional contact with the utensil, the handle of a utensil shor"rld be
positioned so that it is turned inward, and does not extend over adjacent surface units.
. Use proper pan size - This appliance is equipped with one or-more sulface units of cliff'erent size. Select t¡tensils having flat
bottorns large enough to cover the surface unit-heating element. The use of undersized utensils will expose aportion of the
heating element to clilect contact and may result in ignition of clothing. Proper relationship of utensils to burner will also
improve efficiency.
. Never leave surface units unattended at high heat setting - Boil-over causes smoking ancl gleasy spillovels that rnay ignite.
For Coil Surface Elements Cook-top models:
o Make sure reflector pans or drip bowls are in place - Absence of these pans ol' bowls during cooking rnay subject
wiring or cornponents underneath to darnage.
o Protective liners - Do not use aluminum foil to line surface unit drip bowls or oven bottoms, except as suggested in
the manual, Improper installation of these liners rnay result in a risk of electric shock, or fire.
o Do not soak removable heating elements - Heating elements should never be irnmersed in water.
o Clean the cook top with caution - If a wet sponge is used to wipe spills on a hot cook top, be careful to avoid steam
burns.
o To avoid the possibility of a burn ol electric shock, always be certain that the controls fol all surface units are at the
OFF position ancl all coils are cool before atternpting to lift or remove a nnit.
For Ceramic Glass Cook-top models:
o Do not cook on broken cook top - Ifcook top should break, cleaning solutions and spillovers rnay penetrate the
broken cook top ancl create a risk of electric shock. Contact a qualif,red technician irnrnediately.
o Never use the glass cook-top surface as a cntting area.
o Be carefi¡l when placing spoons or other stirring utensils on glass cook-top surface when it is in use. They may
become hot and could cause burns.
o Do not place or store iterns that can rnelt or catch f,rre on the glass cook-top, even when it is not being used.
o Clean cook top with caution - If a wet sponge ol cloth is used to wipe spills on a hot cooking area, be careful to
avoid a steam burn. Sorne cleaners can produce noxious frunes ifapplied to a hot surface.
o Do not to leave a hot lid on the cook-top - As the cook-top cools, air can becorne trapped between the lid and the
cook-top and the ceramic glass could break when the lid is rernoved.
o Do not cook foods directly on the cook-top surface without a pan.
o Do not drop heavy or hard objects on the glass cook-top, they rnay cause it to craok.
Oven:
. Use care whcn opening oven door - Let hot air or steam escape before removirlg or replacing food.
¡ Do not heat unopened food co¡rtai¡rers - Build-up of pressure may cause container to bulst and result in injuty.
¡ Keep oven vent ducts rrnobstrr"rctecl.
¡ Placement of oven racks - Always place oven racks in desired location while oven is cool. If rack must be moved while oven
is hot, do not let potholdel contact hot heating element in oven.
COOK-TOP USE
SETTING SURFACE CONTROLS
a
aPlace cooking utensil on the sr"rrface eletnent'
push in and tnrn the sr.rrface control knob in either direction to the desirecl setting, Start rnost cool,<1ne,o1e1iT::,:::.llTl"i
setting a,,d turn to a lower setting to finish .ooting. The contlol knobs do not have to be set exactly on a patticular setting use
the setting as a guide and adjust them as needed'
. Whe' cooking is cotnpletecl, trtln the sut'face element off before removing the pan'
Note: The surface elernent on indicator light will glow when one or more elernents are tttrned on' A quick glance at this indicatol
light when cooking is frnished is an easy way to bé sr'rle all srtrface elements ale ttrrned off'
a
aPlu." "oit".tly sized cookware on the radiant surface element'
push in and tnrn the surface control knob in either direction to the desired setting' Start most cooking opttut19l:,:.1 "-,llïl"i
SETTING
HIGH (HI - 9) Start rnost foods, bring water to a boil, pan broiling
MEDIUM HIGH (7 - 8) Continue a rapicl boil, fry, deep fat fry
MEDTUM (5 - 6) Maintain a slow boil, cook soups, thicken satlces ancl gravies, steanr vegetables
MEDTUM LOV/ (2 - 4) Keep foods cooking, Poach, stew
LOW (LO - l) Keep food warnr, melt, simmer
Note: The size a'd type of utensil usecl ancl the arnount and type of food being cooked will infllrence the setting needed for best
cooking results.
the
setti.g and turn to a lower setting to finish .ooking. The contlol knobs clo not hive to be set exaotly on a particular setting' use
the settings as a guicle and adjust them as needed. "Each surface element provi<les a constant amonnt of heat at each setting' A
glowing red surface heating area extending beyoncl the bottom edge of the cookware inclicates the cookware is too srnall for
the sr.rrface heating area.
. When cooking is completed, turn the surface element off before removing the pan'
Note: The surface elemert on i'dicator light will glow when one or rrore elements are turned on' A quick glance at this inclicatol
light when cooking is hnishecl is an easy way to bã sure all surface elements a'e tnrnecl off. The hot strrfaoe indicator light will
continue to glow after the control knob is turned to the oFF position ancl will glow until the heating sttrface area has cooled
suffioiently.
m$¡ffñ Iìadiant surface elernents rîay appear to have cooled after they have been turned off. The glass surface rnay still be
hot and burns may occru'if the glass surfaoe is touchecl before it has cooled sufficiently'
RECOMMENDED USE
ù lJ lulùIrù I Du D u r\r' Õ
Usethefollowingchartasaguide'h"n,.ttingffitt,,.gsar.ebasedoncookinginrnedittm-weightrnetalparrswith
They may vary when using other types of pans'
COIL ELEMENTS AND BURNER BOWLS (Coil Surface Elements Cook-top Models)
. Surface units should be level for optirnal cooking results. Dlip bowls, when clean, reflect heat back to the cookware.
They also help catch spills.
. Cookware should have flat bottorns that make good contact with the entile surface unit. Check for flatness by rotating a
ruler across the bottorn. There should be no gaps between the utensil and the ruler.
. Utensil sizes shor"rld match with surface unit size. Pans should cover the entire elernent to absorb the maxiurum heat.
Avoid using an undersized utensil that would expose a portion of the surface unit, resulting in serious burns or clothing
ignition.
. Pans shor.rld not extend more than one inch over the coil element. The boftorn surface of the pan in this situation could
trap enough heat to cause discoloring of the burner bowl, damage to the surface units ancl or crazing of the porcelain
enarnel range surface.
CERAMIC GLASS (Ceramic Glass Cook-top Models)
. The surface cooking area will glow red when an element is on. It will cycle on and off, at all settings, to maintain the
selected heat level.
¡ Wiping off the cook-top before and after each use will help keep it free frorn stains and provide the most even heating.
For rnore information, see "Care and Cleaning" section.
. Use cookware about the same size as the surface cooking area. Cookware should not extend rnole than one inch outside
the area.
. Use flat-bottorned cookware for best heat conduction and energy efficiency. Cookware with rounded, warped, ribbed or
dented bottoms could cause uneven heating and poor cooking results.
. Detennine flatness by placing the straight edge of a Luler, no space ol' Iight shoulcl be visible between it and the
cookware.
OVEN USE
--l
{
r
T
I
*
r
ì
I
I
:
BEFORB SBTTING OVEN CONTROL
Vent Whentheovenisol1,warlnairflowsthroughtherightreat.
element. This venting i, n.".rtuty foi prop.. air circulation in the oven and good baking resttlts'
DO NOT BLOCK OVEN VENT.
Arranging Oven Racks
. T., """td l-ssitl" burns, place racks in the desile position before tulning the oveu on'
. Racks have stop-locks, so that when praced "orr".ìly on the s'pports, they will stop before co'ring cornpletely or'rt' and
will not tilt.
o Do not rnove racks with bake ware on thetn'
To remove, putl the rack out until the stop position, raise the front edge and slide out'
To replace, fit the r.ack onto the guides on the oveí walls. Tilt the front of the rack trpward and slide it back into place'
Recommended Rack Positions for Broili Baki and
FOOD RACK POSITION
I or2
Broiling meats, chicken or ftsh
Cookies, cakes, pies, biscuits and muff,tns 2or3
Broiling fish, rnedium steaks, hamburgers q{h"p' 2
Broiling well-done foods strch as chicþn :ncllobsler J
F-r"n pies, angel food cake, yeast bread, "utt"@ 4
4
Tnrkey, toast or ham
NUMBER OI- PANS POSITION ON RACK
Centet' of rack
Side by side or slightlY staggered
3 or'4 -pposite colners on each ru.k, Mo
Air Circulation into the Oven
. T" "ook food evenly, hot air must be able to circulate'
. For. best air circulation and baking results allow two inches of space aronncl bake ware an<l be sul'e palls ancl bake ware clo
not toucheach other, the oven door, sides or back ofthe oven cavity.
¡ The hot air.rRust circulate ar.or.rnd the pans and bake ware in the oven for even heat to reach arottnd the foocl'
HOW TO OPERATE TTIE OVEN
IIfiEfn The oven inclicator light will glow when there is electlic power to the bake element. When the oven temperature setting
is leached, the indicator light will go off. lt lights up again when the powel cornes back on the bake elernent.
The oven indicator lighf glows until the oven reaches your selected ternperatuLe, then goes OFF and ON with the oven elernent(s)
during cooking.
Bakine
Before baking, positions racks and bake ware according to "Arranging oven racks and Ail cilculation in the oven" sections.
1. Preheat the oven before start baking. To preheat, set the oven at the correct ternperature. Preheating is necessary for good
results when baking oakes, cookies, pastry and breads. Pleheat the oven for l0 rninutes.
2. Tuln the oven control clockwise to the ternperature setting desired. Check food for doneness at the rninirnum time shown
in the recipe. Cook longer ifnecessary.
3. Tuln the oven control knob OFF when cooking is complete.
Broiline
Before broiling, position rack ¿rccording to "Arlanging oven racks" section.
To broil, tuln the oven control clockwise to BROIL. It is not necessary to pleheat the oven unless recommended in the
recipe. Position food on broiler pan provided with the lange. It is designed to drainjuices and help prevent spatter and
smoke. Close the door to the broil stop position to ensure propcr broiling ternpelature.
Broil on one side until foocl is browned, turn and cook on the second side. Always pull the rack ou¡t to the stop position
before turning or rernoving food.
Turn the oven control knob OFF when cooking is complete.
fil$nõÑ Should an oven fite occuL, close the oven door and turn OFF the oven. If the fire continues, use a fire extinguisher.
DO NOT put water or flour on the fire. Floul may be explosive.
SETTING THE CLOCK AI\D TIMER (Some Models)
TO SET THE CLOCK
o Pless and hold the CLOCK pad.
e Press the UP or DOWN ARIìOW pads to select the tirne of day.
¡ Press the CLOCK pacl to start.
TO SET THE TIMER
. Press the TIMER pacl.
¡ Press the UP oI DOWN ARROW pacls to increase ol declease the time in one-rninute inclernents. Press and hold the pacls to
increase or decrease the tirne in lO-minute increments. The tirner can be set for any amount of tirne from 00:01 rninutes to
I l:59 hours.
¡ Press the TIMER pad to start.
NOTES: The tirner does not start or stop cooking. It serves as an extla tirner in the kitchen that will beep when the set time has nrn
oLrt. While the tirner is active, press and holcl the UP or DOWN ARROW pads to inclease or cleclease the time. To cancel the tinrer
before the set time has run out, pless the CLOCK pad.
GET\ERAL CARE AI\D CLEANING
WARNING: Make sure you disconneot your stove befole cleaning, Be caleful if it is hot. Always follow label instrLrctions on
cleaning prodr.rcts.
IMPORTANT: Do not use any type of abr.asive sponge for the cleanliness of any surface of your stove. The product can sttffet'
consiclerable damages. Soop, *uié. and a soft cloih or sponge are suggested filst unless otherwise noted.
SURI-ACES
Co¡rtrol panel and knobs
Porcelain enamel surfaces,
painted surfaces
Oven cavity
(OJO:ESTE TEXTO SOLO
APLICA PARA MODELOS
ELECTRICOS)
HOW TO CLEAN
Before cleaning the control panel be sure that the knobs are oD TURN OFF
position. Clean with cloth ancl warln soap water. Remove residttes and dry
carefully. The water excess in atld around the contlols might cause stove damage'
Make sule of rernoving cleaners completely to avoid stains which are hal'd to
relÌ)ovc thlotrghotrt the tilne.
The control knobs rnay be removecl fol easier cleaning. Trl Lemove, pLrll thern
straight off the stern. Clean with cloth and warm soap watel'. Rinse well'
To relocate the knobs, make the flat side of the k¡ob cavity coincide with the
control rod flat side. Then, iust press the knob inside
Be sure to weat'rttbber gloves to protect yor-rr hands.
. Do not use oven cleaners, cleaning powders, steel wool pads, synthetic fiber pads
or any other matelials that rnight darnage the sulface finishing'
. Ifany aci<l, grease, sugar, etc. spills on surfaces while they are hot, use a dry papel
towei or cloih to wipe it up light away. When the surface has cooled, clean with
cloth and warln soap water. Rinse well.
. Also it is possible to use vinegar ancl water solution'
Fleavy spatteling or spillovers rnay require cleaning with a mild abrasive cleanel
Use vinegat' to t'etnove hard stains (white stains
Do not ,,r" oven cleaners, cleaning powders, steel wool pads, synthetic fiber pads
or any other rnaterials that might datnage the surface finishing'
. To clean the oven bottom, gently lift the bake element' This will allow easier
access to the oven bottorn for cleaning. Be carefr-rl not to raise the elelneut more
than 4 to 5 inches from the resting position
ale heatecl.
a
a
. Clean with warm water. Rinse and dry with clean towel.
Oven heating elements
(OJO: ESTE TEXTO SOLO
APLICA PAIìA MODELOS
no not.l"un the oven heating elernents. Any soil will burn off when the elements
ELECTRICOS
Oven racks f-"uL" tt . racks slicle rnole easily apply a small amottnt of vegetable oil or'
cookins oil to atowel and wipe the edges of the lacks with it.
Broiler pan n"r'rlou. ttt" broiler pan frorn the oven after bloiling ancl carefully pour orrt the
grease t'om the pan into a proper containet'.
. Wash and rinse the broiler pan using hot water and a soap-filled scouring pad.
. If food has bulned on, splinkle with detergent while it is hot and covet'it with wet
paper.towels or a dishcloth. Soaking the pan will remove burned-on food'
. Also it is possible to rtse viuegar and water solution.
¡ Do not nse cornmercial oven cleaners, cleaning powclers, steel wool pads or harsh
abrasives on any sttrfaces.
Hea tterins or srrillovers may requile cleaning with a rnild abrasive cleaner.
Oven light (on some modcls) B.fr" r'"plu.ing the oven light bulb, be sttre than oven light switch is ttrln OFF'
Replace bulb with a 4O-watts household appliance bulb
. The oven cloor is rernovable for cleaning.
l'Iow to rerrove:
. Operr the door to the fully opened position.
a
a
l,ift-ofï oven door
o Pull tro the lock located on both hinge stt ts and it in the hook of the
hinge levers. You may have to apply a little downward pressure on the door to pull
the lock fully over the hooks.
Grasp the cloor by the sides; pLrll the bottom of the door trp and towarcl yor,r to
disengage the hinge supports. Keep pulling the bottom of the door toward you
while rotating the top of the door toward the range to corlpletely disengage the
hinge levers.
How to replace:
. Proceecl in Leverse to reinstall the door. Make sule the hinge supports are fully
engaged before unlocking the hinge levers.
Ilow to clean the inner door:
. Soap and water will norrnally do the job. Heavy spattering or spillovels rnay
require cleaning with a lnild ablasive cleaner.
¡ Use a glass cleaner to clean the glass on the inside of the door' (on some models)
How to clean the outer door:
. Use soap and water to thoroughly clean the top, the bottom, sides and front of the
oven door. Rinse well.
. Do not let water drip into the vent openings.
Use a glass cleaner to clean the glass on the outside of the door on some models
10