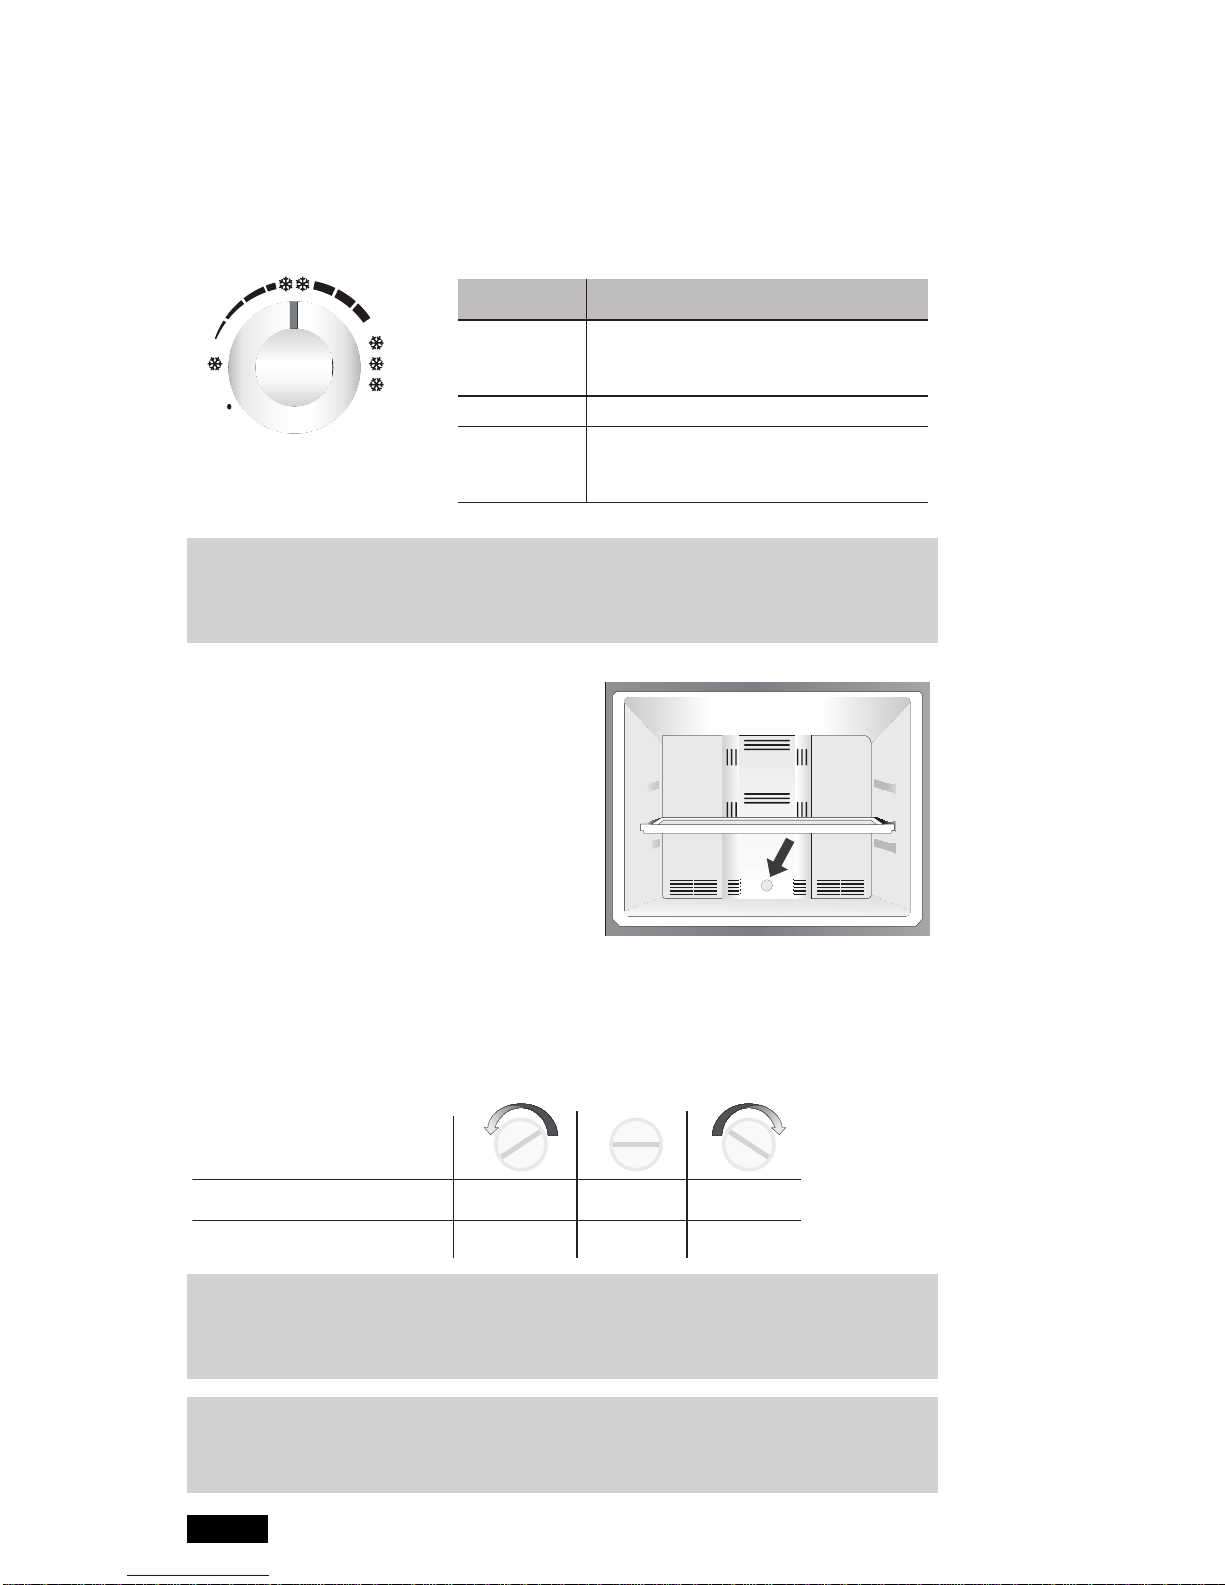
Summit ingenious User manual

1
Use and Care
Manual
Refrigerator
225D6783P011 REV. 0

2
index
Welcome
Quick Installation Guide
Parts and Features Ingenious Model
Quick Reference Guide Ingenious
Where to Start
Know Your Product
Temperature Control
Air Regulator
Exterior Display
Smart Station
SmartFillIceFactory
Compartments
Take&Go Egg Box
ExpressChillZone
Safety Glass Spill Guard Shelf
Shelves
Air Flow
How to Get the Most from Your Refrigerator
Choosing a location
Positioning
Installation
Levelling
Minimum requirements for correct electrical installation
General Temperature Control
Express Chill Zone Function
Exterior Temperature Control
Power Cool Function
Holidays Function
Alarm Function
Lock Function
EnergySaver
Fruits & Veggies Crisper
Deli Fresh Compartment
Meat Keeper
Humidity Control
Medium Shelf
Wide Shelf
Double Capacity Shelf
Jumbo Drinks Shelf
Dairy Shelf
7
7
6
5
4
3
3
ingenious model
6
6
8
9
9
10
10
12
16
16
12
16
16
17
17
18
19
22
23
22
22
22
23
24
24
25
25
25
25
25
25
26
27
Cleaning and Servicing Your Refrigerator
Increased Temperatures of Areas Close to Freezer
General Precautions
Holidays and Absences
Moving
Power Outages
Normal Operating Sounds
Changing the Bulb
Frequently Asked Questions and Operating Guide
29
29
29
30
30
30
31
31
32

3
welcome
Ouraimistomakeyourlifebettereveryday;that’swhywecreateappliances
whichadapt to yourlifestyle and throughtheir technology allowyou to enjoy
each moment.
Today we invite you to join this world, so you can discover the ingenuity
and versatility that our line of refrigerators offers you.
You will nd all of the information you need for running your refrigerator
inside this booklet. We invite you to read it and to enjoy your new product.
Thank you for choosing us.
Before beginning, we’ve included a quick guide and a brief description of
the most important parts of your new refrigerator.
quick installation guide
choosing a
location
installation
positioning
cleaning
packaging
connection
Select a large, clean,
and dry space.
Let the refrigerator
stand for 6 to 8 hours.
THIS IS VERY
IMPORTANT SO THAT
THE GAS CAN SETTLE.
Allow for a 5 cm space
on each side, 10 cm at
the back, and between
5 and 10 cm at the top.
Before connecting the
plug, clean the
refrigerator with a cloth
or soft sponge and a
neutral soap.
Remove all packaging
including tape,
cardboard, plastic,
and Styrofoam.
Connect the plug to
the correct outlet.
Leave it empty and
closed for 4 hours
before usage.
2
3
4
56

4
Exterior
Handles
Wheels - Levellers
Display
Access to Smart Station
Inside Freezer
Shelves
Air Regulator
Express Chill Zone
Smart Fill Ice Factory
Medium Shelf
Wide Shelf
Inside Cooler
Shelves
Multiple Use Compartment
Fruits and vegetables compartment
Air Flow Outlets
Take & Go Egg Box
Internal Temperature Control
Refrigerator Light
Cold Meats Comparment
Medium Shelf
Smart Station
Double Capacity Shelf
Jumbo Drinks Shelf
a
b
c
d
e
f
g
h
i
j
k
l
m
o
p
q
r
s
t
u
v
w
Ingenious Model

5
quick reference guide for the ingenious model
For more details on the use and the specications of the benets described
below, we recommend you consult the rest of the manual.
express chill zone
Inside the freezer you’ll find
this separate compartment
designed to rapidly cool
your favourite foods and
drinks. You can control it
from the exterior display
and it will let you know
when your foods and drinks
are ready. )
exterior display
take & go egg box
smart fill ice factory
power cool
smart station
Specially designed to allow
easy organisation of your
favourite foods. Furthermore,
thanks to its external
access you will always have
these on hand. Not having to
open the refrigerator door,
thanks to this special access,
will help save energy.
)
Practically designed to allow you to operate certain additional
functions like the Express Chill Zone, as well as the refrigerator
temperature. )
You can take this
multipurpose egg box
wherever you want.
In addition, it’s designed to
hold loose eggs or a carton.
You can also put
the Take&Go in the
“Double Capacity” shelf at
the door.
)
This no-spill ice-maker has a
removable cylinder which
can be easily filled and when
in place, automatically fills
the ice-trays. It also comes
with a storage box that can
be used as an ice-bucket.
)
The Power Cool function
is great for rapidly cooling
a large amount of room
temperature food once it’s
placed in the refrigerator.
As soon as you get back
from the supermarket,
simply activate it and it
will rapidly cool the
refrigerator interior.
)
2
3
(pg.
(pg.
19
18
(pg. 23
(pg.
16
(pg.
12
4
5
6
(pg.
12

6
where to start?
choosing a location
Choose a place for your refrigerator. We recommend a large space that
can be kept clean and dry to prevent oxidation.
positioning
To ensure that the refrigerator works correctly, it’s important that air can
circulate. We recommend the following minimum surrounding distances:
• 10 cm on both sides, 10 cm at the back,
between 5 and 10 cm on top.
• Don’t position it near heat-generating appliances
such as hobs, heaters, or in areas exposed to
sunlight. This could overwork the refrigerator,
making it less efcient and increasing energy
consumption.
• Don’t lean it against a wall.
Observing these distances and recommendations
will guarantee you a fully-functioning product, as
it will prevent the components from direct contact
with walls and furniture, thus avoiding unpleasant
sounds.
installation
You must remove all packaging including:
tape,cardboard,plastic, and/orStyrofoam(EPS).
The refrigerator must not be connected to an
energy source before installation.
important
Let the refrigerator stand for 6 to 8 hours before
connecting it to allow the cooling gas and the
compressor oil to settle.
Top
Base
Corner
packaging
8
working width
door opening direction
model ingenious ingeniousprismatic prismatic glass glass
Capacity 400 litres 510 litres 400 litres 510 litres 400 litres 510 litres
Total Dimensions
(closed doors) cm cm cm cm cm cm
Depth 69.32 70.28 76.02 78.18 76.58 78.16
Width 66.22 74.37 66.22 74.37 66.22 73.91
Total Dimensions
(open doors)
Depth 125.85 138.80 126.07 138.83 125.70 138.61
Width 107.06 120.35 111.14 124.51 111.64 124.42
working depth
Top
Base
Corner
packaging
8
working width
door opening direction
model ingenious ingenious prismatic prismatic glass glass
Capacity
Total Dimensions
(closed doors) cm cm cm cm cm cm
Depth
Width
Total Dimensions
(open doors)
Depth
Width
working depth
Top
Base
Corner
packaging
8
working width
door opening direction
model ingenious ingeniousprismatic prismatic glass glass
Capacity 400 litres 510 litres 400 litres 510 litres 400 litres 510 litres
Total Dimensions
(closed doors) cm cm cm cm cm cm
Depth 69.32 70.28 76.02 78.18 76.58 78.16
Width 66.22 74.37 66.22 74.37 66.22 73.91
Total Dimensions
(open doors)
Depth 125.85 138.80 126.07 138.83 125.70 138.61
Width 107.06 120.35 111.14 124.51 111.64 124.42
working depth

7
levelling
To level the refrigerator use
the two levelling screws
found on the base at the
front. Make sure that the
refrigerator is placed on level
ground. Adjust the levelling
screws to ensure that the
refrigerator doesn’t move
during day-to-day use.
Turn the screws anti-
clockwise to lift the front of
the refrigerator and clockwise
to lower it.
The front part of the
refrigerator should be a little
higher than the back causing
it to tilt backwards slightly.
Levelling requires two people;
one to tilt the unit backwards
and the other to turn the screws.
To level it, lift the front by turning the screws until there is a 48 mm (1.9
in) gap between the oor and the base of the refrigerator, as indicated in
the gure on the right.
observe the following when installing:
important – after leaving the refrigerator to stand 6 to 8 hours
and before plugging it in:
1.Clean the interior of your refrigerator with a cloth or soft sponge, and
a neutral soap or a soda bicarbonate solution.
2.Plug it in to the correct outlet.
3.Leave it on, empty and closed, for 4 hours before putting food inside.
4.Avoid opening the door before optimum temperature has been
reached.
5.If you want to move your refrigerator to another location, disconnect
it. When it has been repositioned repeat steps 3 and 4.
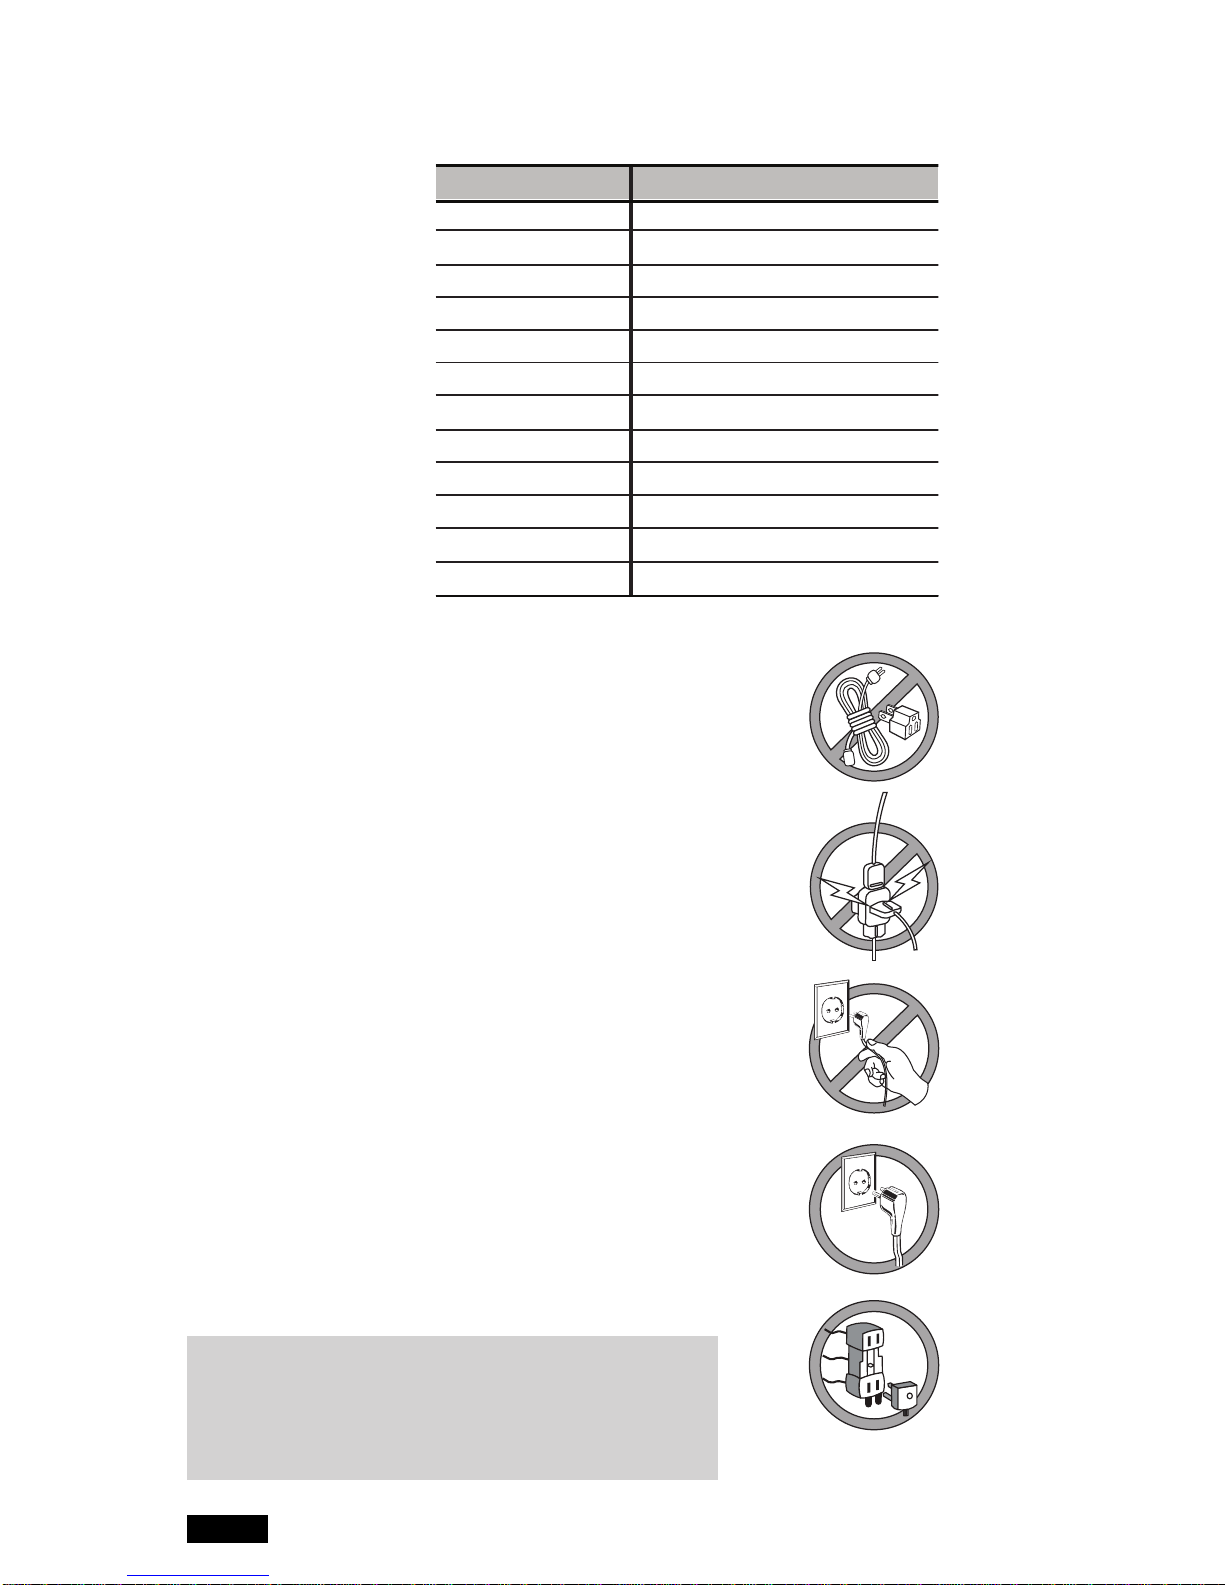
caution
In the case of physical, mental or sensorial difculties (including
children), or if you don’t have sufcient experience or knowledge to
handle this product, you will need the assistance of a capable adult
to ensure safety.
Children should always be supervised. This product is not a toy.
Levelling
screws
Front
wheels
Back
wheels
mm84
Front
Front
Front
Levelling
screws
Front
wheels
Back
wheels

8
minimum electrical requirements:
Check the voltage
and frequency
characteristics in
accordance with
your country of
residence.
electrical installation:
1.Install your refrigerator to the closest outlet. The use of
an extension cord is not recommended
2.Where possible, avoid connecting other electrical
appliances to the same outlet as your refrigerator while
it’s in use. This will prevent uctuations in voltage and
overheating of the refrigerator.
3.To connect and disconnect your refrigerator, take the
cord by the plug and remove it. Never pull on the cable.
4.Your refrigerator comes equipped with a type “Y”
polarisedpowercord, whichincludesagrounding cable.
Do not remove the ground prong by using a two-prong
adaptor, or cut the cable to replace the original plug for
a two-prong plug.
5.If you live in a region where there are voltage and
frequency variations, don’t connect your refrigerator
into the outlet. You must install an automatic voltage
regulator with a minimum power of 500 Watts for 1000
Watts. Makesure theregulator canhandle yourregion’s
variations in tension.
6.If the supply cord is damaged, it must be replaced
by the manufacter, its service agent or similarly
qualied persons in order to avoid a hazard.
important:
Ignoring the above-mentioned advice places the
responsibility for any personal or material risk
entirely with the customer.
País Características Nominales
México 115 V ~ 60 Hz
Brasil 127 V ~ 60 Hz / 220 V ~ 60 Hz
Europa 220 V - 240 V ~ 50 Hz
Medio Oriente 220 V - 50 Hz / 110 V ~ 60 Hz
Perú 220 V ~ 60 Hz
Ecuador 115 V ~ 60 Hz
Venezuela115 V ~ 60 Hz
Colombia115 V ~ 60 Hz
Chile 220 V ~ 50 Hz
El Salvador 115 V ~ 60 Hz
Argentina 220 V ~ 50 Hz
Canadá 115 V ~ 60 Hz
CountryNominal Characteristics
115 V ~ 60 Hz
Brasil 127 V ~ 60 Hz / 220 V ~ 60 Hz
Europa 220 V - 240 V ~ 50 Hz
Medio Oriente 220 V - 50 Hz / 110 V ~ 60 Hz
Peru 220 V ~ 60 Hz
Ecuador115 V ~ 60 Hz
Venezuela115 V ~ 60 Hz
Colombia 115 V ~ 60 Hz
Chile220 V ~ 50 Hz
El Salvador115 V ~ 60 Hz
Argentina 220 V ~ 50 Hz
Canada115 V ~ 60 Hz
Mexico

9
32°C 10°C
N 32°C 16°C
Subtropical ST 38°C 16°C
Tropical T 43°C 16°C
Temperatura ambiente
Temperature Range
Class Symbol
Room Temperate Range
within which our products are
designed for use.
(Storage temperatures should
comply with these.)
Temperate SN +10 to + 32
Mild Temperate N+16 to + 32
Subtropical ST +18 to + 38
Tropical T +16 to + 43
Symbol Maximum Minimum
Mild Temperate
Values in Celsius Degrees
know your product
The refrigerator is designed to work within the room temperatures specied
in the table below.
note: The internal temperature can be affected by factors such as the
locationoftherefrigerator,theroomtemperature,andhowoftenthedoors
are opened.Adjust the temperaturecontrols accordinglyto compensate
for these factors.
For Chile and Europe:
For Brazil, Ecuador, Colombia, and Argentina:
temperature control
The internal temperatures of the freezer compartments and the cooler can
be regulated to allow them to be adjusted for suitable conservation of food.
When using your refrigerator for the rst time, we recommend maintaining
the original factory positions (in mid-position). Let it stand for 4 to 6 hours to
allow the temperature to stabilise.
If you need to change the temperature after this period you can adjust it with
the controls.

10
general temperature control
Therefrigeratorcontrolhastemperaturegraduationsforbothcompartments
thatvaryfromminimum(leastcold)tomaximum(coldest).Ifneedsbe,adjust
the control and monitor the food for a couple of hours. You can readjust it
until you obtain the desired refrigeration level. You will have to wait between
4 and 6 hours until the refrigerator reaches the selected temperature.
air regulator
Your refrigerator has an additional
control that regulates the air ow
between the freezer and the cooler.
It’s calibrated in the factory to ensure
optimum function, so we recommend
you don’t alter its position.
If you wish to adjust it, put a coin into
the central slot. By turning it to the right
you’ll generate greater air ow to the
freezer, accelerating the freezing process. However, you’ll notice that the
cooler will take longer to reach the correct temperature.
By turning the control to the left, the air ow to the cooler will increase,
delaying the freezing process according to the following guide:
note: Forsomemodelsthetemperaturecontrolis located on theexterior
control or display. If your model has an external control or display,
see page 72 to understand how it works.
important
Changing the position of the air regulator will alter the time it takes the
cooler to reach the correct temperature but not the temperature itself.
note: Do not overll the refrigerator. Leave space between food and
use the shelves provided to hold everything. This will facilitate the
necessary air circulation and prevent it from lower performance.
Cold days
Few foods stored
Infrequent door opening
Hot Days
Many foods storedMaximum
Mínimum
Medium Recommended for normal use
regulator position
position when to use
Minimum Maximum
Turn the knob towards Minimum
for less chill or towards Maximum
for greater chill.
Freezer Temperature
Cooler Temperature No variation
Least cold Suggested Coldest
Frequent door opening

11
cautions
1. The room temperature inuences the performance of your
refrigerator. The higher the external temperature, the colder the
selected temperature in the cooler should be.
2. We recommend selecting a lower temperature if you frequently open
the cooler door.
3. When placing your food inside the refrigerator, try not to block the
airways. This will allow adequate circulation and keep the inside
temperature stable and uniform, thus only freezing the items in the
freezer.
4. Use the top compartment to freeze food, conserving it for longer.
Use the lower compartment to refrigerate food. if your refrigerator
has a rapid cooling compartment, you should take into account that
some fresh fruit and vegetables are cold-sensitive and it is not a
good idea to keep them in this compartment.

Alternatively, consult the express chill zone section on page 12.
original “Parts and Features” on page 4.
12
exterior display
(only available with certain models)
Somemodels havean externaldisplay thatwill allow you tooperate certain
functions additional to those that come as standard.
Power
Cool
Function
Express Chill
Zone Button
Temperature
Control
Holidays
Function
Alarm
Function
Lock
Function
Energy
Saver
Indicator
express chill zone function
(only available with certain models)
Designed to rapidly cool food and
drinks. Via the exterior panel you
can control the functions of the
express chill zone; the area found
at the top part of the freezer. This
is labelled with the letter d in the
The express chill zone, with its predetermined cooling temperatures for
food and drink, offers great versatility.
On top of this, it gives you three timing options of 20, 15, or 10 minutes,
so that you can select the option which best suits your needs.
note: Before activating the Express Chill Zone Function, you must
deactivate the Holidays or Power Cool functions. If you activate Holidays
or Power Cool while the express chill zone function is on, you will hear an
alarm that signals the programmes can’t be carried out.

13
how does it work?
First, place the food and drink that you want to cool rapidly into the express
chill zone. Make sure to lower the bottom hatch of the express chill zone
before closing the freezer door.
To activate the express chill zone, press the express chill zone button on
the display a number of times until you reach the desired time. After 5
seconds it will start to work.
A countdown clock on the display screen will show the remaining time.
When the time is up, an alarm will sound, the countdown clock will read
“0” and the button light will ash for a minute, indicating that your food and
drink are ready to be taken out. The alarm will sound until you press the
express chill zone button.
The express chill zone Function will deactivate automatically:
a. If you keep pressing the express chill zone button, thereby
exiting the programme before the required time has lapsed.
b. If you press the express chill zone button once the programme
is completed and the alarm is sounding.
c. Once the cooling time has lapsed, the alarm has sounded for one
minute and stopped.
table of recommended chilling times
note: Times vary depending on the initial temperature of your foods and
drinks.Ifuponprogrammecompletion,theitemshaven’treachedthedesired
temperature,youcanaddadditionalminutes using thedisplay.Theexpress
chill zone can be reprogrammed after 5 minutes have passed since last
use. If you decide to cool your items for longer, be alert for when the alarm
rings to indicate the foods and drinks are ready and remove them from
the compartment. This will prevent them from freezing, which is especially
important for carbonated beverages.
The following table outlines the times required to cool room temperature
drinks (25° to 30°) in the express chill
zone:
TIP: If you use the cooler for beer and
soda, you can bring them to the perfect
temperature before your guests arrive
using the express chill zone.
important: You should not store carbonated drinks with the intention of
freezing them in the express chill zone. This programme should only be
used to cool them. DO NOT exceed the recommended times. Your alarm
will sound for a minute after the time has lapsed, which is when you need
to take your items out of the compartment.
Ignoring the above-mentioned advice places the responsibility for any
consequences entirely with the customer.
Beverages Times
Red Wine 30 min
White Wine 45 min
Sparkling Wine 45 min
Beers 60 min
Sodas 45 min

14
You canalso use theexpress chill zoneto accelerate somedessertsprepa-
ration. Below you will nd some receipes to get the best of the express
chill zone.
Strawberry Charlotte:
Ingredients
Filling:
1 cup of whipping cream
½ cup of sugar (to taste)
2 cans of sweetened condensed milk
The juice of 8 limes
Grated lime rind to taste
Strawberries (blackberries, raspberries, kiwis or any fruit you prefer are also suitable)
Base:
Lady ngers
Brandy or cognac to soak the lady ngers (to taste)
Method:
For the base: Line the base and sides of the dish with the lady ngers.
If you prefer, soak them with brandy or cognac.
Filling:
Whip the cream at maximum speed, adding sugar little by little to sweeten to taste.
Whip until rm peaks form in the cream. Whip the condensed milk in another bowl,
adding lime juice little by little until the milk thickens. Add grated lime rind to taste
Pour a layer of the condensed milk with lime over the lady ngers, and then cover
with strawberries and the whipped cream. Cover with another layer of lady ngers,
then the condensed milk with lemon, and strawberries again.
Refrigerate and serve cold.
Rice Pudding:
Ingredients
1 cup of rice
3 cups of water
A pinch of salt
1 cinnamon stick
1 litre of milk
3/4 cup of sugar
1 spoonful of vanilla extract
Ground cinnamon to taste
Method:
Put the rice, water, cinnamon stick and salt in a large saucepan. Heat and
bring to boil, then lower the heat and cover the pan, leaving it to cook until
almost all the water is absorbed.
Add the milk and sugar turn up the heat and stir constantly until the
mixture thickens. Add the vanilla and leave on the heat for 2 minutes.
Remove from the heat and leave to cool for 30 minutes. Spoon the
mixture into a large serving bowl or into small bowls, and refrigerate.
Sprinkle with a little ground cinnamon to decorate.
Chocolate Covered Strawberries:
Ingredients
1/2 kg of strawberries
300 g of dark cooking chocolate
You can use any chocolate you prefer, be it white, milk chocolate or
dark chocolate.
Method:
Wash and disinfect the strawberries, leaving the stalks on. Once they are
washed and disinfected, dry them carefully using a paper towel.
Put the strawberries on a tray that is either covered in aluminium foil or
waxed, making sure that the strawberries are not touching each other.
Put this in the express chill zone so that they cool whilst you melt the chocolate.
Chop the chocolate into small pieces and melt in a bain-marie using tepid water.
Make sure that the water in the bain-marie doesn’t boil; only heat to the
temperature necessary to melt the chocolate.
Once the chocolate is melted, take the strawberries out of the express chill zone.
Remove the stalks and dip the strawberries in the melted chocolate.
Once covered, put them back on the tray. Once all the strawberries are covered
and put back on the tray, put the tray in the refrigerator for 10 minutes before
serving to allow the chocolate to stick better to the strawberries.
You should consume this dessert on the day you prepare it.

15
important:
Desserts must be covered once they are in the express chill zone. You can
cover them using paper or a lid.
Incase your initialtime cocludesand you wishto keep usingyour Eexpress
chill zone you must turn your container and press the time botton again.
Rice Pudding:
Ingredients
1 cup of rice
3 cups of water
A pinch of salt
1 cinnamon stick
1 litre of milk
3/4 cup of sugar
1 spoonful of vanilla extract
Ground cinnamon to taste
Method:
Put the rice, water, cinnamon stick and salt in a large saucepan. Heat and
bring to boil, then lower the heat and cover the pan, leaving it to cook until
almost all the water is absorbed.
Add the milk and sugar turn up the heat and stir constantly until the
mixture thickens. Add the vanilla and leave on the heat for 2 minutes.
Remove from the heat and leave to cool for 30 minutes. Spoon the
mixture into a large serving bowl or into small bowls, and refrigerate.
Sprinkle with a little ground cinnamon to decorate.
Chocolate Covered Strawberries:
Ingredients
1/2 kg of strawberries
300 g of dark cooking chocolate
You can use any chocolate you prefer, be it white, milk chocolate or
dark chocolate.
Method:
Wash and disinfect the strawberries, leaving the stalks on. Once they are
washed and disinfected, dry them carefully using a paper towel.
Put the strawberries on a tray that is either covered in aluminium foil or
waxed, making sure that the strawberries are not touching each other.
Put this in the express chill zone so that they cool whilst you melt the chocolate.
Chop the chocolate into small pieces and melt in a bain-marie using tepid water.
Make sure that the water in the bain-marie doesn’t boil; only heat to the
temperature necessary to melt the chocolate.
Once the chocolate is melted, take the strawberries out of the express chill zone.
Remove the stalks and dip the strawberries in the melted chocolate.
Once covered, put them back on the tray. Once all the strawberries are covered
and put back on the tray, put the tray in the refrigerator for 10 minutes before
serving to allow the chocolate to stick better to the strawberries.
You should consume this dessert on the day you prepare it.

16
exterior temperature control
On models with the exterior
door display, press the
“Fridge Temp” to change the
temperaturelevel until thelevel
you want lights up.
The “Cold” level (least cold) light is found on the left-hand side, and when
all the lights are illuminated the refrigerator is at the “Coldest” temperature.
power cool function
This is designed to speed up the cooling and freezing of the
entire refrigerator. We recommend activating this function
once you return from the supermarket as you will be storing
various room temperature items in the refrigerator.
note: BEFORE ACTIVATING THE POWER COOL
FUNCTION, the Holidays and Express Chill Zone Functions
must be deactivated as these functions cannot work simultaneously.
ThePowerCool Function helps to cool yourfoodsfastersince the refrigerator
will work at its maximum cooling power. After this time, the refrigerator will
return to working as normal. It is activated by pressing the Power Cool
button. This turns the LED light on, which indicates that the function has
been activated.
holidays function
This assists you in saving energy when you go on holidays.
Forperiodslongerthanafortnightwerecommendyouunplug
the refrigerator, clean it, and leave the doors wide open.
To use this function, press the Holidays button; the LED
indicator will light up telling you that the function is now
activated. To deactivate it, the Holidays button must be
pressed again. Once the cooler door is opened the function
will deactivate automatically.
note: BEFORE ACTIVATING THE HOLIDAYS FUNCTION,
the Power Cool and the Express Chill Zone functions must be deactivated
as these functions cannot work cannot work simultaneously.
alarm function
The Alarm Function is activated by pressing the Alarm button.
The alarm will sound if this function has been activated and the
doorhasbeenleftopenforaperiodoftimelongerthana minute;
accordingly, if this function is not activated and the door is left
open, the alarm will not sound.Activating this function helps you
to avoid leaving the door open by mistake, thus preventing your
refrigerator from being less efcient and consuming more energy.
Thealarmwillstopsoundingoncethedoorhasbeenclosed.To usethisfunction,
press theAlarm button until the light turns on. You can deactivate it at anytime by
pressing the button again until the light turns off.

17
Capacidad
1 Queso tipo americano 200 gr
1 Paquete de salchichas 450gr
1 Paquete jamón 300gr
3 Yogurts p/beber
1lt de Jugo de naranja
1lt de leche
1 mayonesa de 370 gr
1 Queso tipo americano 200 gr
1 Paquete de salchichas 450gr
2 Yogurts p/beber
8 Yogurts cremosos para niños de 100 gr
4 jugos con envase tetrapack de 250 ml
2 leches con envase tetrapack de 250ml
1 botella de vino 750ml
1 Refresco 1lt o 1 tetrapack 1lt (jugo)
1 Botella de agua medio litro
3 latas de cerveza
4 jugos de fruta tetrabrick 250mlt
2 botellas de 500ml de bebidas hidratantes
Agua 1lt botella
1 litro de jugo botella plástica
3 manzanas
1 Paquete de 1kg de tortillas
1 Plato desechable con comida
lock function
This function blocks the exterior control of the display,
preventing anyone else from changing its control conguration.
To use this
function, press the Lock button for 3 seconds; the button will
thenlightuptellingyouthatthefunctionhasbeenactivated.If
you press any button other than the Lock button, the light will
icker and you will hear a beeping sound that indicates the display is blocked.
To deactivate thisfunction, simplyrepress theLock buttonfor 3seconds and
thelightwillgooff,indicatingthefunctionhasbeendisabled.Werecommend
that you activate the Lock Function when you need to clean the display.
energy saver
This indicator informs you when your refrigerator is working
atits maximum energysaving level. Itwill automatically light
upat thevery moment therefrigerator startsto save energy.
The indicator light will turn on only if:
• You go on a trip for a period longer than 5 days.
• The door is not opened constantly (dependent on your
refrigerator load as well as the room temperature).
• You activate the Holidays Function.
smart station
(only available with certain models)
The Smart Station provides quick access to
a special zone in your refrigerator.
This compartment allows you to easily grab
food without having to open the refrigerator
door. It comes with a multi-positional shelf
that you can adjust according to your
needs.
The Smart Station has both internal and
external access. You can put your foods
into the refrigerator via the internal access,
while the external access lets you take
out food from this compartment without
opening the refrigerator door. This will
make your refrigerator more energy-
efcient.
To open the Smart Station’s internal
compartment press the button located beside
the medium shelves in the centre.
Press it and pull it towards you to open the
door. To close, push it until you hear a click.

18
suggestions on how to
get the most from your
Smart Station
Your Smart Station’s capacity offers
you maximum versatility and is
perfectly adaptable to your lifestyle.
Below are some suggestions of
its many uses:
Furthermore, you can also put
ingredients for a specic recipe into
your Smart Station; for instance, a
cake, sauce or pasta, etc.
Later, you can access these
quickly without having to open the
refrigerator door each time you
need a new ingredient.
On top of all this, the external
access door to your Smart Station
can be opened out and used to
temporarily hold up to 8 kg of food
and drink.
note: Be careful that children do not
hang or are left on the door because
they can be hurt.
note: The Smart Station comes with an
air conductor which brings cold air from
the
freezer to the Smart Station
guaranteeing the perfect temperature for
your favourite
foods. Make sure to leave the airway
clear.
capacity
1 packet yellow cheese singles
1 packet sausages
1 packet ham (300 g)
3 drinking yoghurts
1 litre orange juice
1 litre milk
Jar of mayonnaise (370 g)
1 packet sausages or 4 of baby carrots
2 drinking yoghurts
8 Petit Suisse
4 mini-cartons fruit juice
2 mini-cartons milks
1 bottle of wine
1 soda (1 ltr) or 1 juice (1 ltr)
1 half-litre bottle of water
3 cans of beer
4 fruit juices (250 ml each)
2 hydrating drinks (500 ml each)
Water bottle (1 ltr)
1 bottle of juice (1 ltr)
3 apples
1 disposable plate of food
5 half-litre containers with individual
portions ready for the week

19
In case of a spillage, you can take the following
steps to easily clean the exterior door:
To remove and replace the exterior door of your
Smart
Station you will need a small screwdriver:
1. Open the exterior access door
2. Use the at part of the screwdriver to remove
the door from the base on the left hand side.
3. Find the hinge and screw the screwdriver into
it.
4. Once you have unscrewed the hinge, pull the
door to the right until it comes away.
5. To replace the door, rst attach it to the bolt on
the right-hand side.
6. Slide the edge to the right using the
screwdriver, and align it with the marked
groove.
7. Use light movements until you hear a click
indicating that the door is properly positioned.
smart ll ice factory
(only available with certain models)
This no-spill ice-maker with removable cylinder feeds directly into the
ice-tray. It comes with a storage box that can
hold up to 900g of ice.
starting up:
Remove the water cylinder found at the top
of the Smart Fill Ice Factory (SFIF) by pulling
the top middle part towards you.
Once removed, place the water cylinder on a
at surface. Open the top, which you’ll nd in
the middle centre. To avoid spillages, make
sure that there’s no residual ice obstructing
the valve of the cylinder before you ll it with
water. Pour 180 ml of puried water into the
cylinder or ll it to the maximum level.
Replace the top, placing pressure on the
middle. It’s essential that it’s secure in the
centre in order to avoid water leaking out.
Put the cylinder back in its original position
making sure it’s securely connected. You
should be able to see and hear the water
lling the ice-tray which indicates that the
cylinder is correctly installed.

20
note:It’simportantthatonceyouhavecompletedtheabovestepsyoumake
sure that the water cylinder is correctly installed to prevent water freezing in
the cylinder’s interior.
caution: Only ll with drinking water.
removal of ice
1.After a while, your ice cubes will be
ready for use. To remove them, pull the
handle slowly towards you until it’s fully
down. At this point it will be necessary
to pull the handle a little more forcefully
until you hear the ice fall into the lower
compartment of your Smart Fill Ice
Factory.
2.This compartment can hold up 3
complete releases of the ice-tray. To
remove the ice, simply lift and pull the
storage box that you will nd in the lower
part. This box is designed to be brought
wherever you wish. To make more ice,
repeat the process.
note: The cylinder can only hold one load at
a time. Before repeating the process, make
sure that the tray is empty.
note: The ice produced may vary in size.
cleaning the smart ll ice factory
When cleaning your Smart Fill Ice Factory it is imperative that you only use
a soft sponge with water and a neutral soap. Afterwards, leave it to dry.
DO NOT use a steel wool sponge or detergent to clean the SFIF (specially
the ice-bucket), as this could affect how it works, change how it looks, and
affect the avour of your ice cubes.
cleaning the cylinder
Only use a soft sponge with water and a neutral soap to clean. Afterwards,
leave it to dry. Don’t use steel wool sponges or detergents, knives or forks
as these could scratch or damage the central valve. If there’s frozen water
inside the cylinder, let it melt or use tepid water to speed up the process.
important: When removing the ice cubes, pull
the handle all the way down. You will feel resis-
tanceatthispoint,butyouneedtopullalittlemore
sothattheice-traytwistsandreleasestheiceinto
the lower compartment.Oncethis pointhas been
reached, the process is complete.
This manual suits for next models
3
Table of contents
Other Summit Refrigerator manuals

Summit
Summit FF1325SS User manual

Summit
Summit CP171 Series User manual

Summit
Summit FFBF171SS User manual

Summit
Summit CP-35 User manual

Summit
Summit SCR600LOS SERIES User manual

Summit
Summit CM40BL User manual

Summit
Summit SCR600BL-BITB Guide

Summit
Summit CT66 Series User manual

Summit
Summit CM45L Guide

Summit
Summit CP97 User manual

Summit
Summit SP7D2 User manual

Summit
Summit FF71LLF2 User manual

Summit
Summit FF101W User manual

Summit
Summit SCR600 Series Guide

Summit
Summit CM405 User manual

Summit
Summit SCR1275 User manual

Summit
Summit FF63B User manual

Summit
Summit R17FF User manual

Summit
Summit FF-874W User manual

Summit
Summit CT661BI User manual