WELCOME TO THE FUN OF COOKING WITH THE SUN
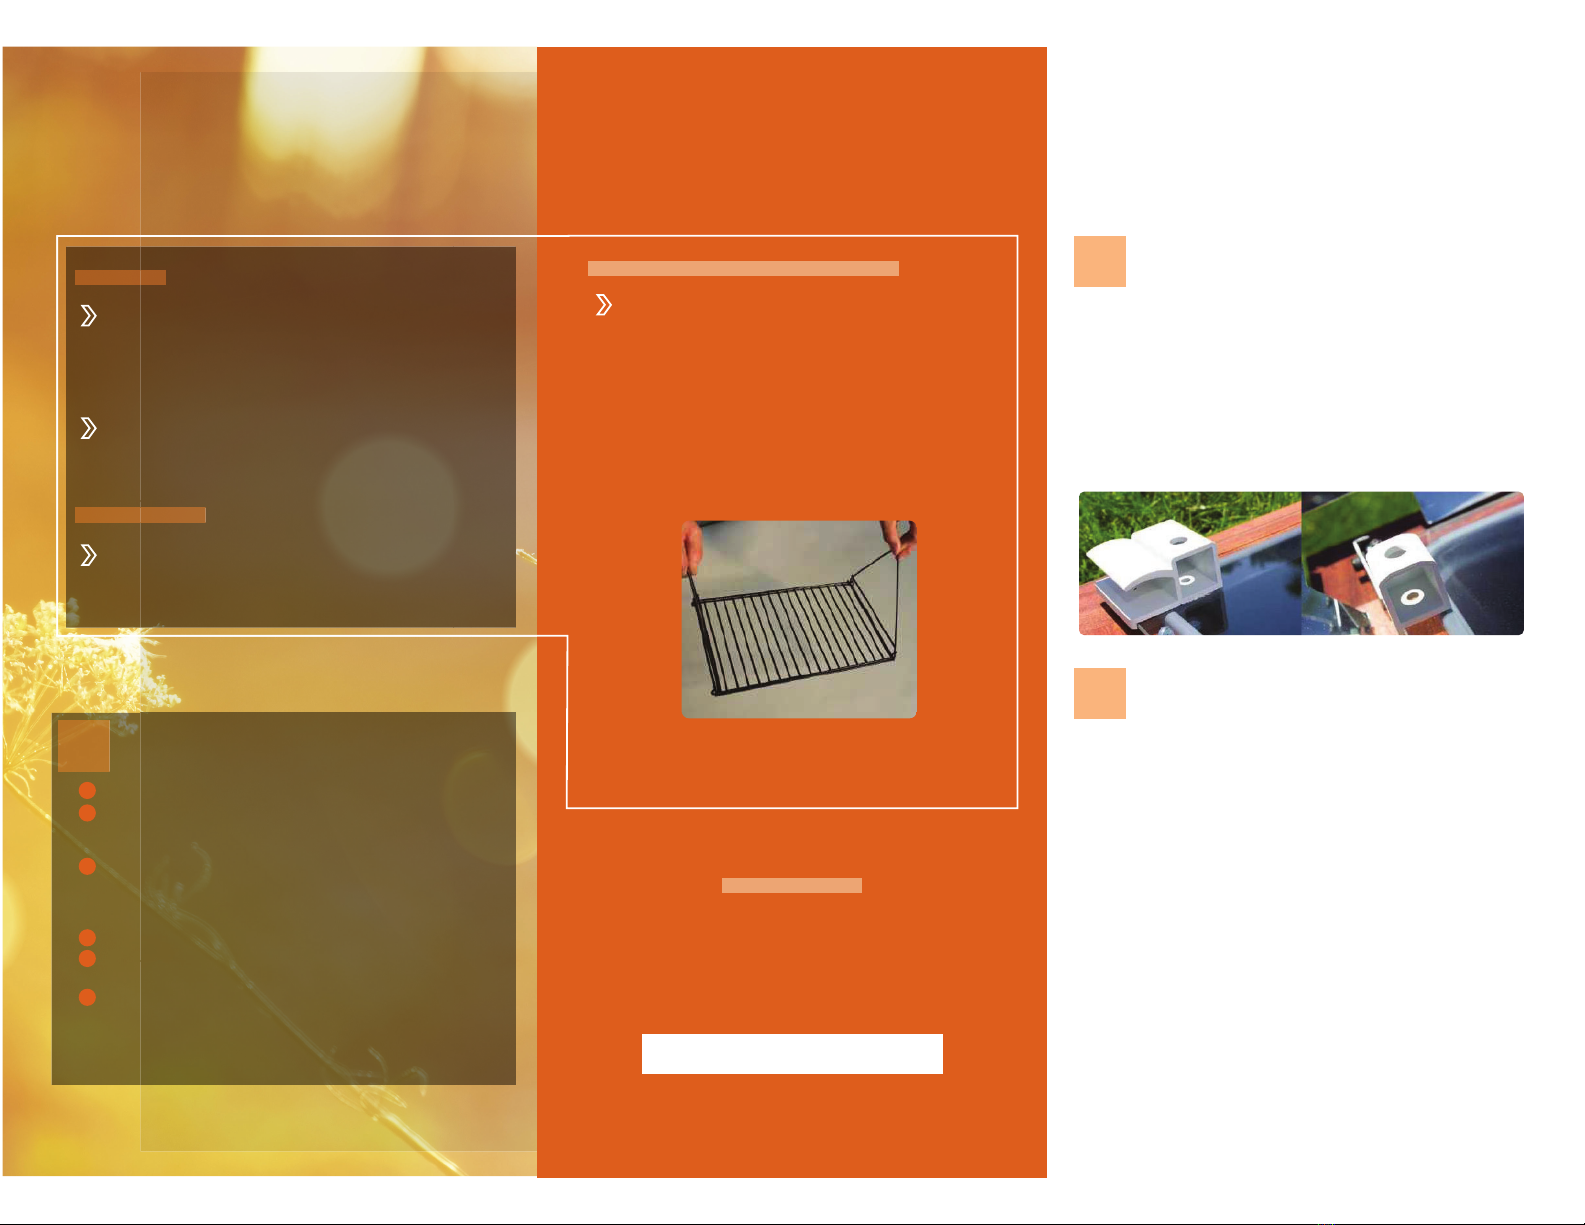
Dual Purpose Leveling Rack
Replacement Parts
For more detailed information see the user manual
available at https://cook.sunoven.com
1
2
3
4
5
6
Pre-Cooking Instructions
Remove the protective film from the reflectors.
Set the Sun Oven facing the sun. Extend the panels, close the glass door,
and close both latches over the glass. Leave in this position for 25 to
30 minutes.
Using an oven mitt release the latches and open the glass door. Pour 2
cups of water with several drops of dish soap into a pot and place the
pot, without a lid, inside the hot Sun Oven and close and latch the
glass door.
Realign the Sun Oven.
Leave the Sun Oven in the sun for 90 to 120 minutes with the open pot of
soapy water. Every 30 minutes realign the oven.
Lastly, after the oven has been heated and well steamed, completely
clean the inside of the chamber and the inside of the glass door with
the hot soapy water. While cleaning, it is best to scrub hard on the
interior of the glass around the area where the glass meets the black
gasket.
How to align the sun correctly
Be sure to watch the shadows created by the oven. When the shadows are
even on all sides, the cooker is directly focused. The built-in leveling leg on
the back allows for easy tracking. Regulate temperature by turning the oven
towards the sun and focusing.If you want a high temperature, turn the oven
towards the sun and directly focus. If you want a lower temperature you
focus the oven directly, then turn the oven slightly out of direct focus.
The need to refocus depends on what you are cooking, the time of day, and
the temperature you wish to maintain. It is recommended to readjust every
30 minutes to maintain maximum heat. At noon the sun is high in the sky and
moves quickly past the maximum focus point, creating the need to refocus
more often. Later in the day you will not need to refocus as often. The SUN
OVEN is equipped with a built in Levelator, which keeps food level and
avoids spills while being refocused.
Many meals can be cooked without refocusing. Sun Oven users often will put
their ovens outside, focused for the mid-day sun, with their dinner in it when
they leave for work in the morning. As the sun moves overhead, the
temperature in the Sun Oven chamber slowly rises to a cooking level. As the
sun passes, the food is kept warm and when they return from work they have
a warm, sun-cooked dinner. (Keep in mind food will not burn in a Sun Oven
and that the chamber is extremely well insulated, allowing food to stay
warm for hours.)
The Sun Oven is equipped with a dual-purpose leveling rack which
hangs from the threaded rods inside the oven and swings freely to
prevent spilling. The dual-purpose leveling rack can also be set on the
floor of the oven to increase the usable area inside the Sun Oven and
allow larger pots or pans to be used. (It is important to note that pots
and pans should be placed on the dual-purpose leveling rack, not on
the floor of the oven. To cook evenly, there must be air flow all the way
around the pot. The rack will allow air to pass under the pot and ensure
an even heat.)
To hang the rack, bend the side arms outward and place the rack
on the threaded rods.
Set-up
Unsnap the webbing strap that holds the reflectors in place. Lift and
unfold the reflectors (which are hinged to the top of the Sun Oven) and
slide the slot in the bottom section of the reflectors over the
thumbscrew in the wooden frame, making sure the thumbscrew fits
through the slot. Twist the thumbscrew one-quarter turn to hold the
reflectors in place.
The latches that hold the glass door shut (on the right side of the door)
are tightened before shipping – you will need to unscrew them ¼ to ½
turn to make them easier to operate.
Placement
Put your Sun Oven in a sunny place which is unobstructed by shadows
from trees, buildings, etc. Remember that areas not currently shadowed
may be affected later by trees, buildings, or other large objects as the
sun moves across the sky.
Focusing
Locate the white E-Z Sun-track indicators attached to the bottom corners of
the glass door. Aim the front of your Sun Oven towards the sun.
If you stand behind or on the left side of the Sun Oven you will notice that
each indicator has two small holes. As the light of the sun shines through the
top hole, a small round dot of light will appear inside the indicator. When the
oven is perfectly aligned with the sun, the round dot will be centered over
the bottom hole.
Move the oven from side to side and adjust the height of the rear alignment
leg so the round dot of light shines directly into the bottom hole.
www.sunoven.com
Our customers still use Sun Ovens they purchased 20+ years
ago. Sun Ovens last. However, sometimes things happen.
We offer replacement parts for purchase via our website.
Keep your Sun Oven cooking!