Sun-Tech PXR4CDWD User manual

CD/MP3 PLAYER WITH TURNTABLE WITH AM/FM STEREO
RADIO AND USB/SD ENCODING
PXR4CDWD
INSTRUCTION MANUAL

Safety Precautions
Read the following recommended safety precautions carefully.
Power Source
Before plugging in for the first time, read the following section carefully.
This device should be operated only from a 220-240V AC, 50 Hz outlet.
Be sure that the power supply voltage of the area be used meets the required voltage and you
select the correct voltage setting for your device.
Power Cord
Do not place the set, a piece of furniture, etc on the power cord or pinch the cord. Handle
the power cord by the plug. Do not unplug the appliance by pulling from the power cord
and never touch the power cord with wet hands as this could cause a short circuit or electric
shock.
Never make a knot in the cord or tie it with other cords. The power cord should be placed in
such a way that they are not likely to be stepped on. A damaged power cord can cause fire
or give you an electric shock. When it is damaged and needs to be replaced, it should be
done by qualified personnel.
Moisture and Water
Do not use this device in a humid and damp place (avoid the
bathroom, the sink in the kitchen, etc). Do not expose this device
to rain or water, as this may be dangerous and do not place objects
filled with liquids, such as flower vases, on top.
If any solid object or liquid falls into the cabinet, unplug the
connected device(s) immediately and have it checked by
qualified personnel before operating it any further.
Cleaning
Before cleaning, unplug this device from the wall outlet. Do not
use an aggressive liquid or aerosol cleaners. Use a soft and dry
cloth.
Ventilation
The slots and openings on the device are intended for ventilation and to ensure reliable
operation. To prevent overheating, these opening must not be blocked or covered in
anyway. When installing this unit make sure to leave space sufficient around the unit to
ensure the ventilation to improve heat radiation.
Do not expose the unit to extreme conditions of heat, cold or moisture
EN-1

Heat and Flames
The device should not be placed near to open flames or sources of
intense heat such as an electric heater. Ensure that no open
flame sources, such as candles, are placed on top of the device.
Batteries should not be exposed to excessive heat such as
sunshine, fire or the like.
Lightning
In case of storm and lightning or when going on holiday,
disconnect the power cord from the wall outlet.
Replacement Parts
When replacement parts are required, make sure that the service technician has used
replacement parts, which are specified by the manufacturer or have the same specifications
as the original one. Unauthorized substitutions may result in fire, electrical shock or other
hazards. Please contact the brand or manufacturer that will redirect you to the nearest
technical service which will supply or change the replacement parts
Servicing
Please refer all servicing to qualified personnel of the brand. Do
not remove the cover yourself as this may result in an electric
shock.
Risk of electric shock
The lightning flash with arrowhead symbol, within an equilateral triangle, is intended to alert
the user to the presence of not insulate,“dangerous voltage” within the product’s enclosure
that may be of sufficient magnitude to constitute a risk of electric shock of persons.
The exclamation point within an equilateral triangle is intended to alert the user to the
presence of important operating and maintenance (servicing) instructions in the literature
accompanying the appliance.
EN-2

Waste Disposal
Instructions for waste disposal:
- Packaging and packaging aids are recyclable and should principally be recycled.
Packaging materials, such as a plastic bag, must be kept away from children.
- Batteries, including those which are heavy metal-free, should not be disposed of with
household waste. Please dispose of used batteries in an environmentally friendly manner.
Find out about the legal regulations which apply in your area- Do not try to recharge batteries,
can have a danger of explosion. Replace batteries only with the same or equivalent type.
This symbol on the product or on its packaging means that your electrical device should be
disposed at the end of its service life, separately from your household wastes. There are
separate collection systems for recycling in the EU. For more information, please contact the
local authority or the dealer where you purchased the product.
Symbol for equipment Symbol for
batteries
Disconnecting the Device
The mains plug is used to disconnect the device from the mains and therefore it must remain
readily operable.
Headphone Volume
In your device has headphones jack, please note that excessive sound
pressure from earphones and headphones can cause hearing loss.
Installation
To prevent injury, this device must be securely attached to the wall in
accordance with the installation instructions when mounted to the
wall (if the option is available).
Warning:
Do not leave your device in standby or operating mode when you leave your house.
The Standby / On button does not fully switch off this
product. Moreover the device continues to consume
power in standby mode. In order to separate the device
completely from mains, the mains plug has to be pulled
from the mains socket. Because of that the device
should be set up in a way, that an unobstructed access to
the mains socket is guaranteed, so that in case of
emergency the mains plug can be pulled immediately. During periods of prolonged
non-use, the device should be disconnected from the mains power supply.
EN-3

Electrical device not in the hands of children
Never let children use electrical devices unsupervised. Children cannot always recognize
any possible dangers. Batteries / accumulators can be life threatening when swallowed.
Store batteries out of the reach of children. In case of swallowing a battery, medical aid has
to be sought immediately. Also keep the packaging away from children as there is danger of
suffocation.
BATTERY INSTALLATION
The battery compartment is located on the back of the remote control.
1. Remove the battery compartment door by pressing in on the tab and lifting it off.
2. Insert two (2) AAA size batteries (not included) into the battery compartment following the
polarity markings inside the battery compartment.
3. Replace the battery compartment door.
EN-4
Battery Precautions
zReplacement of batteries must be done by an adult.
zDo not mix old and new batteries.
zDo not mix alkaline, standard (carbon-zinc) or rechargeable (nickel-cadmium)
batteries.
zThe supply terminals are not to be short-circuited.
zNon-rechargeable batteries are not to be recharged.
zExhausted batteries are to be removed.
zOnly batteries of the equivalent type are to be used.
zBatteries are to be inserted with the correct polarity.
zDispose of batteries properly. Do not dispose of batteries in fire. The batteries
may explode or leak.

LOCATION OF CONTROLS
1) TS button
2) Record button
3) Repeat/Random button
4) CD skip down button
5) Dial scale
6) CD skip up button
7) MP3 folder up button
8) CD play/pause/stop button
9) CD tray open button
10) Band switch
11) Tuning knob
12) Function switch
13) FM stereo LED indicator
14) CD tray
15) Remote sensor
16) USB socket
17) USB indicator
18) SD/MMC card slot
19) SD card indicator
20) Aux in jack
21) 3.5 mm headphone jack
22) Play LED indicator
23) Repeat/Random LED indicator
24) Record LED indicator
25) Off/Volume control knob
26) Power LED indicator
27) FM antenna
28) Line out Audio
29) Auto stop switch
30) AC cord
31) Spindle adaptor
32) Turntable speed selector
33) Pick-up holder
Caution:
This unit should not be adjusted or repaired by anyone except qualified service personnel.
Precautions for use
Installation
•Unpack all parts and remove protective material.
•Do not connect the unit to the socket before checking the voltage and before all other connections have been made.
•Do not cover any vents and make sure that there is a space of several centimeters around the unit for ventilation.
Connection
1. Connect the power cord (30) to AC outlet.
2. Switch on the unit by Off/volume control knob (25). If the power LED indicator (26) light up, it’s mean the power supply
is normal. Now your system is ready to play the music.
Listening to radio AM / FM
Manual tuning
1. Set the tuner mode by function switch (12).
2. Select the descried band by Band switch (10)
3. Tune to the required station by turning the tuning knob (11).
4. Adjust volume knob (25) to the desire volume level.
zThe FM-stereo LED indicator (13) will light up to show FM stereo program is receiving.
EN-5

Hints for best reception:-
- FM : The receiver has a built-in FM wire antenna hanging at the rear cabinet. This wire should be totally unraveled and
extended for best reception.
- AM : The receiver has a built-in am bar antenna. If am reception is weak, slightly rotate or re-positioning of the unit will
usually improve the am reception.
Playing compact disc/MP3 disc
zGetting start
1. Turn the function switch (12) to select “ CD ”mode.
2. Press“open/close”button (9) to open the CD tray (14).
3. Place a CD with the printed side facing up inside the tray & then close the CD door.
4. Focus search is performing, the LED indicator (22) will light up and start playback the disc automatically.
zPlay / pause / stop mode
1. To pause, press the “ Play/Pause/Stop ” button (8) once, the Play LED indicator (22) will flash. Pressing it again will resume
playback.
2. If press and hold the “ Play/Pause/Stop “ button (8) for over 2 seconds during playback. The system will go to stop mode
and the Play LED indicator (22) will go off.
zSkip/search mode (skip/search up / skip/search down )
1. During play or pause mode, if“forward ” button (6) is pressed. It will go to next track and display the track number.
2. During play or pause mode, if“Back” button (4) is pressed. It will go back to the beginning of the track.
3. After step 2, press “Back” button (4) again it will go to the previous track.
4. If press and hold the “Forward or Back “ button (4/6) during CD/MP3 playback, the playing track will fast forward or
rewind until the button is released.
zFor MP3 disc
1. Press “ MP3 folder up“ button (7) during playback MP3 file, system will jump to next folder of the MP3 disc
MP3 track format requirement:-
- MP3 bit rate : 32 kbps~256 kbps.
- The performance of playing MP3 disc varies from the quality of recording disc and the method of recording.
Furthermore, the searching lead-time for MP3-CD is longer than a normal CD due to the difference of format.
zRepeat play
You can listen to desired tracks or all the track repeatedly. Press Repeat/Random button once (3), the Repeat/Random LED
indicator (23) will flash quickly and the current track will repeat playback. Press this button again and the Repeat/Random
LED indicator (23) will flash slowly and the whole disc will repeat playback.
zRandom play
You can listen to all the tracks in random order by using this function, press and hold the Repeat/Random button (3), the
Repeat/Random LED indicator (23) and Play LED indicator (22) will light up, playback will begin in random mode
automatically.
Playback of MP3 song via USB storage media or memory card
Connecting
The system is able to decode and playback all MP3 file which stored in the memory media with USB connecting port or
SD/MMC memory card.
1. Set function switch (12) at USB/SD mode and then press USB/SD button (on remote control) to
select “ USB or card ” mode. The USB indicator (17) or SD card indicator (19) will light up.
2. Plug-in the USB plug with the face up & make sure it going into completely or insert the memory
card in the direction of the arrow as shown in the label on the upper side of the memory card
slot . Insert straight without bending.
zConnecting the USB upside down or backwards could damage the audio system or the
storage media (USB thumb drive / SD/MMC card). Check to be sure the direction is correct
before connection.
3. The system will start reading the storage media and playback automatically after connecting.
4. Repeat the same playback procedure as playing CD/MP3 disc as above
Note
- The system can detect and read the file under MP3 format only through the USB port.
- If the system is connected to a MP3 player via the USB socket, due to the variances in MP3 encoding format, some
MP3 players may not be able to play via the USB socket. This is not a malfunction of the system.
EN-6

Encoding of CD or TURNTABLE into a MP3 file
The system is able to encode normal CDs or Vinyls into MP3 format and recording to USB connecting port or SD/MMC card.
A) CD encoding
I) Encoding 1 track
1. Perform normal playback of the CD track you want to encode & record.
2. Press the “ Record “ button (2) during the playback of the desire track, the Record LED indicator (24) will flash and USB
LED indicator (17) will light up. Press“Skip up” button to select SD encoding if necessary, (a USB/SD
3. must be inserted). The SD LED indicator (19) will light up. Press the Record button (2) again to confirm record, the
Record LED indicator (24) will light up and USB or SD LED indicator will flash, the system will go back to the beginning
of the current track and start to encode.
4. After completion of encoding, unit will stop record and continue playback the CD.
II) Encoding 1 disc
1. Place a CD with the printed side facing up inside the tray & then close the CD tray.
2. Press“Record “ (2) in CD stop mode, the Record LED indicator (24) will flash and USB LED indicator (17)will light up.
Press Skip up to select SD encoding if necessary, (a USB/SD must be inserted). The SD LED indicator (19) will light up.
Press the Record button (2) again to confirm recording, the Record LED indicator (24) will light up and USB or SD LED
indicator will flash, the system will start to playback of the CD from the first track and beginning encoding.
3. After completion of encoding the whole disc, the automatically stop recording.
Remark:-
- The recording speed is 1:1 and according to the actual playing time of the CD track
- The recording format is preset at – MP3 bit rate : 128 kbps, sampling rate : 44.1khz
- No song title will be recorded during encoding mode
- To stop the recording, Record button (2) to stop encoding.
III) Copying of MP3 file
If putting a MP3 disc instead of a CD-disc, the system will copy the files to the USB or SD/MMC card. The function is the same
as CD encoding as described above, and the system will switch to copying mode instead of playback mode if a MP3 file is
being read.
Note.
- The system will save the file to a USB source first if both USB and SD slot are being occupied by storage media.
- If“ Record“ pressed (2) during playback of USB or SD source, the file will copy from USB to SD or SD to USB.
IV) File delete (on remote only)
You can delete the current MP3 file during playback of your USB/SD media by this function. Press Delete during USB/SD
playback mode, the Rep/Ran LED indicator (23) will slowly flash, press Delete again to confirm , the Rep/Ran LED indicator
(23) will flash for a few seconds, the delete was performing then Rep/Ran LED indicator will go off, it means the delete was
successfully completed.
B) Vynil encoding
1. Set the Function switch (12) to “ Phono “ mode.
2. Press“Record “ (2), the Record LED indicator (24) will flash and USB LED indicator (17) will light up. Press Skip up to
select SD encoding if necessary, (USB/SD must be inserted). The SD LED indicator (19) will light up. Press the Record
button (2) again to confirm record, the Record LED indicator (24) will change to light up and USB or SD LED indicator
will flash, the system will start to encode.
3. Start playback of the vynil at the track which you want to record to a USB.
4. After the recoding is finish, press the“ Record “ (2) once, the USB and Record LED indicator will go off and the system
stop the recording.
C) Track separation (by remote handset)
You also can divide the recording music from Phono/Aux to USB/SD track by trace during encoding. Every time when press
the “ “ (track separation) button once at remote handset during encoding from phono/AUx to USB/SD, the system will
generate a new track and continuous the recording. The Record LED indicator (24) will flash once, in the unit is added a new
track successfully.
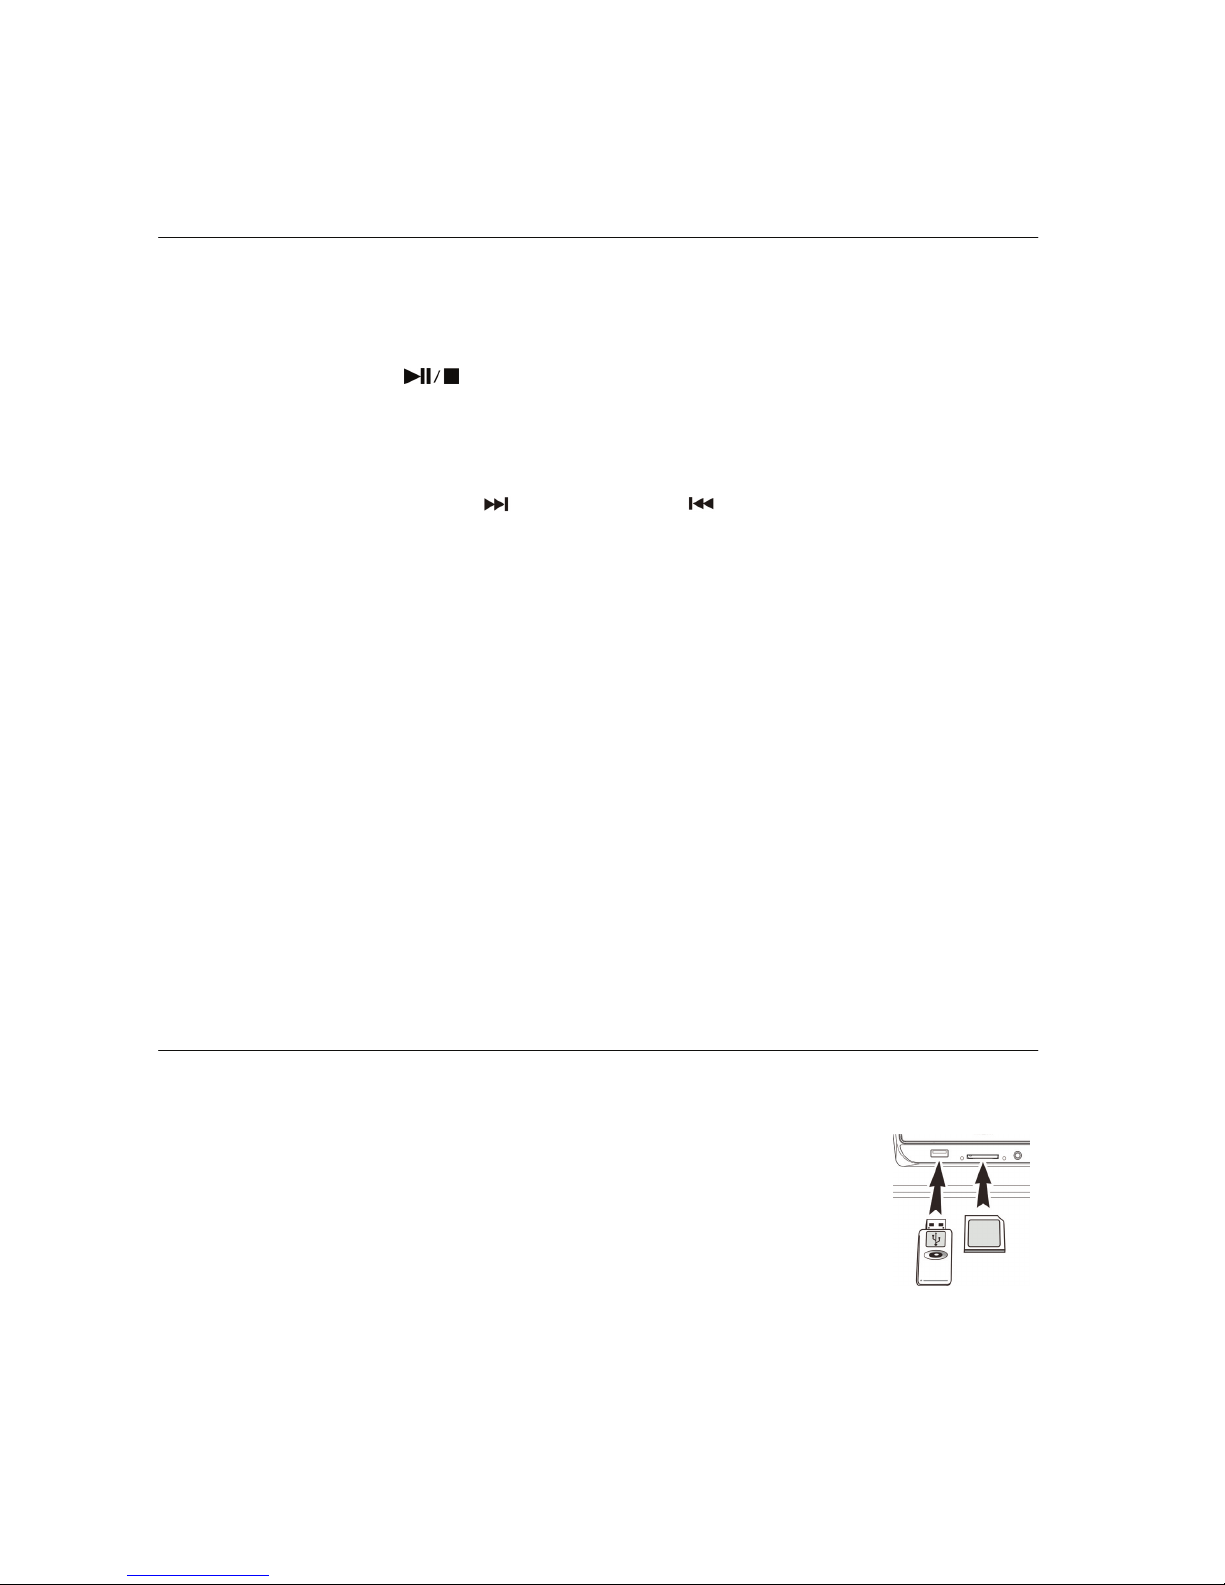
Removing of usb / memory card
To remove the USB / memory card, turn off the power or switch the function mode to either CD, Phono or tuner first.
EN-7

Phono
-Remove the stylus protector.
-Be sure that the tone arm is being detached from the tone arm rest before operating
and re-secured again afterwards.
1. Set the function switch (12) to Phono mode.
2. Set the speed selector to the proper position depending on the record to be played.
3. Place the record on the platter (use the adaptor of 45 rpm if required).
4. Lift the tone arm from the rest and slowly move it to the record side. The platter will start to rotate.
5. Place the tone arm to the desired position of the record.
6. Adjust the volume to the desired level.
7. At the end of record, the vynil will automatically stop rotating. Lift the tone arm from the record
and return it to the rest.
8. To stop manually, lift the tone arm from the record and return it to the support arm.
Note :The Phono and Aux are in the same channel of this unit, once the Aux in jack (20) is plugged by any 3.5mm stereo plug,
the Phono function will change to Aux automatically and the Vynil will stop. Ensure that not have in the Aux in (20) nothing
connected before use the Phono function.
Aux-in Input
You can connect audio device, e.g. MP3 player, iPod etc. to this system via a cord with 3.5mm stereo jack plugs (not
supplied). Connect one end of this cord to the headphone jack of the external device and the other end to the Aux-in jack (20)
at the front of the unit. Select “ Phono/Aux ” from Function switch (12), then start to playback your external device to enjoy
your music.
Line out connection
You can connect the unit to your hi-fi system by connecting the RCA output socket (28) to the auxiliary in your hi-fi
socket with a RCA cable (not included).
Note : THIS UNIT WILL SWITCH TO STANDBY MODE AUTOMATICALLY ONCE NO ANY MUSIC PLAYING
OVER 15 MINUTES.
Remote control functions
Battery installation (battery not provided)
The infra-red transmitter requires 2 pc AAA size battery for operation
Button description
1) Skip/search forward Press once to skip to next track, press & hold for
search forward
2) Skip/search backward Press once to skip to previous track. Press & hold for
search backward
3) Folder up /down In MP3 mode, press to select folder up or down.
4) Rep/Ran In CD/USB mode, press to active repeat / random function
5) Track separation Press to divide the recording track at turntable one by one
during encoding
6) USB/SD In USB/SD mode, press to select USB or SD function
repeatedly
7) Play/pause InCD/USBmode,pressoncetostartplayback.Pressagaintoenterpausemode.
8) Stop In CD/USB mode, press to stop playback or cancel the stored program.
9)Rec InCD/USB/Phonomode,presstoactive/stoprecording.
10)Delete InUSB/SDplaybackmode,deletethecurrenttrack.
EN-8

Warranty conditions
- The warranty of this product is for 2 years since the purchase date.
- The warranty will exclude breakdowns caused by bad use of the product, wrong installation
or
installation in not desirable places for a proper maintenance of the product, rips, updates of
the products
that are not the supplied by the brand, pieces wore away for its use or for not domestic or
inappropriate
use. Also are excluded breakdowns caused for manipulations of the products by people or
companies
alien to our company.
- For any request regarding the warranty terms, the purchase receipt must be attached.
Correct disposal of this Product
(Waste Electrical & Electronic Equipment(WEEE)
Your product is designed and manufactured with high quality materials and
components which can be recycled and reused.
This symbol means that electrical and electronic equipment, at their end of-
life should be disposed of separately from your household waste.
Please dispose of this equipment at your local community waste collection/
recycling centre.
In the European Union there are separate collection systems for used
electrical and electronic products.Please help us to conserve the
environment we live in!
Made in China
EN-9

DECLARATION OF CONFORMITY
Council Directive(s) to which conformity is declared:
Directive (2004/108/EC) - EMC
Directive (2006/9 /EC) - LVD
Directive (2011/6 /EU recasting 2002/9 /EC) - RoHS
Application of the Standards:
EN 013: 2001+A1: 2003+A2: 2006
EN 020: 2007+A11: 2011
EN 6006 : 2002+A1: 2006+A11: 2008+A2: 2010+A12: 2011
EN 61000-3-2: 2006+A1: 2009+A2: 2009
EN 61000-3-3: 2008
IEC 62321-2008
Manufacturer’s name: AFEX SUNS, S.A.
Manufacturer’s address: C/Pallars 189, 0800 Barcelona
Type of equipment: Turntable
Trade: SUNSTECH
Model no : PXR4CDWD
We, the undersigned, hereby declare under our sole responsibility that the
specified equipment is in conformity with the above Directive(s) and Standard(s)
Place: Barcelona ______________________________
(Signature)
Víctor Planas Bas
(Full name)
Date: 16 - December - 2013
General Manager
(Position)

Instrucciones de seguridad
Lea atentamente las siguientes instrucciones de seguridad recomendadas.
Fuente de alimentación
Antes de enchufar por primera vez lea atentamente el siguiente apartado.
Este dispositivo debe operarse sólo en una toma de 220-240 V AC, 50 Hz.
Asegúrese de que el voltaje de la fuente de alimentación de la zona que se está usando es el
requerido y que selecciona la configuración de voltaje correcta para su aparato.
Cable de alimentación
No coloque el conjunto, un mueble, etc. sobre el cable de alimentación ni lo apriete.
Manipule el cable de alimentación por el enchufe. No desenchufe el aparato tirando del
cable de alimentación y nunca toque dicho cable con las manos húmedas, ya que esto podría
provocar un cortocircuito o una descarga eléctrica.
Nunca haga un nudo en el cable ni lo ate a otros cables. El cable de alimentación debe
colocarse de forma que no haya posibilidades de pisarlo. Un cable de alimentación dañado
puede provocar un incendio o una descarga eléctrica. Cuando esté dañado y necesite ser
sustituido, deberá hacerlo el personal cualificado.
Humedad y agua
No utilice este aparato en un lugar húmedo y mojado (evite el
baño, el fregadero de la cocina, etc.). No exponga este aparato a
la lluvia o el agua, ya que esto puede ser peligroso, y no coloque
encima objetos llenos de líquido como jarrones.
Si algún objeto sólido o líquido se cae en el mueble desenchufe
inmediatamente el (los) aparato(s) enchufado(s) y haga que lo
revise el personal cualificado para ello antes de seguir operándolo(s)
Limpieza
Antes de limpiarlo desenchufe este aparato de la toma de la pared.
No utilice líquidos abrasivos ni limpiadores con aerosol. Utilice un
paño suave y seco.
Ventilación
Las ranuras y aperturas del aparato están pensadas para la ventilación y para asegurar un
funcionamiento fiable. Para prevenir el sobrecalentamiento estas aperturas no deben estar
bloqueadas ni cubiertas de ninguna forma. Cuando instale esta unidad asegúrese de dejar un
espacio suficiente alrededor de la misma para asegurar la ventilación y mejorar la radiación
del calor.
No exponga la unidad a condiciones extremas de calor, frío o humedad.
ES-1

Calor y llamas
El dispositivo no debe colocarse cerca de llamas abiertas ni
fuentes de calor intenso como un calentador eléctrico.
Asegúrese de no colocar fuentes de llama abierta, como velas,
encima del aparato. Las baterías no deben exponerse a un calor
excesivo, como la luz del sol, el fuego o similares.
Relámpagos
En caso de tormenta o relámpagos, o cuando vaya de vacaciones,
desconecte el cable de alimentación de la toma de la pared.
Piezas de repuesto
Cuando se necesiten piezas de repuesto asegúrese de que el técnico de servicio utilice piezas
de repuesto especificadas por el fabricante o que tengan las mismas especificaciones que las
originales. Las sustituciones no autorizadas pueden provocar fuego, descargas eléctricas y
otros peligros. Póngase en contacto con la marca o el fabricante que le remitirá al servicio
técnico más cercano, el cual le suministrará o cambiará las piezas de repuesto.
Mantenimiento
Por favor, acuda al personal cualificado de la marca para que
realice todo el mantenimiento. No retire la cubierta ya que
podría sufrir una descarga eléctrica.
Riesgo de descarga eléctrica
El símbolo del relámpago terminado en flecha dentro de un triángulo equilátero sirve para
advertir al usuario de la presencia de líneas de tensión sin aislamiento dentro de la carcasa del
producto, que pueden tener una magnitud lo suficientemente grande como para suponer un
riesgo de descarga eléctrica para las personas.
El punto de exclamación dentro de un triángulo equilátero sirve para advertir al usuario de la
presencia de instrucciones importantes de funcionamiento y mantenimiento en la literatura
que acompaña al aparato.
ES-2

Eliminación de residuos
Instrucciones para la eliminación de residuos:
- El envase y los accesorios del envase son reciclables y principalmente deben reciclarse. El
material de envasado, como las bolsas de plástico, debe mantenerse alejado de los niños.
- Las baterías, incluidas las que no contienen metales pesados, no deben tirarse con los
residuos domésticos. Por favor, tire las baterías usadas de forma ecológicamente
responsable. Infórmese sobre los reglamentos legales vigentes en su zona. No intente
recargar las baterías porque existe el peligro de que exploten. Sustituya las baterías
únicamente por otras iguales o por un tipo de baterías equivalente.
Este símbolo en el producto o en su envase significa que debe tirar su aparato eléctrico al final
de su vida útil, separado de los residuos domésticos. Existen sistemas de recogida separados
para el reciclaje en la UE. Para obtener más información póngase en contacto con la
autoridad local o el distribuidor al que compró el producto.
Símbolo del equipamiento Símbolo de las
baterías
Desconexión del aparato
El enchufe de conexión a la red se utiliza para desconectar el aparato de la red y, por tanto,
debe permanecer fácilmente utilizable.
Volumen de los altavoces
Su aparato cuenta con clavija para auriculares, tenga en cuenta que
una presión excesiva de sonido de los auriculares y altavoces puede
provocarse una pérdida de audición.
Instalación
Para evitar daños, este aparato debe sujetarse a la pared de forma
segura y de acuerdo con las instrucciones de instalación para el
montaje en la pared (si la opción está disponible).
Advertencia:
No deje su aparato en modo de espera (Standby) o de funcionamiento cuando salga de casa.
El producto no se apaga completamente con el botón
de espera (Standby)/encendido (On). Además, el
aparato sigue consumiendo energía en el modo de
espera. Para separar completamente el aparato de la
red, el enchufe de la red debe sacarse de la toma tirando
del mismo. Debido a que el aparato debe colocarse de
forma que se garantice el acceso sin
ES-3

obstrucciones a la toma de alimentación, así, en caso de emergencia, el enchufe podrá
sacarse inmediatamente. Durante períodos prolongados sin utilizar el aparato, éste debe
desconectarse de la red de alimentación.
No deje el aparato eléctrico en manos de los niños
Nunca deje que los niños utilicen aparatos eléctricos sin supervisión. Los niños no pueden
reconocer siempre los posibles peligros. Las baterías/acumuladores pueden poner en
peligro la vida si se tragan. Guarde las baterías fuera del alcance de los niños. En caso de
tragarse una batería deberá buscar asistencia médica inmediatamente. Mantenga también
el envase alejado de los niños ya que supone un peligro de ahogo.
INSTALACION DE LA BATERIA
El compartimento de la bateria esta situado en la parte trasera del mando a distancia.
1. Retire la tapa del compartimento de la bateria presionando sobre la lengueta y levantandola.
2. Inserte dos (2) pilas de tamano AAA (no incluidas) en el compartimento de la bateria siguiendo las marcas
de polaridad dentro del compartimento.
3. Vuelva a colocar la tapa del compartimento de la bateria.
ES-4
Precauciones relativas a la bateria
zLa sustitucion de las pilas debe realizarla un adulto.
zNo mezcle pilas nuevas con pilas viejas.
zNo mezcle pilas alcalinas, estandar (carbono-zinc) y recargables (niquel-cadmio).
zNo debe haber un cortocircuito en los terminales de suministro de energia.
zLas pilas no recargables no deben recargarse.
zLas pilas agotadas deben retirarse.
zSolo deben utilizarse pilas de tipo equivalente.
zLas pilas deben insertarse con la polaridad correcta.
zDeseche las pilas adecuadamente. No tire las pilas al fuego. Las pilas pueden explotar o
gotear.

UBICACIÓN DE LOS CONTROLES
1) Botón TS
2) Botón de grabación
3) Botón de modo Repetición/Aleatorio
4) Botón de salto atrás del CD
5) Indicador de dial
6) Botón de salto hacia adelante de CD
7) Botón de carpeta anterior de MP3
8) Botón repr/pausa/stop de CD
9) Botón para abrir bandeja de CD
10) Ancho de banda
11) Perilla de sintonización
12) Interruptor de función
13) Indicador LED de FM estéreo
14) Bandeja de CD
15) Sensor remoto
16) Enchufe de USB
17) Indicador de USB
18) Ranura para tarjeta SD/MMC
19) Indicador de tarjeta SD
20) Toma de entrada auxiliar
21) Toma para auriculares de 3,5 mm
22) Indicador LED de repr.
23) Indicador LED de modo de repetición/aleatorio
24) Indicador LED de grabación
25) Perilla de control de apagado/volumen
26) Indicador LED de encendido
27) Antena FM
28) Toma line out
29) Interruptor de parada automática
30) Cable de CA
31) Adaptador del perno
32) Selector de velocidad del tocadiscos.
33) Sujeción del brazo del tocadiscos
ES-5

Precaución:
Esta unidad no deberá ser ajustada ni reparada más que por personal cualificado.
Precauciones de uso
Instalación
•Desempaque todas las piezas y retire el material de protección.
•No conecte la unidad a la red de suministro sin antes comprobar su voltaje y previa a la realización de todas las
conexiones.
•No cubra ninguna de las aberturas de ventilación y asegúrese de dejar un espacio de varios centímetros alrededor de la
unidad para su ventilación.
Conexión
1. Conecte el cable de alimentación (30) a una toma de CA.
2. Encienta la unidad con la perilla de control de apagado/volumen (25). Si el indicador LED de encendido (26) está
encendido, significa que el suministro eléctrico es normal. Su aparato ya está listo para reproducir música.
Escuchar radio AM / FM
Sintonización manual
1. Indique el modo del sintonizador con el interruptor de función (12).
2. Seleccione la banda que desee con el selector de banda de radio (10).
3. Sintonice la emisora que desee girando la perilla de sintonización (19).
4. Ajuste la perilla de sintonización (25) al nivel de volumen deseado.
5. El indicador LED de FM estéreo (13) se iluminará para indicar que se está recibiendo un programa FM estéreo.
Consejos para una mejor recepción:-
- FM : el receptor incorpora una antena de cable FM, que cuelga de la parte posterior del aparato. - Este cable deberá
estar totalmente desenrollado y extendido si se quiere conseguir la mejor recepción FM.
- AM : el receptor incorpora una antena de barra AM. Si la recepción fuera débil, gire o recoloque la unidad ligeramente,
ello ayudará normalmente a mejorar la recepción AM.
Reproducción de disco compacto/MP3
zInicio
1. Gire el interruptor de función (12) para seleccionar el modo“ CD ”.
2. Presione el botón“abrir/cerrar” (9) para abrir la bandeja de CD (14).
3. Coloque un CD con el lado impreso orientado hacia arriba dentro de la bandeja y luego cierre la cubierta de CD.
4. Mientras se realiza la búsqueda, el indicador LED (22) se encenderá y el disco comenzará a reproducirse
automáticamente.
ES-6

zModo repr./ pausa / parada
1. Presione “Repr/Pausa/Stop” (8) una vez para dejar la reproducción en pausa. El indicador LED de reproducción (22)
parpadeará. Pulse de nuevo este botón para reanudar la reproducción.
2. Mantenga pulsado el botón “ Repr / Pausa /Stop “ (8) durante 2 segundos durante el modo reproducción. El sistema
pasará al modo de detención y el indicador LED de reproducción (22) se apagará.
3.
4. Modo salto/búsqueda (salto/búsqueda hacia adelante / salto/búsqueda hacia atrás )
5. Durante el modo reproducción o pausa, si se pulsa el botón “Salto hacia adelante” (6), pasará a la pista siguiente,
mostrando el número de pista y pasando al modo reproducción.
6. Durante el modo reproducción o pausa, si se pulsa el botón “Salto hacia atrás”(4), pasará al principio de la pista.
7. Después del paso 2, presione el botón “salto hacia atrás” (4) y pasará a la pista anterior.
8. Si mantiene pulsado el botón “ Salto hacia atrás o hacia adelante “ (4/6) durante la reproducción de CD/MP3, la pista en
reproducción avanzará/retrocederá a velocidad rápida hasta que se suelte el botón.
zPara el disco MP3
1. Presione el botón “Carpeta MP3 siguiente “ (7) durante la reproducción del archivo de MP3. El sistema pasará a la
siguiente carpeta del disco MP3.
Requisto de formato de la pista MP3:-
- Tasa de bits MP3: 32 kbps~256 kbps.
- El rendimiento de reproducción del disco MP3 varía según la calidad del disco de grabación y el método de grabación.
Además, el tiempo de búsqueda para MP3-CD es más largo que para un CD normal debido a la diferencia de formato.
zRepetición de la reproducción
Podrá escuchar las pistas deseadas o todas las pistas repetidamente. Pulse el botón repetición/aleatorio (3), el indicador LED
de repetición/aleatorio (23) parpadeará rápidamente y se repetirá la reproducción de la pista actual. Presione este botón
nuevamente y el indicador LED de repetición/aleatorio (23) parpadeará lentamente y se repetirá la reproducción de todo el
disco.
zReproducción aleatoria
Podrá escuchar todas las pistas en orden aleatorio usando esta función. Pulse y mantenga pulsado el botón
repetición/aleatorio (3); el indicador LED de repetición/aleatorio (23) y el indicador LED de reproducción (22) se encenderá y
comenzará la reproducción en modo aleatorio automáticamente.
Reproducción de canciones MP3 mediante una unidad de almacenamiento USB o tarjeta de
memoria
Conexión
El sistema es capaz de descodificar y reproducir todos los archivos MP3 almacenados en la unidad de memoria con el puerto
de conexión USB o la tarjeta de memoria SD/MMC.
ES-7

1. Seleccione el modo USB/SD del selector de función (12) y después pulse el botón USB/SD (en
el mando a distancia) para seleccionar el modo “ USB or card”. El indicador de USB (17) o el
indicador de tarjeta SD (19) se encenderán.
2. Conecte la unidad USB y asegúrese de haberlo introducido del todo o introduzca la tarjeta de
memoria en la dirección de la flecha como se muestra en la etiqueta o bajo la tapa de la
ranura para tarjetas de memoria. Introdúzcala derecha, sin doblarla.
zSi conecta la unidad USB al revés podría dañar el sistema de audio o la unidad de almacenamiento (unidad USB /
tarjeta SD/MMC). Asegúrese de que la dirección es correcta antes de la conexión.
3. Después de introducirlo, el sistema leerá entonces la unidad de almacenamiento y la reproducirá automáticamente.
4. Repita el mismo procedimiento de reproducción como para la reproducción de CD/MP3 anterior.
Nota:
- El sistema puede detectar y leer el archivo en formato MP3 únicamente a través del puerto USB.
- Si el sistema está conectado a un reproductor MP3 por medio de una entrada de USB, debido a las variaciones de
formato de codificación MP3, es posible que algunos reproductores de MP3 no puedan reproducir por medio de
una entrada de USB. Esto no es un desperfecto del sistema.
Codificación de un CD o TOCADISCOS a un archivo MP3
El sistema permite codificar CD normales o vinilos a formato MP3 y grabar en puerto de conexión USB o tarjeta SD/MMC.
A) Codificación de CD
I) Codificación de 1 pista
1. Realice la reproducción normal de la pista de CD que desea codificar y grabar.
2. Presone el botón “ Record“ (de grabación) (2) durante la reproducción de la pista deseada. El indicador LED (24)
parpadeará y el indicador LED de USB (17) se encenderá. Presione el botón “Skip up” (salto hacia adelante) para
seleccionar la codificación SD, de ser necesario, (debe insertarse un USB/SD).
3. . El indicador LED SD (19) se encenderá. Presione el botón Record (de grabación) (2) nuevamente para confirmar la
grabación. El indicador LED de grabación (24) se encenderá y el indicador LED de USB o SD LED parpadeará. El sistema
volverá al principio de la pista actual y comenzará la codificación.
4. Después de completar la codificación, la unidad dejará de grabar y continuará la reproducción del DC.
II) Codificación de 1 disco
1. Coloque un CD con el lado impreso orientado hacia arriba dentro de la bandeja y luego cierre la bandeja de CD.
2. Presone el botón “ Record“ (de grabación) (2) en el modo de parada de CD. El indicador LED (24) parpadeará y el
indicador LED de USB (17) se encenderá. Presione“Skip up” (salto hacia adelante) para seleccionar la codificación SD,
de ser necesario, (debe insertarse un USB/SD). El indicador LED SD (19) se encenderá. Presione el botón Record (de
grabación) (2) nuevamente para confirmar la grabación. El indicador LED de grabación (24) se encenderá y el indicador
LED de USB o SD LED parpadeará. El sistema comenzará la reproducción del CD desde la primera la pista y comenzará
la codificación.
3. Después de la finalización de la codificación de todo el disco, se detendrá la grabación automáticamente.
ES-8

Observación:
- La velocidad de grabación es 1:1 y según el tiempo real de reproducción de la pista de CD.
- El formato de grabación se ha fijado en – tasa de bits MP3: 128 kbps; frecuencia de muestro: 44.1khz
- El título de la canción no se grabará en el modo de codificación.
- Para detener la grabación, presione el botón de grabación (2) para detener la grabación.
III) Copia de archivo MP3
Si coloca un disco MP3 en lugar de un CD, el sistema copiará los archivos en el USB o tarjeta SD/MMC. La función es la misma
de la codificación de CD descrita anteriormente, y el sistema pasará al modo de copiado en lugar del moco de reproducción
si se lee un archivo MP3.
Nota:
- El sistema guardará el archivo en una fuente USB primero si el USB y la ranura de SD está ocupados por medios de
almacenamiento.
- Si se presiona“Grabación” (2) durante la reproducción de una fuente USB o SD, el archivo se copiará desde USB a SD o
SD a USB.
IV) Eliminación de archivos (en mando a distancia únicamente)
Puede eliminar el archivo MP3 actual durante la reproducción de su medio USB/SD por medio de esta función. Presione
Delete (Eliminar) durante el modo de reproducción de USB/SD. El indicador LED de Rep/Aleat. (23) parpadeará lentamente.
Presione Delete nuevamente para confirmar. El indicador LED de Rep/Aleat. (23) parpadeará unos segundos mientras se
realiza la eliminación. Luego, el indicador LED de Rep/Aleat. se apagará, lo que significa que la eliminación se completó con
éxito.
B) Codificación de vinilo
1. Gire el interruptor de función (12) para selecionar el modo “Phono ”.
2. Presione el botón “ Record“ (de grabación) (2). El indicador LED (24) parpadeará y el indicador LED de USB (17) se
encenderá. Presione “Skip up” (salto hacia adelante) para seleccionar la codificación SD, de ser necesario, (debe
insertarse un USB/SD). El indicador LED SD (19) se encenderá. Presione el botón Record (de grabación) (2) nuevamente
para confirmar la grabación. El indicador LED de grabación (24) se encenderá y el indicador LED de USB o SD LED
parpadeará. El sistema comenzará la codificación.
3. Comience la reproducción del vinilo en la pista que desea grabar en un USB.
4. Después de terminada la reproducción, presione el botón “Record”(2) una vez. El indicador LED de USB y grabación se
apagará y el sistema detendrá la grabación.
B) Separación de pistas (con el mando a distancia)
Puede dividir la música de grabación Phono/Aux a USB/SD pista por pista durante la codificación. Cada vez que presione el
botón “ “ (separación de pistas) una vez en el mando a distancia durante la codificación de phono/AUx a USB/SD, el
sistema generará una nueva pista y continuará la grabación. El indicador LED de grabación (24) parpadeará una vez. Se
agrega una nueva pista con éxito en la unidad.
ES-9
Table of contents
Languages:
Other Sun-Tech Media Player manuals