manuals.online logo
Brands
  1. Home
  2. •
  3. Brands
  4. •
  5. SUNBOUNCE.COM
  6. •
  7. Camera Accessories
  8. •
  9. SUNBOUNCE.COM MICRO-MINI User manual

SUNBOUNCE.COM MICRO-MINI User manual

M A D E I N G E R M A N Y
Bedienungsanleitung
Operating Instructions
SUNBOUNCE GmbH · Buchenring 8 - 10 · 21272 Egestorf · Germany
© 2015 SUNBOUNCE GmbH. All rights reserved.
Telefon: +49 (0) 4175 - 80 88 79 87 · Telefax: +49 (0) 4175 - 80 88 79 67
E-Mail: [email protected] · Internet: www.sunbounce.com
MICRO-MINI
S U N B O U N C E l i e f e r t I h n e n d i e
strammsten PERMATENSE Reflektoren,
die der Markt zu bieten hat. Darum
werden unsere Screens/ Bespannungen
fast toleranzfrei hergestellt. Dies
garantiert Ihnen eine langanhaltende,
starke Elastizität, die zur präzisen
Ausleuchtung notwendig ist.
P900-BA-MICROMINI (P1MM-000)1506
a
b
c
Hilfreiche Tipps / Helpful Hints
2' x 3'
60 x 90 cm
SUNBOUNCE supplies you with the tightest
PERMATENSE reflectors that can be found
on the market. Thus, our screens are
manufactured accurately, with almost zero
tolerance. This guarantees a long-lasting
and strong flexibility, which is necessary for
perfect lighting.
Before first usage, please follow these steps:
Please stretch the fabric about 2 cm in
vertical direction (from the black pockets to
the black pockets). To do so, stand face to
face with an assistant and hold the fabric as
shown in image a). If no assistance is
available, proceed as described in image b).
Place a foot on the black pockets of one side
and pull the pockets of the other side
towards the top.
Then advance as shown in the instructional
menu. In case it still is very tough, please do
as suggested in image c). Place one foot on
one of the frame poles and pull the other
frame pole slowly towards the top.
Bitte beachten Sie vor dem ersten
Aufspannen die folgenden Schritte:
Bitte dehnen Sie den Stoff ca. 2 cm in
Querrichtung (von den schwarzen
Taschen zu den schwarzen Taschen).
Stellen Sie sich dazu einem Helfer
gegenüber und fassen den Stoff wie auf
Bild a). Sollten Sie keinen Helfer haben
können Sie wie auf Bild b) vorgehen.
Stellen Sie einen sauberen Fuß auf die
schwarzen Seitentaschen der einen Seite
und ziehen Sie die Seitentaschen auf der
anderen Seite nach oben.
Gehen Sie dann wie in der Aufbau-
anleitung gezeigt vor. Sollte es immer
noch schwer gehen, folgen Sie bitte dem
Vorschlag wie in Bild c) dargestellt.
Stellen sie einen Fuß auf das Längsrohr
am Boden und ziehen Sie das andere
Längsrohr nach oben.
Das sind die Rahmen-Einzelteile des
MICRO-MINI:
Zwei Längsrohre (22mm) mit jeweils
einem Verlängerungsstück (19mm)
im Innern des Rohres, ein Querbügel
und ein Tragebeutel.
Optional:
These are the component parts of the
MICRO-MINI:
Two frame poles with an
extension piece each, a
crossbar and the bag.
Optional:
eine Bespannung
(22mm)
(19mm)
a screen
A) Entfernen Sie die schwarzen
Kappen von den Rohren.
B) Entnehmen Sie die beiden
Verlängerungsstücke.
C) Stecken Sie die Verlängerungs-
stücke jeweils auf der gegenüber-
lieg e n d e n S e i t e i n d a s R o h r.
Zusammen haben Zusammen haben
die Längsrohre haben jetzt die
richtige Länge für die Bespannung.
A) Remove the black caps from the
poles.
B) Take out the two extension pieces.
C) Insert each of the extension pieces
into the opposite side of the pole. The
frame poles now have the right length
for the screen.
Das gibt Ihnen genug Spielraum um
das Längsrohr in die Rangieröffnung
am anderen Ende der Bespannung
einzuführen.
This will give you enough room to
guide the pole into the fabric pocket
at the other end of the screen.
Fädeln Sie das Längsrohr in die
angesetzten Taschen der Bespannung
ein.
Slide the pole into the sleeve along
the screen.
Achten Sie darauf, dass das Rohr aus
de r R a n g ieröff n u n g a m Ende
herausschaut.
Ensure that the end of the pole
protrudes beyond the end of the
sleeve.
Ziehen Sie nun die geschlossenen
Ecken der Seitentaschen über die
Rohrenden so dass die Bespannung
straff gespannt wird. Wiederholen Sie
den Vorgang auf der anderen Seite
der Bespannung.
Now pull the closed corners of the
pockets over the pole ends such that
the screen is taut. Repeat with the
other side of the screen.
Stecken Sie den Querbügel auf die
vorgesehenen T-Verbindungsstücke.
Next insert the crossbar in the T-
connector.
Halten Sie den Querbügel fest und
ziehen Sie das Längsrohr zu sich
heran. Stecken Sie das T-Verbindungs-
stücke in den Querbügel. Jetzt ist der
Reflektor einsatzbereit.
Hold the crossbar firmly and pull the
long pole towards yourself. Insert the
crossbar in the second T-connector.
The reflector is ready to go!
A 22mm
19mm
B
C
Packed compact
Extended ready for use
Extension
tube inside

Other SUNBOUNCE.COM Camera Accessories manuals

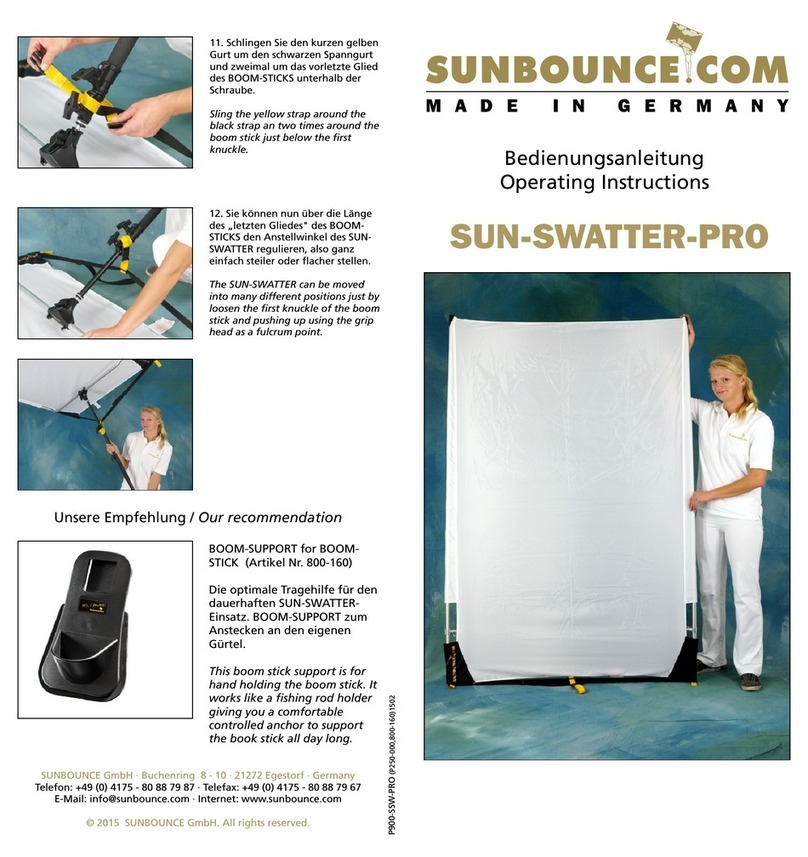
SUNBOUNCE.COM SUN-SWATTER-PRO User manual

SUNBOUNCE.COM

SUNBOUNCE.COM SUN-SWATTER-PRO User manual

SUNBOUNCE.COM SUN-MOVER User manual

SUNBOUNCE.COM

SUNBOUNCE.COM SUN-MOVER User manual

Popular Camera Accessories manuals by other brands

SLIK Pan Head SH-521 operating instructions

SLIK

SLIK Pan Head SH-521 operating instructions

Columbia Lighting BLD-RM30 Series instruction manual

Columbia Lighting

Columbia Lighting BLD-RM30 Series instruction manual

Siemens 2GF1192-8CA installation guide

Siemens

Siemens 2GF1192-8CA installation guide

Panasonic AG-VF5P Service manual

Panasonic

Panasonic AG-VF5P Service manual

SES SE-2015 user manual

SES

SES SE-2015 user manual

Samsung 136S installation manual

Samsung

Samsung 136S installation manual

Fortress Power LFP-10 installation manual

Fortress Power

Fortress Power LFP-10 installation manual

BB Battery HR Series manual

BB Battery

BB Battery HR Series manual

Radio Shack 23-149A Material safety data sheet

Radio Shack

Radio Shack 23-149A Material safety data sheet

Panasonic DMW-DCC9 operating instructions

Panasonic

Panasonic DMW-DCC9 operating instructions

jcb JCB-TRIP instruction manual

jcb

jcb JCB-TRIP instruction manual

Panasonic KX-HNP100C installation guide

Panasonic

Panasonic KX-HNP100C installation guide

Cambo TVB-100 Main operating instructions

Cambo

Cambo TVB-100 Main operating instructions

PROAIM SP-CMFY-01 Assembly manual

PROAIM

PROAIM SP-CMFY-01 Assembly manual

Motorola VERVE CAM user guide

Motorola

Motorola VERVE CAM user guide

EnerSys PowerSafe SBS XC Series Operation guide

EnerSys

EnerSys PowerSafe SBS XC Series Operation guide

Minolta DATA BACK DB manual

Minolta

Minolta DATA BACK DB manual

Akai AKE-10KW-HB installation manual

Akai

Akai AKE-10KW-HB installation manual

manuals.online logo
manuals.online logoBrands
  • About & Mission
  • Contact us
  • Privacy Policy
  • Terms and Conditions

Copyright 2025 Manuals.Online. All Rights Reserved.