Sunburst Above Ground Solar Pool Heating System Maintenance and service guide

HEAT PUMPS
SOLAR POOL HEATING SYSTEMSSOLAR POOL HEATING SYSTEMS
Installation & Maintenance
for
Above Ground Pools

TABLE OF CONTENTS
Safety Information ................................................................................................2
General Information .............................................................................................2
How it Works ......................................................................................2
Tools Required ....................................................................................2
Parts, Hardware and Additional Items .............................................3-4
Placement............................................................................................5
Assembly/Installation.........................................................................................5-8
Initial Operation....................................................................................................8
Maintenance...........................................................................................................9
Winterizing Your Solar Heater ............................................................................9
Trouble Shooting ...................................................................................................9
Warranty .............................................................................................................9
Customer Service..................................................................................Back Cover
Customer Service 1-888-984-1238 / 239-789-1080
Installation Hot Line: 1-888-938-6943

SAFETY INFORMATION
READ ALL WARNINGS BELOW.
FAILURE TO DO SO COULD RESULT IN SERIOUS PERSONAL INJURY OR DEATH.
• Carefully read and adhere to all CAUTION and NOTE notices located throughout this manual. Failure to
comply with these instructions can cause serious injury, death, or damage to the unit.
• Do NOT allow children to operate this product.
• Always turn the lter system to a setting that does not allow ow to the pool return when installing or
working on the solar heater.
• Install product away from the pool to prevent children from using the heater as a way to access the pool.
• NEVER service this unit with the pool pump running.
• Do not use any petroleum-based lubricant. Petroleum based products will destroy plastic parts.
THESE CAUTION WARNINGS ARE NOT INTENDED TO INCORPORATE
ALL POSSIBLE INSTANCES FOR RISK AND/OR SEVERE INJURY.
THE POOL OWNER SHOULD ALWAYS EXERCISE CAUTION
AND COMMON SENSE WHEN UTILIZING THEIR SWIMMING POOL
AND OPERATING EQUIPMENT.
GENERAL INFORMATION
This manual provides a detailed step-by-step procedure for the installation of a Sunburst Above Ground Solar
Pool Heating System. If the directions are followed correctly and only recommended Sunburst hardware and
components are used, the installed system should provide years of trouble-free service, savings and enjoyment.
HOW IT WORKS
This product is a solar heater for above ground pools that uses existing pool pump to circulate the pool water
through the solar panels. The system is to be installed in between the pool lter and the pool inlet supply line.
The pump will send water from the pool to the system where it is heated, then returned to the pool via the pool
inlet supply line hose. It is important to set up your pool heater, so the solar panels receive as much sunlight as
possible to achieve maximum efciency.
2
TOOLS REQUIRED FOR INSTALLATION
• 5/16” nut driver or ¼” at blade screwdriver
• Plugs for pool return and supply lines

PARTS & HARDWARE
Part #17048-12/18101 - 105,600 BTU Base Kit
(2) 2’x12’ Collectors Diverter Valve and Hardware
Part #70066
Teon Tape - Roll
Part #60553
Solar Control
Diverter Valve
Part #60551
readed End Cap
1-1/4” x 6” Hose with Clamps
Part #60550
PVC Elbow - 1-1/2” FPT
Part #60552
Cued Adapter
Part #AG-200-60-6
1-1/4” x 6’ Hose
Included with Part #60553
Solar Control Valve Unions
Included with Part #60553
Solar Control Valve Flanges
Part #60691-1 & 60003-1
7” Hose and 2 Stainless Steel
Hose Clamps
3

Part #17048-12/18104 - 51,744 BTU Add-On Kit
Part #60739
High Wind Stakes Kit (4 stakes)
Part #AG-WB5X14
Underlayment with Staples
Optional Items Available at www.poolheatingdepot.com
4

PLACEMENT
Determine a relatively at location as close to your pool pump and lter as possible that has maximum exposure
to the sun. The optimum time to collect solar energy is between 10:00 AM to 4:00 PM. For each two-panel kit you
will need an area approximately 5 feet wide by 14 feet long.
Clear the area of any sharp objects and rake as smooth as possible. Do not install on a rocky or cement surface. It
is best to put some sort of underlayment beneath the panels to keep weeds from growing in between and around
the solar collectors. Underlayment along with the anchoring staples are available at Pool Heating Depot
www.poolheatingdepot.com, part #AG-WB5X14.
ASSEMBLY/INSTALLATION
The base kit is boxed with the solar panels rolled up inside, along with the solar control valve (diverter valve) and
installation hardware.
Remove the strap from solar panels and unroll them allowing the collectors to relax in the sun. (30 to 60 minutes).
Leave the protective end caps on the solar panels to prevent dirt, grass, bugs or other debris from getting inside
the solar panel headers.
DO NOT WALK ON COLLECTORS.
USE CAUTION WHEN HANDLING SOLAR PANELS LAYING IN THE SUN.
THEY CAN GET VERY HOT!
STAPLES TO SECURE UNDERLAYMENT
UNROLLED PANELS
UNDERLAYMENT
Install underlayment where you have predetermined
the best spot as close to the pool pump and
lter as possible. A 5-foot-wide by 14-foot-long
underlayment is required for each two-panel kit. The
picture illustrates use of silt fence with staples to
hold it down.
ROLLED PANELS
5

If you are locating the solar panels more than 6 feet from
the pool pump and lter, you are going to need additional
ex hose. You can order additional 6 foot hose sections at
Pool Heating Depot www.poolheatingdepot.com,
part #AG-60-200-6.
After the collectors have relaxed, lay the solar panels on top
of the underlayment positioning the headers with the serial
number label closest to your pool equipment. Remove and
discard the black protective end caps covering the threaded
ends of the header pipes.
Wrap the threaded ends of the headers with Teon tape
provided (as shown) for a watertight seal.
Thread elbow connectors on the outside ends of the header
with the label closest to the pool pump and lter (as shown).
Be careful not to cross-thread.
Wrap threads of Pipe-to-Hose Adaptor Fittings with Teon
tape and hand-tighten into Elbow Connectors.
6

Mount the control valve (diverter valve) in between the
two solar panels with the label ends and closest to the
pump and lter. Unscrew the unions on the valve. You
will need to slip the threaded valve unions on the headers
rst before you screw the valve ange to the two headers.
Screw the two threaded valve anges to the threaded
header. Make sure you have applied Teon tape to the
threads on the header.
Position the valve in between the panels and connect the
valve to the headers with the valve unions (as shown).
On the opposite header furthest away from the pool
pump and lter and without the label, thread black end
caps on the outside ends (as shown). Be careful not to
cross-thread.
Slip the 7 inch hose with two stainless steel gear clamps
over the inside headers on the end without the label. Use
a 5/16” nut driver or ¼” at blade screwdriver to tighten
the clamps on the header. Make sure to place the clamps
in between the indexed ribs on the hose.
Turn off pool pump. Insert pool plugs* inside pool wall’s
return and supply line ttings with plugs like shown, or
stuff rags into ttings. You may lose a small amount
of water as you make the connections. This is not a
problem. Just do it as quickly as possible.
* Pool plugs not included in kit
7

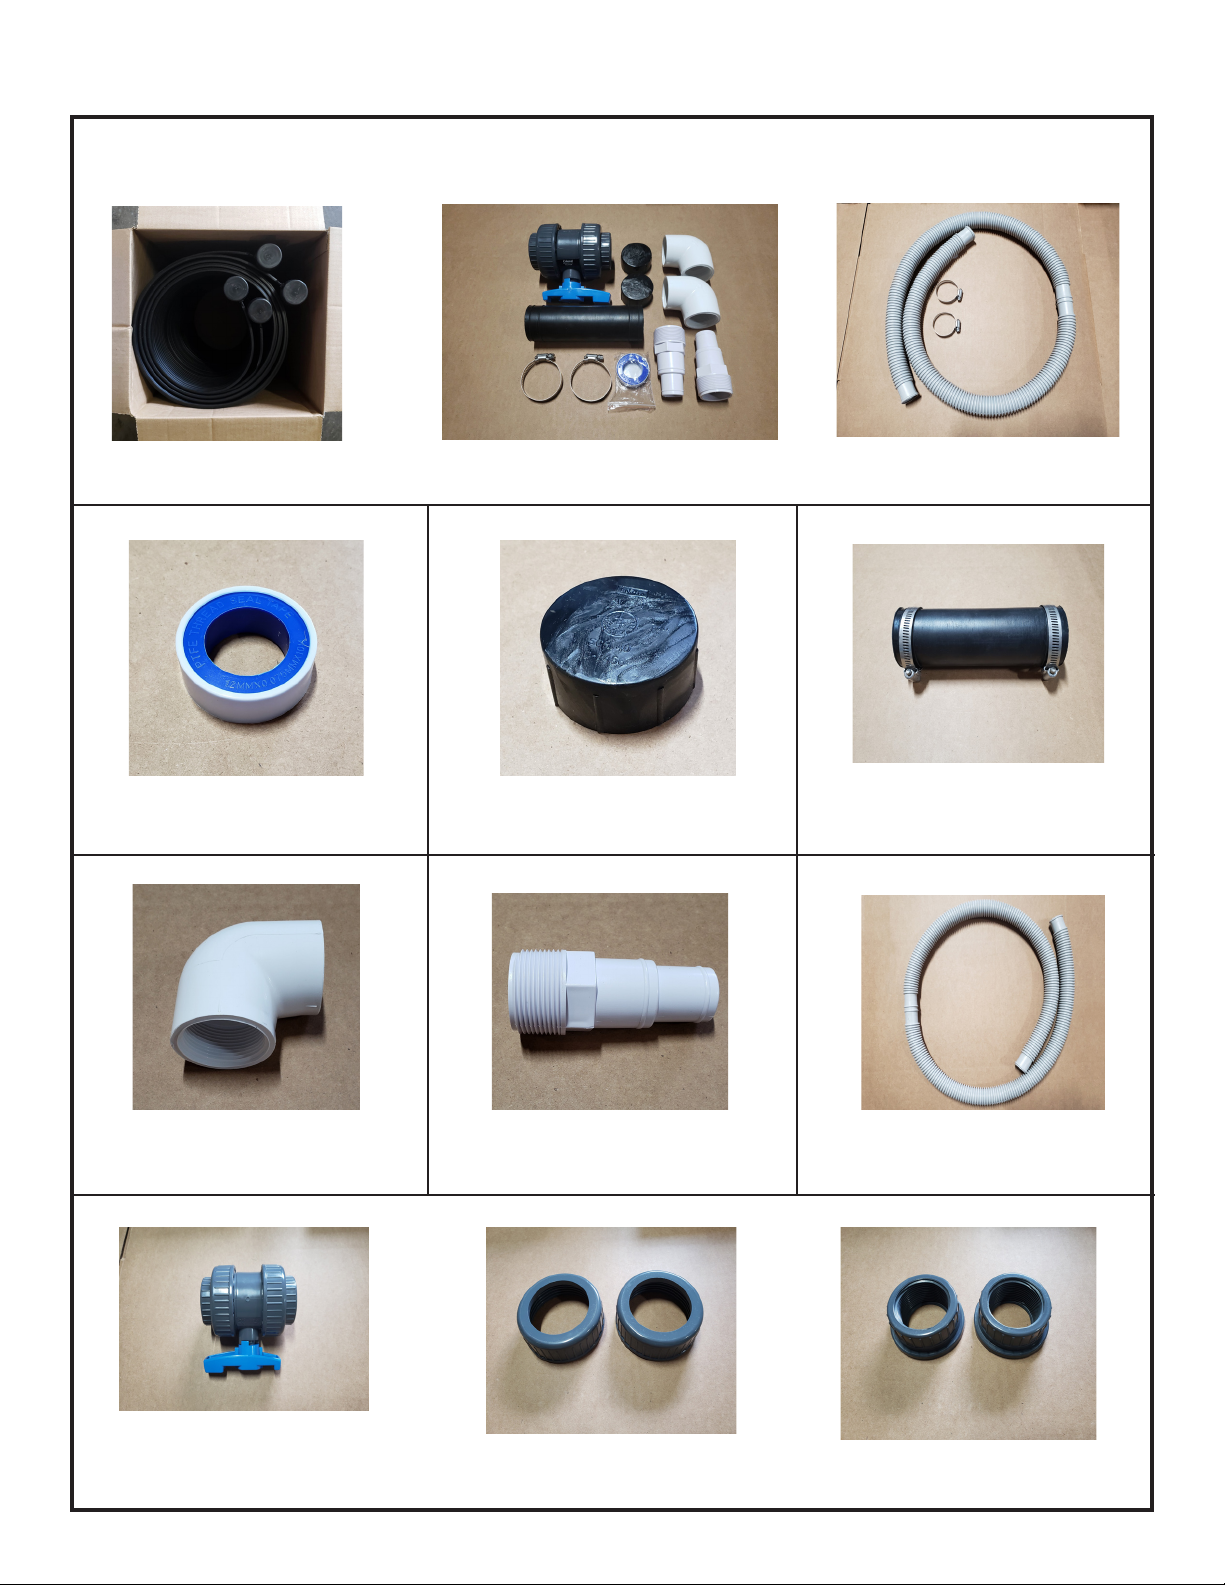
Disconnect the inlet supply hose clamp from the pool and
connect it to the solar panel header that has the 90-degree
PVC elbow and hose adaptor. The inlet supply hose is
the one that sends the water back to the pool.
Connect the 6 foot hose (included in the kit) to the pool
inlet supply using the included plastic clamp. Connect
the other end of the hose to the elbow connector opposite
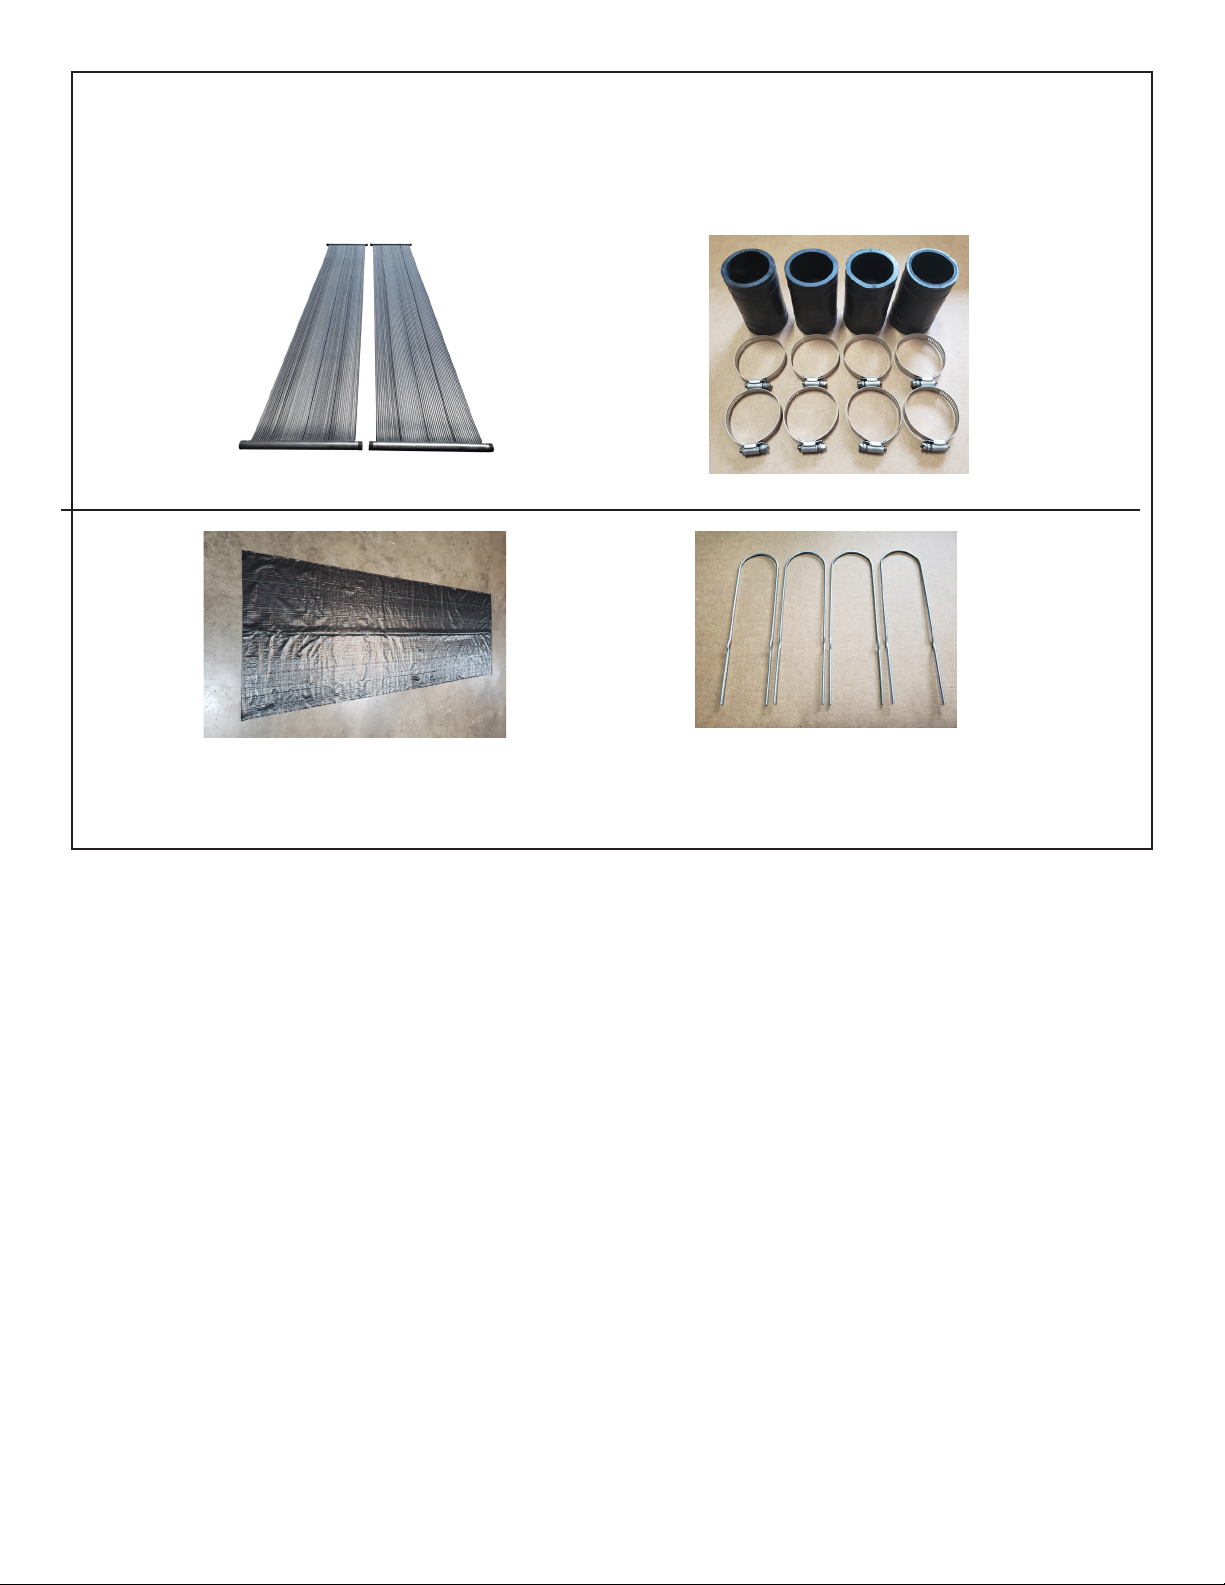
the other hose going into solar collectors. If the solar
collectors are not installed on a at surface, make sure
to feed the water from the pool to the lower of the two
headers. You always should feed the solar panels from
the lowest point in the system.
Remove the plug or rags you placed in the round outlet
and inlet ttings inside the pool.
If you are located in a high wind area you may want to
purchase galvanized stake kits to secure the solar panel
headers to the ground. Available at Pool Heating Depot
www.poolheatingdepot.com part # 60739.
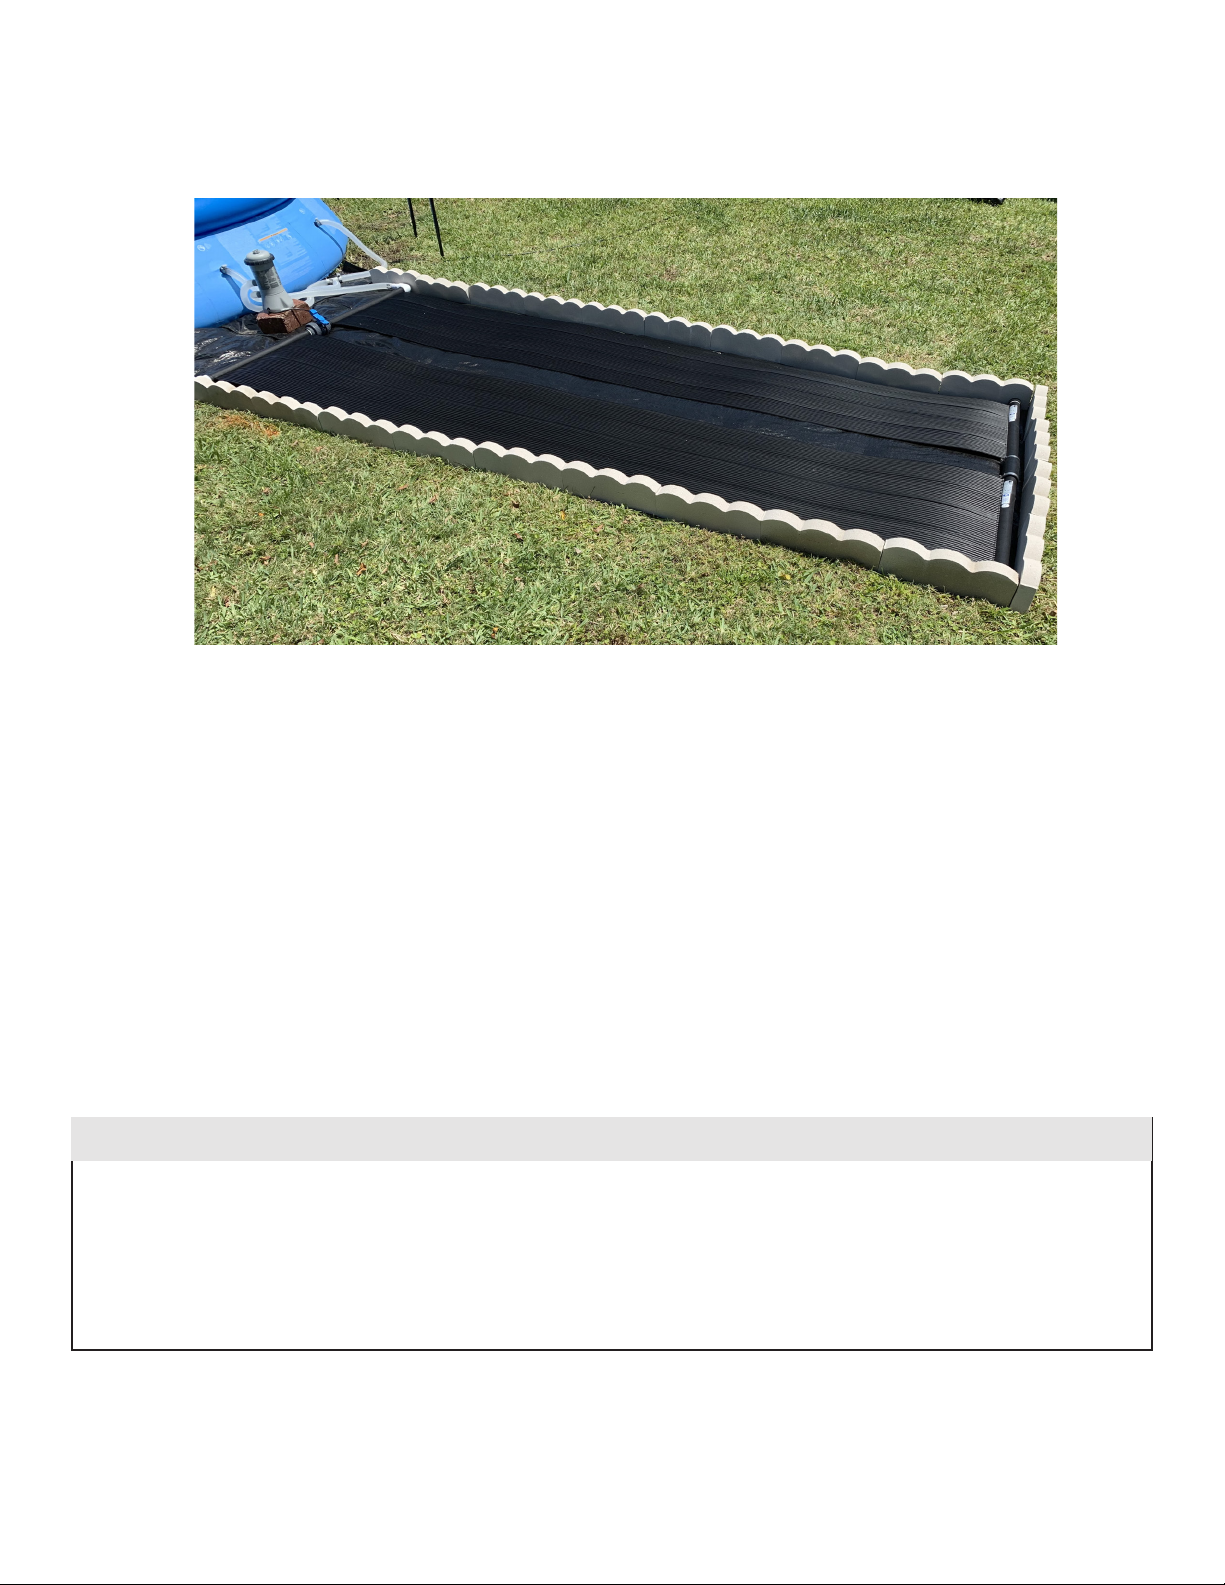
INITIAL OPERATION
The two-way solar control valve determines if the
water is going to ow through the solar collectors or
bypass the solar collectors. The system is on when the
handle on the control valve is positioned perpendicular
to the solar panel headers (see photo).
Put the valve handle in the heating position and turn
on the pool pump. Check all connections for leaks and
tighten connections as necessary. As the water is fed
from the pump to the solar system, it will push out any
air in the system. This can be seen by bubbles shooting
into your pool from the pool supply inlet. After about 5
minutes the air bubbles should stop. This means your
system has been purged of air and ready for operation.
If bubbles continue to be seen, recheck all connections
and tighten clamps as necessary.
Schedule your pump to run during the hours the sun will be shining on the solar panels. Once the pool reaches the
desired temperature, you can bypass the solar panels by turning the solar control valve handle, so it is parallel to
the solar panel headers. During times of rain or cold cloudy weather you may want to bypass the solar system to
not radiate heat from the pool water.
SOLAR VALVE IN HEATING POSITION
8

The picture below shows decorative curbing around the solar system
to protect it from lawn mowers and weed eaters.
The underlayment will block grass from growing around the solar panels.
MAINTENANCE
The solar heater should not require servicing or maintenance other than checking for tight connections and
winterizing. Before the rst frost or at the end of your swim season your solar heater should be drained, removed
from its connections to the pool, and stored in a frost-free location.
WINTERIZING YOUR SOLAR HEATER
When the time comes to put away the solar heaters for the winter, it is imperative that you drain as much water
out of the solar panels as possible to prevent damage to the heater. This can be done by simply removing the solar
panels from the system, remove the end caps, and tilt the units up so that the water runs out. When no more water
ows from your heater it is ready for storage along with your other pool supplies/accessories.
TROUBLE SHOOTING
Pool size vs number of kits needed for heating:
Above Ground Pool Solar System Sizing
Pool Size Round up to 15’ Round 18’ - 21’ Round 24’ Round 27’ -28’ Oval 15 x 30’ Oval 16’ x 25’
Recommended Solar Area 48 96 144 192 144 192
Base Kits 1 1 1 1 1 1
Add-On Kits 0 1 2 3 2 3
Please contact us for sizes not listed in the chart above.
See back cover for customer service telephone number for missing/replacement parts and technical assistance.
WARRANTY
Please refer to manufacturer’s warranty for specic terms and conditions and procedures.
9

the
pool heating depot
the
pool
heating
depot
the
pool
heating
depot
the
pool
heating
depot
Pool Heating Depot
2213 Andrea Ln. Suite 109
Ft. Myers, FL 33912
Phone 1-888-984-1238 / 239-789-1080
Installation hotline: 1-888-938-6943
Email [email protected]
Website www.poolheatingdepot.com
Table of contents
Popular Swimming Pool Heater manuals by other brands

Mestek
Mestek R(B Installation and operation instructions

Raypak
Raypak P-R185B To P-R405B, C-R185B To Installation and operating instructions

Supreme Heating
Supreme Heating Novamax09 Installation and instruction manual

L.S. BILODEAU
L.S. BILODEAU bilovax LS-50 Installation, maintenance and user manual

Toyotomi
Toyotomi zibro LC-DX320 operating manual

Pahlen
Pahlen Aqua HL user manual

Intex Marketing
Intex Marketing HT30220 owner's manual

Jandy
Jandy LRZ Electronic Installation and operation manual

Raypak
Raypak ELS 1102-2 Illustrated parts list

Timberk
Timberk TFH W180.XE instruction manual

Aqua PRO
Aqua PRO VIGOH80 instructions

Raypak
Raypak 538 To 4224 Installation and operating instructions