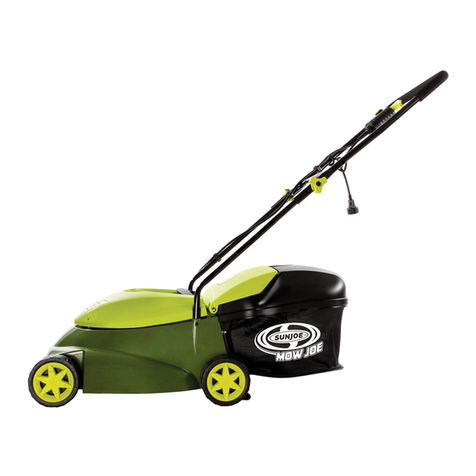
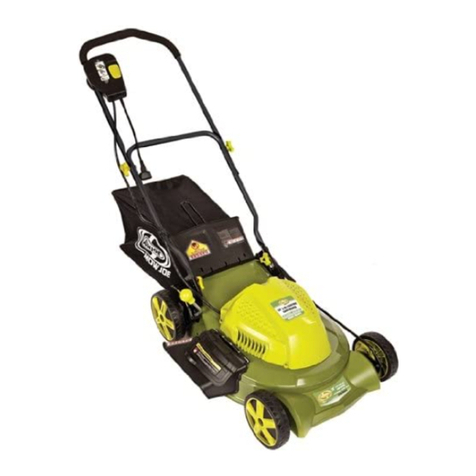
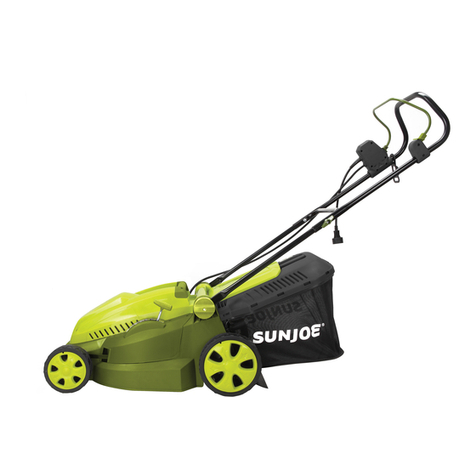
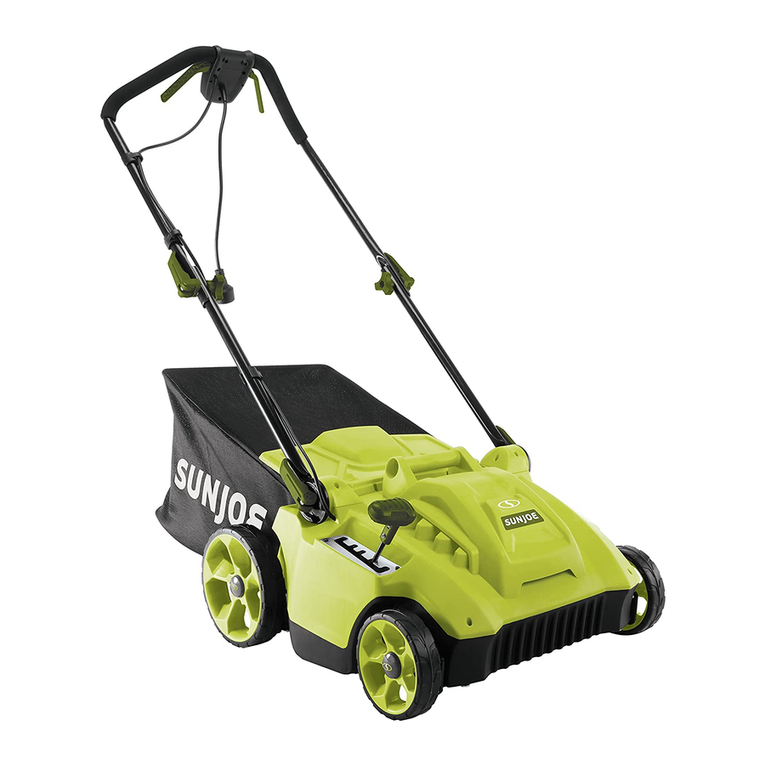
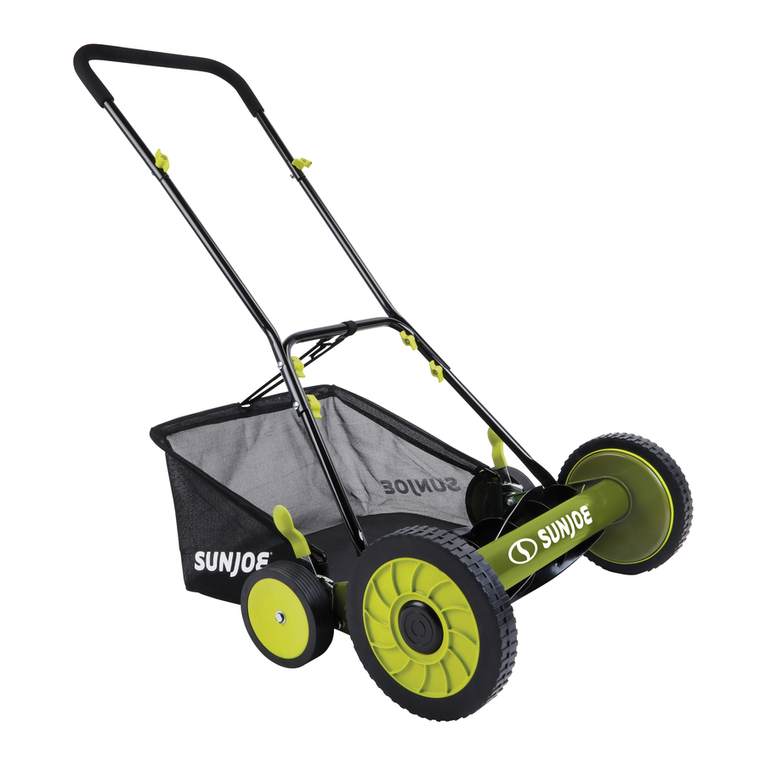
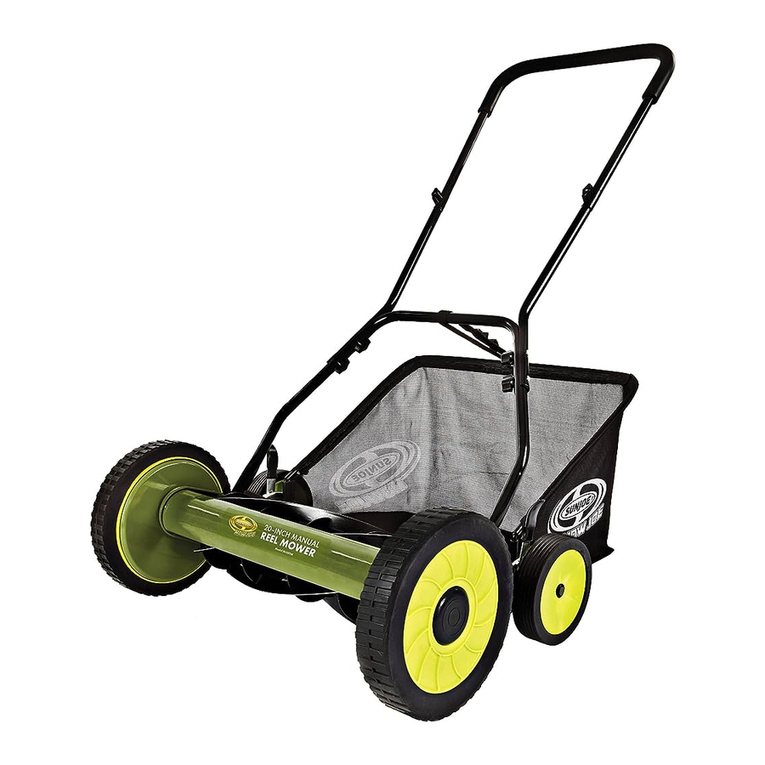
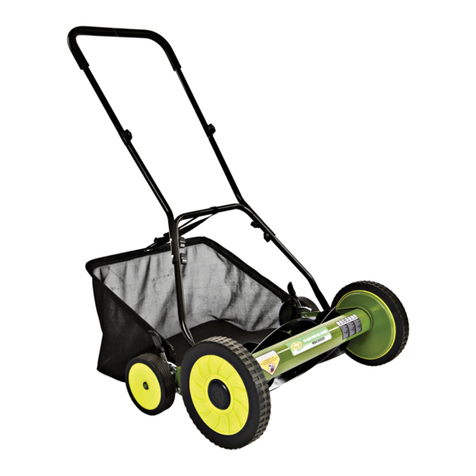
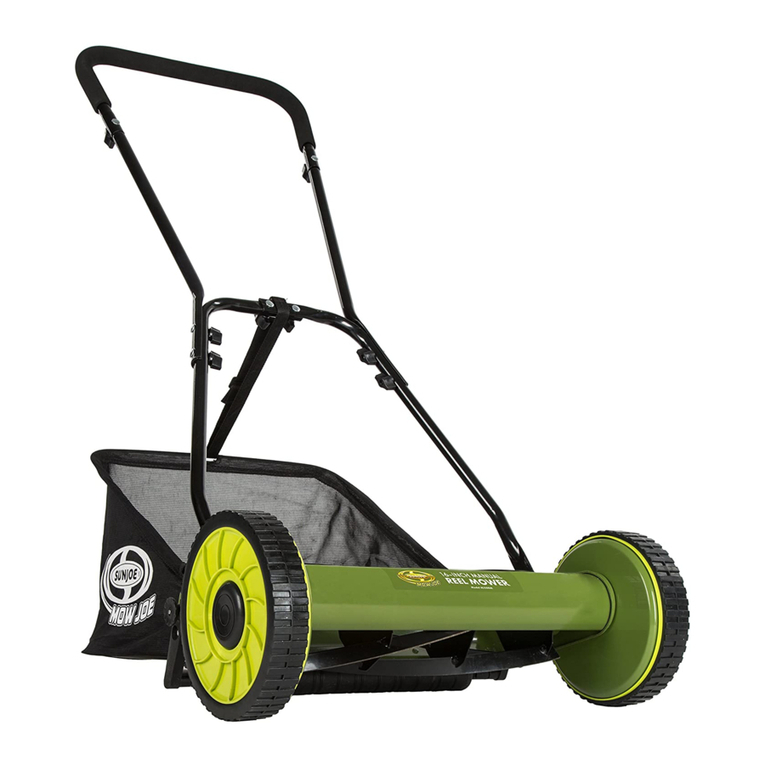
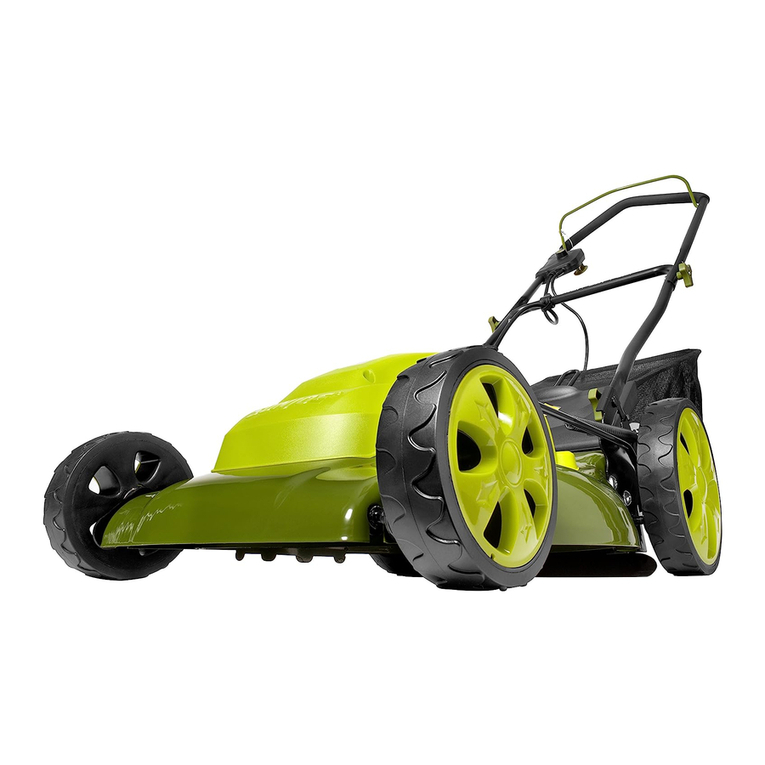
sunjoe MJ502M User manual

© 2020 by Snow Joe®, LLC
All rights reserved. Original instructions. SAVE THESE INSTRUCTIONS
1
EN
A Division of Snow Joe®, LLC
OPERATOR’S MANUAL
Model MJ502M Form No. SJ-MJ502M-880E-MR8
R
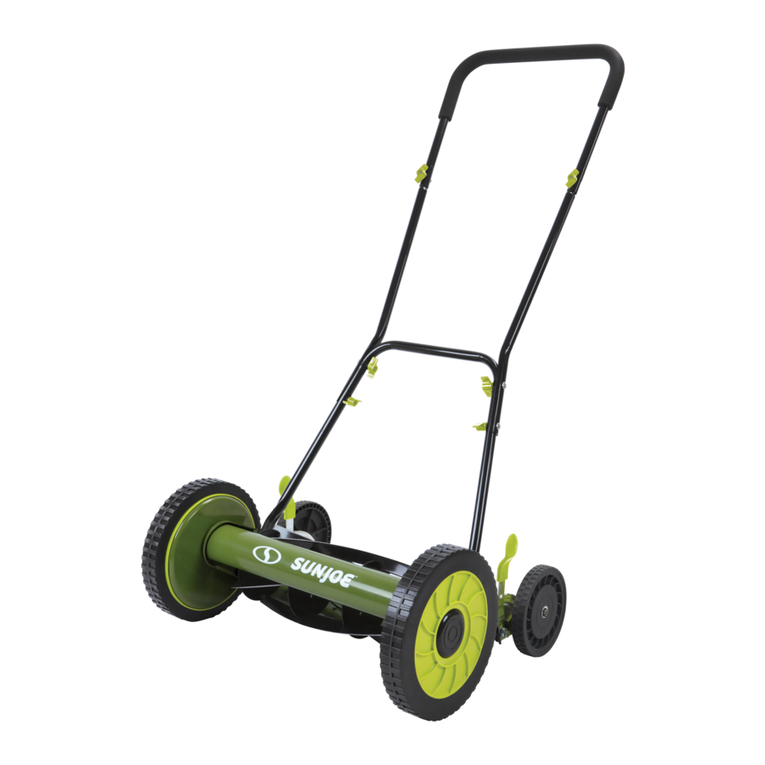
MANUAL QUAD-WHEEL REEL MOWER
20-INCH | GRASS CATCHER | RAZOREEL
IMPORTANT!
Safety Instructions
All Operators Must Read These
Instructions Before Use
Always follow these safety guidelines. Failure to do so may
result in serious bodily injury or death.
General Safety WARNINGS!
When using this reel mower, basic safety precautions should
always be followed to reduce the risk of personal injury.
These precautions include:
mWARNING! This unit can be dangerous! Careless or
improper use can cause serious injury.
mWARNING! Risk of dismemberment: keep hands and
feet away from the rotating blades and the cutting area.
Before using the reel mower, familiarize yourself with the
controls, especially how to stop the mower in an emergency.
The only individuals who should use the mower are those who
thoroughly understand these instructions and know how to
properly operate the unit. Children should never be allowed
access to the mower.
Retain this manual for future reference and reread it at the start
of each mowing season.
Safety Information
1. Never place hands, ngers, or feet inside the reel.
Although this mower is not powered by a motor, the reel
spins when the wheels turn, and it is sharp enough to
cause serious injury.
2. Never mow when the grass is wet as it can be slippery.
3.
Do not use the reel mower while barefoot or while
wearing sandals.
4. Walk behind, never run, while using the reel mower.
Always keep proper footing and balance when using this
reel mower.
5. Do not intentionally strike or hit trees, fences, or
other objects. Doing so can cause severe injuries or
permanently damage the reel mower's mechanisms.
6. Make sure that the reel mower is in proper working order
prior to use. Do not attempt to operate this reel mower if it
is damaged. Contact your authorized Snow Joe®+
Sun Joe®dealer or call the Snow Joe®+ Sun Joe®
customer service center at 1-866- SNOWJOE
(1-866-766-9563).
IMPORTANT!
Safety Instructions for Walk-Behind
Reel Mowers
General Operation
• Read, understand, and follow all instructions on the
machine and in the manual(s) before starting.
• Do not put hands or feet near or under the machine.
Always stay clear of the discharge opening.
• Only responsible adults who are familiar with the
instructions should be allowed to operate this machine.
• Clear the mowing area of foreign objects such as rocks,
wire, toys, and other miscellaneous articles, which could
be picked up and thrown by the rotating blades.
• Make sure that the mowing area is clear of bystanders
before starting the mower. Stop the mower if anyone
enters the area.
• Always look down and behind before starting and while
moving backward with the mower.
• Do not operate the machine without safety protective
devices in place and in proper working order.
• Never operate the mower on wet grass. Always be sure of
your footing; walk, never run, with the mower.
• Keep blades sharp.
• Keep hands and feet away from the cutting area.
• Always wear eye protection when operating the machine.
• Objects struck by the reel mower blades can cause severe
injuries. The mowing area should always be carefully
examined and cleared of all objects prior to each mowing.
• Only use identical replacement blades.
2
Slope Operation
Slopes are major factors involved in slip and fall accidents.
Such accidents can cause severe personal injury. Operating
this mower on any inclined surface requires extra caution.
If you feel uneasy on a slope, do not mow it.
• Mow across the face of a sloped surface; never mow
up and down a slope. Exercise extreme caution when
changing direction on a slope.
• Watch for holes, ruts, bumps, rocks, or other hidden
objects. These may cause an unexpected slip or fall.
• Do not mow on wet grass or excessively steep slopes.
Poor footing could cause a slip and fall accident.
• Do not mow near drop-os, ditches, or embankments.
You could lose your footing or balance.
Children
Tragic accidents can occur if the operator is not alert to the
presence of children. Children are often attracted to the mower
and the mowing activity. Never assume that children will
remain where you last saw them.
• Keep children out of the mowing area and under
the watchful care of a responsible adult other than
the operator.
• Stay alert and stop the reel mower if a child enters
the area.
• Never allow children access to the machine.
• Use extra care when approaching blind corners, shrubs,
trees, or other objects that may block your view of a child.
Service
• Keep all nuts and bolts tight.
• Never tamper with safety devices. Regularly check to
ensure these devices are in place and in proper
working order.
• Keep the reel mower free from grass, leaves, or other
debris buildup.
• If you strike a foreign object, stop and inspect the reel
mower. Repair, if necessary, before restarting.
• Check the grass catcher components and the discharge
guard frequently and replace with manufacturer’s
recommended parts when necessary.
• The mower blades are sharp. Wrap the blades or wear
gloves when handling.
• Maintain or replace safety and instruction labels
as needed.

3
Safety Symbols
The following table depicts and describes safety symbols that may appear on this product. Read, understand, and follow all
instructions on the machine before attempting to assemble and operate.
SAFETY ALERT – Indicates a
precaution, a warning, or a danger.
DANGER! Cutting/dismemberment
hazard – Keep feet away from the
rotating blades.
Keep bystanders and children a
safe distance away.
DANGER! Sharp blades can
sever ngers and toes. Keep
away from the cutting area.
Slip on slope hazard – Use extra
caution when mowing on slopes to
prevent slip and fall accidents.
CAUTION! Beware of stones and
other foreign objects that could be
thrown from the appliance.
DANGER! Cutting/dismemberment
hazard – Keep hands away from the
rotating blades.
Symbols SymbolsDescriptions Descriptions
READ THE OPERATOR'S
MANUAL(S) – Read, understand,
and follow all instructions in the
user manual(s) before attempting to
assemble and operate.

4
Know Your Manual Reel Mower
Read the owner’s manual and safety instructions carefully before operating the reel mower. Compare the illustration below to
the reel mower in order to become familiar with the location of the various controls and adjustments. Save this manual for
future reference.
1. Foam grip
2. Upper handle
3. Upper handle knob and bolt (2)
4. Middle handle bar (2)
5. Lower handle knob and bolt (4)
6. Lower handle
7. Grass catcher
8. Height adjustment levers
9. Rear wheel (2)
10. Front wheel (2)
11. Reel mower body
12. Steel blades
R
R
2
1
3
4
7
9
10
6
5
8
11
12
Technical Data
Rotor ....................................................................5 steel blades
Cutting Width ..................................................... 20 in (50.8 cm)
Cutting Heights ...................................................1.2 in. – 2.4 in.
........................................................................ (30 mm – 61 mm)
Wheel Size ................................................. Front: 10 in. (25 cm)
....................................................................... Rear: 6 in. (15 cm)
Grass Catcher Capacity ........................................ 8.5 gal (32 l)
Height Control .............................................. 9-position manual
....................................................................... height adjustment
Net Weight...................................................... 30.4 lbs (13.8 kg)

5
Unpacking
Carton Contents:
• Reel mower body
• Upper handle
• Middle handle bar (2)
• Lower handle
• Handle knob and bolt (6)
• Grass catcher
• Hex wrench
• Paper test strips (20)
• Manual with registration card
1. Carefully remove the manual reel mower and check to see
that all of the above items are supplied.
2. Inspect the product carefully to make sure no breakage or
damage occurred during shipping. If you nd damaged or
missing parts, DO NOT return the unit to the store.
Please call the Snow Joe®+ Sun Joe®customer service
center at 1-866-SNOWJOE (1-866-766-9563).
NOTE: Do not discard the shipping carton and packaging
material until you are ready to use your new manual reel
mower. The packaging is made of recyclable materials.
Properly dispose of these materials in accordance with
local regulations.
IMPORTANT! The equipment and packaging material are
not toys. Do not let children play with plastic bags, foils,
or small parts. These items can be swallowed and pose a
suocation risk!
Assembly
Fitting the handle
NOTE: Do not tighten the knobs completely until assembly
is complete.
1. Secure the two middle handle bars to the upper handle
using the rst set of knobs and bolts provided. Tighten the
knobs on each side to ensure a secure t (Fig. 1).
2. Attach the upper and middle handle assembly to the lower
handle using the remaining knobs and bolts provided.
Tighten the knobs on each side to ensure a secure t
(Fig. 2).
Upper handle
Middle
handle
bars
Knobs
Bolts
Fig. 1
Fig. 2
Middle
handle
assembly
Lower handle
Knobs
Bolts
Bolts

6
3. After assembling the handle, line up the holes at the lower
end of each handle arm with the short posts that extend
from the side plates of the mower base (Fig. 3).
4. Pull both sides of the lower handle bars over the posts
on the mower body. Press inward on the handle bars to
ensure a secure t over the posts.
Fitting the grass catcher
1. Hook the pre-assembled grass catcher onto the mower
body by connecting the hooks to both ends of the steel
shaft (Fig. 4).
2. Secure the locking strap on the grass catcher to the center
bar on the lower handle of the mower. Adjust the strap to
an appropriate height so that the grass catcher does not
rub against the ground while mowing or transporting the
unit (Fig. 5).
NOTE: If you have any questions, please call the Snow Joe®+
Sun Joe®customer service department at 1-866-SNOWJOE
(1-866-766-9563) for assistance.
Operation
Cutting height adjustment
1. The cutting height of the 20 in. (50.8 cm) reel mower can
be adjusted from 1.2 in. to 2.4 in. (30 mm to 61 mm) by
moving the 9-position height adjustment levers to the
desired setting. The height adjustment levers are located
next to the smaller wheels.
2. In order to set the mower to its lowest cutting position,
pull the adjustment levers on both sides, one at a time,
and set them to position A (Fig. 6).
Fig. 3
Post
Handle bars
R
Fig. 4
Steel shaft
Hook
Hook
Locking strap
Fig. 5

7
3. In order to set the mower to its highest cutting position,
move the adjustment levers on both sides to
position B (Fig. 6).
NOTE: The two adjustment levers MUST be set to the
same position (height).
4. Other cutting heights are achieved by moving the
adjustment levers to the settings between the highest
and lowest positions.
Ensuring a clean cut
mWARNING! The steel blades are extremely
sharp. To avoid injury, do not touch the blades while
making adjustments.
NOTE: Although the blades are pre-adjusted prior to leaving
the factory, it is recommended that the adjustment be veried
prior to rst use.
NOTE: Vibrations during shipping can cause blade
misalignment, which often causes the blades to become too
loose or too tight. This will result in a rough, uneven cut,
or make the mower dicult to push (Fig. 7).
1. To verify proper blade alignment, place the mower on a
at surface. Remove the handles and the grass catcher.
Turn the mower reel upside down to expose the
cutting bar.
2. Using one of the twenty (20) pieces of paper provided,
insert one of these pieces of paper between the cutting
bar and the reel blades, then slowly turn the wheel by
hand (Fig. 8).
3. All the blades should slice the paper evenly along the
entire length of the cutting bar while the reel is
turned smoothly.
4. If the mower cuts the paper intermittently, adjustment
should be made to the appropriate side of the blades to
achieve optimal cutting performance.
Fig. 7
Paper
Fig. 8
Highest
Cutting
Position
Lowest
Cutting
Position Adjustment
Lever
Fig. 6 Position A
Position B
Quality

8
Adjusting the mower blades
1. Each end of the cutting bar can be adjusted separately.
2. The cutting bar blade, which is located under the reel,
is able to pivot. The two adjustment nuts located at the
back of the mower move the cutting bar away from the
blades when they are turned counterclockwise, and closer
to the blades when they are turned clockwise (Fig. 9).
Fig. 9
Hex wrench
Adjustment bolts
m WARNING! Do not overtighten the adjustment screws
as this could damage the cutting bar. Both screws must be
tight on nal adjustment.
3. To loosen the blades, use the hex wrench provided
and turn both adjustment screws by an equal
amount counterclockwise.
4. To tighten the blades, tighten both screws by an equal
amount by turning them clockwise.
NOTE: If you have any questions, please call the Snow Joe® +
Sun Joe®customer service department at 1-866-SNOWJOE
(1-866-766-9563) for assistance.
5. Once the mower blades have been properly adjusted and
their alignment has been veried, you can now proceed
to use your reel mower. Align the cutting path indication
arrow with the previously cut path (Fig. 10).
NOTE: The width of the reel mower's actual cut is
indicated below. Do not use the mower's wheels as a
reference point for the grass cut line.
Mowing Tips
Follow the 1/3 rule
The 1/3 rule is key to an enjoyable mowing experience and a
healthy lawn.
1. You should mow your lawn regularly, at least once a week,
during the growing season.
2. Be guided by observing the lawn and taking care not to
remove more than 1/3 of the total height of the turf at any
mowing session and never more than 1 inch at a time
(Fig. 11).
Fig. 10
20 inches
1/3
1"
Fig. 11

9
3. Following this rule will stimulate the turf’s root growth,
maintain its health, and encourage its natural ability to
crowd out unwanted weeds.
Tall grass requires incremental cutting
1. For extremely tall grass, set the cutting height at the
mower's maximum setting for the rst pass, and then
reset it to the desired height and mow a second or third
time (Fig. 12).
2. Removing too much of the turf’s height, especially in the
heat of summer, can cause root shock and weaken the
lawn; bringing down the height by successive mowing
over two or more days can avoid this damage and
maintain the health of the turf.
3. If the lawn is overgrown (to higher than 4 inches) it may be
necessary to use a brush cutter to remove the excess turf
mass before resuming mowing at normal heights.
NOTE: Do not cover the grass surface with a heavy layer
of clippings. Consider using a grass collection system and
starting a compost pile.
Care and Maintenance
1. Minimum care is required to ensure smooth operation of
your mower.
2. To avoid damage to the mower or cutting blades, keep the
area to be mowed free from debris.
3. For best results, regularly apply lubricant to the mower’s
cutting surfaces, cutting reel axle shaft, and wheels.
Sharpening the Cutting Blades
1. Spread a thin layer of lapping compound on the front edge
of the reel blades.
2. Adjust the cutting bar so that the blade has light but rm
contact across the full width of the bar.
mCAUTION! Do not overtighten the adjusting screws,
as this could damage the cutting bar. Tighten both screws
during nal adjustment.
3. Turn the reel blades until the front edge of the cutting bar
blade is polished.
mWARNING! Clean any grinding compound or debris
from the cutting bar blade, reel blade, pinions, and pawls.
NOTE: Use industrial or valve lapping compound between 100
and 240 grit.
NOTE: Lubricate the axle and pinion with a light lm of wheel
bearing grease.
Cleaning and Storage
1. Clean the exterior of the machine thoroughly using a soft
brush and cloth before storing. Do not use water, solvents,
or polishes.
2. Turn the mower on its side to clean the blade area.
mWARNING! Do not place your hands inside or near the
cutting area. If grass cuttings are compacted in the blade area,
remove them using a wood or plastic cleaning tool appropriate
for blade cleaning.
3. Store the mower in a dry place. Do not place other objects
on top of the mower during storage.
Maintenance Tips
Reel mowers are relatively low maintenance. For consistent
cutting, follow the below instructions:
• Always keep the cutting bar properly adjusted. Refer to the
instruction manual for further directions.
• Regularly clean and lubricate cutting edges with light
spray oil.
IMPORTANT! Reel mowers have diculty cutting tall weeds,
such as dandelions, and will often bend, rather than cut,
such weeds. Cut often to prevent this.
Service and Support
If your Sun Joe®manual reel mower with grass catcher
requires service or maintenance, please call the Snow Joe®+
Sun Joe®customer service center at 1-866-SNOWJOE
(1-866-766-9563).
Model and Serial Numbers
When contacting the company or reordering parts, you will
need to provide the model and serial numbers of your product.
These are found on the decal axed to the housing of your reel
mower with grass catcher. Copy these numbers into the space
provided below.
Cut here on
rstpass Cut here on
second pass
Fig. 12
Record the following numbers from the housing or handle of your
new product:
M J 5 0 2 M
Model #:
Serial #:

R4_01282020
SNOW JOE®+ SUN JOE®CUSTOMER PROMISE
OUR WARRANTY:
Snow Joe warrants new, genuine, powered and non-powered Products to be free from defects in material or workmanship when used
for ordinary household use for a period of two years from the date of purchase by the original, end-user purchaser when purchased
from Snow Joe or from one of Snow Joe’s authorized sellers with proof of purchase. Because Snow Joe is unable to control the quality
of its Products sold by unauthorized sellers, unless otherwise prohibited by law, this Warranty does not cover Products purchased from
unauthorized sellers. If your Product does not work or there’s an issue with a specic part that is covered by the terms of this Warranty,
Snow Joe will elect to either (1) send you a free replacement part, (2) replace the Product with a new or comparable product at no
charge, or (3) repair the Product. How cool is that!
This Warranty gives you specific legal rights, and you may also have other rights which vary from State to State.
PRODUCT REGISTRATION:
Snow Joe strongly encourages you to register your Product. You can register online at snowjoe.com/register, or by printing and
mailing in a registration card available online from our website, or calling our Customer Service Department at 1-866-SNOWJOE
(1-866-766-9563), or by e-mailing us at [email protected]. Failure to register your Product will not diminish your warranty
rights. However, registering your Product will allow Snow Joe to better serve you with any of your customer service needs.
WHO CAN SEEK LIMITED WARRANTY COVERAGE:
This Warranty is extended by Snow Joe to the original purchaser and original owner of the Product.
WHAT IS NOT COVERED?
This Warranty does not apply if the Product has been used commercially or for non-household or rental applications. This Warranty also
does not apply if the Product was purchased from an unauthorized seller. This Warranty also does not cover cosmetic changes that do
not aect performance. Wearing parts like belts, augers, chains and tines are not covered under this Warranty, and can be purchased
at snowjoe.com or by calling 1-866-SNOWJOE (1-866-766-9563).
ABOVE ALL ELSE, Snow Joe, LLC (“Snow Joe”) is dedicated to you, our customer. We strive to make your experience as pleasant as
possible. Unfortunately, there are times when a Snow Joe®, Sun Joe®, or Aqua Joe®product (“Product”) does not work or breaks under
normal operating conditions. We think it’s important that you know what you can expect from us. That’s why we have a Limited Warranty
(“Warranty”) for our Products.
10
EN

11


SP
© 2020 Snow Joe®, LLC
Derechos reservados. Instrucciones originales. GUARDE ESTAS INSTRUCCIONES
13
Una división de Snow Joe®, LLC
MANUAL DEL OPERADOR
Modelo MJ502M Forma No. SJ-MJ502M-880S-MR8
RPODADORA DE CÉSPED MANUAL
CON CUATRO RUEDAS
50.8 CM | RECOLECTOR DE CÉSPED | RAZOREEL
¡IMPORTANTE!
Instrucciones de seguridad
Todos los operadores deberán leer
estas instrucciones antes del uso
Siga siempre estas normas de seguridad. No hacerlo podría
resultar en lesiones corporales severas o incluso la muerte.
¡ADVERTENCIAS generales de
seguridad!
Debe tomar precauciones básicas de seguridad siempre que
use esta podadora manual con el n de reducir el riesgo de
lesiones personales. Estas precauciones incluyen:
m¡ADVERTENCIA! ¡Esta unidad puede ser peligrosa!
Su descuido o uso incorrecto puede causar lesiones severas.
m¡ADVERTENCIA! Riesgo de mutilación: mantenga
las manos y pies alejados de las cuchillas giratorias y el área
de corte.
Antes de usar esta podadora manual, familiarícese con los
controles, sobre todo con la forma de detener la podadora en
caso de emergencia. Las únicas personas que deben usar la
podadora son aquellas que entiendan al pie de la letra estas
instrucciones y sepan cómo operar correctamente la unidad.
Los niños nunca deben tener acceso a la podadora.
Conserve este manual para futuras referencias y vuélvalo a
leer al inicio de cada temporada de podado.
Información de Seguridad
1. Nunca coloque las manos, dedos o pies dentro del eje de
la podadora. Aunque esta podadora no está energizada
por un motor, el eje con cuchillas gira cuando las ruedas
se mueven, y las cuchillas son lo sucientemente aladas
como para causar lesiones graves.
2. Nunca pode el césped cuando éste se encuentre mojado,
ya que puede ser resbaladizo.
3. Nunca use la podadora manual estando descalzo o
usando sandalias.
4. Al operar esta podadora manual, camine detrás de ésta,
nunca corra. Mantenga siempre balance y posición
adecuados al operarla.
5. No golpee de forma intencional árboles, cercas u otros
objetos con la podadora. Hacerlo puede causar lesiones
personales severas o dañar permanentemente los
mecanismos de la podadora manual.
6. Asegúrese de que la podadora manual esté en buenas
condiciones de operación antes de empezar a usarla.
No intente operar esta podadora manual si está dañada.
Contacte a un concesionario autorizado Snow Joe®+
Sun Joe®, o comuníquese con la central de servicio
al cliente Snow Joe®+ Sun Joe®llamando al
1-866-SNOWJOE (1-866-766-9563).
¡IMPORTANTE!
Instrucciones de seguridad para
podadoras manuales de rodadura
Operación general
• Lea, entienda y obedezca todas las instrucciones en la
máquina y en el(los) manual(es) antes de empezar.
• No ponga sus manos o pies cerca o debajo de la
máquina. Manténgase siempre alejado de la abertura
de descarga.
•
Solo adultos responsables familiarizados con las
instrucciones deberán estar autorizados a operar
esta máquina.
• Retire del área a podar objetos extraños como rocas,
alambres, juguetes y otros artículos diversos que puedan
ser recogidos y arrojados por las cuchillas giratorias.
• Asegúrese de que el área de podado esté libre de
espectadores o transeúntes antes de encender la
podadora. Detenga la podadora si alguien entra al área.
• Mire siempre hacia abajo y hacia atrás antes de empezar
a podar, así como durante el movimiento en reversa de
la podadora.
• No opere la máquina sin dispositivos protectores de
seguridad en su lugar y funcionando correctamente.
• Nunca opere la podadora sobre césped mojado.
Siempre esté atento a dónde esté pisando.
Camine, nunca corra, con la podadora.
• Mantenga las cuchillas aladas.
• Mantenga las manos y los pies lejos del área de corte.
• Utilice siempre protección ocular al operar la máquina.

14
• Los objetos arrojados por las cuchillas de la podadora
de césped pueden causar lesiones graves. Siempre se
debe examinar cuidadosamente el área a podarse y retirar
todos los objetos antes del podado.
• Use solo cuchillas de repuesto idénticas.
Operación en pendientes
Las pendientes son unos de los principales factores causantes
de accidentes de resbalones y caídas. Dichos accidentes
pueden causar lesiones personales severas. Operar esta
podadora en cualquier supercie inclinada requiere una
precaución adicional. Si no se siente seguro en una pendiente,
no la pode.
• Pode a lo largo de la cara de una supercie inclinada.
Nunca pode hacia arriba y hacia abajo en una pendiente.
Tenga mucho cuidado al cambiar de dirección en
una pendiente.
• Esté atento a los agujeros, surcos, baches, rocas u otros
objetos ocultos. Éstos pueden causar un inesperado
resbalón o caída.
• No pode sobre césped mojado o pendientes demasiado
inclinadas. Una mala postura puede causar un accidente
de resbalo y caída.
• No pode cerca de laderas, zanjas o terraplenes.
Usted puede perder su equilibrio o posición.
Niños
Pueden ocurrir accidentes trágicos si el operador no está
alerta de la presencia de niños. Los niños son generalmente
atraídos a la podadora y a la actividad de podar. Nunca
asuma que los niños permanecerán donde usted los vio por
última vez.
• Mantenga a los niños lejos del área de poda y bajo la
estricta vigilancia de un adulto responsable que no sea
el operador.
• Esté siempre atento y detenga el movimiento de la
podadora si un niño entra en el área de trabajo.
• Nunca permita que los niños operen el equipo.
• Tenga especial cuidado al acercarse a esquinas ciegas,
arbustos, árboles u otros objetos que puedan obstaculizar
la visualización de un niño.
Servicio
• Mantenga ajustados todos los pernos y tuercas.
• Nunca manipule los dispositivos de seguridad.
Verifíquelos regularmente para asegurarse de que estén
en su lugar y funcionando apropiadamente.
• Mantenga la podadora manual libre de césped, hojas y
demás acumulaciones de residuos.
• Si golpea un objeto extraño, deténgase e inspeccione
la podadora. Repárela de ser necesario antes de volver
a empezar.
•
Verique los componentes del receptor de césped y
protector de descargas frecuentemente, y reemplácelos
con partes recomendadas por el fabricante cuando
sea necesario.
• Las cuchillas de la podadora son losas. Al manipular las
cuchillas, envuélvalas o use guantes.
• Mantenga o reemplace las etiquetas de seguridad y de
instrucciones según sea necesario.

15
Símbolos de seguridad
La siguiente tabla muestra y describe los símbolos de seguridad que pueden aparecer en este producto. Lea, comprenda y siga
todas las instrucciones relacionadas a la unidad antes de intentar ensamblarla y operarla.
ALERTA DE SEGURIDAD:
indica una precaución,
advertencia o peligro.
¡PELIGRO! Peligro de corte/
mutilación: mantenga los pies lejos
de las cuchillas giratorias.
Mantenga a los transeúntes
y niños alejados a una
distancia segura.
¡PELIGRO! Las cuchillas aladas
pueden mutilar los dedos de
manos y pies. Manténgase
alejado del área de corte.
Peligro de resbalo en pendientes:
tenga extremo cuidado al podar
en pendientes para evitar resbalar
y caer.
¡PRECAUCIÓN! Tenga cuidado con
piedras y otros objetos extraños que
puedan ser lanzados por la máquina.
¡PELIGRO! Peligro de corte/
mutilación: mantenga las manos
lejos de las cuchillas giratorias.
Símbolo SímboloDescripción Descripción
LEA EL(LOS) MANUAL(ES) DEL
OPERADOR:lea, comprenda y
siga todas las instrucciones en
el(los) manual(es) antes de intentar
ensamblar y operar la unidad.

16
Conozca su podadora manual con colector de césped
Lea detenidamente el manual del propietario y las instrucciones de seguridad antes de operar la podadora manual. Compare la
ilustración debajo con la podadora manual para familiarizarse con la ubicación de los diversos controles y ajustes. Guarde este
manual para futuras referencias.
1. Empuñadura de espuma
2. Barra superior
3. Juego de perilla y perno de barra superior (x2)
4. Barra intermedia (x2)
5. Juego de perilla y perno de barra inferior (x4)
6. Barra inferior
7. Colector de césped
8. Palanca de ajuste de altura (x2)
9. Ruedas posteriores (2)
10. Ruedas frontales (2)
11. Cuerpo de la podadora manual
12. Cuchillas de acero
Datos técnicos
Rotor ...................................................Cinco cuchillas de acero
Ancho de corte ................................................ 20 plg (50.8 cm)
Alturas de corte ............................................... 1.2 plg – 2.4 plg
........................................................................ (30 mm – 61 mm)
Tamaño de rueda ................................... Frontal: 10 plg (25 cm)
...............................................................Posterior: 6 plg (15 cm)
Capacidad de colector de césped .........................8.5 gal (32 l)
Control de altura ................................... Ajuste de altura manual
de nueve posiciones
Peso Neto..........................................................30.4 lb (13.8 kg)
R
R
2
1
3
4
7
9
10
6
5
8
11
12

17
Desembalaje
El paquete contiene:
• Cuerpo de la podadora manual
• Barra superior
• Barra intermedia (x2)
• Barra inferior
• Tuerca de mariposa y perno (x6)
• Colector de césped
• Llave hexagonal
• Tiras de papel de prueba (x20)
• Manual con tarjeta de registro
1. Retire cuidadosamente la podadora manual de césped
y compruebe que todos los artículos anteriores
estén incluidos.
2. Inspeccione cuidadosamente el producto para asegurarse
de que no haya ocurrido ningún daño o ruptura durante el
transporte. Si alguna parte está dañada o extraviada,
NO DEVUELVA la unidad a la tienda.
Llame al centro de servicio al cliente Snow Joe®+
Sun Joe®al 1-866-SNOWJOE (1-866-766-9563).
NOTA: no se deshaga de la caja de transporte ni del
material de embalaje hasta que usted esté listo para usar
su podadora manual de césped. El empaquetado está
hecho de materiales reciclables. Deseche estos materiales
en conformidad a los reglamentos locales.
¡IMPORTANTE! El equipo y los materiales de embalaje no son
juguetes. No deje que los niños jueguen con bolsas plásticas,
láminas o piezas pequeñas. ¡Estos objetos pueden ser
tragados y representan un riesgo de asxia!
Ensamblado
Colocación del ensamblado del mango
NOTA: no apriete por completo las perillas hasta que se haya
completado el ensamblado.
1. Asegure las dos barras intermedias a la barra superior
usando el primer conjunto de perillas y pernos
suministrado. Apriete las perillas en cada lado para
garantizar un ajuste seguro (Fig. 1).
2. Conecte el ensamblado de barras superior e intermedias
a la barra inferior usando las perillas y pernos restantes
suministrados. Ajuste las perillas en cada lado para
garantizar un ajuste seguro (Fig. 2).
Barra superior
Barras
intermedias
Perillas
Pernos
Fig. 1
Fig. 2
Ensamblado
de barras
intermedias
Barra inferior
Perillas
Pernos
Pernos

18
3. Después de ensamblar la barra, alinee los oricios en
el extremo de cada barra con los postes cortos que
se extienden de las placas laterales en la base de la
podadora (Fig. 3).
4. Jale ambos lados de las barras inferiores por sobre los
postes del cuerpo de la podadora. Presione hacia
dentro de las barras para garantizar un ajuste seguro
sobre los postes.
Conexión del recolector de césped
1. Conecte el colector de césped pre-ensamblado a
la podadora enganchando los sujetadores a ambos
extremos del eje del rodillo (Fig. 4).
2. Asegure la faja de sujeción al colector de césped en
el centro de la barra inferior. Ajuste la faja a una altura
apropiada de manera que el colector de césped no se
arrastre sobre el suelo durante la poda o el transporte
(Fig. 5).
NOTA: si tiene preguntas o necesita ayuda, contacte al centro
de servicio al cliente Snow Joe®+ Sun Joe®llamando al
1-866-766-9563 (1-866-SNOWJOE).
Operación
Ajuste de altura de corte
1. La altura de corte de la podadora manual de 20 plg
(50.8 cm) puede ser ajustada en nueve posiciones,
de 1.2 plg a 2.4 plg (de 30 mm a 61 mm), moviendo las
palancas de ajuste a la altura deseada. Las palancas de
ajuste de altura están ubicadas cerca de las ruedas
más pequeñas.
2. Para congurar la podadora a su altura de corte más baja,
jale las palancas de ajuste en ambos lados, una a la vez,
y colóquelas en la posición A (Fig. 6).
Fig. 3
Poste
Barra
inferior
R
Fig. 4
Eje de acero
Sujetador
Gancho
Faja de sujeción
Fig. 5

19
3. Para ajustar la podadora a su posición de corte más
alta, jale las palancas de ajuste en ambos lados hacia la
posición B (Fig. 6).
NOTA: las dos palancas de ajuste DEBEN estar en la
misma posición (altura).
Posición
de corte
más alta
Posición
de corte
más baja Palanca de
ajuste
Fig. 6 Posición A
Posición B
4. Se pueden obtener otras alturas de corte moviendo las
palancas de ajuste a las posiciones entre la más alta y
más baja.
Asegurar un corte limpio
m¡ADVERTENCIA! Las cuchillas de acero son
extremadamente aladas. Para evitar lesiones, no toque las
cuchillas mientras realiza los ajustes.
NOTA: aunque las cuchillas fueron pre-ajustadas de fábrica,
se recomienda vericar el ajuste antes del primer uso.
NOTA: las vibraciones durante el transporte pueden causar
desajustes que usualmente hacen que las cuchillas se ajusten
o aojen demasiado. Esto resultará en un corte áspero y
disparejo, o dicultad al empujar la podadora (Fig. 7).
1. Para vericar un alineamiento correcto de la cuchilla,
coloque la podadora en una supercie plana.
Retire las barras y el colector de césped. Gire el carrete
de la podadora al revés para exponer la barra de corte.
2. Usando uno de los veinte (20) pedazos de papel
proporcionados, inserte uno de los pedazos de papel
entre la barra de corte y las cuchillas del eje, y luego
lentamente gire la rueda con la mano (Fig. 8).
3. Todas las cuchillas deberán cortar el papel de forma
pareja, a lo largo de toda la barra de corte mientras el eje
gira suavemente.
4. Si la podadora corta el papel de forma intermitente,
se debe hacer un ajuste en el lado apropiado de las
cuchillas para lograr un corte óptimo.
Calidad
Fig. 7
Papel
Fig. 8

20
Ajuste de las cuchillas de la podadora
1. Cada extremo de la barra de corte puede ser ajustado
por separado.
2. La cuchilla de la barra de corte, que está localizada
debajo del eje, es capaz de girar sobre su eje. Las dos
tuercas de ajuste localizadas en la parte posterior de la
podadora mueven la barra de corte lejos de las cuchillas
cuando son giradas en sentido antihorario, y cerca de las
cuchillas cuando son giradas en sentido horario (Fig. 9).
Fig. 9
Llave
hexagonal
Pernos de
ajuste
m ¡ADVERTENCIA! No apriete demasiado los tornillos
de ajuste ya que esto puede dañar la barra de corte.
Ambos tornillos deberán estar apretados para el ajuste nal.
3. Para aojar las cuchillas, use la llave hexagonal
suministrada y gire ambos tornillos de ajuste por igual en
sentido antihorario.
4. Para apretar las cuchillas, apriete ambos tornillos por igual
girándolos en sentido horario.
NOTA:si tiene preguntas o necesita ayuda, contacte al centro
de servicio al cliente Snow Joe®+ Sun Joe®llamando al
1-866-766-9563 (1-866-SNOWJOE).
5. Una vez que las cuchillas de la podadora han sido
ajustadas apropiadamente y su alineamiento ha sido
vericado, puede ahora proceder a usar su podadora
manual. Alinee la echa indicadora de ruta de corte con la
ruta de corte anterior (Fig. 10).
NOTA: el verdadero ancho de corte de la podadora
manual se indica debajo. No considere las ruedas de la
podadora como punto de referencia para la línea de corte
del césped.
Consejos para la poda
Siga la “regla de un tercio”
La “regla de un tercio” es clave para una experiencia
agradable de podado y un césped sano.
1. Usted debe podar su césped regularmente, al menos una
vez a la semana durante la temporada de crecimiento.
2. Guíese observando el césped y cuidando de no retirar
más de un tercio de la altura total del césped en cualquier
sesión de podado, y nunca más de una pulgada por vez
(Fig. 11).
Fig. 10
20 pulgadas
(50.8 cm)
1/3
1 plg
(2.5 cm)
Fig. 11
Other manuals for MJ502M
1
Table of contents
Languages:
Other sunjoe Lawn Mower manuals

sunjoe
sunjoe 24V-X2-21LMSP User manual

sunjoe
sunjoe MJ420C User manual

sunjoe
sunjoe MJ403E User manual

sunjoe
sunjoe MJ401C-XR User manual

sunjoe
sunjoe iON100V-21LM-CT User manual

sunjoe
sunjoe MJ500M User manual

sunjoe
sunjoe AJ800E User manual

sunjoe
sunjoe MJ400E-RM User manual

sunjoe
sunjoe MJ401E User manual

sunjoe
sunjoe MJ502M User manual

sunjoe
sunjoe MJ403E User manual

sunjoe
sunjoe MJ401E-PRO User manual

sunjoe
sunjoe MJ401ERM User manual

sunjoe
sunjoe MJ401E User manual

sunjoe
sunjoe MJ408E User manual

sunjoe
sunjoe MJ503M User manual

sunjoe
sunjoe MJ402E User manual

sunjoe
sunjoe MJ500M User manual

sunjoe
sunjoe AJ798E-RM User manual

sunjoe
sunjoe MJ24C-14 User manual