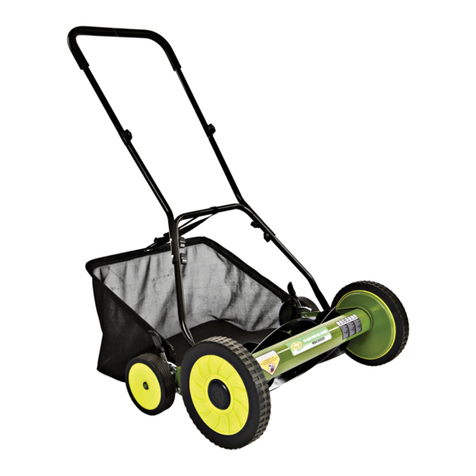
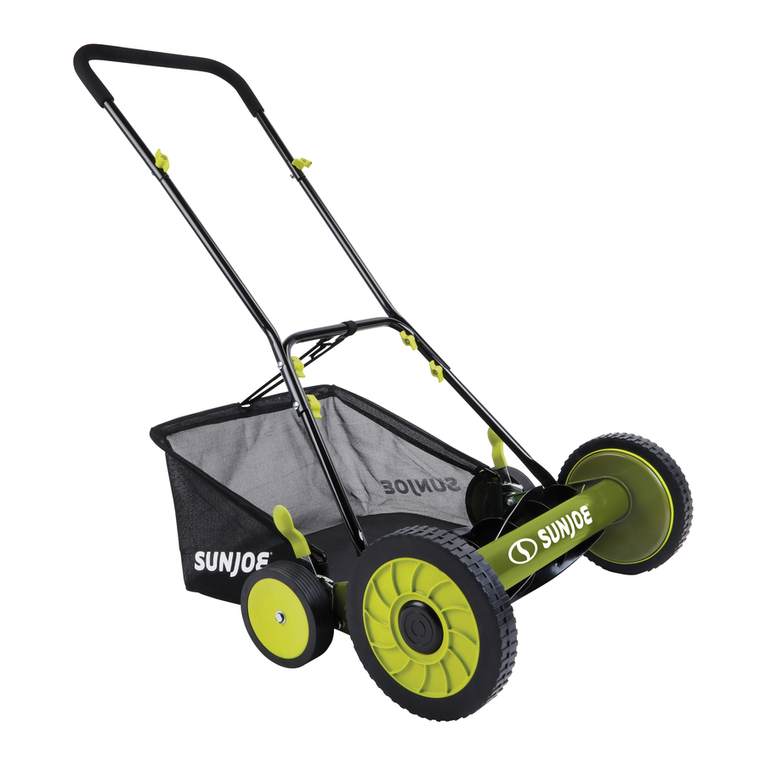
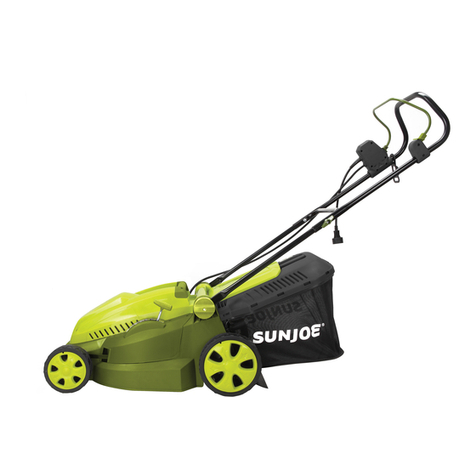
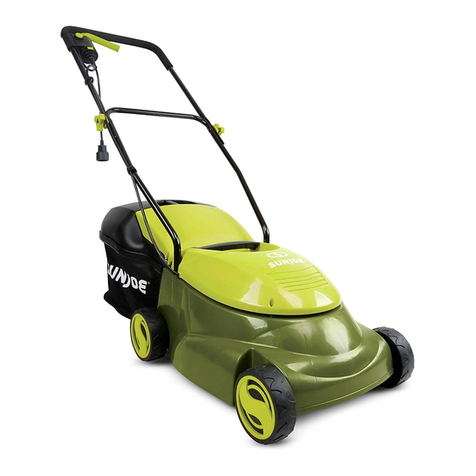
sunjoe MJ506E User manual

1
EN
© 2021 by Snow Joe®, LLC
All rights reserved. Original instructions. SAVE THESE INSTRUCTIONS
A Division of Snow Joe®, LLC Model MJ506E Form No. SJ-MJ506E-880E-MR3
R
OPERATOR’S MANUAL
ELECTRIC REEL MOWER
16-INCH | 6.5-AMP
IMPORTANT!
Safety Instructions
All Operators Must Read These
Instructions Before Use
Always follow these safety guidelines. Failure to do so may
result in serious bodily injury or death.
General Safety WARNINGS!
When using this electric reel mower, basic safety precautions
should always be followed to reduce the risk of re, electric
shock, and personal injury. These precautions include:
mWARNING! Do not operate without the entire grass
collection bag or other safety protective devices in place and
in proper working order.
mWARNING! The use of any other accessory or
attachment might increase the risk of injury.
mWARNING! To reduce the risk of injury, inspect the
grass collection bag frequently and replace with recommended
replacement if there are signs of wear or deterioration.
Before using the lawn mower, take the time to familiarize
yourself with the controls, especially how to stop the lawn
mower in an emergency. The only individuals who should use
the lawn mower are those who have a thorough understanding
of the instructions and who know how to operate the machine.
Children should never be allowed access to the lawn mower.
Retain this manual for future reference and reread it at the start
of each mowing season.
FOR DOUBLE-INSULATED
LAWN MOWERS
1. Replacement parts – When servicing this unit, use only
identical replacement parts. Replace or repair damaged
cords immediately.
2. Polarized plug – Polarized appliance connections reduce
the risk of electric shock. This lawn mower has a polarized
plug (one blade is wider than the other) and will require the
use of a polarized extension cord. There is only one way
the lawn mower’s plug will t into a polarized extension
cord. If the plug does not t fully into the extension cord,
reverse the plug. If the plug still does not t, obtain a
correct polarized extension cord. A polarized extension
cord will require the use of a polarized wall outlet. There
is only one way the plug will t into a polarized wall outlet.
If the plug does not t fully into the wall outlet, reverse
the plug. If the plug still does not t, contact a qualied
electrician to install the proper wall outlet. Do not change
the equipment plug, extension cord receptacle, or
extension cord plug in any way.
mWARNING! Contact with moving parts may cause
entanglement, dismemberment, or other serious bodily
injury. Always keep body parts (i.e. hands, feet) a safe
distance away from moving parts. Ensure all covers and
guards are securely in place before use.
Hot surfaces (i.e. the motor) may ignite ammable or
combustible items and cause a re or explosion, which can
result in serious bodily injury. Keep the lawn mower a safe
distance away from ammable or combustible items until
surfaces that are hot have completely cooled. Do not store
the lawn mower near ammable or combustible items.
Damaged blades or worn blade nut may break o the
lawn mower assembly and cause serious injury. Replace
the damaged blades or blade nut before using the lawn
mower.
FOR ALL LAWN MOWERS
1. Avoid dangerous conditions – Do not use the lawn
mower in the rain or when the grass is damp or wet.
2. Keep children, bystanders, and pets away – Always keep
children and spectators a safe distance away from the lawn
mower during operation and as the machine cools.
3. Dress properly – Always wear personal safety gear (i.e.
glasses, rubber gloves, protective footwear, and dust
masks) and proper clothing when using the lawn mower.
Loose clothing, long hair, or jewelry may get caught in the
moving parts. Wear a protective covering to contain long
hair.
4. Use the right appliance – Do not use the lawn mower for
any applications other than those for which it was intended.
5. Do not force the lawn mower – It will perform better with
less likelihood of personal or mechanical injury if it is used
at the rate for which it was designed.
6. Do not overreach – Keep proper footing and balance at
all times.
7. Stay alert – Always stay alert and watch what you are
doing. Use common sense. Do not operate the lawn

2
mower when you are tired or under the inuence of
alcohol or drugs. This lawn mower is not designed to be
used by people (including children) with limited physical,
sensory or mental capacities. It should also not be used
by those lacking the proper experience and/or knowledge
unless they are supervised by a person who is responsible
for their safety or they have received instructions from
such a person on how to safely use the equipment.
8. Disconnect the lawn mower – Disconnect the lawn
mower from the power supply when it is not in use,
before servicing, when changing accessories, and when
performing any other maintenance task.
9. Store idle lawn mower indoors – When not in use, the
lawn mower should be stored indoors in a dry, locked
place out of the reach of children.
10. Maintain the lawn mower with care – Keep cutting
edges sharp and clean for best and safest performance.
Inspect the lawn mower cord periodically and if damage
is found have it repaired by an authorized service facility.
Extension cords should also be inspected periodically
and immediately replaced if damaged. Keep handles dry,
clean, and free from oil and grease.
Electrical Safety
1. Ground fault circuit interrupter (GFCI) protection should
be provided on the circuit(s) or outlet(s) to be used for
the lawn mower. Receptacles are available having built-in
GFCI protection and may be used for this measure of
safety.
2. To reduce the risk of electric shock, this appliance has
a polarized plug (i.e. one blade is wider than the other).
Use this appliance only with a polarized, UL-listed (CSA
certied in Canada) extension cord recommended for
outdoor use. The appliance plug will t into a polarized
extension cord only one way.
If the appliance plug does not t fully into the extension
cord, reverse the plug. If the plug still does not t, obtain
a correct polarized extension cord. A polarized extension
cord will require the use of a polarized wall outlet. The
extension cord plug will t into the polarized wall outlet
only one way. If the plug does not t fully into the wall
outlet, reverse the plug. If the plug still does not t,
contact a qualied electrician to install the proper wall
outlet. Do not modify the appliance plug, extension cord
receptacle, or extension cord plug in any way.
3. To prevent electric shock, use only with an extension cord
suitable for outdoor use, such as SW, SOW, STW, STOW,
SJTW, or SJTOW.
Before use, check that the extension cord is in good
condition. When using an extension cord, make sure to
use one heavy enough to carry the current your product
will draw. An undersized cord will cause a drop in line
voltage resulting in loss of power and overheating.
4. To prevent the appliance cord from disconnecting from the
extension cord during operation, make a knot with the two
cords as shown in Table 1.
5. Do not abuse the cord. Never pull the lawn mower by the
cord or yank the cord to disconnect it from the receptacle.
Keep the cord away from heat, oil, and sharp edges.
Extension Cord
Length
Wire Gauge (A.W.G.):
Up to 50 ft
(15 m)
+50 ft - 100 ft
(+15 m - 30 m)
16 14
mWARNING m
Electric shock may cause SEVERE INJURY or
DEATH. Heed these warnings:
• Do not allow any part of the lawn mower to make
contact with water while it is in operation. If the
appliance becomes wet while turned o, wipe dry
before starting.
• Use only a UL-, CSA-, or ETL-rated extension cord for
outdoor, all-weather use.
• Do not use an extension cord over 100 ft (30 m).
• Do not touch the appliance or its plug with wet hands
or while standing in water. Wearing rubber boots
oers some protection.
EXTENSION CORD CHART
Cord set
(B) Connect plug and receptacle
Appliance
cord
(A) Tie cord as shown
Table 1. Method of Securing Extension Cord

3
Double-Insulated Appliances
In a double-insulated appliance, two systems of insulation
are provided instead of grounding. No grounding means are
provided on a double-insulated appliance, nor should a means
for grounding be added to the appliance. Servicing a double-
insulated appliance requires extreme care and knowledge
of the system, and should be performed only by qualied
service personnel at an authorized Snow Joe®+ Sun Joe®
dealer. Replacement parts for a double-insulated appliance
must be identical to the parts they replace. A double-insulated
appliance is marked with the words “Double Insulation” or
“Double Insulated.” The symbol (square within a square)
may also be marked on the appliance.
DOUBLE-INSULATED: GROUNDING NOT
REQUIRED. WHEN SERVICING, USE ONLY
IDENTICAL REPLACEMENT PARTS.
This electric reel mower is double-insulated, eliminating the
need for a separate grounding system. Use only identical
replacement parts. Read the instructions before servicing
double-insulated appliances. Use this lawn mower only as
described in this manual.
IMPORTANT!
Safety Instructions for
Walk-Behind Mowers
General Operation
• Read, understand, and follow all instructions on the
machine and in the manual(s) before starting.
• Do not put hands or feet near or under the machine.
Always stay clear of the discharge opening.
• Keep guards in place and in proper working order.
• Only responsible adults who are familiar with the
instructions should be allowed to operate this machine.
• Clear the mowing area of foreign objects such as rocks,
wire, toys, and other miscellaneous articles, which could
be picked up and thrown by the blade. Stay behind the
handle when the engine (motor) is running.
• Make sure that the mowing area is clear of bystanders
before starting the machine. Stop the machine if anyone
enters the area.
• Do not operate the machine while barefoot or while
wearing sandals. Always wear substantial footwear.
• Always look down and behind before and while moving
backward with the lawn mower.
• Never direct discharged material toward anyone. Avoid
discharging material against a wall or other obstruction.
• Never leave a running machine unattended.
• Stop the engine (motor) and wait until the blade comes to
a complete stop before cleaning the machine, removing
the grass collection bag, changing accessories, or
unclogging the discharge guard.
• Operate the machine only in daylight or in good
articial light.
• Do not operate the machine when you are tired or under
the inuence of alcohol or drugs.
• Never operate the lawn mower in wet grass. Always be
sure of your footing; walk, never run, with the lawn mower.
• If the machine should start to vibrate abnormally, stop
the engine (motor) and immediately check the machine
to ascertain the cause. Vibration is generally a signal of
trouble.
• Keep blades sharp.
• Keep hands and feet away from the cutting area.
• Always wear eye protection when operating the machine.
• Objects struck by the lawn mower blade can cause severe
injuries. The mowing area should always be carefully
examined and cleared of all objects prior to each mowing.
• If the lawn mower strikes a foreign object, follow these
steps:
i) Stop the lawn mower by releasing the ON/OFF
switch levers.
ii) Unplug the power cord.
iii) Inspect for damage.
iv) Repair any damage before restarting and operating
the lawn mower.
• Only use identical replacement blades.
Slope Operation
Slopes are major factors related to slip and fall accidents,
which can result in severe injury. Operation on all slopes
requires extra caution. If you feel uneasy on a slope, do not
mow it.
• Mow across the face of slopes; never mow slopes
following an up and down traverse. Exercise extreme
caution when changing direction on a slope.
• Watch for holes, ruts, bumps, rocks, or other hidden
objects. These may cause an unexpected slip or fall.
• Do not mow on wet grass or excessively steep slopes.
Poor footing could cause a slip and fall accident.
• Do not mow near drop os, ditches, or embankments.
You could lose your footing or balance.
4
Children
Tragic accidents can occur if the operator is not alert to the
presence of children. Children are often attracted to the
machine and the mowing activity. Never assume that children
will remain where you last saw them.
• Keep children out of the mowing area and under the
watchful care of a responsible adult other than
the operator.
• Stay alert and turn the lawn mower o if a child enters
the area.
• Never let children operate the machine.
• Use extra care when approaching blind corners, shrubs,
trees, or other objects that may block your view of a child.
Service
• Keep all nuts and bolts tight.
• Never tamper with safety devices. Regularly check to
ensure these devices are in place and in proper
working order.
• Keep the lawn mower free from grass, leaves, or other
debris buildup.
• Never make any adjustments or repairs with the engine
(motor) running. Always unplug electric reel mowers
before adjusting, cleaning, or repairing.
• Check the grass bag components and the discharge
guard frequently and replace with manufacturer’s
recommended parts when necessary.
• Mower blades are sharp. Wrap the blade or wear gloves,
and use extra caution when servicing them.
• Maintain or replace safety and instruction labels,
as necessary.

5
Safety Symbols
The following table depicts and describes safety symbols that may appear on this product. Read, understand, and follow all
instructions on the machine before attempting to assemble and operate.
Slip on slope hazard – Use extra
caution when mowing on slopes to
prevent slip and fall accidents.
To reduce the risk of injury, user
must read instruction manual.
Safety alert. Caution.
Double Insulation.
Severing of toes or ngers by
rotary mower blades.
Thrown objects and rotating
blades can cause severe injury.
Wear eye and hearing protection.
For protection against injury, wear
ear defenders and safety goggles.
Keep bystanders and children a safe
distance away.
CPSC danger label.
Symbols SymbolsDescriptions Descriptions
Blades continue to rotate after
machine is switched o.
Disconnect the mains plug if the
cord is damaged or entangled.
Keep extension cord away from
cutting blades.
WARNING! Turn the machine OFF
and disconnect it from the power
supply before inspecting, cleaning,
changing accessories, or conducting
any other maintenance task.
Do not expose the unit to the rain.
Look behind when backing up with
the lawn mower.
DANGER! Rotating blades
pose a serious risk of injury.
Keep hands and feet away from
openings while the machine is
running.

6
Know Your Electric Reel Mower
Read the owner’s manual and safety instructions carefully before operating the lawn mower. Compare the illustration below
to the lawn mower in order to become familiar with the location of the various controls and adjustments. Save this manual for
future reference.
1. Soft grip
2. Upper handle frame
3. Extension cord restraint hook
4. Cable clips (3)
5. Upper handle latches (2)
6. Upper handle knobs (2)
7. Upper handle washers (2)
8. Lower handle bars (2)
9. Grass collection bag
10. Ejector ap
11. Lower handle latches (2)
12. Lower handle base (2)
13. Rear wheels (2)
14. Height adjustment lever
15. Front wheels (2)
16. Housing handle
17. Grass collection bag handle
18. Appliance cord
19. On/O switch levers (2)
20. Switch box
21. Safety lock button
Technical Data
Rated Voltage........................................................120V ~ 60 Hz
Motor...................................................................................6.5A
No Load Speed ..........................................................3,300 rpm
Rotor.................................................24 sharpened steel blades
Cutting Width Max .............................................16 in. (40.6 cm)
Cutting Height ................ 1.0 in. | 1.4 in. | 1.8 in. | 2.2 in. | 2.6 in.
(25 mm | 35 mm | 45 mm | 55 mm | 65 mm)
Grass Bag Capacity .............................................14.6 gal (55 L)
Net Weight.......................................................31.7 lbs (14.4 kg)
R
R
2
1
6
5
9
8
10
11
13
16
19
20
21
3
4
14
15
18
17
12
7

7
Unpacking
Carton Contents
• Electric reel mower
• Upper handle frame
• Lower handle bars (2)
• Grass collection bag
• Upper handle latches with long bolts (2)
• Upper handle knobs (2)
• Upper handle washers (2)
• Lower handle latches with short bolts (2)
• Lower handle bases (2)
• Extension cord restraint hook
• Cable clips (3)
• Manual and registration card
1. Carefully remove the lawn mower and check to see that all
of the above items are supplied.
2. Inspect the product carefully to make sure no breakage
or damage occurred during shipping. If you nd damaged
or missing parts, DO NOT return the unit to the store.
Please call the Snow Joe®+ Sun Joe®customer service
department at 1-866-SNOWJOE (1-866-766-9563).
NOTE: Do not discard the shipping carton and packaging
material until you are ready to use your new electric reel
mower. The packaging is made of recyclable materials.
Properly dispose of these materials in accordance with
local regulations.
IMPORTANT! The equipment and packaging material are not
toys. Do not let children play with plastic bags, foils, or small
parts. These items can be swallowed and pose a suocation
risk!
Assembly
mWARNING! Do not connect to the power supply
until assembly is complete. Failure to comply could result in
accidental starting and serious personal injury.
mWARNING! Never operate the mower without the
proper devices in place. Never operate the mower with
damaged safety devices. Failure to heed these warnings can
result in serious injury.
Handle Assembly
1. Fit the lower handle bar on the same side with the height
adjustment lever of the unit. Secure with one set of the
lower handle base and latch with short bolt (Fig. 1).
2. Twist the latch clockwise until nearly tight (Fig. 2).
3. Align latch with the notch in the latch base. Flip up and
press rmly to lock (Fig. 3).
Fig. 1
Lower handle
latch + base
Lower handle
Fig. 2 Lower handle
latch
Fig. 3
Flip up to lock

8
NOTE: If the latch is too dicult to ip up, loosen it 1 - 2
full rotations before trying again.
4. Repeat the above instructions to assemble the lower
handle bar on the other side.
5. Slide the extension cord restraint hook onto the upper
handle frame (Fig. 4).
6. Fit the upper handle frame on the ends of the lower handle
bars, and secure with the upper handle latches with long
bolts, washers, and knobs, as shown. Tighten securely,
then ip latch up to lock (Fig. 5).
NOTE: If the latch is too dicult to ip up, loosen it 1 - 2
full rotations before trying again.
7. Clip on the cable clips, and insert the cable into the cable
clips (Fig. 6)
Grass Collection Bag Assembly + Fitting
The grass collecting bag prevents grass clippings being thrown
across your lawn as you mow.
1. Lift the ejector ap with one hand. With the other hand,
hold the grass collection bag by the handle and hook it
in from above. Make sure the bag rods are hooked in the
slots on both sides (Fig. 7).
Operation
This lawn mower is intended for private residential use to cut
grass in small lawns and gardens. This lawn mower is not
intended to cut grass in public parks, playing elds, farms, or
forests. Do not use this lawn mower for any application other
than that for which it is intended.
Adjusting the Cutting Height
This electric reel mower is equipped with a 5-position height
adjustment system to tailor grass cutting heights from 1.0 inch
to 2.6 inch. To change the cutting height of the grass, follow
the instructions below.
mWARNING! Before making these adjustments,
disconnect the power supply to the lawn mower and wait until
the rotating blades have come to a complete standstill.
Fig. 4
Upper handle
frame
Extension cord
restraint hook
Fig. 5 Upper handle
frame
Lower handles
Upper handle
washer + latch Upper handle
knob
Fig. 6
Cable clips
Cable
Fig. 7
Grass
collection
bag Grass collection
bag handle
Grass collection
bag rod
Slot

9
ALWAYS FOLLOW ALL SAFETY PRECAUTIONS AND
RECOMMENDATIONS LISTED PREVIOUSLY IN THIS
MANUAL.
1. Power o and unplug the lawn mower.
2. Pull the height adjustment lever out of the original slot
(Fig. 8).
3. Insert the lever into the desired slot.
5-Position Height Adjustment:
(1) 1.0 in. (25 mm)
(2) 1.4 in. (35 mm)
(3) 1.8 in. (45 mm)
(4) 2.2 in. (55 mm)
(5) 2.6 in. (65 mm)
4. Reconnect the power supply to the lawn mower and
resume normal use.
Starting + Stopping
Do not switch on the lawn mower until it has been completely
assembled. Before switching on the unit, always check the
appliance cord and the extension cord for signs of damage.
Use only intact cords.
mWARNING! Damaged cords pose a severe risk of injury.
Replace damaged cords immediately.
mWARNING! Before switching on the lawn mower, make
sure that it is not in contact with any foreign objects. Keep
your hands and feet a safe distance away from the rotating
mower blades and the ejector opening. Failure to comply with
these warnings can result in severe personal injury.
IMPORTANT: Do not start the lawn mower in tall grass.
1. Place the unit on a level lawn surface.
2. Push a loop of the extension cord through the slot on the
extension cord restraint hook from the opposite side and
around the cord restraint hook. Insert the appliance cord
into the extension cord (Fig. 9).
NOTE: Do not plug the extension cord into the outlet until it
had been secured with the extension cord restraint holder and
connected to the lawn mower's appliance cord. Only use a
UL-rated extension cord for outdoor, all-weather use. Do not
use an extension cord over 100 ft (30 m). See Extension Cord
Chart on page 2.
3. Place the bulk of the extension cord on the lawn closest to
the starting point.
4. Before starting the lawn mower, hold the handle assembly
with both hands and tilt the handle downward to slightly
raise the front of the lawn mower. This will reduce the risk
of lawn damage during start-up (Fig. 10).
5. To start the lawn mower, use one hand to press and hold
the safety lock button while the other hand squeeze one
of the switch levers. Once the machine powers on, release
the safety lock button and squeze the two siwtch levers
with both of hands (Fig. 11).
R
R
Fig. 8
Height
adjustment
lever
Height
adjustment slot
Fig. 9
Extension cord
restraint hook
Slot
Extension
cord
Appliance
cord
Fig. 10

10
6. Let the motor get up to speed, gently lowering the lawn
mower down into the cutting position and start mowing
(Fig. 12).
7. To stop the lawn mower, release the switch levers
(Fig. 11).
Mowing Tips
mWARNING! Inspect the area prior to mowing and
remove all the stones, sticks, wires, and other debris that
might be thrown by the rotating blades.
NOTE: Sharp blades will greatly enhance the performance of
the lawn mower, especially when cutting tall grass.
• Be sure to check the blades periodically for signs of wear
and replace them at least once per year, as described in
the maintenance section.
• In order to prevent electric shock, do not operate the lawn
mower in damp or wet conditions.
• Do not mow in a circle. Travel back and forth across the
lawn following the path outlined below (Fig. 13).
• When cutting thick grass, reduce your walking speed
in order to allow for a more eective cut and a proper
discharge of the clippings. For a healthy lawn, always cut
o one-third or less from the total length of the grass. The
average lawn should be approximately 1.5 to 2 in. (3.8 cm
to 5 cm) long during cool months, and more than 2 in.
(5 cm) long during hot months. If there is growth, the lawn
should be cut in the fall.
• While mowing, make sure that the electric cable is always
behind you and resting on the area of grass already cut.
• The lawn will look better if it is always cut to the same
height and in alternate directions.
• When crossing any graveled area, release the switch
levers to turn o the lawn mower. The stones can be
picked up and thrown by the rotating blade.
• Set the lawn mower to the highest cutting height when
mowing on uneven ground or in tall weeds.
mWARNING! If you strike a foreign object, stop the motor
and disconnect the power cord. Thoroughly inspect the lawn
mower for any damage. Repair any damage before operating
the lawn mower.
Maintenance
mWARNING! Before cleaning, repairing, or inspecting
the lawn mower, disconnect the power supply to the unit and
verify that all moving parts have come to a complete stop.
General
• Always keep the lawn mower clean and free of grass, dirt,
or other debris.
• Keep the handles dry, clean, and free of oil and grease.
• After each cutting session, remove accumulated grass
clippings and debris using either a dry cloth or hand
brush. You may also clean the equipment with a damp
cloth. Do not use cleaning agents or harsh solvents as
they may damage the equipment's plastic components.
Make sure that no water penetrates the equipment's
interior as intake of water can destroy the switch/plug
mechanism and the electric motor.
Fig. 11
Switch bar levers
Safety lock button
Fig. 12
Fig. 13

11
• Do not clean the lawn mower with running water,
particularly with high-pressure water.
• Check all nuts, bolts, and screws for proper tightness
before each use.
• Frequently inspect the grass collection bag for signs of
wear and replace immediately with a genuine Snow Joe®+
Sun Joe®part if damage is found.
• Replace excessively worn or damaged parts immediately.
Lubrication
All of the bearings in this product are lubricated with a
sucient amount of high grade lubricants for the life of the
unit under normal operation conditions. Therefore, no further
lubrication of the bearings is needed.
At the beginning and end of each mowing season, lubricate the
springs on the rear discharger door with light oil.
Blade Maintenance
IMPORTANT: The mower blades are sharp and can cause
severe personal injury if handled incorrectly. Wear protective
gloves, and use extra caution when handling.
The steel blades are designed to provide a ne cut in long or
tough grass. Deterioration in the quality of cut indicates blade
wear or damage.
mWARNING! Vibrating lawn mower indicates the blade
rotor is not properly balanced or has become deformed from
striking an object. In this case, please call the Snow Joe®+
Sun Joe®customer service center for assistance at
1-866-SNOWJOE (1-866-766-9563).
Blade Replacement
mWARNING! Wear heavy duty gloves when handling the
blades.
IMPORTANT: Only use original replacement parts specied for
this lawn mower.
You can purchase a set of replacement blades (Model
MJ506E-24BLDS) and other genuine replacement parts by
ordering online at snowjoe.com or, to order by phone, contact
Snow Joe®+ Sun Joe®customer service at 1-866-SNOWJOE
(1-866-766-9563). The use of parts that do not meet the
original equipment specications may lead to improper
performance of the lawn mower, may compromise operator
safety, and will void the manufacturer's warranty.
1. Disconnect the electrical supply to the lawn mower.
2. Turn the lawn mower on its side to expose the underside
of the blades.
3. Wear heavy-duty gloves.
4. To remove the old blades, work on one piece at a time.
Press down the releasing pin of the old blade. At the same
time pull the blade piece out of its slot (Fig. 14). Repeat for
other pieces of old blade.
5. To t the new blade, push the releasing pin, and at the
same time, insert a new blade (1 piece) in the slot until the
new blade piece clicks in securely (Fig. 15). Repeat for all
other new blades.
NOTE: Make sure the releasing pin pops out and the new
blade piece is locked properly before moving to other/
additional blades.
Fig. 14
Old blade
Releasing pin
Fig. 15
New blade

12
Storage
Follow the steps below to prepare the lawn mower for storage:
1. Disconnect the power supply to the lawn mower.
2. Clean the lawn mower with a damp cloth or hand brush.
3. Inspect the lawn mower carefully for worn, loose, or
damaged parts. Check connections and screws and
tighten if necessary. Pay special attention to the mower
blades and replace/sharpen if they show signs of wear.
Refer to the Maintenance section.
4. Store the lawn mower indoors in a dry, clean, and cool
area out of the reach of children. Do not store the unit next
to corrosive materials, such as fertilizer and rock salt.
5. Wipe the extension cord to remove any foreign
substances, such as oil or stains. Replace the extension
cord immediately if it is cut or damaged in any way.
6. Wind the cord in a series of equal loops to prevent it
from tangling.
7. Do not cover the lawn mower with a solid plastic sheet.
Plastic coverings trap moisture around the lawn mower,
which can damage the unit.
Service + Support
If your Sun Joe®MJ506E electric reel mower requires service
or maintenance, please call the Snow Joe®+ Sun Joe®
customer service center at 1-866-SNOWJOE (1-866-766-9563)
for assistance.

Model + Serial Numbers
When contacting the company or reordering parts, you will
need to provide the model and serial numbers of your product.
These are found on the decal axed to the housing or handle
of your lawn mower. Copy these numbers into the space
provided below.
Record the following numbers from the housing or handle of your
new product:
Model #:
Serial #:
M J 5 0 6 E

13
Troubleshooting
Motor does not run
Motor power drops
Motor performance drops
Grass collection bag
not lling suciently
• Check mains, extension cord, and circuit-breaker (fuse).
• Clean discharge channel/housing.
• Start lawn mower on short grass or in a previously mowed area and tilt back.
• Correct the cutting height.
• Check that you are using a suitable extension cord of proper gauge and
length (see Extension Cord Chart pg. 2).
• Power source (e.g. generator) has too low voltage.
• Correct the cutting height.
• Clean discharge channel/housing.
• Replace or resharpen mowing blades (contact an authorized Snow Joe®
+ Sun Joe®service center).
• Correct the cutting height.
• Allow the lawn to dry.
• Clean the discharge channel/housing.
Problem Remedy
Only a company specialist may be able to correct faults that cannot be rectied with the aid of this table. Please call the
Snow Joe®+ Sun Joe®customer service center at 1-866-SNOWJOE (1-866-766-9563).

14
Optional Accessories
mWARNING! ALWAYS use only authorized Snow Joe®+ Sun Joe®replacement parts and accessories. NEVER use
replacement parts or accessories that are not intended for use with this tool. Contact Snow Joe®+ Sun Joe®if you are unsure
whether it is safe to use a particular replacement part or accessory with your tool. The use of any other attachment or accessory
can be dangerous and could cause injury or mechanical damage.
NOTE: Accessories are subject to change without any obligation on the part of Snow Joe®+ Sun Joe®to provide notice of such
changes. Accessories can be ordered online at sunjoe.com or via phone by contacting the Snow Joe®+ Sun Joe®customer
service center at 1-866-SNOWJOE (1-866-766-9563).
ModelAccessories Item
1
2
24-pk replacement blades
14.6 gal (55 L) grass collection bag
MJ506E-24BLDS
MJ506E-BAG
R

R4_01282020
SNOW JOE®+ SUN JOE®CUSTOMER PROMISE
OUR WARRANTY:
Snow Joe warrants new, genuine, powered and non-powered Products to be free from defects in material or workmanship when used
for ordinary household use for a period of two years from the date of purchase by the original, end-user purchaser when purchased
from Snow Joe or from one of Snow Joe’s authorized sellers with proof of purchase. Because Snow Joe is unable to control the quality
of its Products sold by unauthorized sellers, unless otherwise prohibited by law, this Warranty does not cover Products purchased from
unauthorized sellers. If your Product does not work or there’s an issue with a specic part that is covered by the terms of this Warranty,
Snow Joe will elect to either (1) send you a free replacement part, (2) replace the Product with a new or comparable product at no
charge, or (3) repair the Product. How cool is that!
This Warranty gives you specific legal rights, and you may also have other rights which vary from State to State.
PRODUCT REGISTRATION:
Snow Joe strongly encourages you to register your Product. You can register online at snowjoe.com/register, or by printing and
mailing in a registration card available online from our website, or calling our Customer Service Department at 1-866-SNOWJOE
(1-866-766-9563), or by e-mailing us at [email protected]. Failure to register your Product will not diminish your warranty
rights. However, registering your Product will allow Snow Joe to better serve you with any of your customer service needs.
WHO CAN SEEK LIMITED WARRANTY COVERAGE:
This Warranty is extended by Snow Joe to the original purchaser and original owner of the Product.
WHAT IS NOT COVERED?
This Warranty does not apply if the Product has been used commercially or for non-household or rental applications. This Warranty also
does not apply if the Product was purchased from an unauthorized seller. This Warranty also does not cover cosmetic changes that do
not aect performance. Wearing parts like belts, augers, chains and tines are not covered under this Warranty, and can be purchased
at snowjoe.com or by calling 1-866-SNOWJOE (1-866-766-9563).
ABOVE ALL ELSE, Snow Joe, LLC (“Snow Joe”) is dedicated to you, our customer. We strive to make your experience as pleasant as
possible. Unfortunately, there are times when a Snow Joe®, Sun Joe®, or Aqua Joe®product (“Product”) does not work or breaks under
normal operating conditions. We think it’s important that you know what you can expect from us. That’s why we have a Limited Warranty
(“Warranty”) for our Products.
15
EN

16

17


SP
© 2021 Snow Joe®, LLC
Derechos reservados. Instrucciones originales. GUARDE ESTAS INSTRUCCIONES
19
Una división de Snow Joe®, LLC Modelo MJ506E Forma Nº SJ-MJ506E-880S-MR3
R
MANUAL DEL OPERADOR
CORTACÉSPED ELÉCTRICO
DE CARRETE
40.6 CM | 6.5 A
¡IMPORTANTE!
Instrucciones de seguridad
Todos los operadores deberán leer
estas instrucciones antes del uso
Siga siempre estas normas de seguridad. No hacerlo podría
resultar en lesiones corporales severas o incluso la muerte.
¡ADVERTENCIAS generales de
seguridad!
Usted debe tomar precauciones básicas de seguridad siempre
que use esta cortacésped eléctrico de carrete con el propósito
de reducir riesgos de incendio, choque eléctrico y lesiones
personales. Estas precauciones incluyen:
m¡ADVERTENCIA! No la opere sin toda la bolsa
recolectora de césped u otro dispositivo protector en su lugar
y funcionando apropiadamente.
m¡ADVERTENCIA! El uso de cualquier otro accesorio o
acoplamiento podría aumentar el riesgo de lesiones.
m¡ADVERTENCIA! Para reducir el riesgo de lesiones,
inspeccione frecuentemente la bolsa recolectora de césped y
reemplácela con las partes recomendadas si es que presenta
signos de desgaste o deterioro.
Antes de usar la podadora de césped, tómese el tiempo para
familiarizarse con los controles, sobre todo con la forma de
detener la podadora de césped en caso de emergencia. Las
únicas personas que deben usar la podadora de césped
son aquellas que tengan un entendimiento completo de las
instrucciones y sepan cómo operar la máquina. Los niños
nunca deben tener acceso a la podadora de césped.
Conserve este manual para futuras referencias, y vuélvalo a
leer al inicio de cada temporada de podado.
PARA PODADORAS DE CÉSPED CON
DOBLE AISLAMIENTO
1. Partes de repuesto: al repararla, utilice solamente partes
de repuesto idénticas. Reemplace o repare los cables
dañados inmediatamente.
2. Enchufe polarizado: las conexiones polarizadas de
artefactos reducen el riesgo de un choque eléctrico. Esta
podadora de césped tiene un enchufe polarizado (una
pata es más ancha que la otra) y requerirá el uso de un
cable de extensión polarizado. Solo hay una forma de
que el enchufe de la podadora de césped encaje en el
receptáculo de un cable de extensión polarizado. Si el
enchufe no entra por completo dentro del receptáculo del
cable de extensión, invierta las clavijas del enchufe. Si el
enchufe aún no encaja dentro del receptáculo del cable
de extensión, obtenga un cable de extensión polarizado
adecuado. Un cable de extensión polarizado requerirá el
uso de un tomacorriente polarizado de pared. Solo hay una
forma en la que el enchufe encajará en un tomacorriente
polarizado de pared. Si el enchufe no entra por completo
dentro del tomacorriente de la pared, invierta las
clavijas del enchufe. Si el enchufe aún no encaja en el
tomacorriente, contacte a un electricista calicado para
la instalación de un tomacorriente de pared apropiado.
No modique en ninguna forma el enchufe del equipo, el
conector hembra (receptáculo) del cable de extensión, ni
el enchufe del cable de extensión.
m¡ADVERTENCIA! El contacto con las partes
móviles puede causar enredos, pérdida de miembros, u
otras lesiones corporales severas. Mantenga siempre las
partes del cuerpo (p. ej., manos y pies) a una distancia
segura de las partes móviles de la máquina. Asegúrese de
que todos los protectores y cubiertas estén colocados de
forma correcta y segura antes del uso.
Las supercies calientes (por ejemplo la del motor) pueden
encender objetos inamables o combustibles y causar
un incendio o explosión que cause lesiones corporales
severas. Mantenga la podadora de césped a una distancia
segura lejos de objetos inamables o combustibles hasta
que las supercies que estén calientes se hayan enfriado
por completo. No almacene la podadora de césped cerca
de objetos inamables o combustibles.
Las cuchillas dañadas, o la tuerca de cuchilla gastada,
pueden desprenderse del ensamblado de la podadora de
césped y causar lesiones personales severas. Reemplace
las cuchillas dañadas o tuerca gastada antes de usar la
podadora de césped.
PARA TODAS LAS PODADORAS DE
CÉSPED
1. Evite entornos peligrosos: no use la podadora de
césped bajo la lluvia, ni cuando el césped esté húmedo o
mojado.

20
2. Mantenga alejados a los niños, espectadores y
mascotas: mantenga siempre a los niños, espectadores
y mascotas a una distancia segura de la podadora de
césped mientras esté funcionando y mientras se enfríe.
3. Vístase apropiadamente: Al usar esta cortacésped
eléctrico de carrete, utilice siempre equipos de protección
personal (por ejemplo gafas, guantes de hule, calzado
protector y máscara antipolvo) y una vestimenta
adecuada. Las vestimentas holgadas, el pelo largo o la
joyería pueden engancharse en las partes móviles. Utilice
una cubierta protectora para contener cabellos largos.
4. Use el artefacto correcto: no use la podadora de césped
para cualquier otra aplicación que no sea una de aquellas
para las cuales fue diseñada.
5. No fuerce la podadora de césped: tendrá un mejor
funcionamiento con menos probabilidades de lesiones
personales o fallas mecánicas si es usada a la velocidad
para la cual fue diseñada.
6. No se extralimite: mantenga con sus pies un balance y
posición adecuados durante todo el tiempo.
7. Manténgase alerta: manténgase siempre alerta y vea lo
que está haciendo. Utilice su sentido común. No opere
la podadora de césped si usted está cansado o bajo la
inuencia del alcohol u otras drogas. Esta podadora no
está diseñada para ser usada por personas (incluyendo
niños) con capacidades físicas, sensoriales o mentales
limitadas. Tampoco debe ser usada por aquellos que
no tengan la experiencia y/o conocimientos apropiados
para usarla, a menos que estén supervisados por una
persona responsable por su seguridad, o hayan recibido
instrucciones de dicha persona sobre cómo usar la
podadora.
8. Desconecte la podadora de césped: desconecte
la podadora de césped de la fuente de alimentación
cuando no esté siendo usada, antes de repararla, al
cambiar accesorios y al realizar cualquier otra tarea de
mantenimiento.
9. Guarde la podadora de césped inactiva bajo techo:
cuando no esté siendo usada, la podadora de césped
debe guardarse bajo techo y en un lugar seco, bajo llave y
fuera del alcance de los niños.
10. Cuide su podadora de césped: mantenga las
cuchillas aladas y limpias para un mejor y más seguro
funcionamiento.
Inspeccione el cable de alimentación de la podadora
de césped periódicamente, y si está dañado hágalo
reparar en un centro de servicio autorizado. Los cables
de extensión también tienen que ser inspeccionados de
forma periódica y reemplazados inmediatamente si están
dañados. Mantenga las manos secas, limpias y sin aceite
o grasa.
Seguridad eléctrica
1. Un interruptor de circuito de falla de conexión a
tierra (GFCI) deberá proteger al(a los) circuito(s) o
tomacorriente(s) a ser utilizado(s) para la podadora de
césped. Hay receptáculos disponibles con protección
incorporada GFCI y pueden ser utilizados para esta
medida de seguridad.
2. Para reducir el riesgo de un choque eléctrico, este
artefacto posee un enchufe polarizado (es decir, una pata
es más ancha que la otra). Use este artefacto solo con un
cable de extensión de enchufe polarizado, aprobado por
UL (certicado por CSA en Canadá) y recomendado para
uso en exteriores. El enchufe del artefacto encajará en el
receptáculo del cable de extensión polarizado de una sola
manera.
Si el enchufe del artefacto no entra por completo dentro
del receptáculo del cable de extensión, invierta las
clavijas del enchufe. Si el enchufe aún no encaja dentro
del receptáculo del cable de extensión, obtenga un cable
de extensión polarizado correcto. Un cable de extensión
polarizado requerirá el uso de un tomacorriente polarizado
de pared. El enchufe del cable de extensión encajará
en el tomacorriente polarizado de la pared de una sola
manera. Si el enchufe no entra por completo dentro
del tomacorriente de la pared, invierta las clavijas del
enchufe. Si el enchufe aún no encaja en el tomacorriente,
contacte a un electricista calicado para la instalación
de un tomacorriente de pared apropiado. No modique
el enchufe del artefacto, ni el receptáculo del cable de
extensión, ni el enchufe del cable de extensión en ninguna
forma.
3. Para evitar un choque eléctrico, opere esta cortacésped
eléctrico de carrete solo con un cable de extensión
adecuado para uso en exteriores, tal como SW, SOW,
STW, STOW, SJTW o SJTOW.
Antes del uso, verique que el cable de extensión esté
en buenas condiciones. Asegúrese de usar un cable de
extensión lo sucientemente fuerte para poder transportar
toda la electricidad que su equipo consumirá. Un cable de
extensión demasiado no causará una caída de tensión
de alimentación produciendo pérdida de potencia y
recalentamiento.
Table of contents
Languages:
Other sunjoe Lawn Mower manuals

sunjoe
sunjoe MJ420C User manual

sunjoe
sunjoe MJ401E-PRO User manual

sunjoe
sunjoe 24V-X2-17LM User manual

sunjoe
sunjoe MJ402E User manual

sunjoe
sunjoe MJ403E User manual

sunjoe
sunjoe MJ502M User manual

sunjoe
sunjoe MJ401E User manual

sunjoe
sunjoe MJ401E User manual

sunjoe
sunjoe MJ408E User manual

sunjoe
sunjoe AJ798E-RM User manual

sunjoe
sunjoe MJ401C User manual

sunjoe
sunjoe iON16LM-CT User manual

sunjoe
sunjoe MJ500M User manual

sunjoe
sunjoe MJ500M User manual

sunjoe
sunjoe iON16LM User manual

sunjoe
sunjoe MJ407E User manual

sunjoe
sunjoe AJ800E User manual

sunjoe
sunjoe 24V-X2-16LM User manual

sunjoe
sunjoe MJ401ERM User manual

sunjoe
sunjoe MJ504M User manual