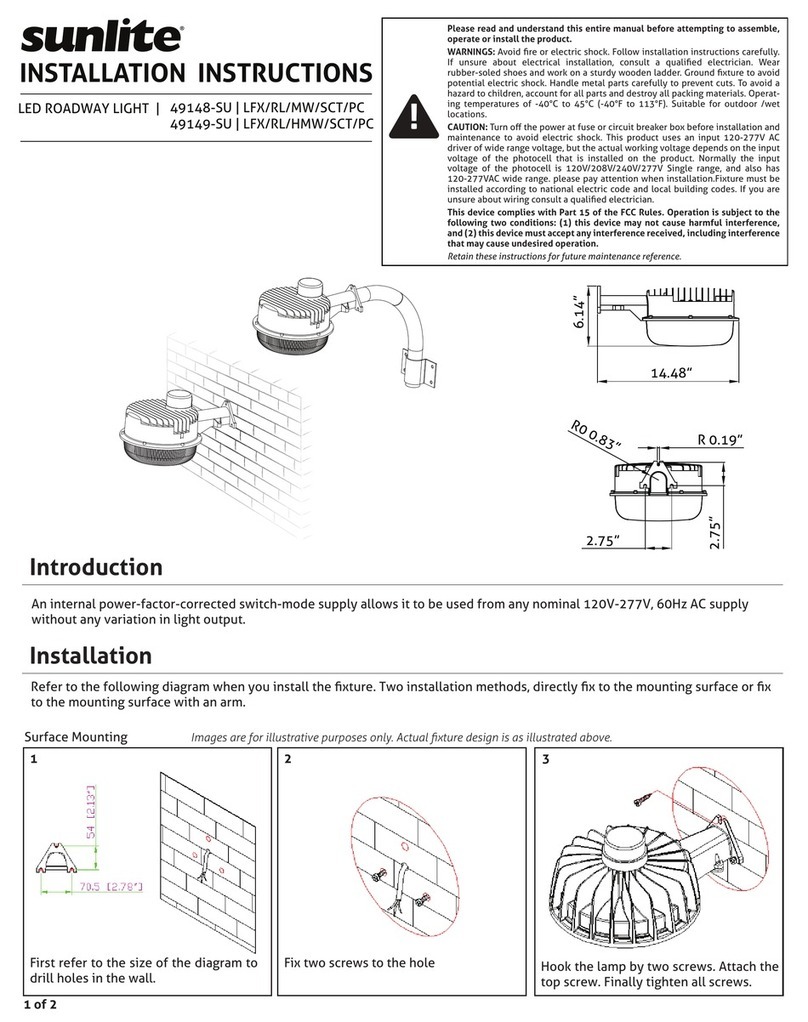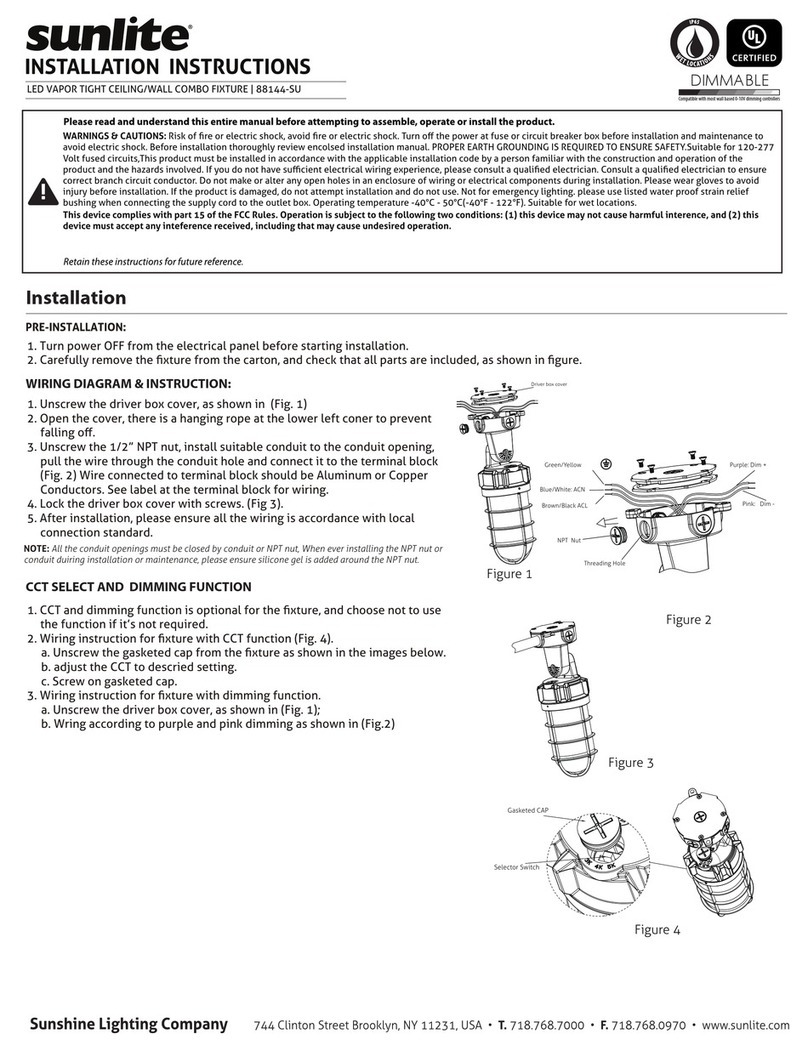
Foundation
Bollard Installation
LED BOLLARD FIXTURE | 87994 -SU LFX-LBF-S-MW-SCT
Anchor Bolt Carrier
Nut
Spring Washer
Flat Washer Anchor Bolt
Bollard Fixture
Please read and understand this entire manual before attempting to assemble, operate or
install the product.
WARNING: Avoid fire or electric shock. This product must be installed in accordance with the
applicable installation code by a person familiar with the construction and operation of the
product and the hazards involved. Before installing the fixture, ensure that all parts are present
and same as the part list. If any part is missing or damaged, do not attempt to assemble, install,
or operate this fixture. Ensure that the foundation is stable and can support the luminaire’s
weight. Use proper means to secure the luminaire to the ground.
CAUTION: Turn offthe power at fuse or circuit breaker boxbefore installation and maintenance
to avoid electric shock. This fixture requires a 120-277Volt AC power source. Wear gloves
while handling or servicing this equipment. Wipe offdust with adry, soft cloth. Remove greasy
spots etc. with a soft cloth dampened in lukewarm water (<122°F / 50° C) with a mild
detergent. never use detergents containing abrasives and solvents. Operating temperature
-40°C to 50°C (-40°F to 122°F). Suitable for Wet locations.
This device complies with part 15 of the FCC Rules. Operation is subject to the following two
conditions: (1) this device may not cause harmful inference, and (2) this device must accept
any inference received, including that may cause undesired operation.
Retain these instructions for future maintenance reference.
DIMMABLE
0-10V Dimming
1-1/2~2”
Hex Wrench
NOTE: Fixture head does not need to be removed from bollard pole during installation.
1. To allow for base plate leveling, before positioning base plate on anchor bolts, thread
one leveling nut followed by a washer onto each anchor bolt. see Fig. 3-4.
2. Place base plate over anchor bolts and leveling nuts.
3. Position wire-tie bracket on one of the anchor bolts.
4. Loosely tighten (4) sets of locking washers and nuts onto ends of anchor bolts, making
sure washer and nut of one of the anchor bolts retains Wire-Tie Bracket.
5. Level the base plate by adjusting the leveling nuts under the base plate. Once leveled,
tighten the upper nuts on top of the base plate.
6. Place conduit supply wires through the wire-tie in the Wire-Tie Bracket.
7. Make wiring connections per the Electrican Connections section.
8. Tighten wire-tie on Wire-Tie Bracket to ensure wiring connections are supported above
ground level. See Fig. 5-6
NOTE: Anchor bolts, template, and wire-tie bracket are attached to base plate
for shipping.
1. Foundation should be a minimum of 12 inches (305mm) in diameter, finished
level and smooth, with a depth below grade of 24 (610mm) inches. NOTE: in
areas where frost occurs, consult with a civil engineer for a recommended
foundation detail.
2. Provided are four 3/8’’ diameter x 12’’ (254mm) long anchor bolts and mount-
ing template (included). Remove base plate from end of bollard by loosening
(DO NOT remove) the 4 set screws at the base of the bollard with a 1/8’’ Allen
wrench. Template and anchor bolts can be removed from base to allow for
installation of anchor bolts.
3. Use template to set anchor bolts at proper location (Note conduit entry allow-
ance). Anchor bolts should project 1-1/2~2’’ above concrete.
Fig 3 Fig 4
Fig 1
Fig 2
Fig 5 Fig 6 Ground


