Superior RFX D-19037 User manual

2023_09_13
RFX™
User Manual and Parts List
P/n: D-19037
DOC#:024091

RFX
DOC#:024091
General
Safety symbols:
WARNING! If used incorrectly the tool can cause injury.
Please read the Operator’s Manual thoroughly making sure you understand how to use
the tool before use.
Always wear personal protective equipment such as gloves, eye protection, hearing
protection, and a hard hat. Jobsites might require certain protective equipment be used
due to national and local regulations and insurance policies. Make sure you check with
the jobsite foreman for requirements before work begins.
Dear Customer,
Thank you for choosing a Superior Innovation product. It is our intent to deliver the best
products possible. Delivering innovative, well-built, ergonomic, efficient products is our
goal to help you do the best job possible. Safety, and innovation are our cornerstone of
our designs.
This Operator’s Manual is a valuable document. Make sure it is always accessible when
using the tool. If you lend or sell this tool, make sure that this document is also
transferred, so the new user will know how to properly use and maintain it. Some of our
products have a QR decal where the user can scan with a smartphone camera to access
the manual. In addition, this document is available for download at
www.superiorinnovationsinc.com/manuals.
User Responsibility
It is the owner’s / employer’s responsibility to ensure that the operator is properly
trained and has sufficient knowledge about how to use this tool safely. Supervisors and
operators must read and understand the operators Manual. They must be aware of the
safety instructions, limitations, proper use and maintenance. Local and national
legislation may regulate the use of this tool. Find out what legislations are applicable in
your location before use.

RFX
DOC#:024091
Superior Innovations Reservation
All of the information and data in this Operator’s Manual was up to date at the time the
Operator’s Manual was sent to print. Superior Innovations research and development is
continually working on product development and improvements. Therefore, we reserve
the right to modify the design, appearance and features of the product without prior
notice. The most current version of manuals can be found at:
www.superiorinnovationsinc.com/manuals
Transportation and Storage
Secure the equipment during transportation to avoid transport damage and accidents.
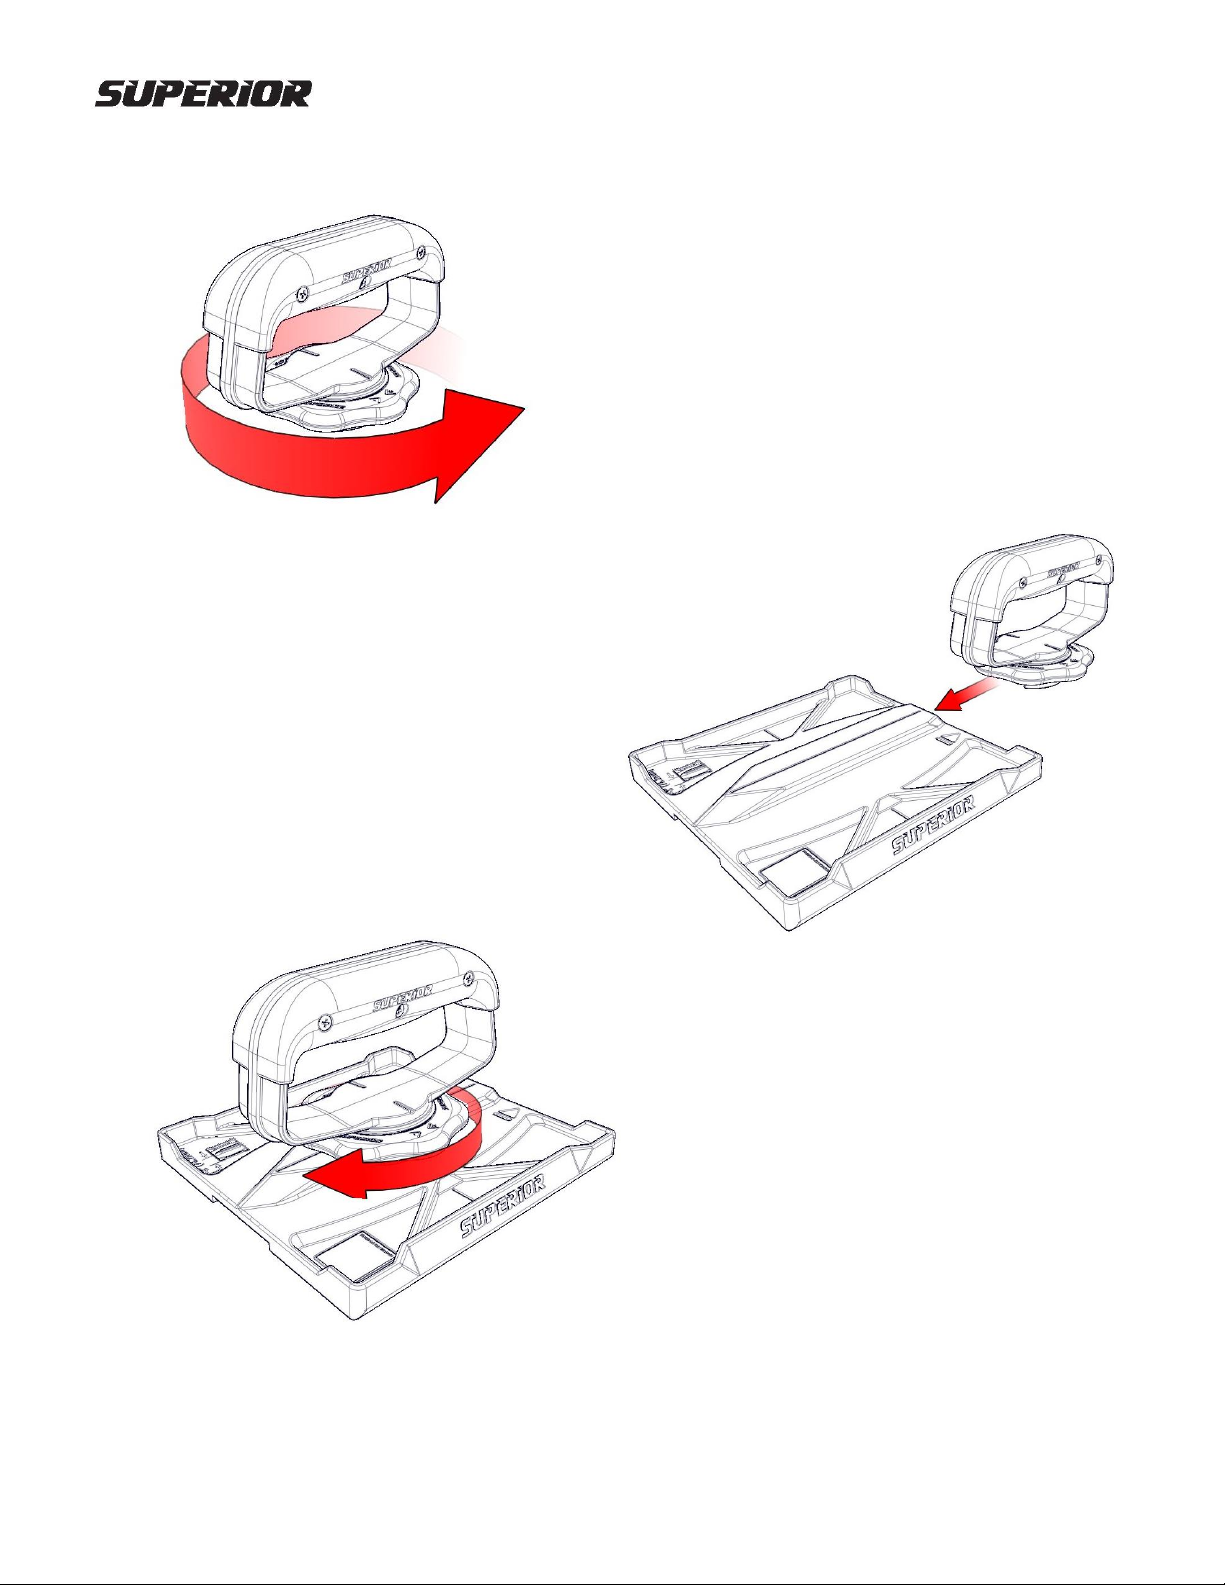
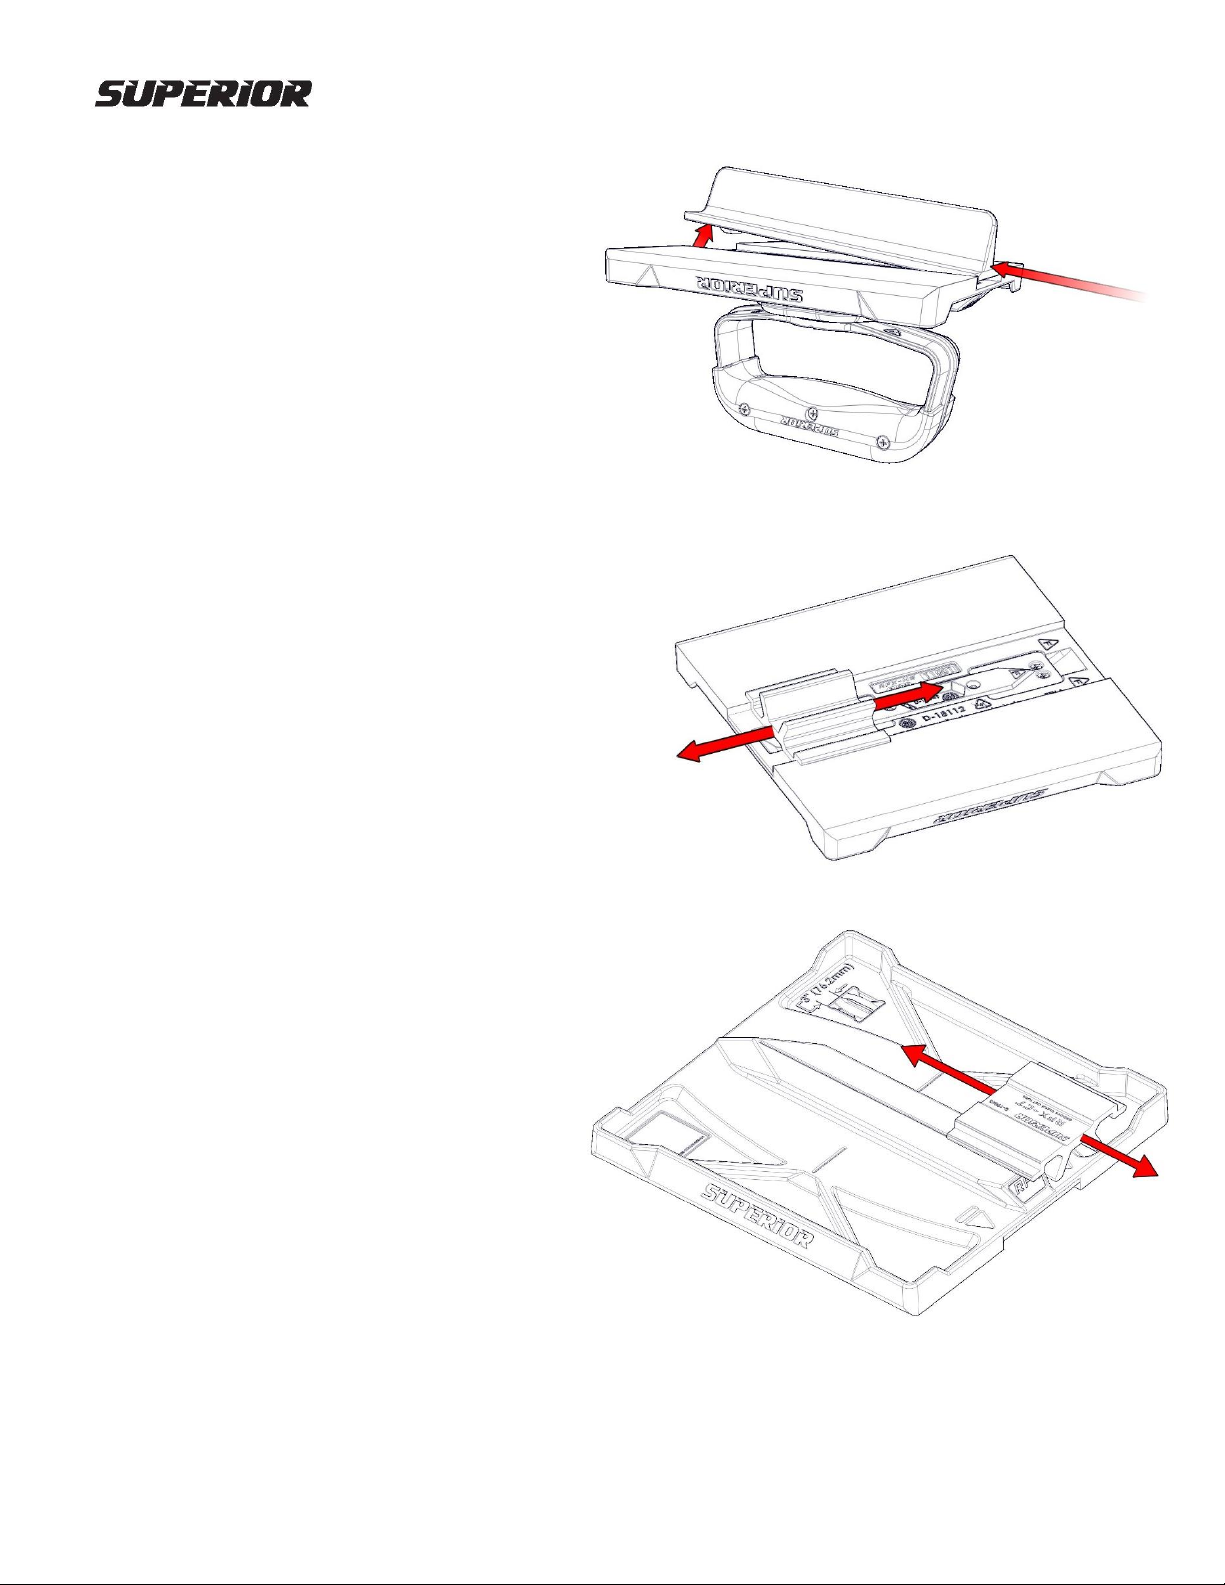
After work is completed, remove the RFX™ fin from the RFX™-HG and thoroughly wipe
down before the concrete has time to setup. DO NOT USE A PRESSURE WASHER!
Pressure washing can remove important safety decals, could remove the handles rubber
coating or force water and debris into sealed chambers.
Personal Protective Equipment (PPE)
You must use approved personal protective equipment (PPE) whenever working.
Personal protective equipment cannot eliminate injury, but it will reduce the degree of
injury if an accident does happen. Ask your dealer for help in choosing the right
protective equipment.
Common Sense
It is not possible to cover every conceivable situation in this document. Exercise care and
use common sense if you get into a situation where you feel unsafe. Stop and seek
expert advice by contacting Superior Innovations, Inc., a service dealer or an experienced
user. Do not attempt any task that you are unsure of.
Work Area Safety
Observe your surroundings to ensure nothing can affect your control of the tools.
Observe your surroundings to ensure there is no risk of people or animals that can come
into contact with the tools while in operation.
Do not use tools in bad weather, such as heavy rain, strong winds, intense cold, or heavy
fog. Working in such weather is trying and can lead to difficult situations.
Ensure that the work area is sufficiently illuminated to create a safe working
environment.
Make sure that there are no electrical cables routed in the working area.
Make sure that the work area is clear, clean and free of obstacles that can cause trips or
spills.

RFX
DOC#:024091
Before Starting
Inspect equipment to ensure that there are no loose fasteners, cracks, leaks, or other
obvious damage. If there are do not use until the problems are corrected.
Make sure that daily maintenance has been completed.
In the Box
The RFX™ is a component-based system where the user can use in many different
configurations. What comes in the box is the most common configuration.
Optional Components
RFX™-HG
RFX™-DH
RFX™FIN
RFX™-CH
RFX™-PM
RFX™-C5
RFX™-CT

RFX
DOC#:024091
RFX™ - Model Nomenclature:
AVAILABILITY OF BLADE SIZES SUBJECT TO CHANGE. ADDITIONAL BLADES AND PRODUCTS WILL BE
ADDED AS THEY BECOME AVALABLE.
PART#
DECAL
COLOR
MATERIAL
RADIUS
DEPTH
SPECIAL
MODEL
NOMENCLATURE
D-18980
GREEN
AA380 DIE CAST
X
X
#304
RFX - #304
D-18976
RED
AA380 DIE CAST
X
X
#314
RFX - #314
D-18983
BLUE
AA380 DIE CAST
3/4
3/4
X
RFX - 3434
D-18986
YELLOW
AA380 DIE CAST
1/2
3/4
X
RFX - 1234
D-19007
GREY
AA380 DIE CAST
1/4
1/4
X
RFX - 1414
D-19001
PURPLE
AA380 DIE CAST
1/2
1/2
X
RFX - 1212
In addition to the model nomenclature, we have also color coded the RFX™ fin decal.
LAST TWO = DEPTH i.e. 34 = 3/4”
(if 1” there will be only 3 digits)
FIRST TWO = RADIUS i.e. 12 = 1/2”
REMOVEABLE FIN PROJECT
HG –HAND GROOVER
PM –POLE MOUNT
DH –“D”-HANDLE
CH –CANTILEVER HANDLE
WG –WALKING GROOVER
CT –CLEANING TOOL
RFX –XX XX
RFX –XX

RFX
DOC#:024091
QAS™is a quick attach system designed to make it quick and easy to attach Superior tools and even other
manufacturers tools together. The ability to quickly Remove and attach modular components allows for
easier setup, cleanup and the ability to configure your tools the way you prefer to use them.
The new RFX™ hand groover system relies on the QAS™system to quickly change or position handles
without any tools. In addition, the new RFX™-PM has a built-in QAS™mount, so you can change your
hand groover to a pole extension groover.
QAS™-M Adapter
QAS™-F Adapter
QAS™-W Adapter
RFX™-DH
RFX™-CH
RFX™-PM

RFX
DOC#:024091
Attaching the RFX™ handle to the RFX™-HG
Loosen the QAS™knob by rotating it counter-clockwise.
The red colored pressure washer on the base of the
QAS™knob must be clear of the top surface of the
QAS™receptacle. Otherwise it will not slide over the
male QAS™on the RFX™-HG.
Align the QAS™dovetail and slide over the male
boss on the RFX™-HG.
Position the RFX™-DH along the RFX™-HG base
where ever desired and tighten the QAS™knob
by turning it clockwise until tight. DO NOT
OVERTIGHTEN.The pressure washer will
compress and add friction to help hold the
handle in place.

RFX
DOC#:024091
Attaching the RFX™ fin
There is a difference between the two
engagement tangs that hold the RFX™ fin in
place. The taller tang is the rear of the fin
and the shorter one is the front. The fin
will only mount flat in the correct
orientation.
The Front of the RFX™ fin is identified by Fand the rear by Ron the decal.
On the bottom of the RFX™-HG, you
will see the same markings to
identify the front and the rear.
Orient the RFX™ fin where the
mounting tangs are facing the
RFX™-HG and the F and R symbols
are aligned.

RFX
DOC#:024091
Slip the rear engagement tang into the rear
receptacle of the RFX™-HG as shown. The rear
engagement tang should pivot in the retaining pin
marked with part number D-18115.
Once the rear tang is engaged, let the RFX™ fin lay
flat in the channel and push the rear with your
thumb as shown. The front tang will drop into the
front engagement recess. Release the pressure
from your thumb and the RFX™ fin will slide back
and lock into place. NOTE: IF the RFX™ fin does
not lay flat in the RFX™-HG channel, then remove
the RFX™ fin and check for debris before re-
installing.

RFX
DOC#:024091
Removing the RFX™ fin
Push the rear of the fin with your thumb and the
front engagement will slide forward and up.
While applying pressure with your thumb; use
another finger to lift on the front of the RFX™ fin
to clear the front engagement. As you are
holding the front up, release pressure from the
rear of the RFX™ fin and lift out. Clean the RFX™-
HG receptacle after every use for best results.
Cleaning the RFX™-HG groove
The RFX™ comes with a cleaning tool that will clean the
receptacle groove as well as the QAS™male. The tool is
called RFX™-CT (D-19043). To use it, simply slide back
and forth in the RFX™-HG receptacle groove. It will
remove any debris that is adhered to the sides of the
channel and the base.
Cleaning the RFX™-HG / QAS™ male
Simply flip the RFX™-CT tool 180 degrees and
slide it back and forth along the angle of each
side of the QAS™ male as shown.

RFX
DOC#:024091
Attaching the RFX™-PM
Start by loosening the QAS™ knob by turning it counter
clockwise until the pressure washer is above the QAS™
receptacle.
Next align the QAS™ male and
female portions and slide the
RFX™-PM onto the RFX™-HG
Position the RFX™-PM where you like
along the RFX™-HG QAS™ male and
tighten the QAS™ knob by turning it
clockwise until tight. DO NOT
OVERTIGHTEN.

RFX
DOC#:024091
Attaching pole extension to the
RFX™-PM
Depress and hold the pins on the
pole extension. While continuing
to holding the pins, slide the pole
extension into the RFX-PM pole
mount. When the pin centers are
past the internal wall of the RFX-
PM pole mount, let them go and
slide the pole where the pins will
expand outward and lock into the
holes on the RFX-PM pole mount.
Pitching the RFX™-PM
Rotate the pole extension counter-
clockwise to loosen the pivot. Once
loose, pitch the pole in the desired
position. Once in the desired position,
rotate the pole extension clockwise to
lock in place.

RFX
DOC#:024091
Rotating the QAS base
The QAS base can be rotated in 45-degree angle increments on the RFX-DH, RFX-CH and the RFX-PM.
Shown below is the rotation on the RFX-DH, but is the same for the other two products.
Remove the M6 flat head cap screw from
the QAS base with a 4mm Allen key
turning it counter-clockwise.
Pull the 80mm knob and QAS base until it detaches
from the grooves on the mating component
Rotate the QAS base to the desired
position. The bosses will align with
the cavity in the mating components
in 45-degree angle increments.

RFX
DOC#:024091
Align the bosses with the cavity
and press firmly until it is seated
in the desired position.
Reinstall the M6 flat head cap screw
from into the QAS base with a 4mm
Allen key turning it clockwise. Tighten,
but do not overtighten.
Maintenance Statement
The owner is responsible for the performance of all required maintenance, as described in the Operator’s
Manual.
Remove RFX™ fin from the RFX™-HG receptacle and clean after use. If concrete sets-up around the QAS™
it may become difficult to use without cleaning. DO NOT USE A PRESSURE WASHER. The high-pressure
water will remove important safety decals, could remove the TPE rubber coating from the handle, or
force water into sealed cavities in the RFX™ receptacle system. You can use the supplied RFX™-CT
cleaning tool to clean the groove and the QAS™ male.
Maintenance Schedule
Daily Maintenance
Weekly Maintenance
Monthly Maintenance
Cleaning (external)
Cleaning (external)
Cleaning (external)
Inspection
Inspection
Inspection
loose fasteners,
cracks, leaks, or other
obvious damage
loose fasteners,
cracks, leaks, or other
obvious damage
loose fasteners,
cracks, leaks, or other
obvious damage

RFX
DOC#:024091
Parts list / BOM
BOM ID
PART NUMBER
DESCRIPTION
QTY.
1
D-18112
RFX-HG MAIN FRAME
1
2
D-19039
RFX-HG BADGE
1
3
D-17624
QR ON-LINE MANUAL DECAL
1
BOM ID
PART NUMBER
DESCRIPTION
QTY.
1
D-18112
RFX-HG MAIN FRAME
1
2
D-18149
RETAINER BLOCK
1
3
D-18540
SILICONE O-RING
1
4
D-18115
RETAINER PIN
1
5
D-18887
RFX-HG GASKET
1
6
D-19046
M2.5 X 0.45 X 8 OVAL HEAD MACHINE SCREW
6
7
D-16379
COMPRESSION SPRING
1
8
D-19045
C-RING - EXTERNAL
1

RFX
DOC#:024091
BOM ID
PART NUMBER
DESCRIPTION
QTY.
1
D-18870
RFX-DH MAIN CORE
1
2
D-18865
HANDLE GRIP
2
3
D-19046
M2.5 X 0.45 X 8 OVAL HEAD MACHINE SCREW
6
4
D-17713
RFX - QAS BASE
1
5
D-18867
RFX - QAS KNOB - 80MM
1
6
D-18868
QAS-KNOB PRESSURE WASHER
1
7
D-19047
M6 X 1 X 12 FLAT HEAD CAP SCREW
1

RFX
DOC#:024091
BOM ID
PART NUMBER
DESCRIPTION
QTY.
1
D-18877
RFX-CH MAIN CORE
1
2
D-18865
HANDLE GRIP
2
3
D-19046
M2.5 X 0.45 X 8 OVAL HEAD MACHINE SCREW
6
4
D-17713
RFX - QAS BASE
1
5
D-18867
RFX - QAS KNOB - 80MM
1
6
D-18868
QAS-KNOB PRESSURE WASHER
1
7
D-19047
M6 X 1 X 12 FLAT HEAD CAP SCREW
1

RFX
DOC#:024091
BOM ID
PART NUMBER
DESCRIPTION
QTY.
1
D-19008
RFX - PM TOP PLATE
1
2
D-19048
M6 X 1 X 12 SOCKET HEAD CAP SCREW
4
3
D-18863
M5 X 0.8 X 8 LOW HEAD CAP SCREW
4
4
D-18026
RFX - PM PIVOT HEAD
2
5
D-17713
RFX - QAS BASE
1
6
D-18867
RFX - QAS-KNOB - 80MM
1
7
D-18868
QAS-KNOB PRESSURE WASHER
1
8
D-19047
M6 X 1 X 12 FLAT HEAD CAP SCREW
1

RFX
DOC#:024091
BOM ID
PART NUMBER
DESCRIPTION
QTY.
1
D-18027
RFX - PM PIVOT HEAD
1
2
D-18019
PIVOT HANDLE
1
3
D-19049
M5 X 0.8 X 8 SOCKET HEAD SET SCREW
3
4
D-18024
HANDLE MOUNT
1
5
D-18029
DUST GUARD
1
6
D-18860
SWIVEL PIN
1
7
D-19050
M10 X 1.5 X 45 SOCKET HEAD CAP SCREW
1

RFX
DOC#:024091
Technical Data
Dimensions
L
W
H
RFX-HG
6.00
(152.5mm)
6.00
(152.5mm)
0.669
(17mm)
RFX-#304
6.00
(152.5mm)
1.77
(45mm)
1.21
(30.85mm)
RFX-#314
6.00
(152.5mm)
1.77
(45mm)
1.46
(37.20mm)
RFX-3434
6.00
(152.5mm)
1.77
(45mm)
1.21
(30.85mm)
RFX-1234
6.00
(152.5mm)
1.77
(45mm)
1.21
(30.85mm)
RFX-1434
6.00
(152.5mm)
1.77
(45mm)
1.21
(30.85mm)
RFX-341
6.00
(152.5mm)
1.77
(45mm)
1.46
(37.20mm)
RFX-121
6.00
(152.5mm)
1.77
(45mm)
1.46
(37.20mm)
RFX-3834
6.00
(152.5mm)
1.77
(45mm)
1.21
(30.85mm)
RFX-1212
6.00
(152.5mm)
1.77
(45mm)
0.96
(24.5mm)
RFX-DH
5.03
(128.0mm
3.31
(84.15mm
3.17
(80.5mm
RFX-CH
6.43
(163.5mm
6.00
(152.5mm
6.00
(152.5mm
RFX-C5
7.89
(200.5mm
5.14
(130.65mm
2.95
(75.00mm
RFX-CT
1.57
(40.0mm
2.16
(55.0mm
0.57
(14.5mm
RFX-PM
7.10
(180.3mm
3.31
(84.15mm
2.65
(67.3mm
Mass
RFX-HG
0.880#, (399.0g)
RFX-#304
0.230#, (104.3g)
RFX-#314
0.224#, (101.6g)
RFX-3434
0.248#, (112.5g)
RFX-1234
0.220#, (99.8g)
RFX-1434
0.193#, (87.5g)
RFX-341
0.280#, (127.0g)
RFX-121
0.240#, (108.8g)
RFX-3834
0.197#, (89.4g)
RFX-1212
0.176#, (79.8g)
RFX-DH
0.560#, (254.0g)
RFX-CH
0.510#, (231.3g)
RFX-C5
0.480#, (217.7g)
RFX-CT
0.060#, (27.2g)
RFX-PM
1.42#, (644.1g)
Mounting / Attachment
Quick Attach System (QAS™) integrated in RFX™-
HG, RFX™-DH, RFX™-CH, RFX™-PM
Materials
Fits on all superior RFX™ hand tools
AA380 (Recyclable - code 41), hard anodized
PA6-GFR30 Plastic
Stainless steel
AISI 1020 steel, MIL A, 8625 C, TYPE II, CLASS 2,
CLEAR
Table of contents
Popular Saw manuals by other brands

Cassese
Cassese CS969 user & parts manual

EINHELL
EINHELL TC-CS 1401 Original operating instructions

Makita
Makita BSS500 instruction manual

Baileigh Industrial
Baileigh Industrial TS-1040E-1.0 30 Operator's manual

Stark
Stark 61057 Owner's manual and safety instructions

EINHELL
EINHELL BM190/JDD 200 operating instructions