Take a measurement with a Flow Factor
To measure with the ow factor displayed next to F press BLACK
button for less than 2 seconds. To change the ow factor, hold
down BLACK button for minimum 2 seconds when F1.00 is shown.
The rst digit will start ashing. Change value by pressing GREY or
BLUE button. When correct value is chosen, conrm by short press
of BLACK button and the second digit will start ashing. Repeat the
same procedure with the second and third digit. After the third digit
is conrmed the instrument will start measuring in F-mode. The me-
asurement can be stored in the same way as in BP-mode. To return
to BP Mode, press GREY button 3 times (First press will show FX.XX,
second will show notE and the third will take you to BP mode).
HOLD function (BLACK button)
If BLACK button is pressed down shortly the display will freeze the
measured value. ”Hold” is shown in the upper left corner of the dis-
play. Press BLUE button to toggle between the frozen values of air
ow, temperature and barometric pressure.
Release the frozen values by pressing down BLACK button for less
than 2 seconds.
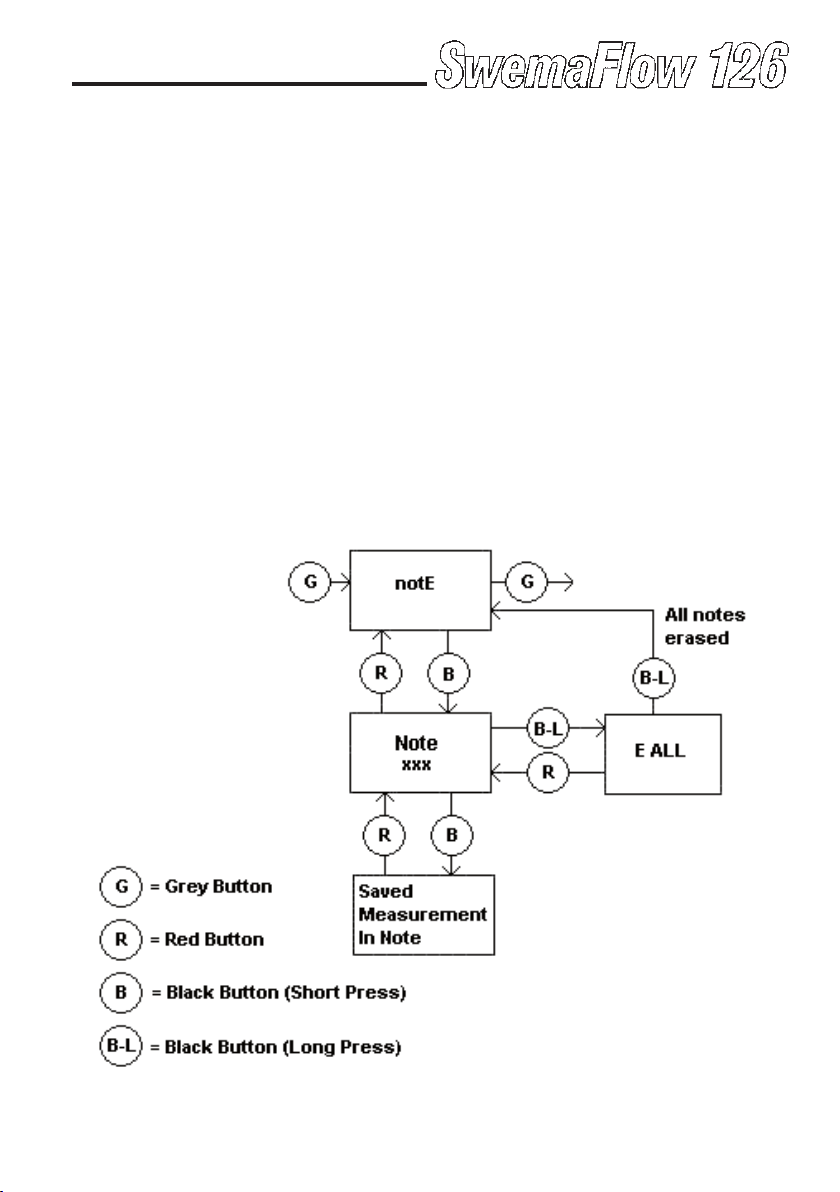
Save measurement (BLACK button long press)
If a measurement is frozen it can be saved by holding down BLACK
button for 2 seconds. The display will show which note number the
measurement is saved as in the note book and then return to mea-
suring mode.
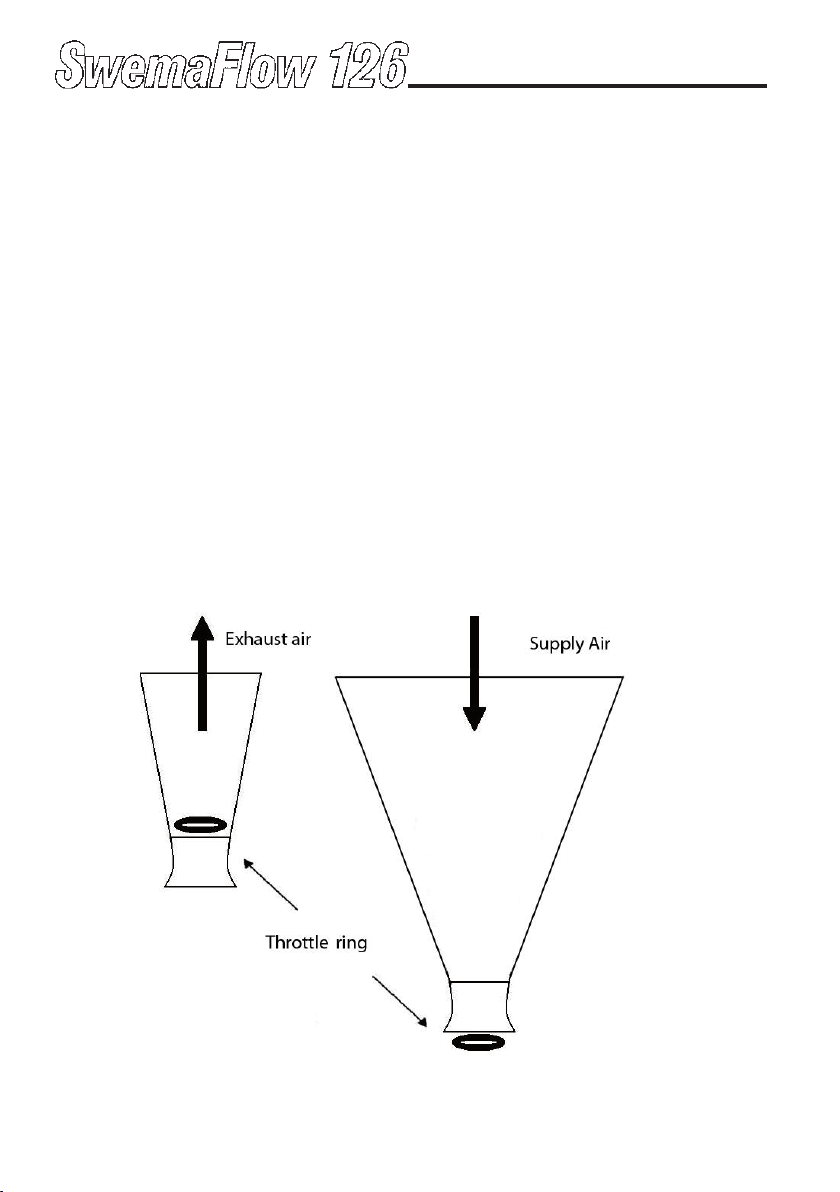
Flow Factor Measurement (F-mode)
In Flow Factor mode the ow is multiplied with a ow factor (ow
factor 1.00 will not alter the ow). A ow factor can be used to com-
pensate for example a leakage. Warning: Changing to anything else
than 1.00 will alter the reading from calibration certicate. The dis-
play will show the text ”Factor” when the instrument is in F-mode.
While in BP Mode change to F-mode by pressing the GREY button.
(BP-mode does not use a Flow factor) The instrument will change to
F-mode and display F1.00 or the value of ow factor that the instru-
ment used last time in F-mode after being turned on. For example
F1.10 will multiply measured ow with 1.10 and display the result.
5.