Swiss SVAC ROB2200 User manual

VACUUM CLEANER
INSTRUCTION MANUAL
MODELNO: SVAC ROB2200
Robuster
Bagless
FOR DOMESTIC USE ONLY!!!
PLEASE READ THIS MANUAL CAREFULLY BEFORE USING
AND KEEPIT FOR FUTURE USE
REFER TO LAST PAGE FOR GUARANTEE CONDITIONS!!!
www.swissappliances.co.za

VERY IMPORTANT
INFORMATION:
FOR GUARANTEE PURPOSES:
THE MOST IMPORTANT INFORMATION TO REMEMBER:
NEVER EVER USE THIS VACUUM CLEANER TO SUCK UP THE FOLLOWING
SUBSTANCES. It will damage your motor and your guarantee will fall away!
A. NO ASH (hot or cold)
B. NO CEMENT POWDER
C. NO TALCUM POWDER (eg. Baby powder)
IN ORDER FOR THE SUPPLIER TO ACCEPT THE PRODUCT FOR A GUARANTEE CLAIM:
All parts need to be returned to the supplier, together with the vacuum cleaner IN IT’S ORIGINAL
BOX –WITH THE FILTER IN PLACE. If there is no filter, the guarantee falls away.
FILTERS
Filters are to be kept clean at all times and changed regularly. If not, dust will enter the motor and your
machine will be damaged and your guarantee will fall away.
(see instructions below for washing the filter - remember to dry the filter properly before re-using, as water
will damage the motor)
THIS PRODUCT IS FOR DOMESTIC USE ONLY!!!!!
If experiencing lower suction power :
CHECK:
1. The canister is full : Empty out the dust regularly to ensure optimum suction power.
2. Turbo brush blockage : Check for any blockages and most important, PETS OR HUMAN
HAIR may be blocking or slowing the brush action. Remove any hair or small objects from
the brushes and or hose/tubes. The machine may only be used again once all obstacles or
blockages are removed.

PLEASE READ –VERY IMPORTANT :
Guarantee conditions:
(Please adhere to these strict
instructions to avoid your guarantee
being rejected) :
Swiss Appliances warrants to the original purchaser of this product, i.e. “the
customer”, that this product will be free of defects in quality and workmanship which
under normal personal, domestic household use and purpose, may manifest within a
period of 1 year from date of purchase.
Where the customer has purchased a product and it breaks, is defective or does not
work for the intended purpose, the customer must notify the supplier from whom the
customer bought the product within the warranty period.
Any claims in terms of this warranty must be supported by a proof of purchase. If
proof of purchase is not available, then repair, and/or service charges will be payable
by the customer to the supplier. The faulty product must be returned to the supplier
in order to exercise the warranty.
The supplier will replace or refund only in the event that the unit cannot be repaired.
(Cracked or broken body or components cannot be regarded as factory defects and a
quotation will be issued to repair or replace same.
NB - All parts, along with the unit and proof of purchase, needs to be returned to the
place of purchase in its original packaging.
All the filters need to be in place at the time of returning the unit. Ensure filters are
kept clean and replaced regularly to ensure smooth running and optimum vacuum
power. Running the unit without filters in place will result in damage to the motor of
the vacuum cleaner, which if found to be the case, will fall outside of the limited
warranty.
FOR DOMESTIC USE ONLY!!!

Safety directions:
1. When using the vacuum cleaner for the first time, it is advisable to read the manual
carefully and keep it in safe place for future use and reference.
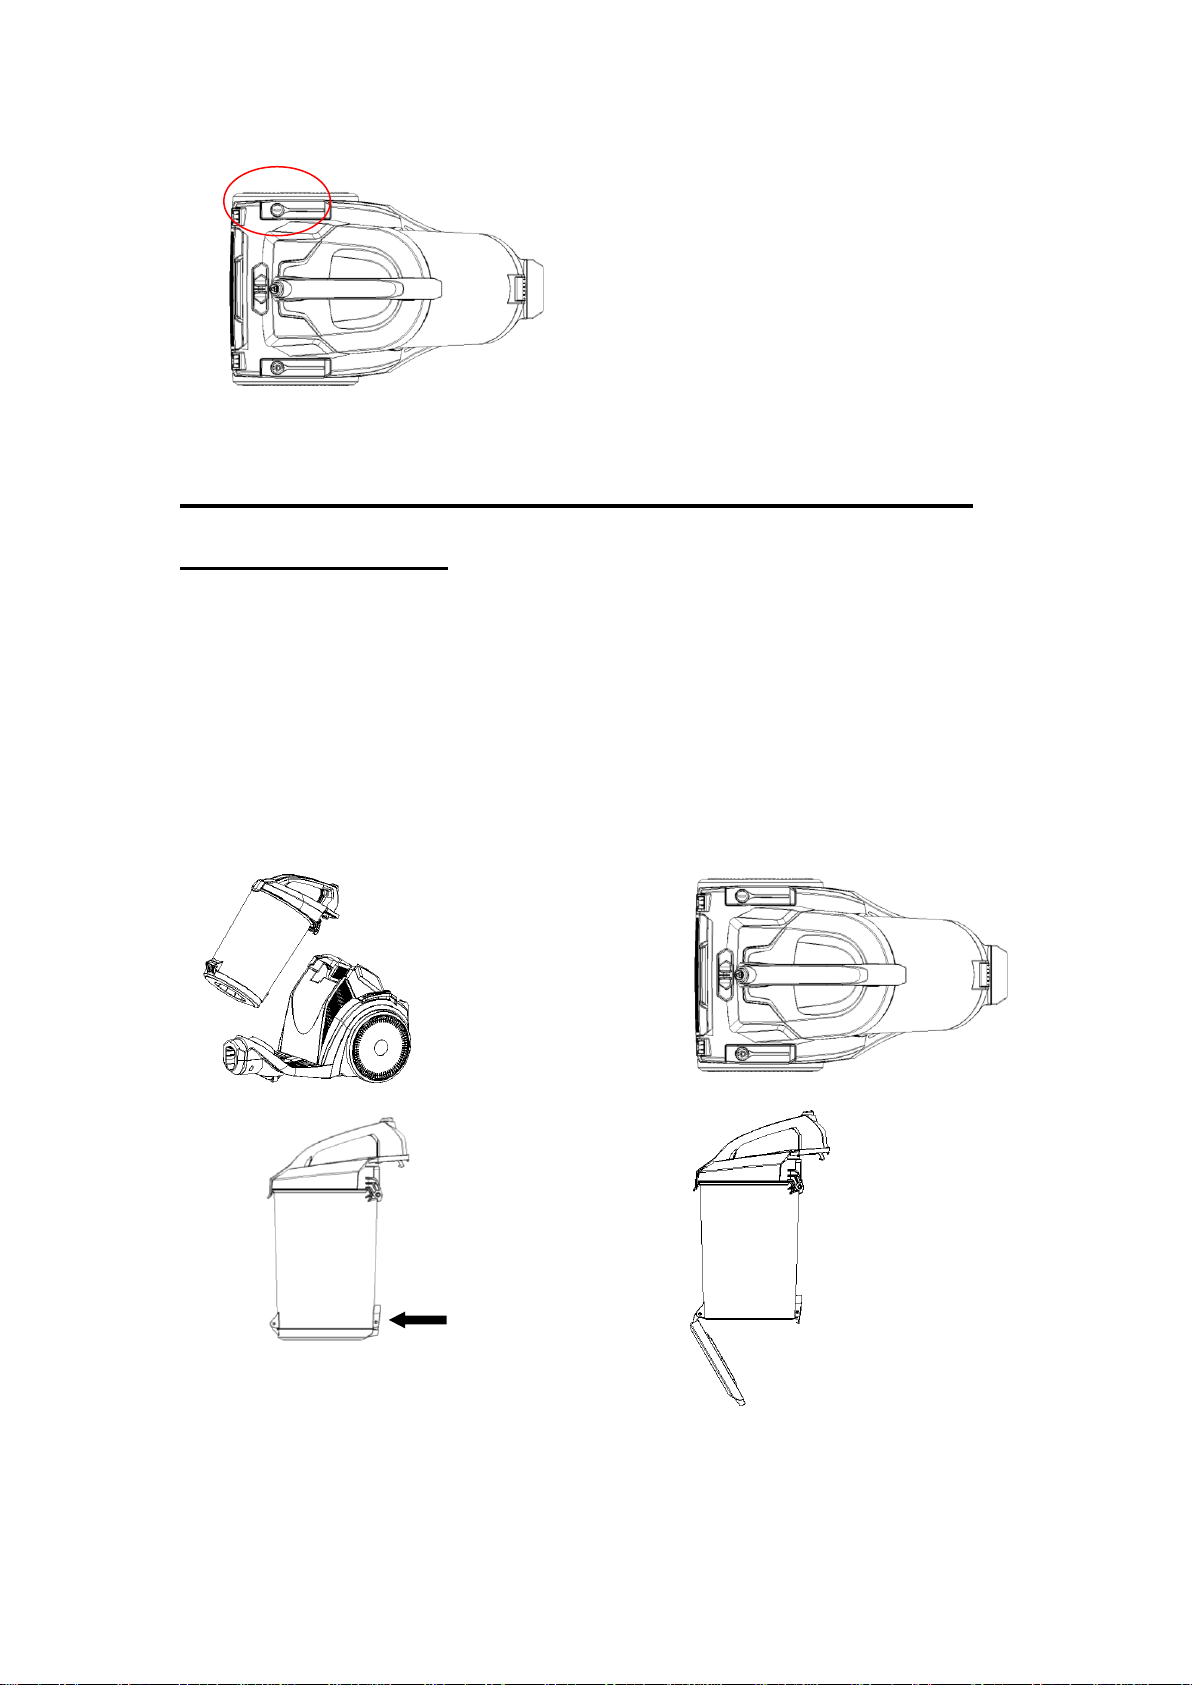
2. Before switching it on for the first time, make sure that the dust canister (cup) or the
dust filter (in some models) is properly installed.
3. NEVER use the machine without a motor protection FILTER fitted!
4. Only use the vacuum cleaner indoors on DRY surfaces .
5. Do not use this vacuum cleaner if it has been dropped, damaged or left outdoors.
6. Do not push the vacuum cleaner over the power cord or use the vacuum cleaner if
the power cord or plug is damaged. Please contact the supplier in this instance.
7. Do not touch the plug or use the vacuum cleaner with wet hands.
8. Do not pull or carry this vacuum cleaner by the power cord. Do not use the power
cord as a handle or pull the power cord around corners, sharp edges or close a door
over the power cord. Do not unplug the vacuum cleaner by pulling on the power
cord.
9. Do not vacuum up any flammable or combustible materials (lighter fluid, petrol,
kerosene, etc.) Do not use the vacuum cleaner in an area with explosive vapours or
liquid.
10. Do not vacuum up coals (hot or cold), cigarette butts, matches or smoking hot
burning items or use in an area where there may be harmful fluids (chlorine, bleach,
and ammonia drain cleaner).
11. Do not attempt to remove any blockages with a sharp object as this may cause
damage to your vacuum cleaner.
12. Do not use the vacuum cleaner with incorrect voltage as this may result in damage
or injury to the user. The correct voltage is listed on the ratings label.
13. If there is an abnormal noise, smell, smoke or any other failure or breakage during
the operation, you should turn off the switch and unplug it. Then contact your
service centre for repairs. Do not attempt to repair it yourself.
14. If the power supply cord is damaged, it must be replaced by the manufacturer or a
service agent or a similarly qualified person, in order to avoid electric shock.
15. This appliance is not intended for use by persons (including children) with reduced
physical, sensory or mental capabilities, or lack of experience and knowledge, unless
they have been given supervision or instruction concerning the use of the appliance
by a person responsible for their safety.
16. Ensure that children do not play with the appliance.
17. The 3 prong power plug must be removed from the power socket before any
maintenance work or parts are replaced.

STRUCTURE OFTHE PRODUCT
1
Handle
7
Dust cup
2
Release button
8
Hose connector
3
Power button
9
Brush tool
4
Cord rewind button
10
Hose
5
Rubber for big wheel
11
Extending metal tube
6
Big wheel
12
Two in one brush
9
11
7
8
12
2
6
4
5
10
3
1

HOW TO USE
ASSEMBLY BEFORE USE
Fig.1 - Shows the connection of the hose to the vacuum cleaner:
Put the hose connector in front of the vacuum cleaner, then insert it into the inlet hole .
If you want to disassemble it, press the release button and then pull it out.
Fig.2 - Shows the connection of the hose and the extension metal tube:
Hold the flexible connector of the hose and insert into the bigger hole of the tube.
Fig.3 - Shows the connection of the tube and the brush tool:
Put the metal tube into the hole of the brush and rotate to fasten.
Fig.4 - Shows how to check the winding of the power cord.
Pull the power cord out of the machine and STOP when you see the yellow mark –indicating
MAXIMUM LENGTH!!!
Make sure you DO NOT PULLTHE CARD PAST THE RED MARK!!!!
When you are finished using the unit, turn off the power, pull the plug out of the socket, and then
push the winding device button until the cord is completely retracted into the machine.
Fig.5 - Shows the power button
Put the plug into the socket, push the power button to switch the machine ON or OFF.
Fig.1 Fig.2
.

Fig.3 Fig.4
Fig.5
CLEANING OF THE DUST CUP –EXTREMELY
IMPORTANT!!!!
The steps for cleaning the dust cup:
1. Fig.6 - hold the dust cup and handle and push the release button at the top of the canister.
2. Fig.7 - take the dust cup out of the machine.
3. Fig.8 –place the dust cup over a rubbish bin, push the release button to open the bottom of the
dust cup to empty out the canister.
4. Fig.9 –close the dust cup after cleaning out the canister.
Fig.6 Fig.7
Fig.8 Fig.9

ATTACHMENTS
HOW TO USE THE ATTACHMENTS:
1. Fig.10 - you can use the two in one brush for cleaning in the corner.
2. Fig.11 - open the other side with bristles to clean the sofa, curtains and ornaments.
3. Fig.12 - tread on the pedal of the brush tool to expose the bristles for flat or smooth flooring.
4. Fig.13 - tread on the pedal of the brush tool again to retract the bristles for cleaning of carpets.
Fig.10 Fig.11
Fig.12 Fig.13
MAINTENANCE
HOW TO MAINTAIN
1. The filter should be cleaned regularly and also when there is obvious dirt on the filter.
2. Ensure the filter is properly placed in position before running the vacuum cleaner.
3. The filter CANNOT be cleaned in the washing machine.
4. The suction power will be reduced and will damage the motor if you use a wet filter.
5. Steps for maintenance:
1) Fig.14 - press the outlet lock to open the outlet board.
2) Fig.15 - unclip the outlet filter.
3) Fig.16 - open the HEPA cover to separate it from the dust cup cover
4) Fig.17 –remove the HEPA and cyclone assembly.
5) Fg.18 - wash cyclone assembly under a running tape with warm water.
6) Wash the HEPA, the HEPA assembly, the outlet HEPA and the dust chamber in the water
without detergent and dry them thoroughly for 24 hours, before use.
7) Fix the HEPA assembly into the chamber cover and make sure that the three important cubes
are stuck in the grooves of the dust chamber.
8) Rotate the HEPA assembly in the direction of the arrow on the chamber cover.
9) Fit the chamber cover assembly and the dust chamber according to the arrows on the outside.

10) Put the dust chamber assembly into the machine. First place the chamber in the right
position and then press the handle of the dust chamber until it clicks into place then the
operation is successful.
Fig.14 Fig.15
Fig.16 Fig.17
Fig.18

Technical Specifications :
Wattage :
Voltage
Cannister capacity
Cord length
Weight:
Subject to Technical changes without notice.
Correct Disposal of this product
This marking indicates that this product should not be disposed with other
household wastes throughout the EU. To prevent possible harm to the
environment or human health from uncontrolled waste disposal, recycle it
responsibly to promote the sustainable reuse of material resources. To return your
used device, please use the return and collection systems or contact the retailer
where the product was purchased. They can take this product for environmental
safe recycling.
To contact the supplier, log onto our website and send a message:
www.swissappliances.co.za

Table of contents
Other Swiss Vacuum Cleaner manuals