465-00127-01
!
5
6
6
3
4
7
8
9
Important!
Note:
Note:
12
10
“Click!”
!
*
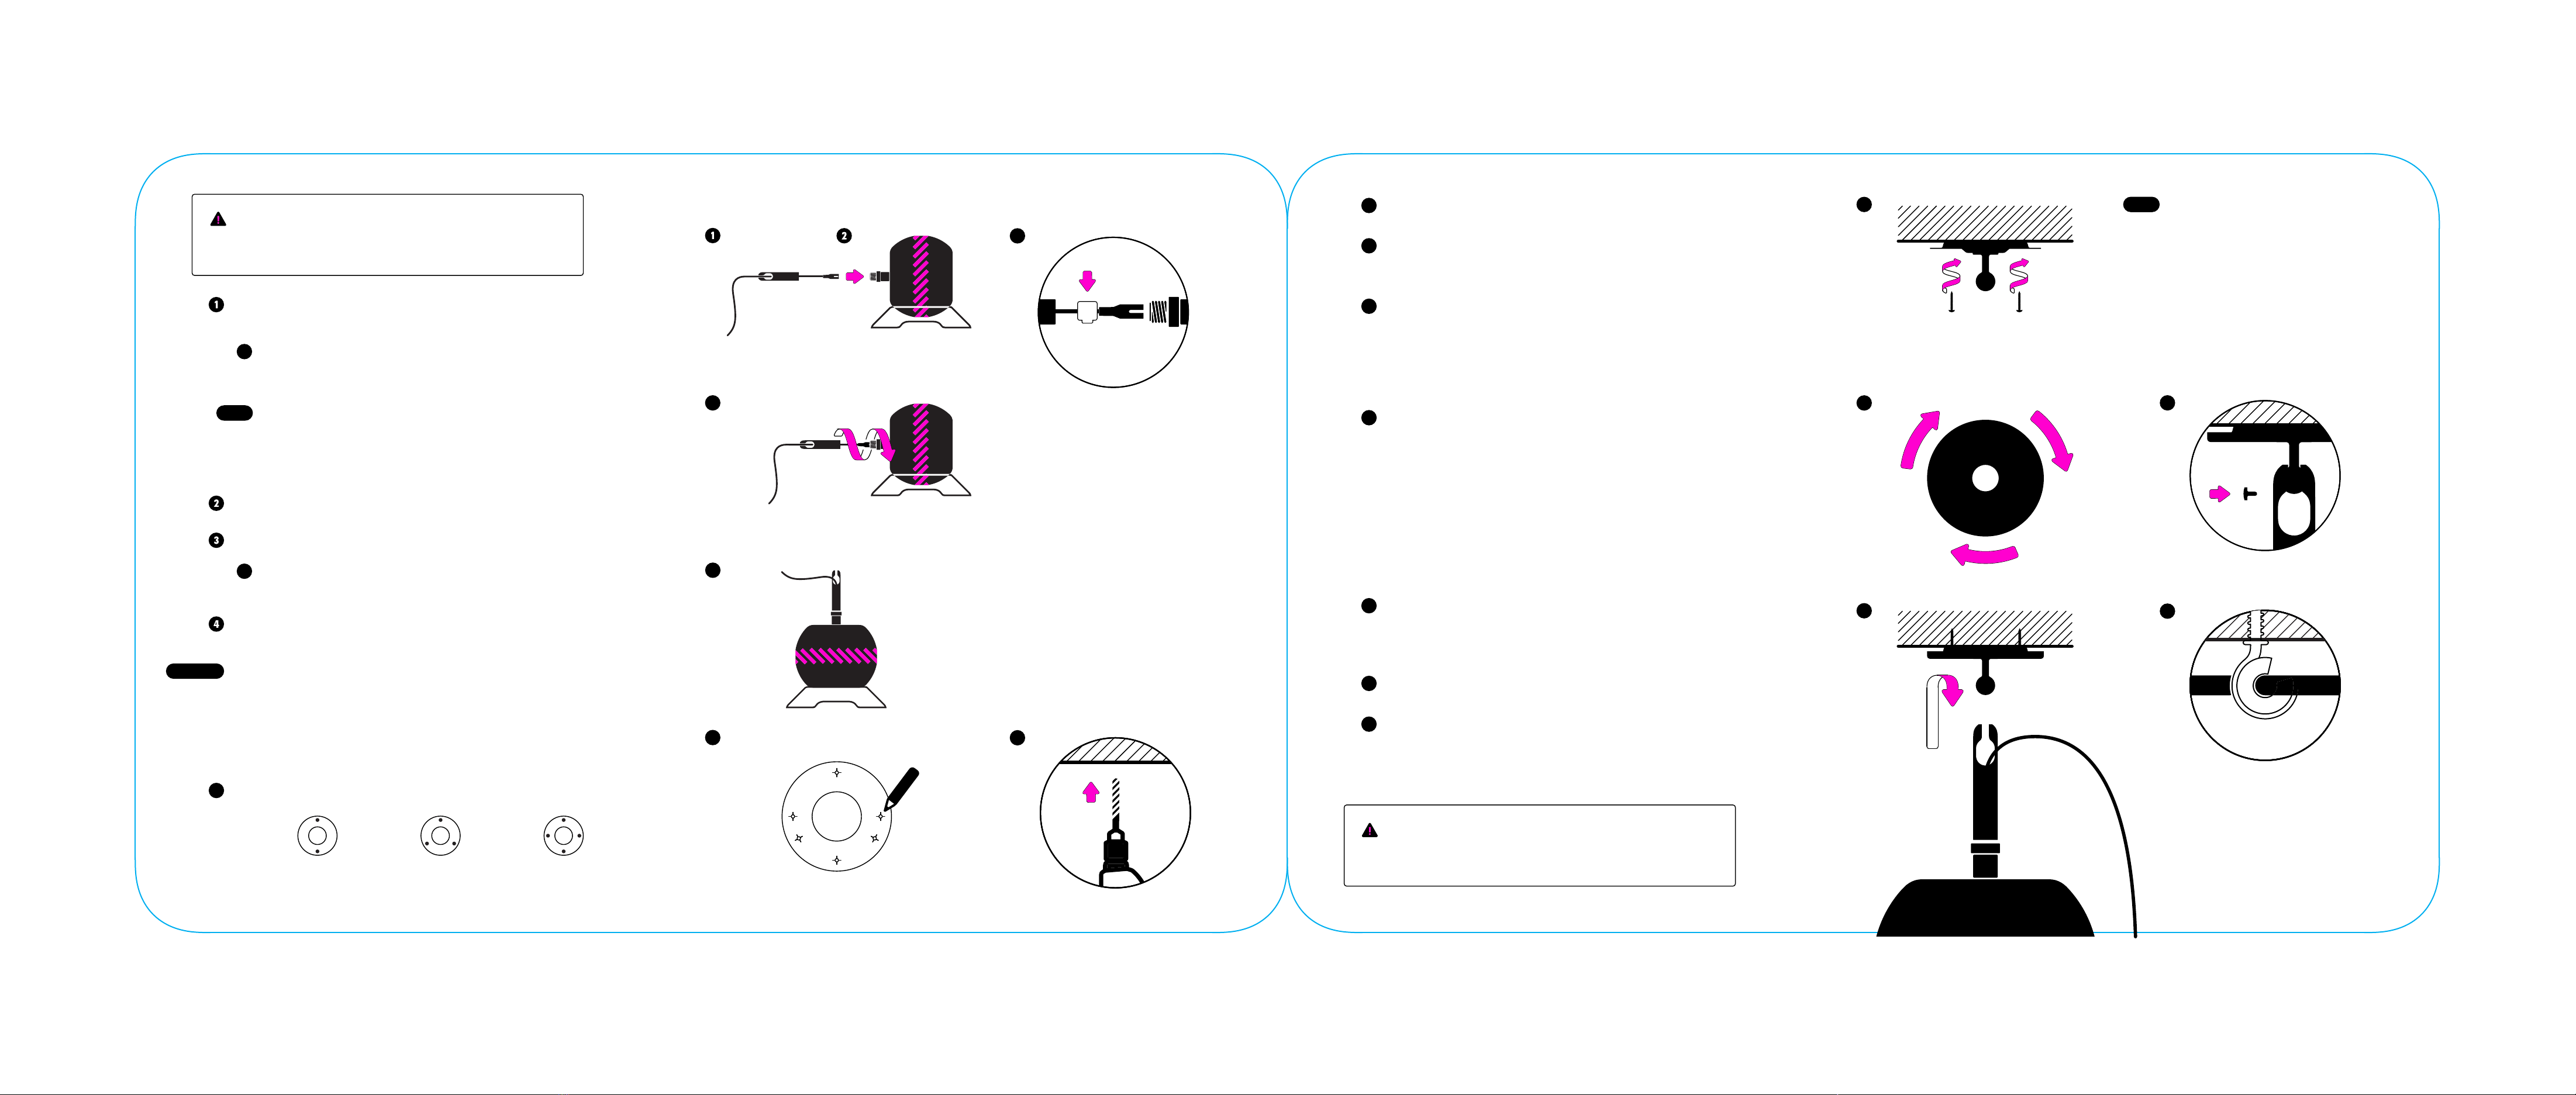
Pass the Power Cord through the Socket and
optional extension tubes.
Install the Ferrite near the end of the Power Cord
where it connects to the Cell for optimal perfor-
mance.
!Ensure Cell, extension tubes and Socket are securely
hand tightened.
Plug the Power Cord into the Cell.
Screw the Socket (+ extension tubes) onto the Cell
If you have just unboxed a new Cell Alpha, please
keep the protective wrap on Cell Alpha during
assembly and use the shipping cradle to stabilize.
Place aside your Cell + Socket assembly and pro-
ceed with step 5.
Locate ceiling joists where you plan to install the ceiling
mount. The Bracket must be installed with provided
Screws into ceiling joists, wooden beams or planked
wood. For concrete or other materials please ask a
specialist.
Ensure that the Power Cord will reach a power outlet.
5Use the Cardboard Template to mark the Screws
location.
2 Screws 3 Screws 4 Screws
Use a minimum of 2 screws when installing to a ceiling
joist.
Drill pilot holes of 1/8“ (3mm) diameter.
Install the Bracket using the Screws.
Screws must be installed securely.
Use the Leveling Plate included
when installing the Bracket on an
uneven surface.
Please contact customer support if
you have any questions.
support@syngspace.com
Hang the Cell + Socket assembly from the Bracket.
Hold the Cell + Socket assembly with both hands.
Align the opening of the Socket with the ball joint of the
Bracket.
Hook the ball joint fully into the Socket opening. Slowly
release the Cell after the ball joint and Socket are
hooked, making sure that the connection is properly
installed.
*Make sure Power Cord is clear of ball joint and Socket.
Install the Security Screw into the threaded hole of
the Socket.
Make sure the Security Screw is fully tightened.
Now you can remove the Protective Wrap.
Install the Cosmetic Plate.
Align the 3 locking features in the Cosmetic Plate with
the slots on the Bracket. Rotate the Cosmetic Plate 30o
clockwise until you feel a “click” and the locking features
are secured into place.
Use the hooks and grommets provided to route the
Power Cord along your ceiling.
Plug the Power Cord into the wall socket and follow Cell
setup instructions in Syng Space.
If you have purchased extension tubes connect
them together with the Socket.
To purchase extension tubes please go to:
syngspace.com/shop
Warning: Mounting the Bracket in a manner not in
accordance with the provided instructions voids
warranty and safety guarantees.
7
8
9
10
11
12
Note:
Important!
Note:
!
!
!


