TAG MIL-BOOK 10 Series User manual

OPERATOR’ S MANUAL
MIL-BOOK 10 SERIES NOTEBOOK
22355 TAG Way, Dulles, VA 20166
Tel: (703) 406.3000 Fax: (703) 607.3853

TRADEMARKS
All brand and product names are trademarks or registered trademarks of their
respective companies.
NOTE
Information in this manual is subject to change without notice.

1
CHAPTER
Getting Started
Congratulations on purchasing this Tablet PC.
This hand-held computer, having no fan and being almost noiseless, is
especially designed for the practical applications of warehouses,
automobiles, vehicles, public security, repairing, assisting the
handicapped, and other demanding situations where conventional
notebook computers just cannot measure up.
This chapter first tells you step by step how to get the computer up and
running. You will find instructions for these procedures:
Unpacking
Connecting to AC power
Turning on the computer
Turning off the computer
Then, you will find a section briefly introducing the external components
of the computer. And the last section navigates you to the information
you may need after the computer is ready for use.

Getting the Computer Running
This section guides you through the procedures for getting the computer
ready for operation.
Unpacking
After unpacking the shipping carton, you should find these standard
items:
Tablet PC
Accessories:
−AC adapter (100~240 VAC, 50~60 Hz)
−AC power cord (US, CE, UK, SA)
−Driver CD
−X-Bay (optional):
Module-1: two serial I/O / RJ-45 / IEEE 1394
Module-2: wireless LAN (802.11B)
Module-3: wireless modem (CDPD)
−Expansion box (optional)
Port Replicator module: includes COM1/4, PIO1, CRT, two
USB ports (connects behind USB hub, FDD bootable), PS/2
keyboard and mouse, MIC input, earphone out, CD-ROM and
AC adapter input
CD-ROM module: 24X TEAC CD-224E or better
DVD-ROM module: 8X Pioneer K-11T or better
USB FDD module: 1.44 MB double-sided high density
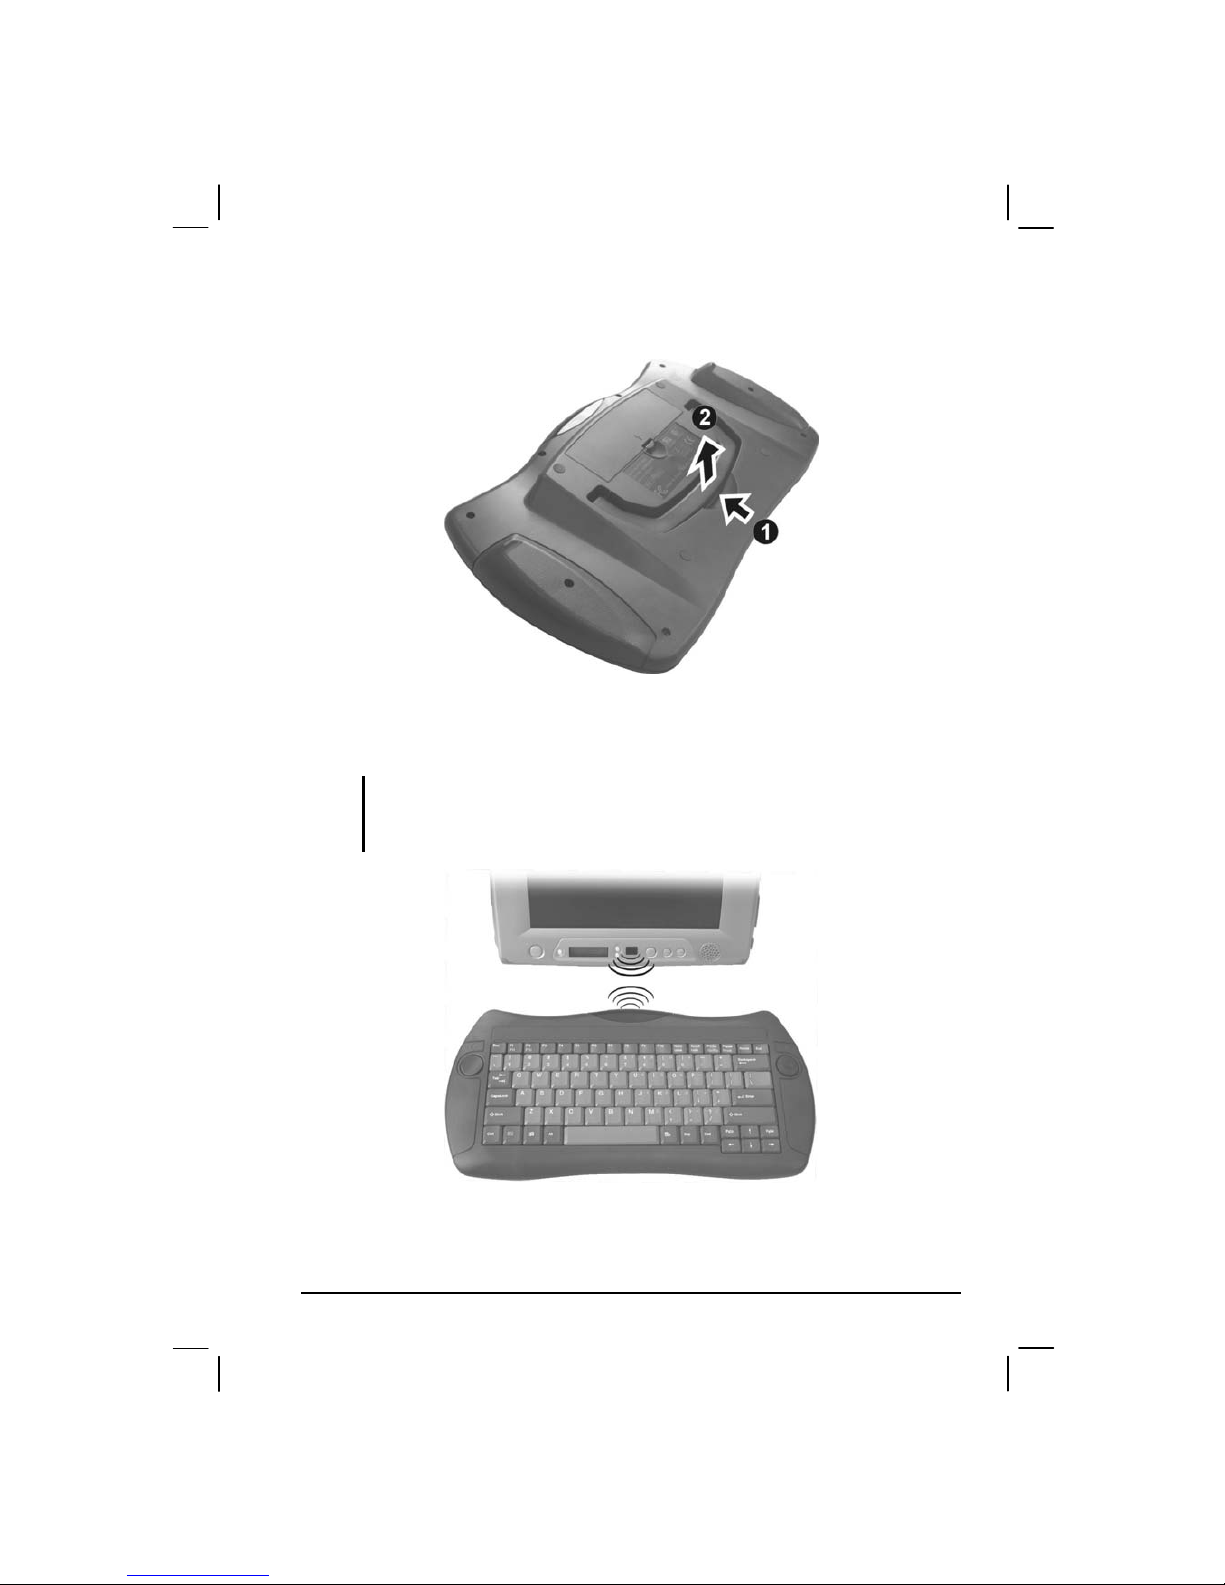
−Wireless keyboard (optional)
−Car adapter/charger (10.7~32 VDC) −(optional)
−Secondary battery (optional)
−Battery charger for secondary battery (optional)
−Carrying bag (optional)
−CCD camera module (optional)
−This Operation Manual
Inspect all the items. If any item is damaged or missing, notify your
dealer immediately.
1-2 Getting Started

Keep the shipping carton and packing materials in case you need to ship
or store the computer in the future.
Connecting to AC Power
The computer operates either on the external AC power or internal
battery power. It is suggested that you use AC power when you start up
the computer for the first time.
CAUTION: Use only the AC adapter included with your computer. Using other AC
adapters may damage the computer.
1. Make sure the computer is turned off.
2. Plug the DC cord of the AC adapter to the power connector on the
right side of the computer ().
3. Plug the female end of the AC power cord to the AC adapter and the
male end to an electrical outlet ().
4. When the AC adapter is connected, the indicator on the AC adapter
lights up, indicating that power is being supplied from the electrical
outlet to the AC adapter and onto your computer. Now, you are ready
to turn on the computer.
Getting Started 1-3

CAUTION:
When you disconnect the AC adapter, disconnect from the electrical outlet first and
then from the computer. A reverse procedure may damage the AC adapter or the
computer.
When unplugging the connector, always hold the plug head. Never pull on the cord.
NOTE: When the AC adapter is connected, it also charges the battery pack. For
information on using battery power, see Chapter 3.
Positioning the Tablet PC
The computer can be placed upright using its stand found at the back. To
place the computer in an upright position, pull open the stand located at
the back as shown on the next figure.
NOTE: It is recommended that you operate the Tablet PC in an upright position as
opposed to letting it lie flat on its back in order to provide adequate air ventilation.
The wireless keyboard operates on four “size-AA” (1.5-volt) batteries on
the battery compartment located at the back. Be sure to observe the
correct polarity when inserting the batteries.
NOTE: The condition of the batteries also affects the effectiveness of transmission. If a
weakness in transmission is detected, try changing a set of new batteries.
Using the Wireless Keyboard (option)
The wireless keyboard can either be placed flat on the table or inclined
using its stand found at the back. To place the wireless keyboard in an
1-4 Getting Started

upright position, pull open the stand located at the back as shown on the
next figure.
Place the wireless keyboard in front of the Tablet PC with no obstructions
between them to allow unhampered communication between the
computer and keyboard’s IR port.
NOTE: It is recommended that the transmission distance must not exceed 3 meters
and that vertical transmission angle is within ±150while horizontal transmission angle
is within ±300.
Getting Started 1-5

Turning On and Off the Computer
Turning On
1. Make sure the computer is connected to AC power.
2. Press the power button .
3. Each time the computer is turned on, it performs a Power-On Self
Test (POST), and the operating system such as Windows should
start.
Turning Off
To turn off the computer power, use the “Shut Down” command of your
operating system.
NOTE: There are other ways you can stop the computer so that you will be back to
where you left off when you next turn on the computer. (See “Stopping the Computer”
in Chapter 2 for information.)
CAUTION: If you have to turn the computer on again immediately after turning it off,
wait for at least five seconds. Turning the computer off and on rapidly can damage it.
1-6 Getting Started

Taking a Look at the Computer
This section identifies the external components of the computer and
briefly describes the function of each component.
Right-Side Components
Ref Component Description See Also
Reset Button Allows you to reset the system. P. 8-16
USB Port Connects a USB device, such as a USB floppy
drive, printer, digital camera, joystick, and more.
P. 4-7
Microphone
Connector
Connects an external microphone. P. 2-20
Getting Started 1-7

Ref Component Description See Also
Audio Output
Connector
Connects a set of headphones, external speakers
with amplifier, or an audio recording device.
P. 2-20
Serial Port Connects a serial device, such as a mouse. P. 4-6
Expansion Port For connecting to: Port Replicator,
CD/DVD-ROM module, or USB FDD module.
P. 2-14,
4-2, 4-4
Power
Connector
Connects the AC adapter. P. 1-3
PC Card Slot Accepts a PC Card for additional functions. P. 4-10
Left-Side Components
1-8 Getting Started
Table of contents
Other TAG Laptop manuals


