Tait T02-00004-0201 User manual

© Tait Limited April 2013
www.taitradio.com
402-00090-01
T02-00004-0201/T02-00004-0202
Horn Speaker
Installation Instructions
Introduction
The T02-00004-0201 horn speaker (for 25W
radios) and the T02-00004-0202 horn speaker (for
30-50W radios) can be mounted externally on the
vehicle so that radio traffic can be heard when
personnel are outside the vehicle. The horn
speaker is connected to the radio's speaker out
terminals.
The horn speaker is supplied with a 20ft (6m)
extension cable, and a flying lead.
The flying lead is terminated with two
receptacles. The receptacles of the
T02-00004-0201 (for 25W radios) are different
from those for the T02-00004-0202 (for 30-50W
radios). Two spare receptacles are included with
each kit.
Alert Symbol and Message Conventions
Please follow exactly any instruction that appears in the text as an ‘alert’. An alert provides
necessary safety information as well as instruction in the proper use of the product. This
document uses the following types of alert:
Warning This alert is used when there is a hazardous situation which, if not
avoided, could result in death or serious injury.
Caution This alert is used when there is a hazardous situation which, if not avoided,
could result in minor or moderate injury.
Notice This alert is used to highlight information that is required to ensure procedures
are performed correctly. Incorrectly performed procedures could result in equipment
damage or malfunction.
This alert is used to highlight significant information that may be required to ensure pro-
cedures are performed correctly, or draw your attention to ways of doing things that can
improve your efficiency or effectiveness.
receptacles
flying lead
horn
speaker
cable
extension
cable

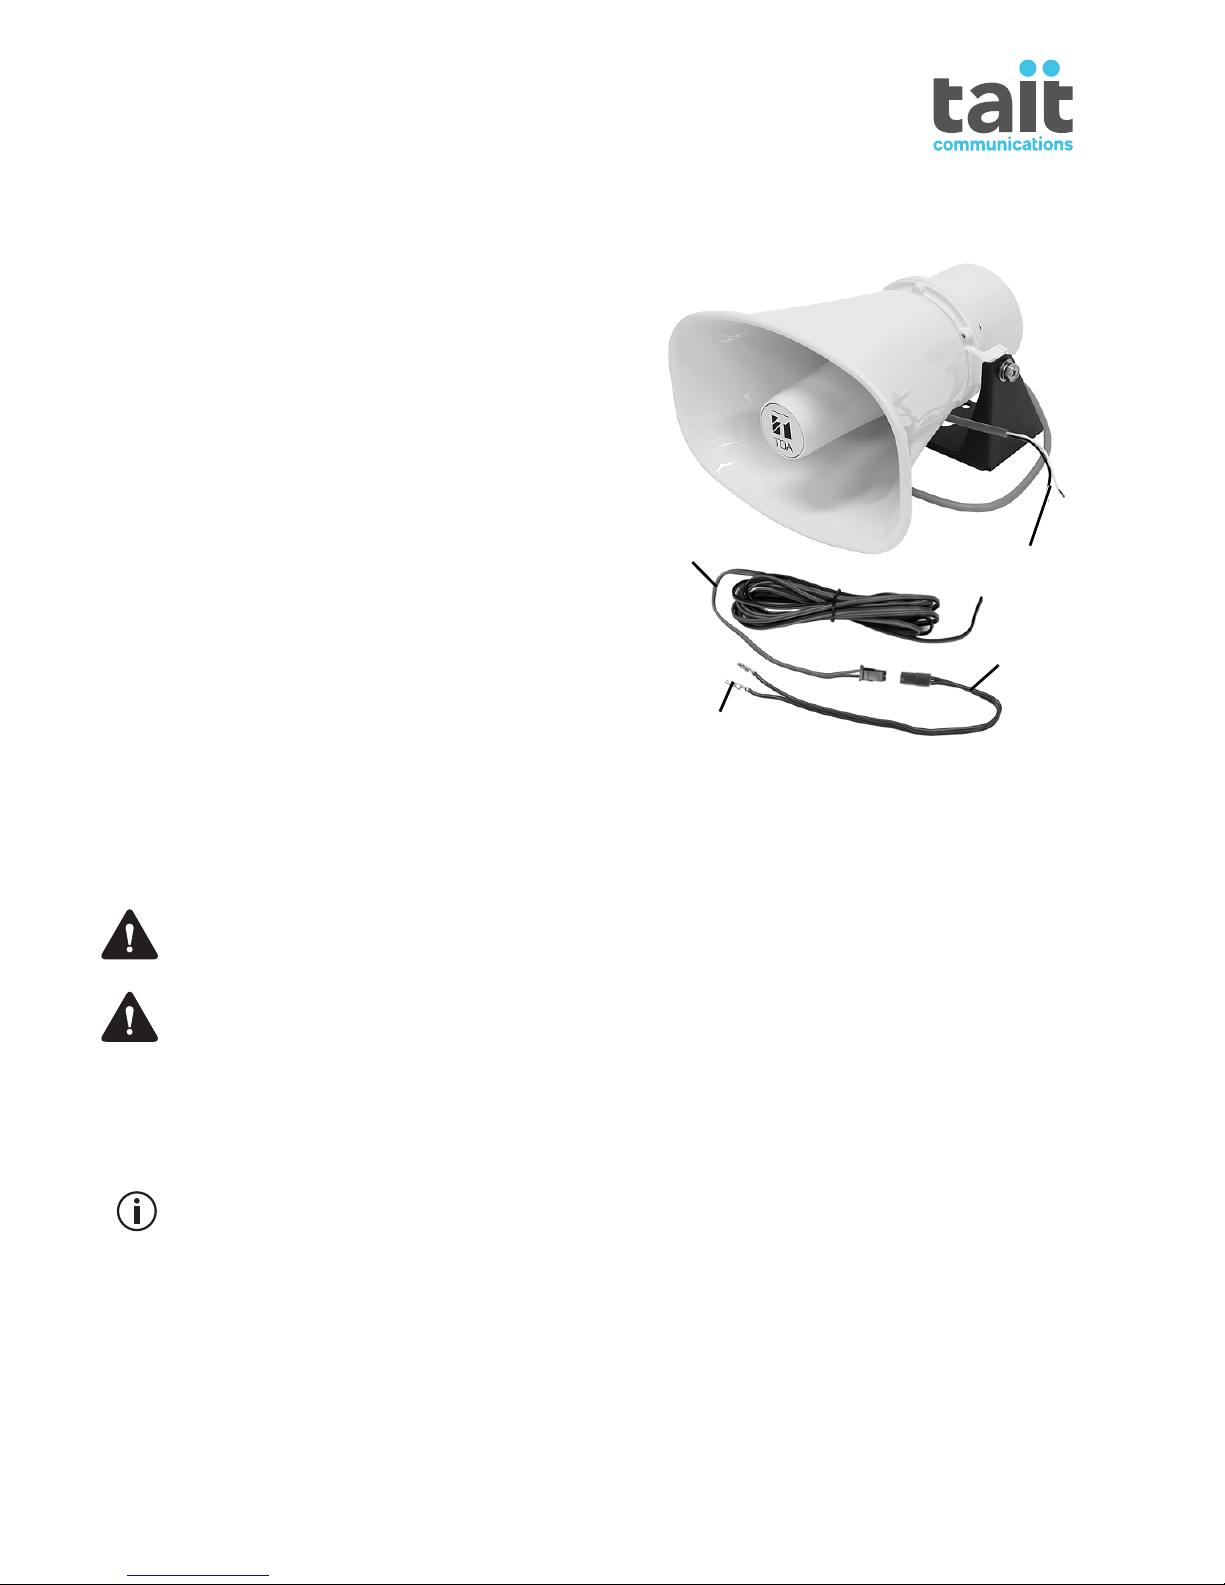
2T02-00004-0201/T02-00004-0202 Horn Speaker
© Tait Limited April 2013
Safe Mounting and Operation of the Horn Speaker
Before installation or use, be sure to carefully read all the instructions in this section for
correct and safe installation and operation. After reading, keep this document handy for
future reference.
Warning Incorrect installation of the horn speaker may result in death or serious
injury. The horn speaker could break loose due to the extreme forces applied during
a collision or braking.
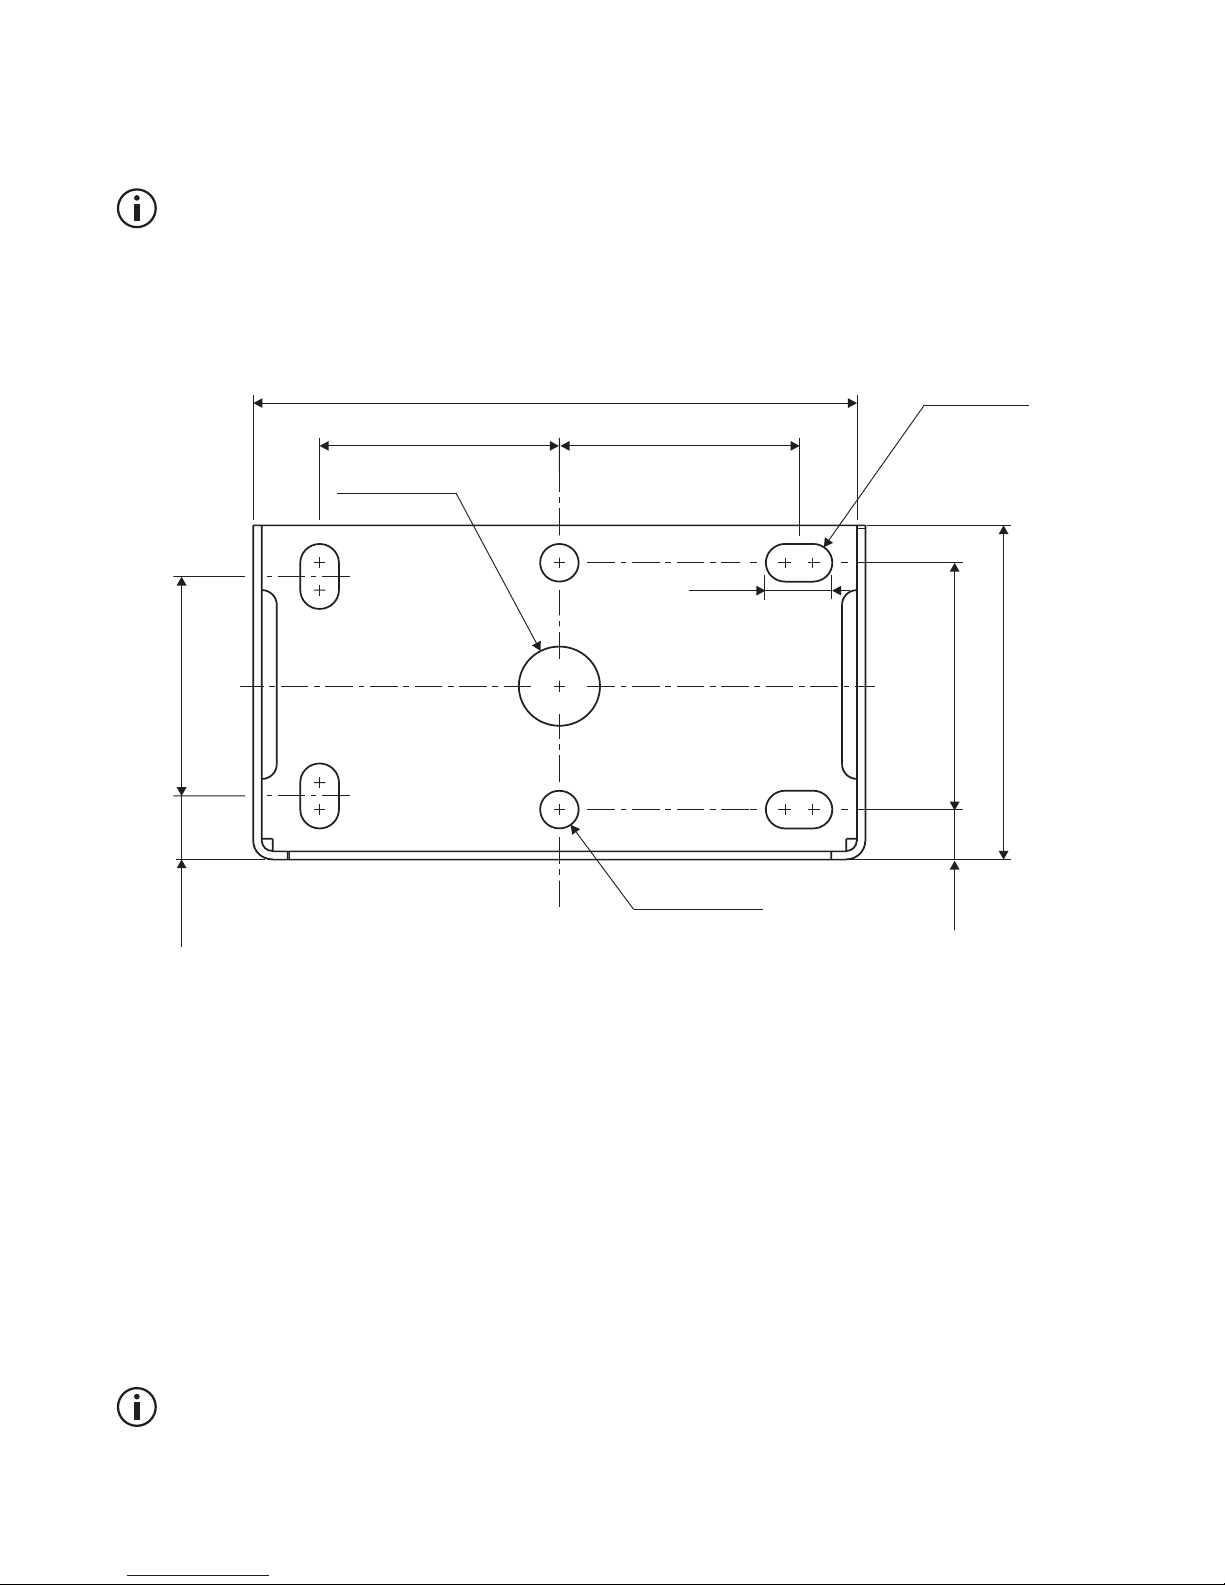
■Install the horn speaker only to a mounting surface or structural element and
in a location that can structurally support the weight of the horn speaker
(13.2lbs [1.4kg]) during a collision.
■Use nuts and bolts that are appropriate for the mounting surface’s structure
and composition.
■Tighten each nut and bolt securely. Ensure that the mounting bracket has no
loose joints after installation.
■Check regularly whether the horn speaker is still secure and hasn’t corroded.
Retighten or replace if necessary.
Warning Attach a safety wire to the unit when mounting in locations high above
the ground.
Warning Choose a mounting position for the horn speaker where it will not inter-
fere with the operation of any of the vehicle controls.
Warning When drilling holes in the vehicle, check that drilling at the selected
points will not damage existing wiring, petrol tanks, fuel and brake lines, or battery
cables.
Warning To avoid accidental air explosions, do not use the unit around gasoline,
thinner or other combustibles.
Warning Protect the unit from exposure in snowy areas, as the weight of snow
build-up could cause the speaker to down or drop.
Warning Do not operate the horn speaker for an extended period of time with the
sound distorting, This is an indication of a malfunction, which in turn can cause
heat to generate and result in a fire.
Caution Do not stand or sit on, nor hang down from the horn speaker as this may
cause the speaker to fall down or drop.
Notice When installing the horn speaker, be sure that water and snow cannot accumu-
late inside the horn.

T02-00004-0201/T02-00004-0202 Horn Speaker 3
© Tait Limited April 2013
Notice When installing the horn speaker, make sure the speaker cable is protected
from engine heat, sharp edges and from being pinched or crushed. Use appropriate cable
grommets.
Installation of this product on a vehicle must be performed according to the instructions
provided by the vehicle manufacturer. For more information, refer to the vehicle manu-
facturer’s website or contact the vehicle manufacturer’s dealer.
Drill Pattern of Mounting Bracket (Not to Scale)
Wiring the Horn Speaker
Notice Be sure to note the following polarities:
– Black speaker cable: Positive (+)
– White speaker cable: Negative (–) or COM
1 Connect the horn speaker cable to the extension cable using a suitable waterproof con-
nector.
■Connect the black (positive) wire of the speaker cable to the red wire of the
extension cable.
■Connect the white (negative) wire of the speaker cable to the black wire of the
extension cable.
The extension cable is a 20 AWG cable.
5.47 in. (139 mm)
2.2 in. (56 mm) 2.2 in. (56 mm)
3.15 in. (80 mm)
2.32 in. (59 mm)
Æ´
´
0.35 0.26 in.
(9 6.5 mm)
Æ0.35 in. (9 mm)
Æ0.75 in. (19 mm)
0.61 in.
(15.5 mm)
2.07 in. (52.5 mm)
0.60 in.
(15.25 mm)
0.47 in.
(12 mm)

4T02-00004-0201/T02-00004-0202 Horn Speaker
© Tait Limited April 2013
2 Run the receptacle end of the flying lead to the radio power cable and install the two
receptacles in the power connector, as described below.
3 Insert the flying lead receptacles into the power connector socket, as shown below.
T02-00004-0201 horn speaker (25W radios)
■Insert the wire with the white stripe (positive) and receptacle into the position nearest to
the red wire.
■Insert the black (negative) wire and receptacle into the position nearest to the black wire.
T02-00004-0202 horn speaker (30-50 W radios)
Tait recommends using insertion tool M81969/18-02 (Tait P/N 355-00001-00).
■Insert the wire with the white stripe (positive) and receptacle into position 3.
■Insert the black (negative) wire and receptacle into position 2.
4 To connect the horn speaker, plug the flying lead into the extension cable. To discon-
nect the speaker, release the locking mechanism and unplug the flying lead.
Switching between the Horn Speaker and a Remote Speaker
The horn speaker and the remote speaker (TMAA10-03 or TMAA10-06) cannot be used
simultaneously. If it is desired to switch audio between the horn speaker and a remote
speaker, use a double-pole double-throw switch with a current rating of at least 2A.
More Information
Refer to your radio provider for more information about this product.
power
connector
flying lead
connector
speaker +
speaker –
+13.8V
(red)
ground
(black)
power connector
flying lead
connector
speaker – (to pin 2)
speaker + (to pin 3)
+13.8V
(red)
ground
(black) power connector
rear view
b
e
d
c
SPKR +
SPKR –
+
This manual suits for next models
1
Table of contents
Popular Horn manuals by other brands

Vixen Horns
Vixen Horns VXO8580/4124B installation guide

Vixen Horns
Vixen Horns VXO8315/4124B installation guide

Kleinn
Kleinn USTL-230 installation manual

Wheelock
Wheelock TBH-104-LH installation instructions

Vixen Horns
Vixen Horns VXO8315/3114B installation guide

UTC Fire and Security
UTC Fire and Security Ziton ZP755HA-2 Installation sheet

Vixen Horns
Vixen Horns VXO8410/4124C installation guide

Dynacord
Dynacord Horn speaker DL 800 / 10T technical information

Vixen Horns
Vixen Horns VXO8530/3318 installation guide

Wheelock
Wheelock SA-H5-B installation instructions

Stahl
Stahl 8495/12 Series operating instructions

Valcom
Valcom InformaCast VIP-148L-IC Installation