* If the Bluetooth adaptor does not detect a compatible wireless accessory within
60 seconds of being put into pairing mode, the adaptor will exit the pairing mode
and resume normal operation.
* Once successfully paired, you will be able to operate your two-way radio using
your compatible wireless accessory.
4
C
onnecting
a
Wired
Audio
A
cc
essor
y
to the
Bluetooth adaptor
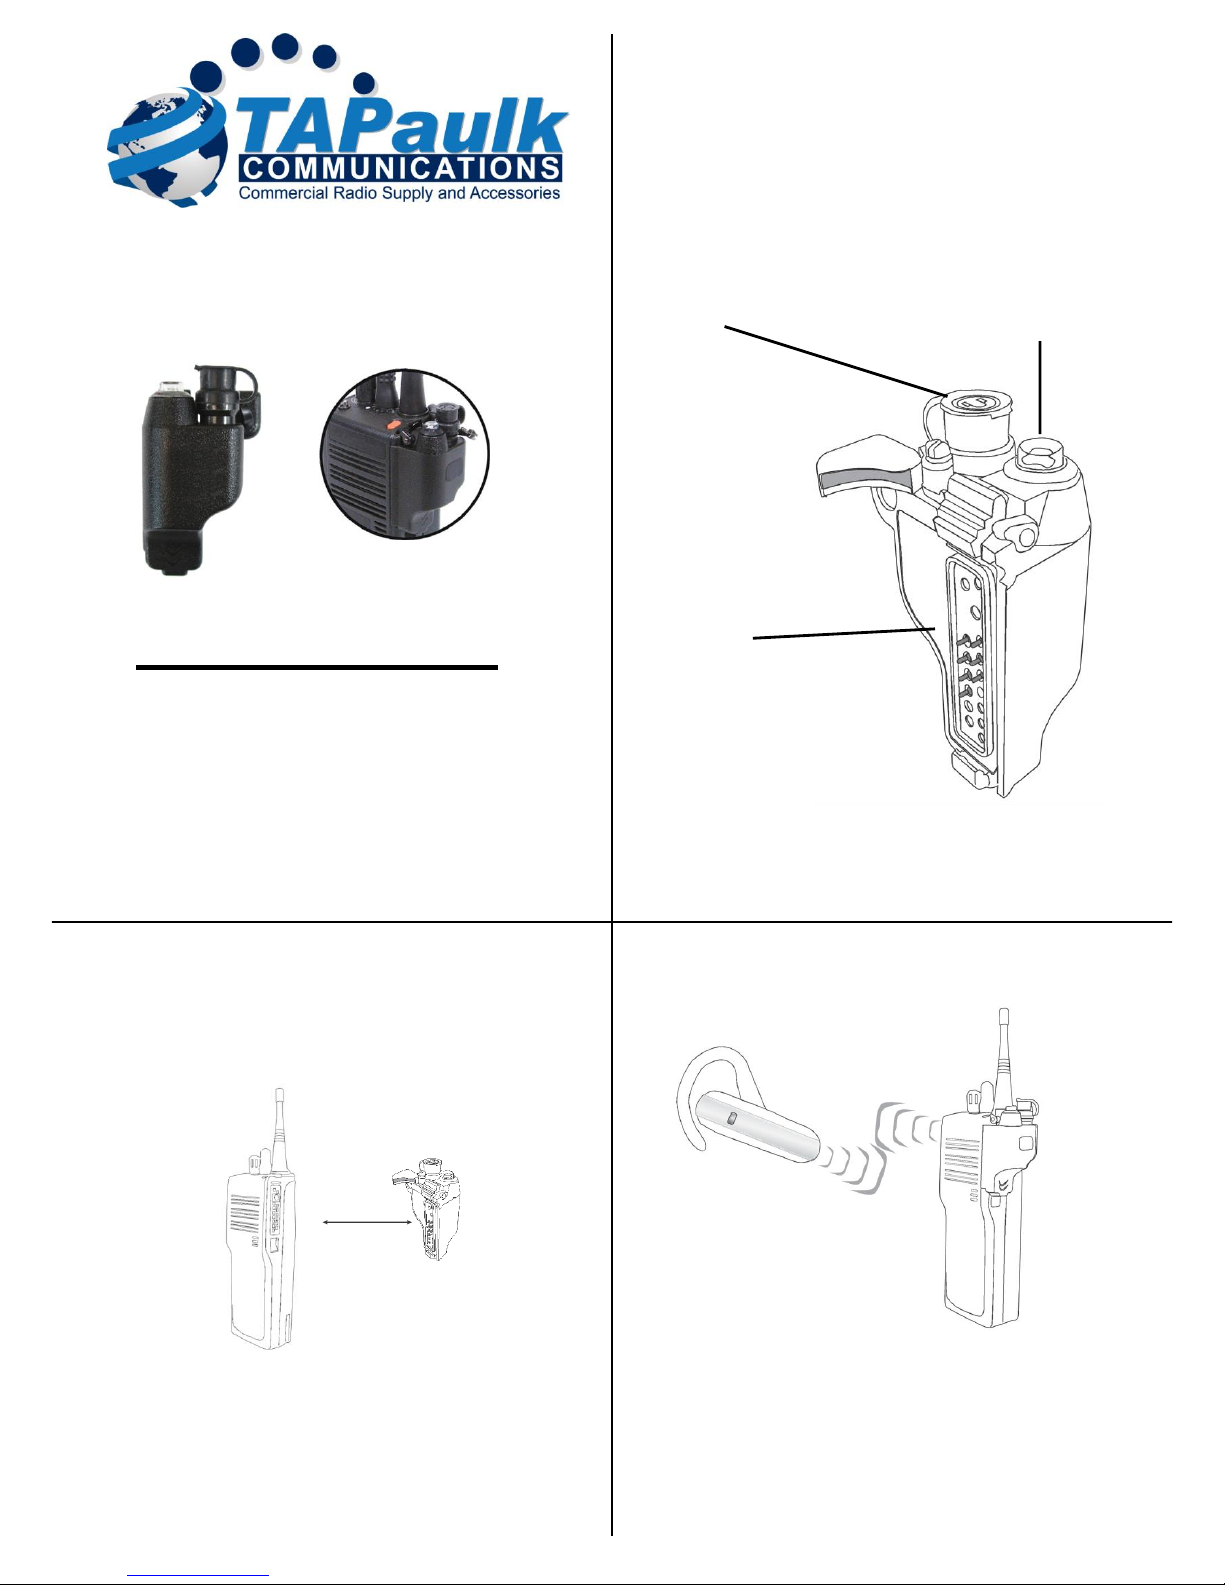
STEP THREE: Using a TAPaulk Quick-Disconnect Wired Audio Accessory
(Optional)
The Quick-Disconnect port on the Bluetooth adaptor allows the connection of a
compatible wired TAPaulk QD series accessory. This includes compatible
earphones, surveillance kits, remote microphones, and Push-To-Talk accessories.
* To connect a wired accessory, first turn off the two-way radio that the Bluetooth
adaptor is connected to.
* Lift up and remove the protective jacket covering the Quick-Disconnect port on
the Bluetooth adaptor to expose the connector.
* Align the Quick-Disconnect connector of the audio adapter with the
Quick-Disconnect port on the Bluetooth adaptor and push the connectors together
gently until they click into place.
NOTE: the male and female ends of the quick release connectors are keyed so they
must be properly aligned before the two halves can be pushed together.
* To remove a wired accessory that has been installed, gently lift up on the outer
cover of the Quick-Disconnect connector until the accessory is released and then
pull up to remove the accessory.
5
STATUS LED
MESSAGES
The meanings of the various status LED messages shown by the Bluetooth adaptor
are shown on the following table:
TROUBLESHOOTING
Mywireless audio accessory will not pair with the
Bluetooth adaptor
.
Follow the instructions to place the Bluetooth adaptor into the correct pairing mode
and then activate the pairing mode on the accessory. Make sure that the Bluetooth
adaptor and accessory being paired are within one meter of each other.
Mywireless audio accessory or worked before, but isnot working
now.
Make sure that the Bluetooth adaptor is properly connected to the two-way radio
and that the radio is turned on. Ensure that your wireless audio accessory has a fully
charged battery and is turned on. If the devices will still not work, re-pair the
Bluetooth adaptor to the wireless accessories.
DISCLAIMER: The wireless link used by TAPaulk products is an open standard,
unsecured technology. As such, it is not recommended for first-responder or other
mission critical users.
7
C
ommunica
tions
Priority
#1 #2
#3
STEPFOUR: Transmit and Receive Operation
The Bluetooth adaptor will automatically route radio calls based on the following
priority:
* If an audio accessory is connected to the Quick-Disconnect Port of the Bluetooth
adaptor, radio calls will be routed to this accessory.
* If no wired accessory is connected, calls will be routed to a wireless accessory, if
one is paired with the Bluetooth adaptor.
* If no wireless headset or audio accessory is paired to the Bluetooth adaptor or the
wireless accessory is turned off, calls will be routed to the internal speaker of the
two-way radio.
NOTE: When a new accessory is connected, paired, disconnected, or powered off, it may take
several seconds for the audio from received radio calls to be routed appropriately.
Push-to-Talk can be activated by any of the following methods:
* Pressing and holding the Talk button of the Bluetooth adaptor.
* Using the PTT button on a wired TAPaulk Quick-Disconnect accessory (if one is
connected to the Bluetooth adaptor).
When transmitting, the operator’s voice is picked-up by:
* The microphone in the wired-audio accessory connected to the Quick-Disconnect
port on the Bluetooth adaptor.
* If no wired audio accessory with a microphone is connected, the microphone in
the paired wireless audio accessory will be used.
* If no audio accessory is paired with the Bluetooth adaptor, or the paired wireless
audio accessory is turned off, the internal microphone in the attached two-way
radio will be used.
6
Support and Warranty
This product is covered by a one-year manufacturer’s limited warranty. For support
or warranty service on your TAPaulk product, contact us or visit us on the web at
www.TAPaulkCommunications.com.
Federal Communication Commission Interference Statement
This equipment has been tested and found to comply with the limits for a Class B
digital device, pursuant to Part 15 of the FCC Rules. These limits are designed to
provide reasonable protection against harmful interference in a residential
installation. This equipment generates uses and can radiate radio frequency
energy and, if not installed and used in accordance with the instructions, may cause
harmful interference to radio communications. However, there is no guarantee
that interference will not occur in a particular installation. If this equipment does
cause harmful interference to radio or television reception, which can be
determined by turning the equipment off and on, the user is encouraged to try to
correct the interference by one of the following measures:
-Reorient or relocate the receiving antenna.
-Increase the separation between the equipment and receiver.
-Connect the equipment into an outlet on a circuit different from that
to which the receiver is connected.
-Consult the dealer or an experienced radio/TV technician for help.
FCC Caution: Any changes or modifications not expressly approved by the party
responsible for compliance could void the user's authority to operate this
equipment.
This device complies with Part 15 of the FCC Rules. Operation is subject to the
following two conditions: (1) This device may not cause harmful interference, and
(2) this device must accept any interference received, including interference that
may cause undesired operation.
This equipment complies with FCC RF radiation exposure limits set forth for an
uncontrolled environment. To maintain compliance with FCC RF exposure
compliance requirements, please avoid direct contact to the transmitting antenna