Targa DVH-5100x User manual
1
DVD/VCR COMBI RECEIVER
Combi Receiver System
OWNER’S MANUAL
MODEL: DVH-5100x
Before connecting up, operating or repairing this product,
please read this instruction booklet carefully and completely.
CD-R/RW
PAL
LH-CX440PNA8SLTS-ENG
ENGLISH
Warning: To reduce the risk of electric
shock, do not remove the cover or back
of this product. There are no user-serv-
iceable parts inside. Refer servicing to
qualified service personnel.
Warning: To reduce the risk of fire or
electric shock, do not expose this prod-
uct to dripping or splashing water, rain,
or moisture. Do not place objects filled
with water such as vases, on the prod-
uct.
Warning: This digital video disc player
employs a laser system. Use of controls,
adjustments, or the performance of pro-
cedures other than those specified here-
in may result in hazardous radiation
exposure.
Warning: To prevent direct exposure to
laser beam, do not open the enclosure.
Visible laser radiation when open.
Warning: Never stare directly into the
laser beam.
Caution: Do not install this product in a
confined space such as a book case or
similar unit.
This product is manufactured to comply
with the radio interference requirements
of EEC DIRECTIVE 89/336/EEC, 93/68/EEC
and 73/23/EEC.
Notes on Copyrights:
It is forbidden by law to opy, broad ast, show, broad-
ast via able, play in publi , or rent opyrighted
material without permission. This produ t features the
opy prote tion fun tion developed by Ma rovision.
Copy prote tion signals are re orded on some dis s.
When re ording and playing the pi tures of these
dis s pi ture noise will appear. This produ t in orpo-
rates opyright prote tion te hnology that is prote ted
by method laims of ertain U.S. patents and other
intelle tual property rights owned by Ma rovision
Corporation and other rights owners. Use of this opy-
right prote tion te hnology must be authorized by
Ma rovision Corporation, and is intended for home
and other limited viewing uses only unless otherwise
authorized by Ma rovision Corporation. Reverse engi-
neering or disassembly is prohibited.
CONSUMERS SHOULD NOTE THAT NOT ALL HIGH
DEFINITION TELEVISION SETS ARE FULLY COM-
PATIBLE WITH THIS PRODUCT AND MAY CAUSE
ARTIFACTS TO BE DISPLAYED IN THE PICTURE.
IN CASE OF 625 PROGRESSIVE SCAN PICTURE
PROBLEMS, IT IS ECOMMENDED THAT THE USER
SWITCH THE CONNECTION TO THE ‘STANDARD
DEFINITION’ OUTPUT.
SERIAL NUMBER:
You an find the serial number on the ba k of the unit.
This number is unique to this unit and not available to
others. You should re ord requested information here
and retain this guide as a permanent re ord of your
pur hase.
Model No. ______________________________
Serial No. ______________________________
Date of Pur hase_________________________
CAUTION
RISK OF ELECTRIC SHOCK
DO NOT OPEN
2

Contents
Introduction . . . . . . . . . . . . . . . . . . .4
Symbol Used in this Manual . . . . . . . . . . . . . . .4
About the Symbol Display . . . . . . . . . . . . . .4
Notes on Discs . . . . . . . . . . . . . . . . . . . . . . . . . .4
Handling Dis s . . . . . . . . . . . . . . . . . . . . . . . .4
Storing Dis s . . . . . . . . . . . . . . . . . . . . . . . . .4
Cleaning Dis s . . . . . . . . . . . . . . . . . . . . . . . .4
Types of Playable Discs . . . . . . . . . . . . . . . . . . .5
Regional code . . . . . . . . . . . . . . . . . . . . . . . . . .5
Disc-related terms . . . . . . . . . . . . . . . . . . . . . . .6
Front Panel . . . . . . . . . . . . . . . . . . . . . . . . . . . . .7
Display Window . . . . . . . . . . . . . . . . . . . . . . . . .8
Remote Control . . . . . . . . . . . . . . . . . . . . . . . . .9
Rear Panel . . . . . . . . . . . . . . . . . . . . . . . . . . . .10
Installation and Setup . . . . . . . . . . .11
TV & Set Top Box
(or another VCR Connections) . . . . . . . . . .11-12
Accessory Audio/Video (A/V) Connections to
DVD/VCR Combi receiver . . . . . . . . . . . . . . . .13
Radio Aerial Connections . . . . . . . . . . . . . . . .13
Speaker System Connection . . . . . . . . . . . . . .14
Speaker Positioning . . . . . . . . . . . . . . . . . . . . .15
Mini Glossary for Audio Stream &
Surround mode . . . . . . . . . . . . . . . . . . . . . . . . .16
Sound Mode . . . . . . . . . . . . . . . . . . . . . . . . . . .16
Before Operation-VCR part . . . . . . . . . . . . .17-21
Tuning in a video hannel on your TV
. . . . . . . . . .17
Using your re eiver for the very first time . . .17
Setting the lo k Manually
. . . . . . . . . . . . . . . .18
To set the olour system
. . . . . . . . . . . . . . . . .18
How to use the main menu . . . . . . . . . . . . . .19
Tuning in TV stations Automati ally . . . . . . . .19
Tuning in TV stations Manually . . . . . . . . . . .20
Changing the order of TV stations . . . . . . . . .21
Deleting TV stations . . . . . . . . . . . . . . . . . . .21
Before Operation-DVD part . . . . . . . . . . . . .22-26
On-Screen Display . . . . . . . . . . . . . . . . . . . . . .22
Initial Settings . . . . . . . . . . . . . . . . . . . . . . .23-26
General Operation . . . . . . . . . . . . . . . . . . . .23
LANGUAGE . . . . . . . . . . . . . . . . . . . . . . . . .23
Menu Language . . . . . . . . . . . . . . . . . . . .23
Dis Audio / Subtitle / Menu . . . . . . . . . . . .23
DISPLAY . . . . . . . . . . . . . . . . . . . . . . . . . . .24
TV Aspe t . . . . . . . . . . . . . . . . . . . . . . . . .24
Display Mode . . . . . . . . . . . . . . . . . . . . . .24
Progressive S an . . . . . . . . . . . . . . . . . . .24
TV Output Sele t . . . . . . . . . . . . . . . . . . . .24
AUDIO . . . . . . . . . . . . . . . . . . . . . . . . . . . . .24
5.1 Speaker Setup . . . . . . . . . . . . . . . . . .24
Dynami Range Control (DRC) . . . . . . . . .24
Vo al . . . . . . . . . . . . . . . . . . . . . . . . . . . . .24
OTHERS . . . . . . . . . . . . . . . . . . . . . . . . . . .25
PBC . . . . . . . . . . . . . . . . . . . . . . . . . . . . .25
Auto Play . . . . . . . . . . . . . . . . . . . . . . . . . .25
DivX(R) VOD . . . . . . . . . . . . . . . . . . . . . . .25
LOCK (Parental Control) . . . . . . . . . . . . . . . .26
Rating . . . . . . . . . . . . . . . . . . . . . . . . . . . .26
Password (Se urity Code) . . . . . . . . . . . . .26
Country Code . . . . . . . . . . . . . . . . . . . . . .26
Operation . . . . . . . . . . . . . . . . . . . .27
Playing a tape . . . . . . . . . . . . . . . . . . . . . . .27-31
CM (Commer ial Message) Skip . . . . . . . .27
OPR (Optimum Pi ture Response) . . . . . .27
Instant Timer Re ording (ITR) . . . . . . . . . . . .28
ShowView Programming . . . . . . . . . . . . . . . .29
Timer re ording using On S reen Display . . .30
If Timer re ord events Overlap . . . . . . . . . . .31
Change (Deleting) the Timer Programme . . .31
Playing a DVD or Video CD . . . . . . . . . . . . .32-34
General Features . . . . . . . . . . . . . . . . . . . . . . .32
Moving to another TITLE . . . . . . . . . . . . . . .32
Moving to another CHAPTER/TRACK . . . . . .32
Sear h . . . . . . . . . . . . . . . . . . . . . . . . . . . . .32
Changing the Audio Channel . . . . . . . . . . . .32
Still Pi ture and Frame-by-Frame Playba k . .33
Slow Motion . . . . . . . . . . . . . . . . . . . . . . . . .33
Random . . . . . . . . . . . . . . . . . . . . . . . . . . . .33
Repeat A-B . . . . . . . . . . . . . . . . . . . . . . . . . .33
Repeat . . . . . . . . . . . . . . . . . . . . . . . . . . . . .33
3D Surround . . . . . . . . . . . . . . . . . . . . . . . . .33
Time Sear h . . . . . . . . . . . . . . . . . . . . . . . . .33
Zoom . . . . . . . . . . . . . . . . . . . . . . . . . . . . . .34
Marker Sear h . . . . . . . . . . . . . . . . . . . . . . .34
Special DVD Features . . . . . . . . . . . . . . . . . . .34
Title Menu . . . . . . . . . . . . . . . . . . . . . . . . . .34
Dis Menu . . . . . . . . . . . . . . . . . . . . . . . . . .34
Camera Angle . . . . . . . . . . . . . . . . . . . . . . .34
Changing the Audio Language . . . . . . . . . . .34
Subtitles . . . . . . . . . . . . . . . . . . . . . . . . . . . .34
DVD Audio Discs . . . . . . . . . . . . . . . . . . . . . . . . .35
Playing an Audio CD or MP3/WMA Disc . . . . . . .36
Audio CD and MP3 / WMA Disc Features . . . . . .37
Pause . . . . . . . . . . . . . . . . . . . . . . . . . . . . . .37
Moving to another Tra k . . . . . . . . . . . . . . . .37
Repeat Tra k/All/Off . . . . . . . . . . . . . . . . . . .37
Sear h . . . . . . . . . . . . . . . . . . . . . . . . . . . . .37
Random . . . . . . . . . . . . . . . . . . . . . . . . . . . .37
Repeat A-B . . . . . . . . . . . . . . . . . . . . . . . . . .37
3D Surround . . . . . . . . . . . . . . . . . . . . . . . . .37
Programmed Playback . . . . . . . . . . . . . . . . . . . . .38
Repeat Programmed Tra ks . . . . . . . . . . . . .38
Erasing a Tra k from Program List . . . . . . . .38
Erasing the Complete Program List . . . . . . . .38
Viewing a JPEG Disc . . . . . . . . . . . . . . . . . . . . . .39
Slide Show . . . . . . . . . . . . . . . . . . . . . . . . . .39
Still Pi ture . . . . . . . . . . . . . . . . . . . . . . . . . .39
Moving to another File . . . . . . . . . . . . . . . . .39
Zoom . . . . . . . . . . . . . . . . . . . . . . . . . . . . . .39
To rotate pi ture . . . . . . . . . . . . . . . . . . . . . .39
To listen to MP3/WMA musi wat hing pi ture
. . .39
5.1 Speaker Setup . . . . . . . . . . . . . . . . . . . . . .40
Playing a DVD VR format Disc . . . . . . . . . . . . .41
Maintenance and Service . . . . . . . . . . . . . . . . .41
Playing a DivX Movie Disc . . . . . . . . . . . . . . . .42
Additional Features-VCR part . . . . . . . . . . .43-44
On S reen Display . . . . . . . . . . . . . . . . . . . .43
Tape Counter Memory Stop . . . . . . . . . . . . .43
Friendly User Guide (Video Do tor) . . . . . . .43
Hi-Fi Stereo Sound System . . . . . . . . . . . . .44
Wide S reen Compatibility 16:9 . . . . . . . . . .44
Additional Features . . . . . . . . . . . . . . . . . . . . .45
Last S ene Memory . . . . . . . . . . . . . . . . . . .45
S reen Saver . . . . . . . . . . . . . . . . . . . . . . . .45
Video Mode Setting . . . . . . . . . . . . . . . . . . .45
Copying from DVD to VCR . . . . . . . . . . . . . . . .46
Recording from another video recorder . . . . .46
Radio Operation . . . . . . . . . . . . . . . . . . . . . . . .46
Presetting the Radio Stations . . . . . . . . . . . .47
Listening to the Radio . . . . . . . . . . . . . . . . . .47
To Clear the Stored Radio Stations . . . . . . . .47
Tuning into a Station Manually . . . . . . . . . . .48
Tuning into a Station Automati ally . . . . . . . .48
Mute . . . . . . . . . . . . . . . . . . . . . . . . . . . . . . .48
RDS Operation . . . . . . . . . . . . . . . . . . . . . . .48
Reference . . . . . . . . . . . . . . . . . . . .49
Language Codes . . . . . . . . . . . . . . . . . . . . . . .49
Country Codes . . . . . . . . . . . . . . . . . . . . . . . . .49
Troubleshooting . . . . . . . . . . . . . . . . . . . . .50-51
Specification . . . . . . . . . . . . . . . . . . . . . . . .52-53
3
To ensure proper use of this produ t, please read this
owner’s manual arefully and retain for future
referen e.
This manual provides information on the operation
and maintenan e of your DVD player. Should the unit
require servi e, onta t an authorized servi e
lo ation.
Symbol Used in this Manual
The lightning flash symbol alerts you to the
presen e of dangerous voltage within the
produ t en losure that may onstitute a risk of
ele tri sho k.
The ex lamation point alerts you to the pres-
en e of important operating and maintenan e
/ servi ing instru tions.
Indi ates hazards likely to ause harm to the
unit itself or other material damage.
Note:
Indi ates spe ial notes and operating features.
Tip:
Indi ates tips and hints for making the task easier.
A se tion whose title has one of the following symbols
is appli able only to the dis represented by the sym-
bol.
DVD and finalized DVD±R/RW
DVD Audio dis s
Video CDs
Audio CDs
MP3 Dis s
WMA Dis s
JPEG Dis s
DivX Dis s
About the Symbol Display
“ ” may appear on your TV display during opera-
tion and indi ates that the fun tion explained in this
owner’s manual is not available on that spe ifi DVD
video dis .
Notes on Discs
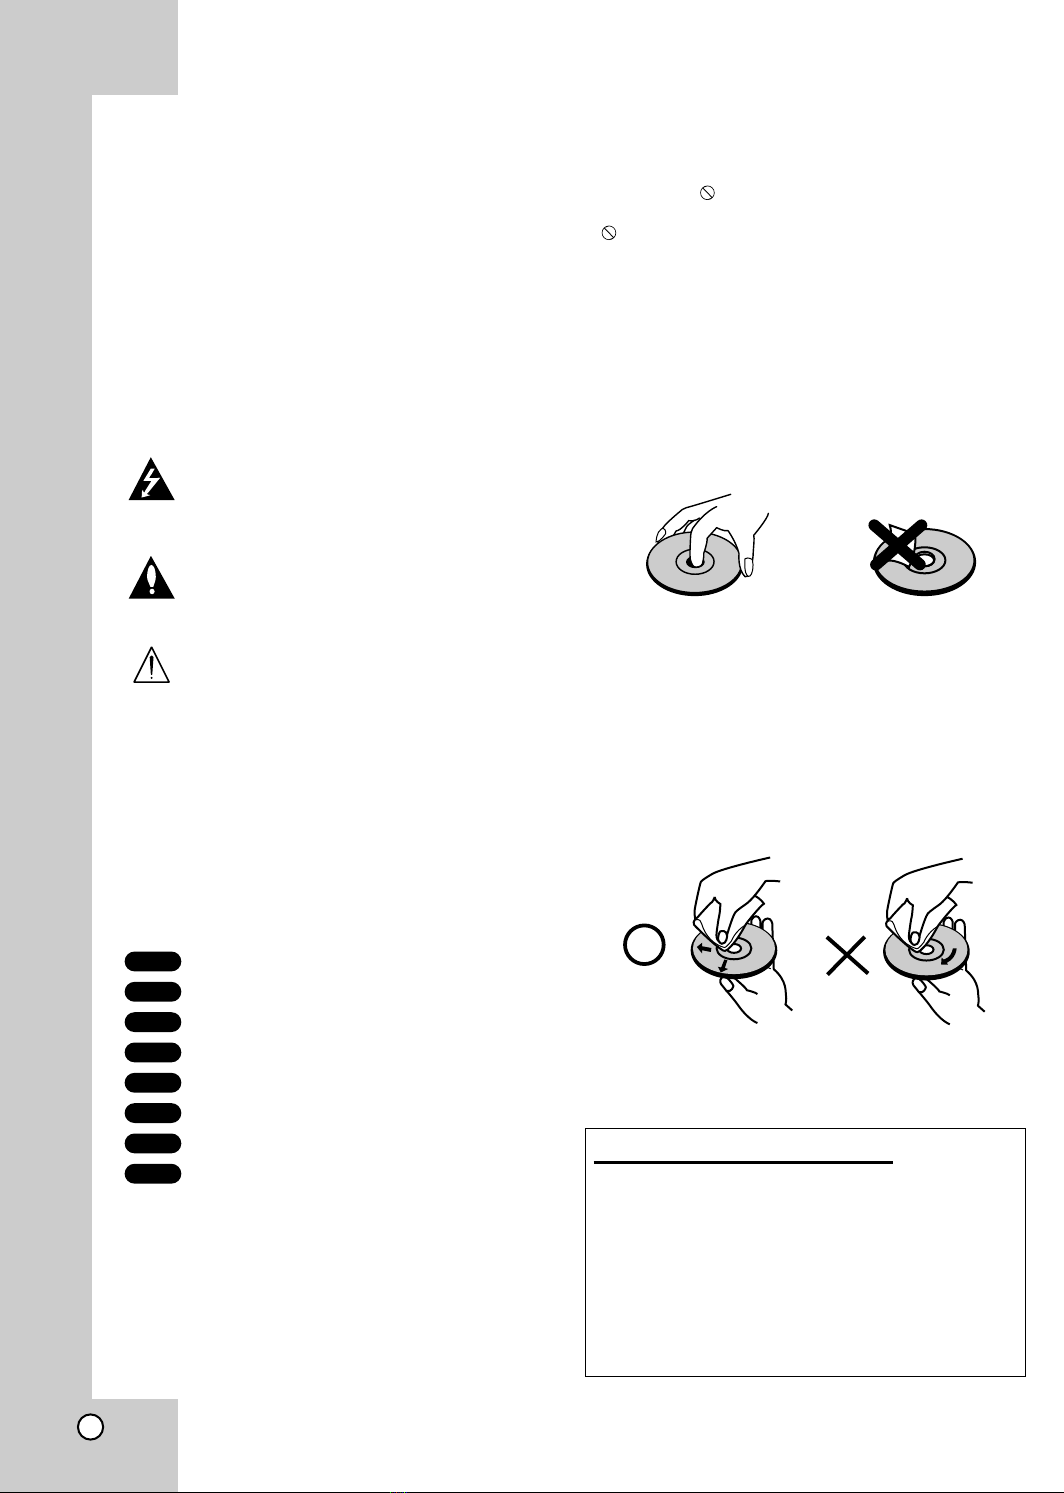
Handling Discs
Do not tou h the playba k side of the dis . Hold the
dis by the edges so that fingerprints do not get on
the surfa e. Never sti k paper or tape on the dis .
Storing Discs
After playing, store the dis in its ase. Do not expose
the dis to dire t sunlight or sour es of heat and
never leave it in a parked ar exposed to dire t sun-
light.
Cleaning Discs
Fingerprints and dust on the dis an ause poor
pi ture quality and sound distortion. Before playing,
lean the dis with a lean loth. Wipe the dis from
the enter out.
Do not use strong solvents su h as al ohol, benzine,
thinner, ommer ially available leaners, or anti-stati
spray intended for older vinyl re ords.
DivX
JPEG
WMA
MP3
CD
VCD
DVD-A
DVD-V
Setting the Output Source
You must sele t one of your output sour es (DVD or
VCR) to view on the TV s reen.
•If you want to view output source of DVD deck:
Press DVD on the remote or DVD/VCR on the front panel
until DVD indi ator on the front panel lights and output
sour e of DVD de k is viewed on the TV s reen.
•If you want to view output source of VCR deck:
Press VCR on the remote or DVD/VCR on the front panel
until VCR indi ator on the front panel lights and output
sour e of VCR de k is viewed on the TV s reen.
Introduction
4

Introduction
Types of Playable Discs
DVD
(8 m / 12 m dis )
DVD audio dis s
(8 m / 12 m dis )
Video CD (VCD)
(8 m / 12 m dis )
Audio CD
(8 m / 12 m dis )
In addition, this unit plays DivX file, DVD -R, DVD +R,
DVD -RW, DVD +RW, Kodak Pi ture CDs, SVCD, and
CD-R / CD-RW that ontains audio titles, MP3, WMA,
and/or JPEG files.
Notes:
• Depending on the onditions of the re ording equip-
ment or the CD-R/RW (or DVD -R, DVD +R, DVD -
RW, DVD +RW) dis itself, some CD-R/RW (or
DVD -R, DVD +R, DVD -RW, DVD +RW) dis s
annot be played on the unit.
• Do not atta h any seal or label to either side (the
labeled side or the re orded side) of a dis .
• Do not use irregularly shaped CDs (e.g., heart-
shaped or o tagonal) sin e they may result in
malfun tions.
Notes on DVDs and Video CDs
Some playba k operations of DVDs and Video CDs
may be intentionally programmed by software
manufa turers. This unit plays DVDs and Video CDs
a ording to dis ontent designed by the software
manufa turer, therefore some playba k features may
not be available or other fun tions may be added.
Manufa tured under li ense from Dolby Laboratories.
“Dolby”, “Pro Logi ”, and the double-D symbol are
trademarks of Dolby Laboratories. Confidential
Unpublished works. Copyright 1992-1997 Dolby
Laboratories. All rights reserved.
Manufa tured under li ense from Digital Theater
Systems, In . US Pat. No’s. 5,451,942; 5,956,674;
5,974,380; 5,978,762; 6,487,535 and other US and
world-wide patents issued and pending. “DTS” and
“DTS Digital Surround” are registered trademarks of
Digital Theater Systems, In . Copyright 1996, 2003
Digital Theater Systems, In . All rights reserved.
Regional code
This DVD player is designed and manufa -
tured for playba k of region “2” en oded DVD
software. This unit an play only DVD dis s
labeled “2” or “ALL”.
Notes on Regional Codes
• Most DVD dis s have a globe with one or more
numbers in it learly visible on the over.
This number must mat h your DVD player’s region-
al ode or the dis annot play.
• If you try to play a DVD with a different region ode
from your player, the message “Che k Regional
Code” appears on the TV s reen.
2
5

Disc-related terms
DVD ±R / DVD ±RW
DVD -R and DVD +R are two different standards for
re ordable DVD drives and dis s. This format allows
information to be re orded onto the DVD dis only
on e. DVD +RW and DVD -RW are two standards for
re-writable media, meaning the DVD ontent an be
erased and re-re orded. Single-sided dis s an hold
4.38 Gigabytes and double-sided dis s hold twi e as
mu h. There are no dual layer single sided re ordable
dis s.
VCD (Video CD)
A VCD holds up to 74 minutes (650 MB dis ) or 80
minutes (700 MB dis ) of MPEG-1 full-motion video
along with quality stereo sound.
MPEG
MPEG is an international standard for video and audio
ompression. MPEG-1 is used in en oding video for
VCD and provides for multi hannel surround sound
oding su h as PCM, Dolby Digital, DTS and MPEG
audio.
MP3
MP3 is a popular ompression format used for digital
audio files that yields very high near-CD quality.
WMA
Windows media audio file. A type of oding / de oding
developed by Mi rosoft Corp.
JPEG
Joint Pi tures Expert Group. JPEG is a ompressed
file format that allows you to save images with no limit
on the number of olors.
DivX
DivX is the name of a revolutionary new video ode
whi h is based on the new MPEG-4 ompression
standard for video.You will be able to play DivX
movies using this DVD/VCR Combi re eiver.
PBC: Playback Control (Video CD only)
Playba k ontrol is available for Video CD (VCD)
version 2.0 dis formats. PBC allows you to intera t
with the system via menus, sear h fun tions, or other
typi al omputer-like operations. Moreover, still
pi tures of high resolution an be played if they are
in luded in the dis . Video CDs not equipped with
PBC (Version 1.1) operate in the same way as audio
CDs.
Title (DVD video discs only)
A title is generally a distin t se tion of a DVD dis . For
example the main feature ould be title 1, a do umen-
tary des ribing how the film was made ould be title 2,
and ast interviews ould be title 3. Ea h title is
assigned a referen e number enabling you to lo ate it
easily.
Chapter (DVD video discs only)
A hapter is a segment of a title su h as a s ene in a
film or one interview in a series. Ea h hapter is
assigned a hapter number, enabling you to lo ate the
hapter you want. Depending on the dis , hapters
may not be re orded.
Group (DVD audio discs only)
The main audio ontent or a ompanying feature on-
tent or additional feature ontent, or musi
album.Ea h group is assigned a group referen e
number enabling you to lo ate it easily.
Scene (VCD)
On a video CD with PBC (playba k ontrol) fun tions,
moving pi tures and still pi tures are divided into
se tions alled “s enes”. Ea h s ene is displayed in
the menu s reen and assigned a s ene number,
enabling you to lo ate the s ene you want. A s ene is
omposed of one or several tra ks.
Track
A distin t element of audiovisual information, su h as
the pi ture or sound tra k for a spe ifi language
(DVD), or a musi al pie e on a video or audio CD.
Ea h tra k is assigned a tra k number, enabling you
to lo ate the tra k you want. DVD dis s allow one
tra k of video (with multiple angles) and several tra ks
of audio.
6

Introduction
7
Front Panel
PAUSE/STEP(XX/CC)
Pause playba k of a tape or a dis in the DVD or
VCR de k temporarily.
Press repeatedly for frame-by-frame playba k.
OPEN/CLOSE (ZZ)
Opens or loses the dis tray.
Remote Sensor
Point the DVD/VCR Combi re eiver
remote ontrol here.
Display window
Disc Tray (DVD deck)
Insert a dis here.
STANDBY/ON
Swit hes the DVD/VCR Combi re eiver ON and OFF.
DVD/VCR (output select)
Sele t one of your output sour es to view
on the TV s reen between DVD and VCR.
REC/ITR (zz)
To re ord normally or to
a tivate Instant Timer Re ording.
STOP (xx)
Stops playba k of a dis or tape.
VIDEO/AUDIO (Left/Right)
Conne t the audio/video output of an external sour e
system, TV/Monitor, Another VCR).
Cassette Compartment
(VCR deck)
Insert a video assette here.
EJECT(ZZ)
Eje ts the tape in the VCR de k.
PLAY (B)
To play ba k a re orded tape or dis .
Forward SKIP/SCAN (
RR
/
TT
)
DVD: Go to NEXT hapter/tra k. Press and hold for two se onds for a fast
forward sear h.
VCR: Advan es the tape during the STOP mode or for fast
forward pi ture sear h.
Reverse SKIP/SCAN (
SS
/
QQ
)
DVD: Go to beginning of urrent hapter/tra k or to previous
hapter/tra k. Press and hold for two se onds for a fast reverse sear h.
VCR:
Rewinds the tape during the STOP mode or for fast reverse pi ture sear h.
PROG./PRESET (v/V)
To s an up or down through memorized hannels or
to ontrol tra king during playing ba k a tape (VCR mode).
To tune in the desired station (Radio Mode).
TUNER FM/AM
To hange between AM and
FM bands.
VOLUME Control
Turn the knob lo kwise to in rease volume, ounter lo kwise to de rease the volume.
INPUT SELECT
Sele t the VCR de k’s sour e (Tuner, A1, A2 or AV3)
Attention!
This is only a standby swit h (power onsumption in standby mode).This devi e has power onsumption
in standby mode. In order to separate it ompletely from ele tri mains you need to unplug the power ord.

MUTE REC COPY
CHP/TRK PROG
RADIO
dts
VCD
RPT ALL
A B
MP3 TV
DVD RDS
PROLOGIC II
DIGITAL
PCM WMA
PHOTO
ST
Hi-Fi
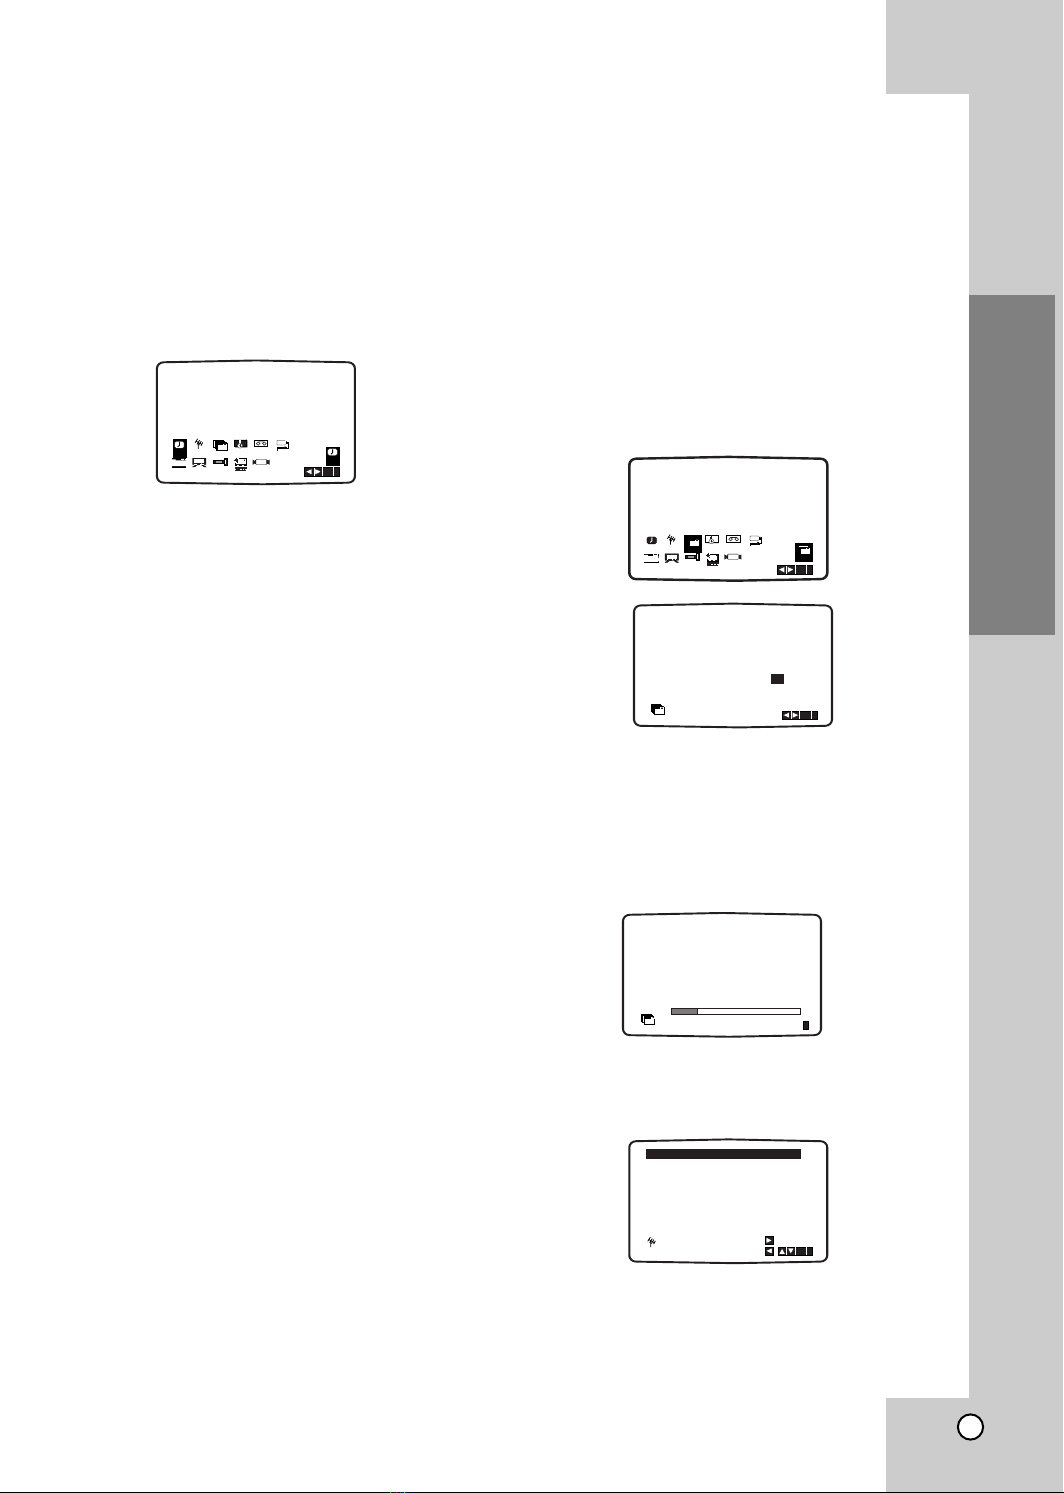
MUTE indi ator
MP3 dis inserted.
Indi ates urrent hapter,
tra k number or
hannel number.
Indi ates urrent
audio stream.
Indi ates urrent
surround mode.
Repeat playba k mode indi ators.
Total playing time/Elapsed time/
Frequen y/remaining time/ Current
de k status/Surround mode/Volume
et . indi ators.
A assette
is loaded
in the VCR
de k.
Indi ates the unit is
radio mode.
JPEG dis inserted.
Lights up when a stereo broad ast is being re eived in radio mode.
Lights up when the FM
station tuned is trans-
mitting RDS data.
A dis is loaded in the DVD de k. (Lights when a dis is
loaded in the DVD de k.)
DVD/VCR Combi re eiver is in VCR timer re ording
mode or a VCR timer re ording is programmed.
DVD to VCR opy is in progress.
DVD/VCR Combi re eiver is Re ording a tape.
Indi ates the unit is
playing ba k a tape
re orded in Hi-Fi.
DVD dis inserted.
WMA dis inserted
VCD dis inserted.
Indi ates the unit is TV mode.
Programmed
playba k a tive
Display Window
8

Introduction
9
AV
PR/TRK/PRESET
DISPLAY
CLK/CNT SET UP/ i
PR/TRK/PRESET
TUNING- TUNING+
PROGRAM CLEAR AUDIO
SOUND MODE
STOP
REC/ITR
PLAY
PAUSE/STEP
REPEAT
A-B
REPEAT TV/VCR
ANGLE
CM SKIP SPEED TITLE ZOOM
RANDOM
EJECT
OPEN/CLOSE
VCR FM/AM AUX
CD/DVD
POWER
ENTER
MEMORY
DISC MENURETURN
BACKWARD
FORWARD
MARKER SEARCH MUTE
S-TITLE
RDS
OK
SHOWVIEW
POWER *
Swit hes DVD/VCR Combi re eiver ON and
OFF.
0-9 numerical buttons
Sele ts numbered options in a menu.
PROGRAM
A esses or removes Program menu.
CLEAR
Removes a tra k number on the
program menu or a mark on the
MARKER SEARCH menu.
Press to lear preset stations from the
tuner memory.
DISPLAY, CLK/CNT
A esses On-S reen display.
Swit hes among the lo k, tape ounter
and tape remaining modes on the display.
b/B/v/V(left/right/up/down)
- Sele ts an option in the menu.
- PR/TRK/PRESET(v/V):
Sele t programme of VCR or Tuner
Adjusts manually the tape’s pi ture
ons reen.
- TUNING (b/B):
To tune in the desired radio station.
RETURN
Removes the setup menu.
REC/ITR (z)
Re ords normally or a tivates Instant
Timer Re ording.
BACKWARD (..)
DVD: Sear h ba kward*/go to beginning
of urrent hapter or tra k or go to
previous hapter or tra k.
VCR: Rewinds the tape in STOP mode
or for fast reverse pi ture sear h.
*Press and hold button for about two
se onds.
FORWARD (>>)
DVD: Sear h forward*/go to next
hapter or tra k.
VCR: Advan es the tape in STOP mode
or for fast forward pi ture sear h.
*Press and hold button for about two
se onds.
STOP (Á)
Stops playba k.
PAUSE/STEP (X)
Pause playba k or re ording
temporarily/press repeatedly for
frame-by-frame playba k.
PLAY (G)
Starts playba k.
ANGLE
Sele ts a DVD amera angle if
available.
CM SKIP
Fast forwards pi ture sear h through 30
se onds of re ording.
RANDOM
Play tra ks in random order.
OPEN/CLOSE, EJECT (ZZ)
- Opens and loses the dis tray.
- Eje ts the tape in the VCR de k.
CD/DVD/VCR select buttons
Sele t the output sour e (CD/DVD or
VCR) to view on the TV s reen.
FM/AM Tuner select button
Sele t the DVD/VCR Combi re eiver’s tuner
as the listening hoi e. (FM and AM bands)
AUX
For sele ting the digital signal from
DIGITAL AUDIO IN (OPTICAL)
AV
Sele ts the VCR de k’s sour e
(Tuner, AV1, AV2 or AV3).
SOUND MODE
Sele ts sound mode between BYPASS,
PRO LOGIC, PRO LOGICII (MOVIE,
MUSIC, MATRIX) and 3D SURROUND.
AUDIO
Sele ts an audio language (DVD) or an
audio hannel (CD).
RDS
To he k the RDS servi e programme (PS).
SHOWVIEW
To display the programme menu for
ShowView programming.
SET UP/ i
A ess or remove setup menu.
OK/MEMORY/ENTER
-Enter a radio stations frequen y into
the tuner.
-Displays fun tions on the TV s reen.
-A knowledges menu sele tion.
DISC MENU
A esses menu on a DVD dis .
VOLUME (+/-)
Adjusts speaker volume.
MARKER
Marks any point during playba k.
SEARCH
Displays MARKER SEARCH menu.
S-TITLE
Sele ts a subtitle language.
MUTE
Momentarily silen e the speaker of the
DVD/VCR Combi re eiver.
TV/VCR
Swit h between your TV’s tuner
and the VCR’s internal tuner.
ZOOM
Enlarges DVD video image.
TITLE
Displays the dis ’s Title menu, if
available.
REPEAT A-B/SPEED/REPEAT
-Repeat hapter, tra k, title, all.
- Repeats sequen e.
- Sele ts re ording speed.
Note
This remote ontrol use the same buttons for VCR and DVD fun tions (ex. PLAY).
To use the VCR, first press the VCR button.
To use the DVD, first press the CD/DVD button.
Remote Control
* Attention!
This is only a standby swit h (power onsumption in standby mode).This devi e has power onsumption in
standby mode. In order to separate it ompletely from ele tri mains you need to unplug the power ord.
4
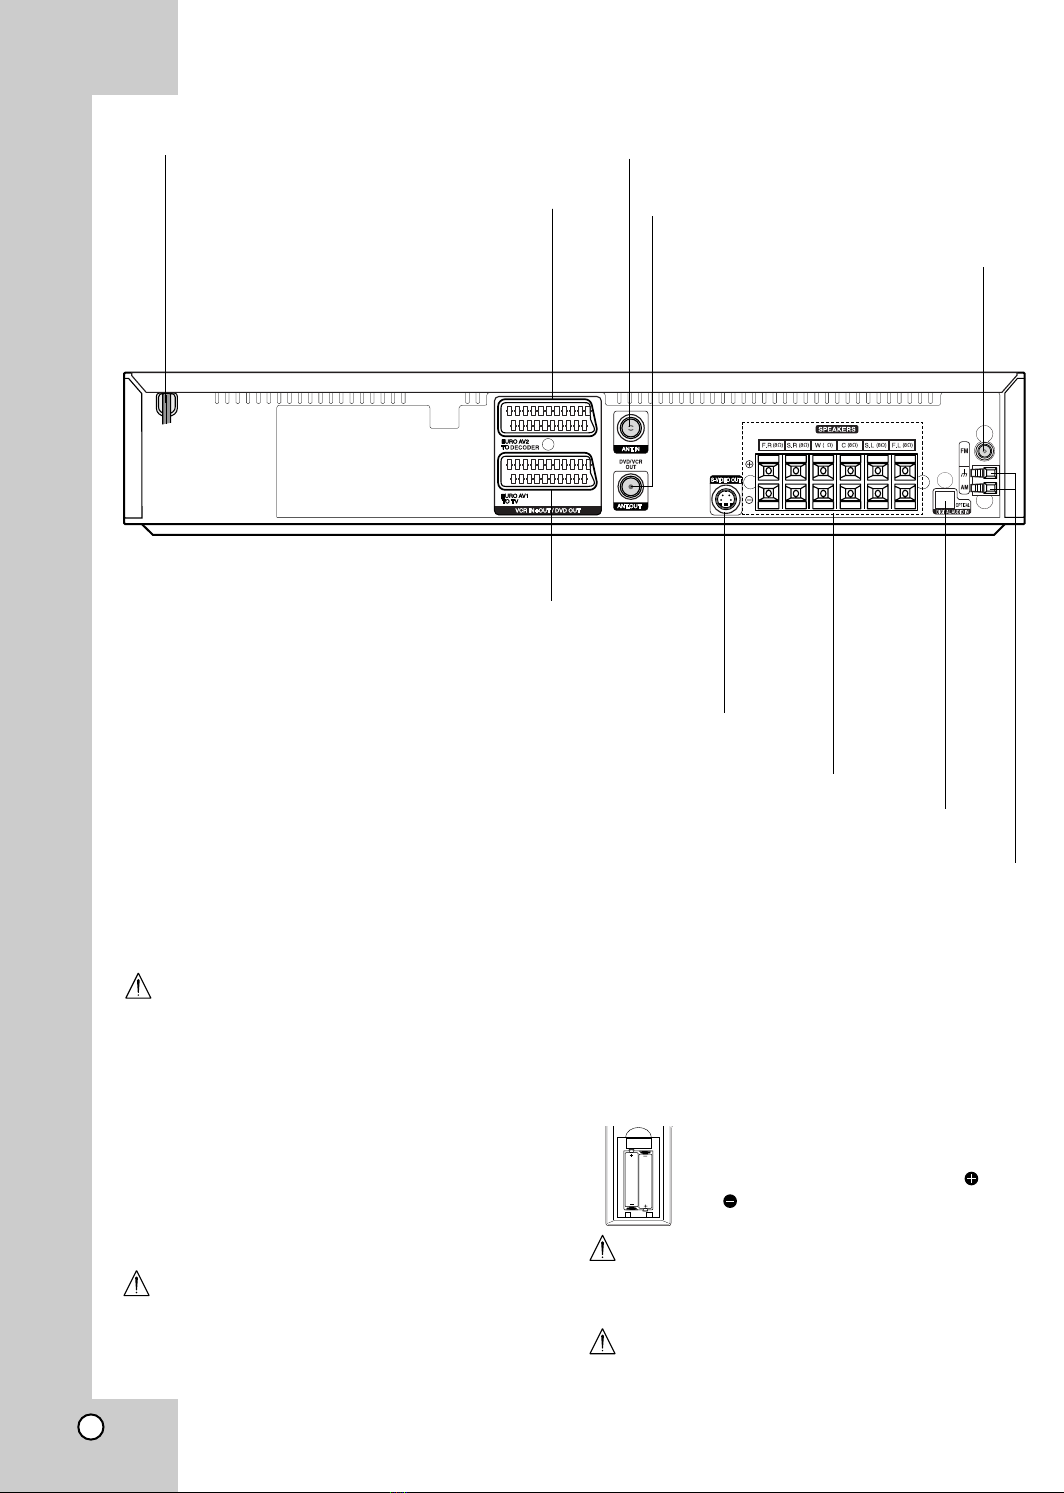
Do not touch the inner pins of the jacks on the rear panel.
Electrostatic discharge may cause permanent damage to the unit.
ANT.IN
Conne t the aerial using this ja k.
AC Power Cord
Plug into the power sour e.
S-VIDEO OUT (DVD OUT)
Conne t to a S-Video Input on TV.
FOR DVD VIEWING ONLY.
ANT.OUT
Conne t to a TV with RF able.
SPEAKER CONNECTORS
Conne t the six supplied speakers to these terminals.
FM ANTENNA CONNECTOR
Conne t the FM antenna to this
terminal.
AM ANTENNA CONNECTORS
Conne t the AM antenna to this terminal.
EURO AV1 TO TV (VCR IN+OUT/DVD OUT)
Conne t to your TV set or another video re order.
EURO AV2 TO DECODER
(VCR IN+OUT/DVD OUT)
Conne t to Set Top Box or
another video re order.
Remote Control Operation Range
Point the remote ontrol at the remote sensor and
press the buttons.
Distance: About 6m (20ft) from the front of the
remote sensor
Angle: About 30° in ea h dire tion of the front of the
remote sensor
Attention!
Dispose worn-out batteries not with your domesti
waste.
Please onta t your lo al government for disposal
pra ti es in your aerea
Remote control battery installation
Deta h the battery over on the rear
of the remote ontrol, and insert two
R03 (size AAA) batteries with and
aligned orre tly.
Caution
Do not mix old and new batteries. Never mix different
types of batteries (standard, alkaline, et .).
Attention!
Only standby power.
This devi e has power onsumption in standby mode.
AAA
AAA
Rear Panel
10
DIGITAL AUDIO IN (OPTICAL)

Installation and Setup
11
S
D
E
R
S-VIDEO
INPUT
AERIAL
Rear of TV
SCART INPUT
A
DECODER (or another VCR)
4
• Make one of the following onne tions, depending
on the apabilities of your existing equipment.
Tips
• Depending on your TV and other equipment you
wish to onne t, there are various ways you ould
onne t the DVD/VCR Combi re eiver. Use one of
the onne tions des ribed below.
• Please refer to the manuals of your TV, VCR,
Stereo System or other devi es as ne essary to
make the best onne tions.
Caution
•
Make sure the
DVD/VCR Combi re eiver
is onne t-
ed dire tly to the TV. Sele t the orre t AV input on
your TV.
• Do not onne t your DVD/VCR Combi re eiver to
TV via your DVD/VCR Combi re eiver. The DVD
image ould be distorted by the opy prote tion
system.
Basic connections (AV)
1. Conne t the EURO AV1 TO TV on the rear panel
of the DVD/VCR Combi re eiver to the s art input
so ket on the TV using a SCART lead (E).
2. You an onne t su h a de oder (or another VCR)
to the DVD/VCR Combi re eiver (D).
Basic connections (RF)
1. Conne t the aerial able (A) from your indoor/ out-
door aerial to ANT.IN ja k on the rear panel of
DVD/VCR Combi re eiver.
2. Conne t the supplied RF able (R) from the
ANT.OUT ja k on the rear panel of
DVD+VCR
Re eiver
to your television’s Aerial Input.
S-Video connection
Conne t the S-VIDEO OUT ja k on the DVD/VCR
Combi re eiver to the S-VIDEO IN ja k on the TV
using the S-Video able (S).
Notes
• The signal of S-VIDEO OUT ja k will output only
when the fun tion mode is sele ted to CD/DVD.
• When you onne t the DVD/VCR Combi re eiver to
your TV, be sure to turn off the power and unplug
both units from the wall outlet before making any
onne tions.
TV & Decoder (or another VCR Connections)
Installation and Setup

12
Progressive Scan (ColorStream®pro) connection
Conne t the EURO AV1 TO TV so ket on the
DVD/VCR Combi re eiver to the COMPONENT
VIDEO INPUT(Y Pb Pr) ja ks on the TV using the
SCART to RCA able (Optional).
If your television is a high-definition or “digital
ready” television, you may take advantage of the
DVD/VCR Combi re eive
r
progressive s an output
for the highest video resolution possible.
If your TV does not a ept the Progressive S an
format, the pi ture will appear s rambled if you try
Progressive S an on the DVD/VCR Combi
re eiver.
Notes:
•Set the Progressive Mode to “On” on the setup
menu for progressive signal, see page 24.
•On e the setting for progressive s an output is
entered, an image will only be visible on a progressive
s an ompatible TV or monitor. If you set Progressive
S an to On in error, you must reset the unit.
1) Remove any dis from the unit and lose the dis
tray. See that “NO DISC” is displayed on the display
window.
2) Press STOP and hold it for five se onds before
releasing it. The video output will be restored to the
standard setting and a pi ture will on e again be
visible on a onventional analog TV or monitor.
• Progressive s an does not work with the analog
video onne tions (yellow VIDEO OUT ja k).
Caution:
You must set the TV Output Sele t option on the
setup menu to use Y Pb Pr or RGB signal from the
EURO AV1 TO TV so ket.
(See “TV Output Sele t” on page 24.)
SCART INPUT
YPb Pr
COMPONENT VIDEO /
PROGRESSIVE SCAN INPUT
VIDEO
INPUT
S-VIDEO
INPUT
Rear of TV
Rear of DVD/VCR Combi receiver
Pr(R)
Pb(B)
Y(G)

Installation and Setup
FM Wire aerial (supplied)
AM Loop aerial (supplied)
4
Radio Aerial Connections
Conne t the supplied FM/AM aerial for listening to the radio.
• Conne t the AM loop aerial to the AM aerial onne tor.
• Conne t he FM wire aerial to the FM aerial onne tor.
Notes
•To prevent noise pi kup, keep the AM loop aerial away from the DVD/VCR Combi re eiver and other omponents.
•Be sure to fully extend the FM wire aerial.
•After onne ting the FM wire aerial, keep it as horizontal as possible.
DVD Player (or Digital Device, etc)
OPTICAL
OUT
4
Accessory Audio/Video (A/V) Connections to DVD/VCR Combi
receiver
Conne t the AV3 ja ks on the DVD/VCR Combi re eiver to the audio/video out ja ks on your a essory
omponent, using the optional audio/video ables.
If the auxiliary devi es (e.g. DVD) are equipped with OPTICAL OUT ja k, onne t them to to the orresponding
input ja k of the DVD/VCR Combi re eive.
13
14
Notes
•Be sure to mat h the speaker able to the appropriate terminal on the omponents: + to + and – to –. If the ables are
reversed, the sound will be distorted and will la k base.
•If you use front speakers with low maximum input rating, adjust the volume arefully to avoid ex essive output on the
speakers.
•Do not remove the front over of supplied speaker.
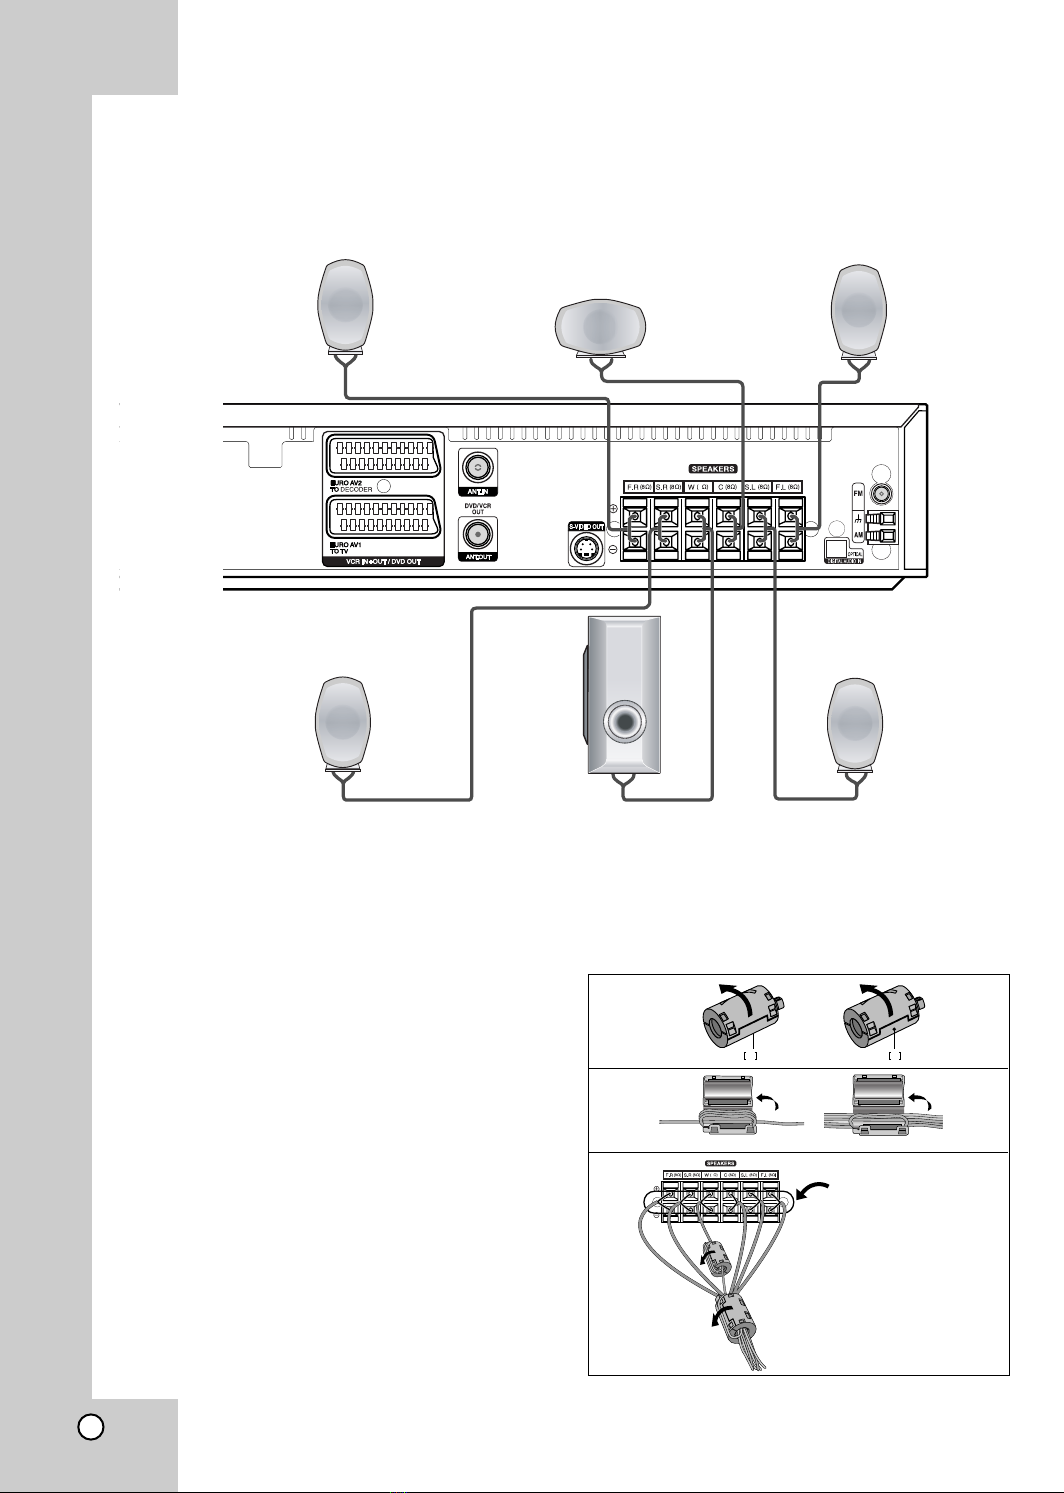
Front Speaker
(Right) Front Speaker
(Left)
Centre Speaker
Rear Speaker
(Right Surround)
Rear Speaker
(Left Surround)
Subwoofer
4
Speaker System Connection
Conne t the speakers using the supplied speaker ords.
To obtain the best possible surround sound, adjust the speaker parameters; distan e, level, et ..
1
2
3
a a
AB
A
B
4
Make the leagth here
as short as possible.
About Ferrite Core
Be sure to atta h the ferrite ore to the speaker ables
(for onne ting to this unit).
This ferrite ore an redu e noises.
How to attach the ferrite core
1. Push the stopper [a] of the ferrite ore to open.
2. Wind the Subwoofer able three times on the ferrite
ore (A). Wind the Subwoofer able on e on the
ferrite ore (B).
3. Pass the others straight on the ferrite ore (B).
4. Close the ferrite ore until it li ks.
Notes
•Take are not to pin h the speaker ables between the
ferrite ores.

Installation and Setup
Centre Speaker
Front Speaker
(Left)
Speaker Positioning Example
Rear Speaker
(Left)
Rear Speaker
(Right)
Front Speaker
(Right)
Subwoofer
Speaker Positioning
In the ase of normal position use the 6 speakers (2 front speakers, entre speaker, 2 rear speakers and
subwoofer).
If you want to play the ex ellent bass sound, DTS digital surround or Dolby Digital surround, you should onne t
a subwoofer.
•Front speakers
A ording to your listening position set up the speakers for equal distan e. And by hearing position set up the
interval between speakers to 45 degree.
•Centre speaker
The entre speakers and front speakers are ideally the same height. But normally pla e it above or below the
television.
•Rear speakers
Pla e left and right behind the listening area. These speakers re reate sound motion and atmosphere required
for surround sound playba k. For best results, do not install the rear speakers too far behind the listening
position and install them at or above the level of the listener’s ears. It is also effe tive to dire t the rear speak-
ers towards a wall or eiling to further disperse the sound.
In the ase of a smaller room size, if the audien e is near to the rear wall set the rear speakers opposite ea h
other, and set the rear speakers above 60 - 90 m than the listener’s ears.
•Subwoofer
This an be pla ed in any front position.
15
16
Mini Glossary for Audio Stream
& Surround mode
Allows you to enjoy 5.1(or 6) dis rete hannels of high
quality digital audio from DTS program sour es su h as
dis s, DVD and ompa t dis s, et .bearing the trademark.
DTS Digital Surround delivers up to 6 hannels of transpar-
ent audio(whi h means identi al to the original masters) and
results in ex eptional larity throughout a true 360 degree
sound field. The term DTS is a trademark of DTS
Te hnology, LLC. Manufa tured under li ense from DTS
Te hnology, LLC.
The Dolby Digital surround format lets you enjoy up to 5.1
hannels of digital surround sound from a Dolby Digital pro-
gram sour e. If you play DVDs with “ ” mark, you an
enjoy even better sound quality, greater spatial a ura y,
and improved dynami range.
Use this mode when playing movie or Dolby Digital 2 han-
nel whi h arries the “ ” mark. This mode provides the
effe t of being in a movie theatre or live on ert house-an
effe t with an intensity whi h an only be obtained through
DOLBY PRO LOGIC SURROUND. The effe t of the
front/ba k/left/right movement of the sound image, as well as
the sense of fixed position in the sound image, is mu h lear-
er and more dynami than before.
(II)
Dolby Pro Logi II reates five full-bandwidth output han-
nels from two- hannel sour es. This is done using an
advan ed, high-purity matrix surround de oder that extra ts
the spatial properties of the original re ording without adding
any new sounds or tonal olorations.
MOVIE mode:
The Movie mode is for use with stereo television shows and
all programs en oded in Dolby Surround. The result is
enhan ed soundfield dire tionality that approa hes the quality
of dis rete 5.1- hannel sound.
MUSIC mode:
The Musi mode is for use with any stereo musi re ordings,
and provides a wide and deep sound spa e. The Musi mode
in ludes ontrols that allow the sound to be tailored to individ-
ual listening tastes.
MATRIX mode:
The Matrix mode is the same as the Musi mode ex ept that
the dire tional enhan ement logi is turned off. It may be used
to enhan e mono signals by making them seem “larger.” The
Matrix mode may also find use in auto systems, where the
flu tuations from poor FM stereo re eption an otherwise
ause disturbing surround signals from a logi de oder. The
ultimate “ ure” for poor FM stereo re eption may be simply to
for e the audio to mono.
3D SURROUND
This unit an produ e a 3D Surround effe t, using 3D
Surround Sound te hnology, whi h simulates multi- hannel
audio playba k from two onventional stereo speakers
instead of the five or more speakers normally required to lis-
ten to multi- hannel audio from a home theatre. This feature
works with DVD dis s en oded with Dolby Pro Logi and
Dolby Digital audio tra ks.
BYPASS
Software with multi hannel surround audio signals is played
a ording to the way it was re orded.
Sound Mode
You an enjoy surround sound simply by sele ting
one of the pre-programmed sound fields a ording to
the
program you want to listen to.
Press SOUND MODE repeatedly until the sound
mode you want appears in the display window as
below.
Ea h time you press SOUND MODE button, the
sound mode is hanged in the following order;
PRO LOGIC →PL2 MOVIE → PL2 MUSIC →PL2 MATRIX
→3D SURROUND →BYPASS
When DVD is inserted.
You an hange the stream of DVD (Dolby Digital, DTS,
PCM, et ) by pressing the AUDIO button on the remote dur-
ing playba k.
Although the DVD ontents differ from dis to dis , the fol-
lowing explains the basi operation when this feature is
used.
Ea h time you press AUDIO button, the sound mode of DVD
is hanged as the following order;
→→→
For your reference
•
The DVD/VCR Combi receiver memorizes the
last mode settings for each source individually.
•
You can identify the encoding format of
program software by looking at its packaging.
- Dolby Digital dis s are labeled with the logo.
- Dolby Surround en oded programs are labeled
with the logo.
- DTS Digital Surround dis s are marked with DTS.
Note
•When you play sound tra ks with 96kHz sampling
frequen y, the output signals will be onverted to 48kHz
(sampling frequen y).
Installation and Setup
Before Operation-VCR part
Tuning in a video channel on your TV
Notes
• The output frequen y of this video re order (VCR) is
set at UHF hannel 36. If hannel 36 is already
used by another TV station, or if the pi ture is
distorted, you an hange the transmitter hannel of
your DVD/VCR Combi re eiver. Stages 5 ~ 8 will
show you how to hange the output frequen y of
your DVD/VCR Combi re eiver.
• Your TV re eives signals from the video re order
(VCR) like another TV station. You have to sele t a
hannel number on your TV and tune it in so that
you may wat h video tapes. If you have used a
SCART able then your TV should already have a
dedi ated video hannel built into it, usually
alled AV.
1. Make sure that you have orre tly installed your
VCR as des ribed earlier in this book.
Press POWER to turn on your DVD/VCR Combi
re eiver. Turn on your TV.
2. Insert a pre-re orded video tape into your
DVD/VCR Combi re eiver and press PLAY on the
remote ontrol. Sele t a TV hannel number on
whi h you wish to wat h video’s.
Don’t worry if you don’t have a video-tape to play
at this stage! If you swit h your DVD/VCR Combi
re eiver on and ontinue stages 3 ~ 4, instead of
seeing video playba k tune your TV until you see
a bright blue s reen.
3. Tune this hannel until the video pi ture is sharp
and the sound is lear.
If you have used a SCART able you will not
have to tune your TV, simply sele t the AV
hannel. The AV hannel is already pre-tuned for
optimum video playba k on your TV.
4. Store this hannel on your TV.
You will need to look at the TV instru tion book if
you do not know how to do this.
5. Only carry out stages 5 ~ 8 if you cannot
obtain clear video playback as described in
stages 1 ~ 4. Sele t a TV hannel number on
whi h you wish to wat h video’s.
Make sure that your DVD/VCR Combi re eiver is
in standby pressing POWER on the remote ontrol
(only the lo k will be displayed).
6. Press PROG. v or Von the front of your DVD/
VCR Combi re eiver for more than 4 se onds.
RF36 will appear in the display window.
The following pi ture will be displayed on the TV
s reen.
7. Press v or Vto sele t another video hannel. You
may sele t any hannel number between 22 and
68.
You an also set it to “OFF” if there is any interfer-
en e when your TV is onne ted to the DVD/VCR
Combi re eiver with a SCART lead.
8. Sele t a TV hannel number on whi h you wish to
wat h video’s.
Press STANDBY/ON on the front of your
DVD/VCR Combi re eiver when you have finished.
Tune this hannel so that a bright blue s reen
appears.
Store this hannel on your TV.
Notes
Make sure that you have orre tly installed your
DVD/VCR Combi re eiver and su essfully tuned in a
dedi ated video hannel on your TV. If you do not
tune in a dedi ated video hannel on your TV you will
be unable to view and re ord video tapes!
Using your VCR for the very first
Initial preset
For the following steps we do assume that you have
just onne ted your video re order for the very first
time. In this ase the video re order is on after mains
onne tion. You should not tou h any buttons yet. On
the onne ted TV you will now see.
Note - If this menu does not appear, your video
re order was programmed already.
1. Sele t the ountry a ording to your area with
F and G.
“A”: Austria, “B”: Belgium, “CH”: Switzerland, “D”:
Germany, “DK”: Denmark, “E”: Spain, “F”: Fran e,
“I”: Italy, “N”: Norway, “NL”: Netherlands, “P”:
Portugal, “S”: Sweden, “SF”: Finland, OTHERS.
2. Press OK to start the automati storing of the
hannels of the TV stations in your area.
i
RF CHANNEL 36
PSET
R
A
NNL P SF
BDDKEFI
OK
i
Pr-12
ACMS
CH
OTHERSS
Pr-12
ACMS
01 C02 00 PR-01
ES
i
17
18
Setting the clock Manually
The lo k in your VCR ontrols time and date
settings for your VCR.
The lo k is set automati ally during ACMS
(Automati Channel Memory System) when your
VCR dete ts a hannel that broad asts a
Teletext signal. If the broad ast signal is weak
the lo k will not be set and will require setting
manually.
1. Press i.
Press 1or 2to sele t TIME DATE.
Press OK.
The auto adjust mode an be set to “OFF” by
pressing Dor Eif you want to set the time manually.
Press OK.
2. Use the numbered buttons on the remote ontrol
to alter the HOURS, MINUTES, DAY, MONTH and
YEAR.
Please note your VCR uses a 24 hour lo k. e.g.
1pm will be displayed as 13:00.
The day of the week will appear automati ally
when you enter the year.
3. If you make a mistake press 1or 2and enter the
orre t details.
4. Press i.
To set the colour system
1. Press i.
2. The main menu will appear on the TV s reen.
3. Press 1or 2to sele t the SYSTEM and press OK.
4. Press 3or 4to sele t a ording to the COLOUR
system used.
5. Press 1or 2to sele t the RF AUDIO.
Press 3or 4to sele t a ording to the RF AUDIO
used.
6. Press ito remove the menus from the TV s reen.
HH MN DD MM YY
:..- -
- - - - - - - - - - -
i
12
TIME
DATE
NIC
REC
i
Pr-12
ACMS
PSET
R
12
TIME
DATE
SYS-
TEM
SYS-
TEM
Dr.
VCR
OSD
ON
OFF
OSD
f
16:9
4:3
OPR
AUTO
PAL
MESECAM
HH MN DD MM YY
:..00 1 01 04 THU
i
12
TIME
DATE
8
OSD
ON
OFF
OSD
f
16:9
4:3
OPR
REC
i
Pr-12
ACMS
PSET
R
12
TIME
DATE
SYS-
TEM
SYS-
TEM
Dr.
VCR
NIC
RF I/I
RF B/G
RF D/K
AUTO ADJUST
- -
i
12
TIME
DATE
ON:
OK
Installation and Setup
19
How to use the main menu
This DVD/VCR Combi re eiver an easily be
programmed by using the menus displayed on
s reen. The menus are ontrolled from the Remote
Control Handset.
1. Swit h on your TV set and DVD/VCR Combi
re eiver by pressing the POWER button.
2. Press ibutton.
The main menu will appear on the TV s reen.
•REC
Timer re ording setting (see p. 30).
•PR SET
Manual tuning setting (see p. 20).
•ACMS
ACMS (Automati Channel Memory System)
(see right olumn).
•TIME DATE
Date & lo k setting (see p. 18).
•SYSTEM
To set the Colour TV System (see p. 18).
•Dr.
To he k a problem with your DVD/CD/VCR
re eiver (see p. 43).
•fOSD ON/OFF
To display the operational mode of your DVD/VCR
Combi re eiverr (see p. 43).
•16:9/4:3
To sele t the aspe t ratio of your TV (see p. 44).
•DECODER
To use a pay-TV de oder (or Satellite) with your VCR
(
see p. 44
).
•OPR
To improve the playba k pi ture (see p. 27).
•NIC
To a tivate or dea tivate the NICAM digital sound
(see p. 44).
Tip:
You an hange the menu language on the DVD
setup menu. (See the Menu Language on page 23.)
3. Press 1or 2to sele t the desired menu.
Press OK and press 3or 4to sele t.
5. Press ito return to a TV pi ture.
Tuning in TV Stations Automatically
If the TV broad ast signal is weak your DVD/VCR
Combi re eiver may not dete t the ne essary
information and will not be able to store them
orre tly. To over ome this problem please turn to
the MANUAL TUNING se tion on page 20.
1. Press POWER to turn on your DVD/VCR Combi
re eiver.
2. Press ibutton.
The main menu will appear on the TV s reen.
Press 1or 2to sele t the ACMS. Press OK.
3. Press 1or 2to sele t COUNTRY.
(A:Austria, B:Belgium, CH:Switzerland,
D:Germany, DK:Denmark, E:Spain, F:Fran e,
I:Italy, N:Norway, NL:Nertherlands, P:Portugal,
S:Sweden, SF:Finland, OTHERS)
Press OK again to start the automati tuning
pro ess.
4. Press i to remove the menus from the TV
screen.
Press ito save your settings.
REC REC
OK
i
SYS-
TEM
PSET
R
Dr.
VCR
Pr-12
ACMS
OSD
ON
OFF
OSD
f
12
TIME
DATE
16:9
4:3
OPR
DECO-
DER
+
-
NIC
02 C03 00
03 C04 00
04 C05 00
05 C06 00
06 C07 00
07 C08 00
08 C09 00
01 C02 00
OK
i
,DELETE :
MOVE :
PSET
R
TV2
SVT
SVT1
SVT2
SVT4
NED1
NED2
TV1
01 C02 00
02 C03 00
03 C04 00
ES
i
Pr-12
ACMS
TV1
TV2
SVT
A
NNL PSSF
BDDKEFI
OK
i
Pr-12
ACMS
CH
OTHERS
REC
SYS-
TEM
Dr.
VCR
OSD
ON
OFF
OSD
f
16:9
4:3
PSET
R
12
TIME
DATE
ACMS
Pr-12
ACMS
Pr-12
OK
i
OPR
DECO-
DER
+
-
NIC
Tuning in TV Stations Manually
In ertain areas of the ountry broad ast signals may
be too weak for your DVD/VCR Combi
re eiver automati tuning pro ess to find or assign TV
stations orre tly.
You must tune in these weaker broad ast
stations manually in order for your DVD/VCR Combi
re eiver to store them.
1. Press i.
The main menu will appear on the TV s reen.
Press 1or 2to sele t the PR SET.
Press OK.
2. Press i.
The station table will appear.
Press 3or 4to sele t the programme number
that you want to tune (for example, PR 09).
3. Press OK.
Press AV to sele t C(Standard stations) or S
(Cable stations):
C02 - C69, S01 - S41.
Enter the hannel number of station that you want
to tune with the numbered buttons or use 3or 4
to find the required station.
4. Sear hing will stop when it lo ates a station.
Press 2to sele t MFT.
Press 3or 4to adjust.
5. Press 2to sele t STATION so that you may name
your TV station.
Press OK.
The TV station name list will appear.
6. Press D or E to sele t a station name from the list.
Press OK to sele t it.
7. You an hange a TV station name manually
rather than using the “standard” names.
Press G.
Press 3or 4to sele t letters and numbers for
the new station name.
Press 1or 2to move ba k and forth between
hara ters.
Press OK.
8. Press i, onfirm the station pla ement.
Press iagain.
Your new TV station has now been tuned into your
DVD/VCR Combi re eiver
.
If you wish to manually tune other stations repeat
stages 1 - 8.
PR CH MFT STATION
01 00
CHANNEL/CABLE : AV
C 02
PSET
R
i
PR-01
20
PR CH MFT STATION
01 00
CHANNEL/CABLE : AV
C 02
PSET
R
i
PR-01
02 C03 00 PR-02
03 C04 00 PR-03
04 C05 00 PR-04
05 C06 00 PR-05
06 C07 00 PR-06
07 C08 00 PR-07
08 C09 00 PR-08
01 C02 00 PR-01
OK
i
,DELETE :
MOVE :
PSET
R
PR CH STATION
09 00
C10
MFT
CHANNEL/CABLE : AV
i
PSET
R
i
PR CH MFT
09 00
PSET
R
C10
i
OK
TV2
SVT
SVT1
SVT2
SVT4
NED1
NED2
TV1
11
12
13
14
15
- - - - - - - - -
- - - - - - - - -
- - - - - - - - -
- - - - - - - - -
- - - - - - - - -
- - - - - - - - -
- - - - - - - - -
09 C10 00 RTP2
16
10
OK
i
,DELETE :
MOVE :
PSET
R
REC
OK
i
SYS-
Dr.
VCR
Pr-12
ACMS
12
TIME
DATE
PSET
RPSET
R
TEM
OSD
ON
OFF
OSD
f
16:9
4:3
OPR
DECO-
DER
+
-
NIC
PR CH MFT
09 00
PSET
R
C10
i
OK
TV2
SVT
SVT1
SVT2
SVT4
NED1
NED2
TV1
If your station name isn’t on the list do not press
OK, but go to stage 7.
PR CH MFT STATION
C09 00
C10 RTP2
i
OK
PSET
R
Table of contents
Other Targa DVD VCR Combo manuals


