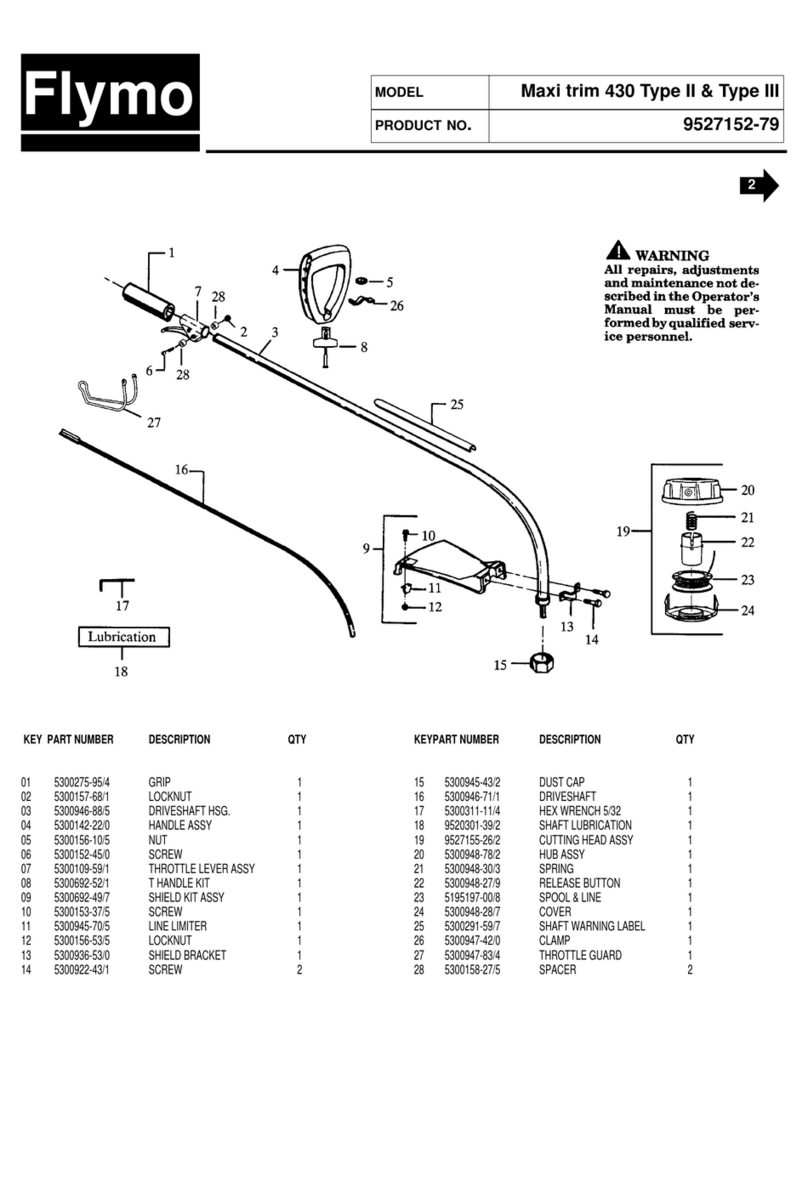
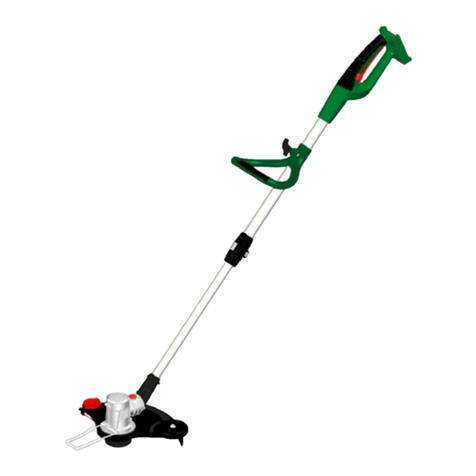
Task Force 21023 User manual

18V CORDLESS GRASS TRIMMER
ITEM / ARTICLE / ARTÍCULO #248920
MODEL / MODELE / MODELO #21023
READ YOUR OPERATOR’S MANUAL COMPLETELY AND CAREFULLY BEFORE
ATTEMPTING TO SET UP OR OPERATE YOUR NEW POWER TOOL. ALL OPERATORS OF THIS
EQUIPMENT SHOULD READ AND UNDERSTAND ALL SAFETY RULES PRINTED ON THE MACHINE
AND IN THIS OPERATOR’S MANUAL BEFORE USE.
CAUTION - FOR YOUR SAFETY
NOTICE: On the nameplate of your machine you will find the serial number and MFG date code of your unit.
Please record these numbers on this manual cover for future service reference.
MFG. DATE ________ PURCHASE DATE: _________
PRINTED IN CHINA
Questions, problems, missing parts? Before returning to your retailer, call our customer
service department at 1-800-444-6742, 8:00 a.m.-6:00 p.m., EST, Monday-Thursday,
8:00 a.m.-5:00 p.m., EST, Friday.

TABLE OF CONTENTS
………………………………………………………………………………….…………..…………………3
………………………………………………………………………….…………..…………………2
2
PRODUCT SPECIFICATIONS
PRODUCT SPECIFICATIONS
SAFETY INFORMATION
………………………………………………………………………………….…………..…………………7
PACKAGE CONTENTS
………………………………………………………….…………..…………………7
KNOW YOUR 18V CORDLESS TRIMMER
………………………………………………………………………….…………..…………………8
ASSEMBLY INSTRUCTIONS
OPERATING INSTRUCTIONS………………………………………………………………………….…………..…………………10
THE BATTERY CHARGER …………………………………………………………………………….…………..…………………13
LIMITED TWO-YEAR WARRANTY…………………………………………………………………….…………..…………………15
MAINTENANCE
…………………………………………………………………………………………….…………..…………………14
PARTS LIST ……………………………………………………………………………………………….…………..…………………16
ENVIRONMENTALLY SAFE BATTERY DISPOSAL……………………………………………….…………..…………………14
18V GRASS TRIMMER
Model Number............................................................................................................................... 21023
ITEM Number............................................................................................................................... 248920
Type................................................................................................................................................ Cordless, battery-operated
Speed ............................................................................................................................................7 000 RPM
Trimmer Line .................................................................................................................................. 0.065” (1.65mm) diameter
monofilament nylon
Cutting Circle Diameter ................................................................................................................... 12“ (30 cm)
Overall Trimmer
Length (Adjustable) ......................................................................................................................... 35” (89 cm) to 44” (111.8 cm)
Weight (with battery pack)............................................................................................................. 6.4 bls (2.9kg)
BATTERY PACK AND CHARGER
Type............................................................................................................................................................
............................................................................................................................................................
Nickel-cadmium
rechargeable
Output voltage ........................................................................................................................................... 18 V DC
Charging time ............................................................................................................................................. approx. 1 hour
Input 120 V AC, 60 Hz
Rapid charging............................................................................................................................................
....................................................................................................................................
.
Yes
Over-heat protection Yes

SAFETY INFORMATION
Please read and understand this entire manual before attempting to assemble, operate or install the
product. These safety instructions are not meant to cover every possible condition that could occur. If
you have any questions regarding the product please call customer service at 1-877-444-6742, 8:00 a.m.-
6:00 p.m., EST, Monday-Tursday, 8:00 a.m.-5:00 p.m., EST, Friday.
3
The purpose of safety signal statements and symbols is to attract your attention to possible danger. Read them
carefully to understand and practice proper accident prevention.
Signals an EXTREME hazard.
Failure to obey a safety DANGER signal WILL result in serious injury or death to yourself or to others.
Always follow the safety precautions to reduce the risk of fire, electric shock, and personal injury.
Signals a serious hazard.
Failure to obey a safety WARNING signal CAN result in serious injury to yourself and to others. Always
follow the safety precautions to reduce the risk of fire, electric shock, and personal injury.
Signals a moderate hazard.
Failure to obey a safety CAUTION signal MAY result in property damage or personal injury to yourself or to others.
Always follow the safety precautions to reduce the risk of fire, electric shock, and personal injury.
IMPORTANT! Signals special mechanical information.
NOTE: Signals additional important general information.
Safety Tool Symbols
IMPORTANT! Some of the following symbols may be used on your tool. Please study them and learn their meaning.
Proper interpretation of these symbols will allow you to operate the tool better and safer.
~
CAUTION
WARNING
DANGER
Safety Signals
SYMBOL NAME EXPLANATION
Alternating Type or a characteristic of
current current
- - - Direct current Type or a characteristic of
current
Class II Designates double insulation
Ni-Cad Battery Designates that this tool is in
Recycling accordance with Ni-Cad
battery recycling program
SYMBOL NAME EXPLANATION
V Volt Potential voltage
A Amperes Current
Hz Hertz Frequency (cycles per
second)
n0No load speed Rotational speed at no load
.../min Movements Revolutions, strokes, surface
per minute speed, orbits, etc. per minute

SAFETY INFORMATION
4
WARNING
READ AND UNDERSTAND ALL INSTRUCTIONS. Failure to follow all instructions listed below may result inelectric shock, fire
and/ or serious personal injury.
Work Area
• Keep your work area clean and well lit.
• Do not operate power tools in explosive atmospheres,such as in the presence of flammable liquids, gases, ordust. Power
tools create sparks which may ignitethedust or fumes.
• Keep bystanders, children, and visitors away while operating a power tool. Distractions can cause you to lose control.
Electrical Safety
•Abattery-operated tool with integral batteries or a separate battery pack must be recharged only with the specified charger for
the battery. A charger that may be suitable for one type of battery may create a risk of fire when used with another battery.
•Use a battery-operated tool only with specified battery pack. Use of any other batteries may create a risk of fire.
Personal Safety
•Stay alert, watch what you are doing, and use common sense when operating a power tool. Do not use tool while tired or
under the influence of drugs, alcohol, or medication. Amoment of inattention while operating power tools may result in serious
personal injury.
•Dress properly. Do not wear loose clothing or jewelry. Contain long hair. Keep your hair, clothing, and gloves away from moving
parts. Loose clothes, jewelry, or long hair can be caught in moving parts.
•Avoid accidental start-ups. Make sure the switch is in the locked or off position before inserting battery pack. Carrying tools
with your finger on the switch or inserting the battery pack into a tool with the switch on invites accidents.
•Remove adjusting keys or wrenches before turning the tool on. Awrench or key that is left attached to a rotating part of the tool
may result in personal injury.
•Do not overreach. Keep proper footing and balance at alltimes. Proper footing and balance enable better control of the tool in
unexpected situations.
Tool Use and Care
•Do not use tool if switch does not turn it on or off. A tool that can not be controlled with the switch is dangerous and must be
repaired.
•Disconnect battery pack from tool or place the switch in the locked or off position before making any adjustments, changing
accessories, or storing the tool. Such preventive safety measures reduce the risk of starting the tool accidentally.
•Store idle tools out of reach of children and other untrained persons. Tools are dangerous in the hands of untrained users.
•When battery pack is not in use, keep it away from other metal objects like: paper clips, coins, keys, nails, screws,or other
small metal objects that can make a connection from one terminal to another. Shorting the battery terminals together may
cause sparks, burns, or a fire.
•Check for misalignment or binding of moving parts, breakage of parts, and any other condition that may affect the tool’s
operation. If damaged, have the tool serviced before using. Many accidents are caused by poorly maintained tools.
•Use only accessories that are recommended by the manufacturer for your tool. Accessories that may be suitable for one tool
may create a risk of injury when used on another tool.
Service
•Tool service must be performed only by qualified repair personnel. Service or maintenance performed by unqualified
personnel may result in a risk of injury.
•When servicing a tool, use only identical replacement parts. Follow instructions in the Maintenance section ofthis manual.
Use of unauthorized parts or failure to follow Maintenance Instructions may create a risk of shock or injury.
ALWAYS WEAR EYE PROTECTION.
A grass trimmer can throw foreign objects intoyour eyes which could cause permanent eyedamage.
ALWAYS wear safety goggles (not glasses). ordinary eyeglases have only impact-resistant lenses...
they are NOT safety goggles.

SAFETY INFORMATION
5
For ALLGarden Tools
•Avoid dangerous environment. Don’t use tool in damp or wet locations.
•Don’t use in rain.
•Keep by standers and children away while operating.
•Dress properly. Do not wear loose clothing or jewellery.They can be caught in moving parts. Use of rubber gloves and
substantial footwear is recommended when working outdoors.
•Avoid unintentional start-ups.
•Don’t grasp the exposed cutting line when picking up or holding the tool.
•Don’t force the tool. It will do the job better and with less likelihood of a risk of injury at the rate for which it was designed.
•Don’t over reach. Keep proper footing and balance at all times.
•When not in use, tool should be stored indoors in dry, high, or a locked-up place-out of reach of children.
•Maintain tool with care. Keep cutting line clean for best performance and to reduce the risk of injury.
•Keep guards in place and in working order.
•Keep hands and feet away from cutting line.
•Always use eye protection.
For Grass Trimmers
•When lengthening new cutting line, be careful of the line cutter on the guard. It is sharp.
•NEVER fit metal cutting elements or blades.
•Keep ventilation openings clear of debris. Keep handles dry, clean, and free of oil and grease.
•Before using the grass trimmer, remove any stones, sticks, debris or objects that could become entangled or thrown by the
trimmer.
•DO NOT switch ON until the grass trimmer is in its normal operating position. Do not press the lock-OFF button or squeeze
the trigger while the grass trimmer is inverted.
•NEVER reach under the grass trimmer (the cutting line area) until it has completely stopped. The trimmer’s cutting line
continues to rotate for 5 seconds after being switched OFF.
•During operation, ensure that there are no other persons or animals within a radius of 3’. Stop using the tool while people,
especially children, or pets are nearby.
•Keep the cutting head and motor clean to reduce the risk of injury.
•Use only the specified size and type of cutting line. Do not substitute.
For Battery Pack and Charger
To avoid serious injury, risk of fire, explosion and danger of electric shock or electrocution:
• DO NOT probe the charger with conductive materials. The charging terminals hold 120 V.
• If the battery pack case is cracked or damaged, DO NOT insert into the charger. Replace the battery pack.
• DO NOT charge these battery packs with any other type of charger.
• Charge only the grass trimmer battery pack provided.
• DO NOT allow liquid inside the charger.
• DO NOT try to use the charger for any other purpose than what is presented in this manual.
If the battery fluid gets in your eyes, flush immediately with clean water for at least 15 minutes. Get immediate medical
attention. Do not charge the battery pack inrain or in wet conditions. Do not immerse the tool, battery pack, or charger in
water or other liquid.
• Do not allow the battery pack or charger to over heat. If they are warm, allow them to cool down. Recharge only at room
temperature.
• Do not cover the ventilation slots on the top of the charger. Do not set the charger on a soft surface. Keep the ventilation
slots of the charger clear.
• Do not allow small metal items or material such as steel wool, aluminum foil, or other foreign particles into the charger
cavity.
• Unplug the charger before cleaning and when there is no battery pack in the cavity.
• Do not place the battery charger or the battery pack inthe sun or in a warm environment. Keep at normal room
temperature.
• Do not try to connect two chargers together.
• The battery pack cells may develop a small leak under extreme usage or temperature conditions. If the outer seal is
broken and the leakage gets on your skin:
– Use soap and water to wash immediately.
– Neutralize with lemon juice, vinegar, or other mild acid.
WARNING

SAFETY INFORMATION
6
WARNING
Fig. B
Minimum Gauge for Extension Cords (AWG)
(when using 120 V only)
Ampere Rating Total Length of Cord in Feet (meters)
More Than Not More Than 25' (7.6 m) 50' (15 m) 100' (30.4 m) 150' (45.7 m)
0 6 18 16 16 14
6 10 18 16 14 12
10 12 16 16 14 12
12 16 14 12 Not Recommended
2 Prong
Polarized Plug
Properly
Grounded
Outlet
Fig. A
Properly
grounded
outlet
2-prong
polarized plug
READ AND UNDERSTAND ALL INSTRUCTIONS.Failure to follow safety rules listed below may result inelectric
shock, fire, and/or personal injury:
• Do not abuse the cord. Never use the cord to carry the tool. Never pull on the cord to remove the plug from the power
outlet. Keep cords away from heat, oil, sharp edges, or moving parts. Replace damaged cords immediately. They may create
a fire. Do not use.
• Do not place the charger where the power cord might be stepped on, tripped on, or subjected to damage.
• Abattery-operated tool with integral batteries or a separate battery pack must be recharged only with the specified charger
for the battery. A charger that may be suitable for one type of battery may create a risk of fire when used with another
battery.
• Use a battery-operated tool only with the specifically designated battery pack. Use of any other batteries may create a risk
of fire.
Grounding (Fig. A)
In the event of a malfunction or breakdown, grounding provides the path of least resistance for electric current, and reduces
the risk of electric shock.
This battery charger is double insulated and has atwo-prong polarized plug (one blade is wider than the other). This plug
will fit into a polarized outlet only one way. If the plug does not fit fully in the outlet, reverse the plug. If it still does not fit,
contact a qualified electrician to install the proper outlet. DO NOT change the plug in any way. IN ALL cases make sure the
outlet is properly grounded. If you are not sure, have a certified electrician check the power outlet.
Extension Cords (Fig. B)
Do not use an extension cord for the charger unless absolutely necessary. If you use an extension cord make sure the
cord is in good condition.
Use one heavy enough to carry the current your charger will draw. An under sized extension cord will cause a dropin line
voltage resulting in loss of power and over heating.The table below shows the correct size of extension cordto use,
depending on cord length and the charger's ampere rating listed on the nameplate. If in doubt, use the next heavier gauge.
The smaller the gauge number is, the heavier the cord.
Make sure your extension cord is properly wired and in good condition. Always replace a damaged cord or have it repaired
by a qualified electrician. Protect your extension cord from sharp objects, excessive heat and damp or wet areas.
Use a separate electric circuit for your tools. Never use any other voltage or power source than common household 120 V
electrical power. The circuit must not beless than a #12 wire and should be protected with a 15 Atime lag fuse. Before
connecting the charger to the power line, make sure the electric current is rated the same as the current stamped on the
charger nameplate.To reduce the risk of disconnection of charger cordfrom the extension cord during operation make a
knot(Fig. B).

PACKAGE CONTENTS
7
Battery charger
Guard
Grass trimmer
Two Batteries
WARNING
By purchasing a battery-powered tool you have helped reduce the pollution level of our environment. Please check the
contents of the carton. Examineall the parts before using the cordless grass trimmer and battery charger. If
any parts are missing or damaged, return the tool to the store with proof of purchase for a replacement.
To reduce the risk of fire, electric shock, and personal injury:
• Read all instructions before using this tool. Basic safety precautions should always be followed.
• Please keep these instructions safe for later use. The safety rules must be followed to avoid injury when using the grass
trimmer.
KNOW YOUR 18V CORDLESS TRIMMER
Battery pack
Trigger switch
Auxiliary handle
Lock Knob
Edge
Height Lock
Adjustment
Adjust button
Edging Guide
Protective guard
Cutting spool

To Remove the battery
1. Press in and hold the latch buttons on both sides
of the battery pack. (1)
2. Grasp the trigger handle (2) firmly. Pull the battery pack
out of the handle.
NOTE: The battery pack fits snugly into the handle to
prevent accidental dislodging. It may require a strong
pull to remove.
To Install
1. Align the tongue (3) of the battery pack with the cavity in
the handle housing.
2. Grasp the trigger handle (2) firmly.
3. Push the battery pack into the handle until both sides
lock. The latch buttons will click when they lock.
4. Do not use force when inserting the battery pack.
It should slide into place and click.
8
WARNING
Guard
1
2
3
Fig.1
(Fig. 2)
ASSEMBLY INSTRUCTIONS
2
1
To avoid injury, always remove the battery pack
before installing the guard, changing a cutting line, or
making any adjustments. If the guard is damaged, do not
use the grass trimmer until it is replaced. NOTE: Install the
protective guard before operating thegrass trimmer. It can not
be removed or disassembled.
1. Remove the battery pack.
2. Invert the grass trimmer to access the trimmer head.
3. Using a phillips head screwdriver, remove the
pre-installed screw (1) from the trimmer head.
4. Place the guard (2) on to the trimmer head and turn the
guard 45° following the track on the head.
5. Align the screw hole on the guard with the screw hole on
the trimmer head.
6. Insert the screw to the trimmer head fastening the guard
in place.
(1)DOWN
Battery pack (Fig. 1)
IMPORTANT! The battery pack is not charged when it is purchased. Before using the trimmer for the
first time, place the battery pack in the battery charger and charge for a full 24 hours. Make sure you
read all safety precautions, and follow the instructions in the Battery Charger section of the manual.
With regular use it will need shorter charging times. After prolonged storage time,charge the battery
pack for at least 24 hours again. Nickel-cadmium batteries can develop a memory for usage and
storage times.
To avoid injury and to reduce the risk of electrical shock or fire:
• Replace the battery pack or charger immediately if the battery case or charger cord is damaged.
• Always make sure the grass trimmer switch is OFF before inserting or removing the battery pack.
• Always make sure the battery pack is removed and the switch turned OFF, before replacing spools or
adjusting the line.
• Read, understand, and follow the Battery Charger instructions.

9
ASSEMBLY INSTRUCTIONS
To avoid injury, adjust the auxiliary handle for
optimum control and balance. Do not overreach when
operating the grass trimmer. Keep proper balance at
all times for better control of the tool in unexpected
situations.
1. Turn the handle lock knob (1) counter-clockwise several
turns to loosen the auxiliary handle (2).
2. Adjust the handle position to provide the best level of
balance and control for the operator.
3. Securely lock the handle in position by turning the knob
clockwise.
4. Before operating the grass trimmer, make sure the
auxiliary handle is tightly locked into position.
A spool of monofilament cutting line is preinstalled on the
grass trimmer. When the cutting line needs replacing,
insert a new spool.
WARNING
Cutting Line (Fig. 4 )
Fig. 3
Fig. 4
1
2
4
3
1
2
To remove the spool:
1. Disconnect trimmer from the power supply.
2. Turn grass trimmer over to access the spool line.
3. Remove spool cover by pressing on two tabs parallel to
each other on the side of the cover (2).
4. Remove the spool (1) from the spool housing (3).
To replace the spool:
1. Replace the spool (1) with a new pre-wound spool.
2. Insert the end of line through the opening(4) in the spool
housing(3).
3. Align the tabs on the spool cover with the slots in the spool
housing on the trimmer head.
4. Push down on the spool cover locking it to the spool housing.
5. To advance the line when initially installed you must pull the
line while pressing the black line release button on the side
of the spool housing (3).

10
OPERATING INSTRUCTIONS
To avoid injury:
• Do not squeeze the trigger while the grass trimmer is inverted.
• Do not carry the grass trimmer with your finger on the switch. Avoid unintentional starting.
To Turn On/Off:
• Squeeze the trigger switch (1) to start.
• Release the trigger switch (1) to stop.
Adjust the Grass Trimmer Height
If you need to adjust the height of the grass trimmer:
• Push (1) and position the height to a comfortable position.
• Now LOCK by releasing (1).
WARNING
STARTING/STOPPING THE TRIMMER
(Fig. 6)
Always allow 5 seconds or more for the cutting line
spool to stop rotating after releasing the trigger switch.
Do not invert the grass trimmer, or place your hands
under the protective guard, until the grass trimmer
spool has come to a complete stop.
CAUTION
Fig.5
Fig. 6
2
2
1
1
0
8
1
H
S
U
P
1
1

11
OPERATING INSTRUCTIONS
Fig. 7
1
2
3
6
3。4
5。
Adjust the Angle (Fig. 7)
This trimmer is equipped with an angle adjustment feature..
1. Using your left hand, grip the nose (1) of the trimmer and
use your thumb to depress the turn button (2). Using your
right hand, turn the head to either of the 3 available
positions.
2. Now LOCK by releasing the turn button (1).

12
OPERATING INSTRUCTIONS
While the grass trimmer is operating, the cutting line gets
worn down and becomes shorter. This trimmer is equipped
with Automatic Line Advancement which automatically feeds
additional line to the correct length as it wears down.
If the line does not automatically advance than the trimmer
line may be tangled or empty.
(To replace the spool see Page 9)
To advance the line, restart the trimmer and upon starting,
the line will automatically advance.
Fig. 8
Lengthening the Line (Fig. 8)
Trimmer Tips
Before each use
• Make sure the protective guard is tightly installed.Tighten the guard screw.
• Make sure the battery is fully charged and that the charger is disconnected before using or storing the trimmer.
• Do not store the grass trimmer in sunlight, in an excessively warm place, or near a furnace. The battery life will be
shortened.
• If the battery must be stored in a warm place, charge it frequently.
• Before trimming, inspect the area for string, wire, branches or other material that may become entangled in the
cutting line and thrown.
During use
• Trim only when the grass and weeds are dry.
• Do not trim grass at night. Always make sure you have adequate lighting.
• Hold the grass trimmer by both the switch handle and the auxiliary handle for best control and balance.
• Stand with the cutting head tipped down at an angle in front, guiding the grass trimmer in a semicircular
motion around you.
• If possible, guide the grass trimmer to the left to cut.The line will cut as soon as it leaves the guard, and the
clippings are thrown away from you.
• To produce a smoothly trimmed area, move the grass trimmer in and out of the area being cut with consistent
speed and height.
• Use only the tip of the cutting line to do the trimming, especially near walls and fences. Trimming with the side of
the cutting line may over load the motor, wear out the line faster, and break the line more often.
• Do not rest the trimmer spool on the ground while trimming. This will cause spool wear and battery drain.
• If the grass is higher than 6” (15 cm), trim in small stages.
• When the grass trimmer is turned off and the spool stop srotating, the cutting line will relax and may recede. Feed
extra cutting line before storing the trimmer to prevent losing the line completely into the spool.
• If the diameter of the cutting area gets smaller, the line is worn down and needs to be advanced more often.
• If the grass trimmer is not cutting correctly, the cutting line may not be feeding properly. Remove and rewind the
line spool.

13
THE BATTERY CHARGER
Charging Procedure (Fig. 9 )
Fig. 10
With regular use the battery pack will need 90 MINUTES or
less to fully charge. Allow the battery to fully discharge before
recharging. It is recommended to charge every 3 months
when not in use.
1. Plug the charger into an AC power outlet.
2. Insert the battery (4) into the charger. Make sure the latch
and battery is fully inserted into the charger.
3.Wait 5 seconds, the RED charging LED light (1) will turn on
indicating a connection to the power source and that the
battery is currently charging.
4. When the battery has become fully charged the GREEN
fully charged LED light (2) will turn on.
5. It is recommended to unplug the charger from the AC
outlet once the battery is fully charged. The battery can be
stored in the charger.
6. If the AMBER check battery LED light (3) turns on it is recommended to remove the battery (4) from the charger
and allow to cool for 30 minutes. If the check battery LED (3) remains on once the battery is re-installed into the
charger it is recommended to call for technical assistance.
Charger mounting (Fig. 10)
1. This charger can be installed hanging on a wall using two
screws (not supplied)
2. Locate the placement for the charger to be wall mounted.
3. If fastening to wood studs use 2 wood screws.
4. Drill two holes 4 7/8" on center ensuring they are level.
5. If fastening to drywall use wall anchors and screws to
secure the charger to the wall.
Fig. 9
1
2
3
4
Checking the Charge
If the battery pack does not charge properly:
• Check the current at the power outlet with another tool.Make sure that the outlet is not turned off.
Charger Maintenance
• Keep the charger clean and clear of debris. Do not allow foreign material into the recessed cavity or on the contacts. Wipe
with a dry cloth. Do not use solvents, water, or place in wet conditions.
• Always unplug the charger when there is no battery pack in it.
• Give the batteries a full charge before placing instorage. Do not recharge a fully charged battery pack. Overcharging
shortens the battery life.
• Check that the charger contacts have not been shorted by debris or foreign material.
• If the surrounding air temperature is not normal room temperature, move the charger and battery pack to alocation where the
temperature is between 65 and 75˚F (18 and 24˚C).
WARNING: If the battery is inserted into the charger when warm or hot the CHECK BATTERY indicator light may switch on. If
this occurs allow the battery to cool outside of the charger for 30 minutes.
• Recharge the battery pack anytime you notice there is less power. Never let the batteries become completely discharged.
• Keep the charger stored in normal room temperature.Do not store it in excessive heat. Do not use in direct sunlight. Always
recharge in a room temperature of 50 to 104˚F (10 to 40˚C). If the battery pack is hot, let it cool down before recharging.
• Disconnect the charger from the AC power outlet when not in use and once battery has reached a full charge.

14
MAINTENANCE
CAUTION
WARNING
ENVIRONMENTALLY SAFE BATTERY DISPOSAL
WARNING
WARNING
To avoid risk of fire, electric shock, or electrocution:
• Do not use a damp cloth or detergent on the batteryor battery charger.
• Always remove the battery pack before cleaning, inspecting, or performing any maintenance on the grass trimmer.
Battery Pack
• Store the battery pack fully charged.
• Recharge the battery pack anytime you notice there is less power. Never let the battery pack become completely discharged.
• Never recharge a battery pack that is already fully charged. Overcharging shortens the battery life.
• Always recharge at a temperature of 50 to 104˚F (10 to 40˚C). If the battery pack is hot, let it cool down before recharging.
• After charging, the battery pack may be stored in the charger as long as the charger is not plugged in.
Cutting Line
• Replace the cutting line only with nylon monofilament .065" line, or with pre-wound replacement spools.(SeeThe Cutting
Line).
• Always wind the line in the same direction as the arrow on the spool. (See To Refill the Spool).
Cleaning
1. Wipe the outside of the grass trimmer with a dry, soft cloth. Do not hose down or wash with water.
2. Scrape the guard and spool area to remove dried clippings and mud.
3. Brush or blow dust, debris, and grass clippings out ofthe air vents. Keep them free of obstruction.
Do not use strong solvents or detergents on theplastic housing or plastic components. Certain household cleaners may
damage and may also causea shock hazard.
Lubrication
No lubrication is needed.
The following toxic and corrosive materialsare in thebatteries used in this grass trimmer battery pack:
Cadmium, a toxic material.
All toxic materials must be disposed of in a specified manner to prevent contamination of the environment. Before disposing
of damaged or worn out nickel-cadmium battery packs, contact your local waste disposal agency, or the local Environmental
Protection Agency for information and specific instructions. Take the batteries to a local recycling and/or disposalcentre,
certified for cadmium disposal.
If the battery pack cracks or breaks, with or without leaks, do not recharge it and do not use. Dispose of it and replace with a
new battery pack. DO NOT ATTEMPT TO REPAIR IT! To avoid injury and risk of fire, explosion, or electric shock, and to avoid
damage to the environment:
• Cover the battery's terminals with heavy-duty adhesive tape.
• DO NOT attempt to remove or destroy any of the battery pack components.
• DO NOT attempt to open the battery pack.
• If a leak develops, the released electrolytes are corrosive and toxic. DO NOT get the solution in the eyes or on skin, and do
not swallow it.
• DO NOT place these batteries in your regular household trash.
• DO NOT incinerate.
• DO NOT place them where they will become part ofany waste land fill or municipal solid waste stream.
• Take them to a certified recycling or disposal centre.

15
LIMITED TWO-YEAR WARRANTY
The manufacturer warranties to the original purchaser that each new product and service part is free from defects in
material and workmanship and agrees to repair or replace under this warranty any defective product or part as follows
from the original date of purchase.
2 —Year Limited Warranty
THIS WARRANTY IS NOT TRANSFERABLE AND DOES NOT COVER:
Products sold damaged or incomplete, sold “as is”, sold reconditioned or used as rental equipment.
Delivery, installation or normal adjustments explained in the owner’s manual.
Damage or liability caused by shipping, improper handling, improper installation, incorrect voltage or improper wiring,
improper maintenance, improper modification, or the use of accessories and /or attachments not specifically recommended.
Repairs necessary because of operator abuse or negligence, or the failure to install, operate, maintain and store the product
according to the instructions in the owner’s manual.
Damage caused by cold, heat, rain, excessive humidity, corrosive environments and materials, or other contaminants.
Expendable items that become worn during normal use.
Cosmetic defects that do not interfere with tool functionality.
Freight costs from customer to vendor.
ANY INCIDENTAL, INDIRECT OR CONSEQUENTIAL LOSS, DAMAGE, OR EXPENSE THAT MAY RESULT FROM ANY
DEFECT, FAILURE OR MALFUNCTION OF THE PRODUCT.
Some states do not allow the exclusion or limitations on how long an implied warranty lasts, so the above limitations may
not apply to you.
Cordless products battery and charger are under a (one) 1 year replacement guarantee against defects in workmanship
and materials.
WARRANTY REPLACEMENT PARTS are available by calling the toll free number, 1-800-444-6742, 8:00am – 6:00pm EST,
Monday-Thursday, 8:00 a.m.-5:00 p.m., EST, Friday.

1
2
3
4
5
9
10
6
7
11
12
13
14
3
2
3
8
16
17
18
19
20
21
22
23
24
25
26
27
28
29
30
31
32
33
32
35
36
37
40
32
41
43
15
38
39
42
34
44
45
46
47
48、49
50
3110373
3410302
3630111
3410313
3340513
3411105
3411213
3330505
3290405
3330605
3411546
3411446
3411746
3340646
3490205
3411646
3330546
3610113
3290205
3410946
3330246
3340246
3410605
3411082
3410982
3330282
3220905
3690105-1
3410182
3340182
3410282
3410382
3330182
3410482
3220505
3410382
3410682
3410782
3110473
3411284
3410882
3290105
3220205
3220113
3320146
3330446
3050111
3650101
3490301
3110185
16
Item
1
2
3
4
5
6
7
8
9
10
11
12
13
14
15
16
17
18
19
20
21
22
23
24
25
26
27
28
29
30
31
32
33
34
35
36
37
38
39
40
41
42
43
44
45
46
47
48
49
50
1
2
6
1
1
1
1
1
1
1
1
1
1
1
1
2
1
1
1
1
1
1
1
1
1
4
4
2
1
1
1
16
1
1
1
1
1
1
1
1
1
1
1
1
2
2
1
4
4
1
No.
Qty
Item No.
Qty
PARTS LIST
Description
battery
board
screw
switch
spring
switch board
spring
spool cover
spring cover
spring
turned head cover
head cover
Edging Guide
guard
blade
rivet
blade holder
string cover
string hole
fan
auto feed button
spring
nylon string
accessory
spool head
screw
nut
bolt
fixed board
motor
cover
screw
baffle
yellow cere pipe
turn botton
auxiliary handle
nut
lock knob
nip pipe
rubber
flex pole
handle cover
battery jack
sheet copper
spring
pyrocondensation tube
wire
end
jacket
charger
Description
Table of contents
