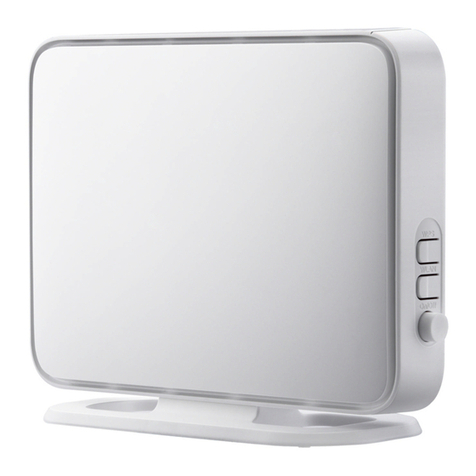
tau 250T-CONNECT TAUOPEN 2.0 User manual

GUIDA ALL’INSTALLAZIONE
INSTALLATION GUIDE
INSTALLATIONSANLEITUNG
NOTICE D’INSTALLATION
GUÍA PARA LA INSTALACIÓN
GUIA DE INSTALAÇÃO
IT - Istruzioni originali
250T-CONNECT
TAUOPEN 2.0
D-MNL0TCONNECT2.0 19-07-2023 - Rev.00

2
COLLEGAMENTO
MODULO WIFI
WIFI MODULE
CONNECTION
CONNEXION
MODULE WIFI
fig. 1
fig. 2

3
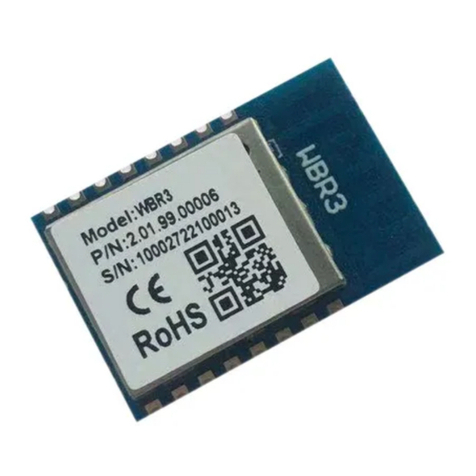
1. Collegare il modulo T-CONNECT per la TAUOPEN 2.0 alla centrale di comando tramite gli appo-
siti cavi. Collegarlo su connettore J4 delle centrali serie Diamond. (g. 1)
N.B: Il modulo T-CONNECT per la TAUOPEN 2.0 funziona solo con centrali con rmware a
partire dalla serie 7.00 (Controllare sull’etichetta del microprocessore)
2. La connessione del modulo T-CONNECT alla rete domestica può avvenire in due modi:
- Via cavo di rete ETHERNET mediante la presa LAN RJ45.
Oppure:
- Congurando il modulo con la rete wi di casa.
ESEMPIO CON RETE WIFI:
- Attendere che sul T-CONNECT il led rosso e il verde lampeggino simultaneamente dopo circa
30 secondi.
- Premere il tasto WPS del router wi di casa (g. 2)
- Subito dopo (se si aspetta troppo tempo il T-CONNECT uscirà dalla procedura), premere il
tastino rosso del modulo T-CONNECT per 1 s, dopodichè i due led si riaccenderanno ssi. Suc-
cessivamente il led verde inizierà a lampeggiare una volta ogni 2 s. per conferma di avvenuta
connessione.
POSSIBILI ERRORI E RIMEDI
ERRORE DESCRIZIONE ERRORE + RIMEDIO
Errore di connessione Se il led verde è acceso e il led rosso lampeggia è un errore di
connessione.
Rimedio: controllare la portata e il segnale del Wi-Fi e ritentare la
connessione (vedi punto 2).
1. Connect the T-CONNECT module for TAUOPEN 2.0 to the control unit using the appropriate
cables. Connect it to connector J4 of the Diamond series control units. (g. 1)
N.B: The T-CONNECT module for TAUOPEN 2.0 works only with control units with rmware
starting from the 7.00 series (Check on the microprocessor label)
2. Connecting the T-CONNECT module to the home network can be done in two ways:
- Via ETHERNET network cable with the RJ45 LAN socket.
Or:
- By conguring the module with the home wi network.
EXAMPLE WITH WIFI NETWORK:
- - Wait for the red and green LEDs to ash simultaneously on the T-CONNECT after about 30
seconds.
- Press the WPS button on the home wi router (g. 2)
- Immediately afterwards (if you wait too long, the T-CONNECT will exit the procedure) press
the red button of the T-CONNECT module for 1 second, after which the two LEDs will turn on
steadily. Subsequently the green led will start ashing once every 2 seconds conrming the
successful connection.
POSSIBLE ERRORS AND REMEDIES
ERROR ERROR DESCRIPTION + REMEDY
Connection error If the green led is on and the red led is ashing it is a connection
error.
Remedy: check the range and the Wi-Fi signal and try the connection
again (see point 2).

4
1. Connecter le module T-CONNECT à la centrale à travers le câble et sur le connecteur J4 des
centrales série Diamond. (g. 1)
N.B. Le module T-CONNECT fonctionne uniquement avec la centrale ayant le rmware
7.00 (Vérier l’étiquette du microprocesseur)
2. La connexion du module T-CONNECT au réseau domestique peut se produire de deux
façons:
- Via le câble réseau ETHERNET via la prise LAN RJ45.
Ou:
- En paramétrant le module au réseau domestique wi
EXEMPLE CONNEXTION AU RESEAU WIFI :
- Attendez que les LED rouges et vertes clignotent simultanément sur le T-CONNECT après
environ 30 secondes.
- Appuyer la touche WPS du router wi (g.2)
- Immédiatement après (si vous attendez trop longtemps, le T-CONNECT sortira de la
procédure) appuyer sur la touche rouge du module T-CONNECT pendant 1 seconde et aus-
sitôt les deux leds s’allumeront. Ensuite, la led verte commencera à clignoter 1 fois chaque 2
secondes pour conrmation d’une connexion réussie.
ERREURS POSSIBLES ET REMÈDES
ERREUR DESCRIPTION DE L’ERREUR + REMÈDE
Erreur de connexion Si la led verte est allumée et la led rouge clignote, il s’agit d’une
erreur de connexion.
Remède: vériez la portée et le signal Wi-Fi et réessayez la connexion
(voir point 2).

5
1
2
Scaricare la TAUOPEN 2.0 tramite AppStore o GooglePlayStore.
Download TAUOPEN 2.0 from AppStore or GooglePlayStore.
Laden Sie die TAUOPEN 2.0 über AppStore oder GooglePlayStore herunter.
Téléchargez TAUOPEN 2.0 sur AppStore ou GooglePlayStore.
Descarga La TAUOPEN 2.0 TauApp desde AppStore o GooglePlayStore.
Signup & Login
TAUOPEN 2.0 APP
- Una volta scaricata l’app, cliccare su “Registrati”. (g.1).
- Inserire il proprio nome e cognome, indirizzo email e password e premere “Registrati” (g.2).
- Si ritornerà alla pagina iniziale di Benvenuto dove cliccheremo “Accedi” (g. 3).
- Inserire le credenziali impostate precedentemente (email e password). (g. 4).
- Once the app has been downloaded, click on “Signup”. (g.1).
- Enter your name and surname, e-mail address and password and press “Signup” (g.2).
- You will return to the initial Welcome page where you will click “Login” (g. 3).
- Enter the credentials previously set (e-mail and password). (g.4).
- Une fois l’application téléchargée, cliquez sur “S’inscrire”. (Fig. 1).
- Entrez vos nom et prénom, adresse e-mail et mot de passe et appuyez sur “S’inscrire” (g.2).
- Vous reviendrez à la page d’accueil initiale où vous cliquerez sur “Se connecter” (g. 3).
- Entrez les informations d’identication précédemment dénies (e-mail et mot de passe) (g.4).
Prima Registrazione / Signup
Fig. 1 Fig. 2 Fig. 3 Fig. 4

6
3Attivazione telefono | Phone activation| Activation par téléphone | Telefonakti-
vierung | Activación del móvil
Fig. 5 Fig. 6
Inserire il codice di attivazione CODAT che troverete scritto nell’ultima pagina del manuale (il
codice di attivazione potrà essere utilizzato su max n. 3 smartphone). (g. 5).
Una volta inserito il CODAT attiva il telefono (g.6).
- Enter the CODAT activation code that you will nd written on the last page of the manual
(the activation code can be used on a maximum of 3 smartphones). (g.5).
- Once the CODAT has been entered, activate the phone (g.6).
- Saisissez le code d’activation CODAT que vous trouverez écrit en dernière page du manuel
(le code d’activation est utilisable sur 3 smartphones maximum). (g.5)
- Une fois le CODAT saisi, activez le téléphone (g.6)
- Geben Sie den CODAT-Aktivierungscode ein, den sich auf der letzten Seite des Handbuchs
- Sobald die App heruntergeladen wurde, klicken Sie auf „Registrieren“ (Abb. 1)
- Geben Sie Ihren Vor- und Nachnamen, Ihre E-Mail-Adresse und Ihr Passwort ein und klicken
Sie auf „Registrieren“ (Abb. 2).
- Man kehrt zur ersten Willkommensseite zurück: Auf „Anmelden“ klicken (Abb. 3)
- Geben Sie die zuvor festgelegten Anmeldeinformationen ein (E-Mail-Adresse und Passwort).
(Abb. 4)
- Una vez descargada la aplicación, haga clic en “Registrate”. (Imagen 1)
- Introduce su nombre y apellido, correo electrónico y contraseña y haga clic en “Registrate”
(Imagen 2).
- La página de inicio se mostrará de nuevo, haga clic en “Iniciar sesión” (Imagen 3)
- Introduce las credenciales precedentemente insertadas (correo electrónico y contraseña).
(Imagen 4)

7
4Congurazione Dispositivo | Device conguration | Conguration de l’appareil
Gerätekonguration | Conguración del Dispositivo
Fig. 7 Fig. 8 Fig. 9
Per congurare il primo dispositivo premere il bottone “Aggiungi dispositivo” (g. 7).
Inserire il codice del dispositivo inquadrando il QRCODE che trovate sull’etichetta del disposi-
tivo stesso (g.8), oppure digitate manualmente il codice che trovate sempre nell’etichetta del
dispositivo e premere “Aggiungi” (g. 9).
Dopodichè partirà la ricerca del dispositivo. (g.10).
- To congure the rst device, press the “New device” button (g. 7).
- Enter the device code by framing the QRCODE that you nd on the device label (g.8), or
manually enter the code that you also nd on the device label and press “Add” (g. 9).
- The search for the device will now start. (g.10).
- Pour congurer le premier appareil, appuyez sur le bouton “Nouvel appareil” (g. 7).
- Entrez le code de l’appareil en encadrant le QRCODE que vous trouvez sur l’étiquette de
l’appareil (g.8), ou entrez manuellement le code que vous trouvez toujours sur l’étiquette de
l’appareil et appuyez sur “Ajouter” (g. 9).
- Ensuite, la recherche de l’appareil commencera. (g.10).
- Um das erste Gerät zu kongurieren, auf die Schaltäche „Neues Gerät“ klicken (Abb. 7).
Fig. 10
ndet (der Aktivierungscode kann auf maximal 3 Smartphones verwendet werden). (Abb.5)
- Nach Eingabe des CODAT das Telefon aktivieren (Abb.6)
-Introduce el código de activación CODAT que está en la última página del manual (el código
de activación podrà ser utilizado en máximo 3 móviles). (Imagen 5)
- Una vez insertado el CODAT, active el móvil (Imagen 6)

8
Fig. 11 Fig. 12 Fig. 13
- A dispositivo trovato completare la congurazione a seconda dell’automazione da coman-
dare. Una volta completata la congurazione premere il bottone “Salva” (g. 11).
- Vericare che il dispositivo sia aggiunto (g. 12).
- In g. 13 come apparirà la schermata di comando delle automazioni.
- Once the device has been found, complete the conguration according to the automation to
be controlled. Once the conguration is complete, press the “Save” button (g. 11).
- Make sure the device is added (g. 12).
- In g. 13 is how the automation command screen will appear.
- Une fois l’appareil trouvé, terminer la conguration en fonction de l’automatisme à con-
trôler. Une fois la conguration terminée, appuyez sur le bouton “Enregistrer” (g. 11).
- Vérier que l’appareil est ajouté (g. 12).
- La gure 13 montre comment l’écran de commande d’automatisation apparaîtra.
- Sobald das Gerät gefunden wird, die Konguration entsprechend der zu steuernden Auto-
matisierung abschließen . Sobald die Konguration abgeschlossen ist, auf die Schaltäche
- Geben Sie den Gerätecode ein, indem Sie den QRCODE scannen, den sich auf dem Gerätee-
tikett ndet (Abb. 8), oder manuell den Code eingeben, den sich immer auf dem Geräteetikett
ndet und auf „Hinzufügen“ klicken (Abb. 9).
- Dann beginnt die Suche nach dem Gerät. (Abb. 10)
- Para congurar el primer dispositivo haga clic en “Dispositivo nuevo” (Imagen 7)
- Insertar el código del dispositivo escaneando el código QR que está en la etiqueta del dispo-
sitivo (Imagen 8), en alternativa digite manualmente el código que está en la misma etiqueta
del dispositivo y haga clic en “Añade” (Imagen 9).
- Después de eso, partirá la búsqueda del dispositivo. (Imagen 10)

9
„Speichern“ klicken (Abb. 11).
- Überprüfen Sie, ob das Gerät hinzugefügt wurde (Abb. 12).
- In Abb. 13 wie der Automatisierungsbefehlsbildschirm angezeigt wird.
- A dispositivo encontrado, completar la conguración a segunda del tipo de automatismo de
controlar. Una vez completada la conguración haga clic en “Guardar” (Imagen 11).
- Verique que el dispositivo ha sido añadido (Imagen 12).
- En la imagen 13 puede ver cómo aparecerá la pantalla de comando de los automatismos.

10

11

Via Enrico Fermi, 43 - 36066 Sandrigo (VI) - Italy
Tel +39 0444 750190 - Fax +39 0444 750376
[email protected] - www.tauitalia.com
Foglietto illustrativo
CARTA - Raccolta dierenziata. Segui le indicazioni del tuo comune. (N.B.: togliere i punti metallici)
Instruction leaet
PAPER - Waste separation. Follow the instruction s of your city hall. (Note: remove the staples)
22
PAP
Codice di attivazione "CODAT": | Activation code "CODAT": |
Code d’activation "CODAT":
Il codice di attivazione riportato
sull'ettichetta qui sotto può essere
utilizzato per attivare al massimo n.
3 smartphone. Si consiglia quindi di
custodirlo fino all'esaurimento delle tre
attivazioni.
The activation code shown on the
label below can be used to activate
a maximum of 3 smartphones. It is
therefore advisable to keep it until the
three activations are exhausted.
Le code d’activation disponible sur
l’étiquette ci-dessous peut être utilisé
pour l’activation de 3 smartphones.
Nous conseillons de le garder jusqu’à
l’activation des 3 smartphones.
