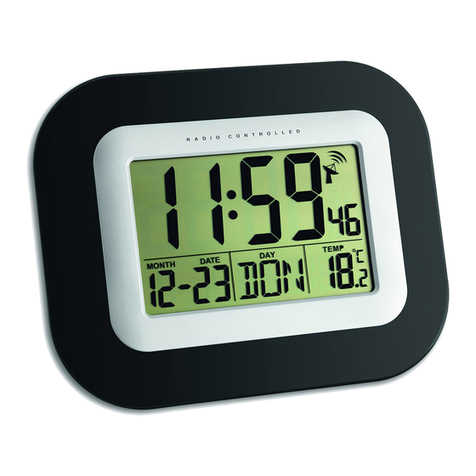
Tchibo 308 950 User manual

Radio-
Controlled
Alarm
Clock
Instructions for use and guarantee
en
Tchibo GmbH D-22290 Hamburg · 76889BB57XIV · 2014-05

Dear Customer
Your new radio-controlled alarm clock has an
easy-to-read display and is simple to use with
the help of just a few buttons.
t is particularly accurate as it synchronises
itself daily with the radio time signal received
from the world's most precise transmitter. The
clock changes automatically from summer to
winter time and vice versa.
We hope you will be entirely satisfied with your
purchase.
Your Tchibo Team
www.tchibo.de/instructions
(Please enter the product number in
the box labelled “Bedienungsanlei-
tungssuche” and click on “Suchen”.)

3
Contents
5 Safety warnings
8 At a glance
10 Buttons and
functions
11 How a radio-
controlled alarm
clock works
12 Prior to first use
12 nserting/replacing
batteries
14 Radio signal recep-
tion
15 Reception indica-
tors and their mea-
ning
17 Information regar-
ding the location
and possible
sources of interfe-
rence
18 General functions
18 lluminating the dis-
play
18 Changing between
the local time of day
and time of day of a
different time zone
19 Switching between
the day of the week
and seconds display
20 Switching between
date and alarm time

4
20 Changing the
language for the day
of the week
21 Selecting display
format
22 Switching between
summer and winter
time
22 Restoring the
settings
23 Setting the alarm
25 Setting the time of
day and date manu-
ally
25 Setting the time of
day
26 Setting the date
27 Setting the time of
day for a different
time zone
28 orld time zones
29 Technical specifica-
tions
30 Disposal
32 Declaration of Con-
formity
34 Guarantee

Safety warnings
Read the safety warnings carefully and only
use the product as described in these instruc-
tions to avoid accidental injury or damage.
Keep this manual for future reference. f you
pass this product on to someone else,
remember give them these instructions.
Intended use
The radio-controlled alarm clock is intended
for private use and is not suitable for commer-
cial purposes.
DANGER to children
• Swallowing batteries can be fatal. Therefore,
keep batteries and the alarm clock out of the
reach of infants. f a battery has been swal-
lowed, seek medical advice immediately.
5

6
• Keep all packaging material away from
children. There is a risk of suffocation!
ARNING – risk of injury
• f a battery has leaked, avoid contact with
skin, eyes and mucous membranes. f neces-
sary, rinse the affected areas with clear water
and consult a doctor immediately.
• Batteries must not be charged, taken apart,
thrown into fire or short-circuited.
CAUTION – material damage
• Never expose the alarm clock to severe tem-
perature fluctuations, moisture, direct sun-
light, dust or impacts.
• Protect the batteries from intense heat.
Remove the exhausted batteries from the
alarm clock. This will avoid damage that can
be caused by leakage.

7
• Always replace all the batteries at the same
time. Do not use different types or brands of
batteries or batteries with different capaci-
ties.
• When inserting the batteries, ensure correct
polarity (+/–).
• Do not use rechargeable batteries as these
do not provide the required voltage.
• Do not use abrasive or solvent-based
cleaning products on the alarm clock.

8
At a glance
Ti e of day display
Alar ti e
Alar sy bol
12-hour display
PM
Snooze sy bol
Reception
indicator
Day display
Month
display
Battery indicator

9
Alarm on/off
Snooze/Light
Battery
co part ent
Switch:
Date set
Time set
Alarm set
(Lock)
Batteries: 2 batteries LR03, 1.5 V

10
Buttons and functions
Alarm on/off Switch the alarm on and off
Switch display
Snooze/Light nterrupt alarm
Switch display light on
Adjust values upwards
Adjust values downwards
Date Set Set the date
Time Set Set the time
Alarm Set Set alarm time
Lock Lock settings

11
How a radio-controlled
alarm clock works
The exact time is received from the official
German transmitter DCF77. The transmitter is
located in Mainflingen, near Frankfurt on Main.
The signal is transmitted on long wave at
77.5 kHz in a radius of approx. 1,500 km
(900 miles).
The alarm clock receives and sets the time
automatically using its built-in antenna. Once
the time is set, the alarm clock continues
operating on its quartz movement. The clock's
receiver system switches on daily and com-
pares the received time to the time displayed.
The alarm clock is highly accurate, meaning
that it will display the correct time even if the
clock is occasionally unable to receive the time
signal.

12
Prior to first use
Remove the protective film from the
display.
Inserting/replacing batteries
1. Slide the battery com-
partment lid downwards
and lift it up.
2. nsert batteries or
replace batteries.
Ensure correct posi-
tioning of the poles
(+/–).
m

13
All display indicators appear briefly and the
alarm clock switches to reception.
The radio reception symbol flashes in the
upper right of the display.
3. Replace the battery compartment lid and
slide it upwards as far as it will go. You
should hear and feel it click into place.
• A change of battery is necessary when the
battery symbol appears in the display.
• Changing the batteries deletes all settings.

14
Radio signal reception
The alarm clock attempts to receive the radio
signal for several minutes. f it does not
receive an adequate signal during this time,
the reception indicator will switch itself off and
the clock will start running from the time of
day set so far. n this case, refer to the section
“ nformation about the location and possible
sources of interference”.
After receiving the time signal, the reception
indicator is constantly displayed.

15
Reception indicators and their
meaning
The quality of the last signal received
was satisfactory, and the time of day
has been synchronised with the recep-
tion signal.
Weak radio signal.
Reception of the transmitter was not
possible or the time of day was set
manually and not synchronised with
the transmitter.
The reception system of the clock checks the
received time at regular intervals and synchro-
nises it with the time displayed on the clock.

16
Please note:
• f adequate reception is not possible, the
reception indicator in the display will switch
off after a few minutes and the time will con-
tinue to run normally as set before.
• f reception is adequate, the clock will be set
to DCF77 time. Any settings made before-
hand will be automatically adapted.

17
Information regarding the location
and possible sources of interference
• We recommend placing the alarm clock near
to a window.
• Do not place the alarm clock on or near metal
surfaces.
• Allow a distance of at least two metres from
sources of interference, for example televi-
sion sets, computers, etc. Airports, base-
ments and high-rise buildings, etc. are not
good reception locations.
• Undisturbed reception is not possible in
moving vehicles such as cars or trains.
• The transmitter may shut off temporarily.
• Disturbances may occur during thunder-
storms.

18
General functions
Illuminating the display
To be able to read the display in the dark,
briefly press Snooze/Light. The display will
be lit for about 5 seconds.
Changing between the local time of day and
time of day of a different time zone
The alarm clock normally displays the local
time of day.
Press the button for approx. 3 seconds
until appears in the display.
m
m

19
To set the time of day of a different time zone,
proceed as described in the section “Setting the
time of day to a different time zone”.
Switching between the day of the week and
seconds display
The alarm clock normally displays the seconds.
Briefly press .
The day of the week will be displayed.
There are different languages available to
show the day of the week; see section
“Changing the language of the day of the
week“.
m

20
Switching between date and alarm time
The alarm clock normally displays the current
date.
Briefly press the Alarm on/off button to have
the set alarm time displayed. The alarm
time is shown on the display and alarm is
activated.
The selected display is shown continuously.
Changing the language for the day of the
week
Keep the button pressed for about 3
seconds. The language abbreviation for the
set language will appear in the display.
Keep the button pressed as long as
necessary until the required language
abbreviation is shown.
m
m
m
Table of contents
