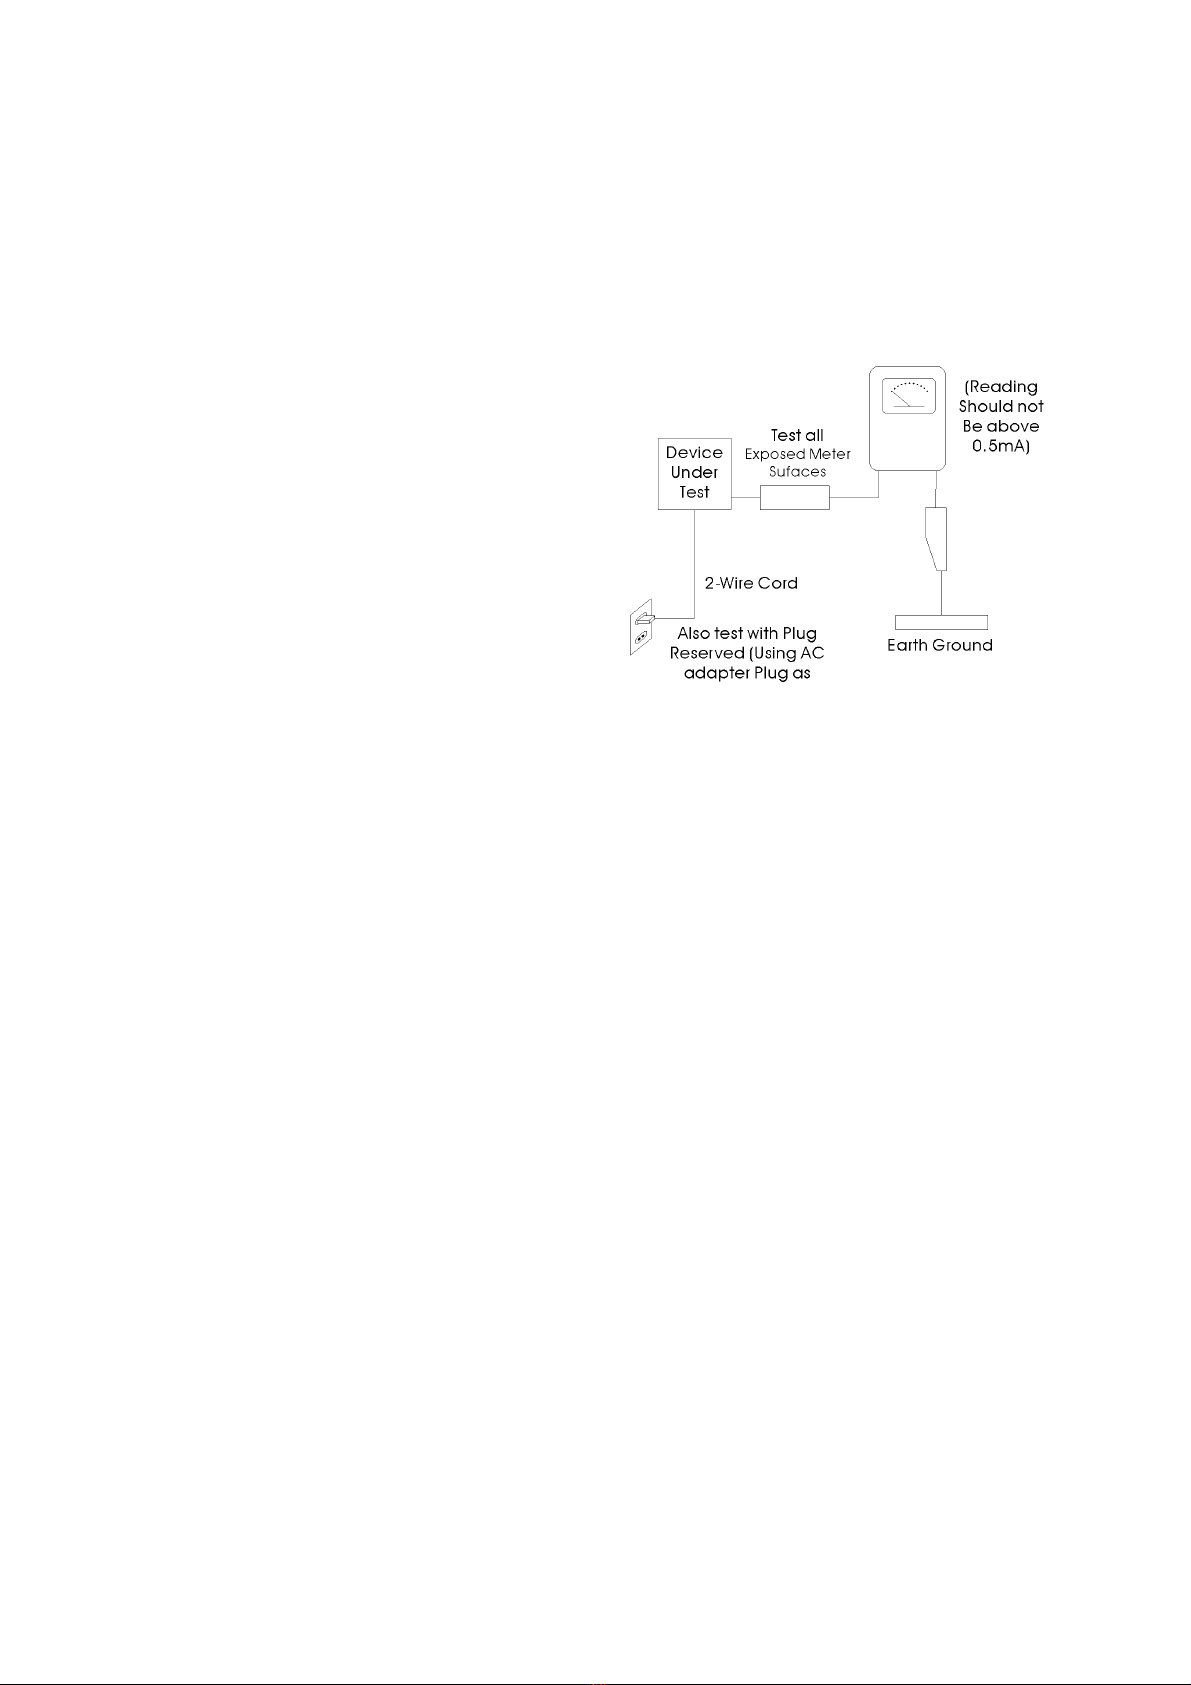
Insulation Resistance Test
2) Read and comply with all caution and safety related
notes non or inside the cabinet, or on the chassis.
3) Design Alteration Warning-Do not alter of add to the
mechanical or electrical design of this instrument.
Design alterations and additions, including but not
limited to, circuit modifications and the addition of
items such as auxiliary audio output connections,
might alter the safety characteristics of this instrument
and create a hazard to the user. Any design alterations
or additions will make you, the service, responsible
for personal injury or property damage resulting there
from.
4) Observe original lead dress. Take extra care to assure
correct lead dress in the following areas:
(1) near sharp edges, (2) near thermally hot parts (be
sure that leads and components do not touch
thermally hot parts), (3) the AC supply, (4) high
voltage, and (5) antenna wiring. Always inspect in all
areas for pinched, out-of-place, or frayed wiring. Do
not change spacing between a component and the
printed-circuit board, Check the AC power cord for
damage.
5) Components, parts, and/or wiring that appear to have
overheated or that are otherwise damaged should be
replaced with components, parts and/or wiring that
meet original specifications. Additionally determine
the cause of overheating and/or damage and, if
necessary, take corrective action to remove and
potential safety hazard.
6) Product Safety Notice-Some electrical and mechanical
parts have special safety-related characteristics which
are often not evident from visual inspection, nor can
the protection they give necessarily be obtained by
replacing them with components rated for higher
voltage, wattage, etc. Parts that have special safety
characteristics are identified by shading, an ( ) or a
() on schematics and parts lists. Use of a substitute
replacement that does not have the same safety
characteristics as the recommended replacement part
might created shock, fire and/or other hazards.
Product safety is under review continuously and new
instructions are issued whenever appropriate.
1-2 Servicing Precautions
CAUTION: Before servicing Instruments covered by this
service manual and its supplements, read and follow the
Safety Precautions section of this manual.
Note: If unforeseen circument create conflict between the
following servicing precautions and any of the safety
precautions, always follow the safety precautions.
Remember; Safety First
1-2-1 General Serving Precautions
(1) a. Always unplug the instrument’s AC power cord from
the AC power source before (1) removing or
reinstalling any component, circuit board, module or
any other instrument assembly. (2) disconnecting
any instrument electrical plug or other electrical
connection. (3) connecting a test substitute in
parallel with an electrolytic capacitor in the
instrument.
b. Do not defeat any plug/socket B+ voltage interlocks
with which instruments covered by this service
manual might be equipped.
c. Do not apply AC power to this instrument and/or any
of its electrical assemblies unless all solid-state
device heat sinks are correctly installed.
d. Always connect a test instrument’s ground lead to
the instrument chassis ground before connecting the
test instrument positive lead. Always remove the test
instrument ground lead last.
Note: Refer to the Safety Precautions section ground
lead last.
(2) The service precautions are indicated or printed on the
cabinet, chassis or components. When servicing,
follow the printed or indicated service precautions
and service materials.
(3) The components used in the unit have a specified flame
resistance and dielectric strength.
When replacing components, use components which