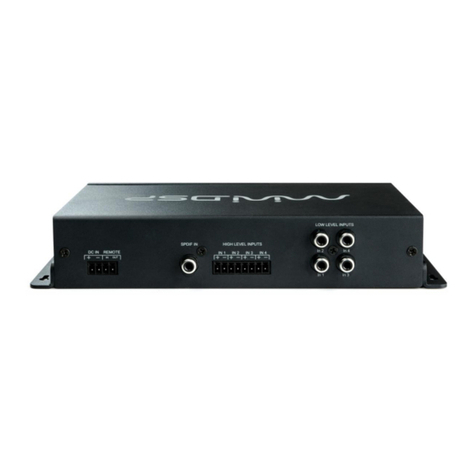
tech21 SansAmp RPM User manual

Owner's Manual
WARNINGS
•Attempting to repair this unit is not recommended and may void its warranty.
•Missing or altered serial numbers automatically void the warranty. For your own
protection, be sure the serial number labels on the unit and exterior box are intact.
ONE-YEAR LIMITED WARRANTY
Manufacturer warrants unit to be free from defects in materials and workmanship for
a period of one (1) year from the date of purchase to the original purchaser and is
not transferable. This warranty does not include damage resulting from accident,
misuse, abuse, alteration, or incorrect current or voltage. If unit becomes defective
within warranty period, Tech 21 will elect to repair or replace it free of charge. After
warranty period expires, manufacturer will repair defective unit for a fee.
PROOF OF PURCHASE IS REQUIRED FOR ANY REPAIR
For residents of the U.S. and Canada, please call Tech 21 for shipping instructions
and a Return Authorization Number. Tech 21 will not accept packages without prior
authorization, pre-paid freight (UPS preferred), and proper insurance.
FOR PERSONAL ASSISTANCE & INQUIRIES
Contact Tech 21 weekdays from 9:00 AM to 5:00 PM, Eastern Standard Time.
DESIGNED AND MANUFACTURED IN THE U.S.A.
T: 973-777-6996
E: info@tech 21nyc.com
W: www.tech21nyc.com
© 2004 Tech 21 USA, Inc.
(Rev 6.11)
Fill in the following information for future reference:
Serial Number______________________________________
Dealer’s Name _____________________________________
Dealer’s Address ___________________________________
Date of Purchase ___________________________________
TM

IMPORTANT SAFETY INSTRUCTIONS.
READ AND SAVE THESE INSTRUCTIONS.
HEED ALL WARNINGS.
This unit is powered by potentially hazardous voltage. Therefore, observe
the following safety precautions:
1. Read and follow all instructions before using
product.
2. Do not use product near water (such as near
a bathtub, washbowl, kitchen sink, swimming
pool, in a wet basement, etc.).
3. Unit should be located so that its location or
position does not impede the flow of air through
the ventilation openings.
4. Product should be located away from heat
sources such as radiators, heat registers, or
other products, including amplifiers, that pro-
duce heat.
5. Product should be connected to a power
supply only of the type described in the operat-
ing instructions or as marked on the product.
6. Protect the power cord from being walked on or pinched particularly at plugs, con-
venience receptacles, and the point where they exit from the unit.
7. Do not allow objects or liquids to penetrate the enclosure through openings.
. During heavy use, chassis may get hot to the touch. Handle with care.
9. Protect unit from strong impact.
10. Unplug product before cleaning. Never spray liquid cleaners into the amp: wipe
with a clean, lint-free cloth to remove dirt and film.
11. Only use attachments/accessories specified by the manufacturer.
12. This product should be used only with a cart or stand that is
recommended by the manufacturer. When a cart is used, use cau-
tion when moving the cart/product combination to avoid injury from
tipping over.
13. Amplifiers may be capable of producing high volume levels that
could cause permanent hearing loss or damage, if the exposure to
such levels is prolonged. Such damage is progressive and irreversible! If you experi-
ence any hearing loss or ringing in the ears, consult an audiologist.
14. Unplug unit during lightning storms or when unused for long periods of
time.
15. This unit must be earth grounded. To reduce the risk of electric shock, NEVER
remove or otherwise attempt to defeat the ground pin of the power cord. If the provided
plug does not fit into your outlet, consult an electrician for replacement of the obsolete
outlet.
WARNING: To avoid the risk of fire, electric shock or injury, do not expose this unit to
rain or moisture. Do not remove the chassis from its cabinet, or remove metal covering
from chassis parts. Removing the chassis from its cabinet exposes extremely danger-
ous high voltages. There are no user-serviceable parts inside. Hazardous voltages are
present inside the chassis. Refer all servicing to qualified personnel.
CAUTION: Never modify the power cord. If original power cord becomes damaged,
frayed, or has exposed wires, replace immediately with same rating and gauge, or high-
er. Replacements are commercially available or you can contact Tech 21 directly.
WARNING: Attempting to repair this unit is not recommended and may void its
warranty. NOTE: In the U.S. and Canada, servicing is performed at factory only. In
other countries, please refer repairs to the local Tech 21 authorized distributor.
FUSE
Fuse holder is located inside A/C cord receptacle. You must unplug and
remove power cord to change fuse. Replace with similar type and same
value: 100V and 117V units: use F 1A L
230V and 240V units: use F 0.5A L
QUICK START INSTRUCTIONS
Get your SansAmp RPM up and running before reading the entire manual. But by not
reading the manual, you’ll miss out on getting the most out of your new investment!
1. Plug your instrument into the front panel Input jack (on the left side).
2. Connect either the 1/4" or XLR SansAmp Output with the input of your mixer, power
amp, powered monitor or amp.
3. Attach the AC cord to the unit and plug into a wall socket. Set the Level and XLR
controls to minimum, then turn the SansAmp RPM on and engage the Active Switch.
4. Turn on the mixer or amp and bring up the Level or XLR controls of the SansAmp
RPM. If the signal is too “hot,” resulting in unwanted distortion, or too weak, check the
mixer’s or amp’s input control as well as the Level control of the SansAmp RPM.
5. Play your instrument and you should hear sound coming through your system. If not,
check that your instrument’s volume control is turned up, recheck your connections, and be
sure your cable isn’t faulty. If there is still no sound, refer to factory or qualified technician.
2
1
This symbol, wherever it appears, alerts the user to the presence of uninsulated dangerous
voltage within the product’s enclosure that may be of sufficient magnitude to constitute a
risk of electric shock to persons.
This symbol, wherever it appears, alerts the user to important operating and maintenance
instructions in the accompanying literature. Read the manual.
RISK OF ELECTRICAL SHOCK
DO NOT OPEN
CAUTION
CAUTION: TO REDUCE THE RISK OF ELECTRICAL SHOCK, DO
NOT REMOVE COVER. NO USER-SERVICEABLE PARTS INSIDE.
REFER SERVICING TO QUALIFIED SERVICE PERSONNEL.
RISQUE D'ELECTROCUTION
NE PAS OUVRIR
ATTENTION
ATTENTION: POUR REDUIRE LES RISQUES D'ELECTROCUTION
NE PAS ENLEVER LE COUVERCLE. AUCUNE PIECE INTERNE
N'EST REPARABLE PAR L'UTILISATEUR. POUR TOUTE
REPARATION, S'ADRESSER A UN TECHNICIEN QUALIFIE.
ELEKTRISCHE SCHLAGGEFAHR
NICHT OFFNEN
VORSICHT
VORSICHT: ZUR MINIMIERUNG ELEKTRISCHER SCHLAGGE-
FAHR NICHT DEN DECKEL ABNEHMEN. INTERNE TEILE KONNEN
NICHT VOM BENUTZER GEWARTET WERDEN. DIE WARTUNG
IST QUALIFIZIERTEM WARTUNGSPERSONAL ZU UBERLASSEN.
ZUR MINIMIERUNG ELEKTRISCHER SCHLAGGE-
F
ZUR MINIMIERUNG ELEKTRISCHER SCHLAGGE-
F

TECH 21, THE COMPANY
Tech 21 was formed by a guitarist possessing the unusual combination of a trained ear
and electronics expertise. In 19 9, B. Andrew Barta incorporated Tech 21 and made his
unique invention commercially available to players and studios around the world. His
highly-acclaimed SansAmp™ pioneered Tube Amplifier Emulation in professional
applications for recording direct and performing live, and created an entirely new cate-
gory of signal processing. While there have since been many entries into this niche,
SansAmp continues to maintain its reputation as the industry standard.
With a full line of SansAmp models, Tech 21 also offers effect pedals and MIDI prod-
ucts, as well as “traditional” style amplifiers for guitar and bass. Each product is
thoughtfully and respectfully designed by Andrew himself with the player in mind. Our
goal is to provide you with flexible, versatile tools to cultivate, control, refine and rede-
fine your own individual sound. Tech 21 takes great pride in delivering consistent pro-
fessional quality sound, studio to studio, club to club, arena to arena.
SansAmp RPM, an Overview
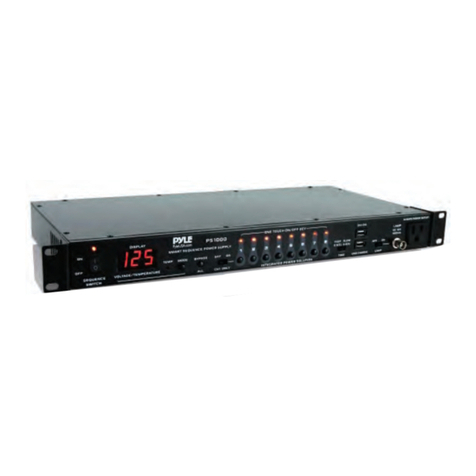
Simply put, SansAmp RPM is a rackmount version of our popular SansAmp Para Driver
DI pedal. With sweepable, semi-parametric EQ and variable gain, SansAmp RPM offers
detailed tone shaping for any signal source. SansAmp RPM is a versatile, multi-instru-
ment pre-amp particularly useful for acoustic guitar, electric and upright bass, man-
dolin, fiddle, and even vocals.
Tech 21’s proprietary, 100% analog circuitry gives your instrument a natural warmth
and presence as if you were miking your instrument through a tube pre-amp. For studio
and live applications, our SansAmp Tube Amplifier Emulation technology enables you to
go straight into the mixer of a recorder or PA system via the XLR Direct Output.
SansAmp RPM will complement any pre-amp system, particularly our own SansAmp
RBI for bass, and our programmable SansAmp PSA for guitar and bass.
FRONT PANEL
SansAmp RPM is designed with active controls, which cut and boost, rather than
traditional passive controls which only cut. This effectively doubles many of the
control’s capabilities, giving you a much larger range of adjustability and, ultimately,
more variety. It should be noted that you need not necessarily set everything at max to
achieve maximum results. As you experiment and become familiar with the interrelation-
ship of the controls, you’ll easily be able to customize your own sounds.
Input Jack
1/4" Input is 4.7MOhm. The unusually high impedance was designed with piezo pickups in
mind to provide maximum output and dynamics. It is factory set at -20dB instrument level.
A second input jack (Input 2) is located on the rear panel. Plugging into the front Input jack
overrides and disconnects the rear panel jack. This allows you to set up your SansAmp
RPM as a permanent part of a rack or patch-bay system, with its usual input source
plugged into the rear panel jack. Then, if you want to plug straight into the SansAmp RPM,
bypassing other gear in the system, you can use the SansAmp RPM’s front Input.
3
Drive
Adjusts the overall amount of gain and overdrive, similar to when the output section of
a tube amp is being pushed.
Bass and Treble
These active tone controls cut or boost ±12dB from unity gain at 12 o’clock. Bass is
0 Hz. Treble is 3.2kHz.
Mid Shift and Mid
Mid Shift is a parametric EQ control, with a sweep ranging from 170 Hz to 3.0 kHz,
which allows you to select the center frequency of the Mid control. Mid will then cut or
boost ±12dB from the frequency selected by the Mid Shift.
Blend
Blends the direct instrument signal with the SansAmp circuitry. In most cases, you will
probably have this set at maximum (100% SansAmp). For certain applications, however,
such as an ultra-transparent sound or for use with piezo pickup-equipped instruments,
you may want to blend-in the direct signal to achieve your desired sound. While the
SansAmp Tube Amplifier Emulation circuitry is bypassed when
Blend
is at minimum,
the
Bass, Mid Shift, Mid, Treble, Level
and
XLR
controls remain active.
XLR
Adjusts the volume level of the SansAmp XLR Output to optimize your amp’s output rel-
ative to the P.A. system.
Level
Adjusts the SansAmp 1/4" Output level.
REAR PANEL
Input 2 Jack
Plugging into Input 2 lets you match the SansAmp RPM’s input circuitry to the signal
level being fed into it, thereby assuring the best signal-to-noise ratio and least distor-
tion. This input is ideal for rack and patch-bay applications, especially if you use other
signal processors or multi-track recorders before the SansAmp RPM. Note: Whenever
you plug into the front panel’s Input, the rear panel Input 2 is disconnected. Also, you
can set the Input level selector switch to its -20dB position when you plug in extra-hot
signals, such as the output from active bass guitars.
Level Selector Switch
This switch lets you connect the SansAmp RPM to a wide variety of equipment with a
variety of signal levels. It has two positions:
0dB position. Optimizes the rear panel Input 2 to receive an instrument level sig-
nal. In this position, Input 2’s sensitivity is exactly the same as the front panel’s Input.
-20dB position. Set the switch in this position when sending a line-level signal
into the SansAmp RPM. When the switch is in this position, the signal coming into the
unit is padded down by 20dB.
4

EFFECTS LOOP
Send and Return
The Effects Loop allows you to connect external effects with the SansAmp RPM and is
placed between the tone controls and Level controls. Connect the input of your proces-
sor to Send; output of your processor to Return. Note: When nothing is plugged into the
Effects Loop, the signal passes through from the SansAmp RPM to the Output jacks,
with both the SansAmp 1/4" and XLR Outputs receiving the same signal.
Mix 50/50 Switch
The 1/4" Send routes 100% of the SansAmp RPM’s signal through your effects proces-
sor when the 50/50 switch is not engaged. If you engage the 50/50 switch, then 50% of
the SansAmp RPM signal goes through your effects processor, and the other 50%
passes directly to the SansAmp 1/4" and XLR Outputs.
To preserve the signal integrity of the SansAmp RPM, use the Effects Loop with the Mix
50/50 switch engaged. When the SansAmp RPM is in this mode, the effects proces-
sor’s mix control should be set at 100% wet. Your relative wet/dry mixture can then be
controlled by increasing/decreasing the effects processor’s output level. NOTE: If you
experience a thin, undesirable sound or phase cancellation, the effect may not be capa-
ble of a 100% wet signal. Therefore, we suggest disengaging the Mix 50/50 switch.
UNIVERSAL OUTPUT SECTION
The output sections of the SansAmp RPM are designed to be compatible with any appli-
cation. The outputs can be used for full range (multi-track recorders, studio monitors,
P.A. systems) or limited range systems (instrument speaker cabinets for bass or guitar),
as well as
simultaneously
. Note: You can compensate for different frequency responses
of speaker enclosures by using the Treble control.
1/4"SansAmp Output
Carries the signal from the SansAmp RPM, including any effects that are placed in the
Effects Loop.
1/4"Uneffected Output
Buffered output without processing. Sends a direct signal to another channel on your
amp, pre-amp, or effects chain, or it can be utilized as a tuner output.
SansAmp XLR Direct Output
Carries the signal from the SansAmp RPM, including any effects that are placed in the
Effects Loop. For recording, the SansAmp XLR Output is like having a built-in direct
box. Designed without a transformer, it provides a balanced, low-impedance output of
extremely high quality for recording or interfacing with professional-quality signal
5
processors. You can go direct to the board and get the same sound you hear coming
out of the speakers right onto tape or disc. The SansAmp circuitry not only captures the
warm, rich, natural harmonics and sweet overdrive characteristics inherent to tube
amplifiers, its speaker emulation encompasses all aspects of multiply-miked tube amp
rigs. For live gigs, you can use this output direct into the P.A. system and you won’t
need a microphone in front of your amp.
If you experience hum from the output
when there’s no instrument plugged
in, you most likely have a ground loop.
Therefore, Pin 1 (signal ground of the
SansAmp XLR) needs to be lifted or
disconnected. You can easily make a
small ground disconnect adapter by
disassembling one end of the cable
and cutting Pin 1 (the shield connec-
tion) as shown to the right.
XLR Output Level Switch
Sets the range of the signal level of the SansAmp XLR Output jack. When the switch is
in the 0dB position (engaged), the Output is in the line level range. When the switch is
in its -20dB position (disengaged), the Output is in the instrument level range. Note:
The standard output level range of the SansAmp RPM is 0dB due to the wide availabili-
ty of digital recorders, which are unforgiving to excessive input levels. This prevents
overloading the input of a digital recorder.
Uneffected XLR Output
Provides a buffered balanced output of the direct instrument signal without processing.
FOOTSWITCH IN JACK
The Footswitch In jack can be used to activate the unit. Simply connect the output of
any alternating (on/off) footswitch to the Footswitch In.
To toggle between this unit and another SansAmp RPM (or SansAmp RBI), do the same
as above and connect the SansAmp RPM Footswitch Out to the Footswitch In of the
second SansAmp RPM (or SansAmp RBI). Now you can switch between 2 sounds. For
the audio signal path, connect your bass into the Input of the first SansAmp RPM.
Connect the 1/4" SansAmp Out to the Input of the second unit. The 1/4" and XLR
Outputs of the second SansAmp RPM are then your main audio outs. (Refer to Hook-up
Diagrams on Page 7.)
6
To
FOOTSWITCH
IN of 2ND RPM
or an RBI
DRY SIGNAL
to MIXER or
RECORDER
To OUTPUT
of PROCESSOR
To FOOTSWITCH
DRY FEED to 2nd
AMP, PREAMP or PROC./
TUNER OUTPUT
LINE or INST
LEVEL IN
To MIXER of
PA or
RECORDER
To AMP,
POWER AMP, MIXER,
RECORDER or
SOUNDCARD
To INPUT of
PROCESSOR
S
SHIELD
-NEG
3
1
2
+POS
+POS
-NEG
23
SHIELD 1
1
2
3
GROUND (SHIELD)
+ SIGNAL (BAL)
- SIGNAL (BAL)

7
SansAmp RPM Specifications
Note: With on-going product development and improvements, specifications and/or
the cosmetic appearance of this unit may change without prior notice. Replacement
parts are available, i.e., knobs, rack handles, faceplate, etc. For more information,
please contact your authorized dealer or Tech 21.
Model Number: RPM
Input Impedance-Input 1: 4.7MOhm
Input Impedance-Input 2: 1MOhm
Output Impedance-1/4”: 1KOhm min
Output Impedance-XLR: 600 Ohms min
Input Level-Input 1: 1V RMS max
Input Level-Input 2: 1V RMS or 10V max, with -20dB pad engaged
Output Level-XLR: Switchable to -20dB or 0dB range
Maximum Output Level: +10dB or better
Effects Loop Send: 1K Ohm min, -20dB
Effects Loop Return: 100K Ohm min, -20dB
Low Frequency Response: 10Hz or better*
High Frequency Response: Harmonic content, 20kHz or better*
Maximum Power Consumption: 5 Watts
AC Input Power (factory set): 100V, 117V, 230V, 240V
Cycles: 50/60 Hz
NOTE: Each unit constructed for specific voltages. AC power cannot be switched.
Enclosure: Aluminum and steel, fully shielded
Dimensions: 19.0"w x 1.75"h x 5.25"d / Overall depth: 6.25"
Weight: 5 lbs.
*Due to the variety of amplifier emulations available, frequency response
characteristics will vary.
To FOOTSWITCH IN
of SansAmp RPM #2
or SansAmp RBI
To FOOTSWITCH
LINE or INST
LEVEL IN*
LINE or INST
LEVEL IN*
To AMP
To SansAmp RPM #2/SansAmp RBI
SansAmp RPM #1
SansAmp RPM #2/SansAmp RBI
CHAINING 2 SansAmp RPMs or to an RBI
GENERAL
"BIAMP" with SansAmp RBI and SansAmp RPM LINE or INST
LEVEL IN
LINE or INST
LEVEL IN*
To AMP #2
To AMP #1 To SansAmp RPM
SansAmp RBI (set to distorted Highs)
SansAmp RPM (set to clean Lows)
To MIXER
To MIXER
CHANNEL A
To MIXER
CHANNEL B
HOOK-UP DIAGRAMS
*NOTE: Engage 0dB pad when biamping.
*NOTE: Set both units at same level,
according to the instrument's output.
"Biamp" with channel switching can be accomplished with four units.
For hook-up details, contact Tech 21.
DRY SIGNAL
to MIXER or
RECORDER To OUTPUT
of PROCESSOR
To FOOTSWITCH
DRY FEED to 2nd
AMP, PREAMP or PROC./
TUNER OUTPUT
LINE or INST
LEVEL IN
To MIXER
of PA or
RECORDER
To AMP,
POWER AMP, MIXER,
RECORDER or
SOUNDCARD
To INPUT of
PROCESSOR
To
FOOTSWITCH
IN of 2ND RPM
or an RBI

SansAmp RPM Sample Settings
®Registered trademarks of their respective companies.
Names of settings are intended for descriptive purposes only.
ACOUSTIC GUITAR - LIVE
ACOUSTIC GUITAR - STUDIO
BASS GUITAR - FAT TUBE
BASS GUITAR - BASSMAN®
BASS GUITAR - SVT®
BASS GUITAR - OVERDRIVEN
SansAmp RPM Custom Settings
Name/Description: _________________________________________
Name/Description: _________________________________________
Name/Description: _________________________________________
Name/Description: _________________________________________
Name/Description: _________________________________________
Name/Description: _________________________________________
Table of contents
